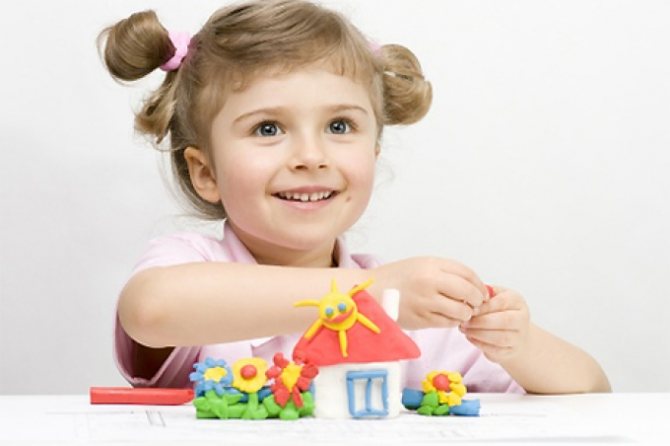
One of the most important activities for young children is clay modeling. They develop fine motor skills of the fingers, teach focusing and develop spatial thinking. The beauty of sculpture is that it is both simple and complex. The difficulty of the task can be changed as the child’s skills develop. Therefore, crafts made from plasticine are equally useful for both kindergarten and primary schoolchildren. For example, you can start with the simplest thing: making a sandwich. The child begins to achieve success, immediately sees the result of his work, so he is satisfied and does not lose interest. So the tasks can become more complicated, gradually simple crafts become more complex, for example, sculpting a flower, an apple, a cup, or a cat or dog. For older children, you can come up with more intricate plasticine figures or compositions consisting of several individual figures, for example, a basket of mushrooms, a house, a fire engine.
Modeling lessons with children 3-4 years old
You should prepare for modeling in advance with your children. Come up with the texture of the craft, play with it, prepare the necessary equipment. It is better to start simple and gradually complicate the tasks. To begin with, it is better to make three-dimensional figures with children that are more reminiscent of real objects. So, when the child’s hand gains enough strength, drawings can be made with plasticine, that is, with flat textures. How to structure a modeling lesson with children of this age group?
Introductory part:
- organize time;
- formulation of the problem.
Main part:
- prior knowledge of the subject;
- casting technology;
- self-employment of children.
Final part:
- analysis of children's works;
- summing up.
Let's look at each part of the lesson in more detail. The introductory part helps prepare the child for the lesson and interest him in modeling. This part is based on play, since play is the main activity in preschool childhood. Children learn everything, children learn everything through play.
The main part of the lesson is direct modeling. Firstly, children are invited to study the sculpted object in detail. The shape, color, and parts from which the object is made are specified. The adult then demonstrates the techniques and techniques of sculpture. Subsequently, the children themselves try to repeat the teacher’s actions.
Along the way, it is specified what color and in what quantity to take plasticine, and also names the technique by which the part or the entire product will be made. So children have time to work independently. Each child decides for himself how to decorate his work, how to assemble an ornamental composition.
The final part of the lesson allows you to summarize: what you learned, what you learned. And collective analysis of children's work allows children to compare their work with others to determine what worked best
The teacher should pay special attention to analyzing the children’s work. It should be emphasized that what was especially successful was the simplest thing that happened
The teacher decides the shortcomings of children's work independently. In the future, this is the basis for individual work on plasticine modeling with a child. During the analysis, children learn to see the positive aspects in other people's works and notice design features.
This lesson structure is used in kindergartens, but when working with a child at home, you should also adhere to this plan. We offer several step-by-step instructions for sculpting plasticine crafts with step-by-step complication.
Plasticineography
Plasticineography is an unconventional drawing technique. Paintings made using this technique contain convex objects made from plasticine.
Using plasticineography and combining it with other creative techniques, original and unique works are created.
The benefits of this type of creativity for a child’s development include the benefits of drawing and modeling. In addition, when a child creates a picture from plasticine, he rolls out and smears the plasticine, thanks to which he learns to feel his hands better and control them more confidently.
Preparation of plasticineography classes in kindergarten
In kindergarten, the topics of classes on non-traditional modeling techniques, integrating different areas of knowledge and types of art, are very diverse. In this regard, a methodologically competent selection of ideas consists of searching for a topic that reflects the realities of the surrounding world and/or corresponds to the season and socially significant events. For example, creating crafts on the theme “Winter” in December-February, “Flag of Russia” on the eve of Russian Flag Day on August 22 or on the eve of National Unity Day on November 4.
Holiday crafts can be homework
Approximate topics
To prepare plasticineography lessons, the teacher draws up a work schedule, which includes a list of goals, tasks for each group, a lesson plan, a description of educational materials and a thematic calendar schedule. At the same time, lessons are planned in the form of thematic blocks, that is, lesson topics from different educational and educational areas overlap. So, on the eve of Mother's Day, at a language development lesson, children learn poems about their mother, during the lesson they get acquainted with the world around them, consider the history of this holiday and make crafts related to plasticine treats.
In younger groups, children are just learning plasticine, so topics include making crafts with large elements and not too curved lines:
- "Drying";
- "Snowman";
- “We decorate clothes”;
- "Easter Egg";
- "Cake for Mom."
Examples of composing a theme for plasticineography classes for children 4-5 years old could be as follows:
- "Vegetables on a plate";
- "Insects in the flowerbed";
- "Mushrooms";
- "Sun in the Clouds";
- “rowan sprig”;
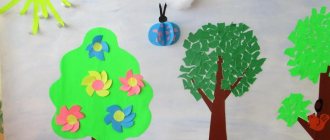
- "Autumn Tree";
- "Fish";
- "Christmas tree";
- "Christmas decorations";
- "Bullfinch";
- "Snow Fashionista";
- Teremok";
- "Peacock";
- "Good rocket"
- “Gift for dad (grandfather)”;
- "Seven Flower";
- "White Birch";
- "Space";
- “Starry Sky”;
- "Dandelion".
In the senior group, topics are supplemented by lessons devoted to the study of folk arts and crafts:
- "Matryoshka";
- "Gzhel"
- "Human body. Man in the Rain";
- "Painted plate".
In the preparatory group, topics also include topics that involve increasing the complexity of the plasticineography technique:
- “Cat” (children train the ability to create a transition from light to dark shades);
- “Clothes” (children develop clothing designs using different techniques: straight, contour);
- “Indoor Plants” (on this topic children learn to create structured images);
- “My Family” (this topic is a complication of the previously studied topic “My Body” - now young creators learn to maintain proportions between the sizes of small people of different ages);
- “Lily of the valley” (the boys continue to work with textured plasticine, combining bas-relief with counter-relief).
Photo gallery: samples of plasticineography works on various topics
Templates for making crafts using plasticine printing technique
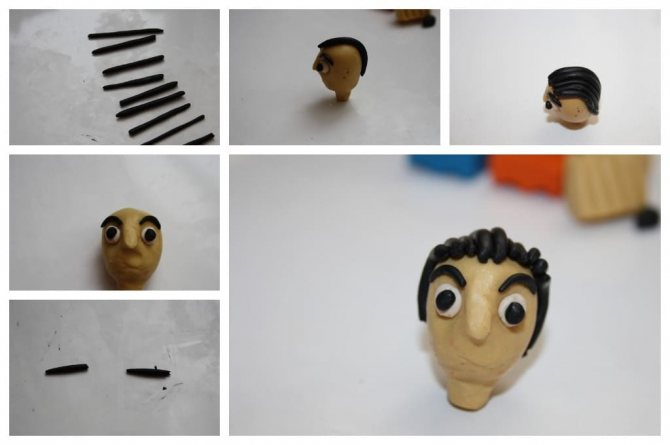
When working with models, children acquire initial skills in non-traditional plasticine modeling techniques, which are mainly used for the direct type of making plasticine drawings, but can also be used for more complex varieties. So, creating drawings depicting people is considered one of the most labor-intensive types of plasticine.
Step-by-step instructions for sculpting figure No. 2 “Colored umbrellas”
Goal: to create a colored umbrella made of plasticine.
Demonstration material: real large umbrella, children's umbrella.
Materials and equipment for work:
- plasticine;
- support table;
- heap;
- thin cocktail tube;
- wet or dry wipes.
What else to read: Lesson notes “Production of didactic material.”
Progress of the lesson
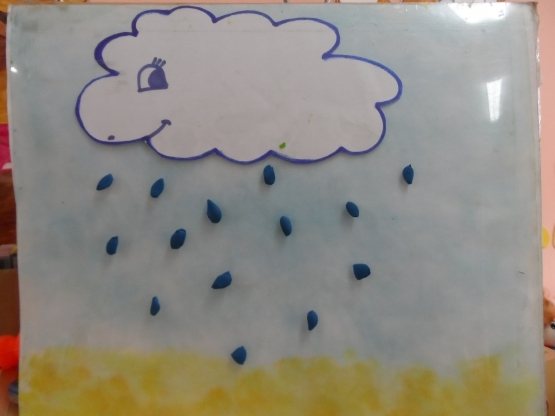
Introductory part. An adult asks a child to guess a riddle about rain:
- If I cry it doesn't matter
- Instead of tears, water flows.
- I'm crying so much
- Because of the gray cloud...
You can then look at the illustrations in the related books and talk about what people need when it rains. I propose to look at the umbrellas and describe them.
Main part. Before we start sculpting, let’s look together with the child at what parts the umbrella is made of and what shape they have. Now let’s invite the child to choose the color of the future umbrella and decide on its size. The child takes a stack and cuts out the required amount of plasticine from a whole block.
Let's start sculpting. First, the adult shows a running pattern, then the children perform independently. The umbrella dome is a disk, for which we first roll a plasticine ball. Now we flatten the ball between our palms and make the center of the resulting disk slightly convex by pushing it with our thumbs.
To make the rod that holds the dome in place, take a piece of cocktail tubing about 1/3 of the way down. Attach a cocktail straw to the center of the plasticine disk. Now let's work on the handle of the umbrella. It can be in the form of a hook or a plasticine ball.
For the handle hook, take a small sausage out of plasticine, fold it and attach it to the tube. It turned out to be a pen. Now all that remains is to decorate the resulting umbrella. For decoration, you can use plasticine, or you can add different materials: beads, small seeds, cereals.
Final part. At the end of the lesson, we play crafts with the child. For example, let's give a toy hedgehog an umbrella. We will also analyze with the child what he did especially well and where he needed help. Considering this information, we choose the following idea for modeling from plasticine.
How to learn to sculpt from plasticine, dough or clay?
- You don’t think that when you give a child plasticine, he will immediately create something specific? He will probably taste it first, knock it on the table, and put it among his toys. You need to teach your baby how to use plasticine for its intended purpose.
- The first thing you need to do is interested . There is no need to persuade him or force him, he must want it himself. To do this, start working with plasticine yourself and your child will become interested.
- First, buy soft plasticine or modeling dough, or you can make it yourself, see the recipe above. With soft material, the child will work more willingly, because he will be able to
- Pieces . This is the first thing you need to show your baby how to tear off a piece and stick it back. You can turn everything into a game: feed the cow by tearing pieces from green plasticine. You can sculpt a torn piece onto cardboard, or, for example, onto a drawing of a Christmas tree, as if decorating it
Making balls and sausages
Balls and sausages . Show your child how to make balls from plasticine, and then you can have fun crushing them or making a snowman out of them. Make sausages between your palms or by running your palm across the table, you can then make a ring out of it or twist it into a spiral
Flat modeling from plasticine
Flattening is a very exciting activity, because with its help you can make a roof for a house, ears for a dog. You can stick the flattened pieces to the paper, thus complementing the design
Smearing plasticine
Smudging . This is also a very necessary technique. Do this first on a board for working with plasticine, then you can “draw” like this on paper.
Prints on plasticine
Prints . Children will definitely enjoy this entertainment. Print something on flattened plasticine, for example, with a figurine from a sorter, or walk with the legs of a toy animal
Plasticine vase
Sticking . Show your child how to cover some container, such as a glass, with plasticine, and press beads on top. You will get a beautiful vase. For the little ones, you can make animal figures from cardboard and offer to sculpt plasticine on them.
These simple tips will help you introduce your child to plasticine. But the main thing in such classes is a good mood. Modeling should first and foremost be fun.
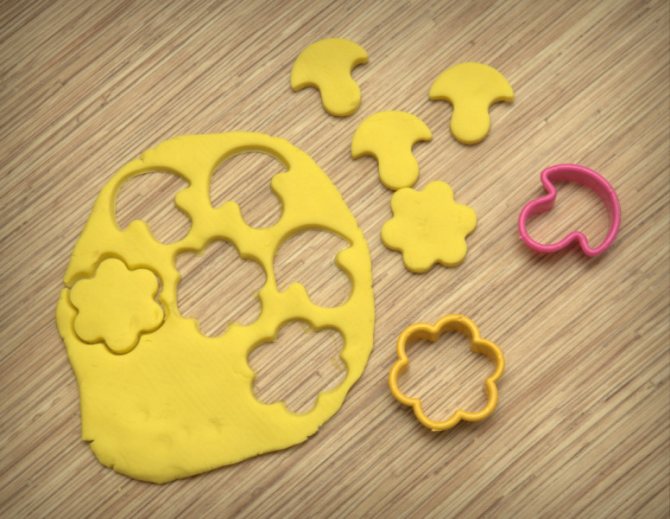
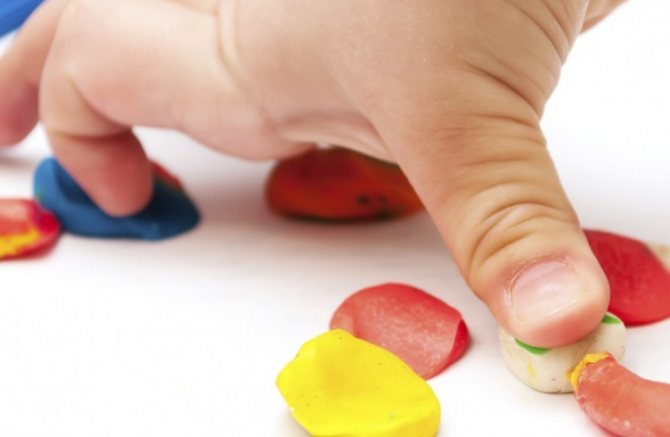
Dividing plasticine into pieces
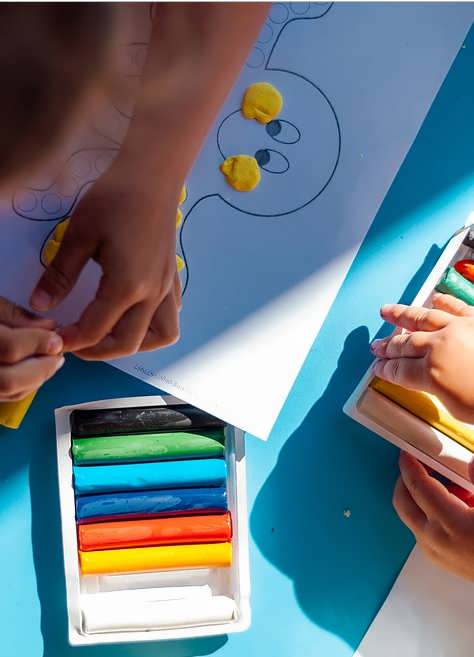
These business options are at the heart of the next big deals.
Prepare:
- plasticine;
- a printed image of a chicken, dog or other animal.
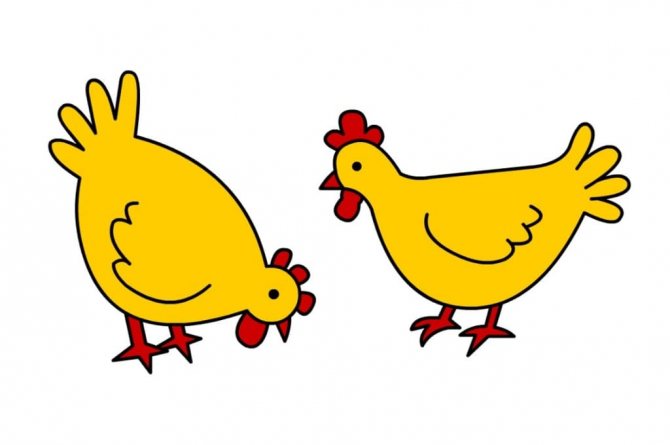
(Chicken model)
Ask your child to separate the seeds from the play dough and glue them to a picture of a chicken to feed it. We can feed dogs and other animals in the same way.
We have collected several simple options in another material.
How to order plasticine in the Aliexpress online store?
Follow the link to select plasticine
https://ru.aliexpress.com/af/%25D0%25BF%25D0%25BB%25D0%25B0%25D1%2581%25D1%2582%25D0%25B8%25D0%25BB%25D0%25B8%25D0%25BD-% 25D0%25B4%25D0%25B5%25D1%2582%25D1%2581%25D0%25BA%25D0%25B8%25D0%25B9.html?ltype=wholesale&d=y&origin=n&isViewCP=y&catId=0&initiative_id=SB_20160227091419&Se archText=%D0%BF%D0 %BB%D0%B0%D1%81%D1%82%D0%B8%D0%BB%D0%B8%D0%BD+%D0%B4%D0%B5%D1%82%D1%81%D0%BA %D0%B8%D0%B9
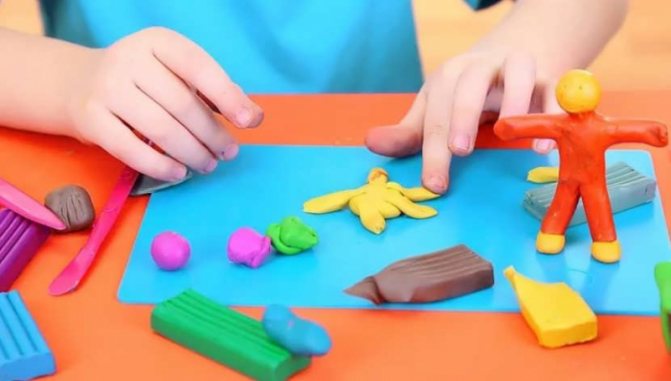
Lesson with plastic material
The video channel “Super Parents” teaches children (from 1 year old) and their parents the basics of interacting with plastic materials. The blogger uses a special composition and homemade unsweetened dough. It is necessary to familiarize the little master with plastic and tell him for what purposes it is used, after which he can begin to practice. The first stage is kneading, the second is pinching, the third is gluing the parts, the fourth is rolling the ball, the fifth is cakes with your finger or palm, the sixth is sausages and these rings. Cut the sausages into stacked pieces. First the adults help, then the child trains.
Properties of plasticine
Plasticine is a material intended for modeling. It includes wax, clay, petroleum jelly, animal fats, and synthetic substances.
Nowadays stores offer a huge selection of plasticine; you can get confused if you want to buy material for modeling.

Any plasticine has the properties of softness, plasticity, and the ability to glue parts, expressed to one degree or another.
Let's look at some types of plasticine:
- classic, made by us, affordable, holds its shape well, easy to mold. The individual parts fit together well. But it is too harsh; you need to warm it up for a long time before work;
- imported, suitable even for crumbs, bright, plastic, soft, amenable to any hand. The composition includes natural ingredients. Individual parts do not stick together well;
- modeling dough, also containing natural ingredients: flour, water, salt, dyes. The parts are easily glued together, can be stored and painted for a long time. When interacting with water, it gets wet;
- floating, easy to sculpt, does not get dirty, floats on water. Perfect for the youngest children. But it doesn’t hold its shape well and falls apart;
- The modeling mass is unique, it molds well, does not stick to your hands, is pleasant to the touch, you can play with crafts for a long time. Quite expensive to purchase;
- ball, great for decorating parts and smoothing out unevenness. Bright, rich colors attract attention. But the parts do not attach well and fall apart easily;
- Modeling paste is suitable for older children. Pleasant to the touch, easy to mold, and can be painted. It dries very quickly, you may not have time to finish the work, which will upset the master;
- wax plasticine, holds its shape well, is bright, does not stain the surface, sticks well. Excessively sticky material.
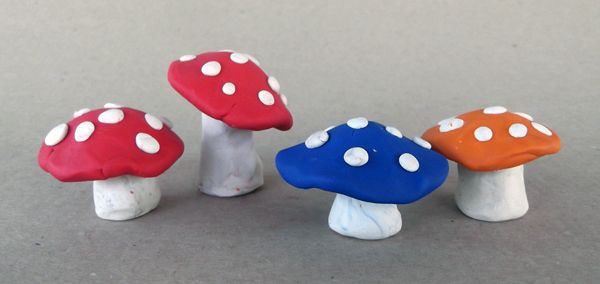
Making a mushroom
Perhaps the simplest plasticine figurine is a mushroom. This is a small tube at the bottom (mushroom stem) and a cap at the top, consisting of a disk or hemisphere. First, you can sculpt a simple mushroom, and then make a fly agaric, decorating the red cap with a white spot of flattened balls. For greater stability, the leg can be made thicker.
Plasticine mushrooms
The usefulness of the sculpting process
A child can sculpt from plasticine from the age of 1.5-2 years. This activity will be of great help in the further development of manual motor skills. Sculpture is not just entertainment. It's about having fun and gaining valuable experience. At a subconscious level, the child begins to understand the causal relationship between action and result. In a playful way, the child:
- develops taste, imagination and creative inclinations;
- develops intellectually;
- form an idea of color and shape;
- improves motor skills and manual labor, improves coordination of movements;
- expands knowledge about the world around us;
- organically develops the nervous system.
With regular practice, the mother herself will notice what influenced the modeling. The child will become more attentive and collected, and visual memory will improve quite quickly. The child will express a desire to dazzle everything he sees in the world around him. In combination with other developmental activities, the child will learn the necessary skills and develop harmoniously.
Important: if a child still does not show interest in sculpture, you should not force him. The child will immediately become interested and want to join if he sees that one of the parents is modeling from bright plasticine
An adult must participate in lessons, and not as a passive observer, but as a counselor and assistant.
The main purpose of learning to sculpt
Awaken children's creative activity, stimulate imagination, desire to engage in visual arts.
Tasks:
· To promote children's interest in modeling.
· Form sensory processes, enrich sensory experience, develop sensory abilities.
· Develop fine motor skills of the hand.
· Introduce children to the properties of the material (soft, plastic, you can tear it off, make something out of it).
· Teach how to use clay correctly (do not throw it around, sculpt it at the table).
· Teach the simplest technical techniques (tearing, rolling, joining).
· Learn to sculpt simple objects (sticks, balls).
Materials:
Plasticine, clay, wax, salty or sweet dough, colored modeling dough, boards, stacks.
Content:
Plastic art is a fascinating world of creativity and craftsmanship. The educational and educational significance of modeling is enormous, especially in terms of the mental and aesthetic development of the child. Modeling broadens his horizons, contributes to the formation of a creative attitude towards the life around him and moral ideas. Modeling classes cultivate a child’s artistic taste, the ability to observe, highlight the main, characteristic things, and teach them not only to look, but also to see. Modeling fosters perseverance, develops the child’s work skills and abilities, finger muscles and manual dexterity.
Two-year-old children willingly sculpt, or rather, manipulate clay, kneading it with their palms, flattening it, and even trying to pinch off a piece. With them, classes with clay are carried out in small groups and mainly in the form of games.
The sculpted works of children are characterized, first of all, by the indistinct form of the image, which is obtained as a result of the fact that children work with the whole hand, since the movements of the fingers are not yet sufficiently developed and poorly coordinated. In addition, children do not yet have effective visual control over the results of their work. For a child of this age, the most significant are the physical properties of clay: viscosity, plasticity, size, mass, etc. The child actually gets acquainted with the properties of clay and performs playful actions with it. This period of fascination with the properties of clay is called pre-figurative. It usually goes faster than in drawing, since actions with voluminous, easily manipulated material quickly lead to meaningful interest in the result. The pre-figurative period proceeds approximately as follows. First, children tear off large and small lumps of clay from the general lump of clay, which are not processed at all. Then they begin to pile them on top of each other, roll them out on a board, and flatten them with their hands on the board. In fact, children act with clay without setting themselves the goal of depicting anything. Children aged 2-3 years master the material under the guidance of a teacher, and children quickly move from the pre-visual period to the visual one. They begin to more meaningfully modify shapeless lumps of clay, rolling them with longitudinal and rotational movements of their palms, first just on the table or board, and then between their palms; associate the resulting forms with familiar objects, and then create simple objects according to the teacher’s instructions: sticks, columns, rings, apples, pyramids, mushrooms. The teacher encourages these experiences and plays with the children.
In the first junior group, the teacher leads children to understand the figurative nature of modeling, arouses children's interest in modeling. But first of all, it is necessary to introduce children to the material (clay or plasticine). Young children’s attitudes to material vary. Some refuse to take clay or plasticine in their hands and abruptly move it away from them. This reaction is most often due to the fact that the proposed material, due to its external properties, is unattractive to the child. In other children, one can observe a completely opposite reaction - they take great pleasure in simply kneading clay, smearing it on the table, i.e., repeatedly performing actions that in the future not only have no special meaning in the modeling process, but, on the contrary, have a negative impact. impact if children linger too long on these ways of using the material. Therefore, it is very important to familiarize yourself with the material correctly.
Teaching modeling in the first junior group mainly comes down to general educational tasks: to promote children’s interest in modeling, introduce them to the properties of the material (soft, plastic, you can tear it off and make something out of it), teach them how to use clay correctly ( do not throw it around, sculpt it at the table), teach the simplest technical techniques (tear off, roll out, connect), teach to sculpt simple objects (sticks, ball).
Guidelines:
Before starting the lesson, you should prepare your workplace. There should be only the essentials on the table. Pieces of clay for small children to work with should be small - pieces 3-4 cm in diameter. If in this lesson children are given the task of making a ball, ball, apple, or the initial form for work should be spherical (for example, when modeling a flat cake, plate, etc.), they should not prepare clay in the form of balls for the lesson. You need to roll out the clay into a cylindrical piece and cut it with a knife into pieces for each child.
It is most advisable to introduce children to the material in the process of performing an elementary action, with the help of which children can immediately obtain a visible result.
The best way to get acquainted with plasticine is as follows. The teacher, showing plasticine to the children, says: “This is plasticine. Let's make a stick out of it. The plasticine is soft, you can tear off a piece from it (tears off a piece from the total mass of plasticine and rolls it between your palms). Thus, introducing children to the material, the teacher teaches children the first form-building movement - rolling. This method of teaching is associated with the peculiarities of the development of movements in a child at this age stage: the movements are not yet sufficiently coordinated, it is difficult for him to work with both hands at the same time.
It is advisable to conduct the first classes introducing children to the material individually with each child during their independent activity (in an early age group). After the kids become interested in the material, they can be combined into groups of 5, 8, 10 people. During the lesson, the teacher teaches children to sculpt while sitting at the table, not to scatter the material, and to clean it up after class. Certain conditions are required for a successful lesson. Children should be free to work at the table. Clay or plasticine is given to children after the task is explained. At the end of the lesson, the sculpted figures are put away on a board divided into cells. After the lesson, the teacher, together with the children, examines what they have done, gives a positive assessment of the work, compares it with the object depicted, and once again clarifies its main parts.
The leading method of teaching formative movements should be demonstration, accompanied by a simple, precise explanation of the actions. A figurative word enhances the effectiveness of the demonstration and creates the opportunity to later move on to verbal instructions. The word as a method of guidance is also necessarily used when organizing the perception of an object: the word helps to fix children’s attention on those qualities that they must later depict.
All children must sit facing the teacher throughout the lesson. This is especially important in the younger group. The child cannot continuously turn his head to see what the teacher is doing and how.
From the very first lessons, the teacher teaches children to sit correctly, without pressing their chests against the table, without bending over the board, teaches the correct position of their hands - both hands up to the elbow on the table, teaches the correct movements of the hands and fingers in the process of work.
Throughout the year, the teacher continues to instill in children the skill of carefully handling clay. When starting work, the child must roll up his sleeves. During the sculpting process, you need to teach him to work on the board, not to litter the clay on the table or floor, not to wipe his dirty hands on his clothes, and not to shake the clay off his hands.
Considering the importance of visual and the predominant role of kinesthetic orientation in the development of a motor skill, one should not only prompt the child to this or that method of action, but also move his hand, paying attention to the movement and position of the hand, which makes it possible to form the correct idea of the necessary action. At the same time, the teacher pays attention to visual control so that the children learn the way of working: you need to roll with your palm.
After children have mastered the shaping motion of creating a cylindrical shape, children should be taught how to transform a cylinder—to make a ring out of a stick. Children must look at the finished ring, and then the teacher consistently shows how to sculpt it. In this case, you should draw the children's attention to the fact that they first need to find the ends of the stick, and then show how to connect them. “The ring should have a hole, and it can be put on a stick or finger,” says the teacher. This moment is very important for developing the child’s ability to control his actions. Instructions should be given to children at a slow pace. The teacher should stand in front of the children so that all children can clearly see his hands, his actions with clay, and the result of these actions.
Children practice the acquired skills, modify the resulting forms, giving them a resemblance to a familiar object (fruits, vegetables, berries). In an effort to arouse children's interest in expanding the topic, the teacher can devote one or two lessons to playing with sculpted figures: he shows the children short dramatizations of fairy tales while simultaneously sculpting simple characters from clay. Children also play with a ball, doll treats, and figurines made according to the teacher’s instructions. This increases children’s interest in sculpting, makes them want to sculpt more often, and helps expand the topics of work according to the children’s plans during free activity.
When sculpting objects consisting of 2 parts, the teacher sometimes divides the demonstration of the work into a number of stages, for example: - We will sculpt a snowman from balls. Let's make two balls - a big one and a small one - to make a snowman.
- Now roll the balls - first big, then small. Children make balls, the teacher checks whether the balls are well made and how the children roll them.
- The balls are ready. First place the large ball in front of you on the board and press the small one on top. The teacher goes around the tables, approves of the children’s work, saying that they have made a lot of beautiful snowmen.
Sometimes you can let the kids paint some products in one color, for example, gingerbread cookies or pies, and the teacher himself does the finishing.
Before teaching children to depict an object, they must be taught to examine it, examine it, and be able to identify its main properties. Teaching images should be done through showing a real object or toy - in this case, a pyramid is considered. When considering an object, the teacher should set the following goals: a) to make the process of perceiving the object deliberate (the teacher tells the children: “You and I will now look at the pyramid, and then we will sculpt it”); to arouse in children orienting activity, attention, and interest in the subject being examined; b) learn to identify the main parts of the subject; c) establish a connection between what is perceived and an existing skill.
These tasks are solved by examining all the objects that we lead children to depict.
After examining, the children begin to sculpt the object. The pyramid remains on the table. During work, the teacher must constantly guide the process of depicting an object, using various techniques.
In the process of working with clay, children gradually begin to understand that clay can be used to create images of various objects.
When selecting objects for depiction, you need to proceed from general didactic principles and age characteristics. The subject, firstly, should be well known to children - it is easier to clarify children’s ideas with a familiar subject. Secondly, the subject must evoke a positive emotional attitude in the child and be interesting to him. And finally, thirdly, the object should be simple in form and structure, consist of a small number of parts (no more than two). Taking this into account, you can choose other simple objects for the image, which are based on geometric shapes - a cylinder, a disk, a ball.
Sample thematic lesson plan. Modeling (from 2 years to 3 years)
| Month | № | Title of the lesson | Number of organized learning activities. |
| September | “Magic Lump” Introduce plastic materials: clay, plasticine, plastic mass, giving preference to clay. Arouse children's interest in modeling. Learn to use materials carefully. | ||
| “Sausage for a Puppy” To instill in children a friendly attitude towards game characters, to make them want to help. Learn to roll a ball of clay or plasticine with straight movements between your palms. | |||
| October | “Let's treat the wolf” (working with dough) Learn to roll out a lump between your palms with straight movements, sculpt sticks, connect the ends. Teach the simplest technical techniques for working with dough, learn how to sculpt simple objects. | ||
| “The sun is looking out the window!” Teach children to roll out and flatten lumps of plasticine, and use plasticine carefully. Arouse interest in the result of the work. | |||
| november | “Turret” Teach children to form a turret from simple shapes using the flattening technique. | ||
| “Visiting grandma for pancakes” Team work To strengthen children’s skills in using plastic materials. Practice mastering various sculpting techniques. | |||
| December | “Let's treat Saule's doll with sweets.” Learn to roll out a lump of clay using palm movements to depict round objects. Cultivate a caring, positive attitude towards others. | ||
| “Grains for the chicken” Develop the ability to work with two fingers (tweezers grip). Promote the development of imagination, memory, attention. | |||
| January | “New Year's gifts for animals” Learn to sculpt round-shaped objects. Introduce the technique of flattening a round shape between the palms. Cultivate responsiveness and kindness. | ||
| “Treat for a kitten” Reinforce previously acquired skills with children. Encourage the children to make a bowl and treat the cat with milk. | |||
| February | “The bun rolled along the path.” Collective work Strengthen the ability to roll out a lump of clay using palm movements to depict round-shaped objects (bun, berries). Cultivate a caring, positive attitude towards others. | ||
| “Fence for the hut” Cockerel” Learn to roll out lumps using straight hand movements, carefully use plasticine. | |||
| March | “Snow Tale” Introduce what parts a snowman consists of. Learn to roll out lumps in a circular motion and connect them together. | ||
| “I’ll bake gingerbread cookies for my dear mother” (working with dough) Teach children to sculpt familiar shapes on their own. Cultivate love for mom. | |||
| April | “Treat for Nauryz” Teach children to independently sculpt familiar shapes (baursak). Induce positive emotions from drinking tea. | ||
| “The Tale of the Snail” Learn to sculpt a snail by folding the column and pulling the horns on the head. Arouse children's interest in modeling. | |||
| May | “Let's help Aibolit cure the cubs” (apple, orange..) Continue to cultivate responsiveness, kindness, empathy. Continue to develop the ability to sculpt famous round-shaped fruits. | ||
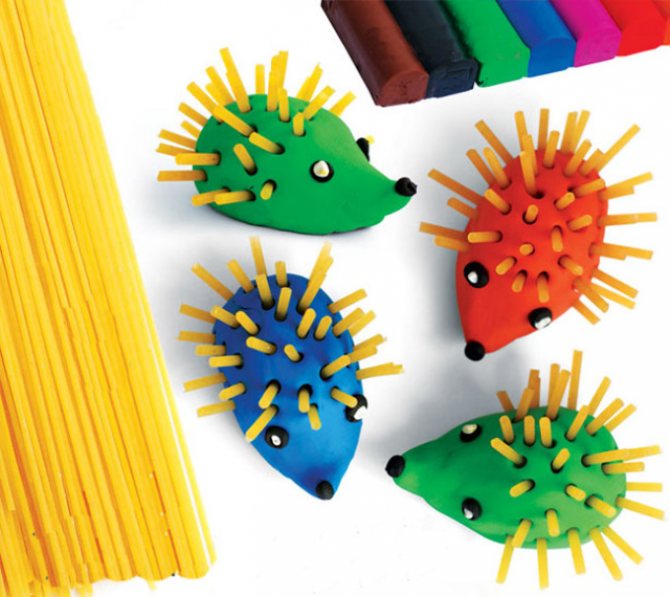
| “Hedgehogs” Develop interest in modeling. Improve the ability to roll plasticine in a circular motion, learn to pull individual parts with your fingers and use a stack to depict spines. |
Technological map of organized educational activities for 1st junior group
Educational areas: "Creativity"
Sections: Modeling
Topic: “Magic Lumps”
Purpose: To introduce plastic materials: clay, plasticine, plastic mass, giving preference to clay. Arouse children's interest in modeling. Learn to take a lump and perform movements with your fingers, modifying the lump. Learn to use materials carefully.
Learning to use a stack
Although the battery is made of plastic, it can be dangerous. It is very important to teach your child how to use this device through simple steps. How to do it:
Using a stack
- Invite your child to place a large piece of plasticine on the board. The child already knows that to do this you need to roll the ball and press it with your palm to the table.
- Using a stack, show your child how to cut out patterns on plasticine. The child can continue the cutting process under your supervision.
- When finished, offer to scrape the plasticine off the board with lint.
Modeling methods
To move on to a specific type of composition creation, the child needs to be taught in stages.
First, a separate technique for making parts (sausages, balls, etc.) is studied with him. Then they show what other manipulations (pinching, pulling, cutting) can be performed with the material. The knowledge gained during the exercises is consolidated, and the child is offered one of three ways to work with plasticine:
1. Sculptural. The craft is made from a single piece, without adding any elements. With the help of such techniques, children learn to distribute plasticine proportionally:
- elongation;
- pad;
- grinding;
- expand.
2. Constructive. The product is assembled from several parts. The largest part is prepared first, then the small ones are attached. The method teaches children to distinguish small objects from large ones.
3. Combined. It includes the two previous methods. The bust is made from a single piece. The remaining parts are made separately and attached to the finished figure.
Modeling methods are divided into types according to texture.
- Topic: Creating an individual character or object.
- Topic: creating a group of interrelated objects (images of scenes from fairy tales, poems, stories).
- Decorative is a type of art of creating compositions from folk art.
To make crafts easier, there are special fleece devices
are modeling tools. With their help, small parts are made that cannot be aesthetically made with fingers.
Fleece
There is metal, plastic, silicone, wood. The choice of lamps depends on the future product.
How to sculpt with a baby?
When working with plasticine or other materials for modeling, you must be close to the child, and not only monitor his work, but also sculpt with him.
You shouldn’t expect much from the baby; he is just beginning his acquaintance with new material. Choose activities according to the child's age.
Choosing the color of plasticine
Let your child choose a color, just don’t offer many options, two are enough.
Do not impose your opinion on him; it may not coincide with the child’s preferences.
How to knead plasticine?
Start kneading the material, you are your piece, the child is yours, let him see what you are doing and try to repeat it himself. When the plasticine is ready, you can start sculpting.
Where to start sculpting?
Simple tasks, to begin with, will be enough for the child to become interested in this type of creativity. Let him pinch off a piece and show him how to make a cake out of it. There are plenty of simple ideas for what you can do with plasticine, and some of them are described below.

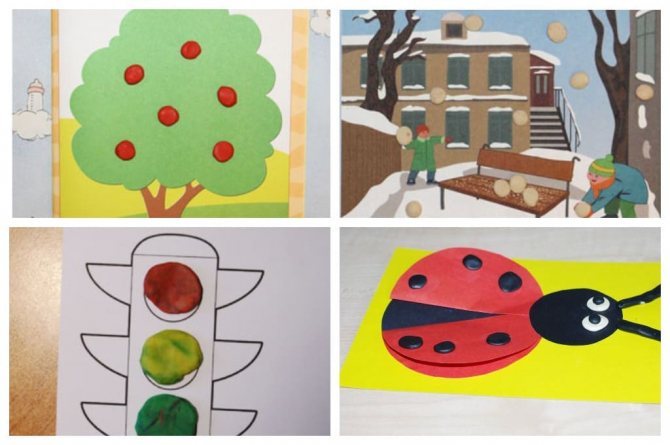
Making flatbreads
This work is already more difficult. With its help, we will teach the child how to make one of the main parts used in the craft - a cake.

What you need:
- plasticine;
- coloring in large fragments, for example, a ladybug or a traffic light.
In this lesson, the child must tear the desired color from an ordinary piece of plasticine, press it with his finger and apply it to the drawing.
Likewise, you can make snowflakes on a picture, apples on a painted tree, or design wheels for a car or steam locomotive.
ladybug for cakes
You can work not only in a certain place. The child can arrange the received parts in any order.
Modeling from plasticine for children 3-4 years old
For children under 4 years old, you can offer simple tasks:
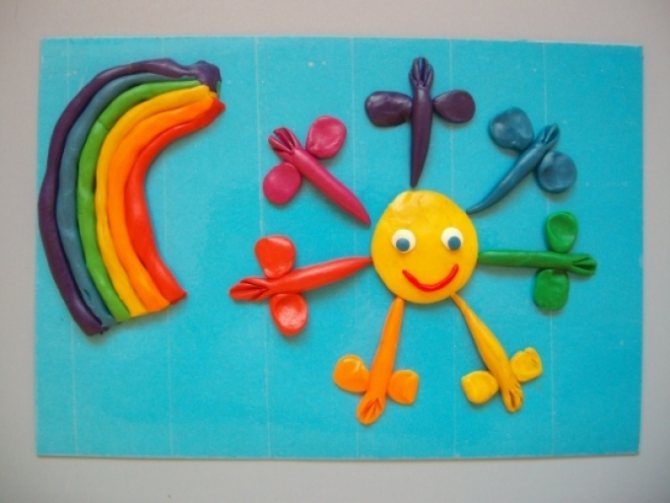
- make a sun , to do this, stick a yellow round cake on blue cardboard, and smear small pieces of plasticine, making rays
- make grass by smearing green pieces of dough, plant flowers by crushing colorful flower-shaped balls on cardboard
- make needles on the already drawn hedgehog, also smearing the plasticine
- make multi-colored fireworks in the sky (on dark blue cardboard)
- balls and garland on it
- make autumn leaves on a tree and show how they fall
- make snowflakes in the sky or rain
- Older children can create more complex works, mix techniques, for example, add natural material to the picture, can work on details, correct or create something using stacks
- They can make plot pictures, depict animals and flora in detail, and add several characters. The older the child, the more opportunities and skills he has that he uses in creativity, the more difficult work he can be offered
- After such work, it is important to support the child and invite him to come up with a story together about what he drew. This will help the development of speech and facilitate the child’s communication with peers.
- Encourage your child for any successes and encourage them if they fail. It is important to select tasks according to age. If he copes with the task, this will instill self-confidence in the child, bring pleasure from creativity, and he will be happy with his results. Such work will bring maximum benefit and satisfaction to both the child and the parents.
Educational modeling
What can you sculpt from plasticine with 3-4 year old children? At this age, tasks for a child become more difficult. Give your child a jar to stick the plasticine on. For decoration you can use various cereals, pasta, peas, beads, buttons. Offer larger materials first so that your child's fingers gradually become accustomed to handling small objects. The result is a very beautiful flower pot. In winter, you can attach plasticine leaves to the branches to create an interesting composition. Make sure all the little things are for decoration and not just for fun. Using the ability to roll balls, you can make a snowman and a plate of fruit, and create a flower arrangement on cardboard.
A 5-year-old can create more complex animal shapes
It is worth focusing his attention on the small details of the character. The child already knows how to combine and mix colors and easily gives plasticine the desired shape.
In a child's fantasy, you can make a hedgehog or a mushroom from nut shells, and a chicken or pig from a plastic egg. A piece of polyester filling will serve as the body for the lamb, and pumpkin seeds will serve as wings for the bee. When teaching 5-year-olds to sculpt from plasticine, imagination and many additional materials play an important role.
Important: Everything that we sculpt from plasticine with children should resonate with life. Characters for sculpting can be taken from the street (animals, trees, sun, etc.
at home (dishes, fruits) and from children’s poems and fairy tales familiar to the child. The use of additional natural materials (moss, pine cones, etc.) helps develop imagination.
The ability to sculpt from plasticine for 6-7 year old children is determined by the development of sculpting skills. The child can make colored objects from plasticine. For example, the picture shows a mushroom. The young creator will not only reproduce it from plasticine, but will also complement the surroundings - grass, flowers, etc. At the age of seven, during the modeling process, imagination and the ability to simulate a situation are fully revealed.
So, by teaching a child to sculpt from plasticine, you open up an interesting world for him in which you can realize your fantasies and skills. Modeling from plasticine is one of the most significant activities among educational games. It gives the child diversified development, develops imagination and prepares fingers for learning to write.
Materials for modeling
There are several materials with different properties that are suitable for sculpting. They are all good in their own way and they all have their shortcomings.
Children's plasticine
Plasticine for modeling needs to be chosen correctly, because a very hard child will not be able to knead it and it will fall apart in his hands, and a very soft one will stick to everything and it will be very difficult to make anything out of it.
Do not buy plasticine with a fruity smell for your kids, otherwise the child will try to taste it instead of modeling it.
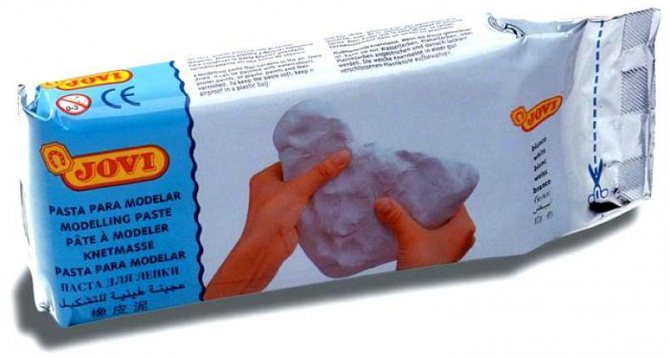
From imported companies we can recommend JOVI plasticine, it is quite soft and made from a natural plant base. This plasticine contains rice and wheat flour, starch and natural dyes. Everything that this company produces is safe and meets the international standard ISO 9002. Plasticine from KOH-I-NOOR and Crayola is also good for children.
Wax plasticine
This is a new type of plasticine that is suitable for small children because it is softer and more flexible. It is made on a wax base, so it is safe for children. Its pieces stick well to each other and it is easy to work with small, fragile hands.
This plasticine is great for plasticineography, read about it below.
Modeling clay
Clay has been used for modeling for many years and children work with it with pleasure, although they have to wash their hands thoroughly afterwards.
Clay is sold in powder form and can be diluted with water at home. If you don't want to bother with this, there is clay already available.
This material is good because of its low cost and you can give a child a lot of it, let him build a big castle or bridge, such entertainment will not put a dent in the parents’ pockets.
Clay can also be used for drawing, especially with young children. Just dilute it with more water and pour it onto some flat surface. That's it, now you can draw with your fingers or a stick, or whatever you want.
There are also ready-made kits for creativity with clay, for example, for making dishes, they also contain a pottery wheel.
If you want to leave a clay craft as a souvenir, it needs to be fired at a temperature of 900°C for a couple of hours. If you don’t do this, then the craft will, of course, dry out, but it will be fragile and crumble at the first opportunity. You can also coat it with PVA glue, it will give the craft a little strength.
Modeling paste
It's something like a mixture of plasticine and clay, something like natural clay. This paste is pleasant to knead in your hand; it is plastic, soft, and very similar to clay when working. But it has one advantage - it does not need to be baked, it hardens on its own. Because It is available only in white or terracotta color; it can be painted after hardening and opened with a clear varnish.
The modeling paste is intended for use with children aged 3 years and older.
Play dough
Salted play dough can be bought ready-made in the store or made yourself. See the recipe for this test below.
This material is great for very young children because it is very easy to work with. A child can sculpt from unpainted dough and then paint it with paints. There is dough already with dyes, but there are not so many colors, although for kids 4 colors are enough so that the variety of colors does not distract the baby from modeling. If you want to save the craft, just leave it for a while and it will dry and harden on its own.
Play dough recipe
This recipe produces a dough very similar to the famous Play Doh brand. It is very soft, does not stick to your hands, it can be stored and used for a long time, and it only takes a few minutes to prepare it.
For the test you will need:
- 1 tbsp. white flour
- 1/2 tbsp. fine salt
- 1 tbsp. any vegetable oil
- 2 tsp citric acid
- a little water, up to 1/2 cup
- any food coloring
Pour all the dry ingredients into the pan and mix thoroughly, then add the vegetable oil. Place the pan on the stove over medium heat, add dye to the water and pour it into the pan in a slow stream, stir constantly until thickened, the mass should become homogeneous. When you stir, the mass will pull away from the walls and bottom of the pan and turn into one lump. When this happens, take the dough out and place it on a floured surface.

This amount of ingredients will make a ball of play dough the size of a large fist.
You can store it in the refrigerator, pre-wrapped in cling film, or in a plastic container with a lid. Before working with the dough, you need to knead it a little in your hands and it will be ready.
Modeling mass
This material is very pleasant to the touch, with a velvety texture, light and soft. This mass stretches well, but does not stick. If you mix pieces of different colors, you get a new color or shade. It does not require baking and dries itself in 6-8 hours in the air.
It also has an interesting property of recovering if it has not dried completely. It can be moistened with water, for example, by spraying it from a spray bottle or wrapping it in a wet piece of cloth, and then seal it hermetically for a while. Thanks to this, a craft made from this material can be corrected or some changes made.
However, the modeling compound has a serious drawback - its price; it is not rational to buy it for children; it is good just for smaller and more detailed work.
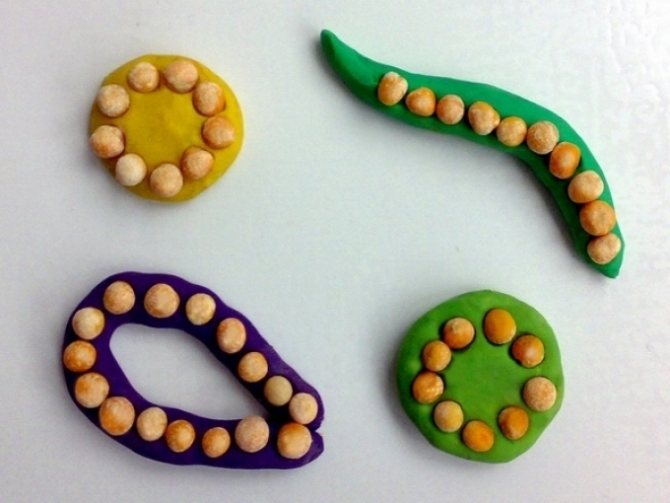
Pressing various objects into plasticine
This is no less important activity. It will help in the future to create unique crafts based not only on plasticine.
Preparing for the lesson:
- plasticine base;
- any small items (pasta, seeds, beans, beads);
- plasticine board.
You can offer your child to plant seeds or mushrooms. If you're looking for an easier activity, buy star-shaped or car-shaped pasta. The child should press them to evaluate the result.
Why did we focus on this type of business? This follows from the two previous lessons. The child already knows how to separate the pieces, make a cake out of them, and as a result he will be able to “put” an additional object into the plasticine. And to make the practice more interesting, you can use this lesson to make a hedgehog from plasticine and seeds.
Plasticine and modeling dough for little ones
- Salt dough or play dough is great for making imprints of various objects. To do this, roll out the dough on the table and try running a hair comb over it, poking it with a felt-tip pen cap, imprinting parts from a construction set, or running a machine over it. You can try to combine several prints in one picture.
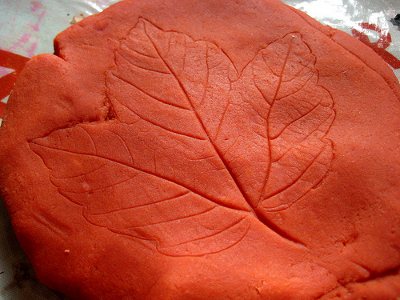
- When walking with your child, look for leaves that are suitable for prints so that they have large veins. Place the back side of the leaf on the plasticine and run a rolling pin over it, carefully remove the leaf and watch how surprised the child is. You can make the dough in different colors, for example, mix red and yellow, then the leaves will look like autumn leaves.
- You can also print a piece of lace in the same way. Then you can cut out figures from this dough, they will be completely embossed with lace
- Get out your cookie cutter kits and stamp them on the dough. You can make a whole picture, for example, print a sun circle on top, add rays to it with imprints of a pen, plant a Christmas tree at the bottom, a bunny under it, etc. You can not print the figures, but cut them out entirely
- Modeling kits come with rolling pins of different textures that leave interesting imprints. But you can make these rolling pins yourself. To do this, take a cardboard cylinder from under napkins or foil, apply a pattern on it with a pencil, and go over the pattern with a glue gun on top. When the glue hardens, it will harden and you will have your own rolling pin, leaving unique patterns
We are gradually moving on to more complex crafts.
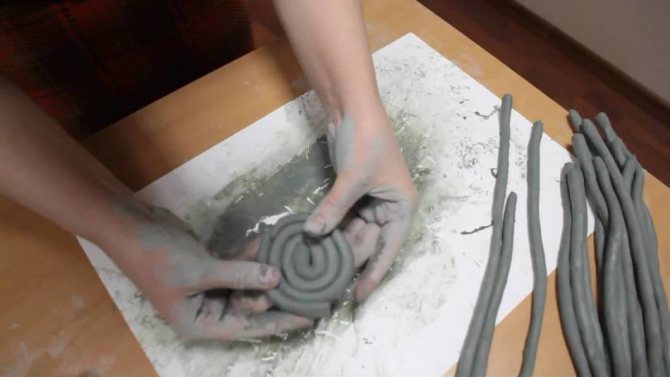
We suggest mastering plasticine or plasticine quilling by laying out a drawing with plasticine flagella.
It is quite difficult to roll a thin flagellum with small hands, so we offer you a little trick. We will need a syringe in which we put a piece of plasticine.
Dip the syringe into boiling water. We leave it for a couple of minutes, you will have to choose the time, because soft clay melts faster, and hard clay takes longer.
Then we begin to squeeze out strips of plasticine.
Tip: it is not necessary to heat several syringes with plasticine at the same time. It is better to do each color separately, heating the water each time.
When the plasticine has cooled a little, start rotating it in a circle or spiral oval. We make all the preparations that we deem necessary.
And we create our own composition. We decided to make a bouquet. In this case, you can change the composition: the plasticine comes off the paper quite easily; first I “assembled” the bouquet, and then my son. And I think he did better.
She encountered an even more complex technique: creating three-dimensional objects from crepe paper and plasticine. You can watch individual master classes on this technique on our website.
What is the difference between plasticine and clay?
Clay is a natural, natural material that hardens when dried, and if fired, it will be resistant to high temperature and moisture.
Plasticine is an artificial invention. Even hard varieties do not harden completely, crafts made from it are not very durable, and they will melt under high temperatures.
Clay is a softer material, so it is given to young children for modeling; when hardened, it can be diluted with water, and it again acquires fusible properties. Plasticine depends on the temperature of a person’s hands; it must be kneaded for modeling. However, clay is more sticky, making it easier to wash your hands off plasticine.
Clay crafts can be painted with paints, and plasticine is initially multi-colored.
The creations that come out great from these materials are up to you to choose.
The basis of crafts is a ball
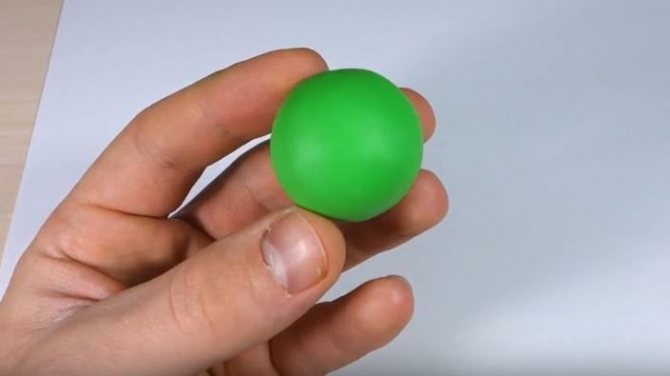
One of the first techniques in sculpting is rolling. Knead the plasticine, roll it in your palms in a circular motion, you get a smooth ball.
You can try to roll a ball on the board, using the palm of your hand to roll the plasticine in a circular motion, you get a ball, but less even than the first method.
If you need a very small ball for the details of a craft, you need to put a piece of plasticine on your palm and roll the desired part with the finger of your other hand.
From these basics you can make many crafts: a caterpillar, a tumbler, flowers, apples, nuts, beads.
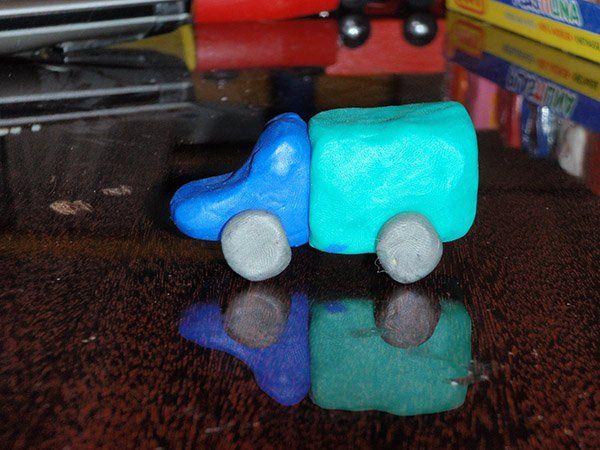
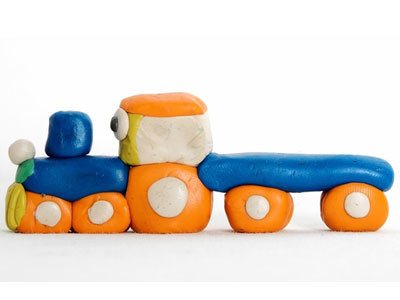
Truck
If the previous craft consisted of balls, then for the van we will need rectangular bars.
First we sculpt a rectangular part - the future kung and a rectangle for the future cabin. The booth can be made by cutting a piece of plasticine out of a rectangle or joining it together to form a rectangle.
Modeling a truck
Then we sculpt the wheels. Roll the balls and press them onto the countertop to form disks. Put it all together.
Simple plasticine cart
Crafts from plasticine
The simplest thing is to take them and throw them in the trash. But take your time. We invite you to remember your childhood, when candy wrappers from the fields...
Hobby Crafts from shells. We make decorations for Christmas trees and gifts for family and friends with our own hands
Seashells and seashells are some of the most accessible and beautiful natural materials. All sorts of crafts are made from them: beautiful panels, original jewelry, various decorative elements, photo frames...
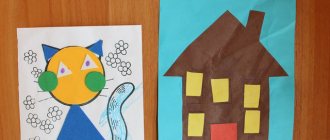
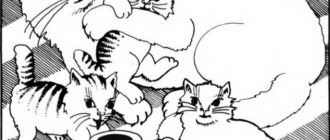
The master classes presented in this article offer options for making plasticine crafts with 3-4 year old children on the topic “Animals”.
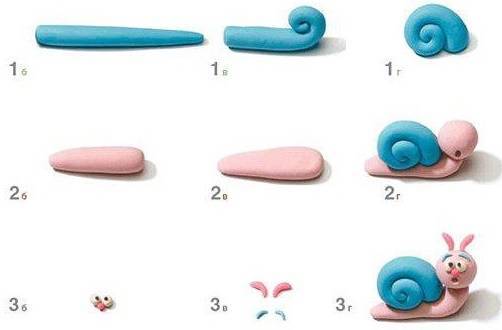
The presented transactions differ in the level of complexity. Children 2.5-3 years old can make a snail, especially the first option. Sculpting a kitten already requires special skills in working with pile and knowledge of plucking techniques. To complete the cockerel figurine, the child will have to show perseverance and hard work, since this craft uses many individual elements, the production of which will take some time. Let's take a closer look at the master classes.
To work you will need 3-4 colored plasticine. The ratio of the sizes of the pieces of plasticine should be approximately the same as shown in photo 1. Roll out a long thin sausage from a larger piece, and a plump sausage from a smaller piece (photo 2). Fold the long piece in a spiral into a circle (photo 3).
This element can be a ready-made craft - a figurine of a snail. All that remains is to slightly stretch the edge of the sausage with your fingers and bend it forward, forming a head (photo 4). You can invite your child to perform a more complex version of the snail. A spiral-shaped part remains, this will be the snail shell. Now let's go back to the thicker sausage - this will be the body. We lift one edge and fold it, forming a head. We attach a shell to this part (photo 5).
Roll out two thin sausages and make snail antennae. We make two elements in the form of balls, place them on the snail’s head and flatten them slightly - the eyes are ready. Making these small parts can be difficult for your child, so please help him with this issue.
For creativity, we prepare plasticine of two colors. Cut a large piece of plasticine of the main color into pieces, as shown in photo 8. Unfold a large piece of sausage and fold it in an arc - this will be the body and legs of the kitten. (photo 9)
Roll the smaller piece into a ball and attach it to the body, forming the head. (photo 10) Roll the next larger piece into a long thin sausage - a tail, attach it to the bow on the side opposite the head. (photo 11)
We pinch the plasticine at the top of the head and pull it out slightly, forming an ear.
Ideas for modeling with dough and plasticine
There are a lot of possible ideas for modeling and you can always come up with your own, give free rein to your imagination and that of your child. We offer you some simple ideas.
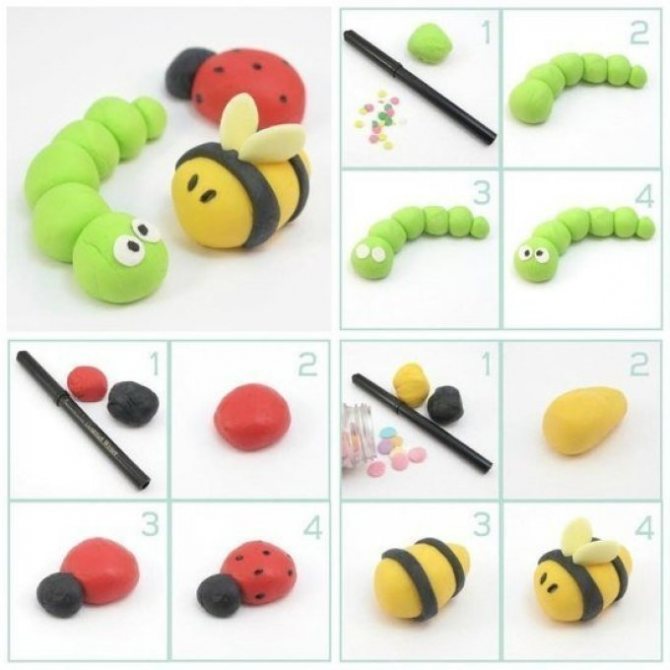
Plasticine caterpillar
Make a lot of balls, maybe multi-colored, connect them in descending order by size, make eyes and horns first - you have a caterpillar . Make a ladybug and a bee as shown in the picture
Steam locomotive made of plasticine
a steam locomotive from balls, sausages and sticks
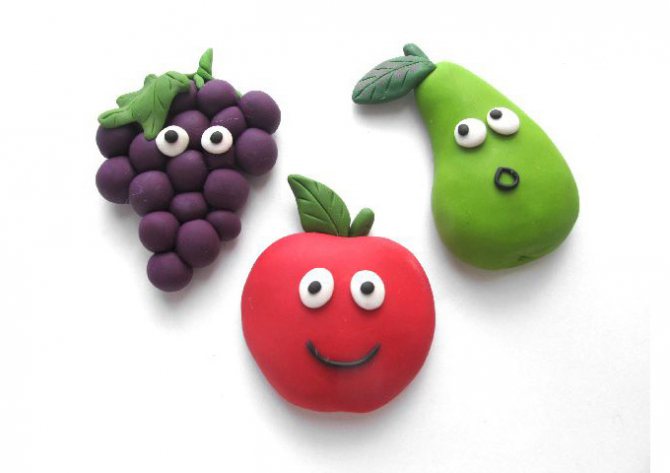
Plasticine fruits
Very simple and funny “live” fruits
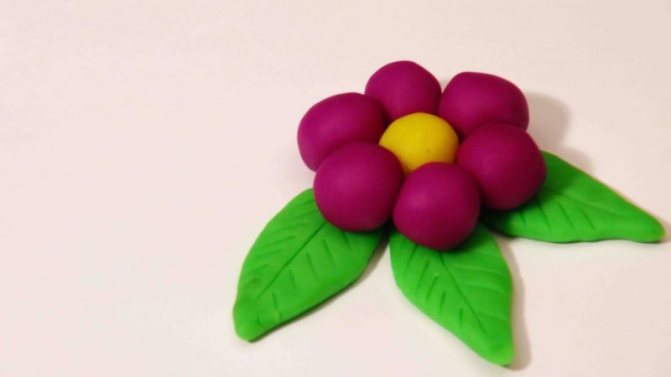
Modeling a flower from plasticine
By flattening the balls and sausages, you get a beautiful flower
Plasticine snails
snails from long sausages
Cakes for dolls made from salt dough
The child will love making beautiful cakes for the doll.
Hedgehogs made of plasticine
hedgehogs like these
Plasticine figures with peas
You can insert peas, nuts, cereals, pasta into different plasticine figures
Pictures for coloring with plasticine
Invite your child to fill up the holes in the pictures. Pictures can be taped or laminated so they can be used more than once.
Plasticine butterfly
a butterfly like this or other drawings
You will find more ideas with step-by-step instructions in the article Ideas for modeling from dough and plasticine. We sculpt food, animals, toys
History of origin
The invention of the sculptural substance is attributed to 2 scientists. Franz Kolb invented the material for making models at the end of the 19th century. William Harbut invented plastic mass
in 1987. It was later discovered that both substances have identical structure and uses. That's why they got the same name.
this is interesting! The first dish was made only in a gray shade. Only years later it gained popularity, and the mass began to be painted in different colors.
Now the material is in great demand. It is used in various industries (modelling, handicrafts, animation, child development, etc.). The use of plasticine has been going on for over a century. Lots of skill
and compositions included in the Guinness Book of Records.
Step-by-step description of crafts
So, everything is ready to go, you can start creating. Let's look step by step at some simple examples of interesting children's crafts.
Plasticine hedgehog with seeds
The funny hedgehog is not difficult to make, but it looks very creative and cute. To work, you will need brown plasticine for the body, beads for the eyes and regular black seeds.
- Roll a ball out of brown plasticine.
- On one side, stretch the ball out slightly so that it looks like a teardrop.
- The eyes and nose can also be made from plasticine or replaced with beads.
- Place the seeds on the back of the hedgehog with the pointed ends facing up.
- When the entire back is covered with “needles,” place the finished craft on a piece of cardboard. You can decorate the back of the hedgehog with a miniature plasticine mushroom or an apple.
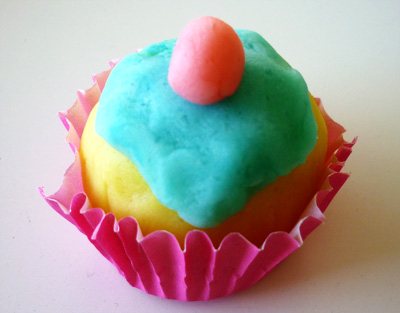
Candy on a stick
Children will definitely love the colorful plasticine lollipops. To work, you will need multi-colored plasticine and matches or canape skewers.
- Make as many different colored balls as you like.
- Roll the balls into thin sausages.
- So you can improvise with the look of our sweets. Take two sausages of different colors and roll them into a spiral. You can pre-roll the sausages into a braid. Throw the finished lollipops onto sticks and you can take a colorful photo.
Bouquet of flowers
The variety of bouquets created from plasticine is limited only by the sculptor’s imagination. Let's conduct a short master class on making a simple version of this craft.
- Prepare red, pink and green clay.
- Roll the greens into thin sausages and cut them into about seven pieces.
- Roll the pink playdough into a sausage, then roll the sausage into a strip, flattening it.
- Divide the strip equally into seven parts and roll each part into a spiral, these will be gems.
- Plant rose buds on green stems.
- Collect a bouquet and decorate with a red plasticine bow.
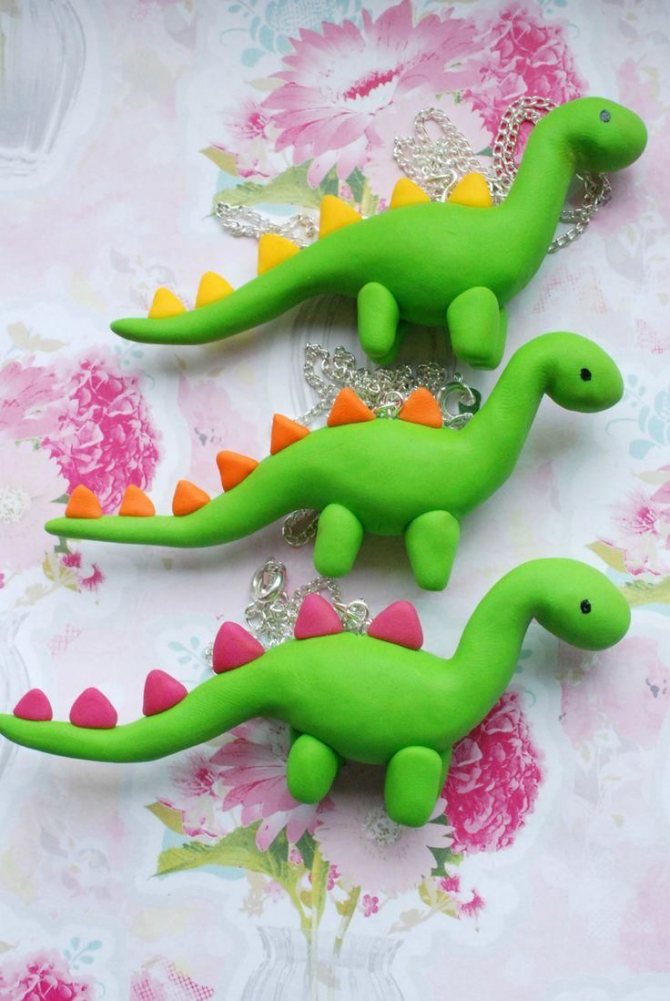
Plasticine Christmas tree
On New Year's Eve you can make a beautiful Christmas tree with your children. To do this you will need green clay, a bamboo stick and scissors.
- Build a cone from green plasticine, choose the size to your taste.
- Place the cone on the bamboo stick, the trunk of the Christmas tree.
- Using the tips of the scissors, make small cuts along the entire checkerboard-shaped cone and slightly bend the ends of the “needles” upward.
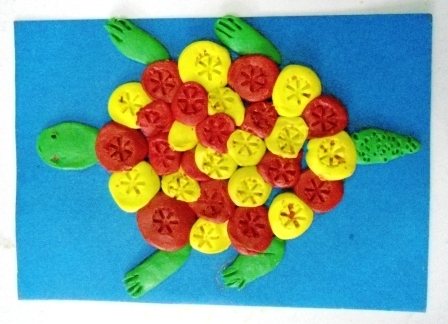
Funny turtle
Step-by-step instructions will help you easily create a funny and cute turtle with your baby.
- For the base you will need brown and green plasticine. For the eyes, you can use beads or make eyes from black and white plasticine.
- Roll six green plasticine balls. One larger one for the head and five smaller ones for the legs and tail.
- Make a large ball from brown plasticine, then form a shell.
- Attach small flattened circles of brown plasticine to the shell, imitating the texture of the shell.
- Blinding head on neck, legs and tail extended. Attach them to the shell.
- Using a toothpick, cut out the nostrils and draw a smile. Attach the eyes to the turtle and the craft is ready.
By sculpting with their child, parents help their child develop creatively, and there is also a chance to reveal the true talent of their child.
Ideas
Before you start practicing, think about how to do an easy
and educational lesson. It is important to consider what exactly interests the baby. Use additional items (cones, ribbons, beads, etc.). What is made from plasticine:
- Animals
(bear,
elephant,
dog,
snail
and others). - Thematic compositions. For example, on the theme of summer
.
It's hard to find a baby who doesn't love warm days. Draw the sun, sky, flowers
, sea. Show your imagination with your little one. - Trees.
- Vegetables and fruits
. - Sweets. Children especially enjoy making their favorite treats.
- Insects (butterfly, dragonfly).
- Fairy-tale heroes.
- Tanks, planes, cars.
Important! Before preparing for a lesson, consider the age of the child. Make the figures in stages so as not to confuse the baby. He must remember the entire process. Repeat the lesson if necessary.
What to sculpt with children 2 years old
With the youngest
A group of children conducts lessons with
airy
and soft plasticine. Regular paste is not suitable due to its hard structure. It will be difficult for the baby to knead it with weak fingers.
Don't miss: How to make a busy board with your own hands?
At first, kids are given easy tasks. Activity ideas:
- Show how to tear material into pieces (large and small).
- Roll the balls. Then flatten them on paper or cardboard.
- Press the balls onto the tortillas in your palms.
- Twist the sausages. They can be twisted into rings.
- Attach plasticine sticks together in a semicircle to form a rainbow.
After mastering basic manipulations, move on to more complex tasks:
Cut large sausages on a board You should get rings.- Cut out various geometric shapes. To do this, make a ball and flatten it on cardboard. Use a knife to cut the mixture into shapes.
- Smear plasticine on a board or paper. Attach any objects (beads, cereals, seeds) to its surface.
Important! Do the exercises for no more than 15 minutes. So that the child does not become overtired. For work, choose 5-6 colors. Don't overload your baby with too many shades.
Lessons for children 3-4 years old
In average
In the group, the kids have already learned how to handle soft
baby
mass. Therefore, you can choose ordinary plasticine for work. The child is already able to make a craft. Activity ideas:
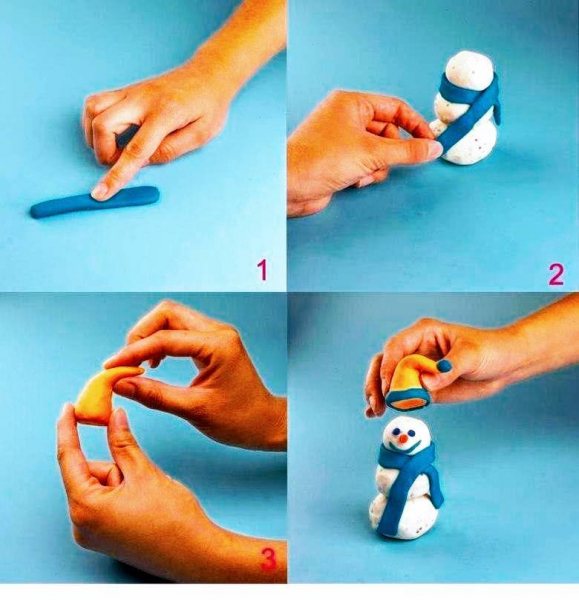
- Snowman. Take a white mass. Ask your child to roll three balls of different sizes. Connect the pieces of the figurine. Use beads to make eyes. The mouth can be made from a red mass, and the nose from orange.
- Pizza or pie. Let your child make a bigger brown ball. Then he will flatten it into a cake. You can lay beads, cereals, pasta, rhinestones, etc. on the surface.
- Hedgehog. Make a brown ball in the shape of a muzzle, slightly flattened at the attachment point. Glue it to the back of the pine cone. Pull out the nose from the plasticine and attach a small black ball to its tip. Then add eyes to the animal.
- Polyanka. Take a small lid. Roll out green plasticine evenly at the bottom. Decorate the sides with sausage of any color. Make white legs for the mushrooms. Attach hats with white dots to them. Place the finished mushrooms in the clearing.
Don't miss: Early Fine Motor Skills
Do such exercises for no more than 20 minutes. But, if the baby wants to continue, give him a little time (5-10 minutes). Kit
Color schemes can be diversified by this age.
A little more complicated: caterpillar
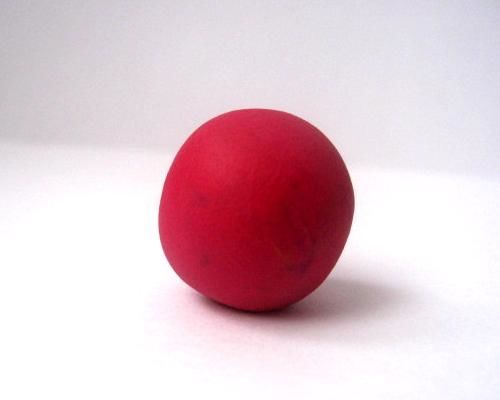
When the apples begin to unfold, you can begin assembling the caterpillar. It consists of several balls, two eyes and horns and a smile. As a result, we need to roll several balls of bright colors. Balloons of the same or different colors will do.
The eyes of the future are smaller balls. You can make each eye from balls of two colors, so you get the pupils. The horns are small tubes. A smile is an even smaller tube.
We collect large balls in a chain, for which we press the balls with a small fold. It can be connected by a straight line or small bends - at the request of the child. You can style several different caterpillars.
So we attach eyes and horns and a smile to the first ball.
Caterpillar
Crafts from plasticine: step-by-step modeling for children
Plasticine hare
A simple plasticine bunny for children. A step-by-step review with detailed photos that will help you make a hare without much difficulty.
Read more: Plasticine bunny
Modeling a frog
Plasticine frogs come in different varieties. I present to you a simple way to make a frog with a photo and step-by-step instructions. Great option for children.
Read more: plasticine frog
Bright dolphin
Plasticine dolphin step by step. A wonderful character that a child can create with his own hands, and then play with him and give to loved ones.
Read more: plasticine dolphin
Plasticine animals - hippopotamus
A plasticine hippopotamus consists of simple shapes - balls, ovals of different sizes. This is a simple craft that kids can do on their own.
Read more: Plasticine hippopotamus
Plasticine crafts - bee
This master class presents a bright insect - a plasticine bee. The creation of such crafts is accessible to many children who have mastered the initial skills of working with plasticine.
Read more: Plasticine bee
Plasticine penguins: 1 modeling option
A simple penguin made of plasticine for children's creativity. Step-by-step photo instructions for sculpting a funny penguin. A simple and original idea.
Penguin - option 2
Are you interested in how to make a penguin from plasticine? Then you have come to the right place. A step-by-step tour of the sculpting process will help you create this interesting bird.
Read more: How to make a penguin from plasticine
Plasticine hedgehog with seeds
A hedgehog made from plasticine and seeds is a simple craft that can be made by preschool and school-age children. The work is interesting, ideal for developing fine motor skills and imagination.
Read more: hedgehog made of plasticine and seeds
Modeling a bullfinch
These colorful birds appear in the city with the onset of winter, when they lack food. Red-throated bullfinches are very noticeable against the background of white snow. A plasticine bullfinch is an excellent creative option for children on the eve of winter and during this cold season.
Read more: Bullfinch made of plasticine
Rat
Fun plasticine mouse craft. It was modeled as a symbol of the year, but it would have been nice to sculpt it without a date reference. Making this character is easy and interesting.
Read more: plasticine rat
Bright deer
For many, deer is a symbol of the Christmas and New Year holidays. Therefore, on the eve of these holidays, a craft is ideal - a deer made of plasticine and even with a gift. But you can also model a deer as a northern animal in a class on a related topic.
Read more: plasticine deer
Plasticine bear
Multi-stage plasticine bear for children. An easy way to make a bear is shown step by step in detailed photos. Easy craft made from plasticine.
Read more: Plasticine bear
Dog made of plasticine and natural material
Modeling with plasticine is very easy and fun! After all, in the end you can get a wonderful flat or bulky craft. An even better option is to combine plasticine with natural materials such as chestnuts, pine cones, and acorns.
Read more: dog made of plasticine and chestnuts
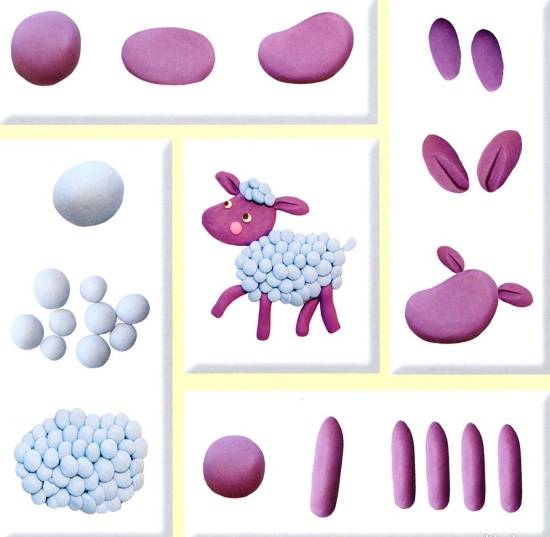
Beautiful sheep
Sheep made of plasticine step by step. An interesting option for sculpting a sheep from black and white plasticine. A simple craft for children's creativity.
Read more: Plasticine sheep
The importance of modeling for the development of a child
The benefits of modeling for children are enormous. These activities have a good effect on the child’s nervous system, fine motor skills of the hands are trained, spatial thinking is formed, the child learns the shape of objects and their colors. It has a beneficial effect on the emotional and mental state of the child. With the help of modeling, a child can create his own world as he sees and feels it.
Modeling is one of the most popular types of creativity, in which the child uses his sense of touch to the maximum. He creates something of his own, and not only sees it, but also touches it, holds it in his hands, and can change it if necessary.
Thanks to modeling, the mental development of the child occurs, it affects the health and emotional state of the baby, and helps the development of personality.
Modeling has the following effects on the development of a child:
Modeling and spatial thinking
- increases sensitivity, helps to sensory perceive shape, weight, texture, color
- forms spatial, figurative and abstract thinking, stimulates imagination
- the child learns to feel, evaluate correctly, see the objects around him and the living world from a different angle, and find solutions in hopeless situations
Modeling and the development of fine motor skills and speech in children
trains fine motor skills, which in turn takes an active part in the development of speech, affects coordination of movements, trains memory and helps the child think logically
Modeling and synchronizing the child's brain
helps synchronize actions with both hands
leads to strengthening the connection between the hemispheres of the brain, due to which attention develops
Developing creativity through sculpting
- the child learns perseverance and patience, to be careful
- children learn to concentrate, make plans and carry out what is planned, compare what is planned with the result obtained, and make changes if necessary
- aesthetic taste develops
- develops a child’s sense of self-worth and gives confidence in their abilities
- the child learns to experiment and make new discoveries
- through modeling, a child can express, in a way accessible to him, his emotions, both positive and negative
In addition, constant practice of such calm games as modeling normalizes sleep, helps calm an overly active baby, reduces excitability, the child becomes calmer and less likely to get irritated.