On the topic: methodological developments, presentations and notes
Software Content: Teach children to lightly press a finger on a small ball of plasticine and smear it in different directions on the cardboard. Develop fine motor skills of the hands. Demonstration.
· Expansion of vocabulary · Introduce children to the symbolism of constellations accepted by astronomers, cultivate a love of nature.
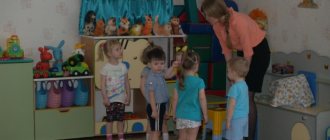
Dear colleagues, educational psychologists working in sensory rooms! I would like to share with you an idea on how to make a “Starry Sky” sensory panel for a relaxation area using available materials.
Summary of a correctional lesson on orientation in space on the topic “Starry Sky”.
The presentation contains photographs of elements of the solar system.
Drawing using the wet technique.
Non-traditional technique: candle + watercolor. Purpose: to cultivate an aesthetic perception of nature and its images using non-traditional artistic techniques; develop color perception and visual movement.
Source
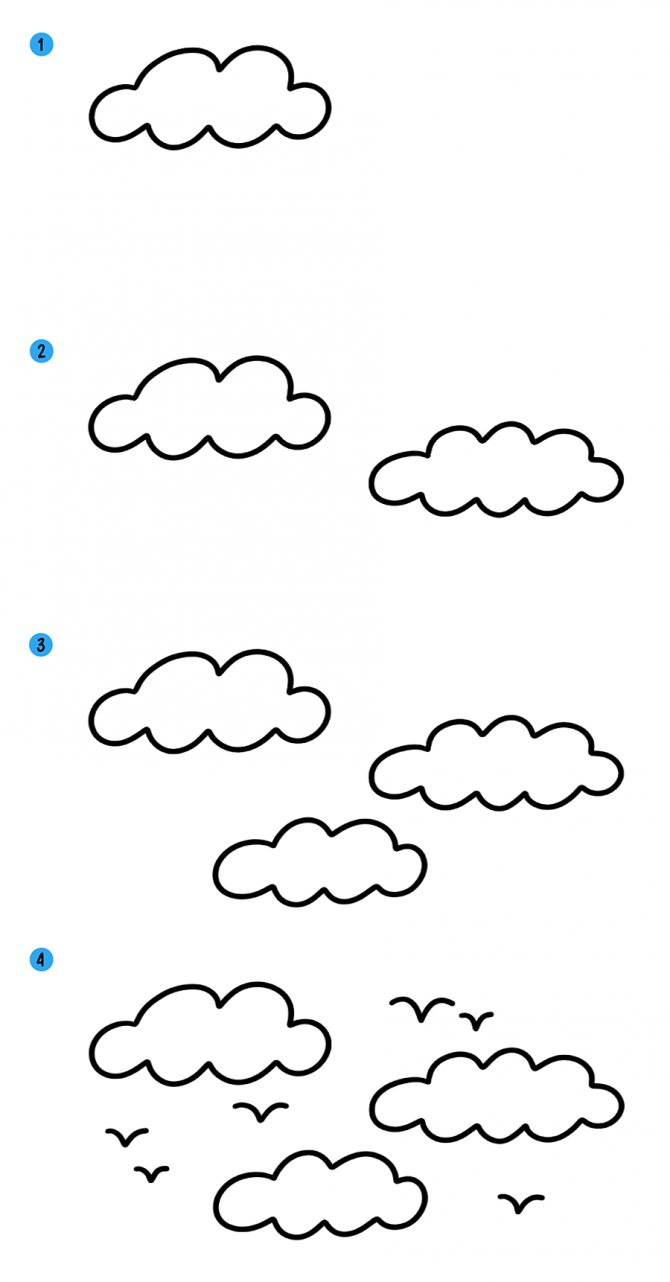
How to draw the sky
The world around us is full of sources of inspiration for artists. One of them is a sky dome with clouds.
This is interesting!
The sky is the space above the surface of the Earth or any other astronomical object. In general, it is a panorama that opens when looking from this object in the direction of space. The brightness of the sky depends on the time of day, altitude, direction, position of the Sun, humidity, dust and aerosol content, and is subject to significant fluctuations. If the sky is covered with clouds, clouds, haze, fog and other phenomena, then with height the brightness as a whole decreases unevenly, in steps, and in certain areas it can increase, for example, at the exit from the cloud.
The sky can be so different - clear and cloudless, gloomy with thunderclouds, day and night, sunset and pre-dawn. Each state of the sky and clouds is attractive in its own way and can set the atmosphere and determine the mood of the depicted landscape.
To create a picture, they use the entire palette of colors, from white, yellow and red to dark purple and black. Learning to draw a sky with clouds means learning to convey the character of a celestial object, weather and mood.
The firmament can be depicted in different versions:
- in light shades with fluffy clouds illuminated by bright sunlight.
- evening with splashes of red and orange, conveying the sunset;
- before the rain with heavy cumulus clouds in dark colors;
- starry at night.
It is better for the child to start with an option that is easier and more familiar to him - the night or day sky with or without clouds.
Drawing techniques and techniques
To depict the sky and clouds, you can use many techniques and techniques, depending on the paints used:
- Watercolor - most often this method is used on a wet sheet. The peculiarity of this technique is to quickly depict (no more than 3-4 minutes) all objects before the paper dries. The main tone is applied to a sheet moistened with water using wide flat brushes, then shades of the sky are added. On top of the tone, without waiting for the sheet to dry completely, clouds are drawn using the glazing method - applying several layers of paint. To blur the boundaries, use a clean brush moistened with water.
- Gouache - gouache is denser than watercolor, it allows you to quickly depict the night sky with stars. To do this, the sheet is thickly coated with paint of dark blue, purple and dark green colors and allowed to dry. After this, dip a flat, wide brush (flute) into white paint and, using your fingers, you need to make several movements along the bristles, splashing drops over the surface of the design. This technique is called “blotography” - small blots on paper turn into stars.
- With a pencil - the main method used when depicting the sky is shading, when graphite chips are smeared over the surface of the sheet. The technique of shading is also used - frequent and short parallel lines, due to the frequency and thickness of the stroke, are able to convey the volume and saturation of the cloud and the background of a celestial object. A simple pencil is also used for preliminary drawing of small details in a watercolor drawing.
They also use various techniques when depicting the sky - gradient stretching of the color gamut, mirror image, scratching dark-colored paper with a sharp object, etc. For clarity of each technique and various drawing techniques, it is recommended to watch the instructional video.
Summary of a drawing lesson in the preparatory group of a kindergarten. Cosmonautics Day
Drawing lesson in a preparatory group on the topic “Space”
Topic of the lesson: Cosmonautics Day Goal: Develop the ability to reflect your ideas about space in a drawing. Objectives: 1. Continue to expand children's understanding of the diversity of space. Tell children about interesting facts and events of space. 2. Give children the idea that the Universe is made up of many stars. The Sun is the star closest to Earth. Clarify ideas about planets and constellations. 3. To give children knowledge about human exploration of outer space, about the importance of space research for the life of people on Earth. Introduce the first cosmonaut Yu.A. Gagarin. 4. Foster a sense of pride for your homeland. It's so cool in space! It's so cool in space! Stars and planets In black weightlessness Float slowly! It's so cool in space! Sharp rockets at great speed, rushing here and there! It's so wonderful in space! It's so magical in space! Been to real space once! In real space! In the one that saw through, In the one that saw through a paper telescope! O. Akhmetova One of the topics that is very interesting for preschool children is space. Space is a mysterious world of stars, planets, and other objects. From childhood, children see that day gives way to night. The sun shines in the sky during the day and the moon at night. And the sky is strewn with many stars. What can you tell children about space?
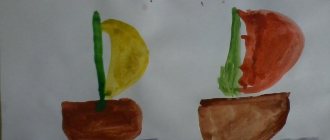
On April 12, Russia celebrates Cosmonautics Day to commemorate the first space flight accomplished by Yuri Gagarin. The starry sky has always attracted the eyes of people, beckoning with its uncertainty. People dreamed of learning as much as possible about space. Thus began the time of space rockets, satellites, lunar rovers... Our Earth is a huge ball on which there are seas, rivers, mountains, deserts and forests. And also people live. Our Earth and everything that surrounds it is called the Universe, or space. In addition to our blue planet, there are others, as well as stars. Stars are huge balls of light. The sun is also a star. It is located close to the Earth, so we see it and feel its heat. In addition to the Earth, there are 8 more planets in the solar system, each planet has its own path, which is called an orbit. To find out what a person will have to face in space, scientists sent animals for “reconnaissance”. There were dogs, rabbits, mice, even microbes. Dogs are smarter animals than mice, but not all dogs were suitable for testing. Ordinary mongrels came closest. The first dog, Laika, was sent into space in 1957. Then Belka and Strelka flew into space. In 1960, on August 19, they were launched into space on the prototype of the Vostok spacecraft. They stayed in space for more than a day and returned safely. The first cosmonaut was Yuri Alekseevich Gagarin. On April 12, 1961, he flew into space on the Vostok-1 spacecraft and circled the Earth in 1 hour and 48 minutes. Came back alive and healthy. An astronaut is a person who tests space technology and works in space. Now there are astronauts in many countries. The first spacewalk was made by Alexei Leonov in 1965. And the first female cosmonaut was Valentina Tereshkova, who flew into space in 1963. To fly into space, you need to study a lot and study well, be persistent, patient, and enduring. The space theme contains a lot of ideas for drawings, and our children from the preparatory group shared their impressions of space.
We recommend watching:
A game for children in the preparatory group for Cosmonautics Day. Scenario Entertainment for children of the preparatory group. Solar system Sports festival for Cosmonautics Day for the preparatory group of kindergarten. Scenario Notes on cognitive development on the topic: Space in the preparatory group
Similar articles:
Leisure time in mathematics in the preparatory group for Cosmonautics Day
Cosmonautics Day in kindergarten. Scenarios
Master class on unconventional drawing “I draw space” for middle school children
Nadezhda Kovalchuk
Master class on unconventional drawing “I draw space” for middle school children

Goal: creating conditions for the development of artistic and creative
children's abilities using non-traditional techniques of drawing the Cosmos
in distance learning conditions.
Tasks:
Introduce preschoolers to unconventional drawing - “splash” and “imprint”; develop the ability to work with non-traditional tools.
Develop children's creative abilities; fine motor skills.
To develop an aesthetic attitude towards Space and the planets of the solar system; sensitivity to the perception of the beauty of the surrounding world.
The master class “I draw Space” on non-traditional drawing consists of 2 stages
1. “Starry sky” (background) – we use the non-traditional painting technique of “spraying” and drawing with cotton swabs.
2. “Planets of the Solar System” - an unconventional “print” drawing technique with cutting elements.
First stage: “Starry sky” (background)
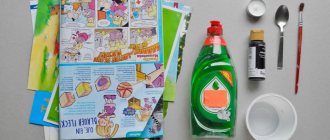
We prepare the necessary material:
• sheet of black cardboard A4;
• toothbrush and cotton swab;
• white, yellow (primary colors) and blue, purple (additional colors) gouache or watercolor;
• water and container for it;
• oilcloth or backing
Attention! For spraying, choose 2 paints: one of the main ones and one of the additional ones. Hold the brush over the sheet, facing away from you.
Step 1. Wet a toothbrush in water and paint it with white or yellow paint (not too thick and not too runny). And we run our finger along the bristles - we spray paint onto the black cardboard.
What is required for drawing
For this fascinating process, you need to prepare in advance the place and everything that is required to depict the sky and clouds. In the room where the child will draw, there must be natural lighting so that the young artist can comfortably depict small details and there is no distortion of the color scheme.
To create a drawing you will need:
- Paper - it is advisable to choose a special one - for watercolor, gouache or pencil drawing.
- Paints (gouache, watercolor), pencils. A child draws better with soft colored or simple pencils.
- Brushes - when choosing brushes, you should pay attention not only to the material they are made of, but also to the number - the thicker the tool, the larger the digital value printed on it. For gouache, thick (No. 18-20) brushes, flat or round, are more suitable. For watercolors, prepare flat, thick brushes for filling in the background, and thin brushes for drawing small elements.
- Palette - for mixing different colors and obtaining any shades.
It is also worth preparing a jar of water for washing brushes, rag or paper napkins to remove excess moisture from brushes. It would not be a bad idea to take care of a stand for tools so that the child can set them aside without staining the drawing and the table if he decides to postpone the process.