Beautiful drawings on the theme of space using scratch paper technique
With this unusual technique you can quickly get a colorful drawing. It will look unusual and bright, but it won’t take much time to complete.
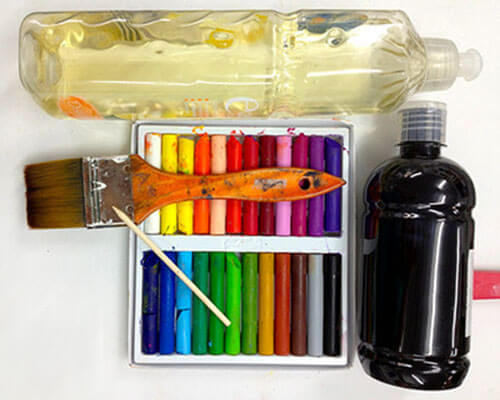
Materials:
- Thick sheet of white paper
- Wax crayons
- Black gouache
- Brush
- Sharp instrument: knitting needle, toothpick, skewer
- Dishwashing liquid
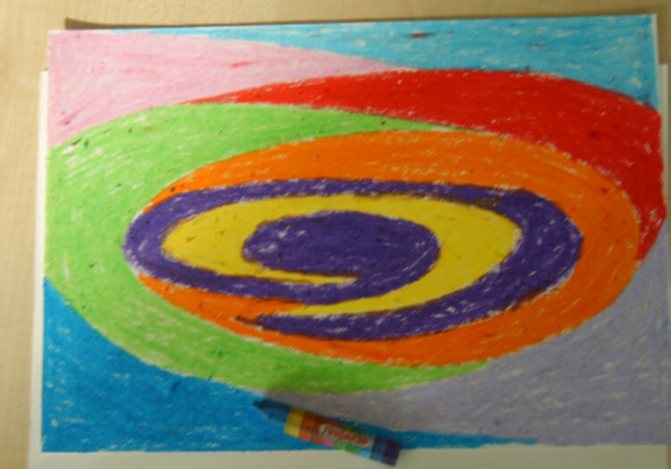
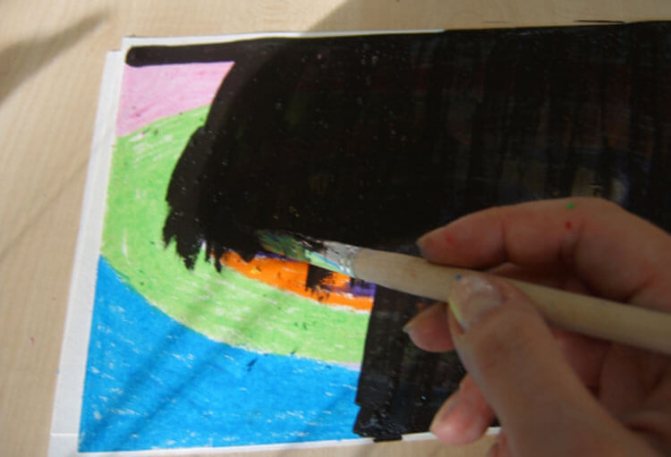
We color a sheet of paper with wax crayons as desired. You need to paint the paper in a thick layer.
Gouache should be mixed with dishwashing liquid in a ratio of 2 to 1. Cover the paper with this mixture.
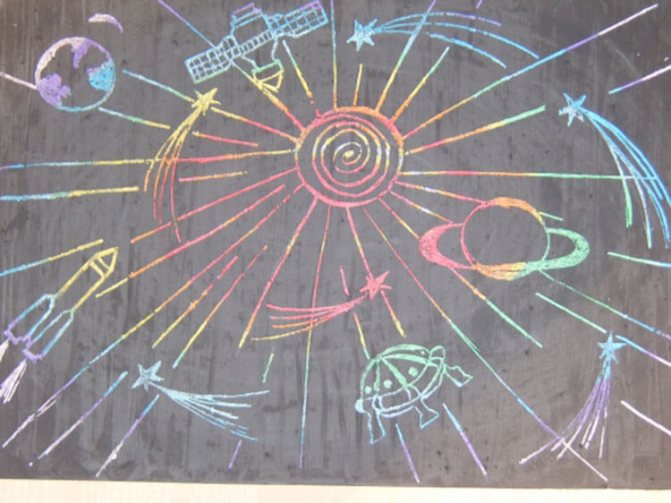
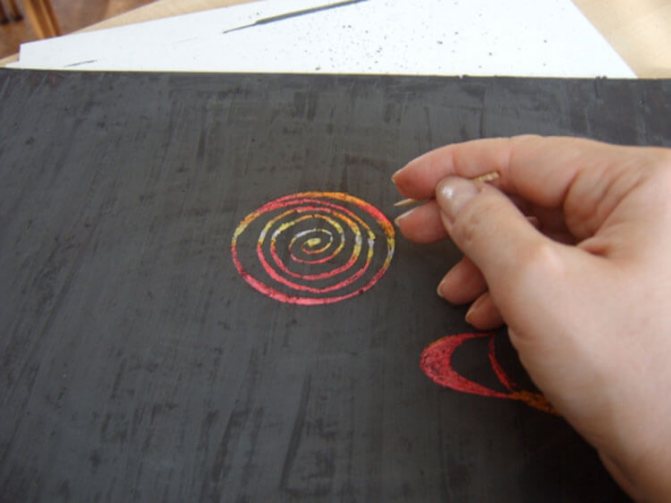
Now you need to wait for the paint to dry. Using a sharp object, draw space objects on the sheet so that the colored chalk appears.
Another version of a drawing on the theme of space using the grattage technique.
It is better and more convenient to use a wooden stick or a bamboo manicure stick for this.
Wax crayons can be used to paint over the sheet in any way.
You can add dishwashing detergent or liquid soap to the gouache.
Only after the sheet has completely dried can you start drawing.
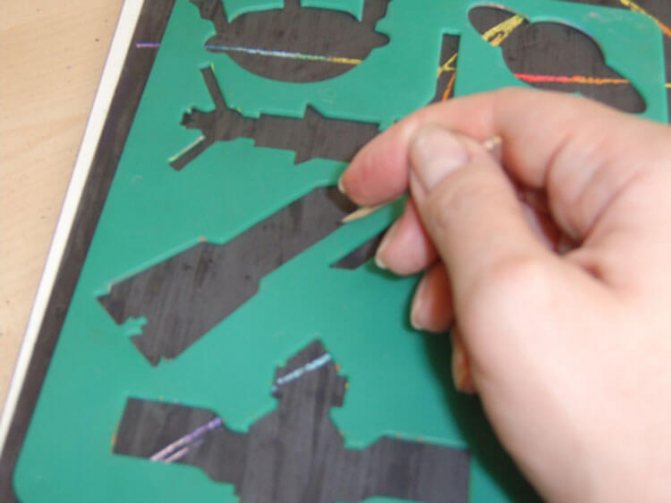
You can use stencils to depict space objects
Master class “This mysterious space” on drawing using the grattage technique
Tatyana Tikhonova
Master class “This mysterious space” on drawing using scratch paper technique
One of the key tasks of modern preschool education is the development of the creative side of the individual. Visual activities, especially non-traditional drawing techniques . Such activities immerse children in the wonderful world of art and give them the opportunity to feel like real wizards. Every child is born an artist; you just need to help him awaken his creative abilities, help him realize his place and purpose in this wonderful world. In kindergarten, the wonderful and unusual scratch technique will undoubtedly be of interest to children of any age. But it’s still worth starting to practice it from the middle group, since such drawing requires certain efforts and the development of fine motor skills of the hands.
Scratching is a method of making a drawing by scratching a paper base covered with a dark-colored background with a sharp tool. The result is original contrasting compositions.
Drawing using the scratch technique brings a lot of benefits to preschoolers, since in the process of drawing the child not only actively develops his imagination, improves his ability to use graphic means of expression to convey the desired image, but the young artist himself feels bolder, more confident, and has greater freedom for self-expression.
The process of creativity in this way undoubtedly raises the child’s self-esteem. If he doesn’t do some object or object very well with traditional drawing , then the composition using the grattage technique will in any case turn out beautiful and original. The preschooler begins to believe in his abilities, because creating compositions using the scratching method is a small miracle every time when a beautiful image gradually appears from the darkness before the child’s eyes. And all the stages of preparing the paper base for work instill in the preschooler attention, perseverance and a sense of consistency.
When working at any age, it is very important to constantly remind children to follow safety precautions . After all, the drawing is done with sharp objects (a toothpick, a glass, etc.), and the children themselves must work carefully and not cause inconvenience to the children sitting next to them.
Drawing using the grattage technique is a rather painstaking task, so during the creative process you should definitely do physical exercises and finger exercises.
Let me present to your attention a master class on drawing using the grattage technique “ This mysterious space ”
, which will be interesting and useful for children of senior preschool and primary school age, teachers of preschool, primary school, and additional education, as well as parents.
This work can be used to decorate a room, as a visual aid, and can also be done as a group work in a kindergarten group.
So, to draw using this technique we will need the following materials: fairly thick paper as a base (the guys and I used half a sheet of whatman paper), wax crayons, black gouache, liquid soap (you can use any liquid detergent, a wide brush, a toothpick, a dry cloth In order to carefully remove wax residues after drawing , use wet wipes.
We begin our work with the pupils of the senior mixed age group with great enthusiasm by painting our base with wax crayons of the brightest different colors in a chaotic manner. It is very important here to try to leave as few spaces as possible. This process literally causes a storm of admiration among preschoolers! The guys will cope with this task very quickly!
Then, using a wide brush, cover our base with a thick layer of black gouache, to which we have previously added a few drops of liquid soap (for uniformity and to prevent rolling)
and leave until completely dry.

Well, now the most interesting part! We are starting to create! The most distant and inaccessible planets, stars, comets, asteroids, satellites - the magical, bright and mysterious world of space is simply “scratched”
toothpick!
Nothing compares to genuine emotions and admiring glances from children's eyes!
The grattage technique attracts with its simplicity of execution and original effect. Therefore, it is ideal for kindergarten classes. By following simple instructions, preschoolers will be able to create a real work of art and believe in their abilities. The kids will want to create using the grattage technique again and again !
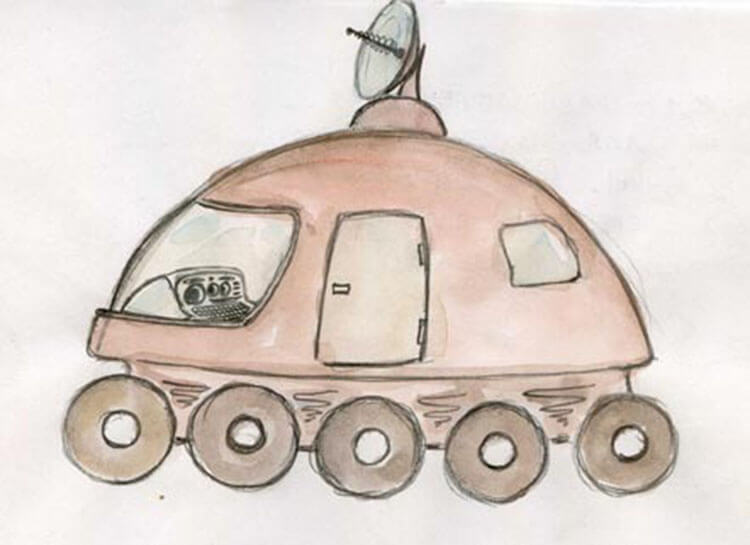
Lunokhod: children's drawing for 1st grade children
Before you start drawing, consider the models of the lunar rover to understand the general principle of depicting this device. For first grade children, you can draw a lunar rover using the following steps.
First of all, we draw the cabin of the lunar rover.
On each side we depict 4 wheels.
Draw an antenna above the cabin.
To make the drawing funny and childish, you can supplement it with original elements.
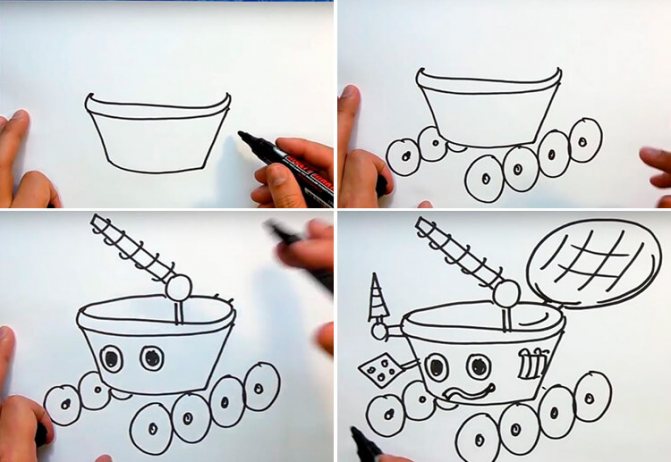
You can color it with pencils or crayons.

A drawing of this kind can be transformed by adding surrounding objects, placing it in outer space, or sending it straight to the moon.
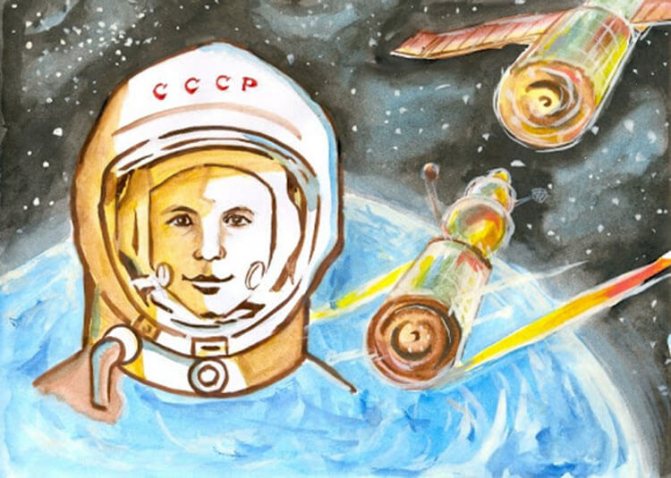
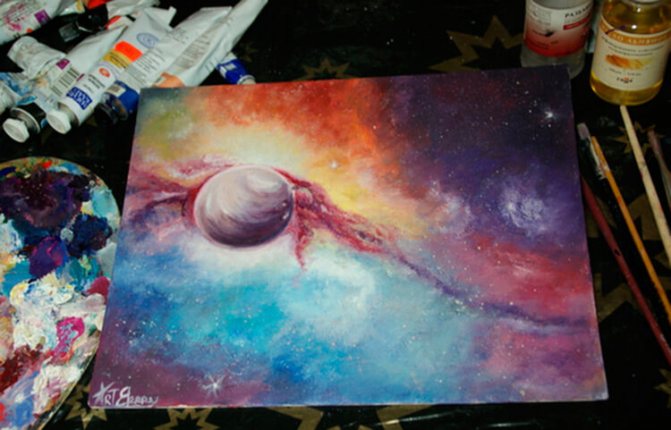
Drawing on the theme of space for school: how to draw for schoolchildren for Cosmonautics Day
Space drawings can be decorated with bright colors in blue and purple tones; use blue, lilac and black paints with white splashes. This way you can show outer space more believably.
You can use watercolors to draw a picture using the sketching technique.

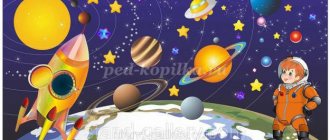
A drawing on the theme of space most often contains an image of a rocket, planets (all or several), you can show an astronaut in a special suit, stars, the moon.
Many people like to look at the sky, watch the stars and the moon. Using watercolors you can more realistically depict the infinity of space.
Materials:
- Watercolor paints
- Watercolor paper
- Brushes
- Palette
- Jar of water
- White paint
- Toothbrush
- Rag
Such a fantasy drawing will be achieved in just a few steps.
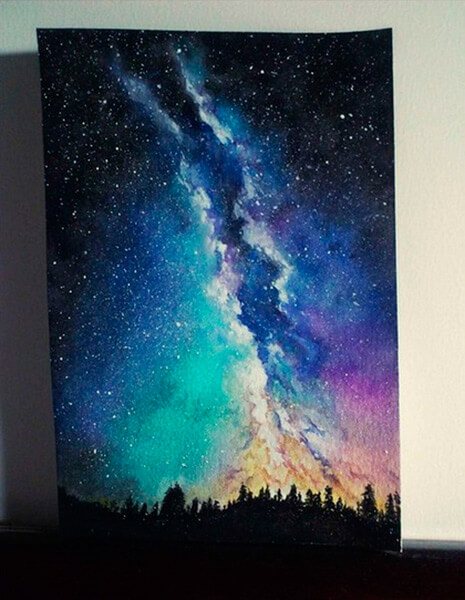
As in any drawing, you need to outline the horizon line and decide in which part of the sheet what details will be. Cover the part where space will be depicted with water.
We cover the sheet with the first layer of paint with the main colors until the paint has dried.
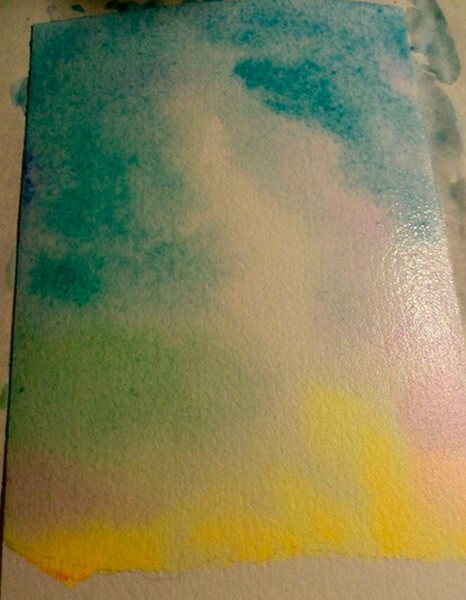
The main principle of painting with watercolors is to dilute the paint with water and apply it to a wet base. This way it will spread smoothly and there will be no precise boundaries.
Let's draw a black forest along the bottom of the sheet.

You can depict stars using white splashes.
Using this technique you can make many different drawings on a space theme.
How to make a painting in the grattage style: examples
Looking at the work of professionals, I can’t believe that this can be done with your own hands. But even an inexperienced artist is capable of creating an amazing picture - you just need to approach the matter responsibly and show imagination.
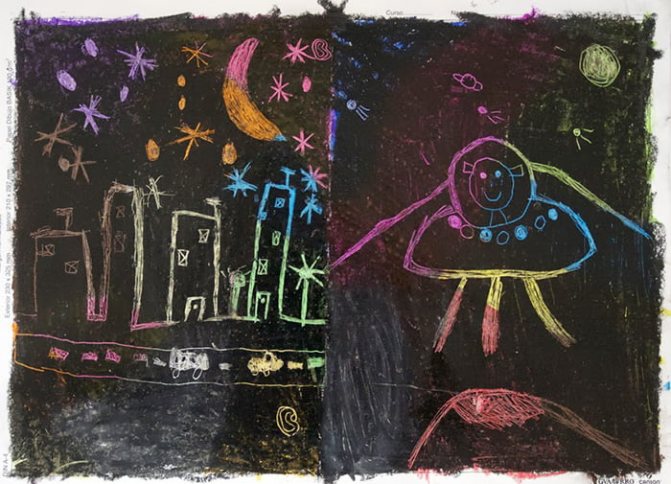
View from space
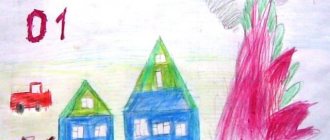
A black background often makes children think of space. To depict the mysterious night sky, the base can be painted over with any colors: from orange to purple. It is best to use oil pastels to then shade the edges of the spots - this will make the transitions between tones smoother. The youngest artists will love the idea of depicting a city at night under the shining stars, whose life is observed by a friendly alien traveling in his “flying saucer”.
Magic tree
Spiral elements look very impressive in the grattage technique. In the composition “Magic Tree” the branches occupy almost the entire space with their large curls. The base is covered with clear transverse stripes of color, smoothly merging into each other: the cool tones from below gradually become warmer as they move to the top. The transitions are clearly visible due to the fact that the tree trunk is quite wide, as are the branches. The difficulty level of this work is average.

Peacock
Small spots of color, randomly located, and thin lines of the design give the effect of a more delicate, subtle play of colors. To depict a peacock, the artist should be patient, this increases the complexity of the painting. Pre-designed head, body and main tail feathers of the bird will help you avoid losing symmetry. When these main lines are ready, you can begin to methodically detail the design: scratching thin lines-beards and scale-like plumage on the neck and chest of the peacock.
There are an infinite number of ideas for creating grattage canvases of varying complexity. To work with a group of children, adults often prepare primed sheets themselves. But for a closer acquaintance with the technique, it is better to divide the lesson into two parts. During the first lesson, young artists will prime the base the way they want, and in the second lesson they will scratch their drawings.
Drawing on the theme of space in kindergarten6 we draw in the middle and junior groups
In kindergarten, the theme of space and the drawings associated with it are aimed at preparing the child to understand the world. They can learn how people are sent into space, how a rocket is drawn, and how an astronaut must fly in a spacesuit.

In kindergarten, children often draw with pencils. You can help them with geometric shapes by drawing them with a compass or using a round object.
About space for children: talking about the stars
The Universe for children is an unusual and amazing world in which the Sun and Stars shine the brightest. To get acquainted with the bright night “pebbles”, invite your child to take a walk in the evening. Show him that there are many bright Stars in the sky, they twinkle mysteriously. In fact, they are not as small as they seem. In real size, these are huge hot balls of gas: the hottest ones glow blue, others glow red. They come in different sizes. The most famous and brightest stars are Polaris and Sirius. The beloved warm Sun is also a star, the most important for us and our planet Earth. There are also colorful constellations in the sky - silhouettes of bright Stars. For example, the Big and Little Dipper.
Children's drawing Rocket: how to draw step by step
Since the main subject in space is a spacecraft such as a rocket, it is quite advisable to teach your child how to draw it to prepare a drawing on the theme of space.
Drawing of a rocket in space
Materials:
- Album sheet
- Pencil
- Eraser
- Pencils/markers
On a sheet of album placed horizontally, let's start drawing a rocket. Let us depict the body as oblong, with a sharp edge at the top and a straight line at the bottom.
Draw two straight lines parallel to the horizon - depict the nose of the rocket and its nozzle.
In the center of the body we will draw two circles - a porthole.
Draw the legs of the rocket on both sides
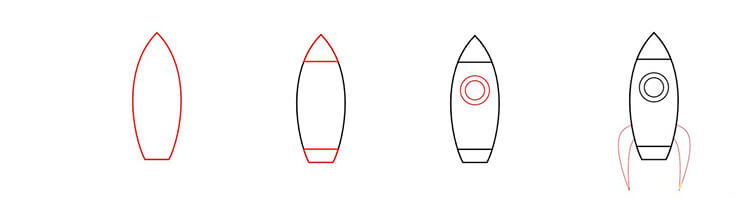
If a rocket is flying, then you need to draw a flame under it
The rockets can be colored with pencils, markers or paints.
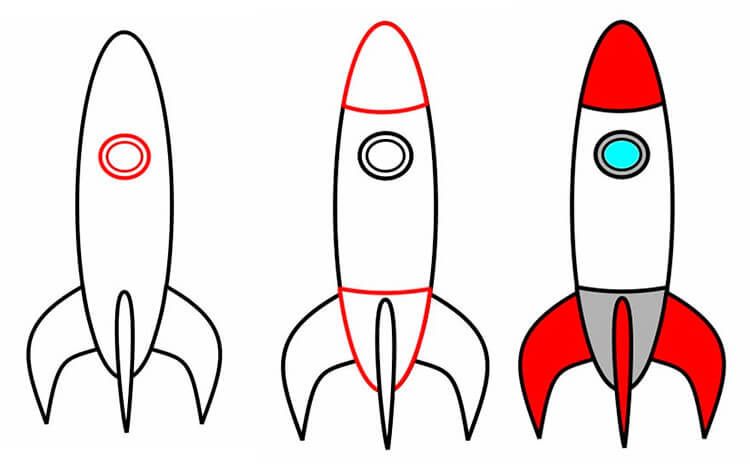
Space rocket: drawing for children on April 12
In order to draw a rocket body, you need to draw an oval. It should not be very thin, but also very potbellied. Draw the legs of the rocket using squares at an angle of about 45 degrees. Below it draws triangles, in front there is a rectangle right in the center.
These rocket legs are called rudders. Make it smoother in shape by erasing the extra lines. Draw a round porthole in the center of the body. Using straight lines, draw the nose of the rocket and the nozzle. All that remains is to color the rocket.
Rocket flying to the stars: simple drawing
It’s not difficult to depict a rocket taking off. To do this, you need to start drawing it at an angle to the horizon.
First show the guide line. The second step is to show the rocket body - a rectangle that meets at the top.
Below we will depict the rocket nozzle and the fire that the rocket will emit in flight. Draw 4 lines along the body. Show the rocket's rudders - two on the sides and one in the center of the body at the bottom. Don't forget about the porthole window.
How to draw space. Drawings of space
Now we will tell you about a very interesting way to draw the moon. For this space-themed craft, you will need regular PVA glue in a bottle with a narrow spout. We will draw on high-density paper. Draw craters directly on the surface of the moon with glue. When the glue is completely dry and transparent, paint over the moon with gray paint.
Material prepared by: Anna Ponomarenko
Drawing for Cosmonautics Day in pencil
As the days of April approach, we remember such a holiday as Cosmonautics Day. You can draw the cosmic universe with pencils in just a few steps, and even schoolchildren can do it.
Draw a circle on a white sheet of paper with a compass. Use a yellow pencil to shade the center of the circle, and then make orange strokes. Then again we make a layer of yellow and then continue with pink a little higher, then lilac.
On the other hand, you can take blue and purple.
Use a black pencil to make strokes in the places where you want. You can use cherry blossom. In the center of the circle, switch to lighter colors. Make smooth transitions, gradually moving from dark to light shades.
A white helium pen will be useful for us to show stars, constellations or the milky way.
Drawings on the theme of space in pencil can be taken from the following options.
Children's drawings on the theme of space. Drawing with shaving foam
For children in creativity, the process itself is more important than the result obtained. We, adults, are interested in the final product of our activities. Today we want to offer you a type of play with colors that will satisfy the needs of both children and adults. The website games-for-kids.ru describes an interesting way to create the so-called. “marble paper” using regular shaving foam and paints (or food coloring). Using the detailed instructions for making “marble paper” described on this site, you can make beautiful drawings on the theme of space for Cosmonautics Day.
Exhibition of drawings for Cosmonautics Day: the most beautiful examples
If you had to urgently prepare a drawing on the theme of space for a school competition, then there are different options for images. Show your child how to combine paints of different colors, make smooth transitions, and what available objects can be used to depict planets and a rocket.

Materials:
- Watercolor paper
- Pencil
- Eraser
- Watercolor paints
- Jar of water
- Toothbrush
- Brushes
Take several lids from jars of different diameters. Arrange them in random order on a piece of paper. Leave room for the rocket.

In order to depict a rocket, you can use a bottle of corrector.
Draw all the details of the rocket - legs, nose of the rocket, porthole.
Dilute the watercolor with water and use a brush with lilac paint to paint the background from the corner. Then you can apply emerald color paint. If there is enough water, these two colors will merge.
We paint the background with lilac, violet, pink and green shades, you can add blue and cyan. We paint the planets with completely different colors - which were not present when painting the background.
You can add green to the orange to mix them up. Another planet can be painted green and blue. Using a thin brush, paint the rocket.

Trace the outline of the rocket with a felt-tip pen. When you have drawn all the small details, we will proceed to the final stage. Place on the rocket and planets the details with which they were drawn.
Dilute white paint with water on a palette and apply paint to your toothbrush. Spray it using a brush.
Such a drawing can take its rightful place at an exhibition.

A drawing competition for Cosmonautics Day is held every year in schools, and in every class there is a child who is passionate about space, rockets and astronauts. Most often these are boys, but some girls also like to depict space objects. For girls, they can turn out sweeter and more tender, with details drawn. Boys pay more attention to spacecraft models.
Drawings on space themes often provide an opportunity to show your imagination - learn to depict the Milky Way, spirals of the Galaxy, space mountains, clouds.
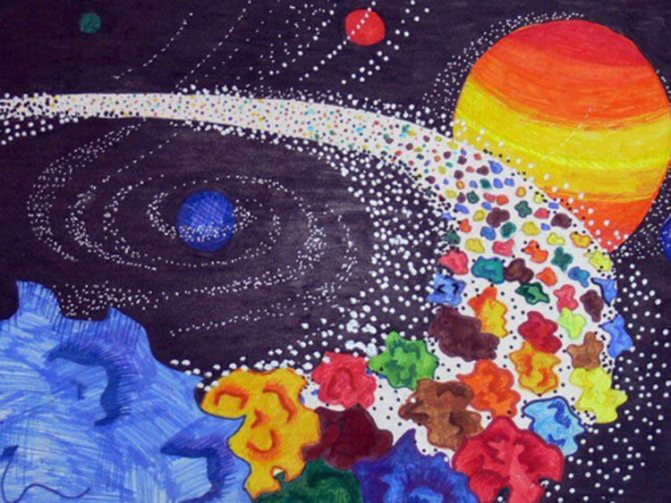
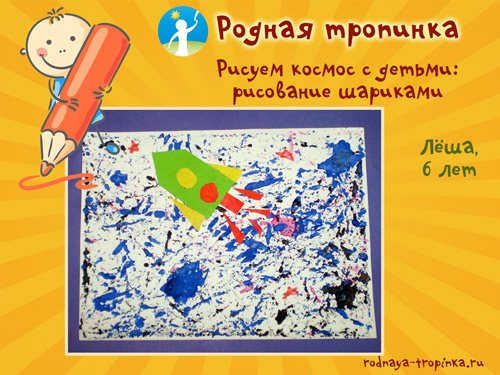
Master class 1: drawing space with children with balloons
Today in this article you will learn a very interesting and unusual technique for painting with gouache balls. Yes Yes! Instead of a brush, the children and I will paint with balloons! This technique allows you to get a very unusual background of space on a sheet of paper and is accessible even to the smallest children.
Age of children : from junior preschool and older.
Materials and tools
To work you need:
- landscape paper, or preferably watercolor,
- gouache,
- a lid with sides from a cardboard box or a disposable rectangular plastic plate,
- colored paper,
- glue stick.
- glass balls.
Where can I get glass balls for drawing? Glass marbles can be bought in children's stores, art stores and florists (they are usually called “marbles”, “marbles mix” and other similar names). Such balls are used for children's games and in floristry to decorate transparent vases, decor, and compositions. You can also use beads and plastic balls from children's sets. In the old days, glass balls were used from dispensers on a bottle of vodka (if you have several copies of one at home and it is possible to get balls from it).
Step 1
- Pick up a lid from the box (I took rectangular plastic plates).
— Cut a sheet of paper to the size of the plate.
Step 2
— Insert the paper into the plate.
— Drop a blot of pink paint, diluted like sour cream, onto the paper
— Put a few glass balls.

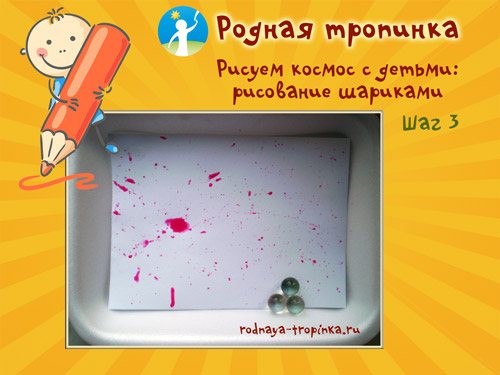
Step 3
— Tilt the plate up and down, left and right so that the balls roll through the paint spot and spread the paint all over the sheet. At the same time, make sure that the tilts of the plate are not sharp, but smooth. The child needs to slowly change the tilt of the plate so that the balls do not fly out of the plate. This develops sensorimotor coordination.
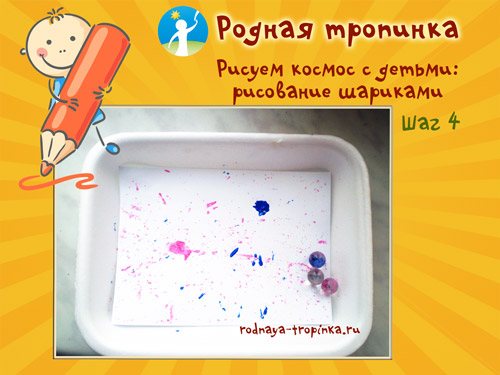
Step 4
— Add a blot of blue paint to the sheet.
- Continue rolling the balls, getting blue lines.
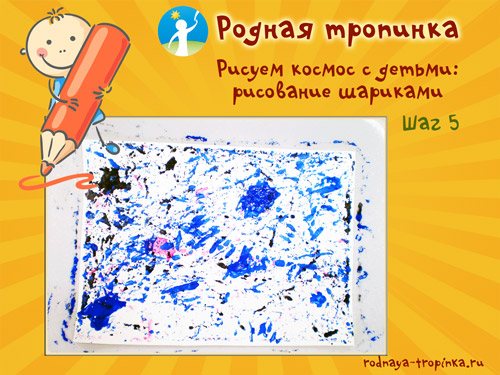
Step 5
Add a black blot and continue rolling the balls until your space sky is ready.
Step 6. Draw a rocket.
In the previous steps we drew the background of space with the child. And now, against this background, we will make a rocket. It can be drawn (if you are drawing space with children of senior preschool age) or done using the appliqué technique (if you are drawing space with children of primary preschool age).
How you can make a rocket or spaceship using the appliqué technique against a background of space:
- Remove the paper from the plate
— Cut out a rocket from colored paper, stick it on a blank with the cosmic sky
— Cut out the wings of the rocket, the fiery tail, and stick it next to the rocket.
— Cut out circles, stick windows on the rocket
The space picture is ready!
This is what the children came up with - their work is shown in the photo below.
Nastya (4 years old) depicted a spaceship approaching the planet against the background of space.

The drawing by Lesha (6 years old) shows a rocket against a background of space.
And this is a drawing of little Felix (3.5 years old). He himself drew the background of space with balls and, with the help of an adult, cut out the finished parts of the rocket and pasted them onto the background.
Creative task:
— Think about what round objects can be used instead of balls to draw space?
— Create your own cosmic sky pattern.
— Use your imagination and compose your own plot composition “Space Space”
Author of the master class: Vera Parfentyeva, technology teacher, head of the children's art circle, reader of the Rodnaya Pathinka website and participant in our Internet Workshop of educational games “Through play - to success!” In the article, Vera shared photographs of her little students’ drawings.