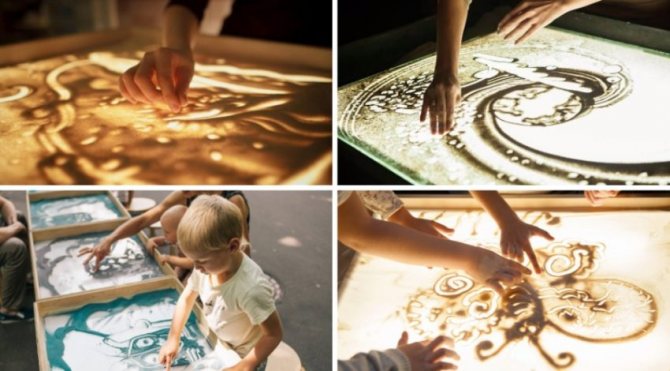
Sand therapy for children makes a significant contribution to the development of cognitive and creative abilities, speech, fine motor skills and tactile sensitivity. Sand helps a child get rid of negative emotions, relax and relieve stress. Joint play and creativity with parents have a beneficial effect on family relationships.
Benefits of the lesson
Sand as an art material has several advantages. And most importantly – a relaxing, therapeutic effect. The child gets rid of the effects of stress, and emotional stability returns to him. Sand painting is used to treat sleep disorders, neurotic disorders, and anxiety in children. Sand art is also useful for healthy children; it allows them to calm down after failures, get rid of low self-esteem and the phobia of becoming a loser. The child sees that a bad drawing can be corrected at any time.
The second benefit of sand painting for children is a developmental activity. The technique improves finger motor skills, sensory perception and creative thinking. Drawing usually involves both hands, which has a positive effect on the development of both the right and left hemispheres of the brain. For schoolchildren, fiddling with sand improves writing skills. It is useful to use the technique with children for whom studying is a burden. In this case, sand painting becomes a good addition to homework and allows you to consolidate school knowledge through art.
The third benefit of drawing on sand is the revelation of artistic potential and the manifestation of imagination. The technique has no restrictions and strict rules. You can draw with your hands and various devices. The loose texture of the material allows you to create images of any complexity and degree of detail. Drawing with sand is available for toddlers, middle school preschoolers, and schoolchildren.
Advantages and disadvantages
Sand murals have many advantages.
By creating a picture out of sand, the child will improve fine motor skills. It is known to stimulate brain development and have positive effects on speech and intelligence. While drawing with sand, the child will show imagination, and his fingers will become more dexterous.
This activity helps develop creative thinking and attention to detail. In addition, it helps develop perseverance and concentration. If parents join in creating the craft, such a pastime will be excellent family entertainment.
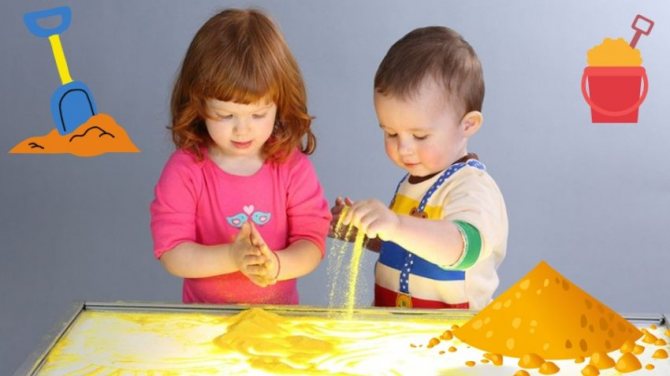
You can entrust several children to make a picture, then they will learn teamwork and mutual assistance. Sand is considered a natural material with calming properties. By handling it with your hands and scattering it on paper, the child will relieve nervous tension. This activity helps reduce aggression and moodiness.
Most sand paintings have virtually no downsides. Yes, individual kits are expensive, but they are of high quality and equipped so that no additional devices are required during operation. But inexpensive options can be frustrating due to the lack of necessary tools, too thin paper base, and an unnumbered stencil. When buying cheap sets, there are also complaints about poor glue and too coarse sand.
Sand painting materials
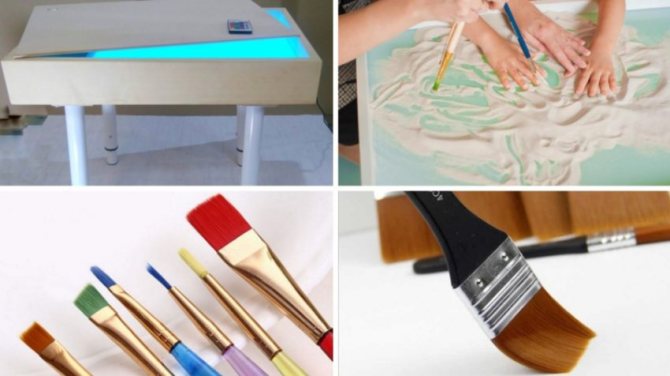
To learn to draw on sand, you need to purchase a list of materials and equipment. All of them are affordable, you won’t have to fork out a lot of money. Here's what the young artist will need:
- table with sides and a lighting device at the bottom;
- sand;
- antistatic agent in a can;
- additional equipment - art brushes, sticks, sieve, templates;
- a wide and flat brush for sweeping grains of sand from the corners of the table.
An antistatic agent is necessary to prevent sand grains from sticking together, which is inevitable when quartz material is used repeatedly. The spray should be sprayed before each lesson. A regular antistatic agent is suitable, preventing synthetic clothing from sticking to the body.
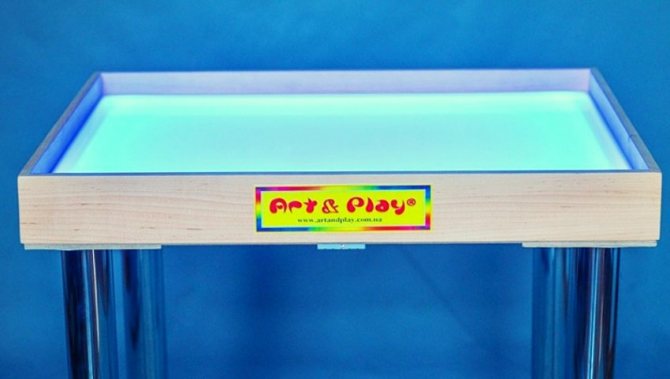
You can buy a table or make it yourself. Homemade design - sides connected in a rectangular shape with a bottom made of frosted glass or plastic up to 5 mm thick. It is necessary to fix the lamp from below so that diffused light is obtained. The lighting can be anything: in the warm and cold range, even colored. The legs of the table should not wobble, otherwise when drawing you will not be able to draw neat lines.
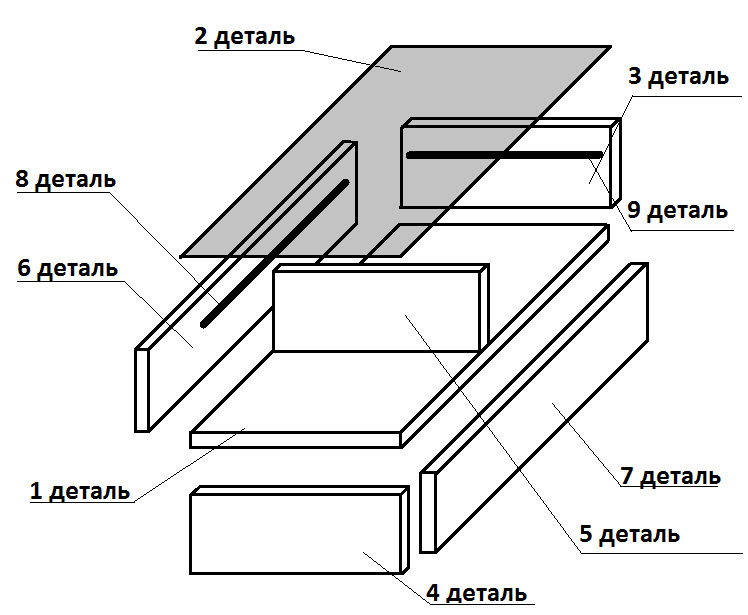
The finished table is a structure with sides and a bottom in the form of an illuminated tablet. The optimal format is 130x70 cm, but for a child 70x50 cm is enough. The height of the sides should be at least 6-7 cm, but from the side of the drawer it is only 3 cm, otherwise it will be inconvenient to draw the lower elements. It is necessary to leave indentations for sand 10-15 cm wide on the right and left sides. It is advisable that these areas be in the same plane as the space for drawing, this makes it more convenient to use many techniques. But some ready-made tables have tray recesses on both sides.
Any sand will do. You can buy an aquarium one at a pet store, and a special one for creativity at a supermarket in the children's section. You can contact a children's and adult creativity studio where sand animation is practiced, if there is such an institution in the locality. They probably won't refuse to sell a small amount of sand. The fraction of the material can also be any. It is advisable to get different ones, since fine sand is convenient for creating tones and halftones, and coarse sand is convenient for creating large image details.
If there is a river near your house, you can dig up sand on the shore. You just have to filter it through a fine-mesh sieve, then rinse. The washing procedure looks like this:
- Pour 4-5 kg of sand into a bucket. This is the standard amount for drawing.
- Fill with water to the edge of the bucket.
- Stir gently with your hand or a large spoon.
- When dust and dirt particles rise to the surface and heavier grains of sand settle to the bottom, carefully drain the water.
- Repeat the procedure until the drained water becomes crystal clear.
- Dry the cleaned material on the balcony if the weather is sunny, or on a radiator, or in the oven.
You can replace sand with semolina, finely ground salt, and to create darker and more contrasting elements of the image - ground coffee.
Bulk material should be renewed once every 3 months, and if the child draws every day, then once every 1.5 months. If this is not done, the sand will become less pliable, since with constant friction the grains of sand are destroyed and the structure of the material softens.
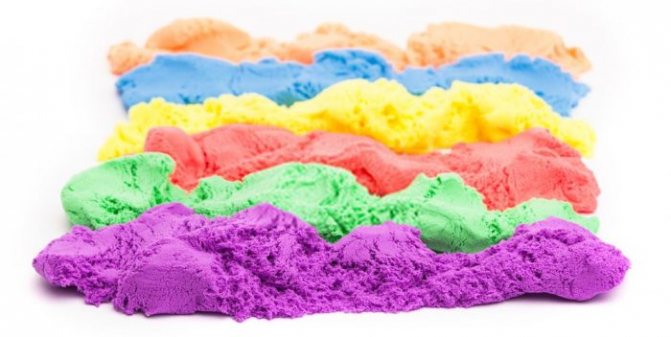
Colored sand for modeling
- Colored sand is great for sculpting. Its only difference is the presence of a binder; manufacturers of famous brands add silicone. Thanks to this component, sand acquires a viscous property.
- Another big plus is that classes can be done at home at any time of the year. This is very beneficial because children love to play in the sandbox, and in the cold season not everyone has the opportunity to dig in the sand.
- The purchased version does not require a specialized storage space and does not deteriorate from moisture or dryness.
Unfortunately, purchased sand has disadvantages:
- high price;
- small particles are difficult to clean;
- sticks to clothing and other surfaces.
Sand painting technique
The technique of creating sand drawings is not difficult, but when teaching a child you will have to be patient. The main tool is the artist’s hands, but it is possible to use auxiliary devices.
Before your child starts drawing, introduce him to the art material. Offer to immerse your hands in the sand, pour it from one palm to the other, and talk about your feelings. After becoming familiar with the material, you can begin to learn drawing methods.
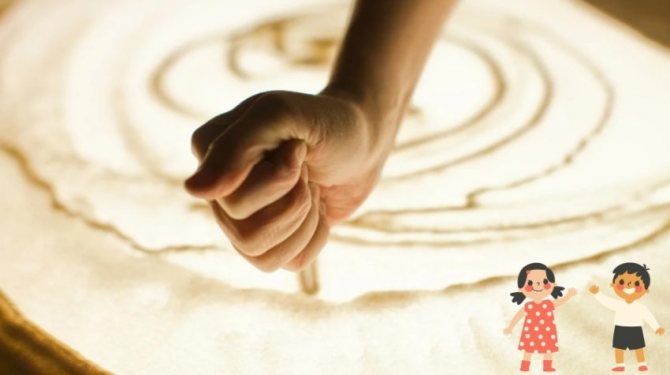
Fist rash
This is the first DIY sand painting method that a preschooler should master. Ask to take the material into your palm, clench it into a fist, and turn it along a vertical axis so that the grains of sand fall down. Explain to your child that the amount of sand spilled out is regulated by squeezing and relaxing the fist muscles. If more grains of sand spill out, the “mound” becomes denser and darker. This creates images with a smooth transition from light to shadow.
Lines of different sizes
Next, preschoolers master drawing lines of different thicknesses, lengths, and tortuosities. Teach your child to draw dotted lines, curls, and waves. This is the best method of getting used to the original drawing technique for a preschooler of the younger group.
To create a thin straight or curved line, you need to pour a strip of sand from your fist, then put two fingers together - your thumb and forefinger, and run them along the strip. You will get a line of the same thickness throughout. Explain to your child that you should not strain your fingers too much, otherwise the image may turn out uneven. If a thicker line is required, the fingers need to be connected diagonally.
Drawing with different parts of the hand
When drawing on sand, different parts of the hand are used. They move one or more fingers over the material, move them and spread them apart. Large elements and thick lines are depicted with a fist and the edge of the palm extending from the little finger. To create many small details, they poke the sand with their fingertips, and draw fine lines with their nails.
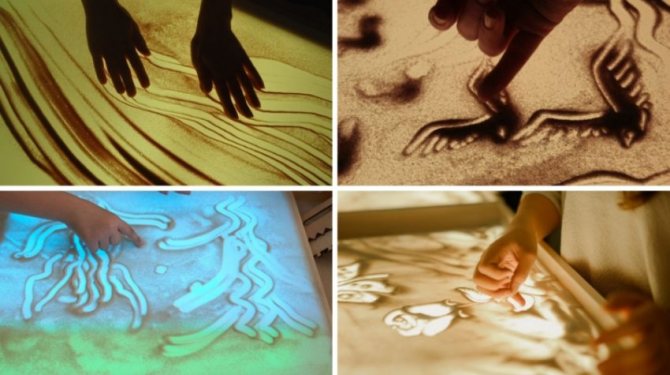
Drawing on dark and light
When the above-described drawing methods have been mastered, you can begin to select a compositional basis. You can draw “in the dark”: fill the background with sand to make light lines on it. Or “in light”, that is, create a dark sandy image on an empty background. Typically, professional artists combine these methods. At the initial stage, it is enough for a child to master them separately.
Drawing with aids
To make sand drawing more fun in kindergarten, let children use not only their fingers and palms, but also additional devices. What you can draw:
- Artistic brushes of different hardness. They are convenient to depict hair and wool.
- Toothpicks, hashi sushi sticks, cooking skewers. Optimal for creating thin and graceful lines, fancy patterns, and detailed drawing. It is advisable to use wooden products; they will not scratch the plastic bottom of the drawing table.
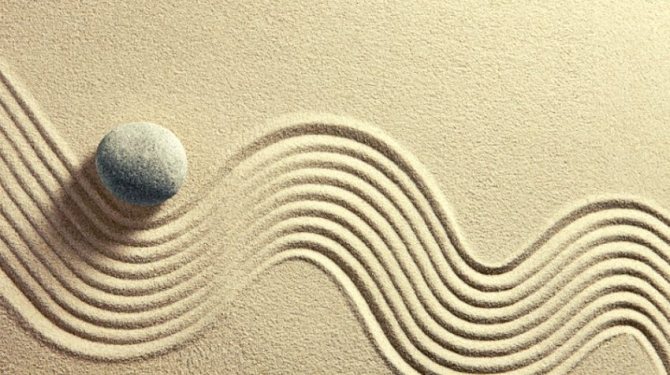
- Comb, small rake. With their help, you get neat waves.
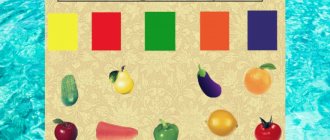
- Colored paper. It is placed on the table and sand is poured on top. Uncovered areas of the design are multi-colored. The method is applicable for creating floral motifs and abstract patterns.
- Funnel. Pour sand through it, create slides, paths, patterns - a fascinating activity.
- Fine mesh sieve. With its help, the table is covered with a thin layer of sand, which can become the background basis for the drawing.
- Stencils. You can use ready-made ones. Or cut them out of plastic lids or cardboard for practice. Or use different flat objects for this purpose. You need to place them on a clean table surface, sprinkle them with sand, and then carefully remove them.
- Pendulum. Attach a round-shaped weight to the thread and give it to the child. Let the pendulum swing over the sandy surface, creating patterns of different depths. This is a wonderful method of strengthening the skill of correct pressure and speed of movement when creating a drawing.
- Cylinder with patterns. You can use a toilet sleeve. Apply patterns on it with a thick layer of glue. Wait until it dries, then give it to your child. Let the cylinder roll on the sand, creating patterned paths.
How to choose a set for children?
When buying a fresco for a child, pay attention to important nuances
- Marking. All sets are marked with a recommended age, for example, “3+” or “4+”. In addition, the packaging must contain information about the safety of the product for children.
- Contents of the set. The number of items in the products of different companies differs; for example, there are sets with a frame so that a sand drawing can decorate the wall of a child’s room.
- Complexity. Pictures can consist of a small number of elements or many multi-colored details. For the first lessons, simple images consisting of large parts are better suited.
- Gender of the child. This characteristic can affect the theme of the picture, for example, a boy can buy a picture with a car, a girl – with a princess. A good choice would be a universal image – some kind of animal or a beautiful landscape.
Exercises
Here are some popular sand painting exercises on light tables for children:
- Letters. The lesson is useful for older preschoolers and younger schoolchildren who are learning to write. Spread sand on the table in a dense layer. Let your child learn to write letters beautifully and develop finger motor skills.
- Water landscape. To create it, walk with your outstretched fingers along the sandy surface, imitating waves. At the top of the composition, make thin strokes with your nail - these will be distant ripples. Draw the horizon with the edge of your palm, remove the excess in the upper part - this is the sky above the reservoir.
- Clouds. Take sand into your fist. Pour it out in a thin stream, making circular, non-sweeping movements.
- Maple Leaf. Draw lines that form the outline and veins of the leaf. Sharpen the outline by running your finger along the outer edge of the line, moving the sand inward. Use your fingernail to follow the veins. Outline the border of the petiole.
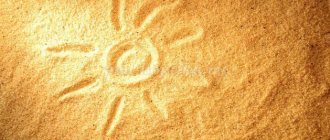
- Sun. Take sand into your fist and lift it 20-30 cm above the table surface. Pour out evenly, trying not to move your hand. Grains of sand, falling from a height, bounce off the plastic surface, form a ring, and the middle remains empty. And its diameter is wider, the higher the hand is raised.
- Mountain landscape. Spread the sand in a horizontal direction using quick zigzag movements. Use the edge of your little finger to walk along the upper part, removing the excess to create a relief.
general description
Sand murals, also called sand paintings, are a type of art kit.
The main element of the set is the base drawing, characterized by a special multi-layer structure. The bottom is thick paper covered with a sticky layer, and the top is a protective coating. The coating is removed in parts and sand is poured onto the resulting sticky areas, which immediately sticks.
Complete with a cardboard base, quartz sand is sold in several shades depending on the image. It is dry, crumbly and pleasant to the touch, and can be either small or larger. The material of each color is contained in separate jars, bags or tubes.
Additionally, the package usually contains tools - a measuring spoon and a glass, but sometimes they may be missing. Note that the sand painting technique is not complicated. The child needs to sprinkle the material of the selected color on a certain sticky area of the template, without crossing the contours.
Sand animation for preschool children
The highest skill is shooting sand animation, in which the artist continuously creates images that smoothly flow into each other. And he does this by making the minimum possible number of movements. This is a complex art that requires the master to act quickly and have impeccable artistic skills.

Real animation is unlikely to be within the capabilities of a preschooler, but something simple, for example, a tree that is bare in winter and blooms in summer, he can easily depict after practicing for 3-4 lessons.
Introducing a sand painting master class for children:
- Spread the material evenly.
- Place the pad of your finger on the sandy surface and move upward. Thin the line by gradually raising the pad. You will get a tree trunk.
- Draw branches with your little finger. Make them curved rather than straight so they look natural. It will turn out to be a tree in winter.
- Now make it summer. Sprinkle sand in a wide layer on the ends of the branches - this is the crown. Also sprinkle horizontally under the tree - this is grass.
- Randomly poke your fingers along the crown, pressing to different depths, to make leaves. Draw blades of grass by running your fingernail vertically under the tree.
- Adjust the contour of the tree crown and remove excess sand.
- The animation can be continued by making it autumn. To do this, place a few spots under the tree with your fingers - these will be fallen leaves.
Using this method, you can make a film in kindergarten, for example, on an environmental theme. You just need to attach a video camera above the table so that it films the drawing process.
How to make colored sand for creativity with your own hands?
- Kinetic sand is a rather expensive product, but smart mothers have long come up with a way out of the situation. They created their own homemade version of colored sand, which is not inferior to its counterpart.
- Swedish modeling material consists of a natural component, silicone and dye. Thanks to silicone, it has the property of ductility. This component can be easily replaced with corn starch.
- A large percentage of the composition of the wonder is sand - 98%, in some cases this figure may decrease. The sand used is purified and fine. An alternative is regular sand, sifted through a sieve and fried in the oven at high temperature. This will allow the sand to be free of harmful germs in case your child wants to put it in their mouth.
- The dye in kinetic sand is natural; it can be replaced with regular food pigment. The variety of flowers in supermarkets is replete, so your imagination has plenty of room to run wild.
Who is suitable for sand therapy?
Using this method can be useful for every child, even if he does not have personality disorders, as a method of developing skills and abilities. But there are cases when the use of sand animation for preschoolers is especially recommended:
• If you have fears or severe anxiety;
• With mental retardation;
• With diagnosed neurosis, nervous tics;
• With low self-esteem;
• During outbursts of aggressive behavior;
• In case of difficulties in relationships with others (parents, teachers, peers);
• For depression, apathy, isolation, suicidal thoughts;
• For speech therapy disorders;
• In case of violence or psychological trauma.
A preschool child often has difficulty formulating his experiences. Sand animation therapy will help him overcome this barrier and cope with negative conditions in a playful way.
Sand therapy stages:
1. Working with sand. At the first stage of work, the child gets acquainted with the sand and the available figures and figurines. It is especially important for a psychologist to observe the actions of a child, paying attention to his behavior and actions.
2. Discussion. After the end of the game, a joint discussion of the progress of the game is held. It is important for a specialist to find out the individual explanation of each game character. The psychologist can interpret the meaning of the figures and their impact on the patient's life problems. During this stage, the psychologist should help identify the problematic situation and push towards its solution.
3. Repeated therapy. Having identified the client’s superficial problems, it is necessary to continue systematic work that allows one to study deep-seated experiences. It is necessary to work on the problem comprehensively, looking at the causes and solutions from different angles.
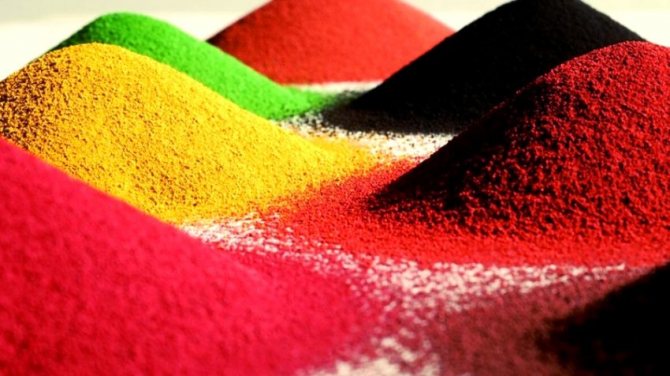
What is decorative sand?
This is ordinary quartz sand (up to 98%), which is first cleaned, crushed, passed through a sieve, separating the largest fractions, and then painted. The resulting material does not lose color even when boiled, so even after a few years, any craft will remain the same bright, pleasing colors.
Some manufacturers produce multi-colored sand that glows in the dark. The material owes these qualities to small particles that accumulate light during daylight hours. This type of sand is even included in children’s art kits: the luminous variety is also absolutely harmless.
In addition to the usual sand material, there is another variety that does not crumble and can keep its shape. This decorative (kinetic) sand was invented in Sweden for the treatment of injured children. Its difference from the usual type is the presence of an additional component: the composition includes sand, natural dye and silicone oil.
In addition to developing fine motor skills of the hands, the material promotes relaxation, so activities with multi-colored kinetic sand will be useful not only for children, but also for adults suffering from stress. It is better to start introducing children to both types of decorative materials from the age of 2-2.5 years, since the “younger youth” are capable of dirtying not only themselves, but also everything around them.
Project "Sand Fantasy"
Municipal autonomous preschool educational institution
"Kindergarten No. 437"
Project
«Sand fantasy»
Gavryaeva Svetlana Aleksandrovna
Teacher-psychologist 1st quarter categories
2020
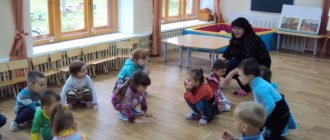
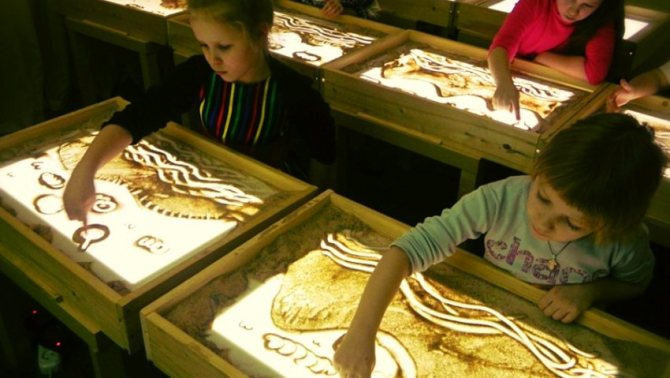
Sand drawing is an amazing drawing in the sand, which is used under the strict guidance of a teacher, teacher-psychologist, teacher-speech therapist during individual, group, developmental and correctional classes with preschool children.
The project represents a non-standard approach to solving problems of enriching the developmental subject-spatial environment in a preschool institution.
Drawing with sand is not just an exciting activity; for a child it is the discovery of a new magical world of sand “castles”. Considering the drawing technique, which involves fine motor skills of the hands, as well as coordination, plasticity and other factors, this technique is undoubtedly the strongest stimulus for the overall development of the child.
The project has a number of practical materials in the form of card files, diagrams and cards.
We hope that this project will help in planning and implementing developmental work between teachers and students.
Introduction
“The best toy for children is a pile of sand!”
K.D. Ushinsky
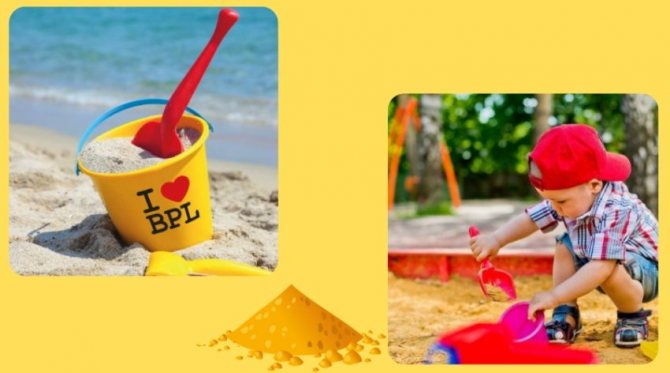
Children love playing with water and sand. Therefore, it is no coincidence that much attention is paid to these games in the theory and practice of preschool education.
Currently, certain aspects of children's experimentation are reflected in the works of N. N. Poddyakov, O. V. Dybina, L. N. Prokhorov. The originality and types of children's experimentation are explored, and the possibilities of organizing experimentation in kindergarten are considered.
Science owes the introduction of the term “experimentation” to J. Piaget: he analyzed the significance of this activity for children and adolescents and proved that the advantage of children’s experimentation lies in the fact that it gives real ideas about the various aspects of the object being studied, about its relationships with other objects.
The most important feature of experimentation, according to N.N. Poddyakov, is that in the process of its implementation a person acquires the ability to control this or that phenomenon: to cause or stop it, to change this phenomenon in one direction or another.
All these basic features of the experiment, although in a rudimentary form, are also noted in children’s experimentation with objects and phenomena. We find the most complete and detailed assessment of these games in E. I. Tikheeva. Considering the play capabilities of each material separately, E. I. Tikheyeva showed how children, by creating, improve their sensory experience and practically learn some of the properties of materials. In plot form, she outlined the approximate content of games with water, sand, clay and indicated that these games require the most attentive attention from adults.
The hygienist L.I. Chulitskaya also highly appreciated the importance of playing with natural materials. When developing tasks for the physical education of preschoolers, she classified games with sand and water as games that help strengthen the child’s body. For this purpose, she developed the construction of sand boxes and water pools. E. A. Flerina connects the use of these same games with the vital need to navigate the surrounding reality, with the need to learn the properties and qualities of materials, and with the development of children’s visual creativity. The issue of managing water and sand play has also been repeatedly emphasized by these authors. E.I. Tikheyeva, along with developing the content of games, demanded that educators help children comprehend the experience they accumulated. E. A. Flerina, taking as the basis for games with natural materials the child’s active desire to explore this material, at the same time pointed out the need for the reasonable development of this desire.
The teacher, in her opinion, when developing play, must constantly take care of the “saturation of materials with various qualities” so that the child’s play does not lose its cognitive meaning and does not acquire the character of a monotonous and destructive activity.
Children's interest in playing with water and other natural materials can be explained precisely by the desire to understand their properties.
The ability to build with sand and the desire to bathe your favorite toy in water create favorable conditions for sensory education, improving such vital mental processes as sensations and perceptions, which are the first steps in understanding the world around us.
Relevance of the project
“The process of “playing in sand” releases
blocked energy and activates
self-healing capabilities inherent in
human psyche."
K.G. Jung
Nowadays, the idea of introducing compulsory preschool education is gaining more and more momentum. This means establishing Federal State Educational Standards for Preschool Education. Which require “the principle of integration of educational areas in accordance with the age capabilities and characteristics of students, the specifics and capabilities of educational areas,” which is stated in paragraph 2.4 of the federal requirements.
Integration can be implemented in different ways, but it should be based on the closest thing for a preschooler - play.
And what could be closer than playing in the sand? Sand is an incredibly pleasant material.
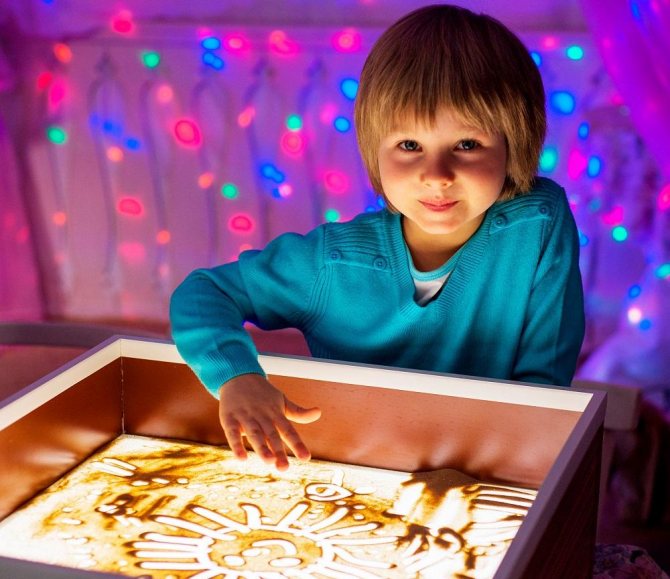
Sand drawing - amazing drawing on sand. Children create unique masterpieces only with their own hands and sand. In an amazing way, a handful of sand turns into a landscape, starry sky, forest, sea, etc. The atmosphere of a miracle is supported by appropriate musical accompaniment. This unusual type of art is called Sand-art, i.e. "sand art" Sand is the same paint, but it works on the principle of “light and shadow”. This “paint” perfectly conveys all human feelings, thoughts and aspirations.
Recently, sand animation (drawing with sand on glass) has firmly occupied one of the leading places in the development of a child’s creative abilities. This amazing process of creating a picture using only sand does not leave anyone indifferent. The original execution and mystery in the creation of the drawing attracts both children and adults.
What are the features of this type of creativity? First of all, it's simplicity. This activity is feasible even for very young children who love to draw with their hands. A child engaged in sand animation develops fine motor skills, interest, attention and perseverance. The extraordinary creation of images makes children want to create uncontrollably, like real artists create. Unlike drawing on paper, there is no need for an eraser or a reserve of blank paper in case you need to correct mistakes. You just need to level the sand and you can start. Sand animation, by the way, is perfect for hyperactive children. By engaging in this type of creativity, the child uses up extra energy and calms down. Sand painting involves both hands, so both hemispheres of the brain work. Sand animation classes develop sensory sensations. Exercises have a beneficial effect on the emotional state of the child. And since the drawing process takes place almost in the dark, using only illumination from below, an aura of mystery is created that will not leave even the most capricious child indifferent.
Doing sand animation is incredibly interesting and exciting. The paintings are created from bulk material - sand. On a special backlit table, sand is applied in a thin layer to the glass and “shimmers,” opening up new horizons of its possibilities. The paintings smoothly replace each other, merging into a single narrative line. Sand animation is always accompanied by music!
Playing with sand as a process of developing a child’s self-awareness and his spontaneous “self-therapy” has been known since ancient times. Sandbox games are used by psychologists during individual and group correctional and developmental classes with preschool children. Drawing with sand is not just an exciting activity; for a child it is the discovery of a new magical world of sand “castles”. Under the strict guidance of the teacher, he learns to create both individual self-sufficient paintings and entire films, which will become a powerful developing factor for his artistic and aesthetic perception. And as mentioned above, taking into account the drawing technique that involves fine motor skills of the hands, as well as coordination, plasticity and other factors, this technique is certainly the strongest stimulus for the overall development of the child.
Considering the above, we are starting to implement the project!
Project passport
Project theme: “Sand Fantasy”.
Type of project: Long-term, open, collective, with the participation of parents.
Implementation period: June 2022 academic year - practical use is ongoing.
Event location: MADOU combined type kindergarten No. 26 “Luchik”.
Project participants: preschool children, their parents and group teachers.
Objective of the project
Creating conditions for the development of the emotional sphere of preschool children in the process of productive and constructive activity of the child, through the introduction of elements of sand therapy.
Introduction to the sand drawing technique - sand animation.
Sensory development of preschool children, the formation of an aesthetic attitude towards the world around them through the technique of sandography.
Project objectives
- Introduce pupils to the properties of sand, teach them to find their manifestations in everyday life (a combination of experiments and observations on walks).
- Develop fine motor skills of the hands and tactile sensations, as well as speech; enrich and activate the pupils' vocabulary.
- Develop imagination, creativity, imagination.
- Reinforce safety rules while playing in the sandbox, as well as during experiments.
- Involve parents in joint activities.
Educational:
- To introduce students to a non-traditional direction of fine art - pescography (sand painting).
- Mastering the work of drawing with a finger, palm, edge of the palm.
Educational:
- Support and create conditions for the development of creative potential.
- Improve communication skills, develop joint activities of children.
- Development of the ability to work with hands, accustom to precise finger movements, improve fine motor skills of the hands and eye.
Educational:
- Cultivate kindness and initiative.
- Cultivate perseverance and patience.
- Cultivate accuracy when doing work.
Educational area: social-communicative, speech, physical, artistic - aesthetic, cognitive development - aimed at satisfying social interests.
Predicted result
Competencies:
- pupils know and are well oriented in the ratio of the sizes of objects (small - large), know colors;
- master actions with objects and suggest a variety of ways to use them;
- have basic skills of productive activity;
- have an expanded vocabulary (verbs, nouns, adjectives, etc.), use general concepts (water, sand);
- have a cognitive interest in experimental research activities.
Communication skills:
- enjoy joint activities with adults;
- get positive emotions from holidays and entertainment;
- use speech as a means of communication with peers.
Prerequisites for scientific activity:
- have a strong interest in fiction;
- interest in meaningful activities arises;
- are able to express thoughts and engage in dialogical communication.
Project product
- Visual aids: games, card indexes.
- Material on working with students.
- Consultation for parents “Playing with sand”.
- Photo exhibition.
- Project presentation.
Risks
1. Low cognitive interest of children.
2. Low awareness, as well as passivity of parents.
3. Certain areas of the project may be missed due to the large volume of material.
Risk Prevention
To increase the cognitive interest of pupils and their parents, hold a parent meeting in the group to explain the planned tasks for the educational and research project “Sand Fantasy”, and involve parents in active participation in the project together with their children.
Distribute among educators those responsible for the implementation of individual areas of the project, who will organize and monitor the implementation of the project action plan in their area.
Expected Results
- pupils will learn the importance of sand in the life of all living objects of nature and its properties;
- children will distinguish and name the characteristic features of sand;
- students will learn to conduct simple experiments and research;
- children will treat nature with care and strive for correct behavior in relation to the natural world;
- Pupils will develop a desire to study natural objects, they will learn to draw conclusions and establish cause-and-effect relationships;
- the pupils will significantly increase the level of development of attention, perception, memory, thinking and speech;
- students mastering the basic rules of sandography;
- creating drawings using this technique;
- ability to handle sand carefully;
- clearer and more developed finger movements;
- creating a children's drawing album “I am not an ordinary artist”;
Pedagogical feasibility
- sand painting develops fine motor skills;
- tactile sensitivity, plasticity of hand movements;
- improves memory, stimulates brain function (cognitive processes: perception, figurative and logical thinking, spatial imagination).
Project implementation forms
- educational activities;
- conversations with group students;
- didactic games;
- exercises to develop fine motor skills;
- research activities;
- working with parents;
- photo exhibitions of children's works.
The sand painting method allows students to:
- learn to be aware of yourself and express your own feelings;
- improve progress in personal correction, strengthen the sense of one’s own personal value;
- develop a sense of personal control and forecasting;
- reveal resources and make them a tool in life;
- increase motivation in activities;
- work through internal and interpersonal conflicts, difficult situations, make decisions.
Sand drawing helps develop the following skills:
- formation of communication skills;
- improving memory, attention and creative thinking;
- development of fine motor skills of the hands;
- getting rid of worries and fears.
Working with sand calms (especially hyperactive children - the child calms down and is freed from “excess” energy)
Relieves from: fear of mistakes, self-doubt, doubts, stress factors, depression.
The sand drawing created by a child contains rich information about his inner world and his state.
How to behave in this situation, be a teacher, a silent witness to sand plays or become a co-author...
Much depends on the topic and situation, but the principle is “do no harm.”
The inner world of a child is fragile, and only strict adherence to the ethical code and high professionalism of a specialist can protect the child from mental trauma.
Problem
The period of preschool childhood is a period of intensive sensory development of the child. The success of mental, physical, and aesthetic education of children largely depends on its level.
One of the components of sensory development is the development of micromotor skills. Omissions at this stage of education are manifested, as a rule, by the lack of development of skills in children of primary preschool age.
To improve a child’s sensory development, it is necessary to develop and use the most effective means and methods of sensory education in kindergarten.
Sand painting techniques
- Creating a background (gather sand into a fist and scatter it evenly on the glass):
- pouring;
- sketch
- Pinch:
- pouring with a sand stream: sand is clamped in a fist, slightly unclenching the fist, pour sand in a thin stream onto the surface of the glass).
- Sand jet:
- grains of sand fall into one point - a circle;
- the sand stream scatters in a zigzag - waves, seagulls...;
- the sand stream scatters in an arc - hills, mountains...;
- the stream of sand scatters in a line - roads, houses...;
- the sand stream scatters in a closed line - balloons, clouds...;
- a stream of sand crumbles into a spiral - a gust of wind, snow storms...;
- Finger painting - sand is moved across the background with your fingers.
- Drawing with the back of the hand of one hand and both hands at the same time (bird wings, butterflies...);
- Drawing with fingertips (water, rain, stars...);
- Linear cast of sand (rays of the sun);
- Cutting out paintings from the background (extra background around the central image is cut off);
- Partial preservation of the elements of the picture (these elements go into another picture);
- Applying a new drawing to the previous one (a new portion of sand is poured directly on top of the old drawing to create a new plot, the old drawing is the background and is visible as if in a fog).
Project implementation stages
Preparatory (analytical)
Justification of the relevance of the topic, motivation for its choice, determination of the goals and objectives of the project, selection of literature, manuals and attributes.
Identifying children's initial knowledge about playing with sand and water.
Information to parents about the upcoming project.
Selection of literature, equipment.
Development of notes, game files, manuals.
Parent survey.
- preliminary discussion of the project idea;
- defining the project topic;
- formulation of goals and objectives;
- determination of the result;
- making a table with lighting (parents - the Novoselov family);
- sand preparation;
- purchasing additional material for inclusion in the activity (scoop, brush, roller, funnel, rubber ball, etc. - parent committee).
Main (implementation of planned plans)
Practical work (creating conditions for productive activity: conversations, experiments, classes).
Working with students
- Reading and viewing fiction (rhymes, jokes, jokes).
- Playing games with sand and water.
- Conducting gaming activities.
- Replenishment of the subject-developmental environment of the group.
- Experimental activities.
Working with parents
- Selection of fiction.
- Completing creative tasks.
- Joint experimental activities.
4. Consultations for parents.
Final (presentation, product of activity)
Generalization of the results of the work.
Exhibition of children's works, photo exhibition.
Conducting a master class for parents on non-traditional drawing “Magic Sand”.
Presentation of the project as part of the competition “Best Pedagogical Project” at the preschool level.
Project activities with students
Forward planning
Table 1
| № | Type of activity | Content |
| 1 | Outdoor games | “Grains of Sand”, “Shadow”, “By the Bear in the Forest”, “Geese-Swans”. Finger gymnastics. I/u “The most dexterous” (pour sand from one container to another, carry the sand onto the plates) |
| 2 | Role-playing games | “Builders”, “Bake pies”. |
| 3 | Didactic games | “Edible - inedible”, “Domestic or wild animal?”, “What grows on a tree and what in a garden bed? ", "Let's play archaeologists." |
| 4 | Communication games | Introducing the rules of playing with sand, “Call me kindly”, “I bake, bake, bake” |
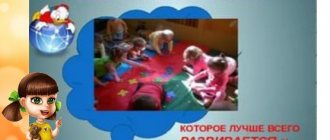
| 5 | Looking at paintings | "Children in the sandbox"; Looking at pictures of the desert |
| 6 | Experimental activities | “Looking at grains of sand under a magnifying glass” Sand - air - “Journey of sand” (blowing sand through a tube) Sand - water - “Properties of wet sand”, “Footprints in the sand”. |
| 7 | Observations | What kind of sand is in the sandbox today (wet or dry); touch the sand in the shade and in the sun (where it is warm and where it is cold, which sand makes better shapes from molds (dry or wet) |
| 8 | Reading poems | V. Berestov “There is a mountain in the middle of the yard”, N. Hilton “I poured water on the sand”, I. Fink “Sandbox”, A. Smetanin “We are on the beach”, A. Poletaeva “They brought us sand for the garden”, S. Kashlev “We are playing in the sandbox”, K. Baldina “We are building a castle out of sand.” |
| 9 | Solving the riddles | Riddles on the theme: “Sand”. |
| 10 | Thematic conversations | “Rules for safe behavior in the sandbox”, “What is sand? » |
| 11 | Acting out problematic situations | “The bunny got sand in his eyes.” LIFE SAFETY FUNDAMENTALS. Dramatization games. (use of toys from the “Bi-Ba-Bo” puppet theater) |
| 12 | Drawing on the sand | "Sandman" "Patterns in the sand." Coloring pages. |
| 13 | Sand applications | "Sand Pictures" |
| 14 | Construction | “Let’s build a tower” summer period |
Thematic planning
table 2
| Topic 1 | Conditional division. (Divide the surface of the table into two halves. The child has a choice: divide it vertically, horizontally or diagonally. A vertical straight line can be drawn either from top to bottom or from bottom to top. A horizontal straight line can be drawn from left to right or from right left.) |
| Topic 2 | Transforming a straight line into a zig-zag and wavy line. |
| Topic 3 | Several straight lines are drawn at equal distances from each other: in horizontal and vertical positions. |
| Topic 4 | The length of straight lines gradually increases to a maximum and then decreases in the same way. |
| Topic 5 | Making shapes from vertical and horizontal straight lines (“mat”). |
| Topic 6 | Diagonal lines. |
| Topic 7 | Intersection of lines (“snowflakes”). |
| Topic 8 | Arcs (C and reverse C, as well as up and down convex). |
| Topic 9 | Circle, oval. |
| Topic 10 | Exercises with intersecting straight lines (many crosses) |
| Topic 11 | Wavy line. |
| Topic 12 | Loops. |
| Topic 13 | Drawing concentric circles from small to large and vice versa. |
| Topic 14 | Technical elements of drawing: fist, palm, edge of the thumb. |
| Topic 15 | Technical elements of drawing: pinch, little fingers, simultaneous use of several fingers. Symmetrically with both hands. Fist pouring. |
| Topic 16 | Subsequent by design. |
Cyclogram of educational work
Table 3
| JUNE AUGUST | ||
| Events | ||
| Selection and analysis of literature on this topic | ||
| Conversation with students on the topic “Sand and its properties” (beginning of the project) | ||
| Organization of the “Sand Country” zone in the group | ||
| Working with parents | ||
| Questioning parents (experimental - experimental activity) | ||
| Sandbox! | ||
| Consultation for parents “How to organize observation of inanimate nature on walks with preschool children” | ||
| SEPTEMBER OCTOBER | ||
| Events | ||
| Cognitive and research activities: "Sand composition" Experiment with a magnifying glass “What is sand made of”; "Properties of sand" Experiments “Sand Country” (“Dry - Wet”, “Loose - Sticky”, “Light - Heavy”); Problem situation “How to help mice?” "Colored sand" Experience (sand coloring) “Multi-colored sand”; Experience “Colored sand” (coloring with chalk); | ||
| Game activity: Ex. “Hello, sand!”, “Sand rain”, “Sand wind” (breathing) I/u “The most dexterous” (pouring sand from one container to another), D/i “Traces”; Exercise with molds “Who comes to us?”; D/i “Sand Fairy”, “Minks - Hills”, “Sand Builders”; Exercise “Patterns on the sand”, “We create the world”, “We are going to visit”, “Sand hide and seek” | ||
| Reading fiction: Reading poems about sand by B. Zakhoder, E Shalerova; stories “Sand and Sunlight”, “Egg in the Sand”, “Tale of the Sands” End of table 3 | ||
| Productive activity Drawing pictures using sand with children in the form of individual work (consolidating the topic “Poultry”) | ||
| Musical, artistic, motor activities I/u “Game with pebbles”; Sketches “On the Seashore”, “Playing with Sand”, game for expressing emotions “Little Sculptor”; A study on the expressiveness of the gesture “Here he is!” | ||
| Communication activities Conversation “Grains of sand, what they are”, “Who needs sand to live” | |
| Working with parents | |
| Consultation “Playing with sand and other bulk materials” | |
| NOVEMBER DECEMBER | |
| Events | |
| 1. | Play activity : Educational children's games with sand and water: “Easter cakes”, “Cook game”, “Treasure”, “Sandy ponds”; Role-playing game "Pharaohs"; D/i “Hide the toys”, “Name your mother”, “Ordinary miracle”. |
| 2. | Constructive activity Sand construction "Construction of sand pyramids in Egypt." |
| 3. | Cognitive and research activities : Making an hourglass (from two plastic bottles); I/u “What’s extra?”, “Compare and tell.” |
| 4. | Productive activity Joint activity with children - making panels using colored sand Making family panels on any theme using colored sand. |
| 5. | Musical, artistic, motor activities Movement exercises “In the desert” |
| 6. | Communication activities Conversation “Animals of the Desert”, looking at postcards; Desert plants “Where are the leaves of saxaul?”, “Does the ostrich hide its head in the sand?”; I/u “Say the opposite” (properties of sand), “Who is missing?” |
| 7. | Exhibition of children's works using non-traditional imaging techniques “Sand Fantasies” Exhibition “Sand Vernissage” (family sand crafts) Photo exhibition “Studying sand” Presentation of the project as part of the competition “Best Pedagogical Project” at the preschool level. |
Conclusion
By older preschool age, the possibilities for a child’s proactive transformative activity increase noticeably. This age period is important for the development of cognitive needs, which is reflected in the form of search and research activities aimed at “discovering” new things, which develops productive forms of thinking.
The teacher’s task is not to suppress the child with the burden of his knowledge, but to create conditions for independently finding answers to his questions “why” and “how”, which contributes to the development of children’s cognitive competence. Therefore, it is very important to organize classes to familiarize students with the properties of sand and clay in such a way as not only to present them with ready-made knowledge, but also to help them obtain this knowledge themselves using game methods, experimentation, and research.
It's no secret that preschool children are explorers by nature. A tireless thirst for new experiences, curiosity, a constant desire to experiment, and independently seek new information about the world are traditionally considered as the most important features of children's behavior. Research and search activity is the natural state of a child; he is determined to understand the world, he wants to know it. To explore, discover, study means to take a step into the unknown, the unknown. It is exploratory behavior that is created so that the child’s mental development initially unfolds as a process of self-development.
In nature, everything is interconnected: people, plants, animals, soil, rivers, air and water. Everything is in indissoluble unity - living nature cannot do without inanimate nature and vice versa. But humans have an even stronger connection with inanimate nature than plants and animals. People need fresh air and clean drinking water.
Therefore, it is in search-cognitive activity that a preschooler gets the opportunity to satisfy his inherent curiosity, practices in establishing cause-and-effect relationships between objects and phenomena, which allows him not only to expand, but also to organize his ideas about inanimate nature.
Thus, search and cognitive activity contributes to the development in children of the ability to analyze a problem, search for its solution, draw conclusions and give reasons for them, compare and generalize their own observations, see and understand the beauty of the surrounding world and inanimate nature as its component.
One of the most accessible and simple materials for children's experimental research activities is sand.
Children's games and experiments with sand enrich the child's memory, activate his thought processes, and have a positive effect on the child's emotional sphere.
Bibliography
Dybina O. V
. The unknown is nearby: entertaining experiences and experiments for preschoolers. O. V. Dybina, N. P. Rakhmanova, V. V. Shchetinina. - M.: TC Sfera, 2005.
Kuzub N.V., Osipuk E.I.
. Visiting the sand fairy: Organization of a pedagogical sandbox and games with sand for preschool children [Electronic resource] URL: https://psy.1september.ru/article.php?id=200600608 (access date: December 2015).
Mariella Seitz
. We write and draw in the sand. Tabletop sandbox: [adapted translation from English] - M.: INT, 2010. P.94.
Poddyakov A. N.
Combinatorial experimentation of preschoolers with a multiconnected object - a “black box”. Journal “Questions of Psychology” No. 5 1990.
Poddyakov N.N.
Creativity and self-development of preschool children. - Volgograd “Change”, 1995.
Prokhorova L.N., Balakshina T.A.
Children's experimentation is a way of understanding the world around them. Formation of the beginnings of the ecological culture of preschool children. Ed. L. N. Prokhorova. — Vladimir, VOIUU, 2001.
Sapozhnikova O.B., Garnova E.V.
Sand therapy in the development of preschool children. M.: TC Sfera, 2014. P.64.
Tikheyeva E.I.
Preschool child and educational environment. Sat. articles / Ed. E.I. Tikheeva. L., 1924. P.38.
Flerina E. A
. Aesthetic education of preschool children. History of Soviet preschool pedagogy: Reader. Comp. Grebenshikova E. A., et al. - M.: Education, 1980.
Chulitskaya L.I.
Child hygiene and taking into account his physical development. Moscow 1980.
Approximate basic general education program “From birth to school.” / Ed. NOT. Veraksy, T.S. Komarova, M.A. Vasilyeva, 2015.
The history of sand therapy
CONTENT:
Back in the 20s of the 19th century, analyst Dora Kalf identified the healing properties of sand. Sand therapy is based on the symbolic manifestation of the unconscious and often becomes a source of development and internal growth of the individual. The author connected the content of sand paintings with a person’s state of mind. It was concluded that with the help of a sandbox, a child creates his own model of the world around him, transferring his own anxieties and concerns into it.
Sand therapy was developed in the works of Margaret Lowenfeld, who used this technology in working with children with psychological problems. She developed her own method called the “world-building technique,” which includes principles of work and exercises for working with children of different age groups. At this stage, sand therapy is distinguished as a separate type of art therapy; it can be used in child psychoanalysis, cognitive behavioral direction, Gashtalt therapy and family psychotherapy.
What are they?
Nowadays, the range of sets with multi-colored sand is quite wide. They differ in plot, detail, and some other characteristics. Typically, the cardboard base is covered with white protective paper with contours and numbers printed on it, corresponding to a certain shade of sand.
Some manufacturers offer sets with colored backgrounds. In them you need to disconnect the stencil and pour sand of the same shade in its place. There are also cardboard bases without numbers, which are separately accompanied by a thin paper template with numbering applied.
The sand included in the composition is usually bright, and neon colors are also found. Sometimes, to create a certain shade, the manufacturer suggests mixing two materials of different colors in a given proportion.
The themes of sand paintings can be very different. These include animals, buildings, cartoon characters, and plants. New Year's images, for example, a Christmas tree with toys or a snowman, are in great demand.
Although the material is considered environmentally friendly, putting bright grains of sand in your mouth is unacceptable, so activities at an early age must be supervised.
Sand therapy session.
In preschool age, this method is widely used by speech therapists and psychologists, taking into account the final goal and personality characteristics of the child, the specialist determines the goals of the classes and the exercises necessary to achieve it. Classes can be conducted both for a group and separately for each preschooler.
Many experts note a positive effect after the first session. Children can open up and establish close contact with a psychologist who, by interpreting what is happening, can reveal their deepest experiences. Very often these are unconscious experiences that could not be recognized before. The main goal of psychological influence is to realize and work through your problems, find solutions and a way out of the situation.
What is colored sand used for?
Colored kinetic sand was invented in Sweden for therapeutic purposes for children. One of the important functions of a color invention is the development of hand motor skills
This is very important in childhood, as well as in case of any injuries. The second, no less important detail is the relaxing therapy from playing with sand. Kneading the soft bulk material in his hands, the child immerses his body in relaxation
This is very useful in general for children and adults, as well as for those who suffer from stress. Thirdly, when a child sculpts or draws with sand, he develops his imagination, fantasizes, and comes up with something unusual. Fourthly, playing with sand develops accuracy, perseverance and attentiveness in the child.