Hello! Top 3D Shop is with you and in this article we introduce you to the technologies, equipment, materials and techniques used in creating kindergarten layouts, as well as practical examples of making such layouts.
Read more in the article.
About company
Top 3D Shop is one of the largest Russian companies selling high-tech equipment for 3D printing, 3D scanning, CNC machines and industrial robots.
Comprehensive customer service and a wide range of additional services have allowed the company to become one of the leading players in this market. Read about the history of Top 3D Shop in the article “How I built a successful 3D printing business.”
Our clients include companies such as:
|
|
|
| |
| European Parliament | Moscow Aviation Institute | Novo Nordisk | Skolkovo | Gazpromneft-Development |


Method 2
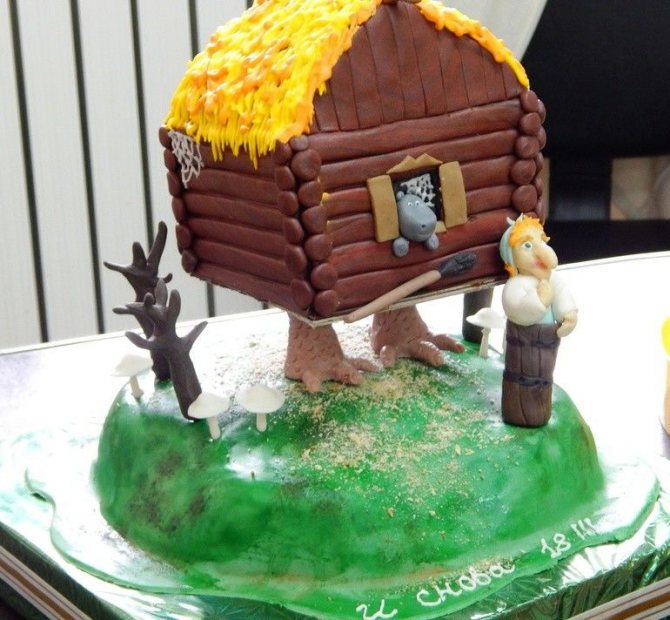
The second method is suitable for producing models of buildings with more complex configurations (photo).
First, you need to fold a sheet of paper like an accordion, as in the photo. The more folds, the more walls you get, but their width will be correspondingly smaller. On one fold you need to draw ½ of the building's facade. We draw very carefully, with a thick line outlining the places of the cut, and a thin line outlining the places where the paper is folded.
Then we cut along the bold lines and unfold the accordion. The result will be a whole façade, absolutely proportional and even, as if in a mirror image. We bend the paper holders as in the photo and cut the windows with a construction knife.
After this, the parts of the structure are assembled together, coated with glue at the joints and glued together. We make a base for the layout from cardboard. When the entire structure is ready, you can paint it or stick some images (as in the photo).
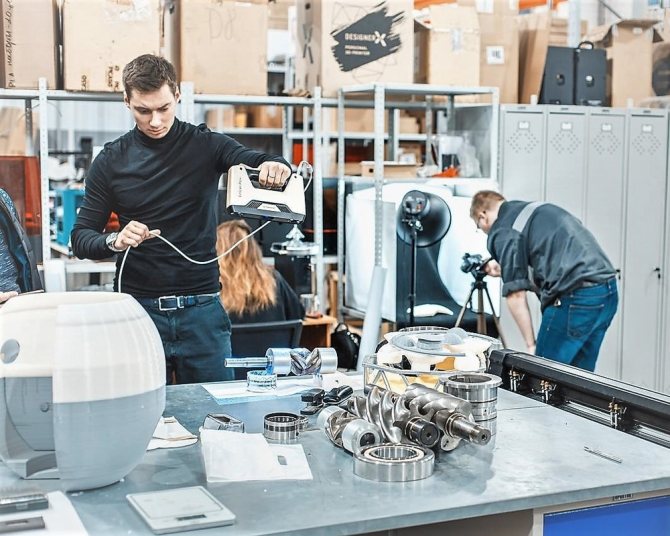
Top 3D Shop Service Department
Experienced employees with specialized education from the service department of the Top 3D Shop company perform work on the production of three-dimensional models of any objects, as well as 3D printing, 3D scanning and production of products on CNC milling and laser machines. Services are provided in Moscow and St. Petersburg.
Read more about this in the article “3D technologies in architectural layout.”
What do you need for work?
To make a house model, you will need the following tools: • thick white/colored A4 paper (several sheets); • cardboard of the same size; • a sharp construction knife (it is convenient for cutting out the walls of a building, and then cutting small windows and doors into them); • glue brush; • PVA glue; • wooden or plastic board for modeling (it is convenient to cut out parts on it so as not to damage the table); • scissors; • pencil; • ruler.
You can also use a regular household hair dryer to speed up drying of glued parts. You can cut out a building from either paper or cardboard. The last option is more reliable, but it is a little more difficult to work with. You can cut out the entire layout from paper, and then mount it on several “load-bearing” cardboard walls (photo). This will strengthen the entire structure and give it more stability.
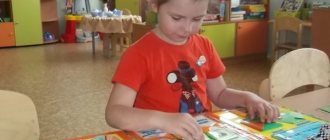
Creation of layouts of kindergartens of any complexity
Preschools, as separate buildings, first appeared in Germany at the beginning of the nineteenth century. The creator of this concept was the German educator and theorist Friedrich Froebel, and at the end of the 19th century, Rudolf Steiner, an Austrian philosopher and architect, discovered the influence of the architectural environment on the psychological state of the child.
Currently, in Russia, the design of preschool institutions is aimed, first of all, at fulfilling the exclusively utilitarian function of temporarily placing children in a strictly controlled environment, therefore the block principle of kindergarten architecture has remained unchanged since Soviet times.
In other countries, for many years, a fundamentally different approach has been used: the buildings of preschool institutions are considered as an intermediary for the perception of the outside world and a catalyst for the social adaptation of children. The kindergarten project should be aimed at creating an environment that develops the mental, physical and creative abilities of the child.
In the eighties, architects came to the conclusion that preschool institutions were a completely new type of building that required a special approach to design. At the same time, four basic principles for preschool design were developed.
The first approach is metaphorical. A good example is the KITA kindergarten project in Frankfurt. Architect Christophe Makler believed that there was no such thing as architecture for children. There are no so-called “childish elements” in his project. He used the metaphor of a small town, where the classrooms are a kind of terraced houses and the corridor acts as a street.
Source: archdaily.com
The second approach is organic. In his kindergarten project, the Austrian architect Hundertwasser tried to establish a connection between man and nature through architectural solutions.
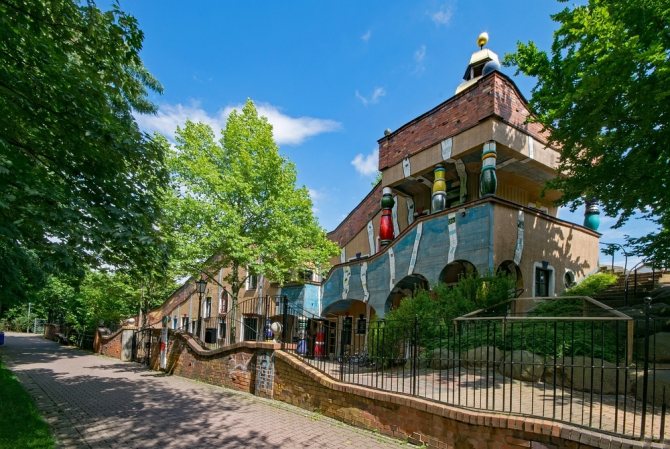
Source: needpix.com
The third approach is the inclusion of late modern structural elements into the project. According to architects who follow this principle, a building is just a frame, a neutral shell, and the substantive elements must be placed inside. An example of such a design solution is the kindergarten of architect Wilson.
Source: archdaily.com
The fourth method, based on Judith Seaver's study "Philosophy of the Educational Approach", argues that the design of preschools should be directly linked to the educational program, combining structured activities, such as planned activities, and unstructured ones, allowing the child to choose his own activities.
Source: archdaily.com
Based on numerous studies by psychologists and architects, principles have been determined for the design of preschool institutions that function as “giant play spaces” - with an open plan, child-friendly sizes of elements and secluded corners where the child can, if necessary, relax and be alone. An ecological approach to design aims to provide visual diversity in form, use parts of the building as play elements, transform boring walkways into integral parts of playgrounds and seamlessly integrate the building into the surrounding space.
Children, following their inner impulses, choose what they want to do. In this way, a permanent active space is formed without “idle” places.
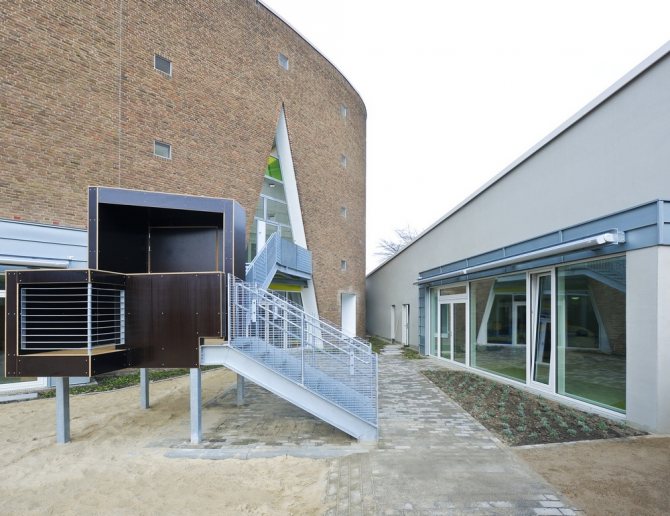
When designing kindergartens and preschool institutions, it is necessary to create 3D models of buildings and surrounding areas. In addition to the design and presentation functions performed by the model during construction, it can also be used in the institution itself, for example, to explain to children in an accessible playful way the escape routes in the event of any threats.
Possibilities
Three-dimensional layout when designing modern preschool institutions allows architects to create an open layout of spaces and abandon traditional corridors.
In large areas, with the help of movable partitions, different floor levels, different floor coverings and other methods, dynamically changing zones can be created, both for relaxation and for active games. Psychologists have come to the conclusion that it is necessary to take into account the scale of the surrounding space for the child: windows at the level of children’s eyes, signs, decorative elements of the appropriate height, and the like.
It’s the layouts that help you design it all correctly.
Advantages compared to manual production
Rapid 3D printing and CNC milling are the latest ways to use 3D processes in architectural modeling. Three-dimensional plans, sectional structures, models of buildings and entire cities - realistic scaled models of a wide range of sizes can be quickly produced and changed, depending on the current task.
About the advantages of using additive technologies in 3D prototyping, features of working with Top 3D Shop, production times, technologies used, ordering procedures, equipment and materials used, read the article “3D technologies in architectural prototyping”.
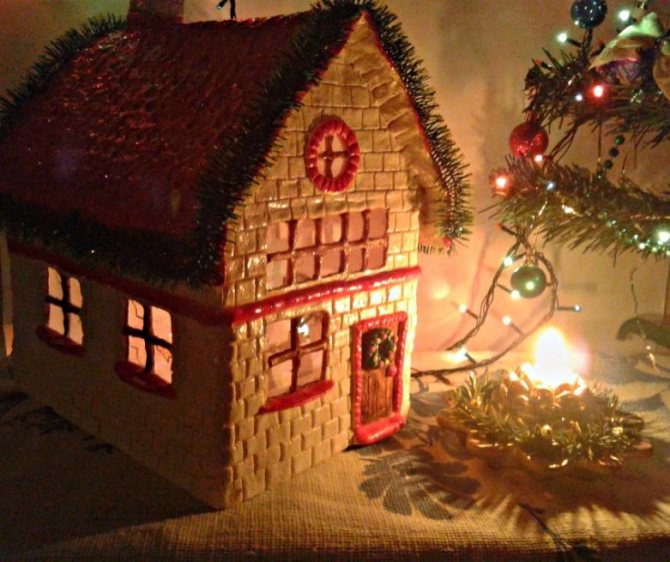
Simple layouts of paper houses and patterns for gluing
Making a house model with your own hands is not difficult. The simplest layouts of paper houses are easiest to make from the so-called. developments, when all their elements are connected to each other by fold lines and represent a solid element in the form of a diagram.
Also, the development, in addition to the walls, floor and roof, has additional bends for gluing. You can find links to such scans on the Internet. It is enough to print them on a printer or, by measuring the aspect ratio, draw them on sheets of paper or cardboard and obtain a scan diagram for modeling.
Next, the contour of the scan is cut out.
You can transfer the resulting scan to colored paper.
Using a needle or awl, you can transfer key points of various elements onto it: windows, doors, places for attaching additional architectural elements, etc. You need to cut them out immediately using a stationery knife, placing a piece of thick cardboard or plywood under the sheet with the scan.
Separately, overlay elements are made: window frames, shutters, doors, etc., which you glue onto the finished layout last.
The easiest way to make an even bend along the lines is to apply a ruler with a sharp edge to it. By repeating this procedure at all bend points, you will get a development ready for gluing.
You can also make a development by making each structural element separately and connecting them together at the bend points from the inside with tape. This method is especially interesting when you are making a house model from thick, hard cardboard.
You can glue the layout using quick-setting adhesives such as PVA, stationery silicate, glue stick, etc. You can also make it using double-sided tape, sold in hardware stores.
We offer a video to help:
Practical examples
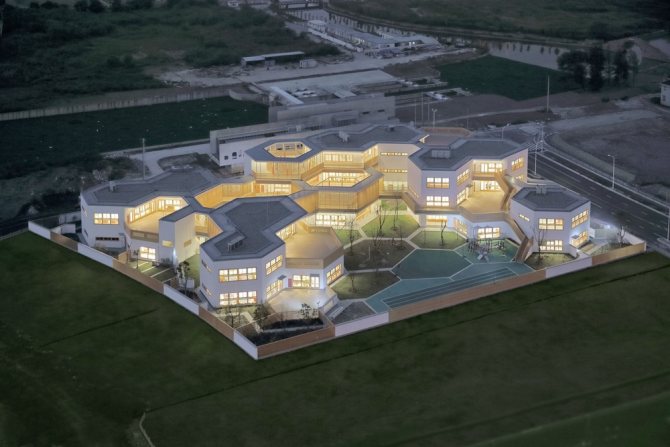
Bilingual Kindergarten of East China Normal University, Antiing City, China
Task
Source: arch2o.com
Antin is a modern suburb located between northwestern Shanghai and Suzhou Huaqiao. The kindergarten, located in a new residential area south of the Antin metro station on line 11, is one of the first objects of the complex.
The modern concept of Chinese urban planning - the unity of society and nature - also and primarily concerns educational institutions, and is to enable children to perceive and learn about the world, while absorbing and preserving folk traditions.
The Scenic Architecture Office company had a task: to place it on a small site of 7400 sq.m. a kindergarten for 15 children's groups, combining modern principles with traditional ones.
Solution
Source: arch2o.com
The courtyard in Chinese architecture is not only a tradition of physical space, but also the core of emotion and communication. This helps people maintain family cohesion and strengthen connections with friends and relatives. But this legacy today is a pipe dream for most citizens.
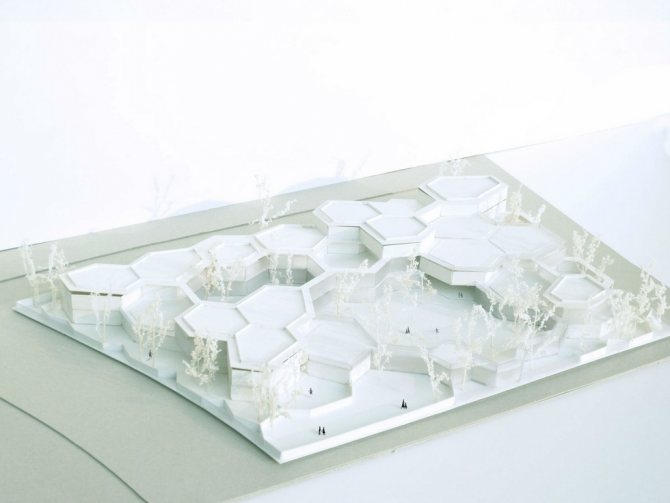
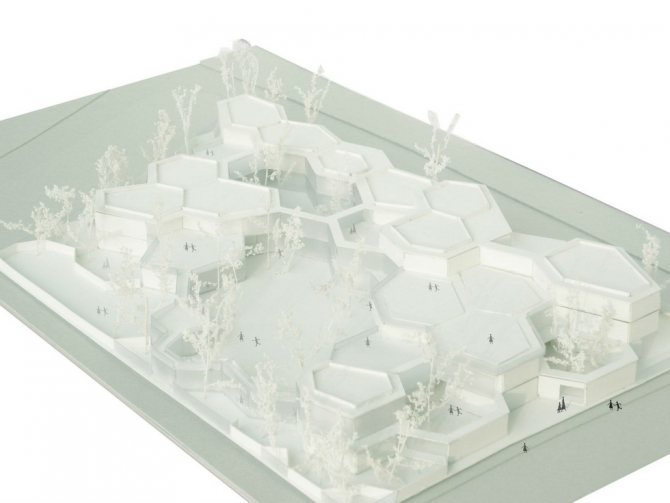
To evaluate possible architectural solutions to this problem, a 3D model of the new kindergarten was printed.
Source: arch2o.com
Kindergartens need fencing in their yards. Following the sloping western boundary of the site, hexagonal plots of regular and irregular shapes, modified to suit the landscape, were designed to pave the area to receive maximum sunlight from the west, south and east. The honeycomb composition better suits the sloping border while eliminating the restrictive traditional symmetry.
Source: arch2o.com
The end result was an unfinished hexagon for the courtyard. Three of the six sides were designed identically, for a more flexible combination of sunlight needs and functionality.

Source: arch2o.com
Entering the gate, children and teachers find themselves in a courtyard with flowers and herbs on different levels, move in zigzag corridors along the edges of the hexagon, pass through lobbies and common spaces, and walk past different classrooms along diverging and merging paths.
Source: arch2o.com
Each two classrooms have a common exit to the courtyard and direct access from the street. After passing through the courtyard, children can resume their journey to other areas including the library, music room, art room, cafeteria, multi-purpose room, small farm and other classrooms.

Source: arch2o.com
Collective classroom activities take place around a column in the center of the room, while teams or individual children can use raised spaces along windows and walls to read, write or care for their small plants.
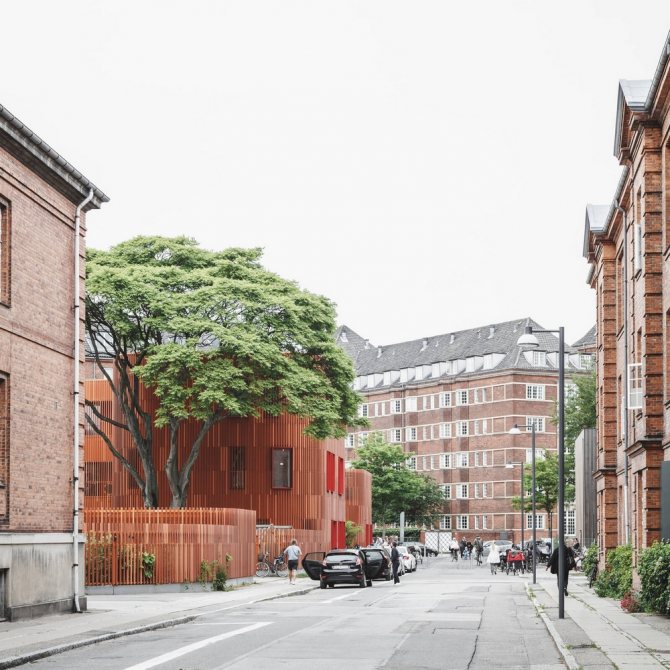
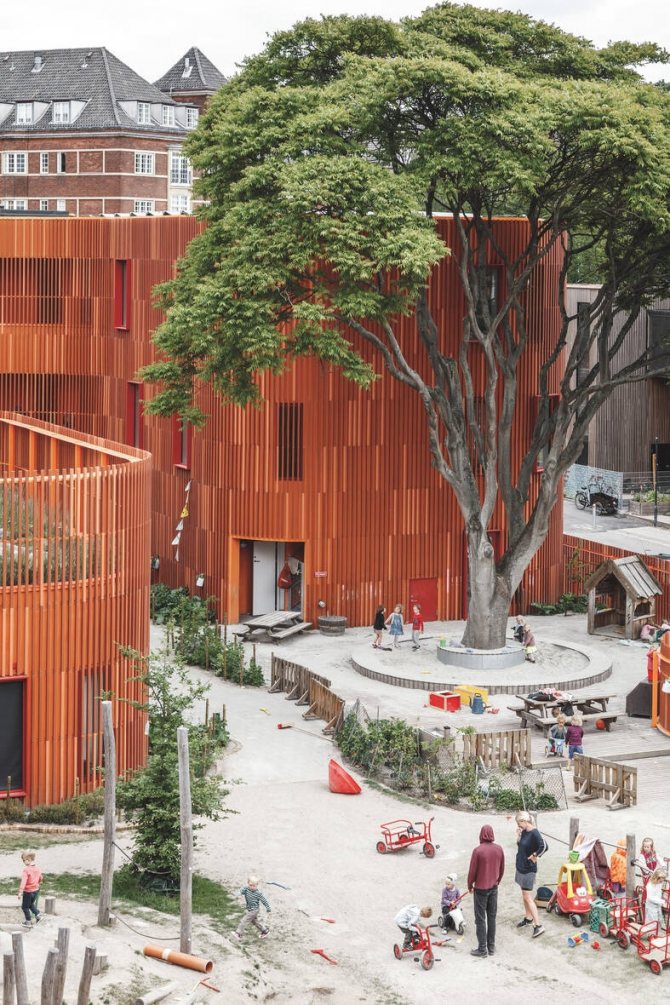
Kindergarten in Copenhagen, Denmark, Cobe company
Task
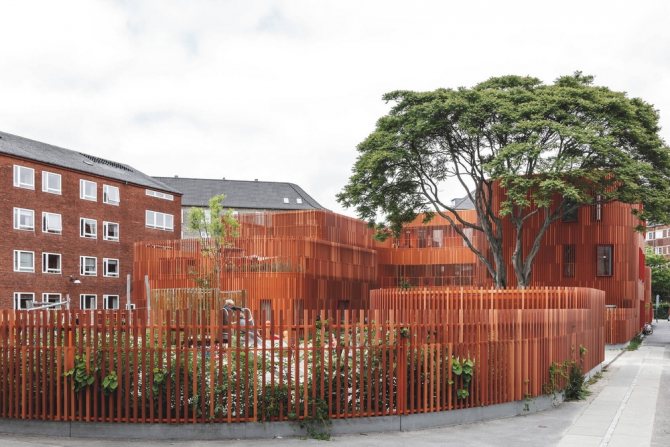
Source: cobe.dk
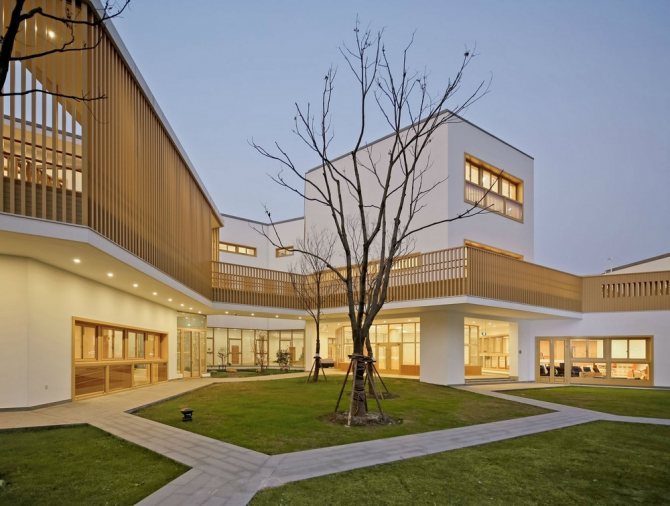
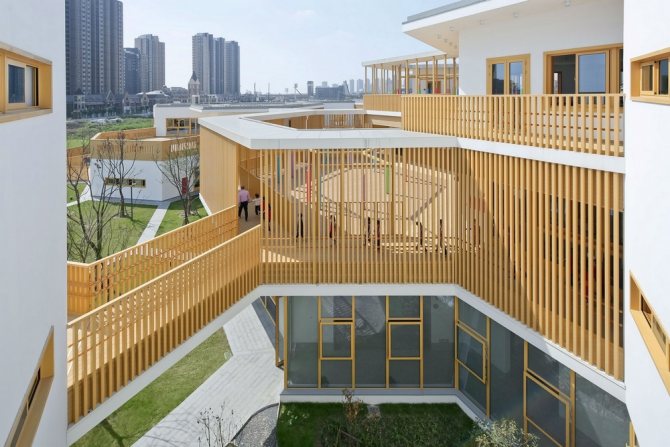
The city of Copenhagen commissioned the architectural company Cobe to design a kindergarten for 160 children under 6 years old with an area of 1950 m². The building needed to be located in the heart of a vibrant historical district. In this lush green garden village, among beautiful red brick houses, Forfatterhuset was to be built - a kindergarten organized around large mature trees, like houseplants on a terrace.
Solution
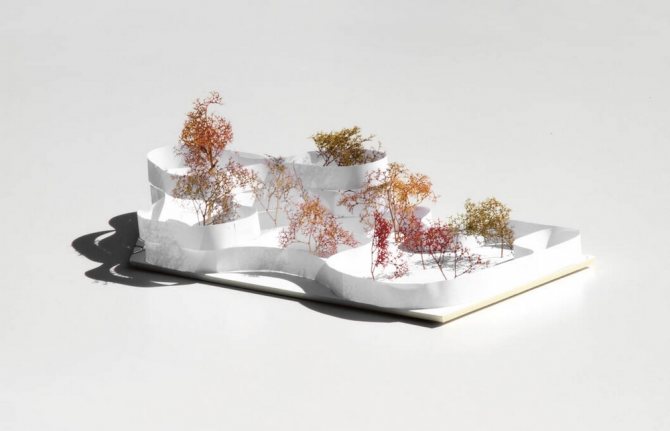
Source: cobe.dk
Conceptual model showing how the facade surrounds the buildings and existing trees on the site. De Gamles By is a green oasis in the city. The area consists of red brick buildings set on a lush carpet of green. One of the conditions was to create a functional and comfortable building without disturbing the appearance of the area.
Source: cobe.dk
As well as being a community for seniors, it is already home to five nursery schools, vegetable gardens for a nearby public school, open space for a high school and a petting zoo.
Source: cobe.dk
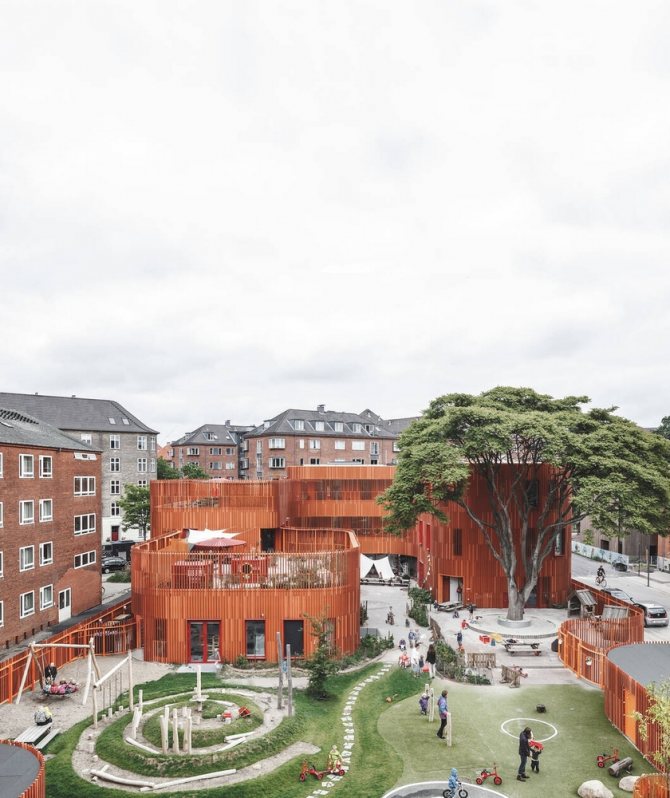
The green area is divided into large and small garden areas, lively play areas, roof terraces and quiet alcoves. Forfatterhuset is both a playground and a building, a park and an institution. This is a whole children's world that needs to be discovered and explored.

Source: cobe.dk
The heart of the kindergarten is a vertical, bright space.
Source: cobe.dk
“This is a subtle art, adding new to old in a historic area. First and foremost, we wanted to understand the characteristics of the area, highlight them, but at the same time create something new and contrasting,” says Dan Stubbergaard, architect and founder of Cobe.
The project was shortlisted for the Mies van der Rohe 2015 award and became a finalist for the Architizer A+ 2015 award.
You are here:
- Home
- house
- DIY paper house layout diagrams
Layout of a house made of paper with your own hands.
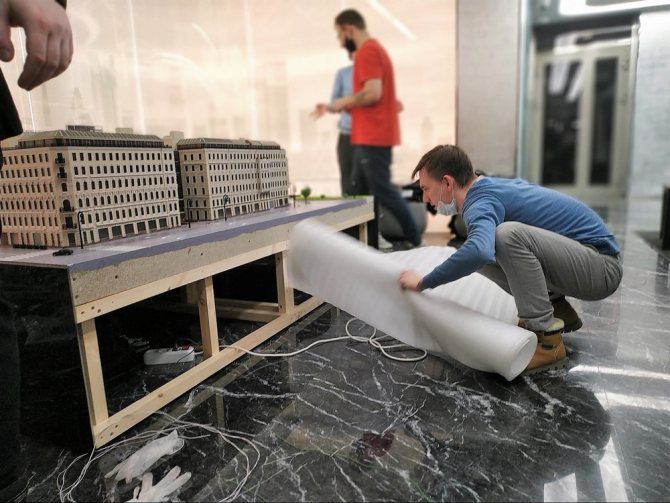
Architects usually create miniature models (models) of buildings. Before you start building a house or an entire residential complex, you first need to make a sample of it to scale (photo). Real architects make models from PVC (polyvinyl chloride), and parts for future buildings are cut out on a special milling machine, which is programmed with a specific computer program.
Such a machine is capable of not only cutting out microscopic parts with pinpoint precision, but also applying a cross-section to their surface that imitates brickwork or other coating. Thanks to this, maximum reliability of the layout is achieved. The machine cuts out tiny windows, doors and other parts. After this, the architect connects them together using a solvent, which melts the edges of the PVC plates and tightly fastens them to each other.
The same thing can be done at home, but only without a milling machine, PVC and solvent, but with the help of cardboard, paper, PVA glue and scissors. The production technology is very similar to what the pros use. The difference lies only in the materials and, of course, the quality of the model produced in this way.
But if you try really hard, you can make a paper building no worse than what an architect creates using a high-tech milling machine. So, how to make a house model with your own hands using a basic set of stationery?
Opinion of Top 3D Shop specialists
The main task in 3D modeling of any children's institutions is to clearly show architects and clients the peculiarities of perception of the design of the building and internal spaces by both adults and children. The layout should also be able to quickly make changes to the project, since the main modern trend in the construction of such objects is to emphasize the concept of individuality and organically fit the structure into the surrounding space.
You can read more about the technologies used to create layouts in the article “Making a layout of a school of any complexity.”
Making trees and grass
To make the layout look more authentic and to be able to visually assess its scale, it is advisable to decorate the cardboard stand with greenery: grass and trees. To do this you will need: • a can of green paint; • acrylic paint in several green shades; • dried twigs (dead wood); • a piece of foam rubber; • glue; • awl; • paint brush.
First, in any unnecessary container, you should mix several tones of green acrylic paint (dark and light to achieve the maximum effect of authenticity). After this, you need to cut the foam rubber into small pieces and properly saturate them with this paint. When the foam rubber is colored, we leave it to dry for a day.
We cut the dried foam rubber into such small pieces that they literally resemble crumbs. This will be our grass. After this, paint the cardboard stand well with greenery several times, and when the paint dries, cover it with a thick layer of glue. Pour green foam rubber crumbs onto the wet glue in random order. The grass is ready.
When the glue is completely dry, you need to make several holes in the cardboard base with an awl. Be very careful not to damage the entire layout. We paint dry twigs with green spray paint and stick them into the holes in the stand. Now the trees have taken their place. All this vegetation makes our paper building model look more realistic.
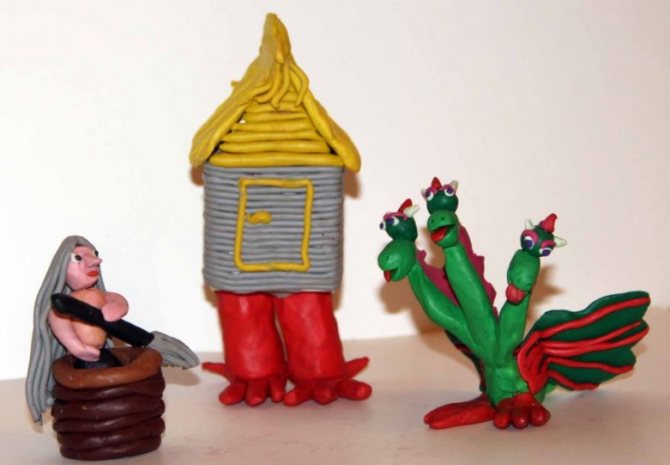
Plasticine house
Crafts made from this material are an affordable option for young children. The walls for a plasticine house can be of two types: “solid” or “log”.
For the first option, you need to cut 4 squares from plasticine cakes with a plastic knife. For a “log” cabin, you need to roll out a lot of sausages and lay them in rows.
The roof is made from 2 larger squares, which are connected at an angle to each other and attached to the walls of the house. Then they start decorating the craft. The pipe, windows and door are made of different colors.