November 09, 2016
Averyanova Sveta
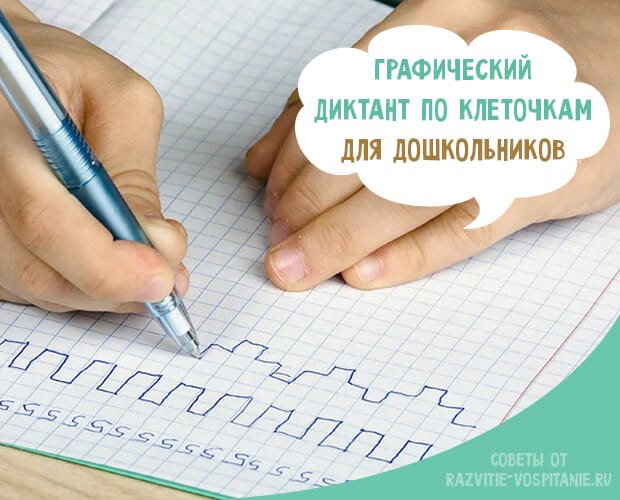
The formation of graphic skills is necessary for the development of writing, drawing, and number drawing skills. Kindergarten teachers and parents use different exercises and tasks. One of the most effective and interesting techniques is graphic dictations.
Parents and teachers in “developmental” schools can dictate a simple drawing or instructions for the diagram, and children 5-6 years old are indescribably delighted with the results obtained. Let's talk about this method of preparing for school in more detail.
How to complete the task
- Print out the proposed tasks for children on A4 or A5 sheets.
- There is a red dot on each sheet - the graphic dictation will begin from this place.
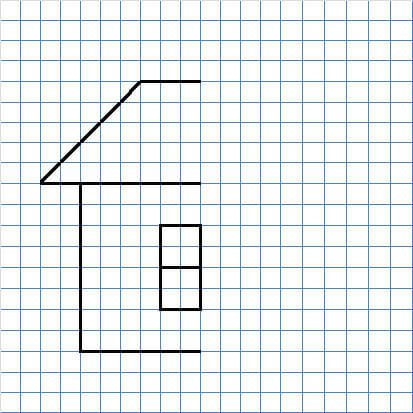
- Explain to your child that 1 step is one cell. 2 steps - 2 cells, and so on. Each step occurs from one corner of the cell to the next in a given direction.
- It is necessary to clarify the concepts of “right”, “left”, “up”, “down” and “diagonally”.
- You can perform graphic dictation directly under dictation, or independently using the arrows at the top of each sheet.
- Great concentration and attentiveness are required, since even 1 mistake will lead to the drawing not working out. When used in classes at home with mother, mother's supervision is recommended.
Required Instructions
To conduct developmental classes with young children and older preschoolers you will need:
- a squared notebook for each child. For younger preschoolers it is better to choose a large cage, for older and first-graders - a small one;
- simple and multi-colored pencils;
- eraser;
- form with a sample picture;
- instructions for the teacher;
- ruler if the lines are long or diagonal;
- card file with drawings.
The first lesson will be a trial lesson. On it you need to explain to the kids the principle of work, the goals and objectives of the exercise “Drawing by cells”. Try to make the lesson fun and exciting so that the young student is interested.
Give verbal instructions clearly and clearly. Talk to your children about all the stages of work:
- Let's create a magical picture from different dashes. These will be enchanted figures. You need to decipher them by making notes on a piece of paper.
- If you follow my instructions and requests correctly, do not confuse right and left, and carefully count the cells, you will get an amazing result.
- I will say: “Draw a line on the form to the left by 2 cells, to the right by 4 cells.” You draw a nice, even line without lifting your hand from the paper.
- Let's practice together on the board. As an example, let’s draw a very simple drawing from dictation. And then you will do another option without prompts and, for example, draw a vase.
After completing a simple logical task, offer preschoolers more complex schemes for independent work. When you receive the correct answer, be sure to praise the guys. Print out certificates of commendation, stars, make a personal growth board for each student.
If children have many difficulties with such exercises, the teacher should analyze the methodology and common mistakes. It is advisable to keep a lesson protocol and record the final result for each lesson. Thus, the dynamics of the development of skills and abilities of preschool children can be traced.
Perhaps the level of complexity of the pictures is not suitable for age, development of skills.
If the child is only 4 years old or a little older, then use simpler templates and increase the time to complete the task. There is no need to independently develop or compose descriptions for pictures for dictations.
Print easy graphic dictations
To download the picture you like, click on it to enlarge. After that, save the image to your device. This way you can print out graphic dictations for free for personal use.
Graphic dictations by cells free download
Graphic dictations on a gray field in PDF format
Graphic dictations on a yellow field in PDF format
Print oral graphic dictations with answers
They try to make tasks for oral dictation a little simpler than those tasks that are done “from sight”, since they require more preparation and concentration. There are no diagonal lines in them. They are also provided with a picture answer to quickly show children an image of the correct solution.
If you find it difficult to unravel abstract images, here is a hint: the following are encrypted: sailboat, dragon, snowflake, bear, lion, car, chair, ladybug, hippopotamus, ship, octopus, hare, snowman, boat, turtle.
Dictations for independent work
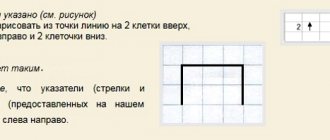
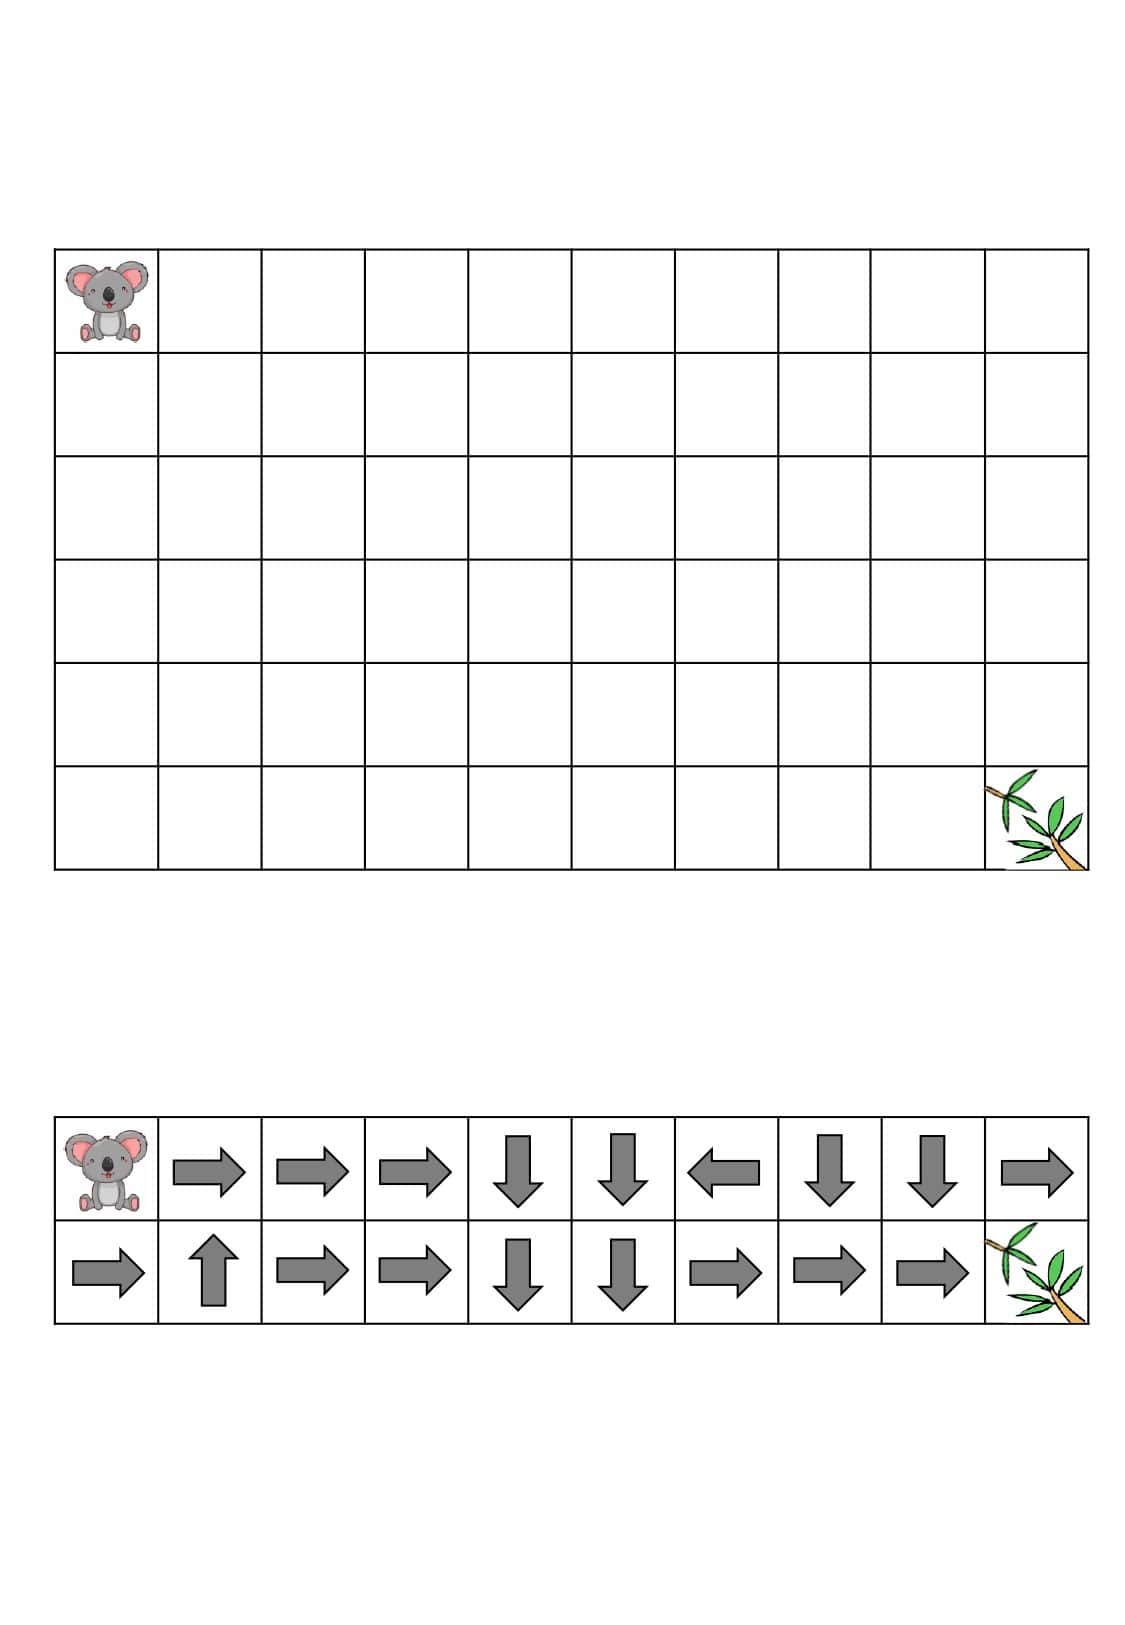
These tasks, where the dictation field and the “path” with arrows are located next to each other, are convenient to use for independent work.
Explain to your child that movement along the arrows begins with a dot. The signs should be read from left to right horizontally .
Reverse task
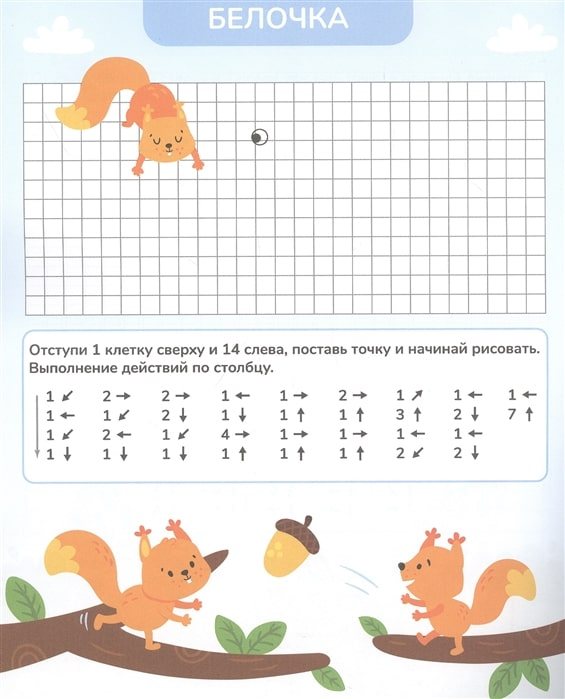
If your child confidently and happily completes tasks in the cells under dictation and independently, offer him the task in reverse . You give a sample drawing, and the child encodes the movements of the pencil from the starting point: 2 up, 3 to the left, 1 down, 2 to the right, etc...
You don’t need to know how to write - the direction can be indicated with arrows. But knowing the numbers is a must!
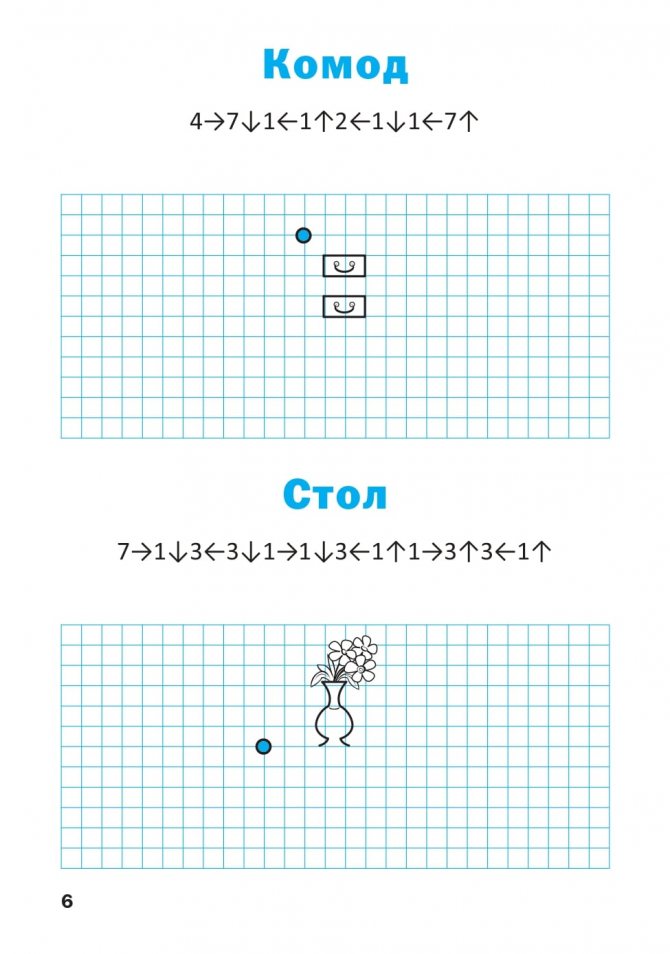
To get started, you can use the pictures below, and then go even further: offer not only to encrypt the picture yourself, but first draw it on checkered paper!

Methods of execution
There are several methods for conducting dictations using the Minecraft method in cells:
- Auditory.
The child draws a graph or a picture from dictation. The teacher gives verbal instructions about how many cells and in which direction the line should be drawn. After finishing the work, compare the result with the sample.
This technology develops attention, brain concentration when performing complex tasks, and child concentration.
- Drawing from a pattern.
Print the finished template. Place it on the table in front of your child. Let him copy it into his notebook. It is important to look carefully at the direction of the line and count the cells. Get your child interested in magical figures and diagrams. The girl will be happy to copy a small pattern, flowers; boy – geometric shapes, cars, animals. For 4-5 year old preschoolers, choose a simple pattern with approximately the same lines; for six year olds, choose a more complex one, where there are diagonal lines, long and short.
The technology involves the development of visual attention, its stability, and perseverance.
- Drawing symmetry.
The blank is an unfinished drawing made on one side. The kindergartener needs to complete half the picture on his own, maintaining symmetry.
The “Complete the mirror image” technique develops spatial orientation and thinking.
If it’s difficult for a child...
If it is difficult for a child to complete tasks on cells with arrows, perhaps you have simply not yet worked out the meaning of the arrows, the concepts of “right, left, top, bottom.” Start with simple arrow exercises like these to get the vocabulary right.
Rules and tips for implementation
Graphic drawings in the cells should be done after the teacher’s introductory speech, conversation with the class (group of children) and preparation:
- Let the child pick up the ball and toss it several times.
- Next, for each syllable of the tongue twister (pure twister), the baby must catch the ball. This is how a sense of tact and an understanding of sequence develops. Children will not rush anywhere.
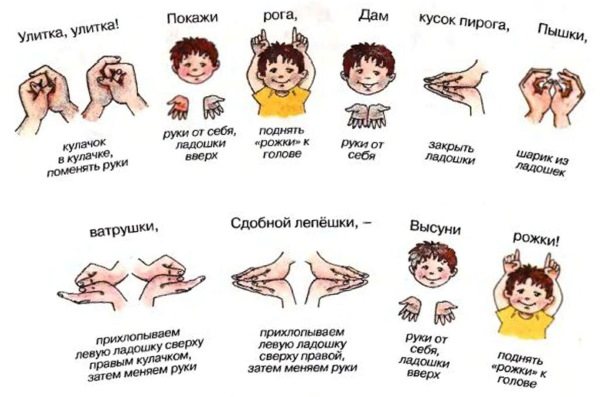
Finger gymnastics promotes the correct execution of graphic drawings
- The ball can be replaced by clapping your hands - for each syllable the child makes a clap.
- Finger gymnastics allows you to prepare children to complete the task. To prevent the kids from being interrupted, you can hand out sheets and pencils while reading and telling tongue twisters.
- Next, you need to explain the game plan so that the children are not afraid of being late with the work.
- Before starting, you should read the terms of the game several times, and then use an example to show what can happen if you follow all the points correctly and consistently.
Before dictating a task to the children, you need to ask them to put a dot - this is the beginning from where the drawing will “grow”. It is important that the point does not end up on the edge or in the middle of the drawing, which takes up a lot of space on the work surface.
Graphic dictations for school preparation
If the presented tasks did not seem enough to you, do not waste time searching for pictures in Yandex or Google.
Printing materials on various sites are often of poor quality, and there are errors in the dictation text, which completely kills the child’s desire to study further.
Here: print out assignments to prepare for school.
Ready-made manuals with graphic dictations are inexpensive and interesting . Here are examples.
Dictations from the book 5+ “Funny Cells. Graphic dictations. To prepare for school."
A very interesting set of tasks in Elena Uleva’s manual “Super developmental tasks for first graders. Graphic dictations for first graders"

Scans of tasks from the series “Waco. On the way to school. Graphic dictations"
Spreads of the notebook “Graphic dictations. Attention training. 1 class":
From the manual “Graphic dictations. From simple to the most complex. Guidelines for activities with children aged 5-7 years:
Time frame
The duration of the lesson “Drawing by cells” depends on the age of the preschool children. Consider their readiness for serious activities and their level of perseverance. If you plan too long lessons with your children, they will get tired, you will lose time and energy, and if they are too short, you will not have time to complete the required work. It is better for teachers and parents to focus on the time frames established by psychologists:
- For kindergarteners aged 5, do written work for no more than 15 minutes.
- With six-year-olds – 15–20 minutes.
- Keep first-graders at their desks for no more than half an hour, at least 20 minutes.
Graphic exercises seem to be straightforward tasks for preschoolers, simple and sometimes unnecessary. This is a misconception. Such lessons help children grow up confident, with adequate self-esteem, developed attention and perseverance. And this will be useful for adapting to school.