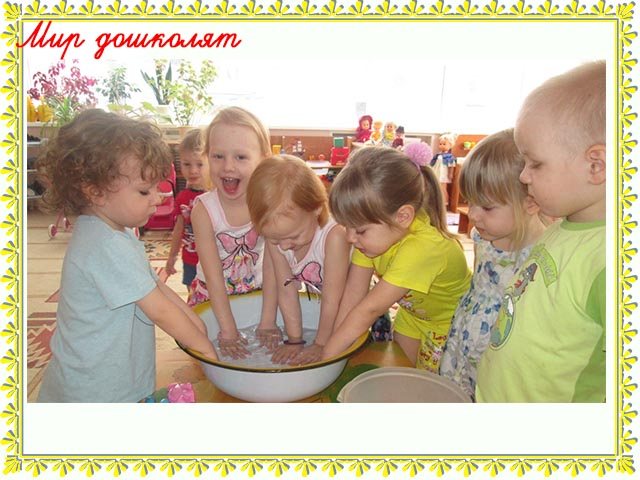
Notes on experiments with sand for younger children
Brief summary.
For children with impaired vision, the development of other, intact analyzers is very important. One of the ways for children with disabilities to explore the world is through experimentation.
This material may be useful for teachers of general education preschool educational institutions and for parents of younger preschoolers.
Experimenting with sand (younger age).
Goal:
to introduce children to the properties of sand, to develop the ability to concentrate; systematically and consistently examine objects, the ability to notice individual details of the overall picture; develop children's observation skills, ability to compare, establish basic cause-and-effect relationships and draw simple conclusions. Introduce safety rules when conducting experiments.
Materials for experimentation:
container with sand, water, stencils, molds, cocktail straws, plastic transparent container (jar).
Experiment 1. “Sand House”
Take a handful of sand and release it in a stream so that it falls in one place.
Gradually, a cone forms at the site of the fall, growing in height and occupying an increasingly larger area at the base. This will be our house. If you pour sand for a long time, drifts (sand rivulets), sand movements similar to a current, appear on the surface of the cone, now in one place, then in another. Children conclude: dry sand is free-flowing and can move. Experiment 2. “Footprints on wet sand”
Wet sand cannot be poured out of the palm of your hand, but it can take any desired shape until it dries. Let's find out with the children why figures can be made from wet sand (working with molds) and leaving interesting imprints - traces (working with stencils).
Experiment 3. “Where is the water?”
Invite children to find out the properties of sand by testing it by touch (loose, dry).
Children pour cups with the same amount of water (pour just enough water to completely sink into the sand). Find out what happened in the container with sand, why the water left (seeped through the sand) where there are more puddles after the rain (there are no puddles on the asphalt, in the sandbox). Experiment 4. “Wind”
Invite children to find out why it is inconvenient to play with sand in strong winds. Children examine the prepared “sandbox” (a jar filled with a thin layer of sand). Together with adults, they create a hurricane - they blow into the sand into a tube and find out what is happening and why (since the grains of sand are small, light, do not stick to each other, they cannot hold on to each other or to the ground with a strong stream of air) .
Experiments with sand in the second junior group
Albina Shmitko
Experiments with sand in the second junior group
Experiments with sand in the 2nd junior group.
Goal: To develop the cognitive activity of children in the process of experimentation. To help expand children's knowledge about the properties of dry and wet sand .
Tasks:
Training tasks:
Help children better understand the inanimate world around them
Introduce children to the properties of sand .
Learn to handle sand carefully , do not spill it.
Teach children to draw their own conclusions based on examination results.
Developmental tasks:
Create favorable conditions for sensory perception
Develop skills of interaction with peers in the process of joint activities. Enrich your vocabulary.
Educational tasks:
To cultivate the moral qualities of a child during his communication with nature
To develop cultural and hygienic skills in children (neatness, neatness)
.
Experience No. 1 “Getting to know the sand ”
Purpose: to introduce sand , to draw attention to the properties of dry sand (it flows, does not get dirty)
Materials: cups of sand , sheets of white paper, magnifying glasses.
Experiment No. 2 “Does sand fall easily?”
Goal: Learn to pick up sand and hold it in your palms, pour it in a thin stream
Material: trays with sand .
Experience No. 3 “Hide and Seek”
Goal: To teach children to bury (get)
toys in dry
sand , and hide the toys by immersing them in the sand.
Material : sand
Experiment No. 4 “Find objects”
Goal: learn to sift sand through a sieve.
sand center , strainer, small objects (pebbles, beads, etc.)
Experiment No. 5 sand in strong winds ”
Goal: To consolidate knowledge about the properties of sand
Material: sandbox
- a jar with a thin layer
of sand , trays with sand , cocktail tubes.
Experiment No. 6 “Miraculous transformations of sand ”
Mothers: cups with sand and water .
The goal is to teach children to water dry sand from a watering can. Develop the ability to notice changes occurring in sand (Color, condition)
.
Experiment No. 7 “Sculpting from sand ”
Purpose: to introduce children to the properties of wet sand .
Material: trays with wet sand .
Experiment No. 8 “Wet sand takes any desired shape”
Goal: continue to introduce children to the properties of wet sand
Material: tray with wet sand , various molds.
Experiment No. 9 “Whose trace”
Goal: To develop the ability to leave footprints in the sand , then determine what object left the trace.
Material: trays with wet and dry sand .
Experiment No. 10 “Drawing with sand ”
Target. Develop the ability to pour dry sand onto the adhesive pattern, then shake off the excess sand .
Materials: dry sand, sheets of paper with drawn pictures, glue sticks.
Project "Sand and Water"
Author:
Khugol Tatyana Fedorovna
Teacher Kindergarten 170 JSC Russian Railways
Tashkenova Elena Alexandrovna
Teacher Kindergarten 170 JSC Russian Railways
Project "Sand and Water"
Environmental project in the 2nd junior group “Sand and Water”
Compiled by teacher: Khugol T.F., Tashkenova E.A.
Type:
short-term, research.
Target:
Acquaintance with the properties of water and sand, developing the skills of experimenting with objects, developing fine motor skills, enriching the vocabulary of words. Satisfy children's needs for activities with natural materials - for experimenting with sand and water.
Tasks:
- Introduce children to the properties of sand (dry - wet, pours - sculpts) and water (liquid - spreads, shimmers).
- To promote the development of cognitive activity, curiosity, the desire for independent knowledge and reflection.
- Enrich the child’s sensory experience and develop fine motor skills.
- Cultivate accuracy in handling sand and the ability to play with peers nearby.
- Introduce the rules of the sandbox game.
Resource support:
sandbox, shovels and sand molds, water in children's watering cans, toys - duck and cockerel, sieve.
Participants:
children, teachers, parents.
Relevance:
Experimentation is a direct path to raising extraordinary, smart children.
For kids, playing with sand and playing with water are some of their favorite childhood activities.
And it’s not surprising, because playing with water and sand is useful not only for the development of tactile sensations and fine motor skills. Water and sand develop various receptors, soothe, and give positive emotions. And what could be better than the happy face of a child!
- They allow you to cope with your emotional state, which is extremely important for children of primary preschool age.
- Involve children in the most interesting process of learning about the environment.
In this project, the object of study was dry and wet sand. Dry sand does not retain its shape - it crumbles. And wet sand retains the shape of the container in which it was placed.
An important point in the project was the question of how to get wet sand from dry sand (rain or watering the sand).
The project is designed for one month.
Since the children are small, joint activities between children and the teacher took a significant place in planning. The teacher guides the children, surprises them, and creates an atmosphere of intrigue and search for solutions to problems.
Expected results:
Formation of the ability to consciously perform actions with dry and wet sand. If necessary, add water to dry sand. Manifestation in children of elementary control over the method of action. Cultivating interest in the result and a sense of satisfaction from the activity.
Stages of implementation of project activities.
1st - preparatory:
setting goals and objectives, determining directions, objects and methods of research, preliminary work with children and their parents.
2nd - research:
searching for answers to questions posed in different ways;
3rd - generalizing (final):
Game - entertainment with sand: “Streams”. Photo report of the project.
Preliminary work:
Selection of educational games on ecology. Selection and development of the content of the educational process, thematic entertainment, grouping of material, drawing up a plan.
Project implementation:
| deadlines | Educated region, activity. | Cooperative activity | Independent activities of children | Working with parents | |
| Image. daily activities | Organiz. educational activities | ||||
| First week | Cognitive development Physical development Elementary work. Speech development | Morning : situational conversation “The Cockerel and the Duck.” Goal: find the leading difference between birds (a duck swims and dives). Walk : Outdoor game “Sun and Rain”. Goal: to develop the ability to consciously act in accordance with the text of the game. | Experience No. 1. Observation of sand properties (dry and wet). Goal: to become familiar with the properties of sand (dry sand flows, wet sand retains its shape). Games with sand and water “I bake, bake, bake”, “Let’s bake cakes”. | Watering sand in a sandbox using watering cans. Loosening with a spatula. Goal: mastering how to handle a watering can and spatula. Game “Drawing on the sand”, “Magic prints on the sand” | Consultations for parents: “Playing with water and sand”, “How to organize children’s search and cognitive activities.” |
| Second week | Speech development Cognitive Social and communicative development Elementary work. | Morning : reading the story “Chicken and Duckling” by V. Suteev. Purpose: to encourage reflection on the plot of the story. Walk : didactic game “Stash”. Goal: learn to bury objects in the sand and dig them out. | Conducting experiments No. 2, No. 4 “Wet sand” (Pour water over dry sand). Experiment No. 3 “Sand can move” Sifting dry sand through a sieve. Goal: developing a household skill: sifting bulk substances through a sieve | Conducting experiments with wet sand, using different molds. Experiments with dry sand (sand sieve). Digging sand with a shovel “Guess what’s hidden in the sand?”, “What did I bury in the sand?”, “Mouse hole.” | Offer to water the sandbox in the yard of your house in the evening. Goal: to help children in the practical development of knowledge of the properties of sand. |
| Third week | Speech developmentCognitive Social and communicative development Elementary work. | Morning : Reading the poem “Sandbox” by Marina Ershova. Goal: to evoke an emotional response from a familiar environment. Walk . A conversation about careful handling of sand. Goal: to teach children to avoid situations where sand gets in the face of themselves and their friends | Problem situation: “Let's help the doll Katya. Sand hit him in the face." Goal: to form ideas about unwanted sand getting into a person’s eyes. | Games in the sandbox with molds and shovels. Goal: To consolidate ideas about the properties of sand. Games “Let's cook dinner”, “New apartment for Masha”, | Pick up poems and riddles about sand. |
| Final event: | Cognitive development Artistic and aesthetic development. Social and communicative development | Game - fun with sand: “Streams” Purpose: To offer children the construction game “Streams for boats”. Develop abilities for orientation in space and constructive activities. Musically - ri Goal: To develop children’s ability to perform dance movements according to the model, to move to the music. Develop a sense of rhythm, create a good mood, help prevent nervous tension. | Games in the sandbox with molds and shovels. Goal: To consolidate ideas about the properties of sand. “Fences”, “Slide for a doll”. | Making boats. Construction of streams. Goal: creating favorable conditions for children to play; strengthening sand construction skills | |
Project results:
Creating a folder “Games with sand and water”
Consultations for parents (playing with sand and water).
Photo report of the project.
Bibliography:
Varygina V.V., Gorbach T.V. Research activities in preschool educational institutions: experiments, experiments, games, “now we’ll find out” evenings. - Kursk, 2010.
Gorkova L.G., Kochergina A.V., Obukhova L.A. Scenario for classes on environmental education of preschool children. - M.: VAKO 2005.
Pavlova L.N. Knowledge of the surrounding world by children of the third year of life. Toolkit. – M.: TC Sfera, 2013. – 144 p.
Consultation for parents:
"Playing with sand and water"
A lot has been said about the benefits of playing with sand, including the development of sensory perception and creative thinking, and the improvement of manipulation skills, and a positive effect on the child’s mental health. It is not for nothing that sand therapy is being used more and more today, which allows one to naturally unload the psyche and find balance. Don't deprive your baby of the pleasure of playing around in the mini-sandbox, your home's “island of summer,” at any time of the year! Playing with sand is very useful. In the sandbox, the child develops fine motor skills - pouring sand in his hands, his eye - filling molds with sand, here he acquires his first communication skills with other children, and it is in the sandbox that his creative abilities begin to develop.
Sand games
Let's introduce our children to the basic properties of dry and wet sand. I offer you a wide variety of games related to these materials. If you invite your child to play these games, you will probably hear enthusiastic consent.
We study the properties of sand and “bake Easter cakes”
Playing with sand brings great pleasure to any child. Offer your baby the tools: a scoop, a bucket, molds of different colors, volumes and configurations, a rake, a funnel and a small sieve, as well as plastic jars and bottles, and he will spend hours digging in the sandbox, pouring sand into the molds and pouring it back.
Point out to your child that sand can be dry or wet.
.
Dry sand
crumbles - nothing can be built from it, but it can be poured in a thin stream or sifted through a sieve. Show your child how dry sand can be used to measure the volume of different molds and even bottles with a narrow neck by pouring sand into it through a funnel. Show how sand takes longer to pour out through a narrow bottle neck than through a wide one.
Completely different games can be offered to children with wet sand.
. First of all, draw the child’s attention to the fact that the properties of wet sand are completely different from those of dry sand. Firstly, wet sand is a different color (it is darker), secondly, it is heavy and no longer crumbles, but you can “bake pies and Easter cakes” from it. To do this, put wet sand into a bucket or mold with a scoop and compact it with the back of the scoop. Then turn the mold over, holding the sand, place it on a hard surface, tap the bottom with a scoop and carefully remove the mold. The “pie” is ready.
Games for children
Gradually, the child learns to sculpt not only castles, but also other figures from wet sand. And if this happens at sea, then the finished sculptures can be decorated with shells and pebbles, as well as flowers and leaves. You can even build buildings with columns from thick sticks. And if you lay paths around it, make flower beds and “plant” trees, you will get a whole city. You can make a moat with water around the castle, and build a bridge on top of it. At the same time, tell your child that this is how the castle used to be built, and the moat protected it from enemy attacks. Sand attracts children like a magnet, because here they can build their own world, where they fantasize and create, work and learn to achieve goals.
What games to play with your child in the sandbox
It got warmer outside, and all the kids turned their gaze to the sandboxes. And this is quite understandable. After all, sand is a whole field for the fulfillment of children's fantasies, a sea of positive pleasures received from this game. However, adults do not always know that playing with sand can be an interesting and useful way to spend time. Turn on your imagination! Remember your childhood - and go ahead! It's no secret that most children love to fuss with sand. They sculpt various figures, sift sand through a sieve, and build castles. Let's find out what games can be organized using sand.
- Construction of cities, castles, building complexes. Don't be surprised by this fact, it really is doable. If the children have with them a set for playing with sand, water, and, of course, the sand itself, then a trip to the “Land of Magic Cities” is already guaranteed. Of course, auxiliary toys - cars, small dolls, cubes - would be appropriate in this game. By the way, you can change the plot every time, all the time, complicating the game. For example, this time build a tunnel for a train. In addition to developing their imagination, children can learn or consolidate knowledge about railway transport through this pastime.
- Introducing letters. What adults can offer their treasures: using an ordinary stick, we draw in the sand any letter that is already familiar to the child. We suggest that your baby try it too. Such simple tasks encourage children to spontaneously learn the alphabet in a playful way. After all, no one asks a young creature to write the letter correctly. We are talking about the primary memorization of the alphabet through such a game form. Of course, this task-game will not be interesting for the smallest toddlers.
- Sand is a great place to draw. After all, by running your finger across the sand, be it wet or dry, you can always draw the desired object or phenomenon. For example, if during a walk a mother and her son or daughter were talking about the sun and its benefits for nature, then you can easily draw the sun on the sand and already consolidate your knowledge about such a miracle of nature.
- Using water, kids can sculpt anything from natural materials. These can be animals, figures, and fairy-tale characters. These types of games develop children's creative imagination and thinking.
Let's play archaeologists
Let the baby turn away, and you bury the toy in the sand. During the excavation process, the baby will guess from the opening parts what you hid.
Let's play hide and seek
The baby buries his hands in the sand, your task is to look for his fingers by name. This will help your baby learn the names of his fingers.
Let's find the treasure
In the sandbox, your little one can imagine himself as a real treasure hunter! Bury a few coins in a small, outlined area. Arm your baby with a strainer and, sifting through the sand, he will find “pirate treasures.”
Finger machine
To develop fine motor skills, draw a path in the sand and ask your child to drive his finger along it without “driving off to the side of the road.” However, before letting your baby near the sandbox, we suggest paying attention to the following points.
— Before playing with sand, adults should definitely look through the sandbox. After all, not all people are well-educated, and it happens that you can find cigarette butts or sharp objects in the sand. In any case, even if the playground is fenced off from others, it would be a good idea to be vigilant in this matter.
- Do not forget that those sandboxes that are accessible to all people can also be contaminated by pets. Naturally, children should not play in such a sandbox.
— After games, it is advisable to wash your hands. Of course, not every parent takes water all the time for a walk, but ordinary wet wipes will be very useful. Moreover, if after an active pastime the son or daughter wants to eat.
These simple manipulations can be carried out using ordinary sand, and thereby delight your children.
Water games
Playing with water is one of children's favorite pastimes.
It is recommended to conduct special exercises with water. It is difficult to find among natural resources anything children love more than water. During any water procedures, children are irresistibly drawn to play with water. If adult supervision is not provided, then children play with water more when washing their hands than washing their hands. After the rain, going out onto the playground, the children reach out to the puddles to tread their bare feet in the water. Children love showers or douches. In a word, during any water procedures, the guys try to use the water as much as possible for the game.
Organized activities with water captivate children so much that it is difficult to distract them from it or switch to another type of activity.
On hot summer days, kids splash in the water, watch floating figures - fish, frogs, a boat, move them through the water, take them out of the water and immerse them again, scoop up water with buckets, pour it into another bowl or pour it on the grass, splash in the water little hands and scream with delight when the spray splashes them from head to toe.
Children 2-3 years old not only splash in water and pour it from one dish to another, but can already pour water into bottles through a funnel or by immersing the bottle in water. They can wash the toys.
Hitting the water forcefully with their palms, the children raise a cascade of splashes. By dousing yourself with water, children enjoy the refreshing coolness.
This kind of game should be played shortly before the shower, because the child still needs to be bathed after the game. Before starting to play with water, it is necessary to give the child something to drink so that he does not have the desire to drink raw water from the basin. Various water procedures accustom the child to neatness and cleanliness, and develop cultural and hygienic skills.
Playing with water not only develops stability of attention and fine coordinated movements, but also teaches the child various technical techniques. For example, when washing rags or doll clothes, a child learns to wet the cloth with water, rub it with soap, wash the areas rubbed with soap, and wring out the washed item. All these techniques, which children master in early childhood in an interesting and fun game for them, develop the rudiments of the labor process that awaits them at an older age.
What can you play with water?
Playing with water jet
Place your child’s palm under the stream, study the fall of water, and splash it. You can, for example, invite him to fill a glass with water first, and then a tablespoon. Moreover, the stream of water can be both warm and cold, both strong and thin.
Waterfall
For this game, you will need any toys that can be used to pour water: a watering can, a small bowl, a small jug or a simple plastic glass. The baby draws water into a container and, pouring it out, creates a noisy waterfall with splashes. Please pay attention to the crumbs that the higher the waterfall, the louder it “makes noise”.
Water takes shape
For this game you will need: an inflatable ball, a rubber glove, a plastic bag, a plastic cup. The baby fills the ball, glove or bag with water using a plastic cup. Parents should draw his attention to the fact that water takes the shape of the object into which it is poured.
Water coloring
Tint the water with watercolors. It's better to start with one color. Make a concentrated solution in one bottle (plastic, transparent), and then pour this solution in different quantities into other bottles. After pouring the concentrated solution into containers, add water and see with your child where the water is darker and where it is lighter.
Drowning - not drowning
Take objects from different materials: metal, wood, plastic, rubber, fabric, paper, washcloth. Lowering various objects in turn, the child observes whether they are immersed in the water and what happens to them.
Little fisherman
Small objects are thrown into a pool or basin. These will be fish. The child is given a “fishing rod” - a ladle with a long handle, with which he will catch fish. You can also catch fish with a net - a colander or sieve is suitable for this.
Bubbles
You should teach your baby to blow bubbles in water. An adult must first show the child how to do this, so that he tries to do the same, and then watches the bubbles. This can become an element of teaching a child to dive and swim if parents do not have the opportunity to conduct classes with their child in the pool. At first, you can simply blow air through your mouth, lowering your head into the water, then try doing this through a straw or hose. Such games give the child incomparable pleasure.
Leisya, Leisya
For this fun you need a funnel, a plastic glass and various plastic containers with a narrow neck. Using a glass, the baby pours water into bottles through a funnel. You can simply pour water through the funnel, raising it high.
Wring out the washcloth
An adult gives the child a sponge and asks him to fill the bowl he is holding in his hands with water. But this should only be done with a sponge, collecting water and then squeezing it into a bowl.
Soap game
A small piece of baby soap is released into the bathroom with the baby sitting there - let him try to catch him. You can even come up with story games with water and soap.
Lots and lots of foam
An adult pours some baby foam into the pool where the baby is. Using a whisk or your own hands, the baby whips up the foam.
Focus
Fill a plastic cup with water, then cover it with a piece of paper. While pressing the cup with your hand, turn the cup upside down. Now, carefully sliding along the paper, you can move your hand away. The trick is that the water does not pour out.
Sprinkler
Make several holes in the cork of a plastic bottle, fill the bottle with water and give the resulting spray bottle to the baby. You can spray at a distance - then the main goal will be to release the longest stream. Or you can shoot from a spray gun at a target, thereby developing accuracy, or simply draw on the asphalt. Give your child a sprinkler on a hot day and the child will be able to come up with new games with water.
Learning to measure
To play, you will need a small bowl or jug, as well as a ladle. An adult asks to fill a bowl with water using a ladle. For comparison, it is better to take a bowl and a jug of different capacities.
Through the sieve
Place a bowl of water in front of the child and let the child pour water from the glass into the sieve. Explain to him why the water flows away.
In play, the child learns the purpose of objects and the properties of matter.
Bathing a doll
You will need: sponge, soap, mug (or jug) and towel. Invite your child to give the doll a bath using a sponge and soap. Then ask to dry the doll and put clean clothes on it.
Wash your nose, wash your feet
Sometimes it can be difficult to stop a cheerful child from washing himself. Try to focus his attention on something: let the child wash each part of the body in turn. At the same time, quickly name individual parts of the body, especially those that are located far from each other (for example, the nose, and then the knees). This will add dynamism to the game and reduce bath time, forcing the child to wash himself faster. For a change, you can sing some calm song, or while the child is washing, let him try to compose a poem about each part of the body.
Like this one:
The washcloth and I have no time for boredom,
I rub my hands with soap,
I rub my feet with soap -
This is me erasing myself
Games with sand and water can be combined. Before playing with wet sand, the child first moistens it with water. After playing, the child washes the toys he used in water.
Card file of schemes - experiments with sand for 2nd junior group
EXPERIENCE No. 1
Target:
highlight the properties
of sand
: flowability, friability, you can sculpt from wet sand; introduce the method of sand painting.
Material:
sand, plastic glasses, watering cans with water, molds, magnifying glasses, album sheets, glue sticks.
The teacher suggests looking at the sand: what color, pour it into glasses, pour it out, touch it (loose, dry). What is sand made of? What do grains of sand look like? We can examine grains of sand through a special device called a magnifying glass. The magnifying glass has magic glass built into it; it turns all small objects into large ones (they examine them). The grains of sand are small, round, and do not stick to each other. Is it possible to sculpt from dry sand? Why? What needs to be done so that we can sculpt from sand? Children use watering cans to water the sand.
Can you sprinkle wet sand in a stream? But it can take any shape until it dries (children sculpt with molds). Why is this happening? When the sand gets wet, the air between the grains of sand disappears, they stick together, as if holding each other by the handles (you can look at dry and wet sand again through a magnifying glass). You can draw on a flat surface of wet sand with a stick (shows).
EXPERIENCE No. 2
Target
: consolidate ideas about the properties of sand (flowability, looseness, you can sculpt from wet ones, show that sand allows water to pass through; develop curiosity and constructive skills).
Material:
sandbox, scoops, rakes, watering cans, pebbles.
What is this? (dog, car, duck). All toys have their own house. A dog lives (in a kennel, a car... (in a garage, a duck... (in a pond, lake). Let's build a house out of sand for each toy. What kind of sand is best to build from? How to make it wet? (Children water the sand). Why sand? became wet? Where does the water go? Children are building a kennel and a garage
EXPERIENCE No. 3.
"Sand can move"
Take a handful of dry sand and release it in a stream so that it falls in one place. Gradually, a cone forms at the site of the fall, growing in height and occupying an increasingly larger area at the base. If you pour sand for a long time, then alloys appear in one place or another. The movement of sand is similar to a current.
EXPERIMENT No. 4 “Wet sand”
Target.
Introduce children to the properties of wet sand.
Materials.
Wet sand, sand molds.
Take wet sand in your palm and try to sprinkle it in a stream, but it will fall from your palm in pieces. Fill the sand mold with wet sand and turn it over. The sand will retain the shape of the mold.
Wet sand cannot be poured out of the palm of your hand; the backwater can take any desired shape until it dries.
When sand gets wet, the air between the edges of the sand grains disappears, and the wet edges stick to each other. Project "Sand and Water"
Properties of water, stone and sand
Savelyeva Irina Valerievna teacher MBDOU DS No. 27 “Beryozka” Stary Oskol city district
PROPERTIES OF WATER, STONE AND SAND Summary of a lesson on experimentation in the first junior group
Purpose of the lesson: to consolidate children’s knowledge about the properties of various objects: water, stone, sand. Generate interest in experimental activities. Develop fine motor skills of the hands and coordination of movements. Activate in children’s speech the words transparent warm, cold, heavy pebbles, cold sand, loose sand, etc. Cultivate curiosity, curiosity, and aesthetic perception.
Form of implementation: Subgroup, practical activity.
Equipment: Paper boats, a bowl of water, a jar of pebbles, a jar of pitch, a sand mold, a scoop, a modeling board, wet wipes according to the number of children.
Advertising message
Progress of the experimentation lesson:
- Clarification of safety rules.
During class:
- do not put sand or stones in your mouth;
- do not splash with water, do not sprinkle with sand;
- do not rub your eyes with dirty hands.
Educator: Guys, today I brought you a paper boat and a jar of pebbles and sand for class.
Performing the 1st part of the experiment.
Educator: Guys, let's put our hands in the bath and try some water, what kind of water are children? (Children answer: cold water.)
Educator: Now let’s put the boat in the bath. Guys, what's going on with the boat? (Children: The ship is sailing.)
Educator: Let's blow on the boat, what happens to them? (Children: Swims quickly).
Educator: Now guys, let's see what we have in the first jar?
Educator: I take a jar of stones and ask the guys what they are. (Children answer.)
Educator: Guys, let's take a pebble in one hand and a boat in the other. What ship? (Children: Easy)
Educator: And the pebble? (Children: Heavy.)
Educator: Let's lower them into the water, look, the boat floats because it is light, but the pebble that sank is heavy. Tell me guys, can you see the pebble? (Children: Apparently.)
Educator: It’s obvious because the water is clear. Now put your hands in the bath, can you see them? (Children: Yes, the water is transparent and we can see the hands.)
Educator: Guys, now take napkins and wipe your hands.
Educator: Children, let's stand on the mat and play a little.
Physical exercise “We will jump and gallop”
One, two, three, four, five We will jump and gallop. The right side bent one, two, three - the left side bent - one, two, three. Now let’s raise our arms and reach for the cloud.
Performing the 2nd part of the experiment.
Educator: Now let's see what we have in the second jar?
Educator: Guys, what is in the jar? (sand). Let's pour sand onto the board. Children, touch the sand and tell me what it is like? (Dry, warm, crumbling).
Educator:
- This sand is dry, loose. (Children repeat).
- – Pour it into your palm. (Children do).
- – Look, what is sand made of? (Children's answers.)
- – Let’s say it together: from grains of sand. They are small. (Children repeat.)
- - How difficult it is to hold them in your hands. Grains of sand fall like a trickle. This sand is dry. (I accompany my words with a demonstration of experience).
Educator: Guys, we have a mold on the table. Let's pour sand into the mold and see if we can make a cake or not.
Carefully pour sand into the mold.
Educator: Did you get the Easter cakes? (Children's answers). Why didn't it work out? (The sand is dry.)
Educator: Guys, to make Easter cakes, what should you do with the sand? (Children answer: Wet.)
The sand is wet - it is dark, cold, and you can make Easter cakes from it. Who knows what will happen if you pour water into the sand? (Children's answers.) Let's check.
Educator: I pour water into the sand.
- Touch it and tell me – is it dry or wet? (children's answers)
- Warm or cold? (children's answers).
Educator: If you pour water into the sand, it will become wet and cold. - Look, wet sand flows in the same way as dry sand? (Show to children.)
Conclusion. Wet sand is not free-flowing.
Educator: You can make Easter cakes from wet, damp sand. Let's try. Take a mold and carefully put wet sand into it. Let’s tap the sand like this with a shovel and compact it. Carefully turn the mold with sand over. Let's knock on the bottom again with a scoop. Let's remove the mold. What happened? (Kulichik.)
- This is what a beautiful Easter cake we made, well done. Children, wipe your hands with a napkin.
Educator: Let me sum it up. Dry sand crumbles, but wet sand sticks. Easter cakes cannot be made from dry sand, but from wet sand you can.