Where to begin
To understand how to draw a dress beautifully, you need to understand what it consists of. To do this, it is worth explaining to the child that we are talking about a female type of clothing with floor-length fabric to cover the body and almost the entire part of the legs.
- The dress consists of a bodice and an underskirt based on one or several parts.
- For example, the crop top look is built on a short top and skirt.
- But it is possible to add a corset, partlet, kirtle, petticoat, stomaki, robe.
- Used for everyday purposes and official public appearances.
It all comes down to what the girl wants to draw. Perhaps this is a copy or invention of your own product as an amateur modeling.
In any case, it is necessary to support the child’s impulse and provide the necessary information, pencils and paper.
A good option is to learn to use computer programs for freehand drawing, thanks to the mouse.
Dress. Coloring by contour lines
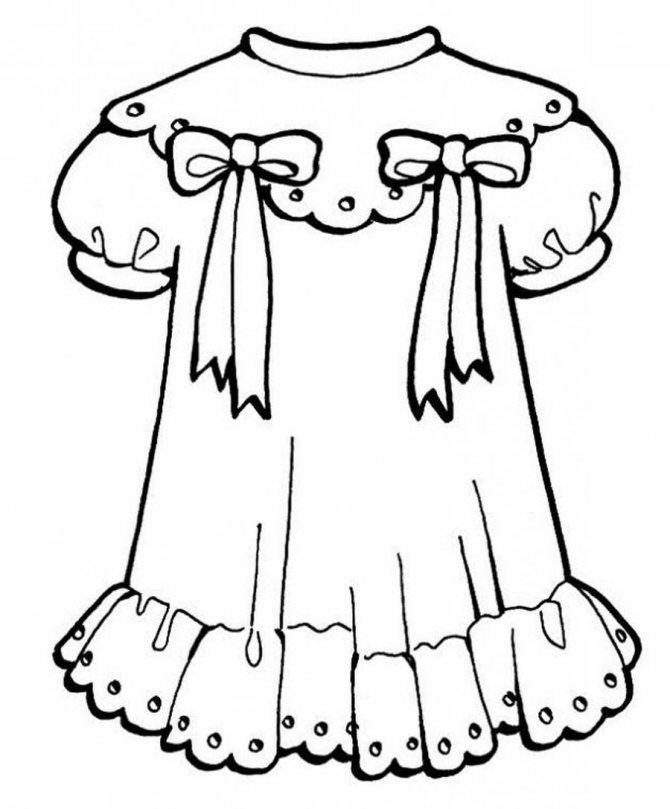
Little girls love to play with their favorite dolls, dress them up beautifully, and some of them make their own clothes from different materials. One of the popular pastimes for girls is to draw dresses on paper, carefully cut out and dress up paper princesses. But it will be difficult for a little girl of 3-4 years of age to draw a beautiful dress on her own, and therefore we have placed on this page outline drawings of different dresses for coloring, which can be printed on paper. What tools are most suitable for coloring pictures? It is not advisable to choose felt-tip pens for coloring books, even special ones for children and safe for children. The fact is that in the process of coloring, hand motor skills improve, basic reading and writing skills are laid, and in the future it will be much easier for the child to learn the letters of the alphabet.
And with felt-tip pens, drawing is easy and simple; the child spends virtually no effort, which is useful for the development of sensory abilities. As the very first tool, we recommend choosing a brush for painting with children's gouache (rather than watercolor) paints. And when walking with your girl, be sure to take a few colored crayons with you. Already at 3 years old, a girl can easily learn to hold a pencil with her fingers correctly. But at this age, offer your child the simplest large-sized pictures without detail for coloring. Over time, you can teach your child to paint over areas of the drawing by numbers, so that the child quickly remembers the names of colors from the palette. At 4 years old, a girl can easily paint over a dress shown on a piece of paper. Offer your child different options with outline drawings of dresses for coloring, which are located below. You can expand the images of the dresses by following the links and print them on paper of any size. Choose high-quality children's pencils for coloring pictures. Such instruments are made of soft wood, are easy to sharpen, and the lead does not crumble much and does not break quickly. The shape of colored pencils can also be different. For a small child, it is not advisable to buy pencils that are cylindrical or have a lot of sharp edges. Such instruments will not be comfortable for a child to hold in his hand. The best option for coloring is a pencil with 3 edges, which the baby can hold correctly with the thumb, middle and index fingers. IMPORTANT ! How to teach a child to carefully color outline pictures? One of the important tasks of parents is to teach their child to color pictures without going beyond the outline. There are a huge number of different techniques with which you can teach children to carefully paint over contour drawings. But we want to offer you a very simple and effective way that will allow your child to “feel” the boundaries of the area being painted. So, for this method we will need an unnecessary gel pen and toothpaste. We unscrew the lower part of the handle and insert it into the neck of the tube with paste, fix it with tape. Now take the outline drawing and trace it with a thick line along the contour, evenly squeezing the paste out of the tube. After some time, the toothpaste will dry and the contour line will be hard and clearly visible to the touch. Let the baby run his finger along the contour line and feel the border of the drawing. Now help your child paint over the picture with gouache, without going beyond the volumetric boundaries of the contour (slightly guide the child’s hand with the brush, holding it with your hand). DRESSES. OUTLINE DRAWINGS FOR COLORING WITH COLOR PENCIL OR PAINT ► Click on the link from the list (below) and expand the picture for coloring. ► Click the right mouse button and select from the list: Copy or Print. OPTION #1: ♦
. OPTION #2: ♦ . OPTION #3: ♦ . OPTION #4: ♦ . OPTION #5: ♦
. OPTION #6: ♦ . OPTION #7: ♦ . OPTION #8: ♦ . OPTION No. 9: ♦ . OPTION #10: ♦
. OPTION No. 11: ♦ . OPTION #12: ♦
. Dear Parents ! Please send us photos of drawings of dresses painted by your daughter! We will definitely publish all children's works on this page. Our email: This e-mail address is being protected from spambots. You need JavaScript enabled to view it
to Home Page
ALSO FIND OUT...
| Comments | Add new | Search |
| Polina - interesting | |2016-04-17 18:46:01 |
3.26 Copyright (C) 2008 Compojoom.com / Copyright (C) 2007 Alain Georgette / Copyright (C) 2006 Frantisek Hliva. All rights reserved."
Related materials:
- My little daughters are 5 years old and I love experimenting with different options for styling braids, twists and curls on their long hair...
">Easy hairstyles for kindergarten for girls 3-5 years old
- A properly executed hairstyle for competitive ballroom dancing is an important element of the aesthetic appearance and unconditionally adds charm to the stage…
">Ballroom and ballroom-sports hairstyles for girls 10-14 years old
- When a girl gets ready for school early in the morning, she is faced with the task of choosing a suitable hairstyle that can be done quickly enough before going out...
“>How to quickly create a beautiful hairstyle for a schoolgirl
- Are you the mother of a beautiful baby aged from one year to seven years? Then you know very well how difficult it is to come up with beautiful hairstyles for…
">How to make a child's hairstyle for a girl from ponytails and braids
- Today in the world of beauty and fashion we can easily find many interesting ideas with original women's and children's hairstyles to choose the perfect one…
“>Learning how to do a beautiful hairstyle for your daughter with your own hands
The following materials:
- Flower coloring pages for girls It’s no secret that for the full and comprehensive development of a small child in preschool age, it is important to organize…
“>Flowers for girls. Pictures for coloring
Previous materials:
- Drawn kitten. Coloring an outline drawingColoring outline drawings with paints or colored pencils is fun and useful for...
">Coloring book. Kitten made from contour lines
- Children's coloring book. Butterfly in pictures - 12 different options At what age will a child be interested in drawing and how to help your child learn...
“>Coloring children's pictures. Butterflies
- Animals in the pictures for coloring: hare, wolf, fox, bear. Children love to color pictures in different colors and are happy to fill in the blanks...
">Pictures with different animals for coloring pages
- Pictures for coloring from the film “Masha and the Bear” From birth, a child plunges into the world of bright colors. An incredible variety of colors with a huge…
">Masha and the Bear. Pictures for coloring
- Coloring book for girls 5 years old. How to paint by numbers Educational activities with children are the cornerstone in the formation of physical, emotional and…
«>Coloring by numbers for girls
- Children's coloring books for girls (4 years old) Preschool children enjoy plunging into the world of educational games and “under the strict guidance” of adults...
">Coloring pages for little ones
- Coloring pages for girls. Disney Princesses Which coloring pictures are the most popular among girls this year? Our website bebi.lv has compiled its…
“>Disney princesses. Pictures for coloring
- Classes with a 3 year old girl. Coloring pages of simple children's pictures All girls of preschool and primary school age simply love to draw and color...
“>Learning to color pictures at 3 years old
- Coloring pages. Print simple pictures for 3-year-old girls. Your baby has long ago learned to walk independently with small legs, with pleasure...
">Easy coloring pages. Options for little girls
- Print high-quality pictures for coloring. Barbie for girls It's no secret that drawing and coloring pictures of your loved ones...
">Barbie dolls from the cartoon. Color the pictures
- Little ponies. Print out pictures for coloring for free1. FRIENDSHIP IS THE MIRACLE ! THE AMAZING ADVENTURES OF LITTLE PONY IN EQUESTRIA This year is the most...
">Friendship is a miracle. Little ponies in pictures for coloring
- Free monster high coloring pages (download and print) HOW TO BEAUTIFULLY COLOR PICTURES FROM THE POPULAR ANIMATION SERIES FOR GIRLS “MONSTER SCHOOL” (MONST…
“>School of Monsters. Pictures for girls
- Coloring pages for girls. Winx fairies The world of coloring books opens up for a child from early childhood, when the little one has barely learned to pronounce the first words...
">Pictures from the Winx series for coloring pages
| Answer |
What you will need for a drawing lesson
We will assume that the dress will be drawn by hand, using a pencil. Therefore, let's look at a few step-by-step instructions for children.
In this case, to work you will need:
- A pencil to create clear outlines of the dress and add various details;
- A sheet of paper based on standard A4 format;
- Eraser for erasing unnecessary or erroneous sketches;
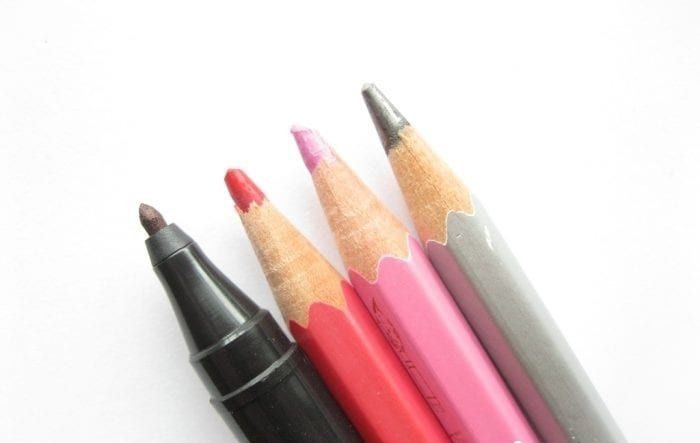
- Colored pencils for coloring different sections of the dress;
- To highlight the contours, you may need gel pens of different colors.
This is a simple set of tools to provide a young artist. As skills develop, a larger paper support may be required. It will help you create a more perfect image while standing.
But for a child, the attention and support of an adult with simple tools for work is enough.
Necessary materials
- A simple pencil (for depicting objects with a clear outline);
- Sheet A4 (base);
- Eraser (can erase erroneous details);
- A set of colored pencils (painting the main elements);
- Set of helium colored pens (outline highlighting).
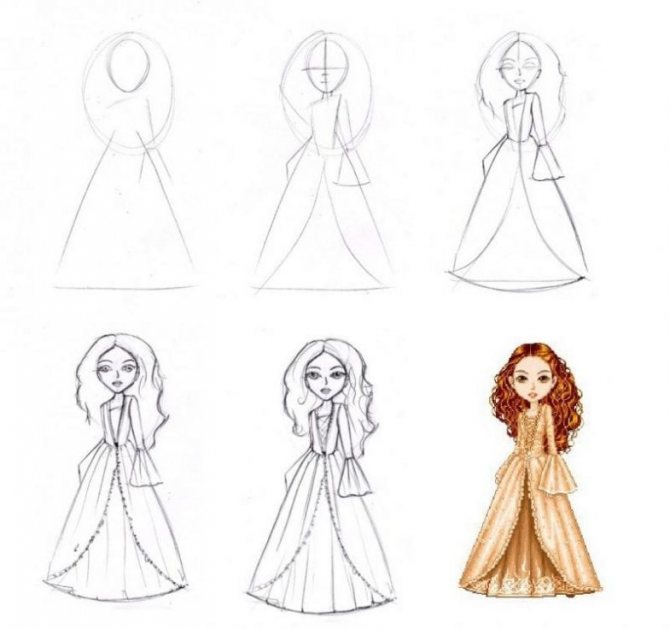
Now, let's move on to the most interesting part - learning step-by-step instructions for drawing princess outfits from fairy tales. We suggest that you familiarize yourself with three detailed lessons for beginning artists.
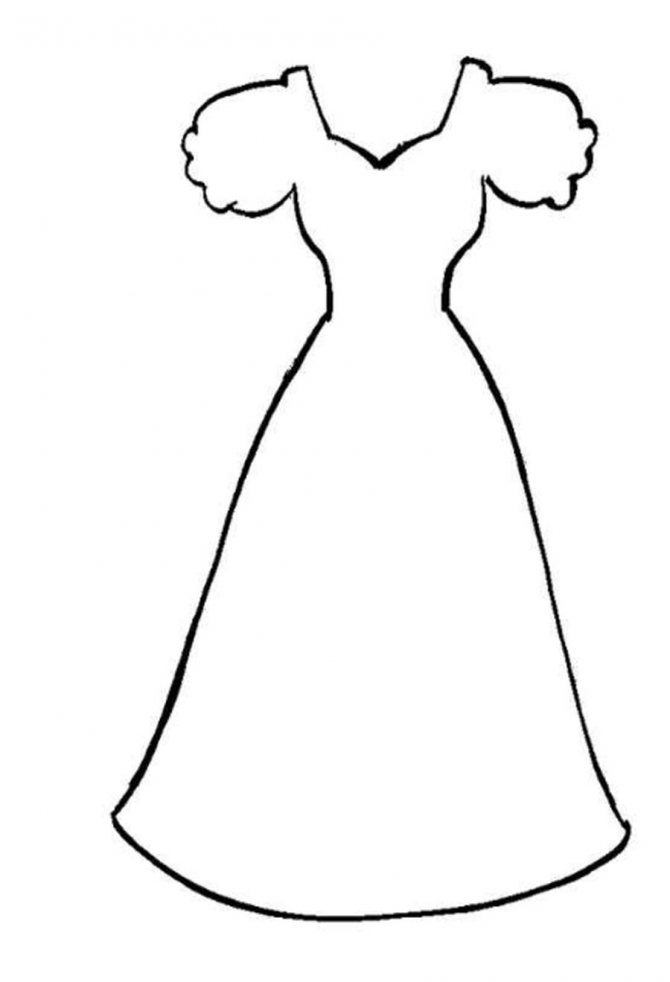
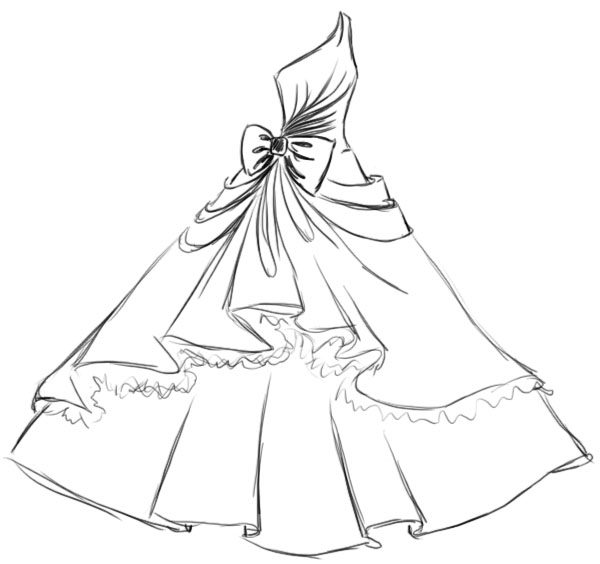
Making a fluffy dress
Let's look at how to draw a dress step by step on paper. First, you need to analyze and figure out where it is more profitable to place the drawing on paper.
Artists consider the central part to be the best solution, since there will be no movement up or down.
Next step by step:
- A V shape is applied to form the neck of the dress model. To do this, use straight lines connecting at the bottom. In fact, it looks like a “tick”.
- Lines are drawn from the base to the right and left, but from different sides. The straps of the dress are formed. To express elegance, curved lines are drawn down. The bust is adjusted with a few touches.
- To create a beautiful waist, draw 2 straight lines in the vertical and horizontal directions. This creates a rectangle.
- A long stitch is pulled on each side to highlight the scale of the skirt. The lines are randomly connected at the bottom to form the hem of the skirt.
- For realism, folds are added under the chest and long vertical ones in the skirt area.
- The belt is decorated with a bow. Two ribbons extend down from it.
- Fluffiness of the sleeves is allowed. To do this, add corresponding lines.
- It is necessary to remove unnecessary lines. Now you can color the sketch.
Tip: It is more profitable to create a drawing from top to bottom.
We looked at a simple drawing technique for beginners. This option is available for the youngest girl with adult assistance.
Preparation for a drawing lesson on the topic “Girl in a smart dress” in the senior group
When preparing a lesson on drawing a girl in an elegant dress, the teacher faces a number of tasks:
- to develop children’s ability to draw a human figure, convey the shape of a dress, the shape and location of body parts;
- consolidate the techniques of drawing and shading a picture with a pencil;
- develop children's creative abilities - developing a dress pattern (design, shape, and decorations), completing the drawing of accessories, background, etc.
- develop the ability to evaluate your own drawings and the drawings of other children.
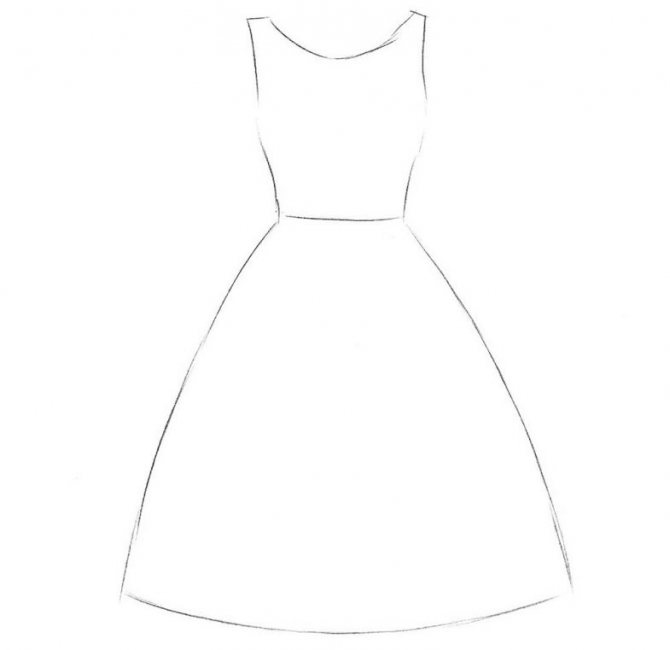
The lesson can be aimed either at children’s independent depiction of a girl in a dress, taking into account the proportions, or it can be carried out as part of decorative drawing, when students are offered ready-made dress templates for finishing and decorating.
Children 5–6 years old depict the human body initially as a set of geometric shapes:
- head - circle,
- neck - a small rectangle,
- body - rectangle or oval,
- legs and arms - in wide lines,
- fingers - thin lines, strokes.
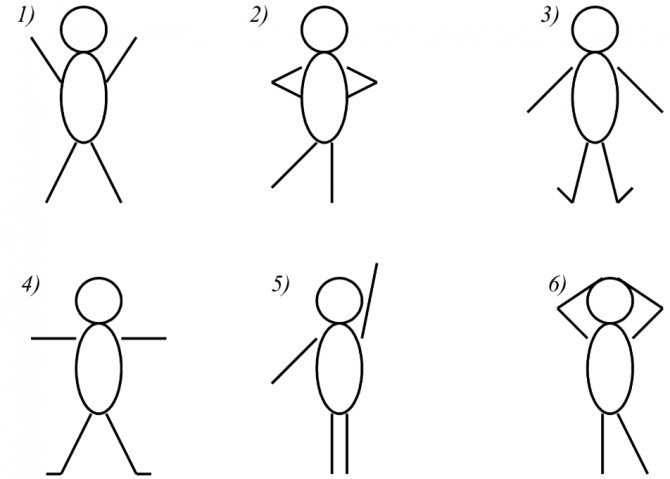
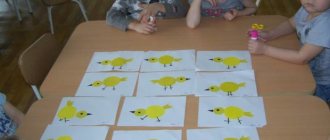
Children's first drawings of people are geometric sketches
Six-year-olds are confident in their use of drawing tools. They manage to complete the task according to the sample presented. The choice of materials remains with the teacher: for the lesson it is necessary to prepare the basis for drawing and tools.
Drawing the figure of a girl in the older group is complicated by the introduction of new elements: costume, hairstyle, accessories
Drawing materials
To depict a girl in a dress, you will need the following materials:
- Lead pencils.
Important. Older preschoolers learn preliminary sketching. Children use a simple pencil to draw the outline of a person, a portrait, then paint with colored shading or strokes of paint.
- Paints: gouache,
- watercolor.
- medium thickness,
On a note. For painting with gouache, you can prepare colored cardboard or paper tinted with watercolors.
For drawing a girl in a dress, colored pencils and gouache are best suited.
The design of patterns and details of the dress can be done using non-classical materials. Paints with glitter, mother-of-pearl effect, bright markers, and gel pens are used. They should be distributed to children at the end of the practical work, when the drawing is ready and all that remains is to add additions to the character’s outfit.
Drawing techniques and techniques
In the senior group, children master and improve the following drawing techniques and techniques:
- Sketch. The teacher shows the stages of drawing on the board or explains the drawing diagram on a poster/sample. Preschoolers successively draw the details of the sketch in the air with a pencil and transfer them to paper.
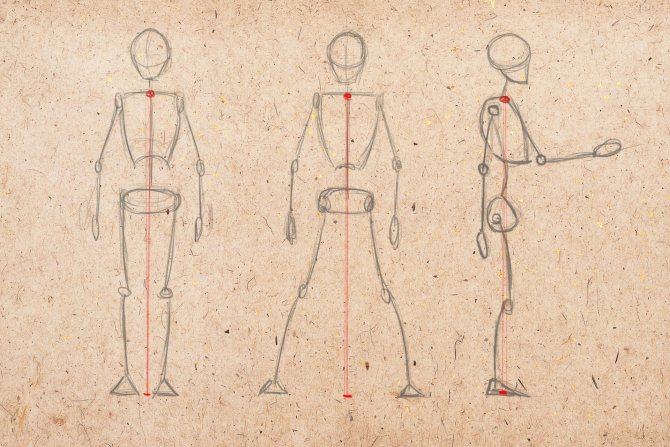
A simple diagram demonstrating how to draw a human figure should be in front of your eyes during class
- Drawing with colored pencils. The skill of coloring figures inside contours is consolidated and mastery of basic techniques is improved: shading with weak and strong pressure;
- outlining and detailing with intense pressure.
Shading with pencils takes longer than drawing with paints, so give children 1/2 of a landscape sheet as a base.
- Fill the background only with watercolors and a wide brush.
Paintings are bright and festive
Video: how to draw a girl
The video can be viewed at the beginning of the lesson and used as a step-by-step plan for drawing a girl. Please note that it is recommended to draw the human figure from top to bottom, that is, starting from the head.
Video: how to draw a little fairy in an elegant dress
Fairies are also girls, and their dresses are more than elegant! An unusual character will attract guys. The video tutorial is aimed at small artists. The only thing is that drawing a cloak using the proposed method (around the fairy figure) may cause difficulties for children 5–6 years old. We advise you to limit yourself to a dress and head decoration.
The “Girl in a Dress” activity is suitable for introducing children to non-traditional drawing techniques (or improving unusual techniques). Children's works produce original and even fantastic outfits. Many methods are suitable for depicting a dress or amazing patterns on it:
- wax crayons,
- finger paints,
- cotton swabs,
- stamps,
- by poking method,
- spray.
Photo gallery: examples of drawings made using non-traditional techniques
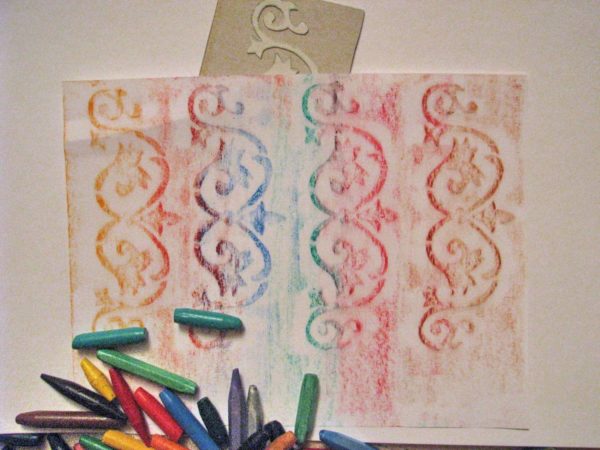
Using stencils and wax crayons, an even ornament is transferred to the dress
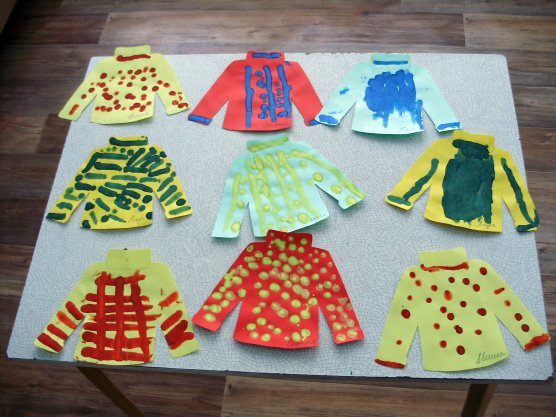
Use fingers and cotton swabs to draw various geometric patterns: dots, stripes, checkered patterns
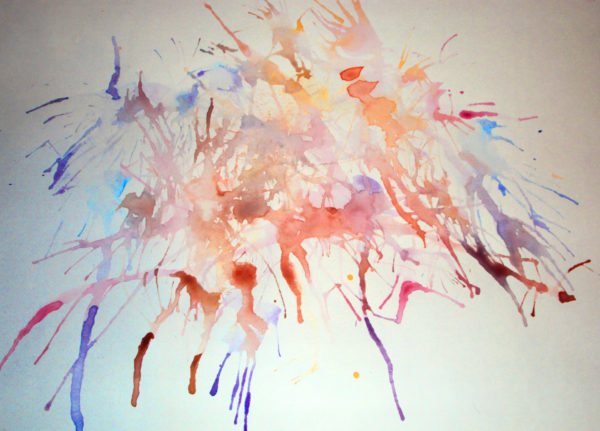
Droplets of watercolor blow up on the paper into fancy patterns. A dress can be decorated with finger paints, creating a polka dot pattern. Beautiful patterns spread out on a damp sheet of paper, like in the batik technique. Original dresses can be made from prints of children's handprints
Combination with other types of visual activities
Drawings on the theme “Girl in a smart dress” are organically complemented by plasticine elements and paper applique:
- as background objects (trees, flowers, clearing, house);
- as a decoration in a girl’s outfit (patterns, frills and ribbons on clothes, a headdress, hairpins).
Origami and plasticineography methods can be used to create a dress, and the girl herself can be drawn using classical techniques.
Folding a dress using the origami technique is a full-fledged task, not just an addition
An elegant dress for a girl can be made with appliqué from natural/waste material:
- scraps of fabric,
- dried flowers and leaves,
- flat multi-colored buttons,
- sequins, rhinestones
The dress can be made in the form of an applique of leaves or other natural materials
How to personalize tasks
An individual-personal approach to fine art classes is implemented by providing children with independence in creativity and adapting the requirements for some students.
Ways to differentiate tasks:
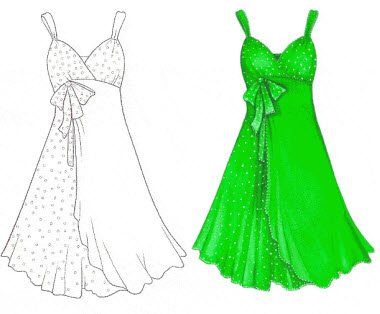
- Give the opportunity to choose a color palette for drawing.
- Determine the purpose of the lesson (draw a girl in an elegant dress) and show embodiment options: a baby in a sundress, a princess getting ready for a ball.
- Prepare a simplified task. For example, trace a girl’s stencil and draw an outfit yourself.
- For creatively gifted children, complicate the task: draw a background object, accessories for a girl, etc.
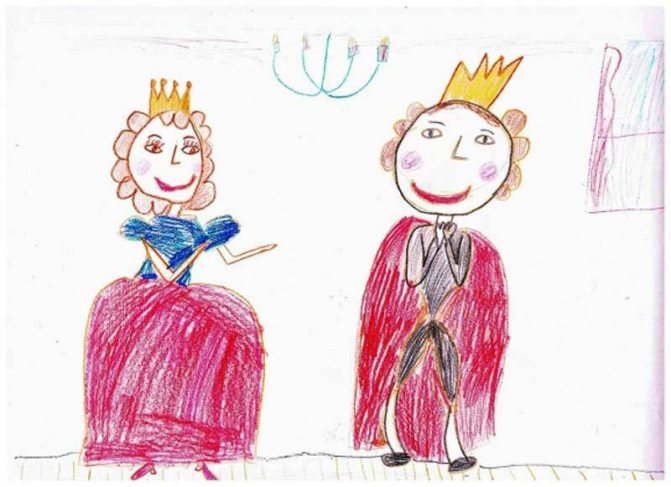
Creatively gifted children aged 5–6 years create their first narrative drawings
Place of the lesson “Girl in an elegant dress” in the card index of drawing topics
Drawing a girl in a dress is a broad topic. In this version, it is heard during a lesson on practicing the technique of mixing colors and shades: children select a palette for the character’s skin, hair, and clothes.
In narrow interpretations, the theme is repeated and developed throughout the school year:
- “The doll is going to visit” - learning the rules of etiquette.
- “When Mom was little” - making a postcard for March 8th.
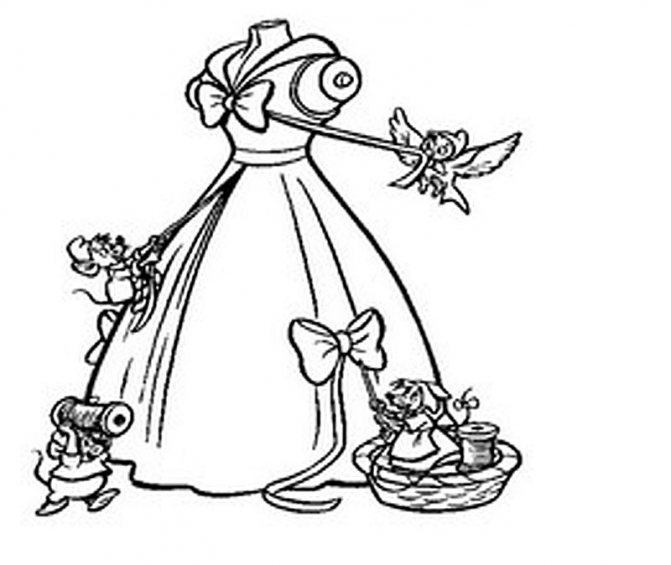
- “Cinderella at the Ball” is a repetition of the fairy tale about Cinderella.
- “Girl in a folk dress” is an introduction to national life and costume.
Transforming Cinderella's clothes from rags into a ball gown - one of the options for the drawing “Girl in a beautiful dress”
A collective composition on a topic is compiled on a common basis - a tinted sheet of whatman paper. Children's drawings are placed in accordance with the plan.
Examples of group work:
- "Festive round dance"
- "Masha doll's birthday"
- "Doll Tea Party"
- "Our girls and boys at the matinee"
- "Princesses at the Ball."
Children can cut out their drawings along the contour to attach them to a common sheet of whatman paper
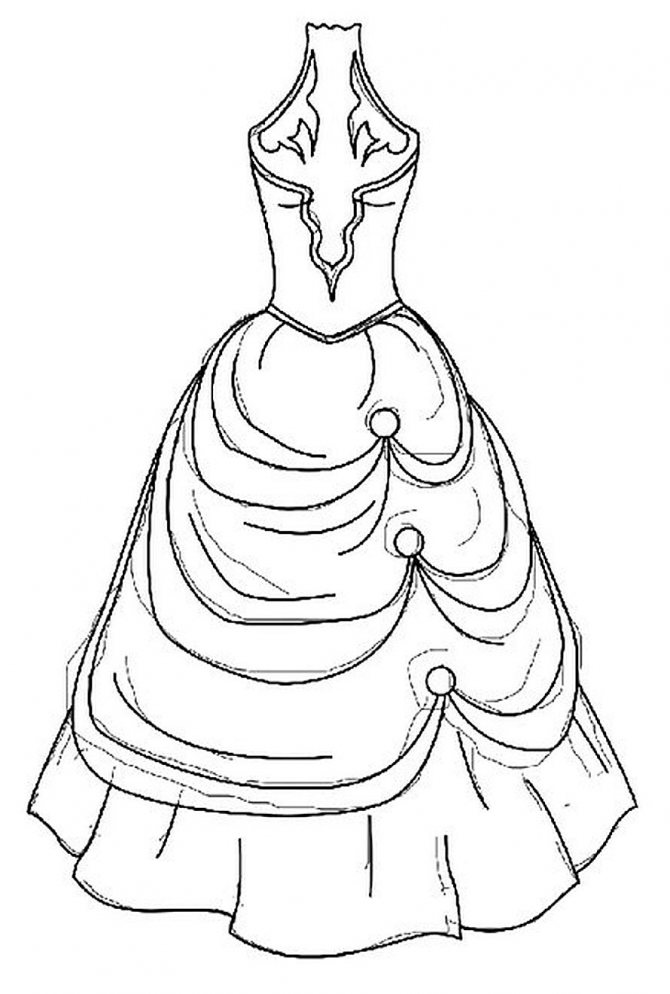
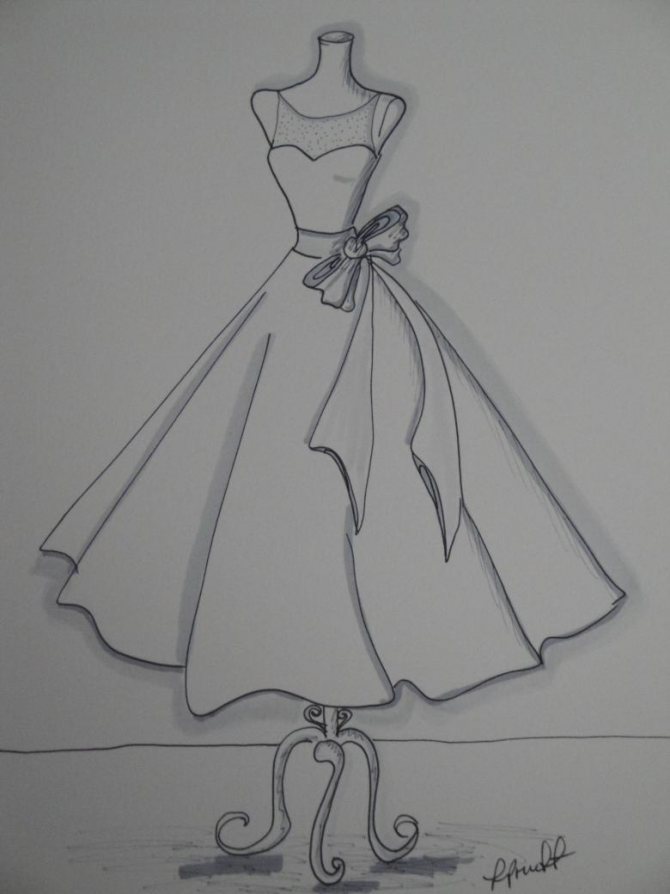
Learn to draw an evening dress
This master class is for beginners, so creating a dress is not particularly difficult.
Let's look at the stages of drawing an evening dress:
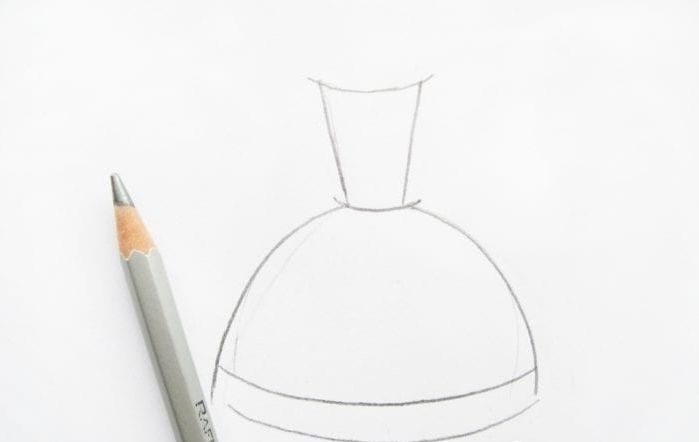
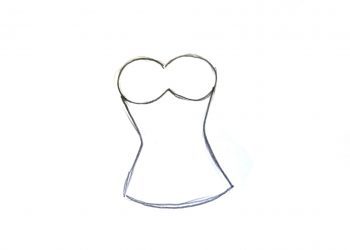
- It is worth starting from the image of the stamp for placing the outfit. We are talking about a hanger with a small thickening in the middle part. A pencil is used for the sketch, the contours are drawn with a pen. A hook is created in the middle.
- Straps and an elegant bodice are drawn on both sides for a beautiful figure. The back is indicated by curved lines.
- Create a waist. Two strokes are added, they taper closer to the belt line.
- An oval is drawn in the waist area to create a ballroom skirt in a shape similar to a bell.
- To highlight the beauty of the dress, you need to add a curved line. The inner side is marked and beautiful folds are drawn.
- The sketch is ready. You can paint over an evening outfit for a chic girl. At the final stage, it is allowed to add beads, belts and other decorative elements, depending on the author’s imagination.
Now it’s clear to us how easy it is to draw a chic evening dress with your child. This option will help you have a great time doing an interesting activity.
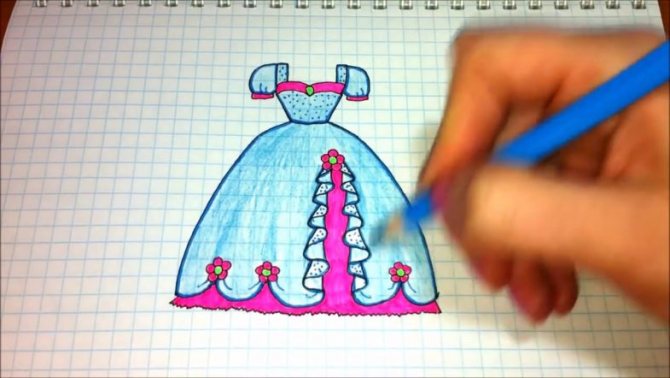
Let's learn to draw a dress for a doll
Many girls think about how to draw a dress for a doll with a pencil step by step? Sometimes they like to change the outfits of their artificial girlfriends.
Let's look at the drawing process step by step:
- Thanks to the oval, the upper part of the dress is created. Auxiliary lines are applied without pressure. In this case, it is not necessary to comply with all proportions.
- The use of a fantasy version is allowed.
- Two curved lines are drawn from the oval to create an elegant dress worthy of a princess.
- For the ballroom version, sleeves and harnesses are not needed. Therefore, the place of the chest immediately stands out. Below the neckline, a “tick” is added.
- Extra lines are removed.
- Decorative elements are added at personal discretion. This may be a bow, ribbons, butterflies, flowers.
- You can play with different colors to create a bright or discreet option; it all depends on the author’s imagination.
Now we know how to draw a dress easily based on different model options. The main thing is to prepare the conditions and calmly sort out this matter together with the girl.
Dress drawing lesson No. 3
The third instruction will help you study in detail how to draw an evening dress for a doll or a real person.
- Let's start with the simplest thing - the image of the base of the figure. Because it is very difficult to draw without maintaining certain proportions. Draw a vertical line and draw an oval on top, which means the upper part. Remember that all auxiliary lines must be drawn with a simple pencil without pressure.
- From the oval, draw two curved lines that will give the shape of a fashionable princess dress.
- Our ball gown will be without sleeves and straps, so let's start marking the chest. In the upper part, just below the neckline line, two curved strokes should be drawn, reminiscent of a “daw”.
- The next step will be to remove unnecessary lines using an eraser (vertical line and part of the oval).
- The design of the skirt depends entirely on the preferences of the creator. Add monograms at the bottom of the skirt. To do this, draw smooth curves and twisting lines.
- If desired, you can decorate the dress with a small bow on the side along the waistline. Draw an oval in the middle and draw two lines crosswise. Then add some folds. A bow will come in handy.
- In this case, there are no traditional options and rules for choosing colors. Each dress can be a different color. For example, pink or yellow. Play with colors.
Thus, after reading our step-by-step lessons, you can once again be convinced that even a child can complete every step of drawing a dress. We hope that the recommendations and advice will help you in the future. Have fun creating!
Photos of dress drawings
0