Article “Creating a library in kindergarten” (work experience). Author: Mavlyutva Ilseyar Nazylovna
Work experience “Creating a library in kindergarten”
Description of work experience in creating a library in a preschool educational institution.
All over the world, interest in traditional books is gradually fading. Printed publications, unfortunately, are fading into the background, giving way to so-called devices for reading electronic books. To read this or that work, today it is not necessary to run to the library - the book you are interested in is easy to find on the Internet. Technology (audio, video, computer) that produces ready-made images and influences people in a special way has weakened interest in the book and the desire to work with it. We are already beginning to reap the fruits of this today: a low level of development of speech, imagination, perception, communication skills, and moral principles in general. The axiom in this problem is that we have no power, and we do not have the right, to deprive the child of everything that progress has brought. Just as we have no right not to notice and deny everything that the electronic world conceals within itself. How to help your child fall in love with a book so that he becomes captive of it for life?
The tasks of teachers and parents are to help children choose the right sources of information, to increase the prestige of reading and the status of a “reading person” among the younger generation; we must help them discover the wonderful world of reading, book wonders and mysteries. It is necessary to structure the work in such a way that the book is present in various areas of the child’s activity, so that children have the opportunity to communicate with books every day and develop their literary interests.
While studying scientific, methodological and practical literature, our attention was drawn to the first publications of a non-standard method of introducing preschoolers to literature, the experience of some kindergartens in creating children's libraries. This method also interested the staff of our kindergarten.
In order to support and develop reading, the teachers of our kindergarten decided to make a feasible contribution to the introduction to books, to the formation of a literate and thoughtful reader, and together in October 2022, a library was created on the basis of a preschool educational institution - a new and rather more experimental direction of our activity. Over the course of two years, the library was modified, replenished and expanded; of course, there were difficulties in organizing events and visiting them due to the combination of the premises with the work of an educational psychologist. But now there are these difficulties and the premises belong only to the organization of library work.
Tasks when creating a library:
- awareness of the value of reading as an effective means of education and upbringing of children
— acquaintance with the works of domestic and foreign poets and writers
— introduction of modern technologies that promote the development of thinking, creative and communication abilities of preschoolers
— to introduce children and parents to book culture, to educate literate readers
— improve the speech culture of teachers, parents and children.
— develop children’s speech through activities within the library’s activities
- cultivate love and respect for the book.
We invite you to take a look at our preschool library
Today, the preschool library is not just a few shelves or bookcases in the corner of the teaching room. This is a separate room equipped with bookshelves and catalogues, alphabetical and thematic headings, computer equipment (projector, laptop, Internet access). In addition to the book collection, material has been developed in electronic form: presentations, a catalog of cartoons.
The operating procedure of the library is regulated by the local document of the kindergarten:
— Regulations on the library of a preschool institution, as well as regulatory documents: — library work plan, — rules for using the library, — operating hours.
The book fund is still small, however, we have created the atmosphere of a real library, where books for children and adults are distributed by genre, subject, format. Each group has its own “reader’s form”, in which the book’s output and return date are recorded, and the teacher ( or a parent) signs for the book taken. This is an important detail: this is how children feel responsible and learn to treat the book with care.
Of course, the foundation does not have all the necessary books. Especially books that would help teachers carry out the educational process according to the educational program of a preschool institution. To replenish the book fund, we attract families of students.
The book fund was actively replenished by the kindergarten staff. Literature was also purchased through extrabudgetary funds. The result was a collection of about 500 books.
— What associations does the word “library” evoke in you? The library in our kindergarten is not just a room for storing books. The library is freedom. Freedom to read, freedom to communicate, this is education, this is leisure, refuge, access to information.
Therefore, we have the opportunity to use a wide variety of forms and methods of work in the library:
— thematic weeks;
- conversations;
— book exhibitions and thematic exhibitions of drawings and crafts;
— reading competitions;
— literary games and holidays;
- excursions;
— viewing filmstrips, cartoons, presentations;
- stock
-joint activities with adults: both teachers and parents.
Children are the main owners of libraries
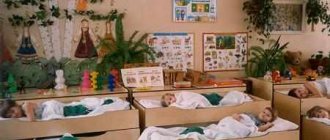
In children's libraries, of course, the main visitors are children. Their time within the walls of this institution can be turned into an interesting and spectacular event. Some libraries organize small improvised theatrical stages with weekly screenings of short tales, plays, or presentations of new products and arrivals that are the most interesting and necessary.
How to design a children's corner in the library? There is no general order, and this is perhaps a plus, because there is room for imagination and creativity. However, most often they organize a corner for emotional and rational reading. The emotional zone includes the most interesting books; the child can immediately read and choose a book for home reading. The rational reading corner cannot do without publications included in the school curriculum; these also include additional literature for in-depth study of school subjects.
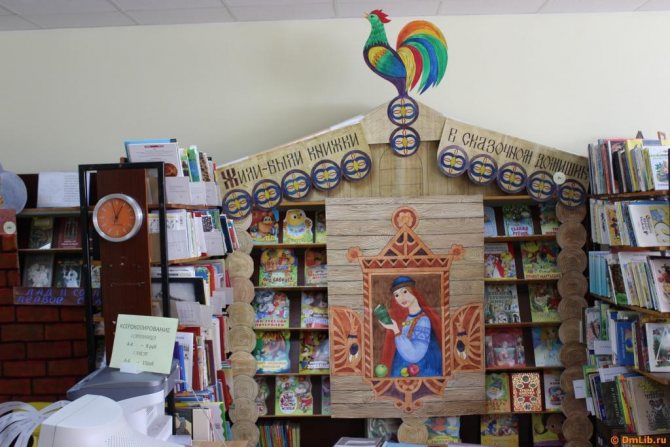
In the photo you see an option on how to arrange a children's corner in a children's library.
At home
A house is an ideal option for creating a photo zone, because the design is unique, and the photo shoot is not accompanied by stress, because you are in a comfortable environment. And even if the apartment is not very large, there are many ideas for photo zones.
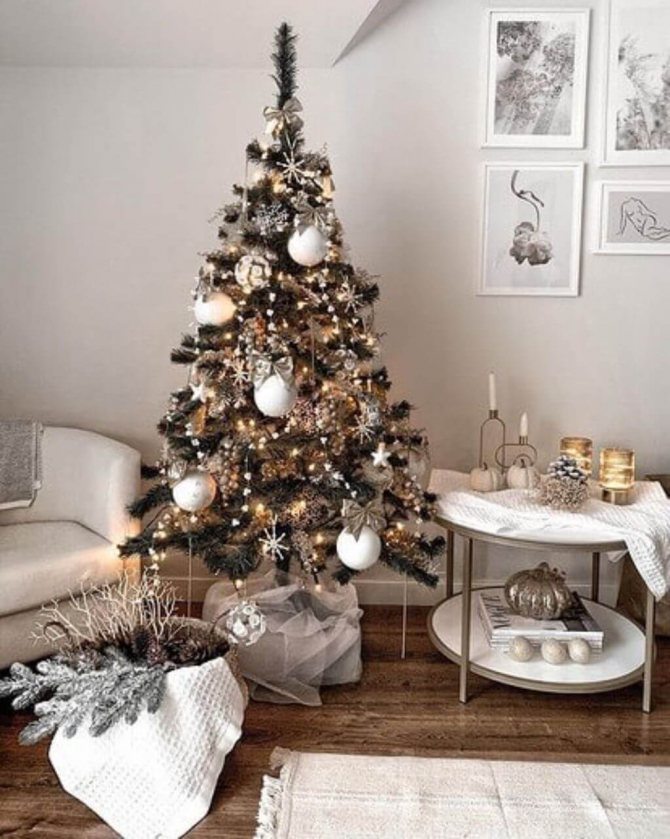
Idea No. 1. With a Christmas tree
Of course, most often the Christmas tree is in the living room. It doesn't matter at all whether you have a natural or artificial tree. It’s much better to think about its design. In the Scandinavian style, they call for minimalist decorations, and sometimes even abandon toys altogether, decorating the tree only with a garland.
But the traditional option is, of course, the maximum variety. In order not to spend money on balls, you can decorate the tree only from the front and leave the back side empty.
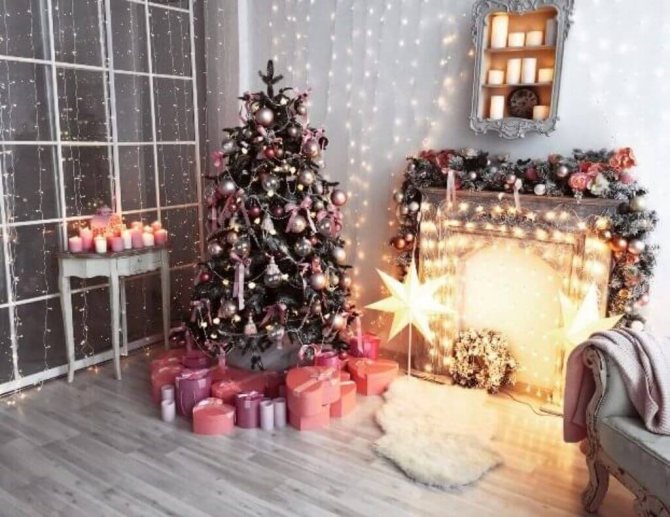
A very important point is the design of the stand for the Christmas tree or trunk. It's time to stop wrapping them with cotton wool or cloth, because it doesn't look like snow at all, and also collects dust and spruce thorns. You can buy them as ready-made decorations or simply make them as fake gifts. Wrap regular cardboard boxes in gift paper and decorate with a bow - the props for the photo zone are ready!

A relaxation group is usually organized near the Christmas tree - armchairs or chairs on which you can sit and get a beautiful shot. If the family is large, then a small sofa or an elegant carpet on which the family can sit will come in handy.
It’s worth finishing off the design of the photo zone at home with small decor. You can buy it in addition or make it yourself, for example, snowflakes or garlands. You can purchase additional candlesticks, figurines and textiles in the form of blankets and pillows.
Idea No. 2. With fireplace
This option is suitable for a private house with a fireplace, and for decorative use in an apartment. You can put a Christmas tree next to the fireplace - this will make the photo zone more interesting, but this is not always safe. There is also an advantage to having a separate fireplace design - there are many more options.
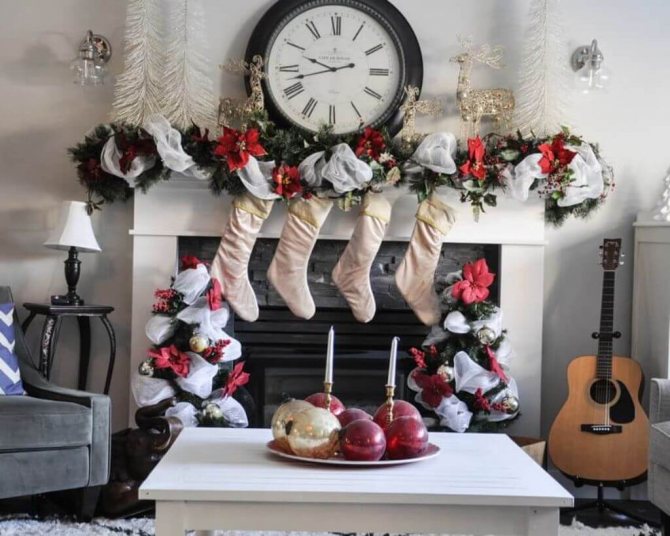
What is the main thing in decorating a fireplace in a photo zone? Garland! Ideally, it will imitate spruce, thuja or other conifers. It can be supplemented with toys, candles, paper figures or flowers. The latest trend is red socks for gifts.
In the office
The office probably has some of the strictest requirements for photo zones—bad taste will not be tolerated at work.
Idea No. 1. With corporate banner
A distinctive feature of such decor can be a banner with the company logo in the background - there can never be too much advertising. A Christmas tree is placed nearby, and decorations are selected in the corporate colors of the company. The photo zone for the corporate event is ready!

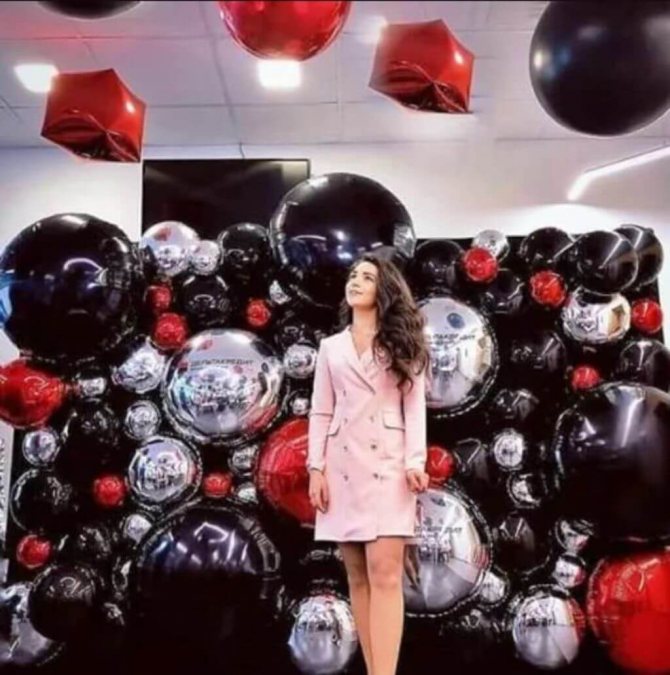
Idea No. 2. With foil balloons
These balls look very stylish and expensive - ideal for the office. You can get by with classic options like silver, gold or red, or use the company’s corporate colors.
The balls are simply attached to the wall in a dense layer, as if creating a wall.
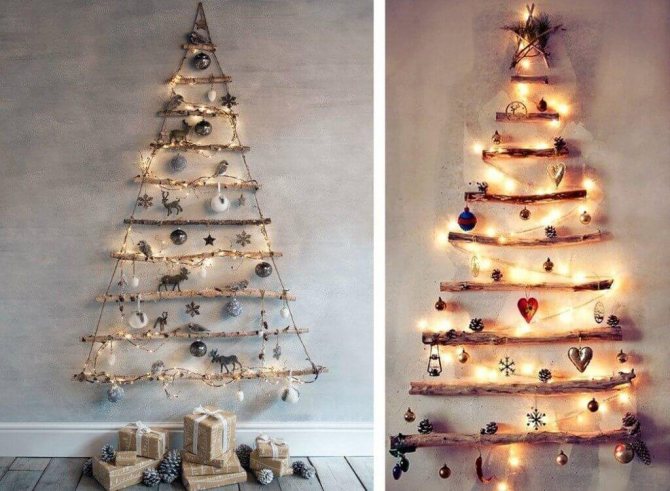
Idea No. 3. With a Christmas tree on the wall
If the office is small and there is not enough space for a real Christmas tree, then you can depict it on the wall and take pictures next to it. The main thing is to depict the silhouette of a Christmas tree, and how to do this is a matter of imagination: you can use tinsel, balls, a garland or even tree branches!
On the street
When outdoors in winter, it is important to take into account weather conditions and select suitable materials. For example, homemade paper snowflakes can quickly freeze or get wet in the rain - you won’t get beautiful photos. It is better to choose accessories made of plastic, rubber, wood, stone or glass.
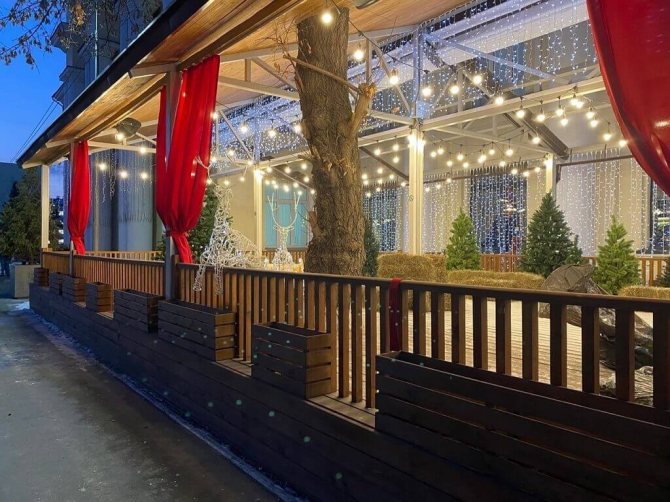
Idea No. 1. With home
Of course, ideally this should be a veranda or courtyard of a private house or cottage. Then you’ll be able to set up a table, a chair and conduct a New Year’s photo shoot with thermoses filled with tea or mulled wine. Just imagine how beautiful a pair of mugs will look in a photo!
Such a place does not need any special decoration, but you can always add a garland with light bulbs, branches, and a warm blanket.
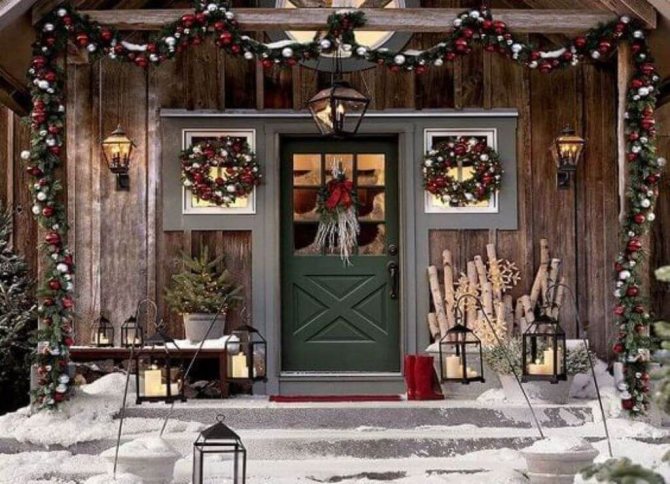
You can decorate the entrance to the house itself. In addition to standard tinsel, there may be more interesting options - skates, sleds and some vintage items from childhood.
Idea No. 2. With a Christmas tree
The street has one advantage - a live spruce tree that doesn’t even need to be cut down! You need to prepare a little in advance, decorate the tree with a garland and wait for the snow. After turning on the garland's lanterns, the snow will be illuminated, and the photo will turn out magical. But it is also important to monitor the weather forecast so that the garland does not get wet in the rain and a short circuit does not occur.

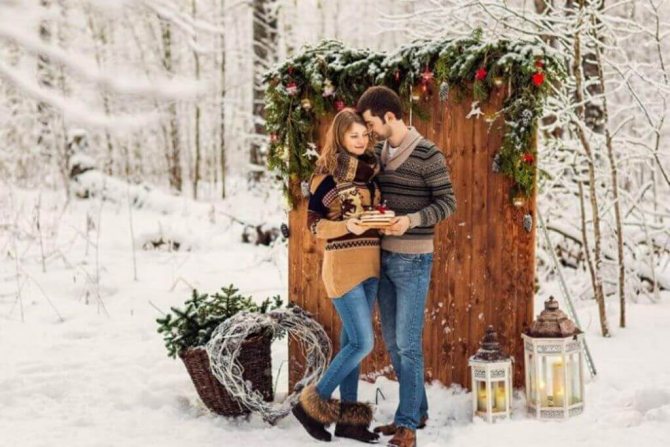
Idea No. 3. With the rain
If there is no suitable spruce tree, then you can find two trees or pillars that stand at a distance of 1-2 meters from each other and string rain or the same garland between them - an excellent photo backdrop is ready!
Idea No. 4. With a snowman
If you want to remember your childhood, then the best thing that can happen for the New Year is making a snowman. If you decorate it properly with carrots, a scarf and a hat, the photos will turn out amazing. You can also build Father Frost himself, the Snow Maiden and place fake gifts next to them.

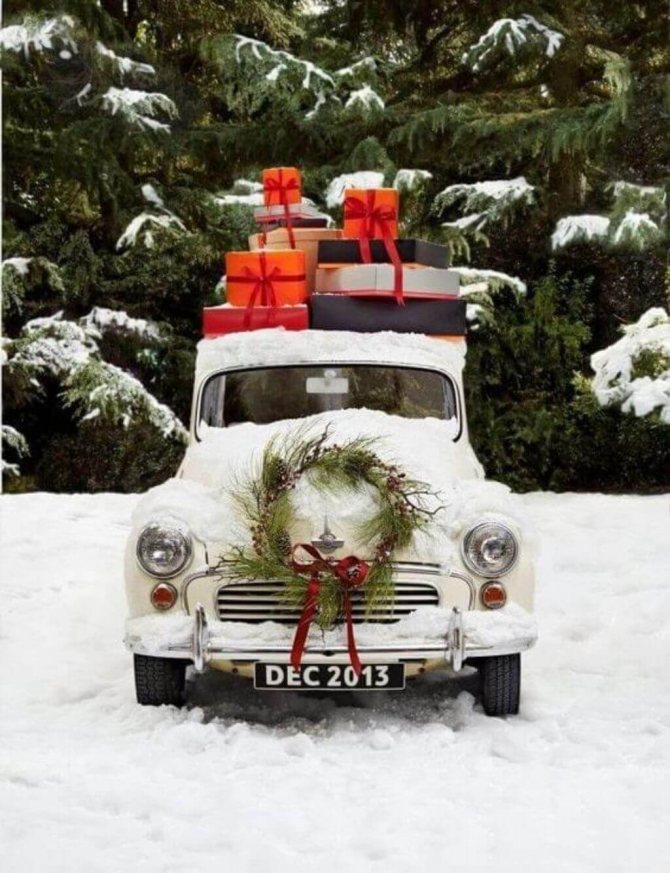
Idea No. 5. With a retro car
Of course, not everyone can implement this idea, but just imagine how beautiful a car decorated with colorful gifts and a New Year’s wreath will look! You can also carefully throw snow on top if the weather is not cooperating. No one can resist a photo in such surroundings!
DIY additions to photo zones
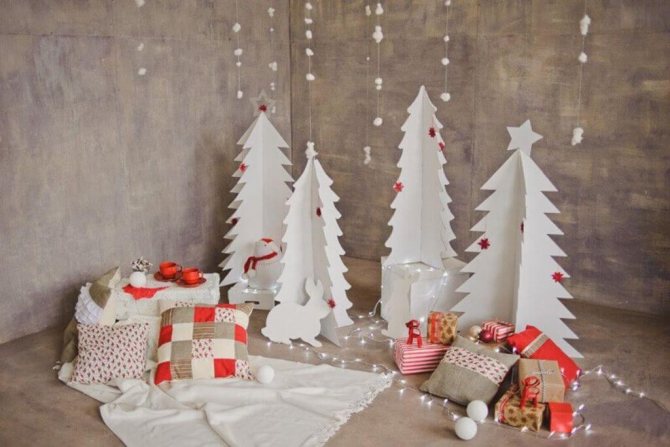
Christmas trees
Homemade Christmas trees are an excellent and budget option for decorating any photo zone. It is best to cut them out of cardboard to make them more stable; then you can paint them with gouache, spray paint, or simply cover them with colored paper. White, silver, golden and green Christmas trees look best.
Candles
The candles themselves can be taken from the store, but if you wrap them in cinnamon sticks and tie them with ribbon, you will get a very beautiful accessory with a pleasant aroma. A great option to decorate a coffee table or fireplace in a photo zone.

Homemade garlands
On New Year's Eve, stores even start selling fir cones, which can be easily and freely collected in the forest! If you collect enough of them (20+ pieces), you can make a homemade garland. To do this, just tie the cones with woolen thread. To make the decor more wintry, you can apply white paint to the petals to imitate snow. Look at this fireplace decoration in the photo!

https://corpdecor.ru/wp-content/uploads/2016/11/ukrasit_dom_5.jpg
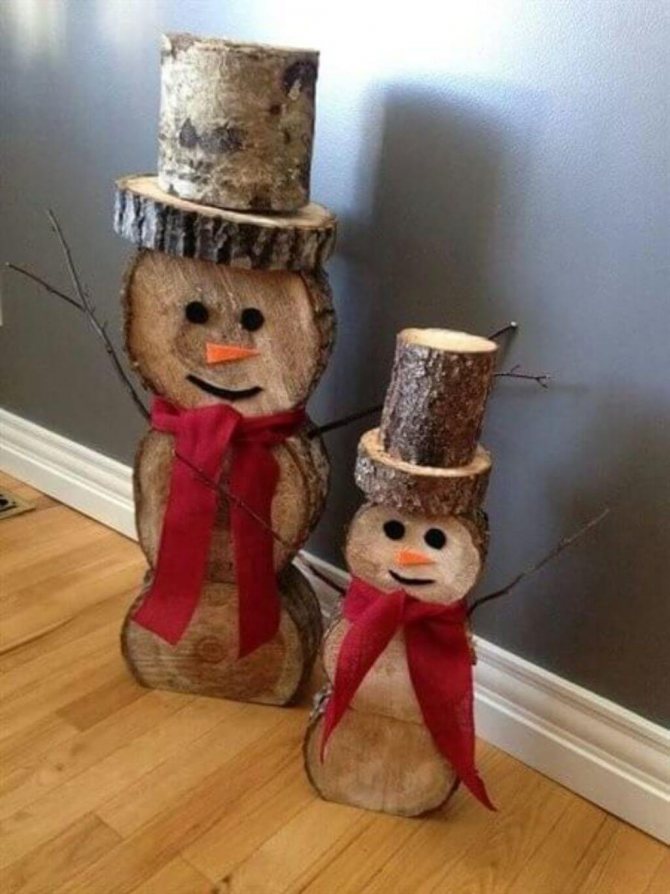
Snowmen
If you can’t do without one of the symbols of the New Year - a snowman, then you need to make it original! For example, made of wood! And then, according to the classics, decorate it with a scarf, eyes and an orange nose.
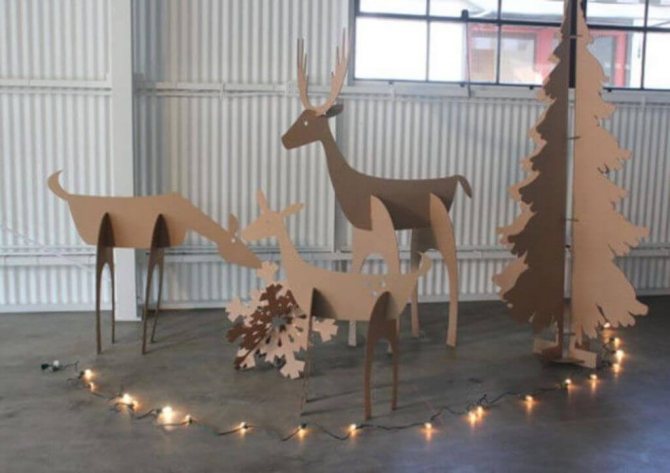
Deer
You can cut out large deer, a Christmas tree or snowflakes from cardboard. All that remains is to paint them with paint, sparkles, and decorate them with tinsel - the New Year's decor is ready!
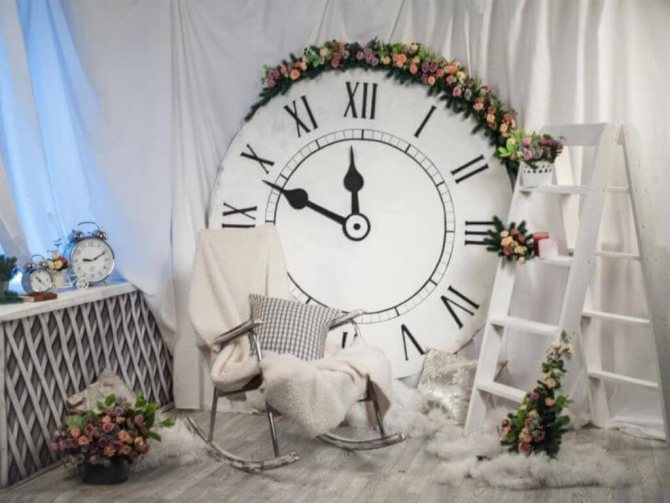
Watch
We invite you to make a large New Year's watch that will look expensive and unusual in any photo zone. Moreover, they are easy to make!
- Cut a round base for the clock from a piece of foam plastic.
- Cover it with fabric and secure it with tape at the back.
- Make a sketch with a simple pencil, draw Roman numerals and arrows.
- Outline with black and red in several layers.
- Decorate with tinsel and other New Year's paraphernalia.
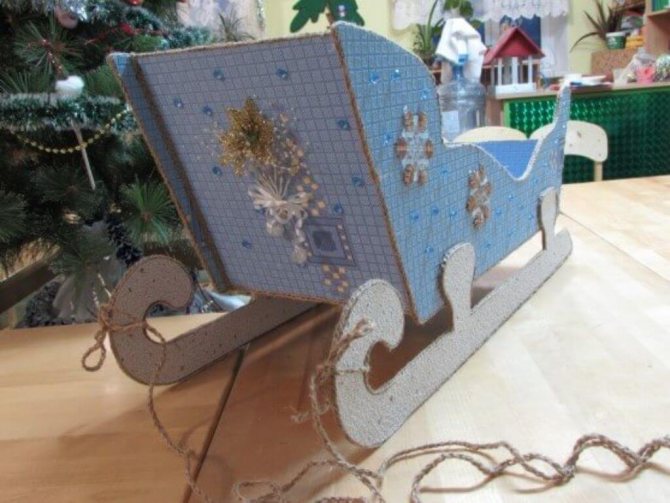
Cardboard sleigh
It is not advisable to put a child in such a sleigh, but they will be an excellent accessory for a photo zone. You will need cardboard and a little time.
- Cut out blanks from cardboard with a stationery knife.
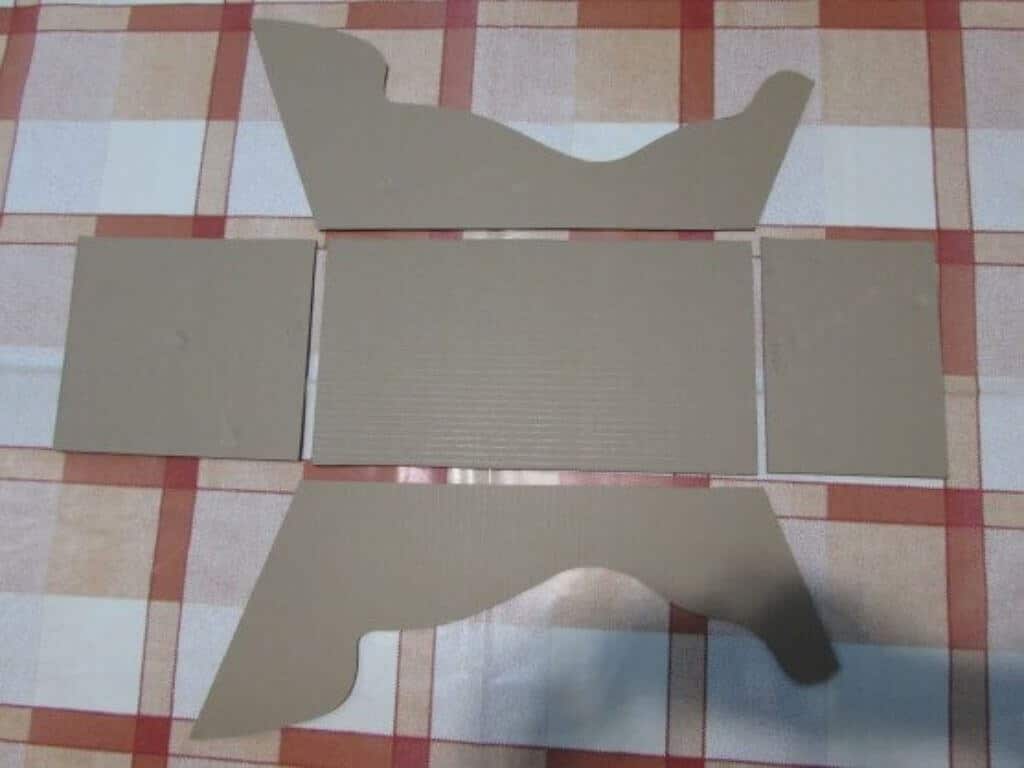
- Paint or cover with paper on both sides.
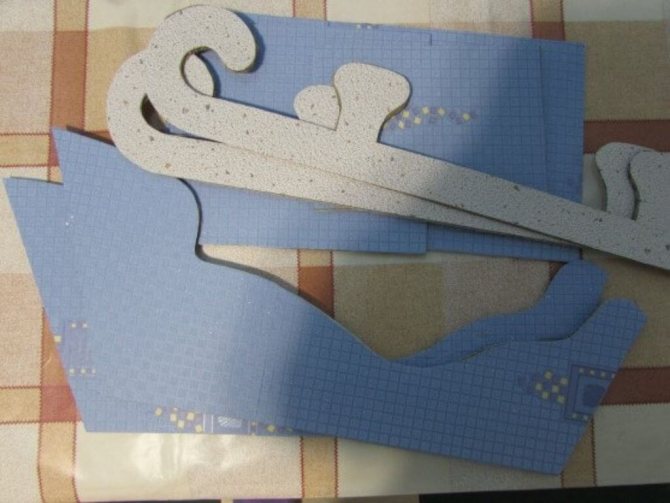
- Using glue we assemble into one whole.
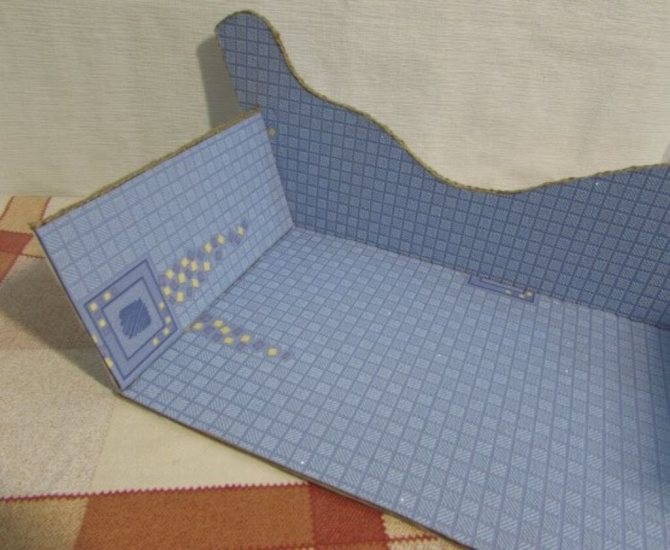
- Unsightly joints can be sealed with regular twine or painted over. Next we decorate the sled.
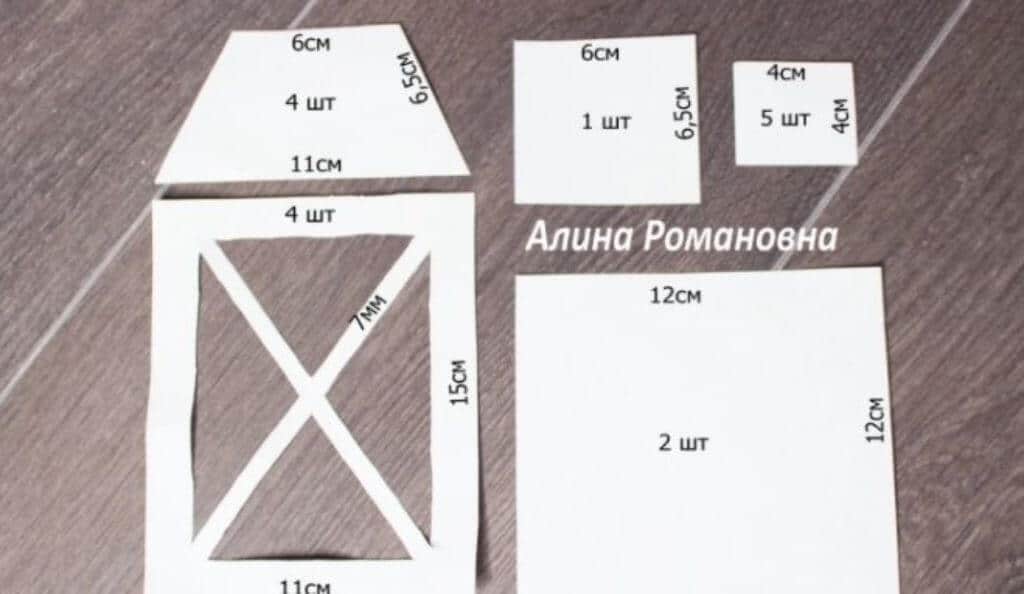
Flashlight
A New Year's lantern can be made from either paper or wood. But the first option is a little unsafe, and the second is labor-intensive. We offer you an alternative - ceiling tiles.
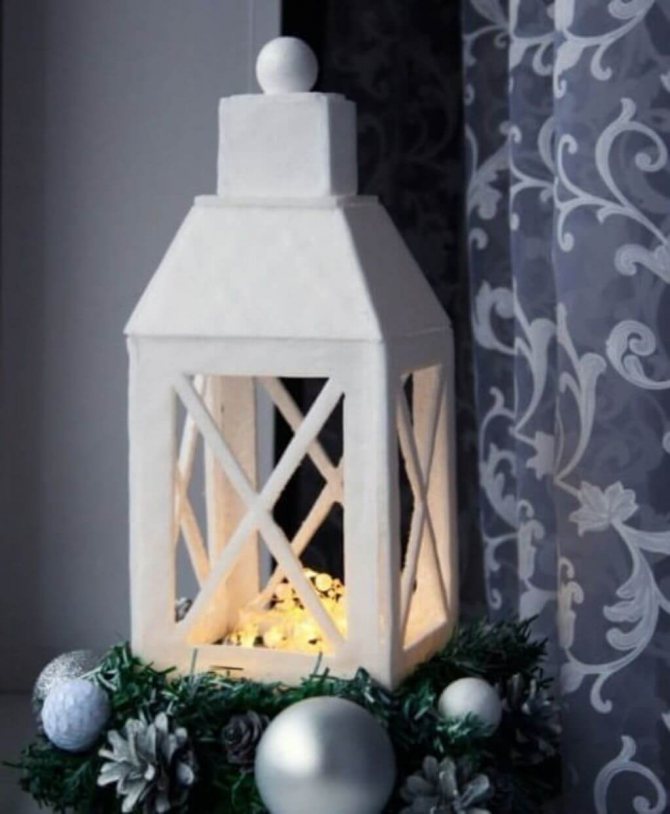
They are easy to work with with a regular knife, they do not heat up and are easy to cut. All that remains is to cut the parts and then glue them together.
Hint: do not glue the lid to the main part so that the filling can be changed.
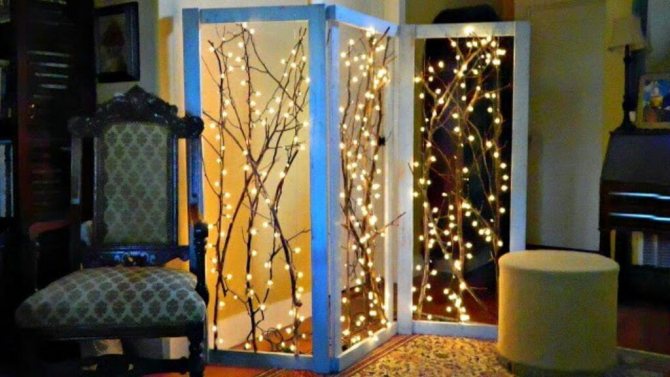
Screen
A screen is not the most common New Year’s attribute, but it can look great in a photo zone. We suggest making an original version from illuminated branches.
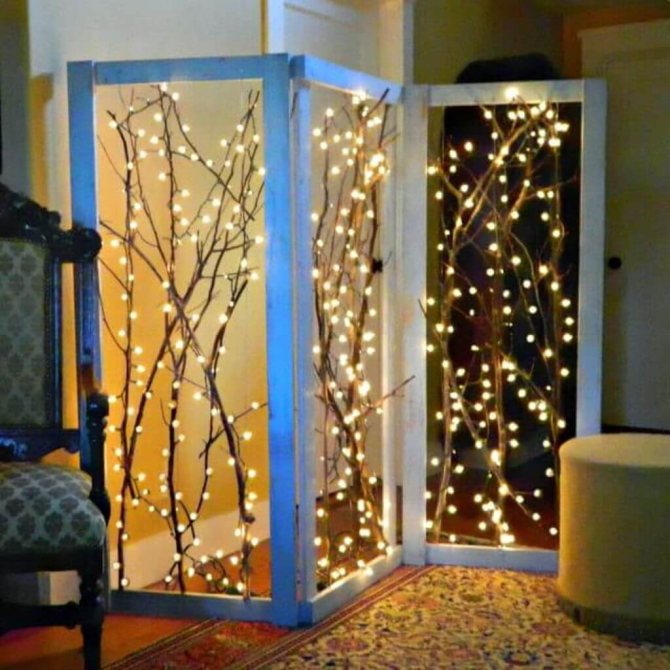
For this you will need bars, screws, a drill, wire, wire cutters, garlands and the branches themselves.
- First we assemble the frames from the boards.
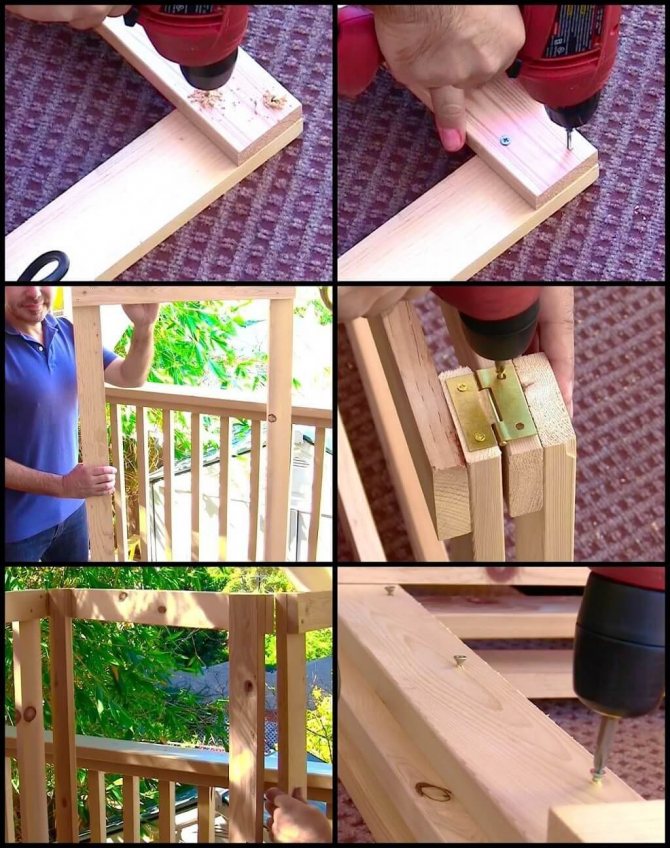
- Then, using butterfly loops, we connect the three frames
- We screw screws into the upper and lower beams, and then we wind wire around them, which will hold the branches.
- We fasten the branches and garland to the wire with ties, tape or the same wire.
- Enjoy!
Arch
An arch will instantly decorate your photo zone, but making it is quite problematic. Therefore, we suggest taking the path of least resistance and buying a ready-made arch at any hardware store, and then simply decorate it.
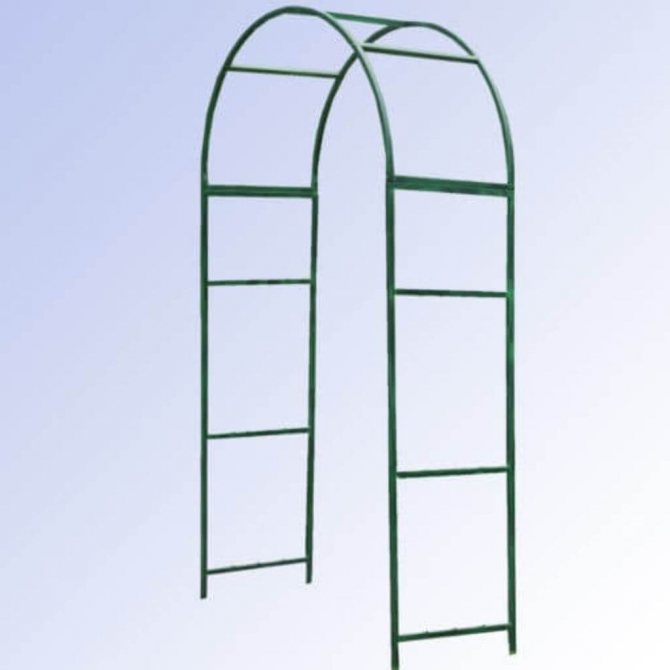
For decoration, you can use tinsel (best of all, one that imitates spruce branches), balls and, of course, an electric garland. The result is this beauty that can be placed anywhere in the apartment and moved without problems - the main thing is to wrap the legs with cotton wool so that they do not scratch the floor covering.

Ball
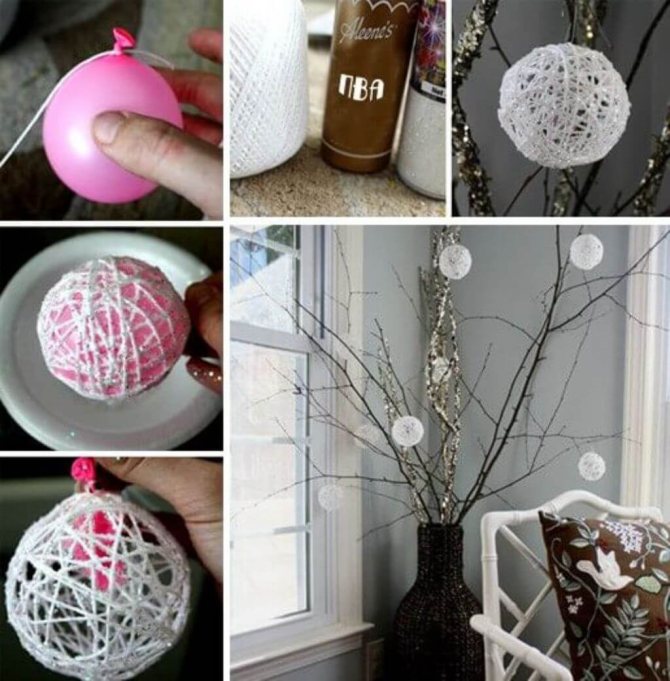
Homemade balls are a great way to spend the evening and create a New Year's mood, so we choose a not very complicated but effective option - balls made from threads. It is better to take a white thread, so the ball will look like a molded snowball.
- Inflate a small balloon.
- We wrap it with white thread and carefully lubricate it with PVA glue.
- We leave it to dry, and then pop this ball with a needle and take it out through one of the holes.
Lifehack! To make the ball look more chic, after applying the glue you can sprinkle it with glitter. It turns out to be an inexpensive handmade option.