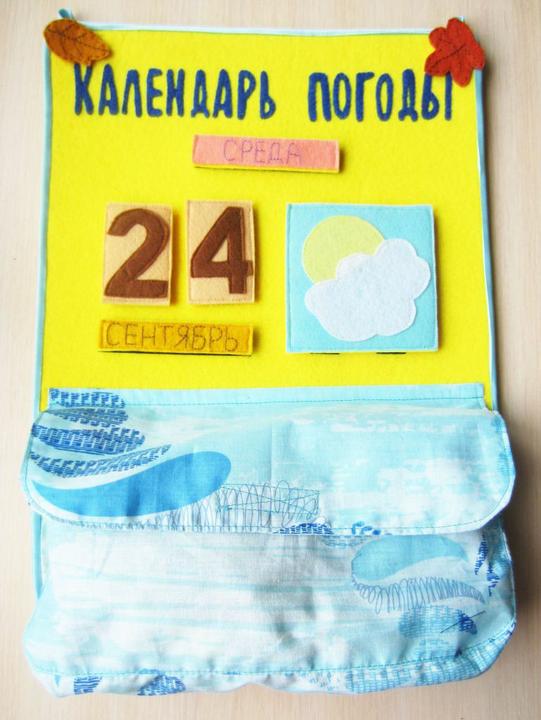
An educational panel will help in a playful way to introduce a child to the seasons, numbers, days of the week, months, and also to learn concepts such as “today,” “tomorrow,” “yesterday,” “more” and “less.” Filling out a children's weather calendar every day promotes the development of speech, visual perception of letters and numbers, and if the parts are made of multi-colored felt, it will help to learn colors and shades. All parts of the educational panel for children are removable; as the child grows up, new elements can be added. In addition, a useful educational panel “children's weather calendar” is easy to make with your own hands.
Design of the “Nature Calendar” corner for all age groups
Alsou Salakhova
Design of the “Nature Calendar” corner for all age groups
Presentation on the correct design of the “ Nature Calendar ”
for
all age groups
To capture changing natural objects, various types of graphic models can be developed. In the pedagogical interpretation, these are calendars of observations of natural . Their main content is acquaintance with birds and other changing seasonal phenomena of nature , the growth and development of living beings. Keeping a calendar gives children the opportunity to get acquainted with wintering birds and track the dynamics of changes in autumn-spring bird migrations. As the practice of preschool education shows, understanding the patterns of seasonal changes is associated with a number of difficulties. This applies primarily not to the assimilation of the characteristic features of the seasons, but to the understanding of the process of gradual growth of these features and qualitative changes during the transition from one season to another. The absence of a sharp visible boundary between the seasons gives children a misleading idea of the constancy of the environment. At the end of autumn, for example, children forget that at the beginning it was warm, there were a lot of flowers and greenery. Children without the help of an adult do not grasp the logic of natural changes.
I will present you with calendars for the junior , middle, senior and preparatory groups .
For the second junior and middle groups , this is a set of pictures for each season, which depict the main weather phenomena in accordance with the program. Kids need to learn to highlight the sun, clouds, rain, etc. The same tree should be drawn in a number of pictures (for example, a birch)
in different conditions: in calm and windy weather, in rainy and sunny weather, with green leaves, with yellow leaves during leaf fall, without leaves.
There should also be a flat cardboard doll with a set of paper clothes for all seasons. With the help of pictures, children consolidate ideas about natural obtained during observations.
The doll helps determine the degree of heat or cold and introduces a playful element into the children’s activities. The methodology of working with children corresponds to age characteristics . With kids, the teacher observes each phenomenon separately (for example, only rainy weather or only leaf fall)
.
With children of the middle group , it is already possible to simultaneously observe two or three phenomena (windy and rainy weather or the coloring of leaves on bushes and trees and their falling off when there is a gust of wind).
When getting ready for a walk on Monday, the teacher shows the children a doll, tells her name, says that she came to visit the children and wants to see how they dress. After the walk, the doll waits for the kids to undress - she can’t wait to find out what they saw on the site. The teacher invites the children to name what they noticed during observations (sun, rain, etc.)
.
“Now we will show you a picture
,” says the teacher, turning to the doll, and takes out a box with a set of cards depicting various
natural . He shows a card that doesn’t show what the guys saw on their walk. “Children, you and I looked at the sun. Is this the sun? “No, these are clouds, let’s find another picture where the sun is drawn.” Children find the desired picture, show it to the doll and place it on a stand (like a book stand)
.
“You probably want to go for a walk too? - the teacher addresses the doll. - Take a walk here (puts it near the card)
.
The sun will shine on you. You just need to get dressed. It’s warm today, the guys wore light blouses during the walk. You put on a blouse too.” The teacher finds a paper blouse, puts it on the doll and says that Natasha (the doll’s name)
is now also walking.
Daily observations using cards and dolls during the first week will help children of the second younger group begin to become familiar with the variety of natural phenomena . In rainy weather, when the children do not go for a walk, the teacher makes observations from the window. The children are interested: everything around is wet, shiny, raindrops are crawling on the glass. The teacher draws attention to the fact that the children do not walk on the street, only adults go about their business - they are wearing raincoats, some have umbrellas. The doll appears in such weather. The children find a card depicting rain and let Natasha go for a walk, putting a raincoat on her or urgently making an umbrella.
In the middle group the same principle of working with the calendar , but four-year-old children are already observing the weather more thoroughly, noting its characteristic signs (for example, the wind appears and then subsides; a cloud rolls in, it rains, then the sun shines again). In this case, two or three pictures are displayed (birch in a calm state, birch in a gust of wind - leaf fall, etc.). The doll may be the same, but she should have a new set of clothes (she grew up - they bought her new clothes)
.
Thus, working with a set of pictures and a doll in the second junior and middle groups helps children develop clear ideas about seasonal natural and teaches them to record observations with the power of ready-made image-pictures. Through play, preschoolers are taught the ability to determine the degree of heat and cold. All this is the basis for maintaining a nature calendar in older preschool age .
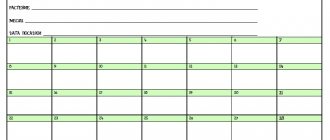
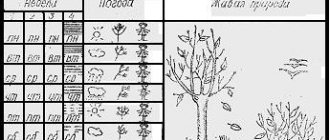
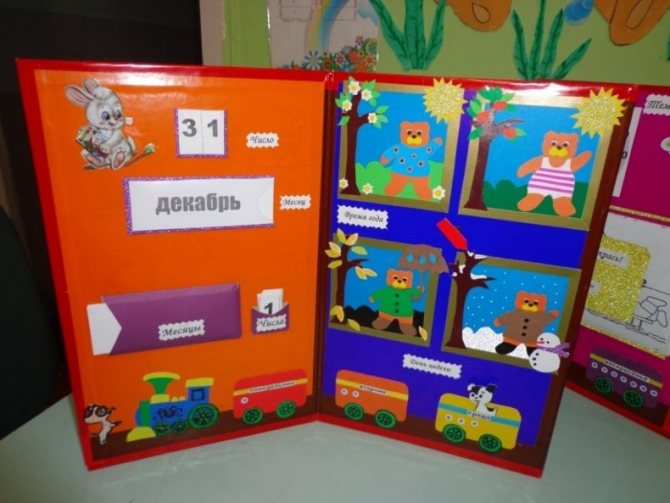
The nature calendar for senior , preparatory to school groups consists of three columns: 1) time; 2) inanimate nature (weather)
;
3) living nature (flora and fauna, human labor. In the calendar of children of the sixth year of life, the first column is represented by one week, in the calendar of children of the seventh year of life - four (the cells of the second week are filled in, the rest are empty)
. This is important for the formation in children, going to school, distinct temporary ideas: when discussing the completed
calendar, he sees that there are four weeks in September, and observations of seasonal natural were carried out during one (second)
week. Later, when filling out
the calendar , they will understand the temporal length of the season: three months , each of which consists of four weeks, each of which in turn consists of seven days.
Every day after the walk, the children paint the cell corresponding to the given day and put down icons indicating the weather. At the end of the week (on Thursday or Friday, after observing the vegetation and the animal world, preschoolers draw a picture of wildlife .
When maintaining a calendar, you need to pay attention to the following points: it must be filled out by children in a timely manner under the guidance of the teacher; conventional icons are schematized drawings of phenomena that children observe. Special stencils made by the teacher from thick transparent film or cardboard will help you calendar cells neatly and beautifully This is especially important in the early stages in the older group , when children are just getting acquainted with this type of calendar . Drawing with stencils is interesting for preschoolers and neutralizes the difference in their visual skills.
To develop the ability to fill out a calendar , i.e., record the results of your observations, as well as the ability to read them (talk about observations on the calendar ), it is important that the symbols are simple and understandable to children. The following symbols are most suitable: days of the week - in different colors, weather - with naturalistic icons (for example, wind - a tree leaning to the side, snow - a graphic image of snowflakes, etc.) Particular attention should be paid to the graphic image of the degree of heat and cold: this is a schematic figure of a child, dressed differently, in shorts , dress, in a coat (jacket, fur coat. Preschoolers understand such icons, since they correspond to their clothes during a walk. If it is difficult for children to depict birds so that they differ by species, the drawing can be replaced with a “tick”
of one color or another, for example, a sparrow is a brown
tick
, a dove is blue, a tit is yellow, a bullfinch is red, etc.
The experience of introducing calendars into the practice of kindergartens has shown: the use of this type of modeling has an intense impact on the development of visual-figurative thinking. Working with the calendar at all stages (filling out, summing up, repeated examinations, comparing similar phenomena) enriches children’s specific ideas, forms a special type of ideas that reflects the process of changing natural in unity with the time parameter. However, the formation of this type of representation is possible only with regular, time-ordered recording of observations. The model thus serves as a means of developing unified spatiotemporal concepts. In addition, when discussing the results of observations, children are forced to compare the phenomena recorded on the pages of the calendar , trace the nature of changes, the relationship of individual components; Thus, they learn to detect temporary and causal relationships and establish the simplest patterns. Thus, logical thinking develops, and with it, speech inextricably develops. What is meant here is a special, so-called collective form of speech - a conversation between a teacher and a group , when statements are mutually complemented, when the content of the conversation, unified in meaning and complete in form, is created. It should be noted that the calendar is the subject of a logically structured discussion, which contributes to the development of skills to reason, analyze, compare events, and then reflects them in speech (conclusions, generalizations, i.e. serves as a visual means of teaching logical operations.
Material for making a calendar
What can you make a calendar from? Different materials can be used:
- Cardboard
- Thick paper
- Textile
- Tree
- Plastic
In addition, you can use a variety of decor to decorate the calendar. These can be pictures, flowers, twigs, leaves, ribbons, twine, buttons and generally any available materials.
It is enough to look at photos of handmade calendars on the Internet to understand that imagination in their design has no limits. Each master class on making calendars with your own hands is unique in its own way.
Where to begin
If you have never done anything like this before, you should definitely start by looking for detailed instructions on how to make calendars correctly. To do this, you first need to decide what kind of calendar you want to make.

Then stock up on the necessary tools and materials.
The set of tools for any type of calendar is approximately the same:
- Pencil
- Ruler
- Scissors
- Glue, glue gun or double-sided tape
For the kitchen calendar you will also need magnetic tape. And for the reversible one - springs or rings.
- And, of course, you need to prepare a calendar grid: monthly or for the entire year.
- It can be drawn by hand or printed on a computer.
- After this, all that remains is to make the calendar step by step with your own hands.
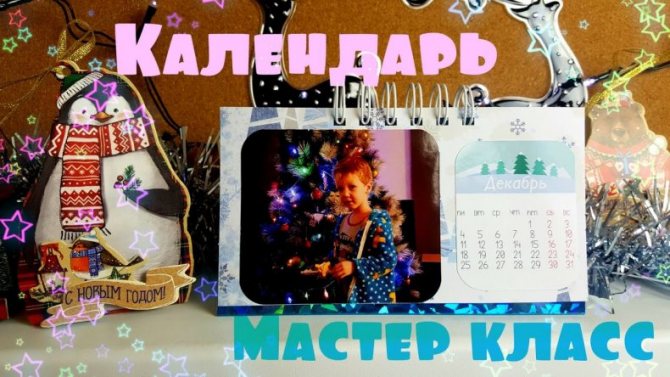
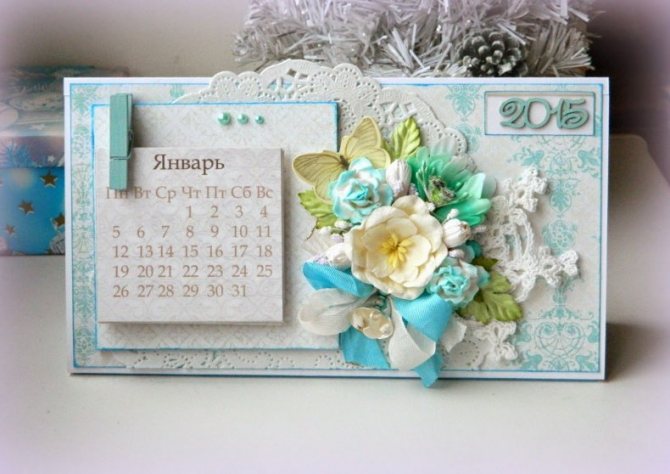
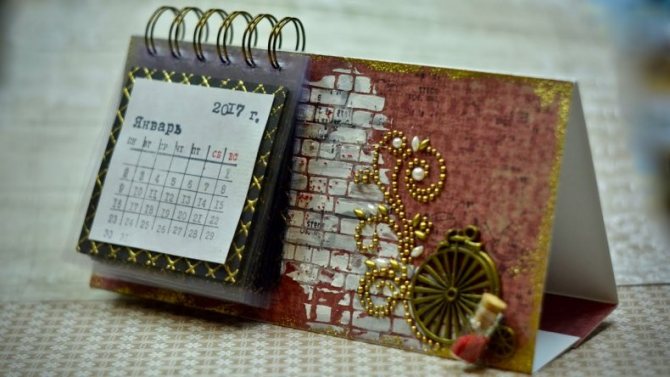
Desk calendar
Take thin cardboard or thick A4 paper. Place the sheet vertically and, using a pencil and ruler, draw horizontal lines at the following distance:
- From the bottom edge 1 cm
- From this line upward 2 cm
- From the top edge 2 cm
- In the middle of the remaining central part

Now you need to make folds along the outlined lines.
- Next, you need to decide where the calendar sheets and, accordingly, the rings will be located: on the left, on the right or in the middle.
- Monthly calendar grids need to be cut out and pasted onto thicker paper, the size of which is 3-5 mm larger on the sides and bottom edge, and 1-2 cm larger on the top edge.
- On these sheets in the upper part you need to make holes for the rings. The same holes should be made on both halves of the calendar closer to the central fold.
- Insert the rings into the holes.
- Before attaching calendar sheets to them, you need to decorate the base.
- You can stick colored or scrap paper on it, decorate it with lace, an interesting picture, and various decorative elements.
- Then the calendar sheets are attached to the rings.
After this, to give it stability, a 2 cm wide strip is glued onto a 1 cm strip. Thus, the calendar has a dense bottom, and it itself takes on the shape of a triangle.