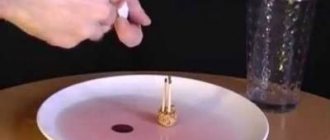
Card index of experiences and experiments with water. experiences and experiments (preparatory group) on the topic
CARD OF EXPERIMENTS AND EXPERIMENTS FOR PRESCHOOL CHILDREN “EXPERIMENTS WITH WATER”
Developed by teacher Varygina L.A. MADO No. 313
Target:
1. Help children get to know the world around them better.
2. Create favorable conditions for sensory perception, improving such vital mental processes as sensations, which are the first steps in understanding the world around us.
3. Develop fine motor skills and tactile sensitivity, learn to listen to your feelings and pronounce them.
4. Teach children to explore water in different states.
5. Through games and experiments, teach children to determine the physical properties of water.
6. Teach children to make independent conclusions based on the results of the examination.
7. Nurture the moral and spiritual qualities of a child during his communication with nature.
EXPERIMENTS WITH WATER
Experiment No. 1. “Coloring water.”
Purpose: Identify the properties of water: water can be warm and cold, some substances dissolve in water. The more of this substance, the more intense the color; The warmer the water, the faster the substance dissolves.
Materials: Containers with water (cold and warm), paint, stirring sticks, measuring cups.
An adult and children examine 2-3 objects in the water and find out why they are clearly visible (the water is clear). Next, find out how to color the water (add paint). An adult offers to color the water themselves (in cups with warm and cold water). In which cup will the paint dissolve faster? (In a glass of warm water). How will the water color if there is more dye? (The water will become more colored).
Experiment No. 2. “Water has no color, but it can be colored.”
Open the tap and offer to watch the flowing water. Pour water into several glasses. What color is the water? (Water has no color, it is transparent). Water can be colored by adding paint to it. (Children observe the coloring of the water). What color did the water become? (Red, blue, yellow, red). The color of the water depends on what color of dye was added to the water.
Conclusion: What did we learn today? What can happen to water if you add paint to it? (Water easily turns into any color).
Experiment No. 3. “Playing with colors.”
Purpose: To introduce the process of dissolving paint in water (at random and with stirring); develop observation and intelligence.
Materials: Two jars of clean water, paints, a spatula, a cloth napkin.
Progress:
Colors like a rainbow
Children are delighted with their beauty
Orange, yellow, red,
Blue, green - different!
Add some red paint to a jar of water, what happens? (the paint will dissolve slowly and unevenly).
Add a little blue paint to another jar of water and stir. What's happening? (the paint will dissolve evenly).
Children mix water from two jars. What's happening? (when blue and red paint were combined, the water in the jar turned brown).
Conclusion: A drop of paint, if not stirred, dissolves in water slowly and unevenly, but when stirred, it dissolves evenly.
Experience No. 4. “Everyone needs water.”
Purpose: To give children an idea of the role of water in plant life.
Progress: The teacher asks the children what will happen to the plant if it is not watered (it dries out). Plants need water. Look. Let's take 2 peas. Place one on a saucer in a wet cotton pad, and the second on another saucer in a dry cotton pad. Let's leave the peas for a few days. One pea, which was in a cotton wool with water, had a sprout, but the other did not. Children are clearly convinced of the role of water in the development and growth of plants.
Experiment No. 5. “A droplet walks in a circle.”
Goal: To give children basic knowledge about the water cycle in nature.
Procedure: Let's take two bowls of water - a large and a small one, put them on the windowsill and watch from which bowl the water disappears faster. When there is no water in one of the bowls, discuss with the children where the water went? What could have happened to her? (droplets of water constantly travel: they fall to the ground with rain, run in streams; they water plants, under the rays of the sun they return home again - to the clouds from which they once came to earth in the form of rain.)
Experiment No. 6. “Warm and cold water.”
Purpose: To clarify children’s understanding that water comes in different temperatures - cold and hot; You can find out if you touch the water with your hands; soap lathers in any water: water and soap wash away dirt.
Material: Soap, water: cold, hot in basins, rag.
Procedure: The teacher invites the children to wash their hands with dry soap and without water. Then he offers to wet your hands and soap in a basin of cold water. He clarifies: the water is cold, transparent, soap is washed in it, after washing hands the water becomes opaque and dirty.
Then he suggests rinsing your hands in a basin of hot water.
Conclusion: Water is a good helper for humans.
Experiment No. 7. “When does it pour, when does it drip?”
Goal: Continue to introduce the properties of water; develop observation skills; consolidate knowledge of safety rules when handling glass objects.
Material: Pipette, two beakers, plastic bag, sponge, socket.
Procedure: The teacher invites the children to play with water and makes a hole in the bag of water. Children lift it above the socket. What's happening? (water drips, hitting the surface of the water, the droplets make sounds). Add a few drops from a pipette. When does water drip faster: from a pipette or a bag? Why?
Children pour water from one beaker to another. Do they observe when the water fills faster - when it drips or when it pours?
Children immerse a sponge in a beaker of water and take it out. What's happening? (water first flows out, then drips).
Experiment No. 8. “Which bottle will the water be poured into faster?”
Goal: Continue to introduce the properties of water, objects of different sizes, develop ingenuity, and teach how to follow safety rules when handling glass objects.
Material: A bath of water, two bottles of different sizes - with a narrow and a wide neck, a cloth napkin.
Progress: What song does the water sing? (Glug, glug, glug).
Let's listen to two songs at once: which one is better?
Children compare bottles by size: look at the shape of the neck of each of them; immerse a wide-necked bottle in water, looking at the clock to note how long it will take for it to fill with water; immerse a bottle with a narrow neck in water and note how many minutes it will take to fill it.
Find out from which bottle the water will pour out faster: a large one or a small one? Why?
Children immerse two bottles in water at once. What's happening? (water does not fill the bottles evenly)
Experiment No. 9. “What happens to steam when it cools?”
Purpose: Show children that steam in a room, cooling, turns into droplets of water; outside (in the cold) it becomes frost on the branches of trees and bushes.
Procedure: The teacher offers to touch the window glass to make sure that it is cold, then invites three children to breathe on the glass at one point. Observe how the glass fogs up and then a drop of water forms.
Conclusion: The vapor from breathing on cold glass turns into water.
During the walk, the teacher takes out a freshly boiled kettle, places it under the branches of a tree or bush, opens the lid and everyone watches how the branches are “overgrown” with frost.
Experiment No. 10. “Friends.”
Purpose: To introduce the composition of water (oxygen); develop ingenuity and curiosity.
Material: Glass and bottle of water, closed with a cork, cloth napkin.
Procedure: Place a glass of water in the sun for a few minutes. What's happening? (bubbles form on the walls of the glass - this is oxygen).
Shake the water bottle as hard as you can. What's happening? (a large number of bubbles have formed)
Conclusion: Water contains oxygen; it “appears” in the form of small bubbles; when water moves, more bubbles appear; Oxygen is needed by those who live in water.
Experiment No. 11. “Where did the water go?”
Purpose: To identify the process of water evaporation, the dependence of the evaporation rate on conditions (open and closed water surface).
Material: Two identical measuring containers.
Children pour an equal amount of water into containers; together with the teacher they make a level mark; one jar is closed tightly with a lid, the other is left open; Both jars are placed on the windowsill.
The evaporation process is observed for a week, making marks on the walls of the containers and recording the results in an observation diary. They discuss whether the amount of water has changed (the water level has become lower than the mark), where the water from the open jar has disappeared (water particles have risen from the surface into the air). When the container is closed, evaporation is weak (water particles cannot evaporate from the closed container).
Experiment No. 12. “Where does water come from?”
Purpose: To introduce the condensation process.
Material: Hot water container, cooled metal lid.
An adult covers a container of water with a cold lid. After some time, children are invited to examine the inside of the lid and touch it with their hands. They find out where the water comes from (water particles rose from the surface, they could not evaporate from the jar and settled on the lid). The adult suggests repeating the experiment, but with a warm lid. Children observe that there is no water on the warm lid, and with the help of the teacher they conclude: the process of turning steam into water occurs when the steam cools.
Experiment No. 13. “Which puddle will dry up faster?”
Guys, do you remember what remains after the rain? (Puddles). The rain is sometimes very heavy, and after it there are large puddles, and after a little rain the puddles are: (small). Offers to see which puddle will dry faster - large or small. (The teacher spills water on the asphalt, creating puddles of different sizes). Why did the small puddle dry up faster? (There is less water there). And large puddles sometimes take a whole day to dry up.
Conclusion: What did we learn today? Which puddle dries out faster - big or small? (A small puddle dries faster).
Experiment No. 14. “Game of hide and seek.”
Goal: Continue to introduce the properties of water; develop observation, ingenuity, perseverance.
Material: Two plexiglass plates, a pipette, cups with clear and colored water.
Progress:
One two three four five!
We'll look for a little bit
Appeared from a pipette
Dissolved on the glass...
Apply a drop of water from a pipette onto dry glass. Why doesn't it spread? (the dry surface of the plate interferes)
Children tilt the plate. What's happening? (drop flows slowly)
Moisten the surface of the plate and drop clear water onto it from a pipette. What's happening? (it will “dissolve” on a damp surface and become invisible)
Apply a drop of colored water to the damp surface of the plate using a pipette. What will happen? (colored water will dissolve in clear water)
Conclusion: When a transparent drop falls into water, it disappears; a drop of colored water on wet glass is visible.
Experiment No. 15. “How to push water out?”
Purpose: To form the idea that the water level rises if objects are placed in the water.
Material: Measuring container with water, pebbles, object in the container.
The children are given the task: to get an object from the container without putting their hands in the water and without using various assistant objects (for example, a net). If the children find it difficult to decide, the teacher suggests placing pebbles in the vessel until the water level reaches the brim.
Conclusion: Pebbles, filling the container, push out water.
Experiment No. 16. “Where does frost come from?”
Equipment: Thermos with hot water, plate.
Take a thermos with hot water for a walk. When children open it, they will see steam. You need to hold a cold plate over the steam. Children see how steam turns into water droplets. This steamed plate is then left for the rest of the walk. At the end of the walk, children can easily see frost forming on it. The experience should be supplemented with a story about how precipitation is formed on earth.
Conclusion: When heated, water turns into steam, when cooled, steam turns into water, water into frost.
Experiment No. 17. “Melting ice.”
Equipment: Plate, bowls of hot and cold water, ice cubes, spoon, watercolor paints, strings, various molds.
The teacher offers to guess where the ice will melt faster - in a bowl of cold water or in a bowl of hot water. He lays out the ice and the children watch the changes taking place. The time is recorded using numbers that are laid out near the bowls, and the children draw conclusions. Children are invited to look at a colored piece of ice. What kind of ice? How is this piece of ice made? Why is the string holding on? (Frozen to the ice.)
• How can you get colorful water? Children add colored paints of their choice to the water, pour them into molds (everyone has different molds) and place them on trays in the cold.
Experiment No. 18. “Frozen water.”
Equipment: Pieces of ice, cold water, plates, a picture of an iceberg.
In front of the children is a bowl of water. They discuss what kind of water it is, what shape it is. Water changes shape because it is liquid. Can water be solid? What happens to water if it is cooled too much? (The water will turn into ice.)
Examine the pieces of ice. How is ice different from water? Can ice be poured like water? The children are trying to do this. What shape is the ice? Ice retains its shape. Anything that retains its shape, like ice, is called a solid.
• Does ice float? The teacher puts a piece of ice in a bowl and the children watch. How much ice floats? (Upper.) Huge blocks of ice float in the cold seas. They are called icebergs (show picture). Only the tip of the iceberg is visible above the surface. And if the captain of the ship does not notice and stumbles upon the underwater part of the iceberg, then the ship may sink.
The teacher draws the children's attention to the ice that was in the plate. What happened? Why did the ice melt? (The room is warm.) What has the ice turned into? What is ice made of?
Experiment No. 19. “Water Mill”.
Equipment: Toy water mill, basin, jug with coda, rag, aprons according to the number of children.
Grandfather Znay talks with children about why water is needed for people. During the conversation, the children remember its properties. Can water make other things work? After the children’s answers, grandfather Znay shows them a water mill. What is this? How to make the mill work? Children put on aprons and roll up their sleeves; They take a jug of water in their right hand, and with their left they support it near the spout and pour water onto the blades of the mill, directing the stream of water to the center of the blade. What do we see? Why is the mill moving? What sets it in motion? Water drives the mill.
• Children play with a mill.
It is noted that if you pour water in a small stream, the mill works slowly, and if you pour it in a large stream, the mill works faster.
Experiment No. 20. “Steam is also water.”
Equipment: Mug with boiling water, glass.
Take a mug of boiling water so the children can see the steam. Place glass over the steam; water droplets form on it.
Conclusion: Water turns into steam, and steam then turns into water.
Experiment No. 21. “Transparency of ice.”
Equipment: water molds, small items.
The teacher invites the children to walk along the edge of the puddle and listen to the ice crunch. (Where there is a lot of water, the ice is hard, durable, and does not break underfoot.) Reinforces the idea that ice is transparent. To do this, place small objects in a transparent container, fill it with water and place it outside the window overnight. In the morning, they examine frozen objects through the ice.
Conclusion: Objects are visible through ice because it is transparent.
Experiment No. 22. “Why is the snow soft?”
Equipment: Spatulas, buckets, magnifying glass, black velvet paper.
Invite the children to watch the snow spin and fall. Let the children scoop up the snow and then use buckets to carry it into a pile for the slide. Children note that buckets of snow are very light, but in the summer they carried sand in them, and it was heavy. Then the children look at the snow flakes that fall on the black velvet paper through a magnifying glass. They see that these are separate snowflakes linked together. And between the snowflakes there is air, which is why the snow is fluffy and so easy to lift.
Conclusion: Snow is lighter than sand, since it consists of snowflakes with a lot of air between them. Children add from personal experience and name what is heavier than snow: water, earth, sand and much more.
Please pay attention to the fact that the shape of snowflakes changes depending on the weather: in severe frost, snowflakes fall out in the shape of hard, large stars; in mild frost they resemble white hard balls, which are called cereals; When there is a strong wind, very small snowflakes fly because their rays are broken off. If you walk through the snow in the cold, you can hear it creaking. Read K. Balmont’s poem “Snowflake” to the children.
Experiment No. 23. “Why does snow warm?”
Equipment: Spatulas, two bottles of warm water.
Invite children to remember how their parents protect plants from frost in the garden or at the dacha. (Cover them with snow). Ask the children whether it is necessary to compact and pat down the snow near the trees? (No). And why? (In loose snow, there is a lot of air and it retains heat better).
This can be checked. Before your walk, pour warm water into two identical bottles and seal them. Invite the children to touch them and make sure that the water in both of them is warm. Then, on the site, one of the bottles is placed in an open place, the other is buried in the snow, without slamming it down. At the end of the walk, both bottles are placed side by side and compared, in which the water has cooled more, and find out in which bottle ice appeared on the surface.
Conclusion: The water in the bottle under the snow has cooled less, which means the snow retains heat.
Pay attention to the children how easy it is to breathe on a frosty day. Ask the children to say why? This is because falling snow picks up tiny particles of dust from the air, which is present even in winter. And the air becomes clean and fresh.
Experiment No. 24. “How to get drinking water from salt water.”
Pour water into a basin, add two tablespoons of salt, stir. Place washed pebbles at the bottom of an empty plastic glass and lower the glass into a basin so that it does not float up, but its edges are above the water level. Pull the film over the top and tie it around the pelvis. Press the film in the center above the cup and place another pebble in the recess. Place the basin in the sun. After a few hours, unsalted, clean water will accumulate in the glass. Conclusion: water evaporates in the sun, condensation remains on the film and flows into an empty glass, salt does not evaporate and remains in the basin.
Experiment No. 25. “Snow Melting.”
Goal: To bring to the understanding that snow melts from any heat source.
Procedure: Watch the snow melt on a warm hand, mitten, radiator, heating pad, etc.
Conclusion: Snow melts from heavy air coming from any system.
Experiment No. 26. “How to get drinking water?”
Dig a hole in the ground about 25 cm deep and 50 cm in diameter. Place an empty plastic container or wide bowl in the center of the hole, and place fresh green grass and leaves around it. Cover the hole with clean plastic wrap and fill the edges with soil to prevent air from escaping from the hole. Place a pebble in the center of the film and lightly press the film over the empty container. The water collecting device is ready. Leave your design until the evening. Now carefully shake off the soil from the film so that it does not fall into the container (bowl), and look: there is clean water in the bowl. Where did she come from? Explain to your child that under the influence of the sun's heat, the grass and leaves began to decompose, releasing heat. Warm air always rises. It settles in the form of evaporation on the cold film and condenses on it in the form of water droplets. This water flowed into your container; remember, you slightly pressed the film and put a stone there. Now all you have to do is come up with an interesting story about travelers who went to distant countries and forgot to take water with them, and begin an exciting journey.
Experiment No. 27. “Is it possible to drink melt water?”
Goal: To show that even the most seemingly clean snow is dirtier than tap water.
Procedure: Take two light plates, put snow in one, pour regular tap water into the other. After the snow has melted, examine the water in the plates, compare it and find out which of them contained snow (identify by the debris at the bottom). Make sure that the snow is dirty melt water and not suitable for people to drink. But, melt water can be used to water plants, and it can also be given to animals.
Experiment No. 28. “Is it possible to glue paper with water?”
Let's take two sheets of paper. We move one in one direction, the other in the other. We moisten it with water, squeeze it slightly, try to move it - unsuccessfully. Conclusion: water has a gluing effect.
Experiment No. 29. “The ability of water to reflect surrounding objects.”
Purpose: To show that water reflects surrounding objects.
Procedure: Bring a bowl of water into the group. Invite the children to look at what is reflected in the water. Ask the children to find their reflection, to remember where else they saw their reflection.
Conclusion: Water reflects surrounding objects, it can be used as a mirror.
Experiment No. 30. “Water can pour, or it can splash.”
Pour water into the watering can. The teacher demonstrates watering indoor plants (1-2). What happens to the water when I tilt the watering can? (Water is pouring). Where does the water come from? (From the spout of a watering can?). Show the children a special device for spraying - a spray bottle (children can be told that this is a special spray bottle). It is needed to spray on flowers in hot weather. We spray and refresh the leaves, they breathe easier. Flowers take a shower. Offer to observe the spraying process. Please note that the droplets are very similar to dust because they are very small. Offer to place your palms and spray them. What are your palms like? (Wet). Why? (Water was splashed on them.) Today we watered the plants and sprinkled water on them.
Conclusion: What did we learn today? What can happen to water? (Water can pour, or it can splash).
Experiment No. 31. “Wet wipes dry faster in the sun than in the shade.”
Wet the napkins in a container of water or under the tap. Invite children to touch the napkins. What kind of napkins? (Wet, damp). Why did they become like this? (They were soaked in water). Dolls will come to visit us and we will need dry napkins to put on the table. What to do? (Dry). Where do you think napkins will dry faster - in the sun or in the shade? You can check this on a walk: hang one on the sunny side, the other on the shady side. Which napkin dried faster - the one hanging in the sun or the one hanging in the shade? (In the sun).
Conclusion: What did we learn today? Where does laundry dry faster? (Laundry dries faster in the sun than in the shade).
Experiment No. 32. “Plants breathe easier if the soil is watered and loosened.”
Offer to look at the soil in the flowerbed and touch it. What does it feel like? (Dry, hard). Can I loosen it with a stick? Why did she become like this? Why is it so dry? (The sun dried it out). In such soil, plants have trouble breathing. Now we will water the plants in the flowerbed. After watering: feel the soil in the flowerbed. What is she like now? (Wet). Does the stick go into the ground easily? Now we will loosen it, and the plants will begin to breathe.
Conclusion: What did we learn today? When do plants breathe easier? (Plants breathe easier if the soil is watered and loosened).
Experiment No. 33. “Your hands will become cleaner if you wash them with water.”
Offer to make sand figures using molds. Draw children's attention to the fact that their hands have become dirty. What to do? Maybe we should dust off our palms? Or shall we blow on them? Are your palms clean? How to clean sand from your hands? (Wash with water). The teacher suggests doing this.
Conclusion: What did we learn today? (Your hands will become cleaner if you wash them with water.)
Experiment No. 34. “Helper water.”
There were crumbs and tea stains on the table after breakfast. Guys, after breakfast the tables were still dirty. It’s not very pleasant to sit down at such tables again. What to do? (Wash). How? (Water and a cloth). Or maybe you can do without water? Let's try wiping the tables with a dry cloth. I managed to collect the crumbs, but the stains remained. What to do? (Wet the napkin with water and rub well). The teacher shows the process of washing tables and invites the children to wash the tables themselves. Emphasizes the role of water during washing. Are the tables now clean?
Conclusion: What did we learn today? When do tables become very clean after eating? (If you wash them with water and a cloth).
Experiment No. 35. “Water can turn into ice, and ice turns into water.”
Pour water into a glass. What do we know about water? What kind of water? (Liquid, transparent, colorless, odorless and tasteless). Now pour the water into the molds and put it in the refrigerator. What happened to the water? (She froze, turned into ice). Why? (The refrigerator is very cold). Leave the molds with ice in a warm place for a while. What will happen to the ice? Why? (The room is warm.) Water turns into ice, and ice into water.
Conclusion: What did we learn today? When does water turn to ice? (When it is very cold). When does ice turn into water? (When it is very warm).
Experiment No. 36. “Fluidity of water.”
Purpose: To show that water has no shape, spills, flows.
Procedure: Take 2 glasses filled with water, as well as 2-3 objects made of hard material (cube, ruler, wooden spoon, etc.) and determine the shape of these objects. Ask the question: “Does water have a form?” Invite children to find the answer on their own by pouring water from one vessel to another (cup, saucer, bottle, etc.). Remember where and how puddles spill.
Conclusion: Water has no shape, it takes the shape of the vessel into which it is poured, that is, it can easily change shape.
Experiment No. 37. “The life-giving property of water.”
Purpose: To show the important property of water - to give life to living things.
Progress: Observation of cut tree branches placed in water, they come to life and give roots. Observation of the germination of identical seeds in two saucers: empty and with damp cotton wool. Observing the germination of a bulb in a dry jar and a jar with water.
Conclusion: Water gives life to living things.
Experiment No. 38. “Ice melting in water.”
Purpose: Show the relationship between quantity and quality from size.
Procedure: Place a large and small “ice floe” in a bowl of water. Ask the children which one will melt faster. Listen to hypotheses.
Conclusion: The larger the ice floe, the slower it melts, and vice versa.
Experiment No. 39. “What does water smell like?”
Three glasses (sugar, salt, clean water). Add a solution of valerian to one of them. There is a smell. The water begins to smell of the substances that are added to it.
Summary of the lesson “Experiments with water” in the preparatory group
Elena Plokhikh
Summary of the lesson “Experiments with water” in the preparatory group
Goal: developing ideas about the properties of water.
Tasks:
1. Expand children’s understanding of the properties of water.
2. Learn to conduct laboratory experiments and follow safety rules.
3. Develop observation, the ability to analyze, generalize, establish cause-and-effect relationships, the ability to draw conclusions, and develop children’s cognitive interest in the process of experimentation.
In the preparatory group, conducting experiments should become the norm; they should be considered not as entertainment, but as a way to familiarize children with the world around them and the most effective way to develop thought processes. Experiments allow you to combine all types of activities and all aspects of education, develop observation and inquisitiveness of the mind, develop the desire to understand the world, all cognitive abilities, the ability to invent, use non-standard solutions in difficult situations, and create a creative personality.
What I heard, I forgot.
I remember what I saw.
I know what I did!
Playing with water is a favorite pastime for children. After all, when playing with water, they not only receive positive emotions, but also conduct experiments and experiments, learning the properties of this miraculous liquid.
Here are some experiments carried out with children with water.
Experiment 1: “What does water smell like and what color?”
We give three glasses of water. Add a solution of valerian to one of them, a few drops of perfume to another, and a third with clean water. (The water begins to smell like the substances that were added to it).
Take two glasses of clean water. We put spoons in them. The water is clear, but if you add paint to one glass, it will take on the color of the paint you added.
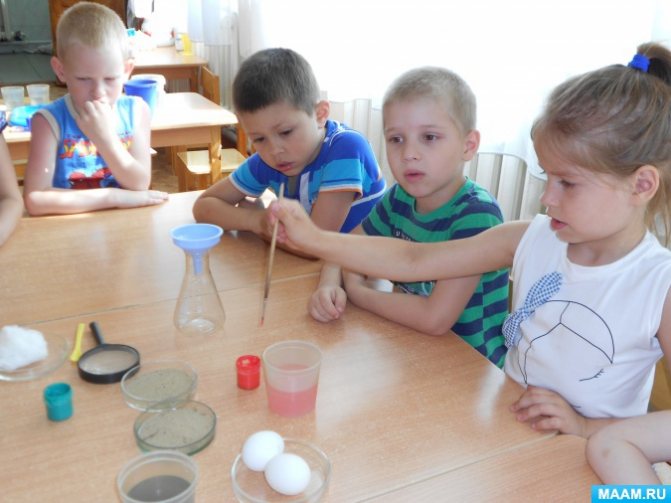
Experiment 2: “Does water have a shape?”
We pour the same water into vessels of different shapes. Water takes the form of vessels. We pour water from the last vessel onto a plate, it spreads into a shapeless puddle. (Water has no shape).
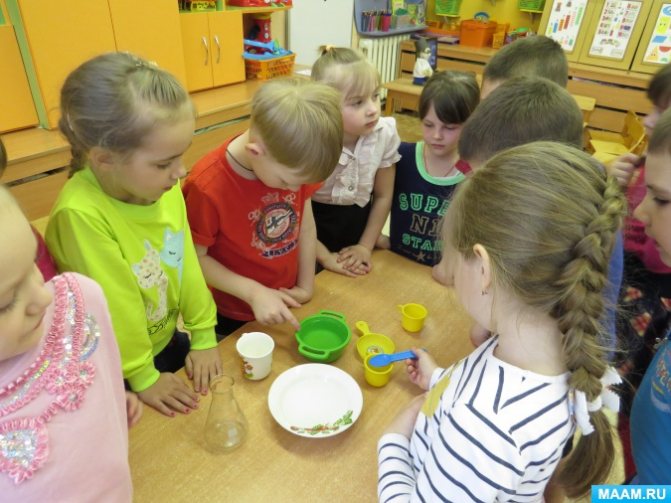
Experiment 3: “Does water have taste?”
Give children a taste of drinking water, then salty and sweet. (Water takes on the taste of the substance that is added to it).
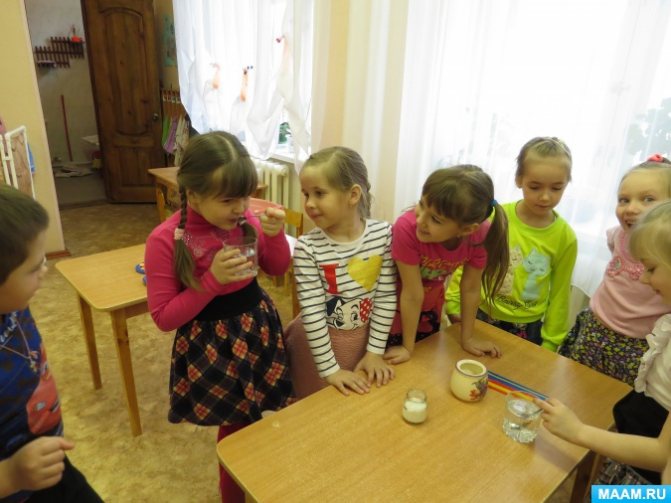
Experiment 4: “What dissolves in water?”
Give the children three glasses of water, sugar, salt, river sand, and offer to dissolve them in water. (The water with sand became cloudy and dirty, salt and sugar dissolved and became invisible in the water).
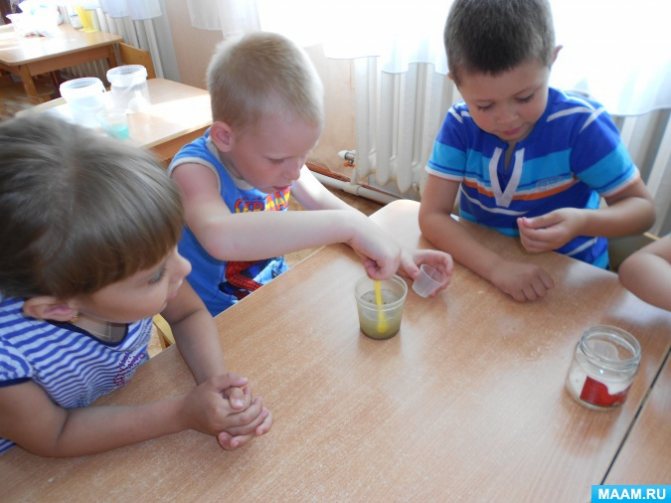
Experiment 5: “Bubbles in the water.”
Drinking glasses, cocktail straws. Children blow into tubes, creating bubbles in the water. (The bubbles are clearly visible because air and water do not mix.)
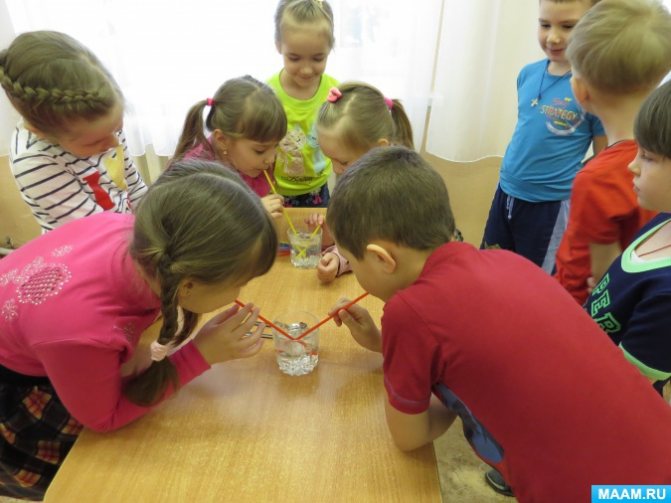
Experiment 6: “Floating Egg.”
We will need an egg, two glasses of tap water. First, we lower the egg into ordinary water; it sank because it was heavy. And in the second glass, add 2 tablespoons of salt, lower the egg, and see the egg floats. (Salt water has a higher density than regular tap water. It is the salt that lifts the egg to the surface).
Experiment 7: "Balls".
Take two balloons, two pebbles. Place stones into balls. Tie one balloon without inflating it, and inflate the second one along with the pebble. Place both balls in water. An inflated balloon will float on the surface, while an uninflated one will sink to the bottom. (The air in the inflated balloon prevents it from drowning.)
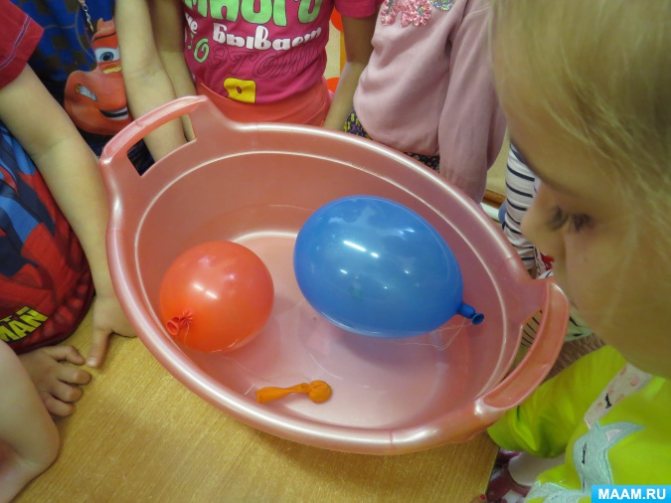
Experiment 8: “Why don’t ships sink?”
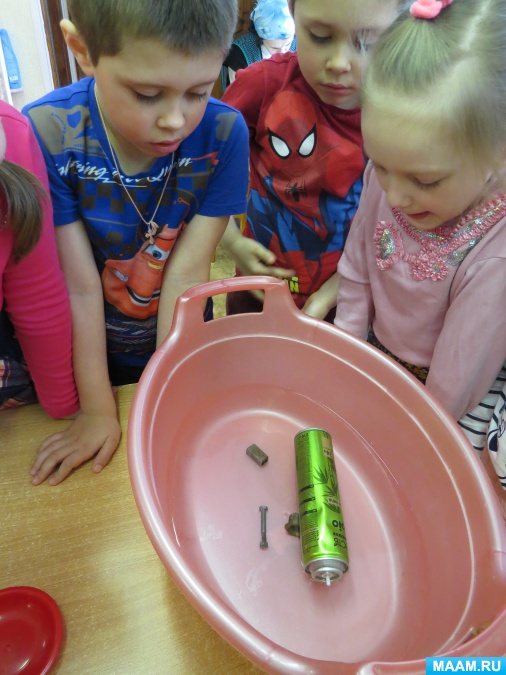
Place metal objects in a container of water and watch them sink. Place a tin can (hairspray bottle) in water. Children will make sure that the jar (bottle) will remain afloat, because it is lighter than water, because there is air there.
Experiment 9: “Lotus Flowers.”
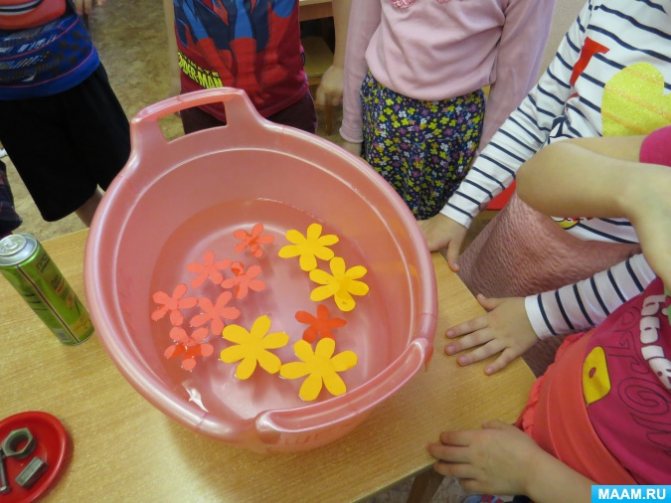
We make flowers out of paper, twist the petals towards the center, lower them into water, the flowers bloom. (The paper gets wet, becomes heavier, and the flower’s petals begin to bloom.)
Experimentation provides the child with the opportunity to find answers to the questions “how?” and why?"
Card index of experiments with water with children in the preparatory group for school.
Card file of experiments with children in a pre-school group
Water
Experiment No. 1
“Properties of water”
Purpose. Introduce children to the properties of water (takes shape, has no smell, taste, color).
Materials. Several transparent vessels of different shapes, water.
Process. Pour water into transparent vessels of different shapes and show the children that the water takes the shape of the vessels.
Bottom line. Water has no form and takes the shape of the vessel into which it is poured.
Experiment No. 2 “Taste of water”
Target. Find out if the water has a taste.
Materials. Water, three glasses, salt, sugar, spoon.
Process. Before experimenting, ask what the water tastes like. After this, let the children try plain boiled water. Then put salt in one glass. In another sugar, stir and let the children try. What taste does the water have now?
Bottom line. Water has no taste, but takes on the taste of the substance that is added to it.
Experiment No. 3 “The smell of water”
Target. Find out if the water has an odor.
Materials. A glass of water with sugar, a glass of water with salt, an odorous solution.
Process. Ask the children what does the water smell like? After answering, ask them to smell the water in the glasses with solutions (sugar and salt). Then drop a fragrant solution into one of the glasses (but so that children cannot see). Now what does the water smell like?
Bottom line. Water has no odor, it smells of the substance that is added to it.
Experiment No. 4 “Color of Water”
Target. Find out if the water has a color.
Materials. Several glasses of water, crystals of different colors.
Process. Have the children put different colored crystals into glasses of water and stir until they dissolve. What color is the water now?
Bottom line. Water is colorless and takes on the color of the substance that is added to it.
Experiment No. 5 “Living Water”
Target. Introduce children to the life-giving properties of water.
Materials. Freshly cut branches of quickly blossoming trees, a vessel with water, the label “Water of Living”.
Process. Take a vessel and label it “Water of Living.” Look at the branches with your children. After this, place the branches in the water and remove the vessel in a visible place. Time will pass and they will come to life. If these are poplar branches, they will take root.
Bottom line. One of the important properties of water is to give life to all living things.
Experiment No. 6 “Evaporation”
Target. Introduce children to the transformation of water from liquid to gaseous state and back to liquid.
Materials. Burner, vessel with water, lid for the vessel.
Process. Boil water, cover the vessel with a lid and show how the condensed steam turns back into drops and falls down.
Bottom line. When water is heated, it changes from a liquid state to a gaseous state, and when it cools, it changes from a gaseous state back to a liquid state.
Experiment No. 7 “Aggregative states of water”
Purpose: To prove that the state of water depends on air temperature and is in three states: liquid - water; hard – snow, ice; gaseous - steam.
Procedure: 1) If it’s warm outside, then the water is in a liquid state. If the temperature outside is sub-zero, then the water turns from liquid to solid (ice in puddles, instead of rain it snows). 2) If you pour water on a saucer, then after a few days the water will evaporate, it will turn into a gaseous state.
Experiment No. 8 “Water expands when it freezes”
Goal: Find out how snow retains heat. Protective properties of snow. Prove that water expands when it freezes.
Procedure: Take two bottles (cans) of water of the same temperature for a walk. Bury one in the snow, leave the other on the surface. What happened to the water? Why didn't the water freeze in the snow?
Conclusion: Water does not freeze in snow because snow retains heat and turns into ice on the surface. If a jar or bottle where water has turned into ice bursts, then we can conclude that water expands when it freezes. Experience No. 9
"
Ice is lighter than water."
Place a piece of ice in a glass filled to the brim with water. The ice will melt, but the water will not overflow.
Conclusion: The water that ice has turned into takes up less space than ice, meaning it is heavier.
Experiment No. 10 “Dependence of snow melting on temperature”
Target. Bring children to understand the dependence of the state of snow (ice) on air temperature. The higher the temperature, the faster the snow will melt.
Procedure: 1) On a frosty day, invite the children to make snowballs. Why don't snowballs work? The snow is powdery and dry. What can be done? Bring the snow into the group, after a few minutes we try to make a snowball. The snow has become plastic. The snowballs were blinding. Why did the snow become sticky? 2) Place saucers with snow in a group on the window and under the radiator. Where will the snow melt faster? Why?
Conclusion: The condition of the snow depends on the air temperature. The higher the temperature, the faster the snow melts and changes its properties.
