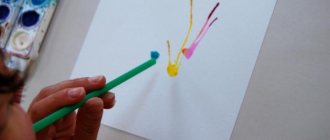
We started drawing at about 1 year old. At first Antoshka did it with finger paints in the bathroom. A couple of months later, my husband made an easel, and my son became acquainted with brushes and gouache.
Basically, the child draws whatever he wants with the materials he wants or that I provide. Free drawing should be practiced as often as possible. But don't stop there.
In this article I will share drawing ideas with children aged 1 – 3 years old, I will talk about various techniques for drawing with paints, pencils and other materials, even shaving foam.
You can also download coloring pages for little ones and templates for finger painting.
I won’t talk at length about the benefits of drawing with children. I think you already know very well that it develops the child’s imagination, creativity, improves hand coordination and fine motor skills of the fingers.
How to draw with a child 1-3 years old
In the article about applications, I talked about the book by E.A. Yanushko . This author also has a book called Drawing with Young Children (Labyrinth). This is an excellent teaching tool for parents and teachers, and it also comes with a CD with demonstration materials.
The book presents a methodology for conducting drawing classes with children 1 – 3 years old . I take many ideas from her.
Before you start drawing with your child, here are some simple tips from me:
- Show your child various drawing techniques (pokes, strokes, stamping, etc.) gradually, starting with the simplest ones.
- I highly recommend buying or making your own easel for painting. It is relevant as soon as the child learns to walk.
- Draw as often as possible.
- Use a variety of drawing materials.
- Try to immediately teach your child to hold a brush and pencil correctly. But if the child stubbornly refuses to do this, do not insist.
- Give your child maximum freedom. Let the child draw what he wants and how he wants. Never demand that he draw the way you want. Below I will talk about various drawing techniques with children, but if the child refuses to do something, do not insist.
Don't correct your child! Let him draw purple skies and red grass. So what if cows don't fly and there are no fences on the rainbow? Your child's mind is still free from cliches. He is a true creator.
How to draw with your child
The more different art materials you use, the better.
You need to start with the easiest to learn (for example, finger paints), eventually reaching regular pencils.
We draw on:
- plain paper
- old wallpaper,
- easel,
- magnetic board,
- plaster figures for coloring,
- wood, plywood,
- fabrics,
- tiles in the bathroom and in the bath itself.
For drawing with children 1 – 3 years old, you can use the following materials :
- Finger paint;
- gouache, watercolor (and, accordingly, brushes of different sizes);
- felt-tip pens (water-based and regular);
- crayons (wax and regular);
- wax pencils;
- dry pastel;
- pencils (preferably soft ones);
- gel and ballpoint pens;
- foam rubber, sponges;
- cotton swabs and cotton wool;
- stamps;
- semolina;
- shaving foam.
You will also need a glass for water (preferably a sippy cup) and a palette for mixing paints.
Drawing techniques with paints and pencils
All drawing techniques involve the use of different materials depending on the age and capabilities of the child. We give paints, crayons, felt-tip pens to very young children, and pencils, etc. to older children.
I list all the techniques in order of increasing complexity .
Free drawing
My son calls this kind of drawing “scribbles”.
We introduce the child to drawing materials and give him the opportunity to experiment. At the same time, there is no need to give any tasks to draw something specific.
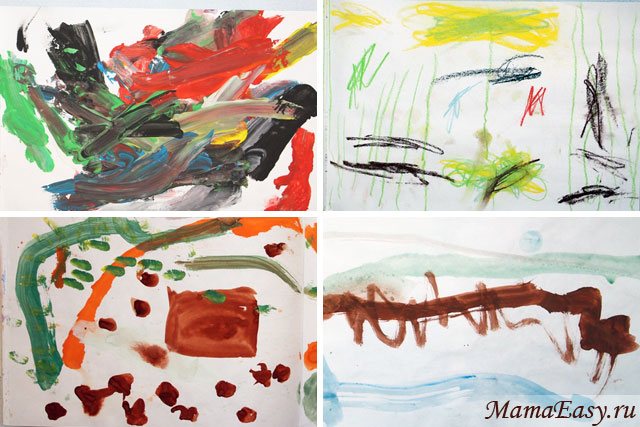
Practice free drawing as often as possible at any age of the child. It perfectly develops imagination.
Painting a sheet
We give the child paints, crayons, etc. and we suggest drawing:
- grass for the cow,
- water for fish,
- sand, snow.
The child needs to paint over the sheet, and not draw individual blades of grass, etc. Even a one-year-old can cope with this task.
paint rollers here - plain or shaped.
Shading an element
We draw a base (small images of animals and various objects) and ask the child to hide them by painting them over:
- hide the mouse, bunny, fish, bug;
- hide the moon and stars, the sun, the car.
With very young children it is interesting to do this with a sponge; with children over 2 years old it is useful to paint over elements with pencils.
Drawing points
Pre-draw the basis for the drawing - a bird that the child will feed, a bush on which berries will grow, etc.
Invite your child to draw: grains, berries, snow, raindrops, a bagel with poppy seeds, freckles, polka dots on a dress.
Drawing lines
- Direct: rays of the sun, stems of flowers, tops of carrots, fence, cage, path, rails, paws of bugs, needles of a cactus, teeth of a comb.
- Wavy: boat waves, worms, octopus legs, car tracks, hair.
- Broken: slides, a fence, icicles, a road with turns, thorns for a hedgehog.
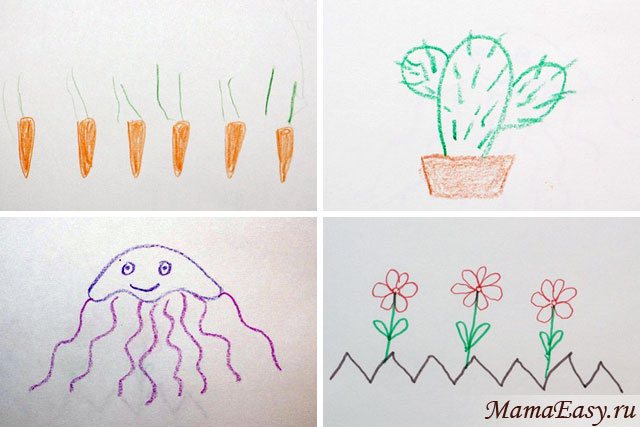
Draw circles, ovals
Balls, apples, candies, Christmas tree decorations, beads, balloons, rowan berries, berries, bubbles, eggs, cones.
Drawing Spirals
Invite your child to draw: a snail's house, smoke, a bee's flight, curls, sheep's rings, threads.
Finishing the drawing
Antoshka really likes to play this game: I say that one boy drew different figures, but did not finish them, and I suggest that my son finish them. He does this with great pleasure. This is how we finish drawing:
- geometric figures;
- I draw a road (a broken line) and Antoshka repairs it,
- any simple and understandable drawings.
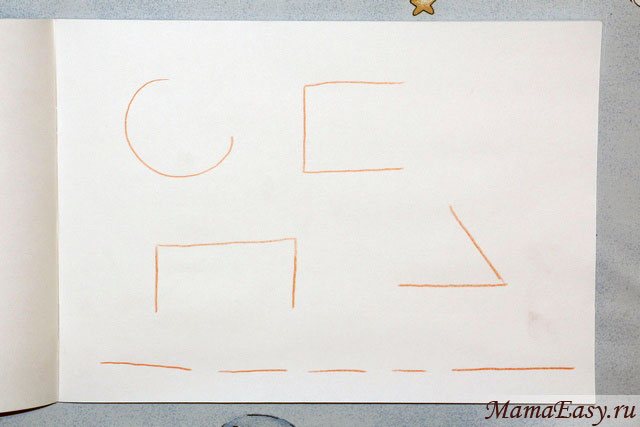
Drawing simple stories
This is the most difficult stage in mastering drawing. Here the child combines different drawing techniques according to the instructions of an adult.
Take turns asking your child to draw different elements that will eventually turn into something specific. But give your child as much freedom as possible.
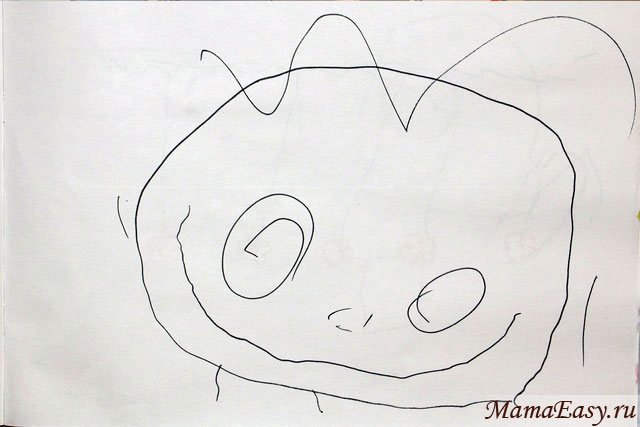
The purpose of such drawing is to show the child how the finished image appears step by step.
We draw by dots, developing skills gradually
Drawing lines with a pencil or pen is an excellent practice that helps accustom your hand to writing, develop small muscles, and teach your baby to hold something tightly.
The dotted line serves as a guide and helps the child, because at any time you can slow down the speed of drawing, increase or decrease the pressure on the pencil, without spoiling the picture, and, therefore, without losing interest.
As soon as the child learns to draw lines, straight lines and all kinds of waves using points, move on to shapes and then to animals. The curves of the dotted lines will develop drawing skills enough to begin learning how to spell letters and numbers.
Sponge painting
The child can hold the sponge with his hands or with a regular clothespin.
Simple sponge painting:
- waves, sand, snowy landscape, grass, paths - by smearing;
- snow, leaves - poked;
- we hide bugs, fish, etc. - by painting.
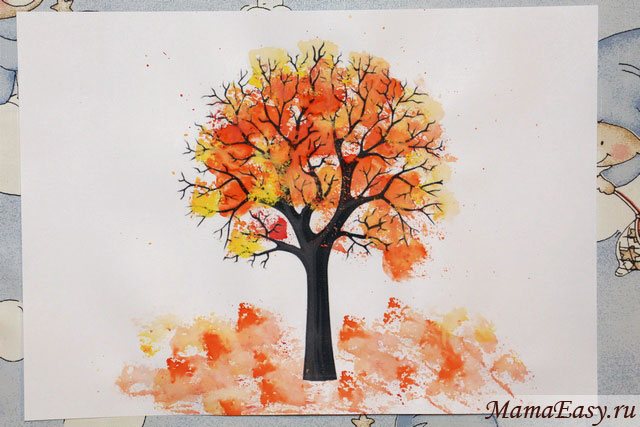
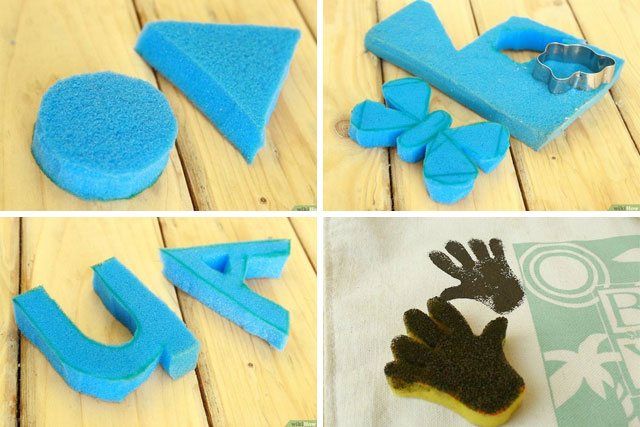
Sponge stamps . Draw the shape you want on the sponge - a triangle, a tree, or even letters. Cut it out. Invite your child to dip a sponge in gouache and make an imprint on paper.
Master class “Drawing a turtle”
After the fairy tale about Françoise and Fedya, it is appropriate to invite the kids to pretend to be the boy’s new girlfriend. Children 4-5 years old perceive this kind of drawing as a fun and exciting game. It won’t be difficult for children to portray a turtle if they are offered a master class. The drawing can also be based on geometric shapes.
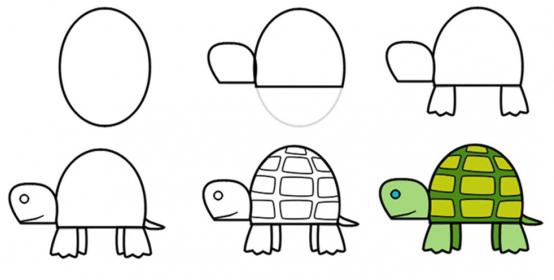
- First, an oval is depicted.
- The lower part of the oval is cut off with a straight segment, the excess is erased with an eraser. This will be the body of a turtle in its shell.
- Just above the lower section of the shell you should draw the turtle's head. Its shape can be round, oval or uneven, but from below it, like a shell, is limited by a straight segment.
- Along the edges of the lower part of the shell, you need to depict the paws in short straight segments, which are slightly wider at the bottom than at the top. They can be made not even, but with several fingers.
- A short tail must be drawn on the back of the reptile.
- Be sure to put eyes and a mouth on the face, otherwise Françoise will die of hunger and will not be able to see her best friend Fedya!
- The animal's shell has a pattern, so you need to ask the children to apply the design on the picture as well.
- Shades of green and brown are suitable for coloring.
Drawing with semolina
I talked about drawing with semolina in articles about games with semolina, as well as about applications for children 1 – 3 years old. There are two ways to draw with semolina:
1 way . You need to pour a little semolina onto a surface with sides: a tray, a baking sheet, a lid from under a large shoe box. And then the child draws simple images with a finger or a brush - waves, paths, circles, etc., makes fingerprints or various objects.
Method 2 . Print out a coloring book for the little ones. Invite your child to apply glue to the image and sprinkle it with semolina. It will be more like coloring with semolina. But you can simply give your child a brush with glue and let him randomly apply it to the sheet, and then pour in semolina, shake it and see what pattern he gets.
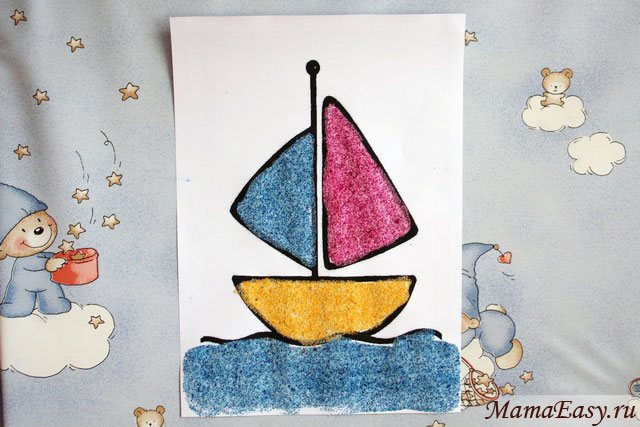
I paint semolina with gouache. Instead of semolina, you can use sand for children's creativity.
Drawing a Teddy Bear Using Geometric Shapes
In kindergarten classes, children receive their first drawing lessons. Children 4 years old can be asked to draw their favorite teddy bear using geometric shapes: circles and ovals. Moreover, you should not focus on the fact that the drawing will be constructed using geometry. But while working, you can call the parts by their scientific names.
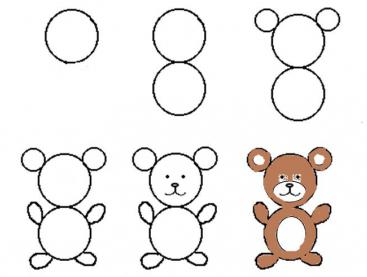
- The bear's head can be depicted using a circle.
- The second circle may be a little larger - this will be the torso. Both figures should touch where the head meets the body.
- The two small circles located at the top of the head are the ears, they also touch the circumference of the head.
- It is better to draw all four legs oval. They are attached to the body, so they are drawn in such a way that the ovals are in contact with the bottom circle.
- Now the eyes and nose are drawn on the muzzle, arcs are drawn from the nose - this is the mouth.
- Paint the bear brown, leaving white the oval near the nose and mouth, the circles on the ears and the large oval on the tummy.
Coloring pages for kids
On the Internet, I have repeatedly come across the opinion that children should not be given coloring books before school. Allegedly, they interfere with the child’s creative development. Some parents are simply afraid to give coloring books to their children, while others have a real phobia.
I don't see anything wrong with coloring books . But rather only benefit if used in moderation. And give the main priority to free drawing, which I mentioned above.
Offer your kids simple coloring books that use 1-2 colors. From 1.5 years old, you can try coloring books that involve the use of several colors. But all the same, the elements in them must be large. And you need to paint them, of course.
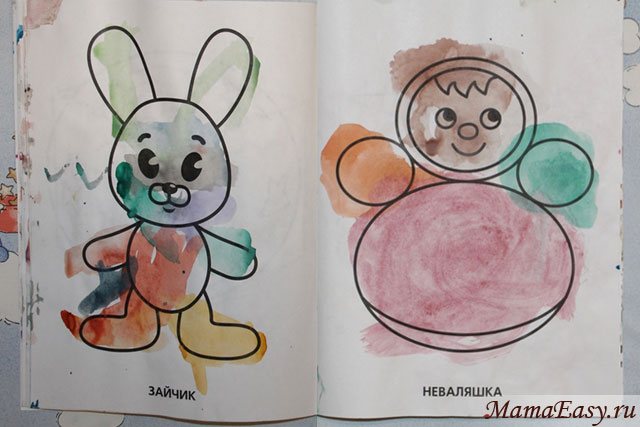
But it’s better to color small images with pencils or felt-tip pens, because the child simply won’t have the patience for large ones.
At 1–2 years old, children are also interested in water coloring books (Labyrinth, My-shop).
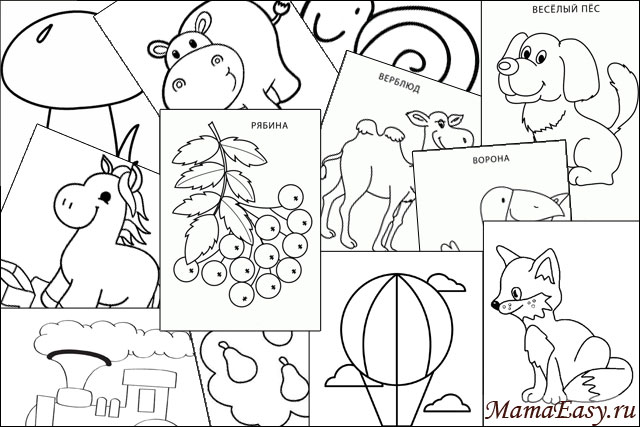
There are ready-made regular coloring books on sale (Labyrinth, My-shop).
You can also DOWNLOAD COLORING PAGES for kids in one file.
The Tale of Françoise the Turtle
You can make such an activity more interesting and even fabulous by telling the kids an amazing story.
“The boy Fedya once had a painted turtle named Françoise. They were very close friends, went for walks in the park together, watched cartoons together, swam in the river together in the summer. But one day Fyodor forgot to put the drawn turtle in the album for the night. And the playful, stupid kitten got playful, played around with an eraser and erased almost the entire image from the picture. The next morning the boy cried bitterly: only a pale outline of Françoise remained on the piece of paper, and even that was completely erased in some places. Guys, let’s help the boy and finish drawing his dear turtle, color it with paints and return Fedya’s beloved friend!”
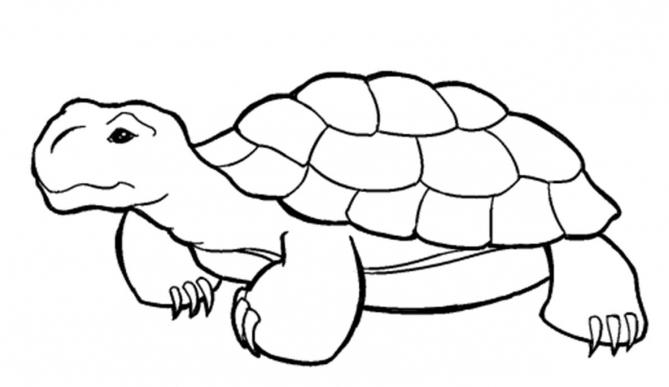
It is important, along with sketches, to give a sample picture for children to draw, so that they can compare their drawings with the original.
Drawing stamps
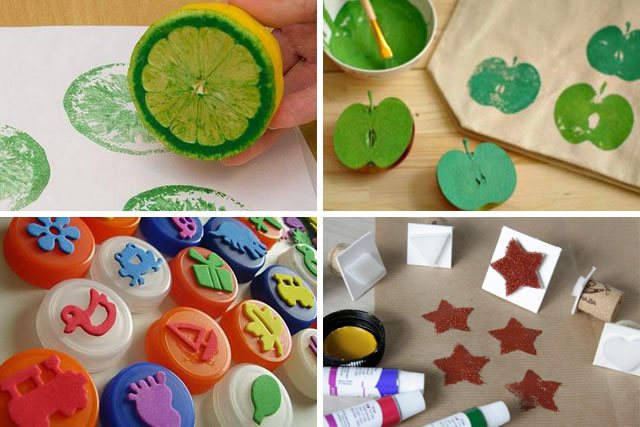
All children draw with stamps with great pleasure. You can make them yourself. For example, from sponges for washing dishes, vegetables. You can use improvised objects and toys as stamps.
Or you can buy ready-made stamps or even entire drawing sets (Labyrinth, My-shop).
I really hope you found this article helpful. Draw with your child and then he will also love this activity. Which drawing method does your child like best?
Similar articles:
- Applications for children 1 - 3 years old
- Games with semolina
- Games with cereals, pasta and beans
How else to develop fine motor skills, besides drawing with dots?
If your child for some reason is not interested in dot-to-dot materials, you can have fun developing fine motor skills in other ways.
- String large beads together on strings or sort through the beads;
- Glue a large sheet of paper or old wallpaper onto the wall and let your child draw his own pictures on the sheet. Drawing on a vertical surface requires more effort and the pens are trained faster;
- As soon as your child is already able to hold small things firmly enough in his hands and does not let go of them if he pulls lightly, start teaching him how to tie shoelaces or braid braids from any ribbons or ropes;
- If you read newspapers or magazines, give your child a marker and encourage him to circle all the headlines with it;
- A good grip between the thumb and forefinger is most easily developed by transferring beans or even peas from one bowl to another, using only two fingers rather than the entire palm.
- Frosty windows or foggy bathroom mirrors are a great place to learn to draw with your index finger.
If you wish, you can use each of the ways to develop your child’s fine motor skills in everyday life, this will help him learn to write faster in the future.
Go to the children's education section
