Album of non-traditional art techniques
Drawing using postcards.
In fact, almost every home has a ton of old postcards. Go through old postcards with your children, teach them to cut out the necessary images and paste them into place, into the plot. A bright factory image of objects and phenomena will give even the simplest unpretentious drawing a completely artistic design. Can a three-, four-, or even five-year-old child draw a dog and a beetle? No. But he will add sun and rain to the dog and the bug and will be very happy. Or if, together with the children, you cut out a fairy-tale house with a grandmother in the window from a postcard and paste it on, then the preschooler, relying on his imagination, knowledge of fairy tales and visual skills, will undoubtedly add something to it.
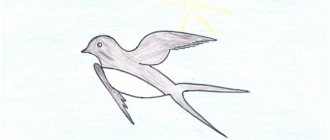
Spray technique
The “spray” technique is the spraying of drops, which in kindergarten can be done with a toothbrush, a ruler, and a comb. Use a toothbrush to pick up paint and draw a ruler along the surface of the brush towards you. Themes for drawing can be absolutely anything. For example, on a sheet of paper we place a composition of dry plants. We attach a vase stencil and a butterfly stencil. Turn the toothbrush away from you (bristles up) and start “combing” it with a ruler, moving from bottom to top. Don’t be afraid to get splashed; if you perform all the steps correctly, splashes of paint and water will fly onto your work. Splash the created composition along the contour, choose darker and more saturated colors (burgundy, red, dark green). You can draw snow like this.
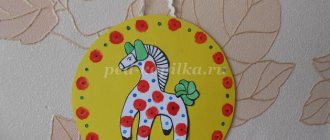
Technique for drawing with semolina.
A drawing is drawn on a sheet of paper with a pencil (or ready-made coloring pages are taken). Then, one by one, the elements of the pattern are coated with glue and covered with semolina. Let it dry, shake off excess grains. When the drawing is dry, paint it with gouache.
Sawdust painting technique.
This method is simple and accessible to almost every child. . A drawing is applied to the surface of the product with a pencil (or ready-made coloring books are taken).
Then, one by one, the elements of the design are coated with glue and covered with colored sawdust. The best wood is birch and aspen, the sawdust should be white. If it is not possible to prepare birch or aspen sawdust, then softwood sawdust will do. The harvested sawdust is dried and sifted through a fine sieve. Raw sawdust sifts very poorly. After this, the prepared material is painted over. We use gouache paints. The paints are diluted with water in the required concentration. The amount of water is determined experimentally. The more water, the paler the coloring material will be, therefore, the color saturation of the sawdust itself will change. The prepared sawdust is poured into gauze, tied (not tightly) and filled with coloring solutions (stir thoroughly). For better impregnation, leave the sawdust in the solution for a day (stirring occasionally, then untie the gauze, put it on film and dry it near the radiator. Store the painted and dried sawdust in plastic containers.