Didactic modeling games for preschool children
"Candy for Dolls"
Purpose: to consolidate sculpting techniques (pinching, rolling, flattening); develop fine motor skills of the fingers, develop creative imagination.
Materials: modeling board, white and brown plasticine, candy boxes, stacks, napkin, rolling pin, scissors.
Progress of the game: invite children to make “candy” for dolls of different shapes from plasticine. You need to pinch off a piece of brown plasticine, roll a ball or cube, take a white piece of plasticine, pinch off a piece, make a sausage out of it, decorate the ball or cube with the sausage. Or roll out plasticine of two colors with a rolling pin, place it on top of the rolled out modeling mass, roll it up and cut it into pieces, put it in a candy box.
"Colorful Ball"
Purpose: to consolidate sculpting techniques (pinching, rolling); learn to mix colors; develop fine motor skills of fingers and perseverance.
Materials: modeling board, classic plasticine, stacks, napkin.
How to play: Invite children to pinch off small pieces from pieces of plasticine of different colors using their fingers. Knead them in your hands, connecting them together, until the plasticine becomes soft. Then roll this piece into a ball. Using a stack, draw lines on the surface of the ball so that it looks like a ball.
"Magic Balls"
Purpose: to consolidate sculpting techniques (pinching, rolling); develop fine motor skills of the fingers, perseverance; contribute to the formation of children's interest in modeling.
Materials: modeling board, modeling compound, counting sticks, napkin.
Progress of the game: invite the children to make balls from the modeling mass of various colors. Then you need to insert counting sticks into each ball. From the received elements, invite the children to make various shapes.
"Tasty apple"
Goal: to consolidate sculpting techniques using the “plasticineography” technique; develop
creative imagination, fine motor skills of fingers; contribute to the formation of children's interest in modeling.
Materials: modeling board, modeling dough, stack, apple template, natural material (beans), napkin.
Progress of the game: invite the children to roll out the dough into a thin layer (0.5-1 cm), and then each child places the apple template on the rolled out plate, cuts it out in a stack, then places the dark beans on the outline of the apple with a leaf or fills the entire apple with beans.
"Let's decorate the pie"
Goal: to consolidate sculpting techniques using the “plasticineography” technique; develop
creative imagination; fine motor skills of the fingers.
Material: modeling board, modeling dough, stack, natural material
(chestnuts, beans, peas, nut shells, etc.), napkin.
How to play: Invite children to flatten a lump of dough - a pie. You can offer to decorate such a pie with chestnuts, beans, peas, and walnut shells.
"Christmas tree"
Purpose: to consolidate the techniques of volumetric modeling; develop creative imagination and fine motor skills of the fingers.
Materials: modeling board, green classic plasticine, stacks, beads, seed beads, buttons, scissors, napkin.
Progress of the game: invite the children to knead the plasticine on the board and give it the shape of a Christmas tree. Using scissors, make cuts in the form of triangles (needles). Offer to decorate the Christmas tree with beads, beads, natural materials or small balls of colored mass.
"Fingerprints"
Purpose: to consolidate sculpting techniques (pinching, rolling); develop fine motor skills of the fingers, develop creative abilities.
Materials: modeling board, modeling dough, dough molds, rolling pin, colored cardboard, napkin.
How to play: Invite children to roll out the modeling dough with a rolling pin. Use a pastry cutter to make impressions on the rolled out dough. With these molds you can cut out figures from it. Come up with a plot and lay out the resulting figures on cardboard.
"Snake"
Goal: to improve sculpting techniques: rolling plasticine between the palms; practice using the technique of flattening and pulling; consolidate the ability to connect parts, pressing them tightly against each other, and smoothing seams; continue to introduce children to the properties of plasticine (soft, pliable, able to take any shape); strengthen the ability to work with a stack; develop children's fine motor skills;
Material: classic plasticine, stack, napkin.
Progress of the game: invite children to roll out a long and thin roller from bright colored plasticine, sharpen the tail, and flatten the head. Remember how a snake hisses: “Sh-sh-sh.” Using stacks, convey the features of the surface of the image - cut through the “scales” with strokes; apply a pattern in the form of straight, wavy, intersecting lines.
"Mosaic"
Goal: to consolidate sculpting techniques using the “plasticineography” technique; develop
creative imagination; fine motor skills of fingers
Materials: plasticine of different colors, colored pencils, stacks, molds, napkin.
Progress of the game: roll out the plasticine. Use a stack or cutters to cut out small squares (you can just roll small balls). On thick cardboard, draw with a pencil the outline of the image: a fish, a vase, a boat, a sun. To make it easier for children to decide on the color of the mosaic to be used, carefully paint the sketch with colored pencils. Now it's time to get down to business. Children lay out the mosaic following the drawing. It's best to start from the center of the image, then gradually move to the edges until the drawing is complete.
"Geometric figures from plasticine"
Purpose: to consolidate sculpting techniques (pinching, pressing, smearing) to consolidate geometric shapes; teach not to go beyond the contour; develop fine motor skills of the fingers and eye; cultivate the desire to complete the work started.
Materials: modeling board, ball plasticine, drawn geometric shapes on cardboard of various sizes, laminated with tape, napkin.
Progress of the game: invite children to pinch off a piece of ball plasticine, press it and smear it on the image of a geometric figure. Say the drawn figure out loud.
"Riddles and guesses"
Goal: to improve children’s skills to create a guess image without visual reinforcement based on the idea; improve sculpting skills using different sculpting methods; develop the ability to create a general composition; develop the ability to solve riddles.
Materials: modeling board, modeling compound, napkin.
Progress of the game: tell the children that they will listen to riddles and solve them in an unusual way - make answers without saying the answer out loud. Take turns asking riddles and invite the children to create answers in the form of sculpted figures. Clarify that you can sculpt both three-dimensional and relief images. It’s even better to try to combine the answers into a common composition. During one game you can offer 2-5 riddles.
"Forms"
Goal: to develop children’s skills in creating various images based on the transformation of forms and creative imagination; improve the ability to use various modeling techniques when sculpting; consolidate children's knowledge about geometric shapes; develop imagination; cultivate interest in modeling.
Materials: modeling board, modeling compound, napkin.
Progress of the game: invite children to sculpt several geometric bodies (ball, cube, brick, pyramid) or shapes (circle, square, triangle). Offer to combine them and turn them into various objects.
"Fantastic Animal"
Goal: to improve the ability to choose a sculpting method (structural, plastic, combined); strengthen the ability to work with a stack; develop the ability to convey the movements of characters in a plastic way; develop imagination and fine motor skills; cultivate interest in modeling.
Material: classic plasticine of different colors, stack, napkin.
Progress of the game: invite children to imagine distant planets inhabited by unknown, fantastic animals. And also imagine that a zoo has appeared where you can look at these animals. Offer to come up with and sculpt some unusual animal for this zoo, give it a name and tell a story about it.
"Dancing Men"
Goal: to create an expressive dynamic image based on the information read and to convey a given movement in sculpting; develop the ability to understand the relativity of the sizes of parts; show the possibility of conveying the movement of a figure by slightly changing the position of the arms and legs; consolidate and complicate the method of sculpting a human figurine from a cone (a figurine of a girl); develop the ability to analyze simple diagrams (little figures in different poses); develop the ability to sculpt human figures in a rational way from an elongated cylinder (roller) by cutting in stacks and adding details (figurine of a boy);
Materials: modeling board, classic plasticine, napkin.
Progress of the game: invite children to repeat the movement or take the same pose as the person shown on the card. And then sculpt it. Sculpt a person in any pose as desired. Combine the sculpted figures into an overall composition.
"Plastic studies"
Goal: improve the ability to come up with your own unique image with short works; develop the ability to sculpt characters from read works; improve the ability to use various modeling methods when sculpting; develop fine motor skills of the hands; contribute to the formation of children's interest in modeling.
Materials: modeling board, classic plasticine, napkin.
Progress of the game: invite children to sculpt their favorite images based on fairy tales. Modeling poetry is the best thing about fun and humorous poetry. Modeling songs. Modeling a performance with scenery based on a literary work.
"Playground"
Goal: to improve the ability to sculpt figures in various ways from a whole piece or from parts; show the possibility of conveying the movement of a molded figurine by slightly changing the position of the arms and legs; combine the sculpted figures into an overall composition; develop children's creative imagination.
Material: classic plasticine of different colors, stack, napkin.
Progress of the game: show the children a picture of a playground on which there are swings and a slide and invite the children to think about what else can be placed on the playground. Then offer to sculpt your own playground where you would like to play.
"Letters and numbers"
Goal: to expand children’s understanding of drawing printed letters and numbers; show that letters and numbers can not only be written, but also sculpted (modeled) in different ways; strengthen children’s understanding of the shape of printed letters and numbers; develop fine motor skills of the hands, constructive and creative abilities, aesthetic taste.
Materials: modeling board, modeling compound, counting sticks, napkin.
How to play: Invite children to sculpt the first letter of their name. Sculpt your name. Make a letter (number) from one long roll, without dividing it into parts. Model the “neighbors” of the written letter (number).
"Plasticine letters"
Purpose: to consolidate sculpting techniques (pinching, pressing, smearing); consolidate learned letters; develop fine motor skills of the fingers and eye; teach not to go beyond the contour; bring up to finish the job started.
Materials: modeling board, ball plasticine, painted letters on cardboard laminated with tape, napkin.
Progress of the game: invite children to pinch off a piece of ball plasticine, press and smear the letters on the picture. Say the drawn letter out loud.
"Color the picture"
Goal: to teach children to lay out silhouettes of given designs from plasticine flagella on cardboard; consolidate the ability to roll out thin flagella; teach not to go beyond the contour; learn to select and arrange shades of colors; develop fine motor skills, hand coordination, eye control; cultivate interest in the process and results of work; cultivate perseverance and accuracy in work.
Materials: modeling board, modeling compound, envelopes with subject pictures showing outline drawings, laminated with tape for reusable use, stacks, napkin.
How to play: invite children to choose a picture of their choice. Then suggest tracing the outline of the drawing with flagella. The color of the plasticine is chosen by the child.
“Whose traces?”
Goal: to consolidate sculpting techniques using the “plasticineography” technique; develop
creative imagination; contribute to the formation of children's interest in modeling.
Materials: modeling board, modeling dough, stack, tools for
drawing a picture (anything that can leave a clear imprint on plasticine: pencil, cocktail straw, felt-tip pen body, large buttons, keys, coins, shells, etc.), napkin.
Progress of the game: invite children to roll out the dough into a thin layer (0.5-1 cm). On the surface of the rolled out dough, squeeze out the desired image with a pencil, a glass, an empty ballpoint pen, a cocktail straw, etc. Children experiment, study, compare different prints, try to determine the source (“Who left this mark?”, “What is this?”, “What does it look like?”, “How else can you leave such a mark? .
"Entertaining labyrinths"
Goal: to teach children to lay out labyrinths on given patterns from plasticine flagella; consolidate the ability to roll out thin flagella; teach not to go beyond the contour; develop fine motor skills of the fingers, hand coordination, eye control; cultivate accuracy in work.
Materials: modeling board, modeling compound, drawings with labyrinths, laminated with tape for reusable use, stacks, napkin.
How to play: Invite children to choose a picture if they wish. Then offer to lay out the labyrinth according to the instructions on the image using plasticine flagella. The color of the mass is chosen by the child.
"Bring the picture to life"
Purpose: to consolidate sculpting techniques (pinching, rolling, rolling, flattening); continue to learn to perceive and accept prepositions in speech; develop auditory perception; contribute to the formation of children's interest in modeling.
Materials: modeling board, classic green and yellow plasticine, a picture of a tree without leaves, a napkin.
Progress of the game: invite children to listen to the story and at the same time perform actions according to the story: “In spring, leaves bloom on the trees (the child sculpts leaves from green plasticine and places them on a picture of a tree). Autumn has come, the leaves on the trees have turned yellow (the child changes the green leaves to yellow ones). suddenly a strong wind blew and tore the leaves from the tree (the child is making fallen leaves). The leaves quietly spin and fall to the ground (the child lays the leaves under the tree on the ground). When the children go for a walk, the leaves will rustle under their feet.”
"Unusual Objects"
Purpose: to consolidate sculpting techniques; develop creative abilities, fine motor skills of fingers; cultivate the desire to complete the work started.
Materials: modeling board, ball plasticine, stack, napkin.
How to play: invite children to create something unusual: an unusual car
(on which you can go on a trip), an unusual tree (on which unusual fruits grow), etc.
"What is missing?"
Purpose: to consolidate sculpting techniques; develop creativity, fine motor skills of the fingers, perseverance; contribute to the formation of children's interest in modeling.
Materials: modeling board, plasticine, pictures of animals with completed body parts, stacks, napkin.
Progress of the game: tell the children that the artist drew animals, but did not have time to finish drawing: “Look what the artist did not have time to draw (a goat without horns, a squirrel without a tail, a hare without ears, a zebra without stripes, etc.). How can I help him?
"Airplane"
Goal: to improve sculpting techniques: rolling plasticine between the palms; consolidate the ability to connect parts, pressing them tightly against each other, and smoothing seams; continue to introduce children to the properties of plasticine (soft, pliable, able to take any shape); strengthen the ability to work with a stack; develop children's fine motor skills;
Materials: modeling board, classic plasticine, stack, napkin.
Progress of the game: invite children to make an airplane: roll out the plasticine and give it the shape of a roller, divide the roller into two equal parts - the body and wings, connect them crosswise, and bend the tail up. Remember how the plane hums during flight:
"Uh-oh."
"Turtle"
Goal: to improve sculpting techniques: rolling plasticine between the palms; practice using the technique of pinching and pulling; consolidate the ability to connect parts, pressing them tightly against each other, and smoothing seams; develop children's fine motor skills and creative imagination.
Materials: modeling board, classic plasticine, stack, napkin.
Progress of the game: tell the tongue twister: “A turtle, not bored, sits for an hour with a cup of tea” and invite the children to make a turtle. First, mold the shell in the shape of a dome, roll up the head, legs and tail, attach the head, legs and tail from below. Mark the eyes with a pencil, mark the shell.
"Bug"
Goal: to continue to acquaint children with the properties of plasticine (soft, pliable, able to take any shape); develop children's fine motor skills.
Materials: modeling board, classic plasticine, stack, napkin.
How to play: ask the children a riddle: “If it flies, it buzzes, if it falls, it crawls and gnaws the ground” (beetle). Invite the children to make a beetle: roll up a ball, flatten it and divide it in half with a ruler, attach the head, mark the eyes with the tip of a pencil, roll up two small antennas and remember how the beetle buzzes: “J-J-J.”
"Car"
Goal: to improve sculpting techniques: rolling plasticine between the palms; practice using the technique of pinching and pulling; consolidate the ability to connect parts, pressing them tightly against each other, and smoothing seams; develop children's fine motor skills and creative imagination.
Materials: modeling board, modeling compound, stack, napkin.
Progress of the game: invite the children to make a car: “Take a piece of plasticine and make a car body with a cabin, trunk and hood. You need to take two toothpicks and pierce through the bottom of the car in the place where the wheels should be. Make wheels from four pieces of dough. Their thickness should be at least 9-10 millimeters. Pin the wheels onto the ends of the toothpicks.”
"Animated figurine"
Goal: to develop imagination, creative imagination, fine motor skills.
Material: classic plasticine of bright colors, stack, napkin.
Progress of the game: invite children to imagine that they are wizards: “You have received a wonderful gift and everything that you blind comes to life. What would you make?" The children do it.
"Wonderful transformations"
Purpose: to consolidate sculpting techniques; develop creative imagination, develop fine motor skills of the fingers; cultivate accuracy in working with plasticine.
Materials: modeling board, modeling compound, stack, napkin.
Progress of the game: invite the children: “Turn a butterfly into a flower, a crocodile into a car, a tumbler into a princess, etc.”
"Magic Transformations"
Goal: to develop children’s skills in creating various images based on the transformation of forms and creative imagination; improve the ability to use various modeling techniques when sculpting; cultivate accuracy in working with plasticine.
Material: “magic wands”, classic plasticine of different colors, stack, napkin.
How to play: tell the children: “There are two magic wands: a long one and a short one. Think about what they can become." In the process of sculpting, children create images based on “magic wands.”
"Let's help the sculptor"
Goal: to consolidate sculpting techniques using the “plasticineography” technique; develop
creative imagination; promote children's interest in modeling
Materials: salt dough, napkin.
Progress of the game: inform the children that the sculptor did not have time to complete the figures from salt dough and asks for help. The children do it.
“What in the world doesn’t happen?”
Goal: to improve the ability to use various sculpting methods when sculpting; develop fine motor skills of the hands; contribute to the formation of children's interest in modeling.
Material: classic plasticine of different colors, stack, napkin.
Progress of the game: invite children to create something that does not exist in the world (fairy-tale, magical, etc.).
"Good and Evil"
Goal: to develop children’s skills in creating various images based on the transformation of forms and creative imagination; improve the ability to use various modeling techniques when sculpting; develop fine motor skills.
Material: classic plasticine of different colors, stack, napkin
Progress of the game: invite children to create an evil or good fairy tale character.
"Dwarves, Giants"
Goal: to improve the ability to use various sculpting methods when sculpting; develop fine motor skills of the hands; contribute to the formation of children's interest in modeling.
Material: classic plasticine of different colors, stack, napkin
How to play: say “I have a magic wand. It can zoom in or out whatever you want. Sculpt what you would like to increase or decrease.”
"Time Machine"
Goal: to consolidate sculpting techniques using the “plasticineography” technique; develop creative imagination, fantasy, fine motor skills.
Material: classic plasticine of different colors, stack, napkin
Progress of the game: say: “Imagine that we have a time machine in kindergarten. You sit in it and can travel to the future and past of any country.” Invite children to imagine and then create what they could see while traveling in a time machine.
"Functions of objects"
Purpose: to consolidate sculpting techniques (pinching, rolling); develop fine motor skills of the fingers, develop creative abilities.
Material: stacks, caps of felt-tip pens or fountain pens, toothpicks, small household items (beads, beads, etc.), natural and waste material.
Progress of the game: invite children to name as many options as possible for using the same object in the process of sculpting from salt dough. The one who names the most other such options wins. For example, a button can be used as an additional detail (an eye, a cap, a wheel, etc.), it can make prints on plastic materials and can be used as a template, etc.
Modeling lessons with children 3-4 years old
You should prepare for modeling in advance with your children. Come up with the texture of the craft, play with it, prepare the necessary equipment. It is better to start simple and gradually complicate the tasks. To begin with, it is better to make three-dimensional figures with children that are more reminiscent of real objects. So, when the child’s hand gains enough strength, drawings can be made with plasticine, that is, with flat textures. How to structure a modeling lesson with children of this age group?
Introductory part:
- organize time;
- formulation of the problem.
Main part:
- prior knowledge of the subject;
- casting technology;
- self-employment of children.
Final part:
- analysis of children's works;
- summing up.
Let's look at each part of the lesson in more detail. The introductory part helps prepare the child for the lesson and interest him in modeling. This part is based on play, since play is the main activity in preschool childhood. Children learn everything, children learn everything through play.
The main part of the lesson is direct modeling. Firstly, children are invited to study the sculpted object in detail. The shape, color, and parts from which the object is made are specified. The adult then demonstrates the techniques and techniques of sculpture. Subsequently, the children themselves try to repeat the teacher’s actions.
Along the way, it is specified what color and in what quantity to take plasticine, and also names the technique by which the part or the entire product will be made. So children have time to work independently. Each child decides for himself how to decorate his work, how to assemble an ornamental composition.
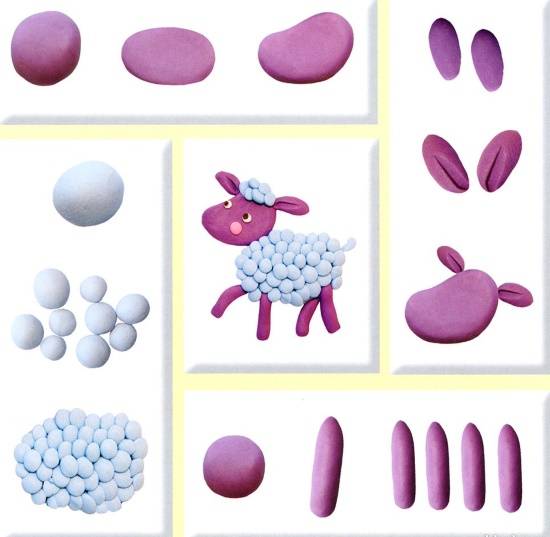
The final part of the lesson allows you to summarize: what you learned, what you learned. And collective analysis of children's work allows children to compare their work with others to determine what worked best
The teacher should pay special attention to analyzing the children’s work. It should be emphasized that what was especially successful was the simplest thing that happened
The teacher decides the shortcomings of children's work independently. In the future, this is the basis for individual work on plasticine modeling with a child. During the analysis, children learn to see the positive aspects in other people's works and notice design features.
This lesson structure is used in kindergartens, but when working with a child at home, you should also adhere to this plan. We offer several step-by-step instructions for sculpting plasticine crafts with step-by-step complication.
Making flatbreads
This work is already more difficult. With its help, we will teach the child how to make one of the main parts used in the craft - a cake.
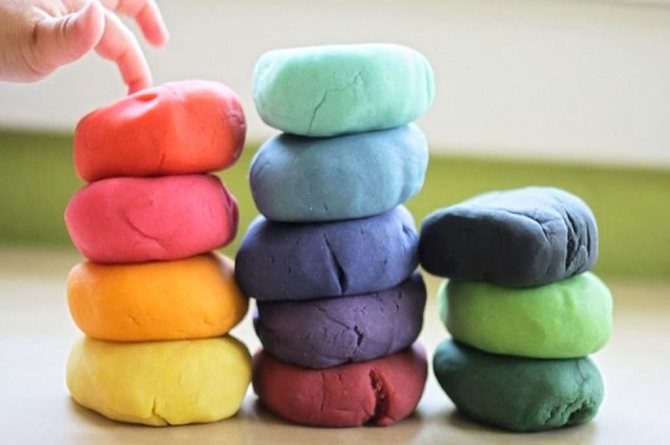
What you need:
- plasticine;
- coloring in large fragments, for example, a ladybug or a traffic light.
In this lesson, the child must tear the desired color from an ordinary piece of plasticine, press it with his finger and apply it to the drawing.
Likewise, you can make snowflakes on a picture, apples on a painted tree, or design wheels for a car or steam locomotive.
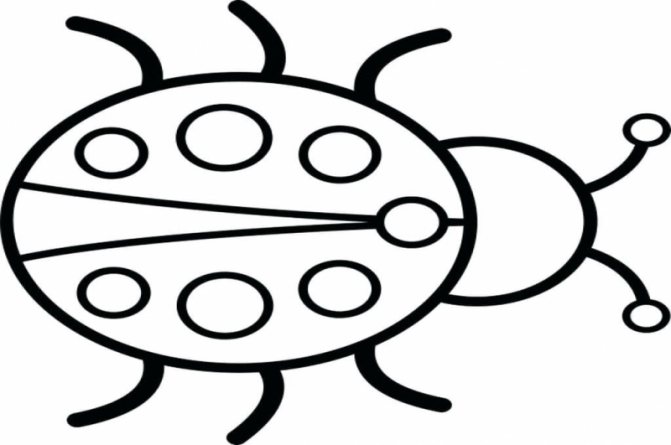
ladybug for cakes
You can work not only in a certain place. The child can arrange the received parts in any order.
Making a mushroom
Perhaps the simplest plasticine figurine is a mushroom. This is a small tube at the bottom (mushroom stem) and a cap at the top, consisting of a disk or hemisphere. First, you can sculpt a simple mushroom, and then make a fly agaric, decorating the red cap with a white spot of flattened balls. For greater stability, the leg can be made thicker.

Plasticine mushrooms
Step-by-step instructions for sculpting figure No. 2 “Colored umbrellas”
Goal: to create a colored umbrella made of plasticine.
Demonstration material: real large umbrella, children's umbrella.
Materials and equipment for work:
- plasticine;
- support table;
- heap;
- thin cocktail tube;
- wet or dry wipes.
What else to read: Didactic math game for preschoolers 3-6 years old
Progress of the lesson
Introductory part. An adult asks a child to guess a riddle about rain:
- If I cry it doesn't matter
- Instead of tears, water flows.
- I'm crying so much
- Because of the gray cloud...
You can then look at the illustrations in the related books and talk about what people need when it rains. I propose to look at the umbrellas and describe them.
Main part. Before we start sculpting, let’s look together with the child at what parts the umbrella is made of and what shape they have. Now let’s invite the child to choose the color of the future umbrella and decide on its size. The child takes a stack and cuts out the required amount of plasticine from a whole block.
Let's start sculpting. First, the adult shows a running pattern, then the children perform independently. The umbrella dome is a disk, for which we first roll a plasticine ball. Now we flatten the ball between our palms and make the center of the resulting disk slightly convex by pushing it with our thumbs.
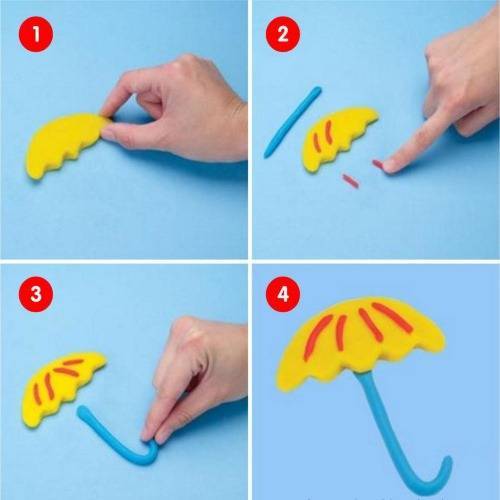
To make the rod that holds the dome in place, take a piece of cocktail tubing about 1/3 of the way down. Attach a cocktail straw to the center of the plasticine disk. Now let's work on the handle of the umbrella. It can be in the form of a hook or a plasticine ball.
For the handle hook, take a small sausage out of plasticine, fold it and attach it to the tube. It turned out to be a pen. Now all that remains is to decorate the resulting umbrella. For decoration, you can use plasticine, or you can add different materials: beads, small seeds, cereals.
Final part. At the end of the lesson, we play crafts with the child. For example, let's give a toy hedgehog an umbrella. We will also analyze with the child what he did especially well and where he needed help. Considering this information, we choose the following idea for modeling from plasticine.
Lesson with plastic material
The video channel “Super Parents” teaches children (from 1 year old) and their parents the basics of interacting with plastic materials. The blogger uses a special composition and homemade unsweetened dough. It is necessary to familiarize the little master with plastic and tell him for what purposes it is used, after which he can begin to practice. The first stage is kneading, the second is pinching, the third is gluing the parts, the fourth is rolling the ball, the fifth is cakes with your finger or palm, the sixth is sausages and these rings. Cut the sausages into stacked pieces. First the adults help, then the child trains.
We are gradually moving on to more complex crafts.
We suggest mastering plasticine or plasticine quilling by laying out a drawing with plasticine flagella.
It is quite difficult to roll a thin flagellum with small hands, so we offer you a little trick. We will need a syringe in which we put a piece of plasticine.
Dip the syringe into boiling water. We leave it for a couple of minutes, you will have to choose the time, because soft clay melts faster, and hard clay takes longer.
Then we begin to squeeze out strips of plasticine.
Tip: it is not necessary to heat several syringes with plasticine at the same time. It is better to do each color separately, heating the water each time.
When the plasticine has cooled a little, start rotating it in a circle or spiral oval. We make all the preparations that we deem necessary.
And we create our own composition. We decided to make a bouquet. In this case, you can change the composition: the plasticine comes off the paper quite easily; first I “assembled” the bouquet, and then my son. And I think he did better.
She encountered an even more complex technique: creating three-dimensional objects from crepe paper and plasticine. You can watch individual master classes on this technique on our website.
Pressing various objects into plasticine
This is no less important activity. It will help in the future to create unique crafts based not only on plasticine.
Preparing for the lesson:
- plasticine base;
- any small items (pasta, seeds, beans, beads);
- plasticine board.
You can offer your child to plant seeds or mushrooms. If you're looking for an easier activity, buy star-shaped or car-shaped pasta. The child should press them to evaluate the result.
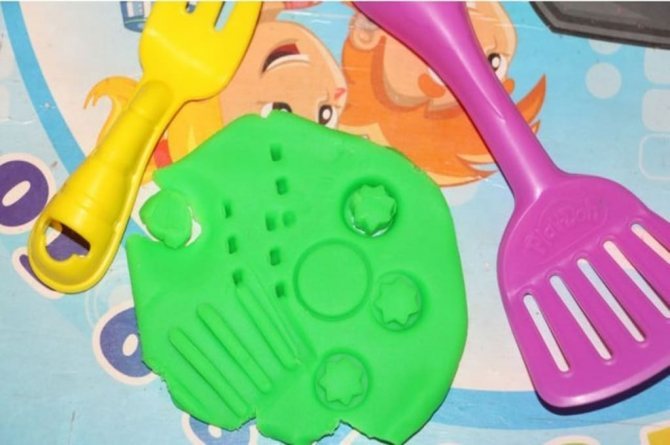
Why did we focus on this type of business? This follows from the two previous lessons. The child already knows how to separate the pieces, make a cake out of them, and as a result he will be able to “put” an additional object into the plasticine. And to make the practice more interesting, you can use this lesson to make a hedgehog from plasticine and seeds.
Dividing plasticine into pieces
These business options are at the heart of the next big deals.
Prepare:
- plasticine;
- a printed image of a chicken, dog or other animal.
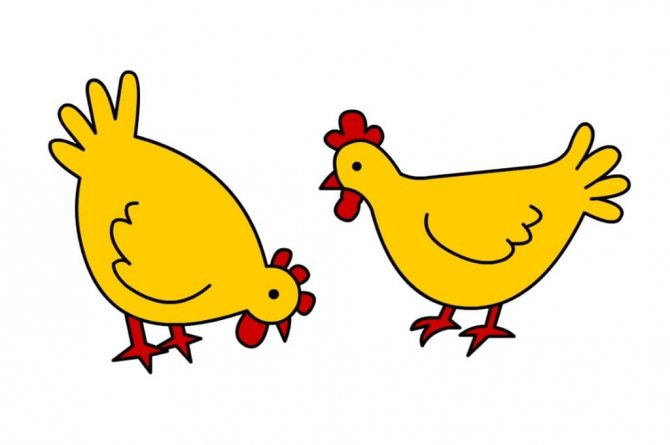
(Chicken model)
Ask your child to separate the seeds from the play dough and glue them to a picture of a chicken to feed it. We can feed dogs and other animals in the same way.
We have collected several simple options in another material.
Learning to use a stack
Although the battery is made of plastic, it can be dangerous. It is very important to teach your child how to use this device through simple steps. How to do it:
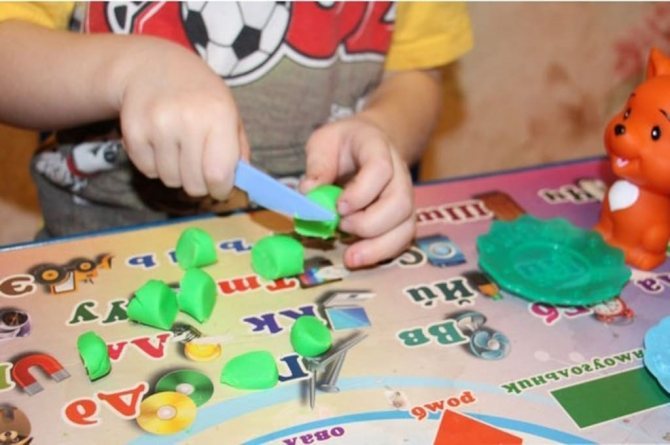
Using a stack
- Invite your child to place a large piece of plasticine on the board. The child already knows that to do this you need to roll the ball and press it with your palm to the table.
- Using a stack, show your child how to cut out patterns on plasticine. The child can continue the cutting process under your supervision.
- When finished, offer to scrape the plasticine off the board with lint.
