What and how to make an applique from leaves
What we need:
- 1. Natural material: leaves of various sizes, shapes and colors (they can be dried in advance), twigs, flowers, herbs, seeds.
- 2. Colored paper, felt, glue, scissors, paints, pencils, cardboard.
- 3. Varnish can also be useful to fix the finished work and give it shine.
How to work with leaves:
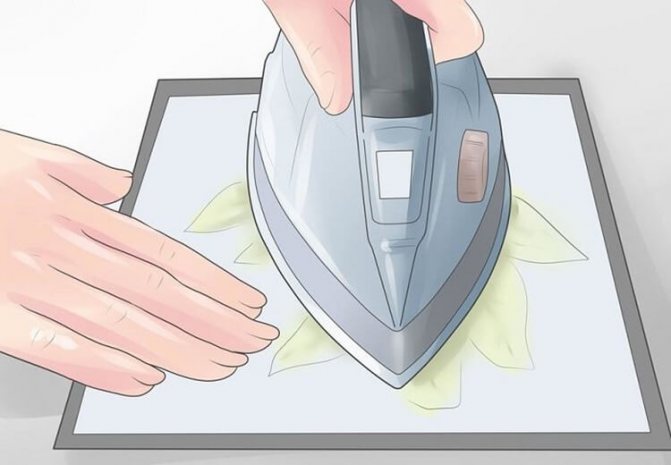
To start working on crafts from leaves, they must first be dried. This can be done between the leaves of books, or using an iron. Store the leaves between the pages of books or newspapers.
Types of applications made from natural materials
- Overlay applique. A simple look that does not require additional work with leaves - they are glued to a sheet of paper or cardboard, creating the intended plot. These can be animals, trees, mushrooms. You can add some details.
- Mosaic or modular application. This technique involves gluing leaves that are identical or similar in shape. This way you can make a bird's tail or fish scales.
- Symmetrical applique. In this case, it is necessary to select similar leaves to create mirror images. This way you can make an image in water, a butterfly, a dragonfly.
- Ribbon applique. A type of symmetrical applique, but in this case you can make several similar images.
- Silhouette applique. The leaves are trimmed to create the desired pattern or shape.
Children become interested in applications and crafts even at the stage of collecting material. Kids like to collect leaves on the paths while walking, look for cones and chestnuts. Therefore, it will not be difficult to persuade your child to use all this to create a beautiful applique.
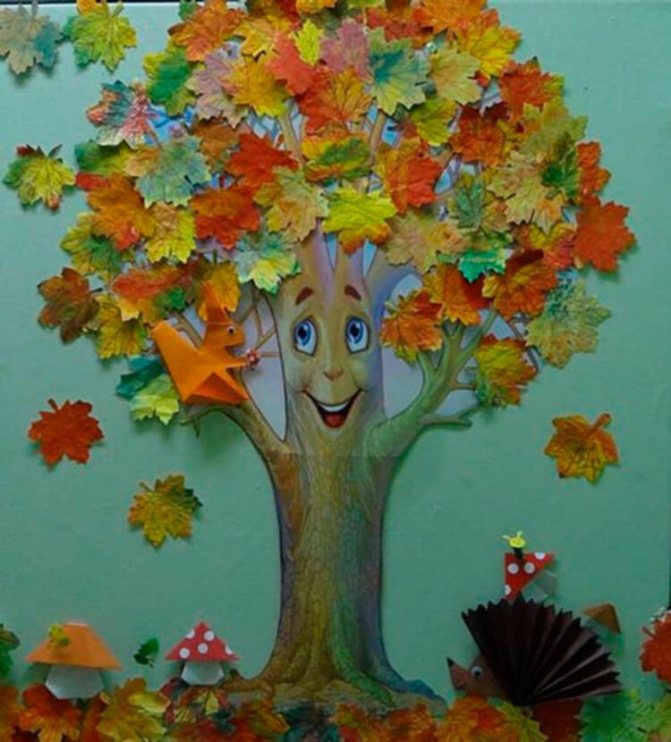
Family tree making technology
If you want to try something new in your work, then I suggest you do some applique work in the form of a family tree. In this case, it is advisable to make the crown of the tree whole; voluminous leaves are not suitable here. In this photo they look very sloppy.
What will happen on the crown depends on your imagination. You can stick apples on which children will write members of their family (suitable for a preparatory group) or flowers. You can also ask parents in advance to bring photographs of family members in the form of small circles. Such a craft can even take pride of place in the living room and become a family heirloom. There are a lot of options, choose depending on the age of your students.
Simple autumn applications for kids
It is always more difficult to work with the youngest children and you need to find an approach to them. They cannot be forced to sit on one job for a long time. Therefore, the craft should be as simple as possible. How to make an interesting autumn-themed craft in just a few minutes to inspire your child to continue.
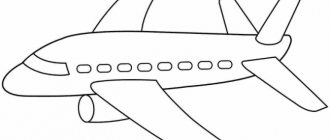
It seems that nothing simpler than this application can be found.
Take one beautiful yellow leaf. Turn the wide part down. Glue it onto cardboard. You can finish drawing the arms and legs, and insert the drawn umbrella into your hand.
A leaf like this with eyes will look funny. They can be made from plasticine or cardboard, or maybe you can find small buttons and glue them on. Don't forget to make it cheerful by drawing a smile.
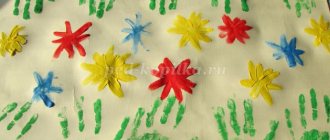
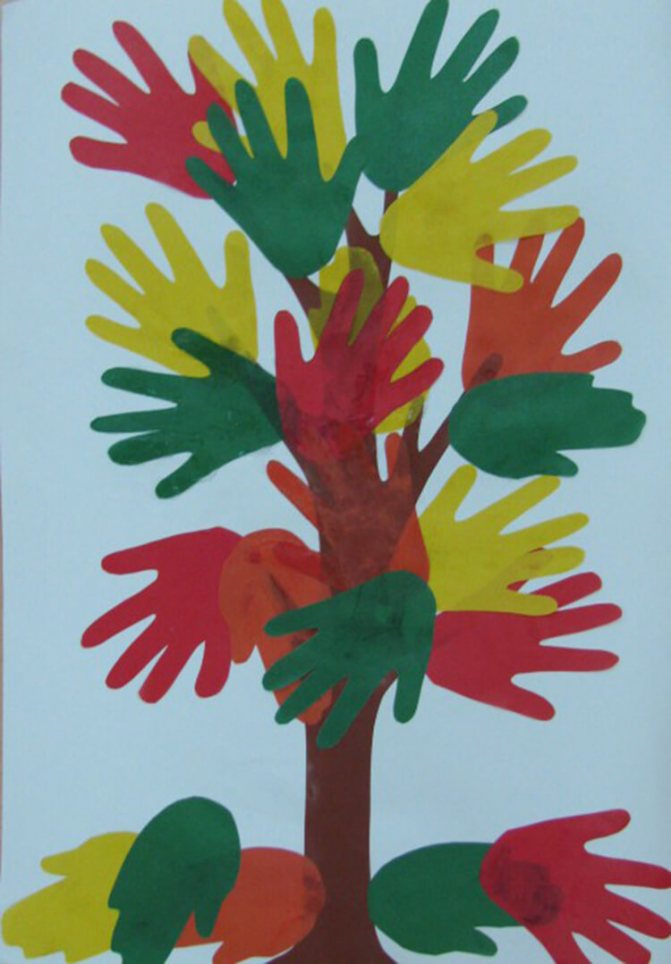
Autumn from palms: applique
We will need:
- Colored paper
- Scissors
- Glue
- Sheet of cardboard
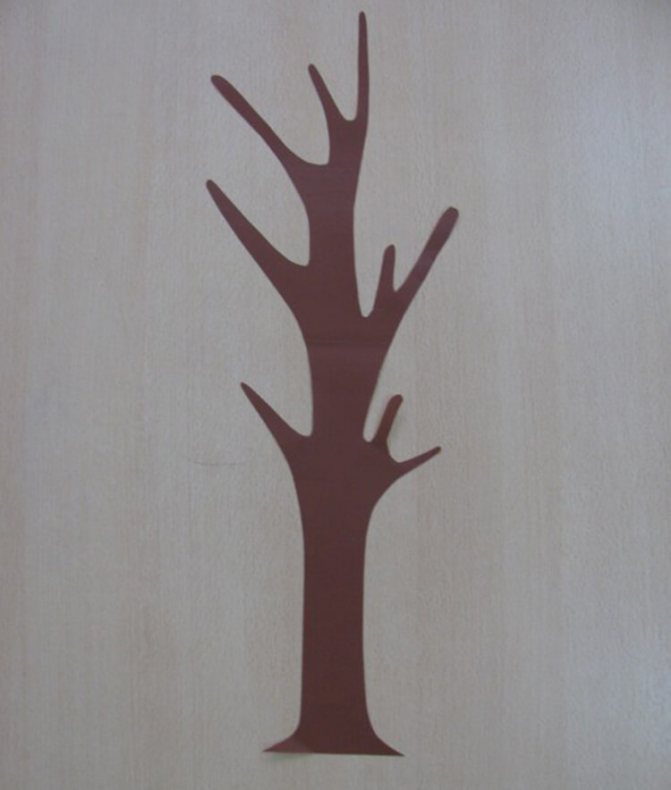
1. We need brown paper to create a tree trunk.
2. Trace children's palms on colored paper, making several multi-colored blanks.
3. Glue the tree trunk and leaves onto the cardboard
Options for appliqué on the theme of autumn made from palms:
Application for the younger group: autumn tree
Another applique option for the little ones is a tree.
It’s easy to make: collect thin branches of approximately the same size and glue them in a bunch on cardboard. We lay the leaves above like a crown. You will get an autumn tree from leaves.
You can make a torn applique from colored paper.

Using cereals you can make a beautiful autumn tree.
Paint the millet with different colors. Draw the trunk and branches. Using PVA, glue the cereal to create a tree crown.
Application options
Many people believe that such a craft can be made exclusively from colored paper, but there are other methods. You can stick it on cotton wool, cotton pads or any other elements. In this case, the result will be completely different. Therefore, we recommend experimenting, introducing your child to creativity and developing his original approach to creating things.
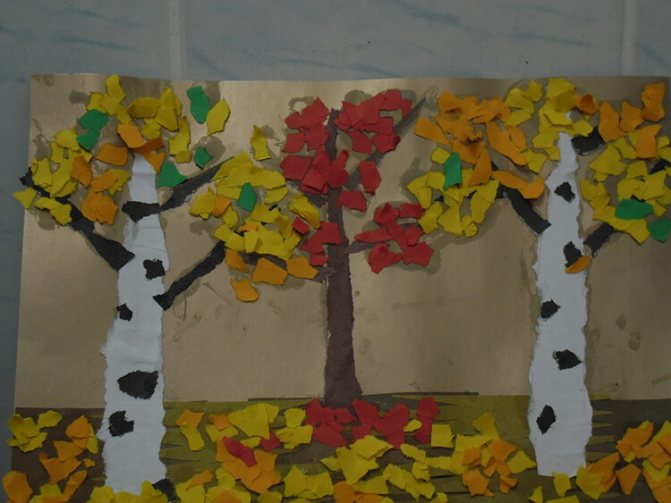
Flat paper applique
The standard way to create an autumn forest. To do this you need:
- Take a piece of paper of any color that seems most suitable - white, blue, green.
- Glue a strip of paper along the bottom to imitate the ground. More often they choose brown or green. Just choose this color that is contrasting with the background.
- Make several trees of different colors. It can be yellow, orange, dark green, brown, mustard. Here the child must draw the outline of the future tree on the back of the sheet, and then carefully cut it out.
- Don’t forget to cut additional trunks for each tree.
- Carefully, lubricating the back side of each blank, stick them onto the prepared sheet so that the trunks stand on the ground.
- Then suggest using a black or dark brown felt-tip pen to draw branches directly on top of the colored paper.
The technique is easy and accessible, even for small children. It is used in kindergartens.
Volumetric techniques
By working not only on a given theme, but also on texture, you can achieve a certain effect when creating an appliqué. There are several techniques for creating volumetric applications. Let's try to analyze the main and most effective of them.
Working with cotton wool
This method involves molding pieces of cotton wool into the required volumes. Fixing them to the main sheet. And then carefully painting the entire surface to create a specific color scheme for the entire composition.
This is done as follows in class:
- A piece of cotton comes off.
- It is necessary to prepare a small container of water to make it easier to mold the cotton wool.
- By dipping your fingers in water, give the cotton a certain look and shape.
- Lubricating or dipping one part of the cotton wool into glue, then fix it on the paper in the right place, while creating a tree crown.
- Take a brush with a fairly voluminous and thick bristle, dilute the paint of the appropriate color quite thinly, and with precise movements paint the cotton wool in the desired color. It is not necessary to achieve a continuous tone creation. It will be enough to apply it pointwise.
- Cut out trunks from paper and glue them under the cotton wool.
Application with cotton pads
It is necessary to invite the child to take cotton pads and color them in the desired color. Take into account and prompt the child that the final application will look most impressive if the cotton pads are painted with several shades of the same color at once.
Cut out a trunk from colored paper and glue it to the main sheet. Now start gluing cotton pads around the trunk and on top of it, forming the crown of the tree. Keep in mind that if they are placed one on top of the other, with a slight overlap, you can achieve greater volume of the composition and its effectiveness.
Make several of these trees, preferably painting cotton pads in different colors.
Composition of rolled strips of paper
In this case, a colored sheet of paper needs to be cut into thin strips of short length and glued into rings. Cut out the trunk and glue it to the base.
Drop a drop of glue onto the rings, preferably in the place where there is a seam on the paper. And fix it around the trunk in this way so that a crown is formed.
Please note that the rings can be glued both vertically and horizontally. This will result in completely different wood looks. Therefore, you can combine several methods on one application to get more texture.
Using methods for creating an autumn forest appliqué, you can arrange a real master class for your child, both at home and in classes in the garden or at school. Although, there are other ways that the teacher must also take into account when drawing up notes for the relevant classes.
Application for the younger group on the theme of autumn
Applications made from natural materials in kindergarten are not very complicated. For them you can use not only leaves, but seeds, acorns, twigs. Colored paper and cardboard are also used.
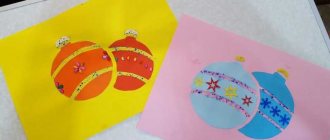
Autumn flower applique
Beautiful colorful leaves that fall to the ground from trees can be transformed into an autumn flower. You can create such a flower using glue and a sheet of cardboard.
If one flower is not enough, then you can make a vase with flowers from autumn leaves.
Beautiful umbrellas will be made from pieces of colored paper. This type of applique is called cut-off.
Applications for kindergarten
During kindergarten classes, children do the simplest work - create silhouettes of familiar animals and birds, make simple flowers. Kids can also collect the material themselves during a walk. The main task of the teacher is to develop initial skills in working with scissors, glue, and paper.
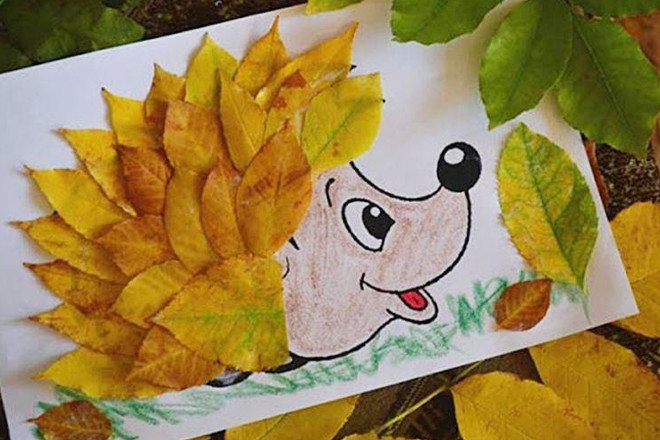
Hedgehog
Hedgehog leaf applique is one of the first crafts in kindergarten. The kids are asked to make needles out of natural materials. Children can trace the face and nose according to the stencil suggested by the teacher.
To work you will need:
- base - cardboard, cut wallpaper, album sheet, colored paper;
- PVA glue or glue stick;
- autumn leaves with sharp edges (birch, maple, rowan, currant).
Glue can be replaced with plasticine, which children rub with their fingers according to a template pattern. In this case, the eyes and nose can also be made from plasticine balls.
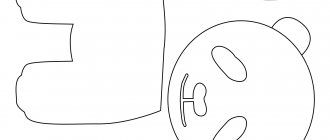
Templates for applications:
If the group copes well with the basic task, you can offer a more complicated one - add a fungus laid out from leaves or berries from painted acorn caps to the needles.
Owl
An owl or an owl is a good example of symmetrical appliqué. The teacher can talk about the habits of the bird, explaining why it has such expressive eyes. You can use buttons as eyes on the applique itself.
To make it easier for children to repeat a complex silhouette, the work should be divided into stages, performed step by step:
- on a sheet of paper draw a branch on which the owl will sit;
- using a stencil or by hand, outlined the head and body at the same time - an oval;
- find the position of the eyes and wings, make the appropriate notes.
The children must handle the rest of the work themselves. They need to find leaves of the same size for the wings and line the body with small feathery leaves. The work is decorated with spectacular “ears” and paws, which should rest against a pre-drawn branch.

Owl templates for applications:
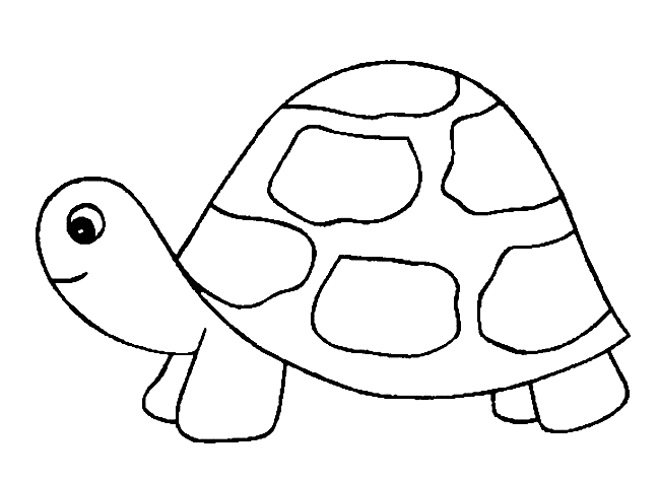
Turtle
There are several options for how to make a turtle. You can recreate the carapace ornament on the finished drawing. In this case, you will need to cut squares or hexagons from large leaves. The drawing itself, the basis for the lesson, can simply be printed.
The second option is to create a turtle from one birch or aspen leaf. Paws can be small leaves rolled into a cone or perfectly similar “helicopters” - ash seeds.
To make the picture complete, you can also consider an aquarium background. Cutting skills from colored paper will come in handy, although corals and small fish can also be made from leaves.
Turtle templates for appliques:
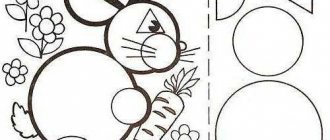
Hare
You can choose the bunny shape. From leaves it is easy to recreate both a running silhouette and a slant standing on its hind legs. In any case, the image will be recognizable, thanks to the long ears. At the same time, the teacher can tell you how the camouflage color of this animal changes in the fall.
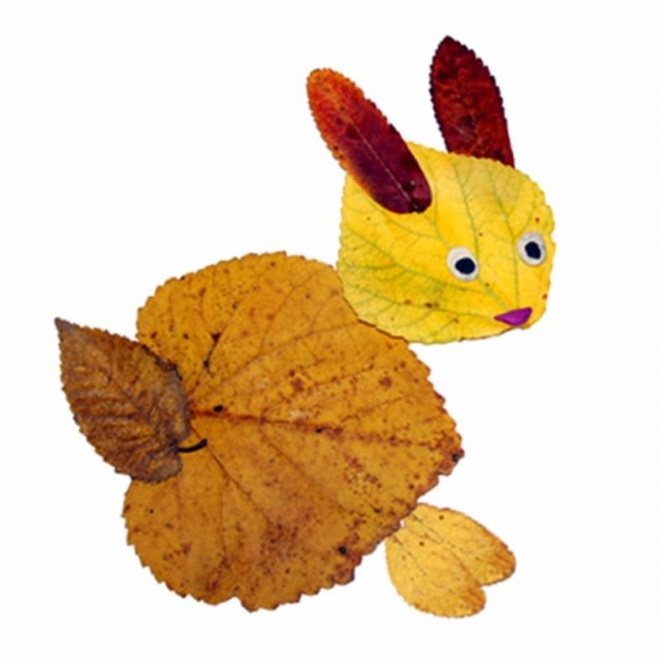
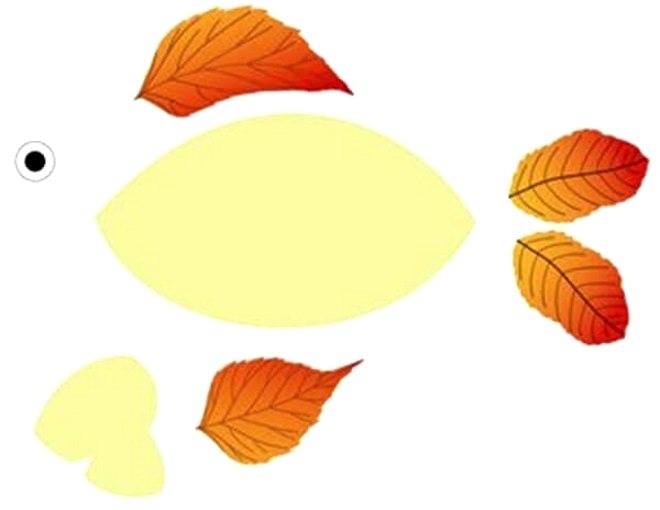
Fish
A fish made from one leaf with a drawn or added tail - a level of complexity that is accessible even to kids from the nursery group. Older children can be asked to pretend to be a goldfish - by this age they already know the fairy tale of the same name.
In this case, the fish must correspond to:
- laid out from glued overlapping small leaves of scales;
- with a large beautiful tail made of a maple leaf or aspen fan;
- with a crown made of a leaf glued into a tube.
From the same leaves you can create waves on which a fairy-tale heroine rises, or algae if the underwater world is depicted.
Sun
The image of the sun in the garden can be an independent work. At school, this same element will become a template for a large panel on an autumn theme or part of a festive classroom decoration. The simplest sun is small leaves around a dinner or printed template. To make the craft more effective, children need to be shown how to carefully glue leaves in a circle in layers from outer to inner. In this case, the image will appear three-dimensional.
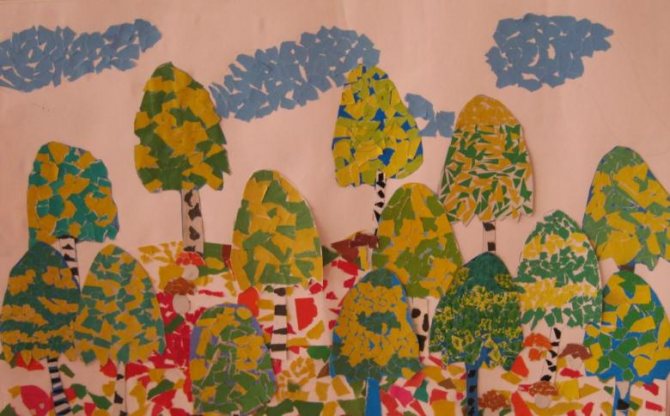
Autumn forest
The image of an autumn forest made of leaves develops associative thinking and imagination. At the same time, the work remains extremely simple - children just need to choose neat, spectacular leaves, stick them on the background and add trunks to them.
You can talk to older groups about perspective and contrasts, showing how yellow “birches” and “aspens” look impressive against a background of dark green “fir trees” (oak leaves or branches of coniferous trees). The concepts of “background” and “foreground” can be discussed.
Autumn applications: preparatory group
Applications made from natural materials in kindergarten occupy a large part of the children's development program. Autumn gifts of nature open up many possibilities for activities with children. Therefore, autumn fairs are a place where you can show off your talents.
You can invite the children to come up with a real composition of leaves.
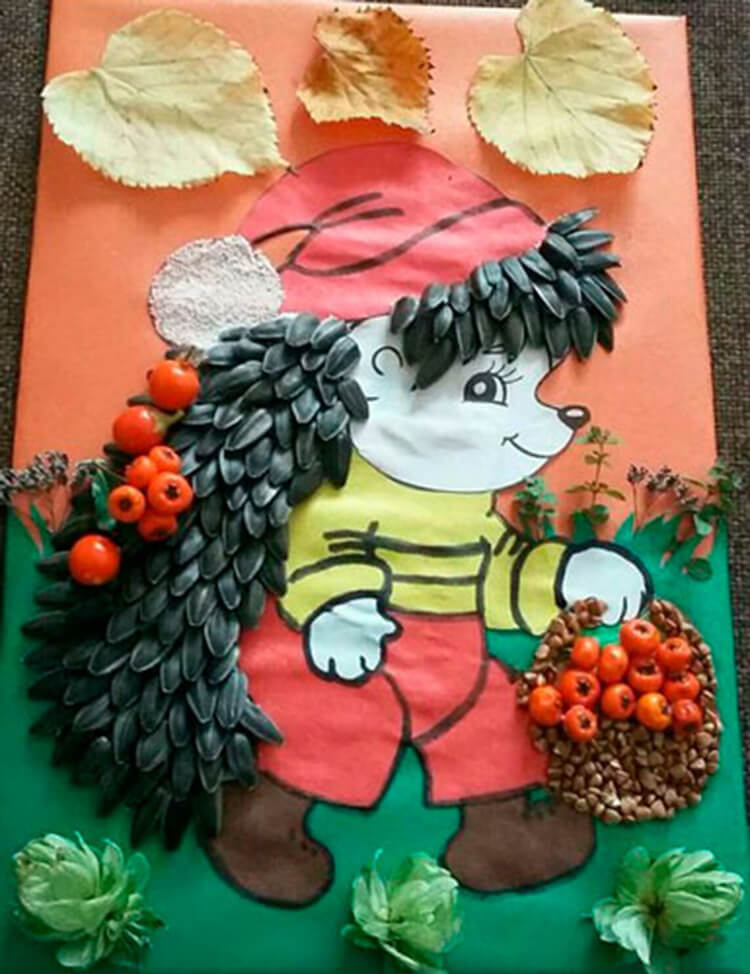
If you combine drawing and applique, you can make such a cute hedgehog from seeds.
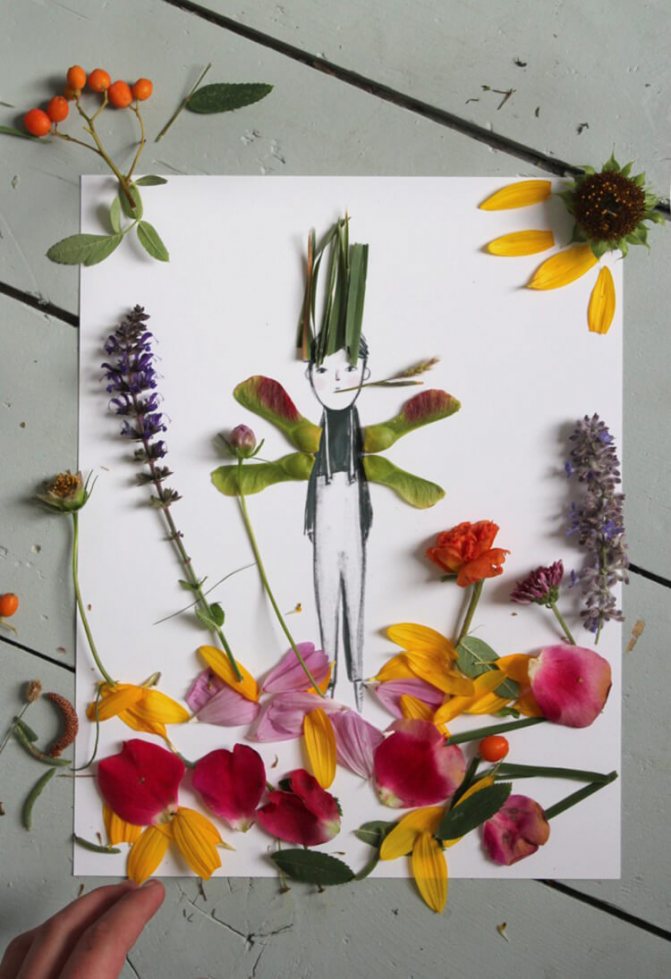
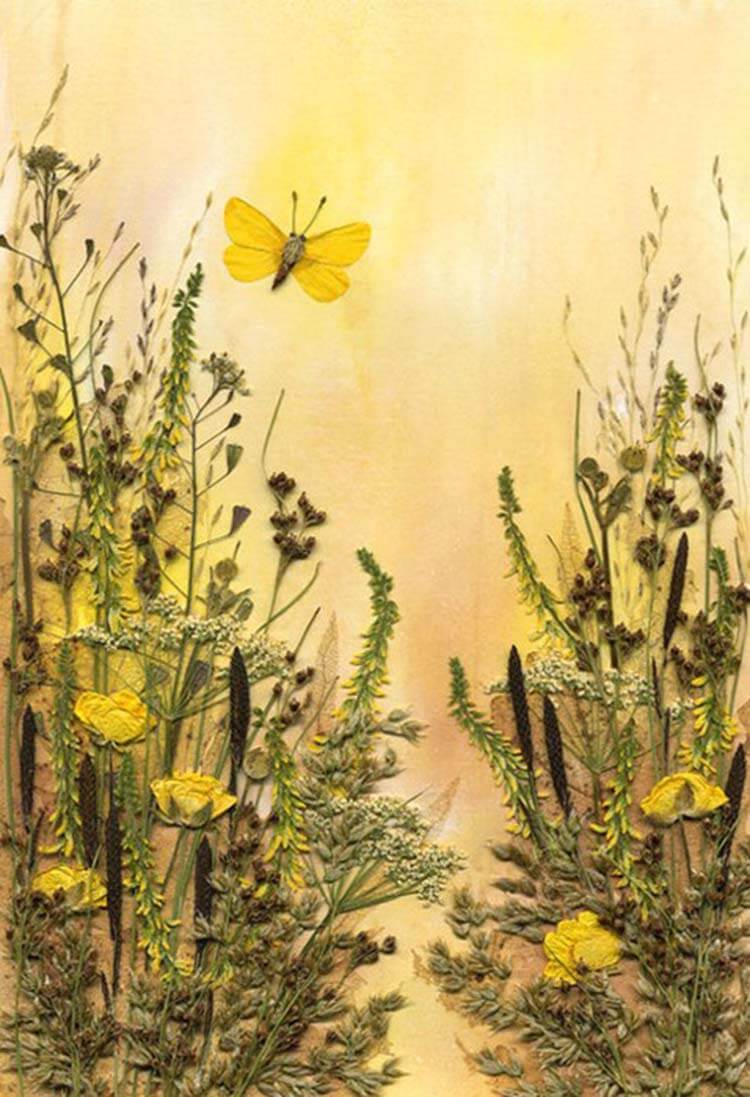
Using flower petals and grass sprigs, you can make beautiful applications
Applications for school
The difference between the program for schoolchildren and the application for children 4-5 years old is greater freedom of creativity. The teacher distances himself as much as possible, inviting students to independently choose the plot, characters and implementation of their own ideas. He can only suggest methods for implementing unusual techniques.
Templates are also abandoned when working with school-age children. They are already able to draw animal faces and silhouettes on their own. You can only suggest characteristic details - remind that the mouse needs a long tail, and the squirrel needs tassels on its ears.
Leaf applications: senior group
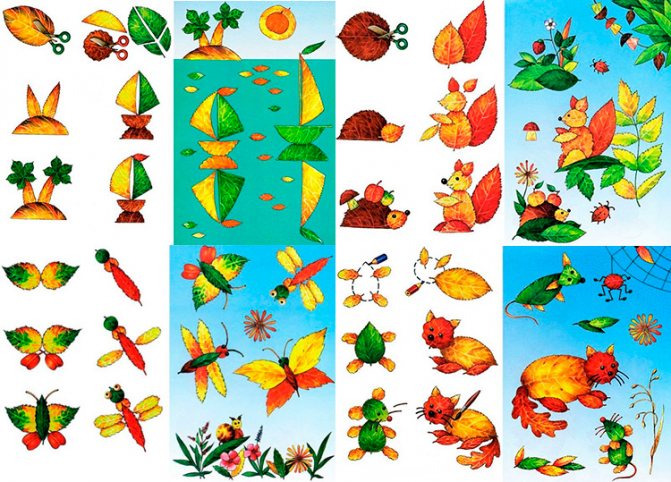
Leaves are the most accessible material for embodying your talent in creating bright and colorful paintings and applications on the theme of autumn. By choosing leaves of the correct shape, you will get a variety of animals and insects.
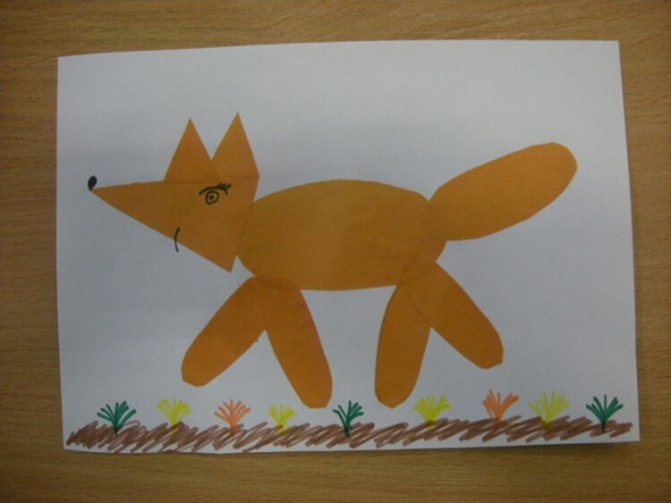
Applique: fox made of colored paper
It is very convenient to make applications with children using ready-made templates. To do this, just print the blank and cut it out.
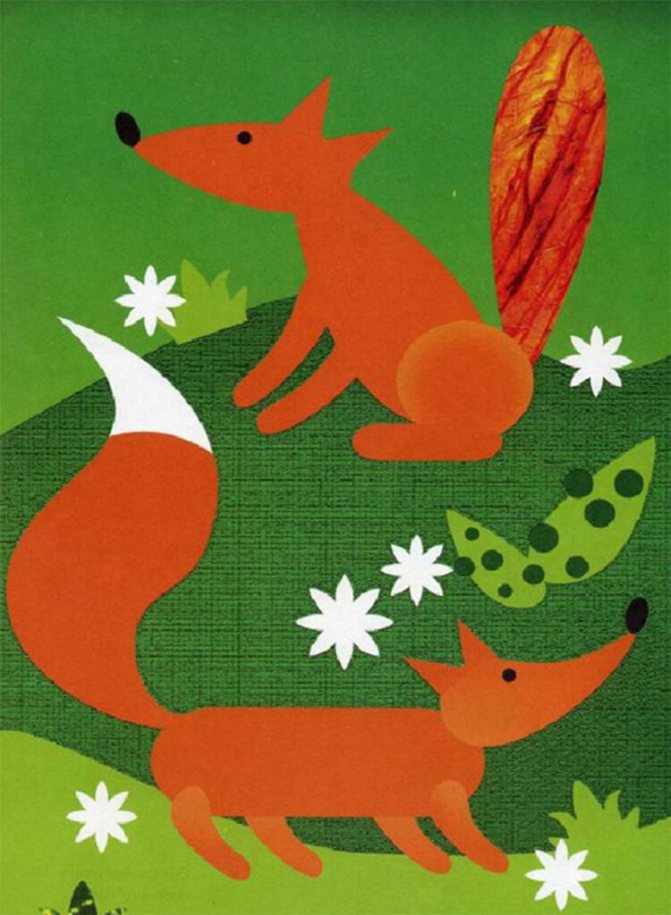
Another version of the fox template made from colored paper made of geometric shapes.

The fox cubs may turn out completely different, but adding them with a drawing will result in interesting works:
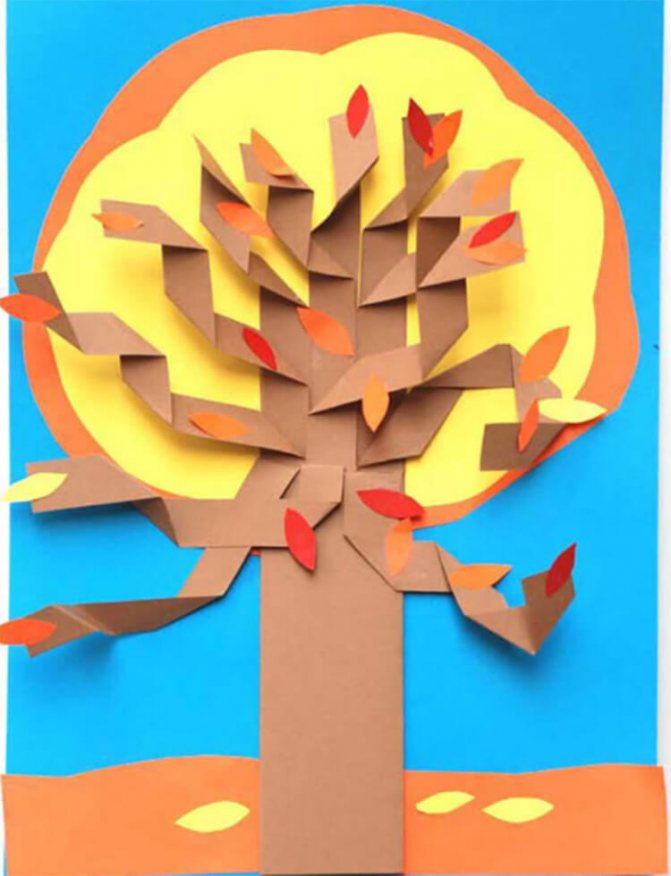
Unusual three-dimensional applique made of colored paper
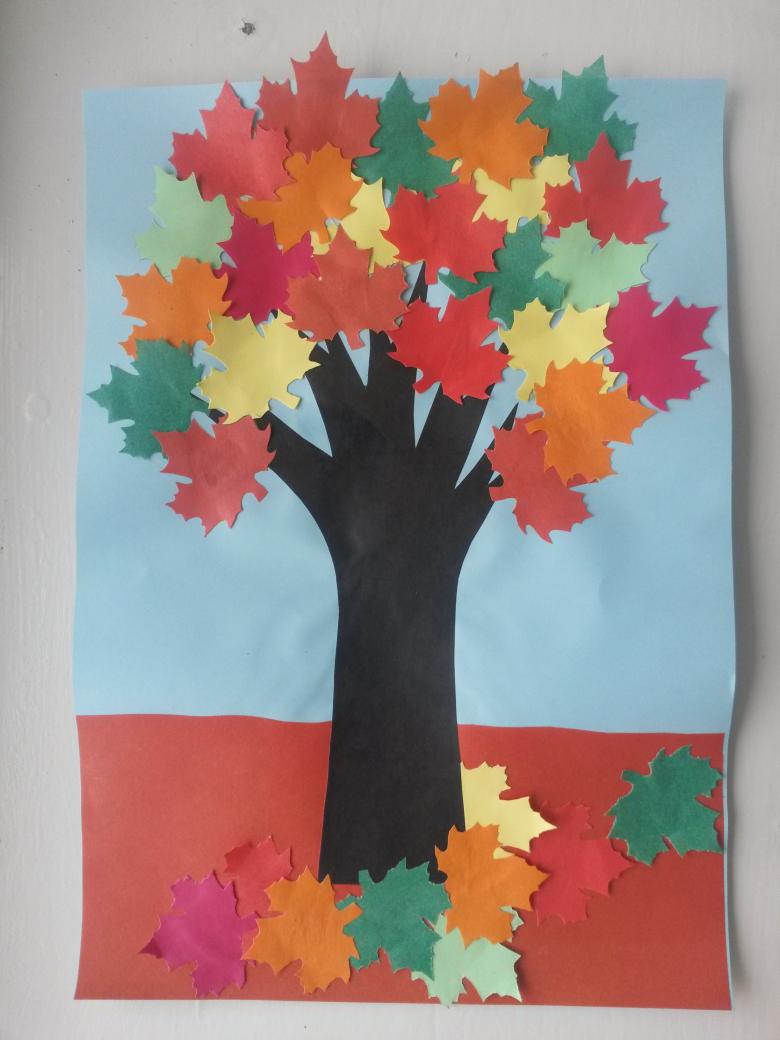
Applique Autumn tree: middle group
The change in nature in autumn is noticeable to everyone and even children see the difference when the trees turn yellow.
We will need:
- Sheet of cardboard
- Colored paper
- Glue
- Scissors
Create a tree trunk and branches from brown construction paper.
Glue the tree onto a background sheet of cardboard, having previously made a tree crown
Glue leaves of different colors onto the branches of the tree.
Autumn mushroom: applique
You can always find mushrooms under a tree in the fall, so learning how to make mushroom appliques is also useful.
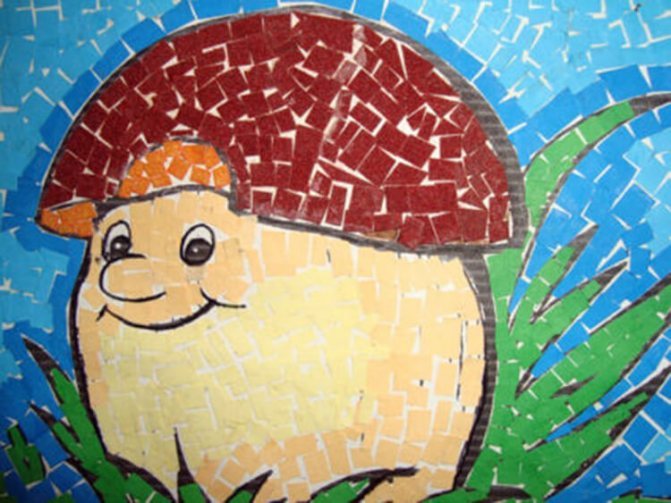
Mushroom cutting templates for appliques
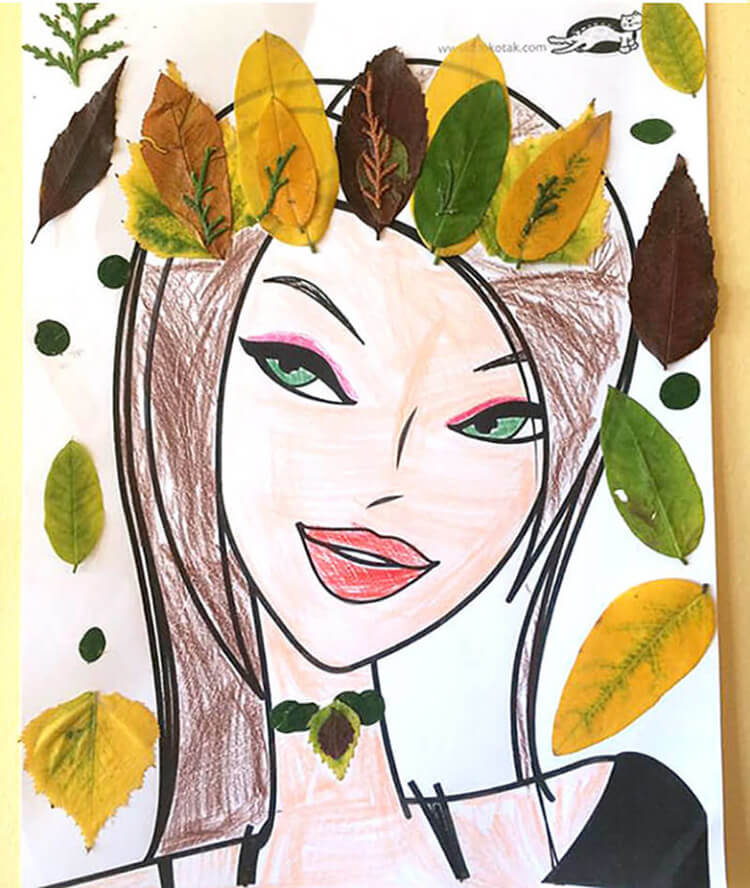
If classic appliqués are already boring and you want some variety, then you can combine drawing and gluing natural materials. Such works are quite suitable as applications made from natural materials for elementary school.
Children can already give a gift to their mother by drawing her portrait and adding leaves and other natural materials to the picture.
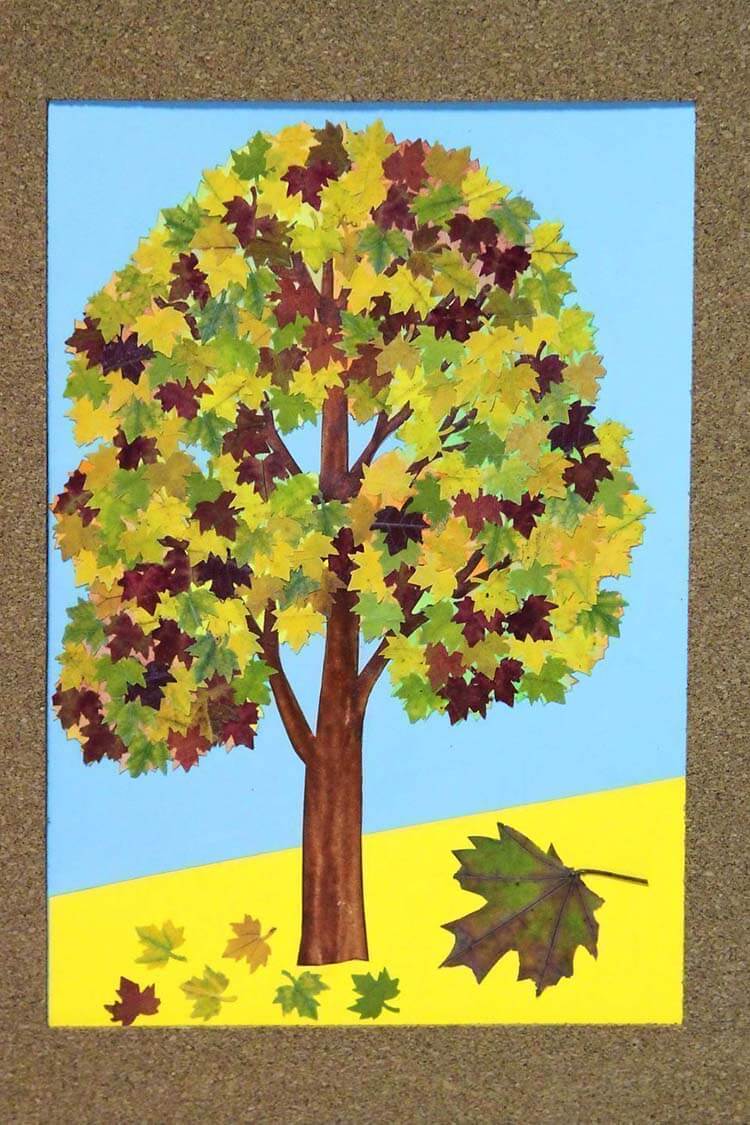
Stages of work
- At the first stage of work, we will prepare the silhouette of the tree. We give the kids cut-out blanks from brown paper; for the older ones, we give them stencils from cardboard or plastic, if available, to trace and cut out. Don't forget to offer children the safety scissors I mentioned above. When the tree is ready, put it aside for a while and work on the background.
- As you remember, we have blue cardboard as the background. You can cut out a semicircle from green construction paper and glue it in the middle of the bottom of the sheet. This will be the greenery on which we will place the tree. We also glue it on top. But there’s never enough greenery, right? Bright rich colors can decorate any application, so next you need to cut a thin green strip of paper and fold it across the entire width like an accordion. It will be weed. We glue it along the entire lower width of the sheet on top of the trunk.
- Next, perhaps, comes the most painstaking stage of work. We will make leaves. You can alternate the stages as you wish. You can first prepare all the elements of the image, and then all that remains is to glue them, or do everything in stages. I recommend that teachers make blanks for the leaves, since this will take a lot of time for children. For leaves you need multi-colored squares 3cmx3cm according to the color of the leaves: red, green, yellow, orange, light green, etc.
- Now we form the leaves directly, fold the squares like an accordion starting from any corner. When the accordion is ready, bend it in half and glue the middles together - these will be the original leaves. You need quite a lot of them to make the tree beautiful, so allocate more time for this work. One tree will require at least 30 leaves. Glue them onto the branches.
- The final stage of the applique will be clouds, which are formed from torn, crumpled blue paper and glued to the top of the background.
If you do the work at home with children, you can buy this interesting set of “Peppa Pig” applique, which can be planted under a tree.
Autumn applications made from natural materials
With the help of activities with natural materials, you can also strengthen children’s understanding of changing weather conditions, explain to them what the seasons are and what happens with their changes.
The late autumn applique will help reveal to the child a new stage of nature that precedes winter weather. After all, in late autumn we observe a cooling, the leaves become less and less and the last leaves are blown away by the wind from the branches of the trees.
Application: autumn has come
An application on this topic will reveal to the child the concept of how summer changes to autumn, what happens in nature during this period. After all, there are still many leaves on the trees, some green, but also red, orange and burgundy.
Take unnecessary puzzle pieces, paint them with different colors, whatever color you want the leaves on the tree to be. The tree trunk can be drawn, or it can be glued from paper.
Volumetric applique on the theme of Autumn
Autumn is accompanied by rains and an attribute that can be found in any apartment is an umbrella. It’s quite simple to depict an umbrella and create a voluminous applique on an autumn theme.
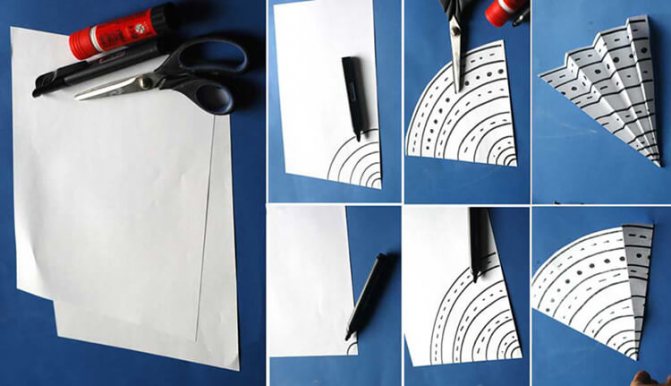
Take a white sheet of paper. Starting from the corner, draw any pattern. You need to cut the corner in a semicircle. We fold the cut out part of the sheet like an accordion.
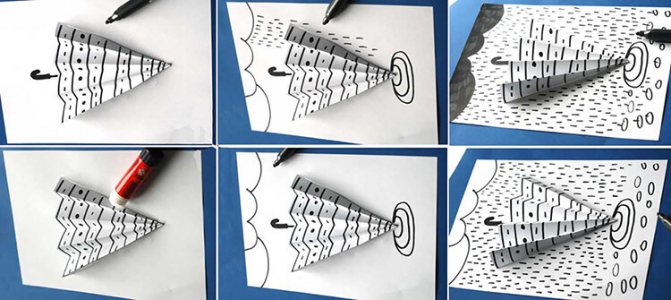
Glue this part onto a piece of paper
You can draw raindrops on a piece of paper.
You can also use a ready-made template to make an umbrella.
We cut out the template, having previously printed it, and make patterns on it.
Just like in the previous version, we fold the umbrella blank like an accordion
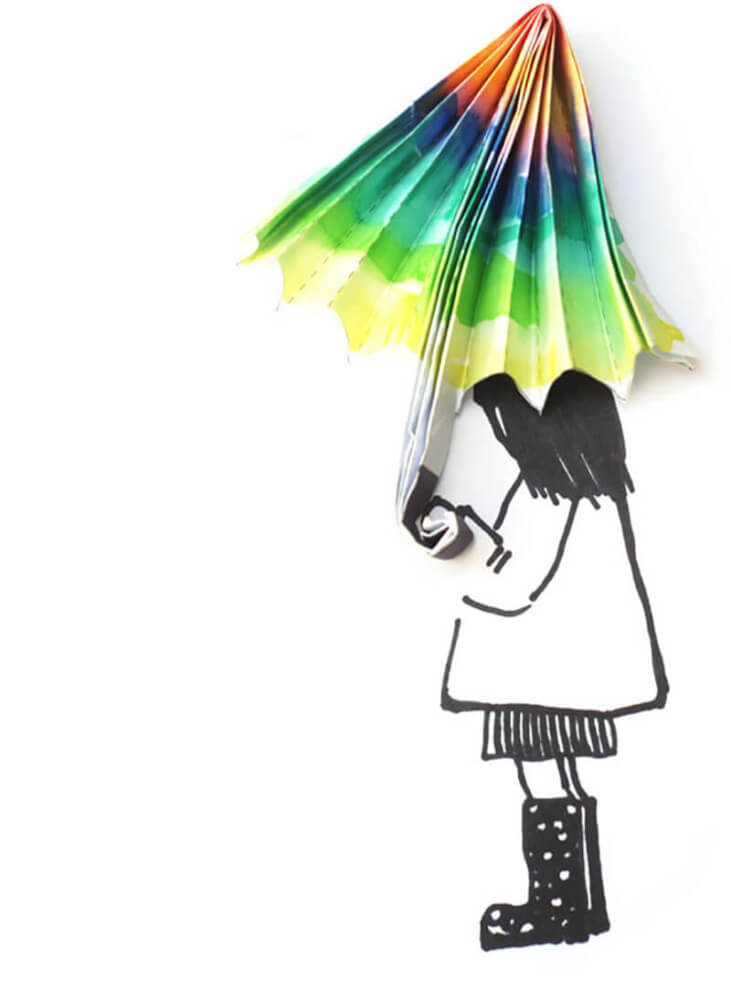
You can make such funny umbrellas
Draw or print out an image of a girl and glue an umbrella to her hand.

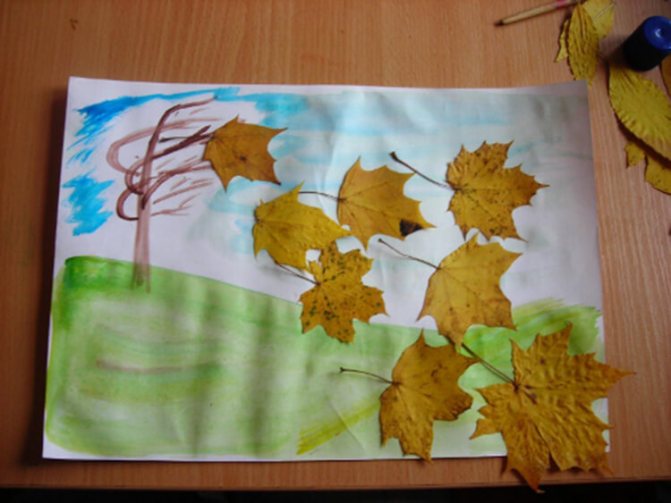
Leaves applique: autumn
It is not necessary to use only whole leaves for appliqués. There is a separate direction in creativity - broken applique. You can use not only leaves, but also colored paper. Its principle is that the silhouette of the figure is created from torn material.
To make the application, we will need:
- Sheet of cardboard
- Leaves
- Glue
- Dye
Dried leaves must be crumbled.
Draw a tree trunk and branches on cardboard.
Once the paint is dry, apply glue to the trunk and branches where you want the leaves to be.
Sprinkle pieces of leaves onto the glue.
Press down the leaves a little to secure.
Shake off excess leaves from the appliqué.
The same tree can be made using colored paper.
It is not so easy to cope with such an application. The main thing here is to choose the right leaves
Where to start?
So, regardless of which group you are conducting the lesson with, it is initially necessary to introduce children to the varieties of trees and shrubs.
After all, only a few of them will be able to name you more than 2 types of trees, not to mention shrubs. How can you do something you don’t know? Therefore, the teacher’s task is not only to tell, but also to show what this or that tree looks like. Perhaps you have teaching material on this topic: hand-drawn or printed from the Internet. But I recommend that you purchase demonstration pictures “Trees and Shrubs”, which can later be used in other classes. They cost just a penny, and the thick cardboard and large size of the cards will make you very happy.
The thematic picture dictionary “Flowers, Trees” will also serve well in classes where you need to get acquainted with the diversity of the plant world, depict it in the form of an applique or draw it. These two manuals will provide invaluable assistance to the teacher both in the initial stages of preparation for creative work, and in the case of a more in-depth study of the topic.
And of course, you will need templates to work. For the little ones, you will need to cut them out yourself, leaving only small elements for cutting - you need to practice using scissors from an early age. Students will only have to glue the necessary elements. For older children, “patterns” will be useful for tracing them on colored paper and then cutting them out yourself.
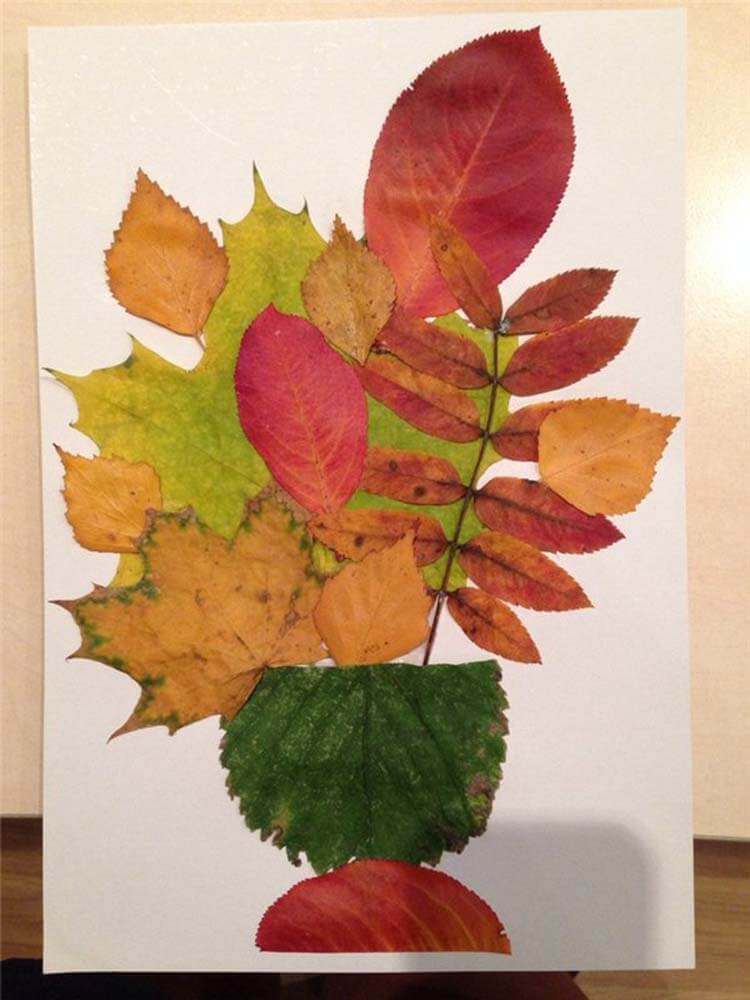
Applique Autumn bouquet
This craft is quite suitable as a gift for a teacher or mother from a schoolchild. After all, such a bouquet of leaves will last much longer than a fresh bouquet of real flowers.
Pre-dry leaves from different trees. Prepare glue, scissors and a sheet of cardboard.
Form a vase from the leaves by gluing them onto cardboard. And then help your child create a beautiful bouquet of leaves. To make it bright and neat, use light leaves for the craft, without holes or stains.
A vase for an autumn bouquet of leaves can be made from colored paper, or you can create a bouquet not only from leaves and do without a vase.
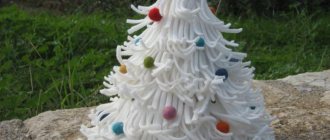
Cotton wool applications
One of the most popular and simplest ways to imitate snow for crafts is cotton wool. The work done in this way turns out to be voluminous and truly winter-like.
Snow covered trees
What you will need:
- blue or light blue cardboard;
- pencil;
- glue;
- cotton wool
Let's get started:
- Take cardboard and draw a tree trunk on it.
- We coat the branches with glue and put cotton wool on them.
- In the background we draw snowdrifts and a few more trees, make clouds and bushes.
- We glue the cotton wool to the snowy hills and along the contours of the plants. The picture is ready.
We use cotton balls
For the next craft we will prepare: cardboard, colored paper and several cotton balls.
- We cut out snowdrifts from a strip of white paper and glue them at the bottom.
- We make several trunks for future trees from brown paper and place them on cardboard. We put a snow cap made of cotton wool on each of the branches.
- We cut out patterned snowflakes or make small circles using a hole punch and paste them over the trees.
Forest of cotton pads
As an alternative to regular cotton wool, you can use cotton pads. Additionally you will need: colored cardboard, glue and scissors.
Let's start designing the application:
- To imitate snow-covered hills, take a cotton pad, cut it in half and glue it onto cardboard.
- Then we cut out several strips - these will be tree trunks. Glue them onto the snowdrifts.
- We make the crown of the tree from a whole disk.
- To add liveliness to our picture, we draw snowflakes. They can be cut out of paper, drawn with cotton swabs, or small circles of cotton pads made with a hole punch can be glued on.
Another craft option:
- We draw Christmas trees on several cotton pads: we got four, then we cut them out.
- From another disk we make a month and snowflakes.
- We take cardboard and glue a cotton swab in the middle at the bottom - this is the trunk of one of the trees.
- Cut several cotton pads in half. In our case - three. We glue them at the bottom with different sides - we get snowdrifts and snowy hills.
- Place a cotton pad on top of a cotton swab - this is the crown of the tree.
- We place the cut out Christmas trees on the snowdrifts. Glue the month and snowflakes.
House in the forest made of cotton swabs
Don't forget about cotton swabs. With their help, you get cute snow-covered trees and houses.
Let's take: cardboard, colored paper, scissors.
- Whole sticks are suitable for tree trunks, but to create branches you will need to cut them.
- To make it at home, place cotton swabs next to each other horizontally or vertically. Cut out a triangular roof from white paper and glue it on top. We make windows and doors from colored paper. You can do the opposite: cut out houses from paper, and lay out the roof from sticks.
- We also cut out clouds, snowflakes and snowdrifts from white paper.
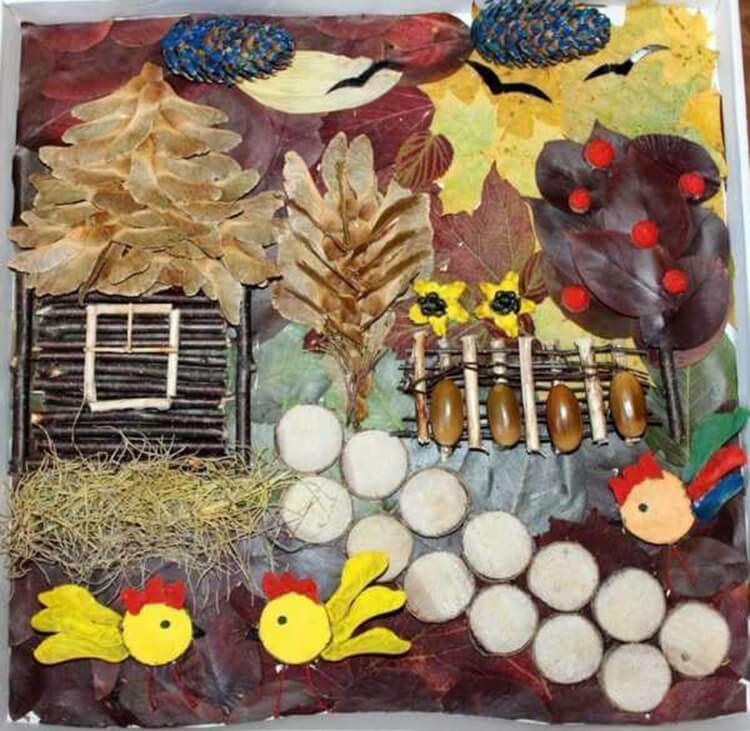
Autumn paintings, panels: applications
Using the appliqué technique, you can create beautiful and original paintings from a variety of natural materials.
Collect various leaves, twigs and flowers, dry them as a herbarium and start creating real panels and paintings.
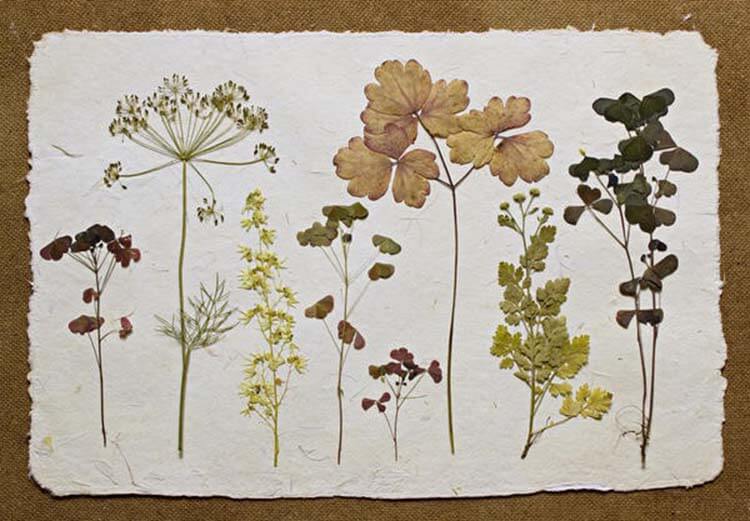
The following are perfect for such a picture: moss, straw, spikelets, seeds, small flowers
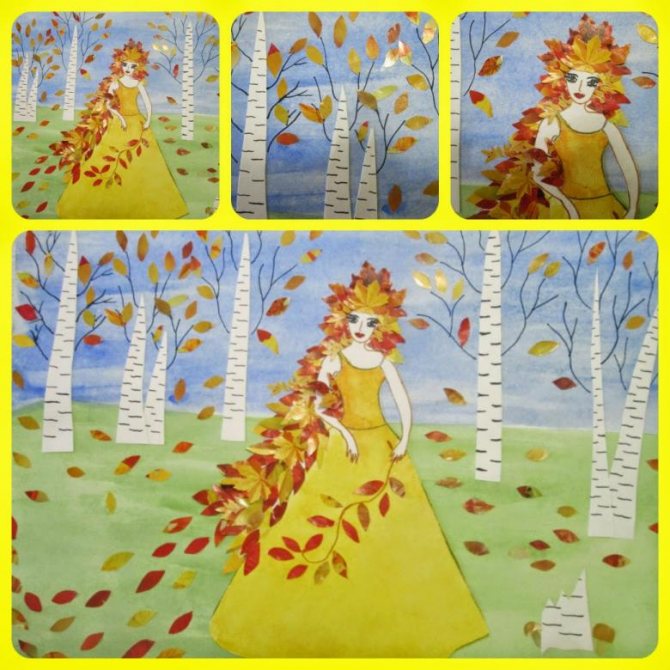
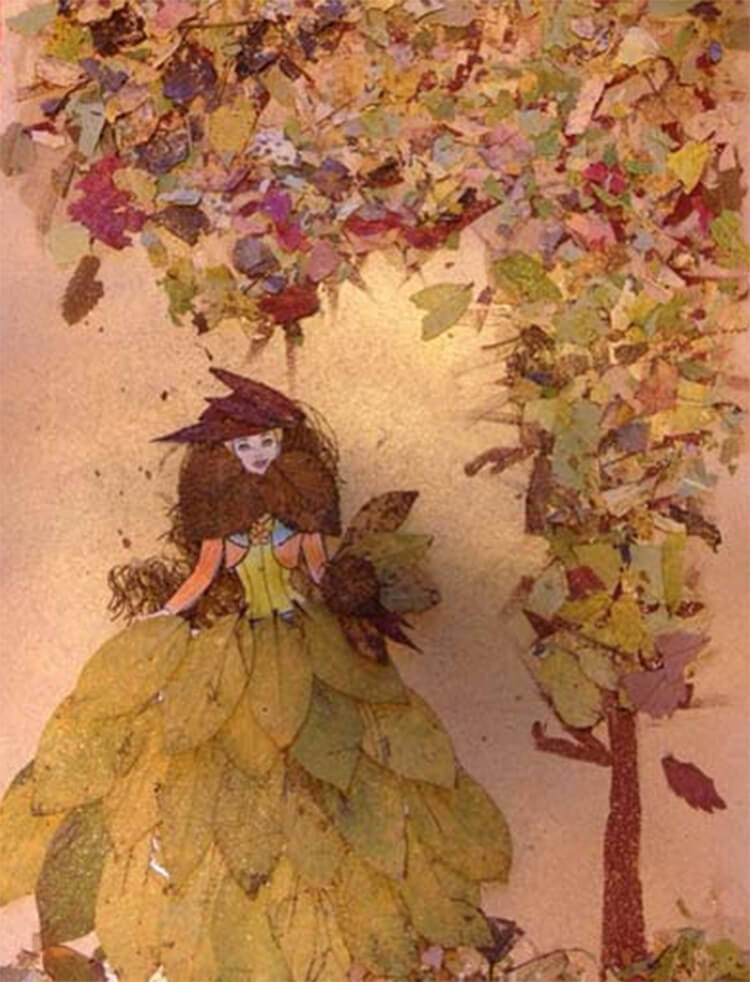
Painting “Autumn Girl”
Volumetric applications of vegetables and fruits in the preparatory group
Every child will be interested in making a variety of fruits and vegetables out of paper, which they eat from an early age. They can be made as appliqués on paper or in volume.
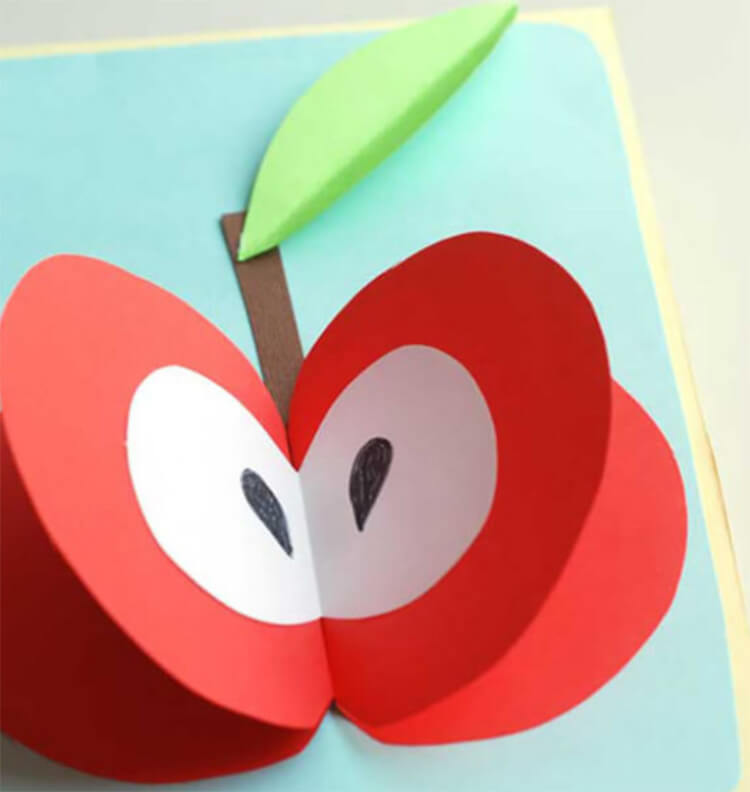
How to make an apple out of paper
We will need a sheet of red double-sided paper. Fold it in half and cut it. We also fold the halves in half and draw the silhouette of half an apple with a pencil.
Glue the apple halves onto a piece of paper and create a core, stalk and leaf.
Fruit applique: senior group
Making strawberries out of paper

Cut out tails from green paper.
Fold two pieces of red paper in half and cut out a heart.

Glue one part to the base of the sheet, and glue the second along the fold line.
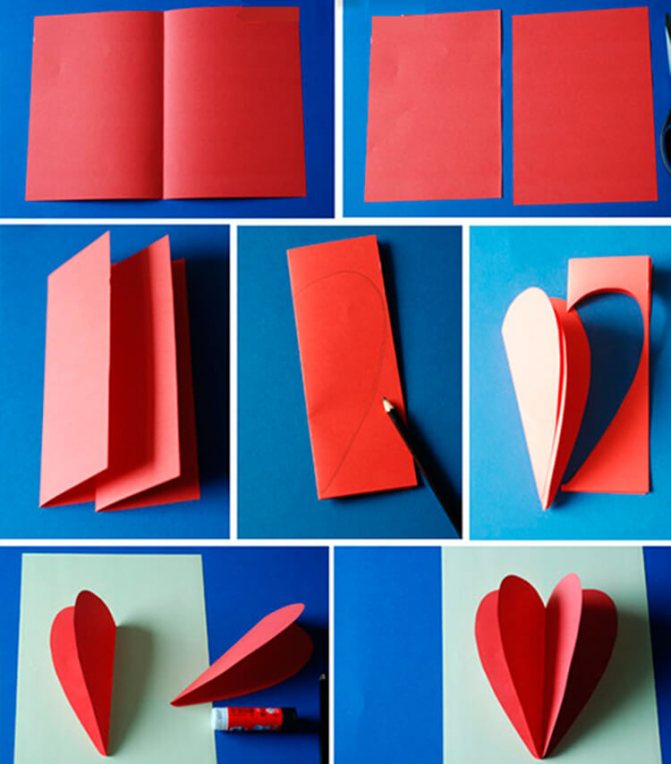
Glue a green tail cut from a template on top and draw dots with a black felt-tip pen.
Volumetric cherries made of paper: applique
From red paper you need to cut 4 circles (diameter 5-6 cm).
Fold the circles in half and cut out the green strip.
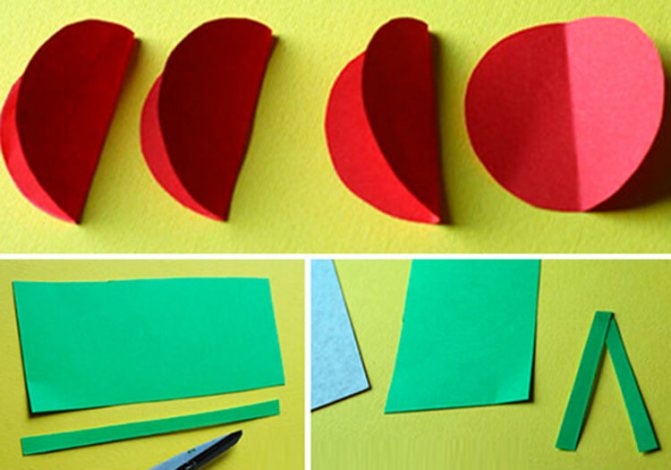
Take a green sheet 12*6 cm and cut out the leaves by folding the paper in half
Glue a strip folded in half onto a sheet of cardboard. Glue leaves on top and a cherry on each branch.
Bunch of grapes made of colored paper
Text of the book “Applique with children 3-4 years old. Class notes"
Daria Nikolaevna Koldina Application for children 3–4 years old
From the author
By the end of the third year of life, the child acquires basic ideas about color, size, shape; listens to fairy tales; learns to compare real objects with their images in paintings; looks at the landscapes.
It is easier for a small child to express his impressions with the help of visual activities (three-dimensional image - in modeling, silhouette - in appliqué, graphic - in drawing). He conveys images of objects using plasticine, colored paper, and paints. The child should always have these materials at hand. But this is not enough. It is necessary to develop the child’s creative abilities, show modeling techniques, teach how to cut out colored paper, and introduce various drawing techniques. To improve visual skills, one should develop the perception of form, color, rhythm, and aesthetic concepts.
A 3-4 year old child can do a lot: wash his hands, brush his teeth, feed himself, dress and undress, use the toilet. The baby develops simple verbal reasoning. He answers questions from adults with pleasure and is eager to communicate with other children; His gaming skills and voluntary behavior develop.
To develop children's creativity and mastery of visual arts, it is necessary to take into account the interests of children, use a variety of lesson topics and forms of organization (individual and collective work). It is very important to create a friendly environment in class.
At first, the child is interested in the process of making the craft, but gradually he begins to be interested in its quality. He strives to stick the object as neatly as possible, and after class admire his work, tell him what color he chose, what this object can do, and what kind of applique he turned out to have.
In this manual, we provide notes on exciting activities for children 3–4 years old on appliqué made from colored paper and natural materials.
These activities contribute to the implementation of the following tasks: introducing the child to the surrounding beauty; development of imagination, independence, perseverance, the ability to complete work, accuracy and hard work, skills in processing various materials, which in the future the child will be able to independently use to make similar crafts.
The classes are organized according to the thematic principle: one topic unites all classes (on the surrounding world, on speech development, on modeling, on appliqué, on drawing) during the week.
It is advisable to conduct an appliqué lesson after the children have sculpted the item.
An appliqué lesson for children aged 3–4 years is held once a week and lasts 15 minutes. The manual includes 36 notes of complex plot-game activities designed for the academic year (from September to May).
Read the lesson notes carefully in advance and, if something doesn’t suit you, make changes; prepare the necessary material and equipment. Preliminary work is also important (reading a work of art, becoming familiar with surrounding phenomena, looking at drawings and paintings).
By observing each child in class or playing with other children, you can learn more about them and deal with challenging behavior.
If a child quits his activity
, as soon as something doesn’t work out for him, it means he doesn’t know how to overcome obstacles. This can be taught by offering the child other ways to achieve what he wants. Then he will understand that there must be a way out of any situation. For example, if a child wants to draw a snowman, but he can’t do it, invite him and you to make an applique of a snowman from white paper on a dark background.
If your child quickly loses interest in an activity
, perhaps it is too simple or, on the contrary, complex for him. Understand the reason and make the task harder or easier. For example, a child needs to applique a turnip with tops. If this is too easy for him, have him stick a basket and place different vegetables in it using colored paper. If the task is too difficult for the child, you can invite him to stick a turnip without tops.
If your child gets tired quickly
, cannot sit for even five minutes, try to develop his endurance using massage, hardening, and sports exercises. In art classes, alternate between active and calm actions more often.
To ensure that the child understands the task and completes it
, it is necessary to develop his attention and ability to concentrate. Play the game “What Has Changed?” with your child. (place 3-4 toys in front of the child, and then quietly hide one of them or swap the toys).
Try to find as many ways as possible to involve the child in bringing the task to its logical conclusion (for example): “Let’s stick balls on the elephant, otherwise he has nothing to play with” or “Let’s make a big house for the bunny and the rooster, otherwise they have nowhere to live.”
We recommend conducting appliqué classes with children 3–4 years old in accordance with the following sample lesson plan.
1. Creating a gaming situation to attract children’s attention and develop emotional responsiveness (riddles, songs, nursery rhymes; a fairy-tale character in need of help; dramatization games; exercises to develop memory, attention and thinking; outdoor games).
1. Acquaintance with the subject that children will subsequently depict in the appliqué; determining the sequence of laying out pre-prepared parts, applying glue to them; attaching forms to paper and gluing.
2. Bringing the application to the desired image with the help of additional decoration with felt-tip pens or decorating the work with small pieces of colored paper (in this case, it is necessary to draw the children’s attention to expressive means: correctly selected colors and interesting details).
3. Review of finished works (they are given only a positive assessment). Children should be happy with the result and learn to evaluate their crafts.
There are three types of application:
Subject
– individual objects are depicted that do not participate in any events (fruit in a vase);
Plot
– a composition is compiled based on events (actions) in fairy tales, stories, poems, nursery rhymes; by personal recommendation;
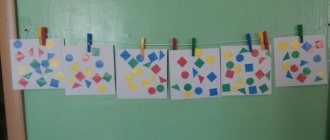
Decorative
– a pattern is made of geometric shapes on a strip, square, circle.
We list the application methods that are used in working with children 3–4 years old.
Application from prepared parts of an object
– the child must assemble an object (pyramid, bear) from the proposed parts and stick it on paper.
Application from prepared silhouettes of objects
– the child makes a composition from one or more cut-out objects, and then pastes it onto a sheet of paper (cucumber, tomato).
Breaking-mosaic
- small circles, triangles, squares or torn pieces of colored paper are glued inside the outline (autumn leaves on a tree).
Cutting along the contour
– colored paper is torn along the intended contour to convey the texture of the object (the curly body of a lamb, a fluffy cloud).
Rolling paper
– the paper tears into small pieces, each piece crumples and rolls into a lump (rowan berries, fluffy chicken).
Overlay applique
– parts that are identical in shape but different in size are glued onto each other, starting from the largest to the smallest (snail, turtle, flower).
Application of dried leaves
– the leaves are laid out and arranged into the intended object, then glued onto a sheet of paper (fish, swan).
For applique classes you will need: colored paper, magazine paper, colored napkins, dried leaves, album sheets, colored cardboard, felt-tip pens, PVA glue, oilcloth lining and a rag.
Expected skills and abilities of a child by age 4:
• has an interest in the art of applique from pre-prepared figures;
• knows how to select colors that match the color of objects;
• knows the order of gluing (first you need to lay out all the prepared parts of the application on a sheet of paper and make an image of the object, and then gradually stick them on);
• knows how to carefully glue (first you need to put the part with the colored side on the oilcloth, carefully pick up glue on a brush and apply it in a thin layer from the middle to the center, apply the side with the glue applied to a sheet of paper, gently pressing it with a cloth or napkin);
• knows how to stick simple objects (fruits, tree leaves) onto a sheet of paper;
• knows how to compose a subject application from 2–4 parts (house, traffic light);
• knows how to create a simple composition (a plate of fruit, flying airplanes);
• knows how to make patterns on a strip, square, rectangle, circle from prepared geometric elements, alternating them by color, shape and size (decorate a scarf);
• knows how to decorate a product using felt-tip pens (draw the eyes and nose of a hare);
• knows how to create an object not only from colored paper, but also from magazine paper, dried leaves and napkins.
If your child can't do any of the above, don't worry. You will still have time to catch up.
We wish you success!
Annual thematic planning of application classes
Class notes
Theme of the week: “Toys”
Lesson 1. Cube on cube (Colored paper. Applique from prepared parts of the object)
Program content.
Teach children to lay out cubes and squares in a certain sequence (by size). Introduce the method of applying glue with a brush to the back side of the figure from the middle to the edges; teach to apply the glue-smeared side to a sheet of paper and press it tightly with a cloth. Introduce the color blue, learn to correlate the color with its name. Cultivate compassion and kindness.
Demonstration material.
Cubes of three colors.
Handout.
Half of an album sheet; 3 blue squares (large, medium and small), cut out of paper; PVA glue, glue brush, cloth, oilcloth lining.
Progress of the lesson
Read the story “Cube upon Cube” by Ya. Taits to the children:
“Masha puts cube on cube, cube on cube, cube on cube. She built a high tower.
Misha came running:
- Give me the tower!
- I'm not giving it!
- Give me at least one cube!
- Take one cube. Misha reached out his hand and grabbed the lowest cube! And instantly - bang-bang-bang! “The whole Machine Tower has collapsed!” Ask the children: “Which cube should be given to Misha so that
did the tower collapse? (Upper.)
Let's help Masha build a new tower."
Place a landscape sheet and 3 blue squares (large, medium and small) cut out of paper in front of each child. The child must find the largest square and place it at the bottom of the sheet, then find the middle square and place it above the large one, and place the small square on top.
Tell the children that they now need to glue the cubes onto a piece of paper. Show them how to put glue on a brush, apply it in a thin layer from the middle to the edges, not on the colored side, but on the back of a small square, press it firmly to a sheet of paper with the greased side and blot off excess glue with a rag. The large and medium squares are glued in the same way.
Look at the resulting towers with your children and ask: “What color are the cubes from which your towers are built?” (Blue.)
Theme of the week: “Vegetables”
Lesson 2. Turnip (Colored paper. Applique from prepared parts of the object)
Program content.
Teach children to make a whole from two parts. Strengthen the ability to apply glue to parts and stick them onto a sheet, pressing with a cloth. Continue to introduce the color yellow, learn to correlate the color with its name. Develop memory. Learn to retell fairy tales based on illustrations.
Demonstration material.
Six cards, each of which depicts a hero from the fairy tale “Turnip” (grandfather, grandmother, granddaughter, Bug, cat, mouse) or a sheet of paper with schematic images of the heroes.
Handout.
Half a landscape sheet, blanks for turnips, cut out of colored paper (root crop and tops); glue, glue brush, rag, oilcloth lining.
Progress of the lesson
Read the Russian folk tale “Turnip” to the kids in advance.
During the lesson, remind the children of this fairy tale, show cards on which the heroes of the fairy tale “Turnip” are drawn and offer to arrange the heroes of the fairy tale in the right order: grandfather, grandmother, granddaughter, Bug, cat, mouse. (If you don’t have cards, you can sketch the characters on a piece of paper, leaving space in front of them for a turnip.)
Help each child make a turnip from two parts (root and tops). Show the kids how to apply glue evenly with a brush on the back side of the root crop from the center to the edges and stick it on the sheet, pressing with a cloth, and then stick the tops in the same way.
Ask the guys: “What color is the turnip? What color are the tops?” Ask the children to retell the story based on their work.
Theme of the week: “Fruits”
Lesson 3. Fruits in a vase (Colored paper. Application from prepared silhouettes of objects)
Program content.
Teach children to apply glue to the part and stick it to the sheet. Continue to introduce the color green, learn to correlate the color with its name. Cultivate a friendly attitude towards others.
Demonstration material.
Doll.
Handout.
Colored cardboard on which the vase is glued in advance; apples and pears cut out of colored paper in yellow and green colors; glue, glue brush, rag, oilcloth lining.
Progress of the lesson
Show the children the doll and say: “Guys, the doll Masha came to you for help. She got sick. The doctor said that she needs to eat more green apples and pears because they contain a lot of vitamins. But the doll doesn’t know which apples and pears are green.”
Invite the children to help the doll - put only green apples and pears in the vase. Place in front of each child colored cardboard, on which a vase and blanks cut out of colored paper have been glued in advance - apples and pears in yellow and green colors.
Children select green apples and pears and place them on a sheet of cardboard.
“Thank you,” says the doll and “takes” from one of the children a cardboard with fruit preparations (apples and pears fall). “Oh, how can I carry apples and pears home?”
If the guys don’t guess that apples and pears need to be labeled, tell them. Remind how to put glue on a brush, apply it in a thin layer to the workpiece and press it tightly to the sheet with a cloth.
At the end of the lesson, say: “Well done, guys! Now the doll won’t lose the fruit.”
Theme of the week: “Berries”
Lesson 4. Strawberries (Colored paper. Applique from prepared silhouettes of objects)
Program content.
Continue teaching children to stick parts on the sheet in the right place. Continue to introduce the color red, learn to correlate the color with its name. Cultivate compassion and kindness.
Demonstration material.
Doll, object picture, which depicts a strawberry bush with berries.
Handout.
Half of an album sheet on which strawberry bushes without berries are drawn and red strawberries cut out of colored paper; glue, glue brush, rag, oilcloth lining.
Progress of the lesson
Show the children the doll and say: “This is the girl Zhenya. She wanted to pick strawberries in the garden, but did not find a single berry. Zhenya is very upset.”
Invite the kids to plant berries on the strawberry bushes and treat Zhenya.
Place in front of each child half of a landscape sheet on which strawberry bushes without berries are drawn and red strawberries cut out of colored paper. Examine strawberry bushes with your kids, determine the shape and color of the berries.
Remind the children to apply glue to each berry and stick it to the tip of the branch.
At the end of the lesson, invite the children to give Zhenya a treat: give her strawberry bushes and berries.
Theme of the week: “Mushrooms”
Lesson 5. Mushroom (Colored paper. Application from prepared parts of the object)
Program content.
Improve children's ability to make appliques and apply glue to parts. Learn to accompany the words of the poem with movements corresponding to the text. Develop precision and coordination of movements.
Handout.
Landscape or tinted sheet of paper; blanks cut out of colored paper: grass, mushroom details; glue, glue brush, rag, oilcloth lining.
Progress of the lesson
Talk to the guys about mushrooms, tell them where mushrooms grow, what time of year they appear. Tell the children: “Today I invite you to go for a walk in the forest. I will read a poem, and you repeat the appropriate movements after me:
In the morning the children went to the forest (Steps with high knees.)
And they found mushrooms in the forest.
(Measured squats.)
We bent over, collected,
(Bent forward.)
We got lost along the way.”
(Rhythmic spreading of arms to the sides.)
Invite the children to depict a mushroom in the applique.
First, they must place the blanks - the details of the mushroom and the grass on the sheet, then apply glue to the stem of the mushroom and stick it on, then apply glue and stick on the cap. The grass is glued last.
Tell the kids a riddle about a mushroom:
Antoshka stands on one leg.
Ask the guys: “Can we say that the mushroom has one leg? (Can.)
What else does a mushroom have?”
(Hat.)
Theme of the week: “Autumn trees and bushes”
Lesson 6. Maple (Colored paper. Collective applique from prepared silhouettes of objects)
Program content.
Strengthen children's knowledge about the rules of sticking. Introduce the color orange, learn to correlate the color with its name. Consolidate knowledge about yellow, green, red colors. Continue to learn to understand and analyze the content of the poem.
Demonstration material.
Half a piece of Whatman paper with a maple tree without leaves on it.
Handout.
Maple leaves cut out of colored paper (yellow, red, green, orange), glue, glue brush, rag, oilcloth lining.
Progress of the lesson
Read the poem “Maple” by D. Rozalieva to the children:
The maple moves its branches, shedding its leaves. A cloud runs across the sky, dropping droplets.
Give the children one maple leaf cut out of paper. Draw the children's attention to the shape of the leaves - it resembles a star. Tell the children: “Run up to me, everyone who has yellow leaves!”
Children, holding yellow maple leaves in their hands, run up to the adult and then return to their seats. Then the guys with red (green, orange) leaves run up.
Show the children a piece of whatman paper with a maple without leaves on it and suggest: “Guys, let’s give the maple its leaves back.” Each child must apply glue to their own leaf and stick it to a tree branch.
At the end of the lesson, say: “Well done, guys! You’ve got a real autumn maple!”
Theme of the week: “Autumn”
Lesson 7. Sun in the clouds (Colored napkins. Cutting along the contour and appliqué from large lumps of paper)
Program content.
Teach children to create a plot composition from a broken circle along the contour and crumpled lumps of napkins. Learn to glue rolled up large lumps of paper onto cardboard. Strengthen the ability to understand and analyze the content of a poem.
Handout.
Napkins of yellow and white colors, a sheet of blue cardboard, glue, a glue brush, a rag, an oilcloth lining.
Progress of the lesson
Read the Armenian song to the children:
– Where does the sun spend the night? - In grandma's bed. - Who is his grandmother? - Blue sky. - What will it cover with? - A woolly cloud. -Who will cover him? - Grandfather is the wind.
Ask the children: “Where does the sun sleep? (In the sky.)
What color is the sky?
(Blue, blue.)
What covers the sun?
(A cloud.)
What color are the clouds?
(White, gray.)
Now you and I will also put the sun to bed.”
Show the children a blue piece of cardboard and ask: “What does it look like?” (To the sky.)
Then show them the yellow napkin and ask: “What do you think can be done with this napkin?”
(Sun.)
Give each child a yellow napkin and help them tear it in a circle to make a “sun.”
Show the children a white napkin and ask: “What can you do with this napkin?” (Clouds, clouds.)
Place a white napkin in front of each child and offer to tear the white napkin along a line into four parts, crumple each part - you get four clouds. Now we need to place the sun and clouds in the sky. The child sticks on the sun first, and then the clouds.
Theme of the week: “In the forest”
Lesson 8. Leaves from the forest (Applique from dried leaves)
Program content.
Show children that the applique can be made from dried leaves. Learn to relate an object to its shape. Continue to teach how to accompany the words of the poem with movements corresponding to the text. Cultivate compassion and kindness.
Handout.
A landscape sheet on which colored outlines of two leaves of different shape and color are drawn; dried leaves of appropriate shapes and colors; leaves cut out of colored paper; glue, glue brush, rag, oilcloth lining.
Progress of the lesson
Give the kids leaves cut out of colored paper and invite them to play with these leaves while listening to the poem:
The leaf flew up, (Flash the leaf).
The leaf is spinning, The leaf is spinning,
(Twist the leaf.)
It falls under your feet.
(Lower the leaf to your feet.)
The leaf is torn, torn, torn.
(Tear the leaf.)
The leaf wrinkles, wrinkles, wrinkles.
(Crumple up the leaves.)
Play out the situation that two Leafs came to visit the children from the forest: everyone in the forest tramples them, the Leafs want to find their home.
Place in front of each child a landscape sheet with colored outlines of two leaves of different shapes and colors drawn on it, and ask them to find a house for each leaf.
Tell the children: “In order to prevent the leaves from losing their houses again, they need to be glued: apply glue to the back of the leaf with a brush and press it to the paper with a cloth. So we hid the leaves in the houses.”