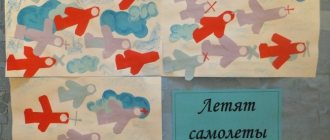
Passenger plane
And for those who want peace, not war, we suggest drawing a Boeing passenger plane.
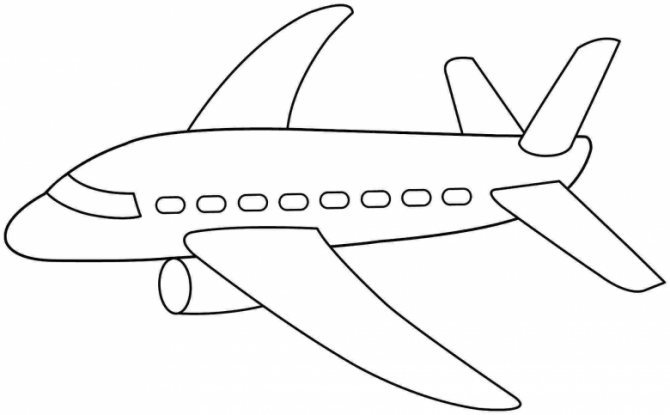
Step by step lesson:
- Draw an oblong oval at a slight angle. Closer to the top, draw a long parallel line, visually dividing the body into two parts. Draw two small ovals on the bottom. The right oval should be inscribed inside the body, and the left one should be pushed out.
- At the top right, add two lines converging at an angle of 60 degrees. Trace the contours of the drawing so that these lines turn into the tail of the airplane.
- Make engines from the outlined ovals by drawing two semicircles in front and one in the back.
- Above the right engine, draw the wing, adding all the necessary details, as in the original.
- Now start selecting the front window, portholes and doors.
Your Boeing is ready to fly, or rather, ready to paint.
We looked at several options for step-by-step drawing of sketches of aircraft of varying complexity. Which one to start first depends on the age of the child and his creative inclinations.
How to quickly and easily draw an airplane
Young children can ask Mom or Dad to teach them how to draw an airplane, but this can be challenging for some adults, too.
In fact, it is not so difficult, because there are drawing methods that explain step by step how to do it correctly.
Below we will tell you how to make an image quickly and easily. It is enough to break the whole process into several stages, find a suitable tool and follow the instructions.
It will be more convenient for a preschooler to draw with a pencil; for a very small child, a wax pencil will be suitable, it is comfortable to hold and does not need to be sharpened. A pencil is also convenient because it can be erased if you don’t like the drawing or if some lines are not drawn quite accurately. In the first stages, it is not necessary to adhere to ideal proportions; it is important to show the preschooler how to start doing this.
On the topic: methodological developments, presentations and notes
Date: February 21, 2012 Participants: children of the preparatory group Conducted by: educational psychologist Panova M.M. Purpose: to promote formation.
Introduce children to number and figure 6. Improve counting skills and comparison of subject aggregates. Form children’s ability to distinguish between the concepts of yesterday, today, tomorrow. Consolidate knowledge about geome.
The lesson “An exciting trip on a traffic police helicopter” is aimed at strengthening children’s knowledge of familiar traffic rules.
Goal: - To develop practical skills in working with a variety of natural materials. - When making a toy, to teach how to measure its parts. - To develop children’s imagination and desire to make toys.
Summary of a lesson on artistic and aesthetic education for children of senior preschool age on the topic: “Drawing a military helicopter.”
Source
March
Lesson 61. Application “Flags” Program content.
Strengthen the ability to create in an application an image of a rectangular object consisting of two parts; correctly position an object on a sheet of paper, distinguish and correctly name colors; Use the glue carefully and spread it all over the mold. Develop the ability to enjoy the overall result of the lesson.
Lesson 62. Drawing “Beautiful flags on a string”
(Option “Spatulas for dolls”) Program content.
Teach children to draw rectangular objects using separate vertical and horizontal lines. Introduce the rectangular shape. Continue to practice drawing and coloring techniques with colored pencils.
63. Modeling “Tumbler” Program content.
Teach children to sculpt an object consisting of several parts of the same shape, but of different sizes, pressing the parts tightly against each other. Create a desire to decorate an object with small details (a pompom on a hat, buttons on a dress). Clarify children's ideas about the size of objects. Strengthen the ability to sculpt accurately. Create a feeling of joy from what you have created.
Lesson 64. Modeling “Little Masha”
(Based on a nursery rhyme) Program content.
Teach children to sculpt a small doll: the fur coat is a thick column, the head is a ball, the hands are sticks. Strengthen the ability to roll out clay with straight movements (column - coat, sticks - sleeves) and circular movements (head). Learn to compose an image from parts. Invoke a feeling of joy from the resulting image.
Lesson 65. Drawing “Draw someone who wants something beautiful” Program content.
Develop aesthetic perception. Learn to see and highlight beautiful objects and phenomena. Strengthen children's ability to draw with different materials, choosing them as they wish.
Lesson 66. Modeling “Treats for dolls, bears, bunnies” Program content.
To develop children’s ability to choose the content of their modeling from the named objects. Foster independence. Reinforce sculpting techniques. Create a desire to sculpt something needed for the game. Develop imagination.
Lesson 67. Drawing “Baby Books” Program content.
Teach form-building movements of drawing quadrangular shapes with a continuous movement of the hand from left to right, from top to bottom, etc. (you can start the movement from any side). Clarify the technique of painting by moving your hand from top to bottom or from left to right. Develop imagination.
Lesson 68. Application “Napkin” Program content.
Learn to make a pattern of circles and squares on a square-shaped paper napkin, placing the circles in the corners of the square and in the middle, and the squares
between
them. Develop a sense of rhythm. Strengthen the ability to glue parts carefully.
Lesson 69. Drawing “Draw something rectangular in shape” Program content.
Teach children to independently think about the content of the drawing, to apply the acquired skills in depicting various rectangular objects. Learn to select pencils of the right colors for drawing. Practice drawing and painting rectangular objects. Develop a sense of color and imagination.
Lesson 70. Modeling “Tumbler Bear” Program content.
Exercise children in depicting objects consisting of round parts of different sizes. Practice the ability to fasten parts of an object, pressing them tightly against each other.
Progress of the Lesson:
Q. Guys, the holiday “Defender of the Fatherland Day” is coming soon. Why is it called that? Who can we call defenders of the fatherland?
Q. But to defend the Motherland you need special equipment. Guess the riddle:
it looks like an all-terrain vehicle,
will pass through mud easily,
hill, ditch is not a barrier,
will instantly rush as it should. (tank)
The bird flies across the sky, but does not move its wing.
makes a wonderful flight ( plane )
Guys, look at the plane (showing a toy plane )
.
An airplane has a body , wings, and a tail.
Let's try to make a plane out of magic pebbles.
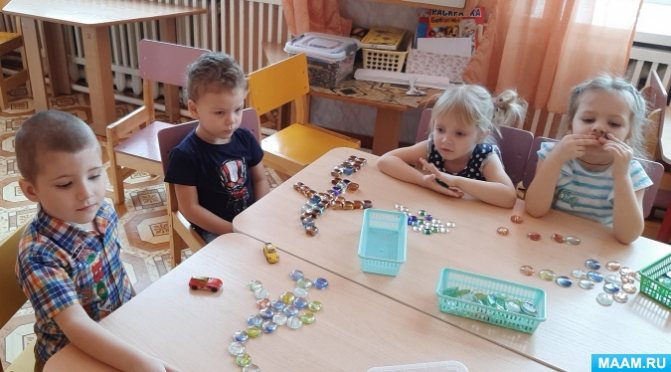
We'll build the plane ourselves,
let's fly over the forests,
let's fly over the forests,
and then we’ll go back to mom.
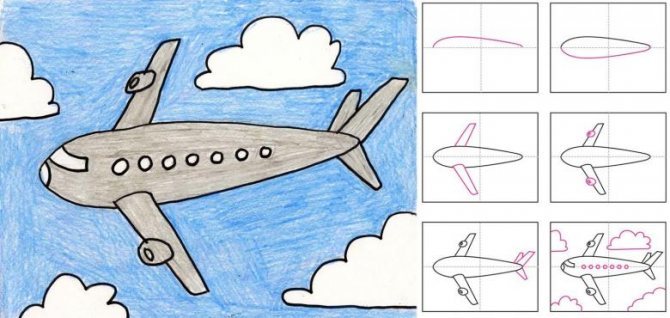
Now look at how to draw an airplane . You need to take a pencil and hold it with three fingers. Like this. First we draw the body of the aircraft . Like this, in a straight line (I show)
Now we draw the wings.
I draw straight lines on the sides of the aircraft . Like this (I show)
at a slight angle.
Draw the tail from the end of the airplane body upwards , to the side. Like this (I draw on an easel)
.
Now let’s show in the air with our finger the order in which to draw the plane . (Together with the children I show with a gesture, and we say with the children again: body, wings, tail of the plane ).
Admire your planes , how beautiful they turned out. How beautifully they fly in the sky . Well done!
Summary of the integrated lesson “Hello, autumn!” (second junior group) Summary of the integrated lesson 2nd junior group “Hello autumn!” Objectives: Expand children's understanding of seasonal natural phenomena. Summary of the integrated lesson “Geese-swans” (second junior group) Purpose. Consolidating children's knowledge of the material covered on FEMP and speech development. Objectives: Educational: 1. Strengthen the ability to determine. Summary of the final lesson on FEMP “Journey to the Fairytale Forest” (second junior group) Purpose: to consolidate the concepts of many, one; train the ability to compare the number of objects: “more”, “less”, “the same”; secure.
Summary of the music lesson “Acquaintance with musical instruments” (second junior group) Synopsis of the musical lesson “Acquaintance with musical instruments” Second junior group Program content • Learning objectives:.
"Maple twig." Notes on non-traditional drawing using the technique of “imprint, imprint with leaves” (second junior group) Notes on the lesson “Maple Twig” using the method of unconventional drawing Technique “Imprint. Imprint with leaves" Educational.
Source
Preview:
Summary of drawing lessons for young children
"Road for Cars"
1. Exercise children in the ability to draw a straight line without lifting the brush from the sheet.
2. Develop fine motor skills of the hands.
3. Cultivate accuracy when working with gouache.
Materials: brushes, jars of paint, jars of water, napkins for each child; three toy cars, a finished sample drawn; pattern with one stripe, pattern with two stripes.
Educator: Guys, cars came to visit us today, they are magical and came to us from a magical land. (shows three small cars).
Guys, look at the cars and tell me what kind of cars they are? (cars) and this? (freight)
-What color are they?
- What does the car have? (wheels, body, headlights, doors, windows, steering wheel, windshield, mirrors)
Let's show our cars how we can do (physical education minute):
To drive a car, we need to pump up the tires (simulation of movement with the sound shhhhh)
Pour gasoline into the gas tank (simulation of movement)
And let's go to the store (“travel” around the room)
Educator: Guys, do you know that our cars are very sad and upset! Do you know why? Yes, because they were driving towards us along a bad road. The road was full of holes, ditches and mounds! They almost broke down, and they still had to return home, so they were sad. Let us draw the cars a new smooth, smooth and colorful road.
Educator: Now, we sit down at our tables, but no one takes anything, you need to listen carefully to how we are going to draw so that it turns out correctly and only after I say loudly: DRAW, you will start drawing. Agreed?
— You have brushes, paints, jars of water and napkins on your tables. Now each of you will draw a part of the road, evenly and neatly, then we will let the drawing dry and collect our drawings into one long and beautiful road and show it to the cars, imagine how happy they will be. Look how I drew my path. To draw yours, you need to draw one line from top to bottom, then a second one and paint over the middle.
- Now, let’s pick up the brushes correctly (the teacher shows how to do it and looks at how the children are holding it; if it’s wrong, he corrects it). DRAW (speaks loudly) The children begin to draw, and the teacher draws with them again from the very beginning and says: first, from top to bottom, one line (sees how the children do it, then not far away the second line (looks at the children) and paint over (the teacher goes in rows to control the children's process, directing or correcting, or praising the children who are correct).
As the drawings are completed, the teacher takes the children's work to dry, praises each child and thanks them for their help on behalf of the machines.
- Well done guys, you tried very hard, the cars are happy and happy.
Source of the article: https://nsportal.ru/detskiy-sad/risovanie/2020/09/22/konspekt-zanyatiya-po-risovaniyu-s-detmi-rannego-vozrasta-doroga
How to draw an airplane step by step with a pencil - easy children's master classes for beginners
Many boys in childhood simply rave about the sky and everything connected with it. Even the smallest child can draw a plane soaring among the clouds. And we, adults, must simply indicate what and in what order to put on paper in order to get a beautiful drawing.
Toy airplane
Young artists can easily learn to draw an airplane. You need to start by creating a sketch with a simple pencil, and then start coloring.
- Place a landscape sheet in front of you and draw two semicircles, curving down. They must be at a certain distance from each other. The left one should be twice as large as the right one. The rounding point should be narrower than the base. Bend the top line in both geometric shapes with an arc outward. These are airplane wings.
- Above the right wing, draw another semicircle, rounded upward - the rear right wing, which will peek out from behind the body.
- Draw a long elongated triangle - the body of the airplane. The narrow side should be on the side of the rear wings, make the opposite side as wide as possible.
- Above the front wing add a cockpit - a large semi-oval. Inside the cockpit is the smiling head of a pilot in a helmet, glasses and headphones.
- At the front of the plane, add a nose - a narrow semi-oval. Blades depicted in the form of petals should extend up and down from it.
- At the front of the plane, draw a vertical line and draw a row of rivets - bold dots.
- The wings are also divided by vertical lines - flaps.
flying plane
Having drawn such an airplane surrounded by clouds, the picture can be presented to dad on February 23rd. This image is more shaped like a whale. Let's look at it step by step:
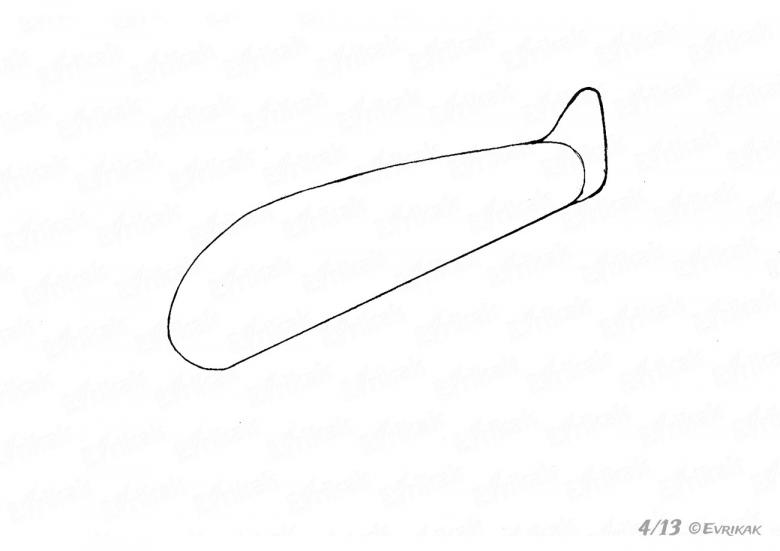
- Draw the silhouette of a whale - an oval at an angle of 45 degrees, slightly narrowed on the right.
- On the right, add a vertical semi-oval - a tail. Make two thin perpendicular wings in different directions from it.
- Add wings to the right and left of the body.
- Draw the pilot's cockpit in front, and along the body - circles-portholes. There should be caps of clouds around the flying plane.
Now start coloring your creation.
Tail and propeller
Step-by-step drawing does not end with the wings; you need to depict the figure as full. Drawing a tail is not difficult; it is usually directed upwards. When teaching children how to draw, tell them why an airplane needs a tail and what function it performs in flight. This will help you remember the names of the parts and reproduce them more easily in the future.
Difficulties may arise in drawing a propeller; it is a slightly more complex geometric figure. It can be depicted as two elongated drops.
Some airplane models do not have a propeller on the front, so if drawing one is difficult, you can do without it.
We make sure to draw the cockpit and viewing windows so that the plane takes on its final appearance.