ECD "Let's decorate the Dymkovo duck" outline of a drawing lesson (junior group) on the topic
GCD for drawing in the 2nd junior group “Let's decorate the Dymkovo duck”
Goal: Continue to introduce children to the Dymkovo toy.
Tasks:
1. Learn to draw elements of Dymkovo painting, apply them to a duck cut out of paper.
2. Develop creative activity and the ability to distinguish colors.
3. Cause joy from the result obtained.
4. Cultivate interest in Russian folk art.
Preliminary work: examination of Dymkovo toys.
Media: gouache, brushes, napkins, cups of water, Dymkovo duck.
Progress of the lesson:
The teacher attracts the children's attention by whistling the Dymkovo whistle.
Educator: Guys, look what I have! What it is?
Children: Toy!
V.: Guys, today we will introduce you to an amazing toy. And it is called “Dymkovo toy”. This is a world of fabulously beautiful, elegant and expressive figures of animals and people. Look closely at the toys. Craftsmen create such wonderful toys in the village of Dymkovo.
Smoke comes out of the chimneys in a column,
It's like everything is in a haze,
Blue distances...
They hit the village of Dymkovo!
First, the toy was molded from clay, then dried, painted white and decorated with a pattern. The result is such an elegant toy. Look at these toys, which were made by craftsmen from Dymkovskaya Sloboda. What colors do the craftsmen use when painting these wonderful toys?
Children's answers.
Q: Guys, do you want to become Dymkovo masters?
D.: Yes!
V.: Then we will go with you to the land of masters. And in order for us to get there, we need to complete tasks and exercises.
Task 1: We stand one after another and walk on tiptoes, hands on the belt.
Task 2: We stand in a circle, hands down. 1-2 hands forward, 3-4 hands up, 5-6 hands down.
Task 3: Game “Find your color”. The teacher has circles of different colors in his hands and hands out a circle to each child. There are cubes of different colors on the floor. At the teacher’s command, children must run up to the cube that matches the color of the circle in their hand.
V.: We completed all the tasks and reached the Land of Masters. Today we were prepared to paint a duck toy.
Duck – Marfutka
Walks along the shore
Duck – Marfutochok
Leads to swim.
Q: But first, let’s remember what paints do the craftsmen use when painting Dymkovo toys?
D.: Red, blue, cyan, green, yellow, orange.
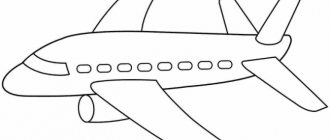
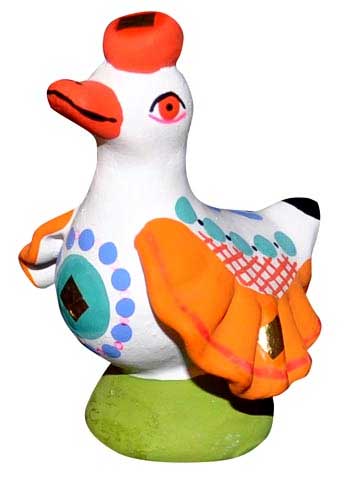
V.: Guys, the master gave us a figure of a duck and asked us to decorate it with circles and dots.
V.: Look how I decorate my duck.
The teacher draws circles and dots of different sizes with a brush.
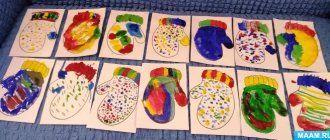
V.: So I decorated my duck. Look how beautiful she is! And you will do even better. Now let’s get to work, draw patterns on our ducks.
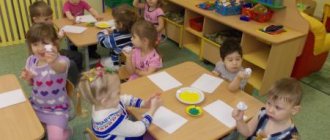
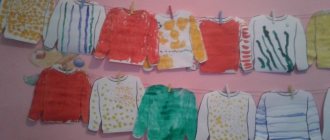
Children draw patterns on the duck figurine. The teacher provides assistance to the children.
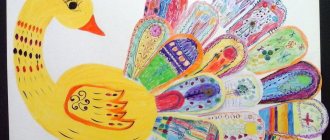
V.: What wonderful duck toys we made! Bright, elegant! I really want to play with them!
I'll buy myself a whistle
I will trill.
Masters from the glorious Haze
We will never forget!
Q: Guys, tell me what toys we met? What kind of Dymkovo toy did we depict?
It's time to return to the group.
Materials
If we want to make a Dymkovo hinny, for example, its creation involves several stages: modeling, drying, firing, whitewashing, painting. They sculpt the toy in parts. They take oily, washed clay, diluted with sand, and roll it into balls. Then the balls are flattened to form flat cakes, and the body of the toy is made from them. And smaller parts are attached to the body.
Then the toy awaits drying, firing, and whitewashing. And only after the surface has dried, the master begins painting. All the bright patterns decorating the rooster or the lady are simple and unpretentious. This is why preschool children love the painting process. The child likes to make a white figurine bright, to enliven it with paint. But first, the Dymkovo painting patterns presented for children are worked out on paper blanks. Children learn patterns and work with primary colors.
Therefore, the materials for a future toy can be different: clay, acrylic paints, gouache, and paper. Child labor requires the simplest set of materials and tools - thick watercolor paper, gouache, brushes. Older children can work with papier-mâché, that is, paint three-dimensional figures.
A selection of materials on the topic
click on the picture below to download a collection of pictures depicting Dymkovo toys: And you can also download individual pictures of Dymkovo toys at your discretion: Lady Horse Rooster Turkey Duck
The development of fine motor skills, logic, attentiveness and perseverance in a child must be addressed from an early age. Proven teaching methods include drawing or coloring the outlines of shapes. Parents, in order to captivate their baby, use various drawing templates.
Dymkovo toys will be the most suitable for this purpose. Despite their apparent simplicity, they have small details, the painting of which will require a lot of effort from the child.
Dymkovo toys are created in several stages. They cannot be made without special skills, so the process of making such crafts for children is usually supervised by professional craftsmen.
On the way to obtaining a high-quality result, the toy must first be molded, then thoroughly dried, burned, whitened and beautifully painted. Skipping one of these steps may result in the figurine being too fragile or not working at all.
Dymkovo toys are molded by hand. Despite the presence of uniform templates for drawing, in reality not a single craft is similar to its counterparts, precisely because of the individual approach to their creation.
Sequence of creating a toy:
How to make it?
First, red clay is taken, mixed with brown river sand. This type of clay exists precisely near Vyatka. A figurine is sculpted from it, for example, a rooster, turkey or horse. You have to sculpt the figures in parts. Then they are glued together using liquid clay, and the figure is adjusted by the master. The toy is then dried and fired in a kiln at high temperature. Then they begin to paint it. The patterns are painted with white paint. Previously, paint was made from chalk mixed with milk. Today there are special paints. In addition to white, toys abound in blue, green, and yellow colors, which give them a special cheerfulness. The top of the toys was covered with whipped egg white, which gave them a bright shine and elegance. Each toy is unique because it is made by hand. Among the many figurines collected in museums, you will not find two identical ones. The largest toy museum is located in Kirov.
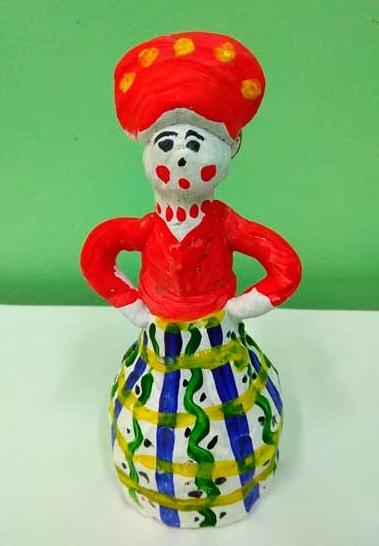
Master class on painting the Dymkovo lady
Let's look at the painting of the colorful Dymkovo lady using children's works as an example. In this case, you can take not clay, but plasticine, which is more accessible and comfortable for the child. To work you will need plasticine, a modeling board, stacks, a plastic bottle, gouache, squirrel brushes, a marker and cotton swabs.
Action plan:
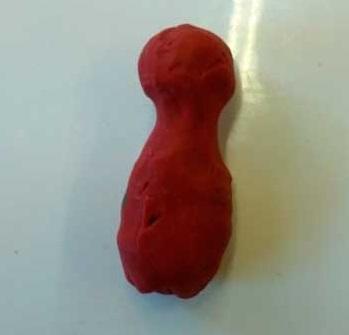
- You need to roll out a roller from plasticine of any color. Having retreated a place on top of the head, we press down the plasticine so that we get a neck. The head and body can also be made from two parts.
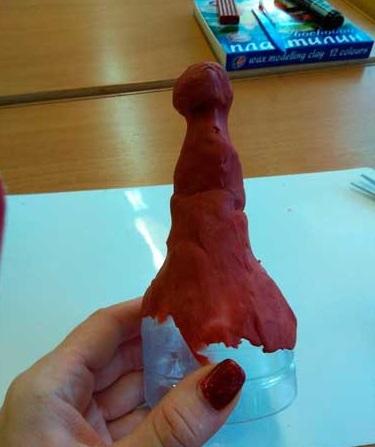
- If you cut off the top of a small plastic bottle, it will be a good blank for a skirt. The lady's torso (plasticine) needs to be attached on top of the plastic blank.
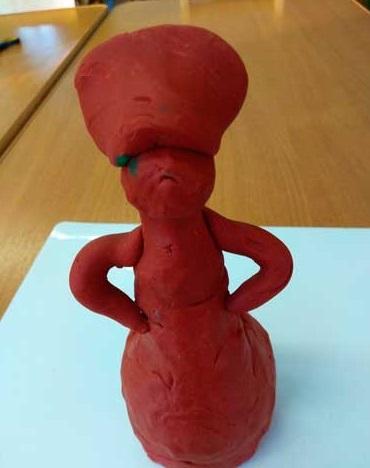
- We coat the entire structure with plasticine, make hands from two plasticine rollers and sculpt a kokoshnik, do not forget to weave a plasticine braid.
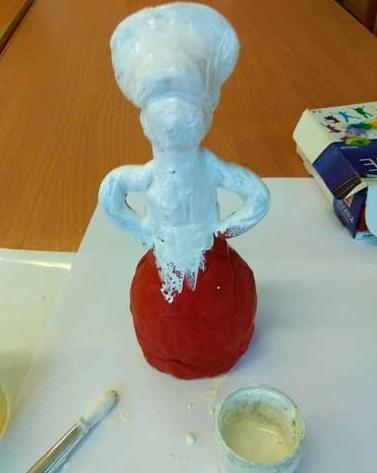
- We cover the finished lady with white gouache, a very dense layer. You need to wait until the figure dries.
- Now begins the most interesting stage - painting. It is assumed that the children have already practiced the basics of Dymkovo painting on paper: elements of painting for children can be studied using special recipes. You can also make a sketch on paper, based on which the child will paint a three-dimensional figure.
- You need to act in stages: it is very convenient to draw dots and circles with cotton swabs, which serve as a kind of stamps. It is convenient to draw eyes and eyebrows with a black marker, and a mouth with a red marker.
- The children are instructed in advance what colors they can use in painting. You can talk about the meanings of colors and the symbolism of elements. This is how the child does not paint an abstract picture, but, like a true master, puts meaning into the work and conveys some kind of message.
You can see an example of painting a Dymkovo lady in the video presented. Odnoklassniki
Dymkovo toys are also called Vyatka or Kirov toys. They have a long history, and appeared more than 400 hundred years ago in the settlement of the same name near the Russian city of Vyatka.
Simple coloring pages of Dymkovo patterns for young children
Dymkovo toys (drawing templates, in particular) should be chosen based on the age of the child who will work with them.
Children's development will benefit from painting large components of a drawing, using the most saturated colors.
Among the most popular options for such pictures:
| Drawing for coloring | |
| Horse. The task for the child will be to color the horse in the way he thinks will be as beautiful as possible. Typically, children are asked to use red, white, orange and yellow pencils. This set of colors, as a rule, is sufficient not only for their individual use, but also for creating new shades. In this version of the coloring book, the child, if desired, can complete the animal’s face, or can simply add brightness to the picture, without adding patterns to it. |
| Matryoshka. Coloring this picture of a matryoshka doll is best combined with telling your child the history of the origins of the original Russian toy. It will also be interesting for the child to learn the principle of playing with such a wooden doll. Pencils of red, black, white and yellow are usually used to add color to this sketch. | |
| Lady. The process of coloring the lady will also be a fun activity for kids. Despite the apparent simplicity of the design, giving it color requires thinking through the shades used in the work. To complicate the task, the child can be given the goal of coloring the outline of a woman so that the items of her clothing match each other and do not merge. For this purpose, it is recommended to invite him to choose a shade to work with from an unlimited number of pencils. Experience shows that children most often choose red, yellow, green, blue, black and white. |

Dymkovo toy Lady
Adults associate Dymkovo toys (drawing templates will help children master artistic skills) with the figure of a lady. A drawing template with a picture of a woman in a beautiful outfit will teach your child to draw the details that create a realistic person's face and the details of his clothing.
A lady can look different:
It is worth choosing the most suitable option based on the experience and age of the children who will work with the template. At the initial stage, it is optimal to let the child complete the simplest image of a woman without unnecessary details.
For example: