Lesson 8. Drawing “Beautiful stairs”
Program content. Teach children to draw lines from top to bottom; carry them straight without stopping. Learn to put paint on a brush, dip the entire bristles into the paint; remove the excess drop by touching the edge of the jar with the lint; rinse the brush in water, dry it with a light touch of a cloth to pick up paint of a different color. Continue introducing flowers. Develop aesthetic perception.
Methodology of conducting the lesson. Remind the children that they saw ladders on the site during a walk, in the hall during a physical education lesson. If possible, look at the climbing ladders with the children, pay attention to how bright and beautiful they are.
Tell the children that today they will draw beautiful stairs. Invite them to show with their hands in the air the direction of the lines of the ladder. Show on a piece of paper pinned to the board how to draw lines together with the entire bristle of the brush. Call one of the guys to the board and ask them to draw a ladder. Then show the children how to rinse the brush, dry it on a cloth, and only then apply another paint.
Place the finished drawings on the board (table) and examine them with the children. When viewing works, highlight beautiful color combinations.
Materials. Paper 1/2 landscape sheet size (or A4 size); gouache paints of four colors (for different tables, paints of two colors in different combinations, beautifully combined), jars of water, brushes, paints (for each child).
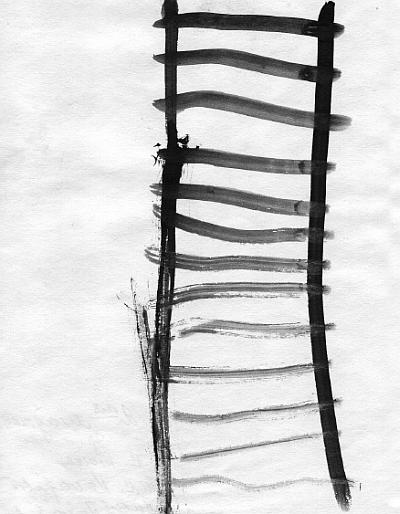
"Ladder"
Vlad K., 2nd junior group
Connections with other activities and activities. Take a look at the ladders on the site and in the gym with your children. Pay attention to the even bases of the stairs and steps. Include hand movements in parts of the ladder in the process of viewing, emphasizing that they are straight and even.
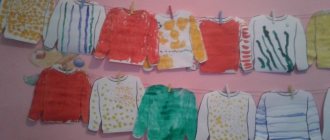
Option. Drawing “Beautiful striped rug”
Program content. Teach children to draw lines from left to right, to move the brush continuously along the pile; put paint on the brush, rinse the brush thoroughly; paint carefully with another paint, without going into the places where it has already been painted. Develop color perception and consolidate knowledge of colors.
Methodology of conducting the lesson. Attach 3-4 striped (two-color) rugs to a board or large sheet of paper. Draw children's attention to the direction of the stripes. Remove sample mats.
Show children how to draw a striped rug: first draw stripes of the same color from left to right, at a short distance from each other (emphasize the continuity of movement, timely dip the brush in the paint), then rinse the brush well, dry it on a cloth, dip it in another paint and draw stripes of a different color between the already drawn stripes.
At the end of the lesson, look at all the drawings, note the variety of color combinations, and say that the rugs turned out very beautiful.
Admire the works with the guys. You can beautifully arrange the pictures by color.
Materials. 3-4 striped two-color rugs. Square sheets of paper; gouache paints (two different, well-matching paints for each table); jars of water, brushes, rags (for each child).
Connections with other activities and activities. Clarify children's knowledge about colors in educational games. Look at beautiful striped fabrics, runners, scarves.
Theme of the week: “Pisces”
Lesson 19. Aquarium with fish
(Drawing with watercolors)
Target. Continue introducing children to watercolor paints; learn to draw a round object and carefully paint over it. Cultivate compassion and kindness.
Demonstration material. Toy cat.
Handout. A landscape sheet on which fish are drawn with wax crayons, watercolor paints, a brush, a jar of water.
Progress of the lesson
Place in front of each child a landscape sheet on which fish are drawn with wax crayons; read the poem by M. Kaminskaya:
Here is an aquarium, and in it
The fish are splashing.
In their glass bright house
Don't let the cat get in.
Show the children a toy cat.
Cat . Hello guys! How many fish do you have? I want to eat them quickly.
Invite the children to draw a round aquarium and “pour” water into it (paint it over). Show them watercolor paints and explain that when painting with watercolors, you need to put more water on the brush - then the fish will remain unpainted.
Once work is completed, the aquariums can be cut out.
At the end of the lesson, tell the children: “What a great fellow you are - the cat didn’t have time to eat a single fish!”
On the topic: methodological developments, presentations and notes
Summary of a drawing lesson in the second junior group “Beautiful flowers for a bee.”
Summary of a drawing lesson in the second junior group “Beautiful flowers for a bee” Program content: Maintain interest in visual arts; Continue learning to draw with your palm and.
Summary of a drawing lesson in the second junior group “Beautiful striped rug.”
Program content Visual tasks: Teach children to draw lines from left to right, hold the stick continuously. Consolidate knowledge about color. Educational tasks: 1. Educate children.
Learn to draw horizontal lines, strengthen the ability to hold a brush correctly, establish colors: blue and red, and cultivate aesthetic feelings.
Summary of a drawing lesson in the second junior group “Beautiful striped rug.
Program content:• Maintain interest in visual arts;• Pro.
Source
Summary of a drawing lesson in the second junior group “Tree”
Topic: “Tree” Objectives: Teach children to draw a tree, the trunk is tall, straight; the branches do not grow from the very bottom of the trunk, they stretch upward, towards the sun; branches grow both to the right and left of the trunk; thinner branches extend from large branches; teach by combining straight and oblique lines, long and short, in a drawing. Introduce children to the color brown; Materials: Brushes, brown paint, water jars according to the number of children, napkins.
PROGRESS OF THE LESSON Educator: Guys, guess the riddle: He rushes without looking back, Only his heels sparkle. He rushes as fast as he can, his tail is shorter than his ear. Quickly guess - who is it? (bunny). Educator: What time of year is it? (winter) By what signs did you determine that winter has come? (it’s cold outside, people dressed warmly). Surprise moment: A hare runs in. Runs away from the wolf. Hiding behind a tree. The little white bunny, the bunny changed his fur coat, but there is no snow and it is very difficult for him to hide, he has to run in circles and confuse the wolf, he hid behind a tree and sits shaking. The wolf looked for the bunny, (the wolf looks behind the trees, behind the bushes) looked around, found no one, got offended and ran away. Educator: Look, what a nimble bunny, he hid behind a tree, he’s invisible, but there are many bunnies living in the forest, and we have only one tree for now, and so that other bunnies have somewhere to hide, let’s draw trees for them, behind which they can also hide. (come on) Educator: Guys, during our walk we looked at the trees. Let's remember what a tree has? (.) Trees have one big leg - this is the trunk. He is tall and fat, and on this leg there are twigs growing like arms, they are thin and stretch upward to bask in the sun. Guys, look (Hang up a picture of a tree) and tell me what color the tree is? (brown). Ask what parts of the tree are called (trunk, branches). Ask to show these parts in the picture, identify: the trunk is tall, straight; the branches do not grow from the very bottom of the trunk, they stretch upward, towards the sun; branches grow both to the right and left of the trunk; thinner branches extend from large branches; the whole tree is in small branches. Educator (we show the sequence of drawing).
On the easel, the teacher shows the children that first of all we draw the line of the ground, because the tree grows from the ground. After we have painted the ground, we draw a tree trunk, we draw the tree trunk with brown paint (from the bottom up, we try to draw the trunk with one long line), the trunk is tall, straight; the branches do not grow from the very bottom of the trunk, they stretch upward, towards the sun; branches grow both to the right and left of the trunk; Thinner branches extend from large branches. Guys, look at the tree I got.
Guys, let’s all show together with a brush in the air how you will draw a trunk. (Please note that you need to draw a straight line from bottom to top, since trees grow from the ground and stretch upward to the sun), we remind the children that before drawing the trunk, we draw the line of the ground. Branches grow from the trunk of the tree, which stretch upward towards the sun, so we will draw them like this (we show drawing inclined lines from the trunk upward). Now show in the air with a brush how we will draw the branches. (Please note that we draw the branches from the trunk upwards). (Children show how the branches grow - they raise their hands up). How many branches does the tree have? (a lot of)
Physical minute:
The wind blows in our faces, the tree sways,
The wind is quieter, quieter, quieter,
The tree is getting higher and higher.
To start painting, you need to wet the brush in water and put brown paint on it. (we put paint on the brush, do not immerse the brush entirely in gouache), the teacher reminds that first you need to draw the trunk of the tree. We will lead it from the bottom up. What will the tree trunk be like? (brown, tall, branches on both sides of the tree) Children’s independent work. We pay attention to how children hold their brushes, how they draw straight and inclined lines. Helps if children have difficulty completing a task. Educator: Well done, everyone did a good job! In the meantime, while your work is drying, let's play a very interesting game:
Staging of the nursery rhyme “Gray Bunny”
The teacher invites the children to get up from their chairs, sit in a circle and play:
— The gray bunny sits and wiggles his ears, the children are squatting
Like this, like this, he moves his ears. Wiggle their ears
It’s cold for the bunny to sit, we need to warm up our paws, clap our hands
This is how you need to warm your little paws.
It’s cold for the bunny to stand, the bunny needs to jump, They jump like bunnies
This is how, this is how a bunny should jump.
Whoever scared the bunny, the bunny hopped and ran away. They run away and sit on chairs
Educator: Guys, what did we do today? (draw) What did we draw? (trees, trees have long branches, show how long they are? (children raise their hands up imitating tree branches, show how the tree branches sway?) Tell me, how many branches does the tree have? (many) How many trunks does the tree have? (one) . Look what beautiful trees we have made. We evaluate the work, note the drawings in which the tree has many branches drawn and they are located in different directions, note the slenderness and beauty of the tree. Let's call the bunny who is hiding behind our tree. (Bunny come out ), look, bunny, what kind of forest the children drew for you, how many trees there are in the forest, now you can hide behind any tree, and the wolf won’t find you, and we also know, bunny, that you and your friends really like to feast on the bark of trees, so now it’s cold in the winter you'll have something to chew on. Bunny: Thank you guys, you're very grateful for your work. Now we're with our friends as bunnies, we can't be afraid that a wolf will catch us and we can safely walk through the forest. And now I ran into the forest, to my friends, I want make them happy faster. Goodbye, guys! I liked you all very much, I will come to visit you again.
On the topic: methodological developments, presentations and notes
Notes on modeling for children of the second junior group on the topic: “Mimosa for your beloved mother!”
· Objectives: · — practice children in gluing ready-to-learn shapes, arranging them by size. ·.
Goal: To arouse interest in creating an expressive image of flowers using the brush painting technique To develop the creative abilities of children through the integration of educational areas “Communication”.
Goal: To teach children to draw lines from top to bottom; carry them straight without stopping. Continue introducing flowers. Develop aesthetic perception.
Summary of organized educational activities in the educational field “Artistic and Aesthetic Development” (drawing) in the junior group on the topic “Luntik’s Birthday.”
Abstract of OOD Artistic and aesthetic development (drawing) in the junior group on the topic: “Snowballs”. Handouts: A4 sheets, napkins, brushes, cups of water.
Source
Preview:
Summary of a drawing lesson in the second junior group “Beautiful Ladder”
Goal: Learn to draw horizontal lines, strengthen the ability to hold a brush correctly, strengthen the colors: blue and red, cultivate aesthetic feelings.
Vocabulary work: Horizontal lines, long, from left to right.
Equipment: sheets of paper, brushes for each child, paints (blue, red), oilcloths according to the number of children, a toy - a teddy bear.
Demonstration material: rug sample.
Previous work: conversation with children about the rug, a surprise moment.
Organization of children: the lesson is held at the table.
Organizational moment: a knock on the door.
Educator: someone is knocking on our door.
Look guys, who came to visit us?
That's right, it's a bear. And the bear came to us for a reason. Teddy bear told me in my ear that he wants you to draw a rug for him. He loves to lie on a rug, but he doesn't have one. He will be very happy if you give him a painted rug. Bear likes different rugs, but he really wants a striped one. Today we will draw a striped rug for the bear. Guys, should we give the bear a rug?
Educator: You, Mishenka, sit down and sit on a chair, and I will show the guys what kind of rug we will draw. Look what I'm holding in my hands, it's me who drew the rug. Look how long the horizontal lines are. Take the brush in your right hand and show how to hold it correctly. Raise your right hand up like I did and draw a horizontal, long line in the air, from left to right. Repeat after me. Well done guys, you're doing the right thing.
On each table there is a piece of paper, jars of blue and red paint, and oilcloth.
Educator: guys, let's start drawing, and I will help you. The bear will look to see who draws correctly. Dip the brush into the red paint and draw a straight line from left to right, from one edge of the leaf to the other edge of the leaf. Repeat after me. Step back like I did and draw another horizontal line below. Now rinse your brush and take the blue paint. Draw a horizontal blue line between the red stripes. Draw carefully and beautifully so that the bear likes the rug. Alternate red and blue stripes until the end of the sheet. Rinse the brush thoroughly after finishing work, do not leave it in the jar.
In the process of work, I approach children who have difficulty drawing and use the “passive drawing” technique, give instructions, and encourage them.
Educator: Well, we're done. Put down your tassels, stand up from your desk, raise your arms up, bend and straighten your fingers:
Our fingers are tired
We'll rest a little
And let's all go play with the bear.
Educator: Well done, guys!
Our works have dried out a little, let's take them and go give them to the bear.
Mishka says that the rugs are very beautiful, he really likes them, he takes them all and gives some of the rugs to his friends in the forest.
Today in class you all did a great job, you all worked hard and drew beautiful, striped rugs.