April Fool's Day, a themed competition, an exhibition of crafts in a kindergarten or school - for all these “reasons” a clown made with your own hands from paper, cardboard, textiles and any other available materials is suitable. The manufacturing technique is selected according to the child’s age, skills, and degree of perseverance. Such a souvenir, made by mom or dad, can please the child himself, for example, by adding it to the main gift for a birthday or New Year.
How to make a paper clown
Children from 3 to 6 years old can be asked to make a cheerful little man with their own hands in the form of an applique, while older children can make a craft in the form of a three-dimensional figurine with movable spring handles.
Application
It’s easier for kids to make applique from already prepared parts.

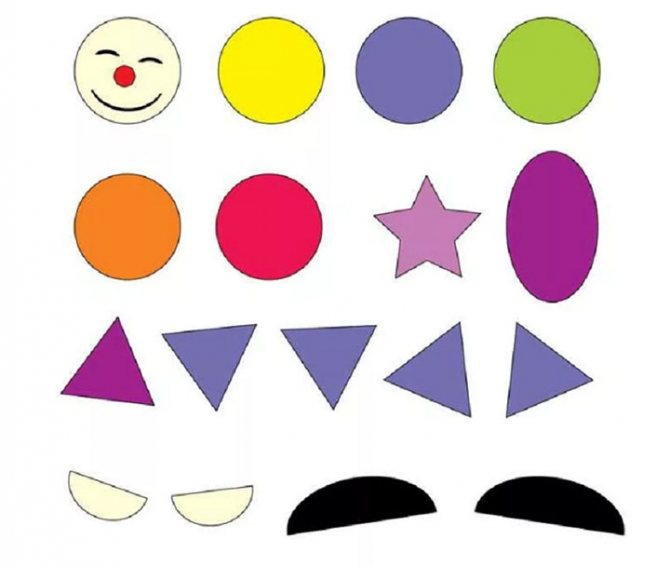
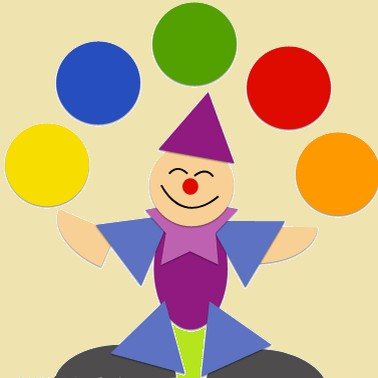
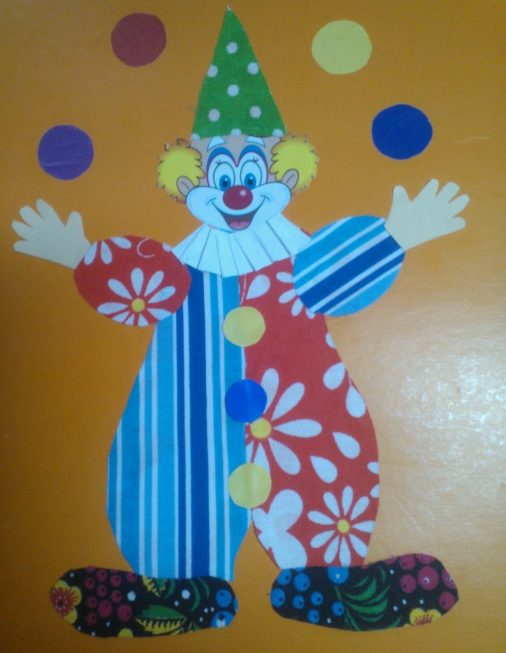
Before starting classes on how to make a clown with your own hands, parents or teachers should cut geometric figures and prepare everything necessary - cardboard for the base of the craft, glue, scissors with blunt tips. 15 parts needed:
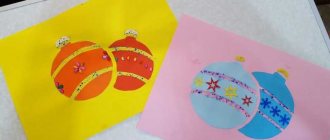
- 6 circles of different colors - juggling balls and a face;
- 5 triangles – cap, pants, sleeves;
- 3 ovals – 1 for the body, 1 (in halves) for shoes, 1 (in quarters) for arms;
- 1 star – collar.
Let's start assembling the application. Just below the middle of a bright sheet of colored cardboard we glue an oval body. We “attach” arm triangles to its upper part. The next parts are the collar and head.

Then we “put on” a cap for the cheerful clown, place shoes along the bottom edge, glue on pants and sleeves, arms and legs, and balls at the top in a circle.
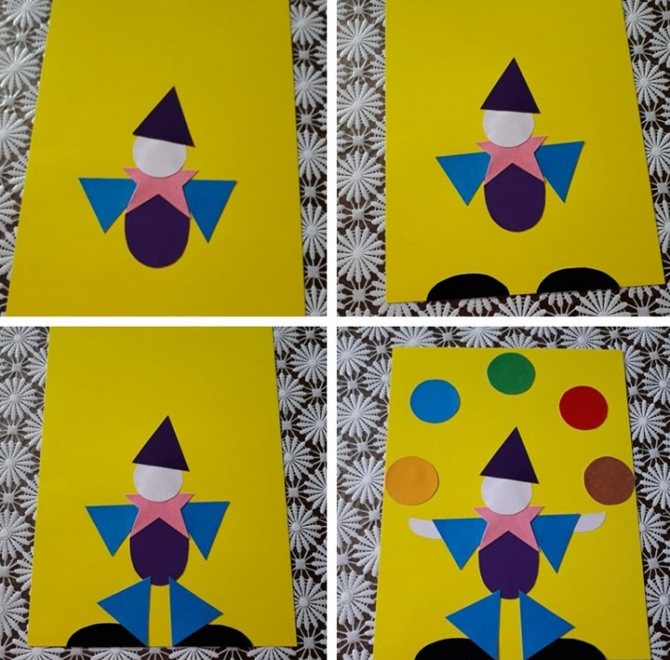
The final touch is the design of the face. Eyes, nose, mouth can be drawn with multi-colored pencils or felt-tip pens.
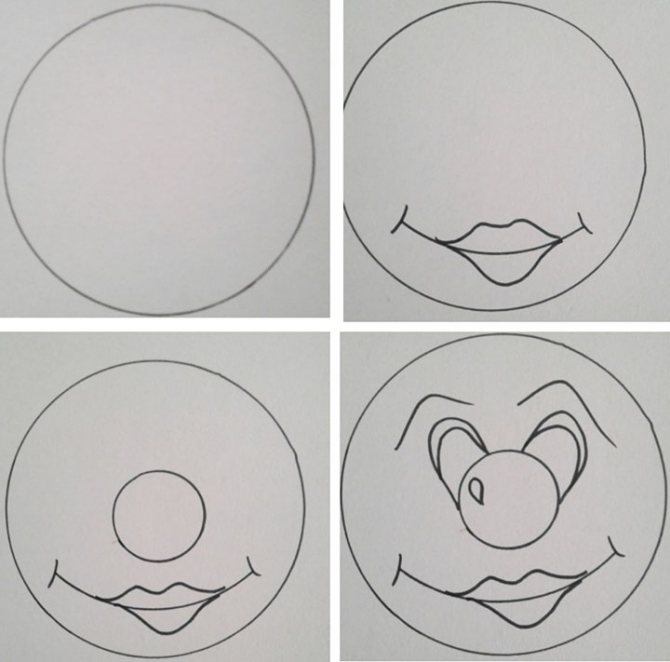
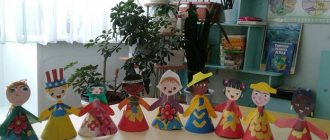
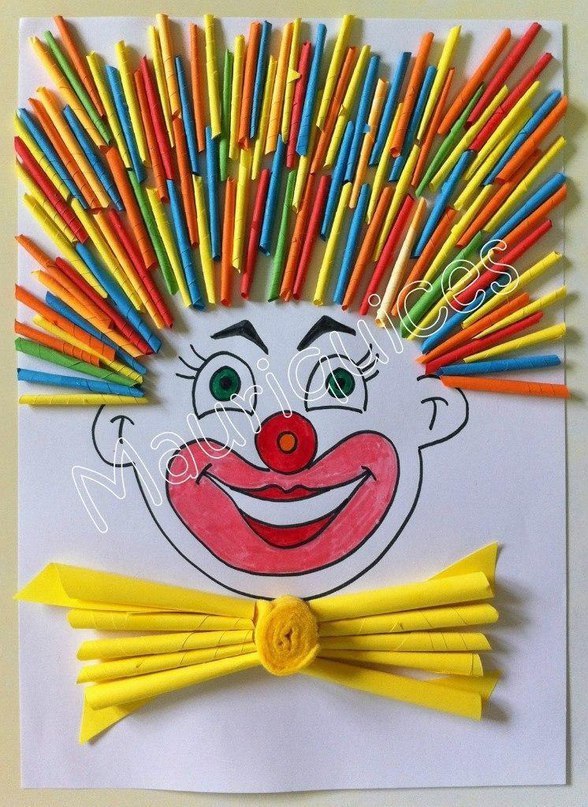
Older children can be encouraged to make a voluminous applique craft with their own hands. Work on it begins with the face. It is better to draw it for parents. We take a sheet of white cardboard as the basis for the volumetric applique.
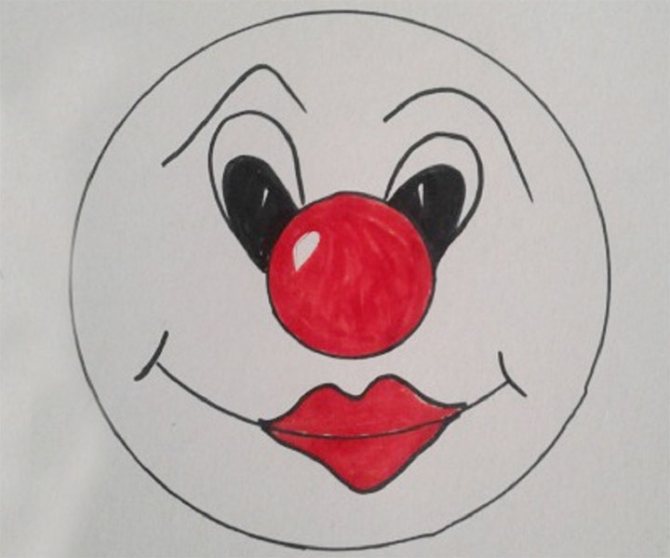
We color the face with pencils or felt-tip pens.
We cut several sheets of paper of different colors into squares with a side of 5 cm, fold them into sharp triangles.
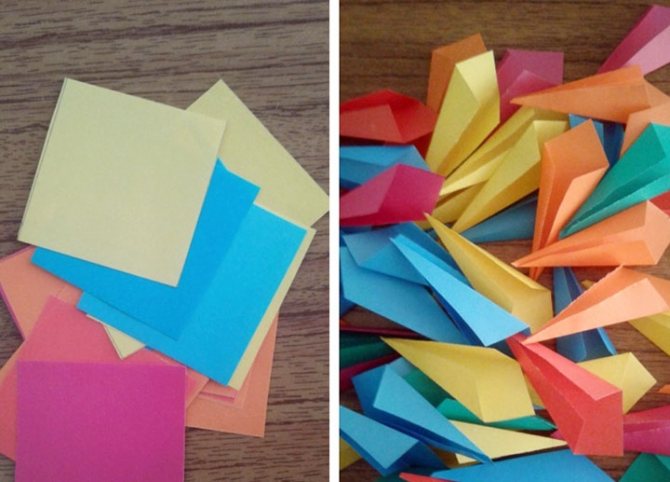
From the resulting blanks we make a “hairstyle” and a bow.
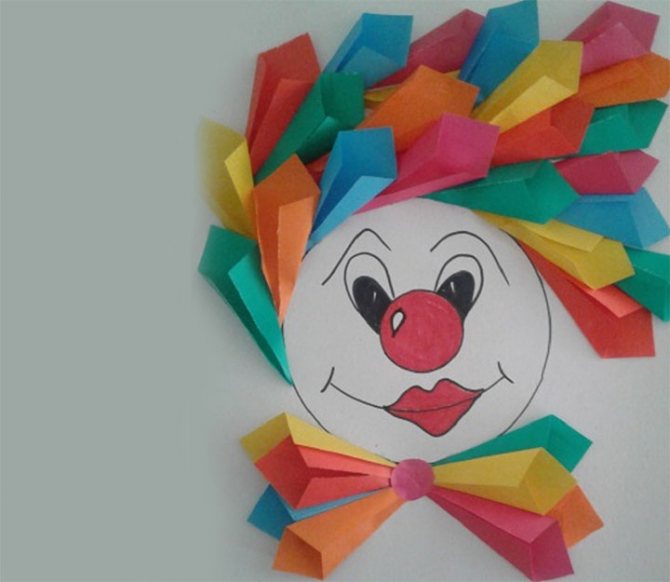
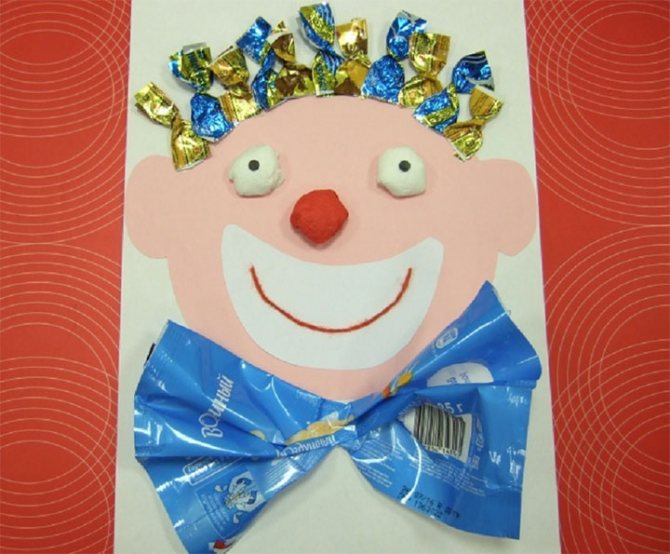
A voluminous, bright, structured craft for the kindergarten is ready. And if you replace the paper triangles with candy wrappers, and decorate the voluminous eyes and nose with textiles or plasticine, then your handmade clown will be even brighter and more attractive.
Video tutorial:
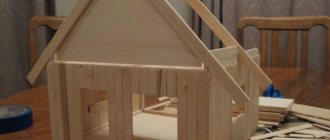
From corrugated cardboard and a tennis ball
A three-dimensional figurine of a funny circus performer can be made from simple materials in 20-30 minutes, and even a first-grader can cope with the task.
Before you start work, you need to prepare everything you need:
- tennis ball, preferably white;
- corrugated cardboard and bright “tissue” paper;
- small pieces of ordinary colored cardboard;
- multi-colored markers and thin springs;
- glue, scissors, wire.
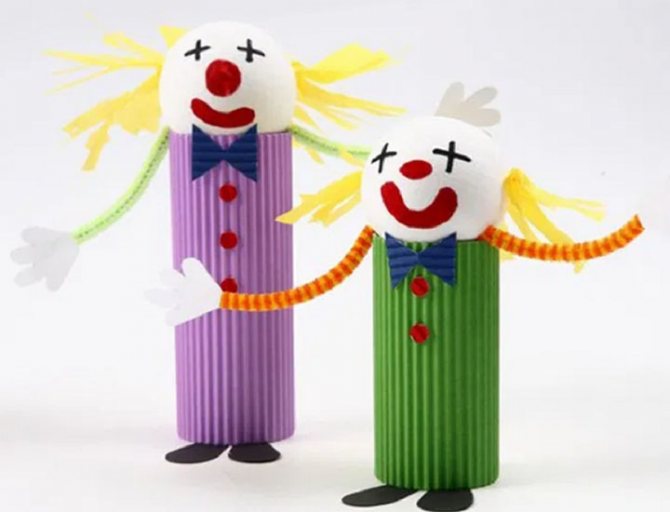
On the tennis ball we draw cross eyes, a red nose and lips with markers. We glue a cylinder from corrugated cardboard. The diameter of the cylinder should be smaller than the diameter of the head.
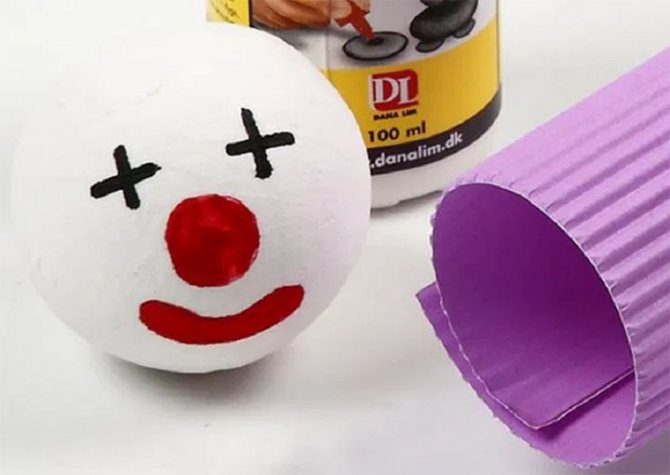
We will make clown hair from tissue paper with our own hands - lightly gather the folded strip in half using a thin wooden stick, and cut the edges into “noodles.” Attach the hair to the toy's head using glue.

We put springs on a thin wire. They can be bought at a specialty store or simply taken out of automatic pens. We attach pre-cut palms to one edge of each workpiece, and fasten the other edge (simply bend it) onto the cylinder. We glue the boot legs to the bottom of the cylinder.
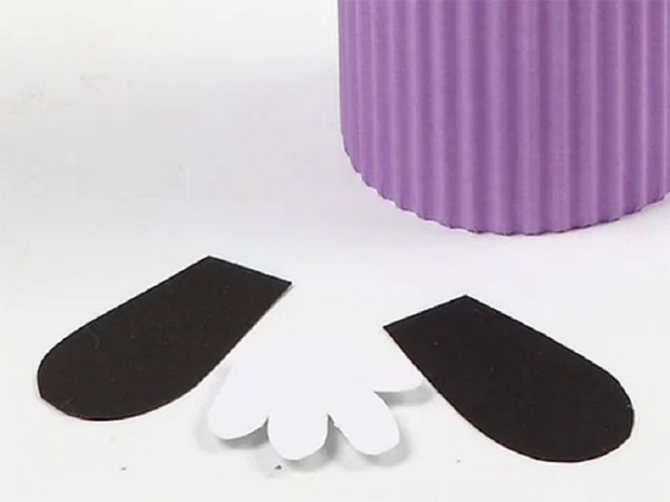
The final stage of work is collecting and decorating the crafts. We attach the ball head with glue so that it does not roll off the base. You can decorate the “suit” with real or cardboard buttons or a corrugated paper tie.
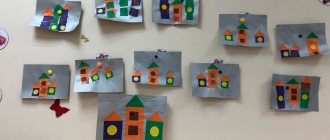
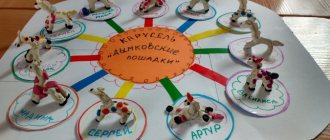
Tasks. Teach children to create a collective composition of applicative elements based on a unifying image (a hat). Show a rational way of cutting from paper folded like an accordion or twice in half (ribbon applique). Develop compositional skills and a sense of color. Develop cooperation skills in collective creativity, a sense of responsibility for a common cause.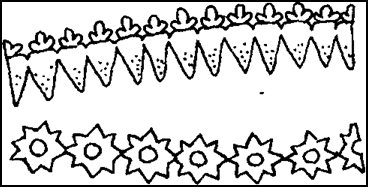
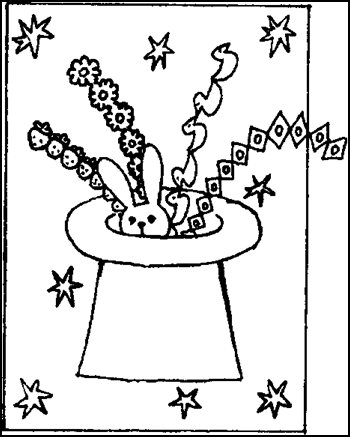
Preliminary work. Preparing the basis for a collective composition (a large sheet of paper: at the bottom there is a magician’s hat, cut out of paper and glued semi-volumely, tricks “fly out” from the hat - 2-3 ribbon applications (for example, doves, flowers, stars, candies, gloves, socks). See picture.
Materials, tools, equipment. Strips and rectangles of colored paper, scissors, glue, glue brushes, napkins, simple pencils for drawing an element, colored pencils and felt-tip pens for adding graphic elements to the application. Unfinished composition “Magician’s Hat” with two or three tricks (ribbon appliqués).
Recommended aids, clarity.
Posters “Circus”, “Zoo”, “Multiple”, “Composition of the number 5”, “Composition of the number 10”.
A set of technological maps for sculpting “Circus”.
Unfinished composition “Magician’s Hat” (applique).
Contents of the lesson.
A teacher in a magician's cloak and top hat performs a trick (takes out a New Year's garland from his hat). Then he shows the children the unfinished composition “Magician’s Hat”, prepared in advance in independent artistic activity, and invites the children to come up with and make their own tricks that will “fly out” of the hat. Then the teacher introduces the children to a new way of cutting out paper folded like an accordion or in half twice or four times (depending on the softness of the paper).
Look at this trick (at this time the teacher unfolds one of the ribbon cutouts, for example, doves, flowers, stars, apples or candies). You see, all the doves (or flowers, apples, candies - elements of the ribbon applique) are connected to each other in the form of a chain or New Year's garland. And you can do it like this. I take a strip of paper, fold it in half, in half again, draw a picture, for example, a Christmas tree, so that the lower branches fall on the fold. I cut, trying to leave the lower branches at the bends uncut. These branches will hold on to each other, and you will get a round dance like this. And if you accidentally cut the design on the folds of the paper, the Christmas trees will separate and the “round dance” will not work.
Children come up with their own tricks, fold strips of paper like an accordion or in half twice, draw one element with a simple pencil (for example, candy, a ball, a bird, an umbrella...), bringing out some elements of the drawing on the folds, and show it to the teacher. The teacher checks that the parts on the folds are fixed and reminds them that they cannot cut at this point. Children cut out along a self-drawn outline, unfold their “tricks” and, if desired, complement them with drawings or appliqué. For those children who have recently come to kindergarten or who are not very skilled with scissors, the teacher suggests making a focus garland from individual elements -
circles, triangles, stars, leaves, beetles, etc. All children transfer their “tricks” (ribbon appliques) to the general composition “Magician’s Hat”, place them beautifully and freely, and carefully glue them.
At the end of the lesson, the teacher asks the children if they can find new unusual tricks on their tables or in paper scrap boxes. Children discover the remains of those strips of paper from which the silhouette “tricks” were cut out. The teacher advises attaching these strips with a through-cut pattern to colored paper and, if desired, sticking them on. (This work can be continued after the lesson in independent artistic activity or in an art studio class.)
After class. In their free time, children, at their own discretion, complement the composition “Magician’s Hat” and, with the participation of the teacher, turn it into a circus poster.
The teacher reads to the children a short fairy tale by V. Krotov “A trick with a magician”:
A magician came to one city on tour. He performed all the tricks himself, but for one he needed an assistant. He called young Kyu from the hall and asked in a whisper: when he disappears, count to three and hit the chair with his wand. But Kyu forgot what to hit. She started knocking here and there, at random. So many things appeared: a goose, a cactus, a bicycle, a bucket of water, but there was no magician. Finally she touched the leg of the chair, and a magician appeared under the chair. But he was not offended and even gave young Kyu a cactus.
Textile clowns
The collections of many craftswomen include rag dolls made from scraps of fabric. Using the same principle, you can make a merry fellow from the circus, for example, as a gift for a child or as an additional souvenir.
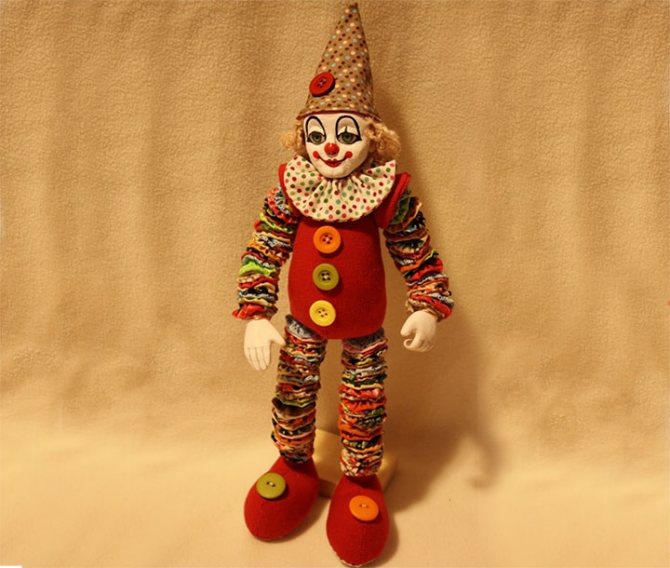
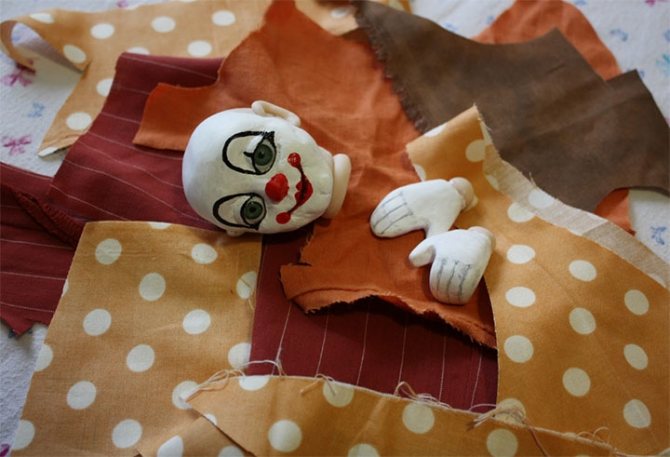
The head and arms for such a doll can be bought ready-made at a craft store or sculpted with your own hands from clay, plasticine, salt dough, sewn and filled with stuffing.
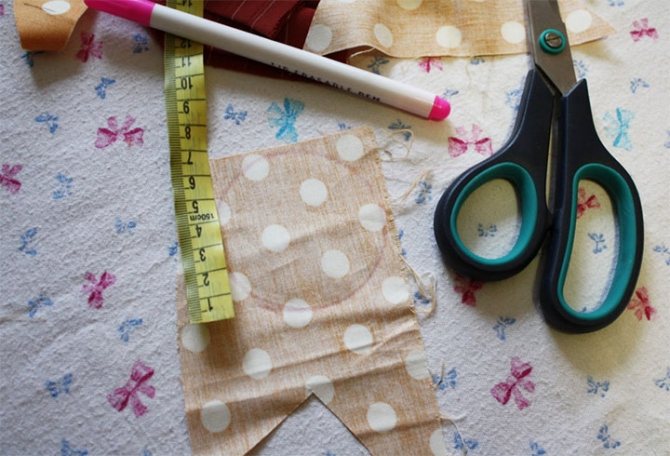
From pieces of fabric we cut circles with a diameter of 6 cm. The more there are, the better.
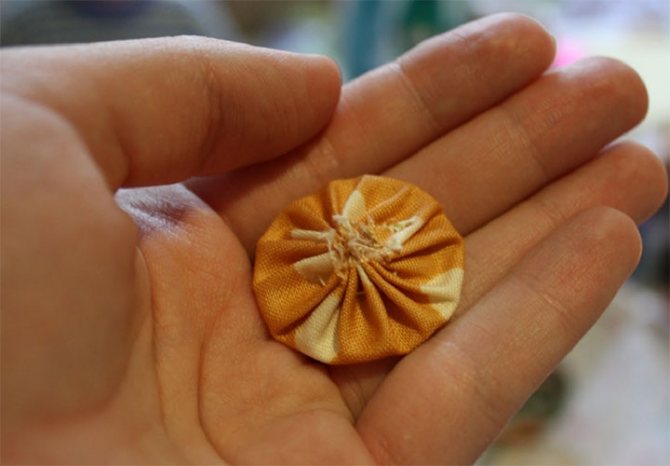
We make a “pillow” from each circle. We put a small piece of cotton wool or padding polyester on the scrap, put a running stitch along the edge and tighten the workpiece. We straighten the filler so that it “lays” in an even layer.
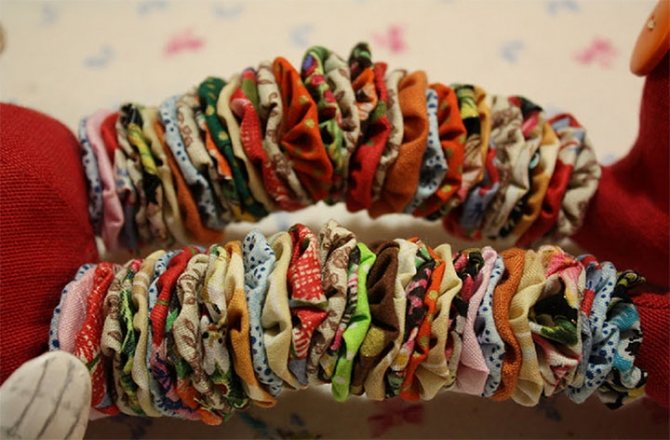
We assemble the body from four ovals of bright fabric and stuff it. In the shoulder area we sew “sleeves” of the same fabric - we sew the circles, leaving a window for turning them inside out, turn them inside out, and sew them to the base. We thread a wire through the hangers - we will string round blanks with filler onto it.
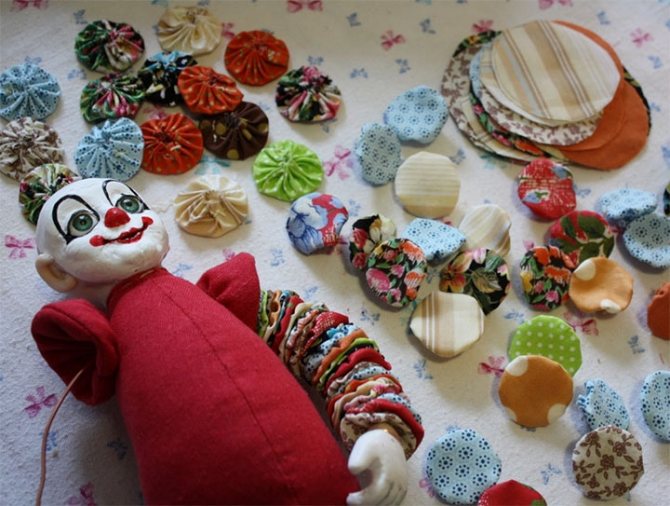
We make the tip of the wire sharp, string the pieces onto it one by one, then attach the palms. Using the same principle, we assemble the clown's legs.
All that remains is to sew the cap, the shoe legs and secure them.
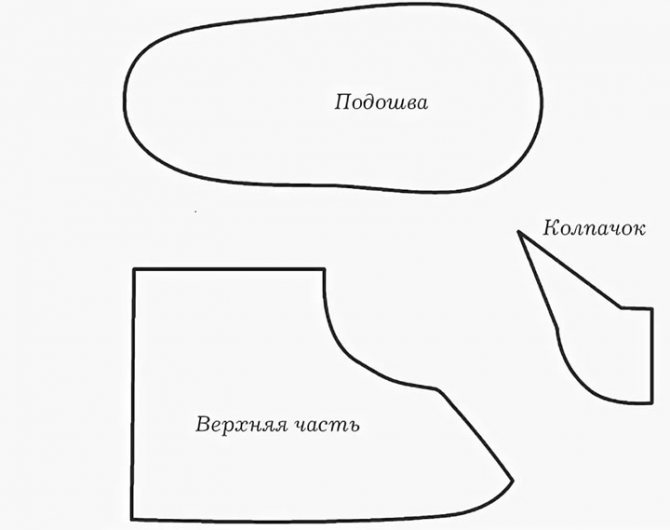
We cut out all the details of the shoes from the same fabric as the body of the toy. For each shoe you will need 2 upper parts and 1 sole. We fill the shoes with padding, tighten the tops and sew them to the legs. For the cap, cut out 2 parts, sew them together and attach them to the figure’s head.
Felt Christmas tree toy
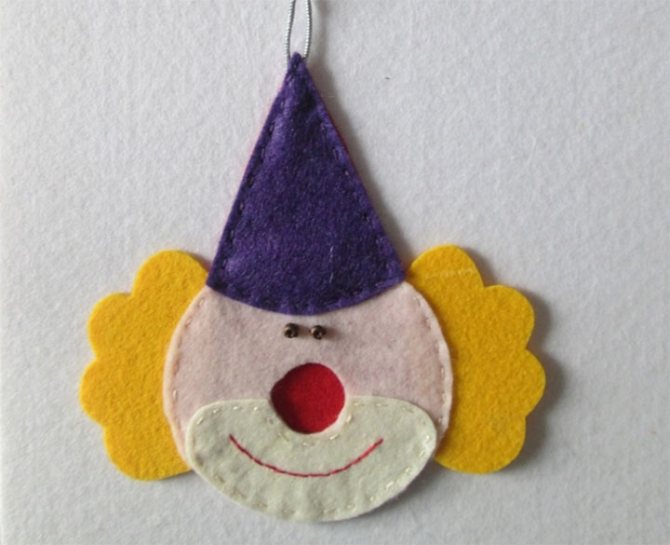
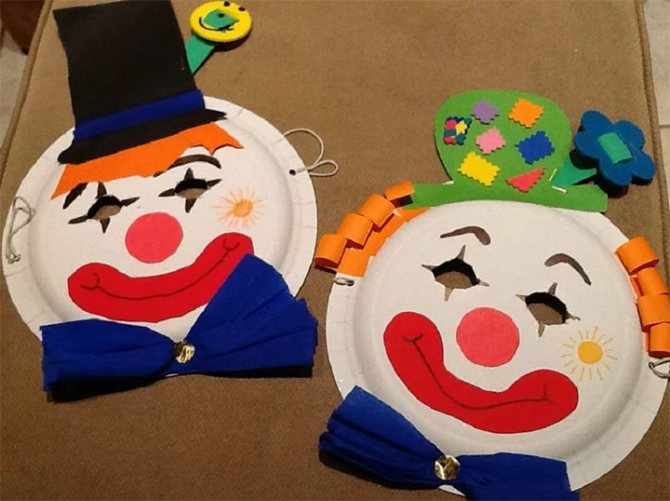
Children are happy to take part in creating toys to decorate the New Year tree. Girls can be invited to make a cheerful clown out of felt. You will need:
- felt and embroidery threads;
- needle, scissors, pencil;
- thin ribbon for a loop;
- two beads;
- pattern templates.
We cut out parts from felt of different colors. We make a small hole in the middle of the round element. Let's start designing the face.
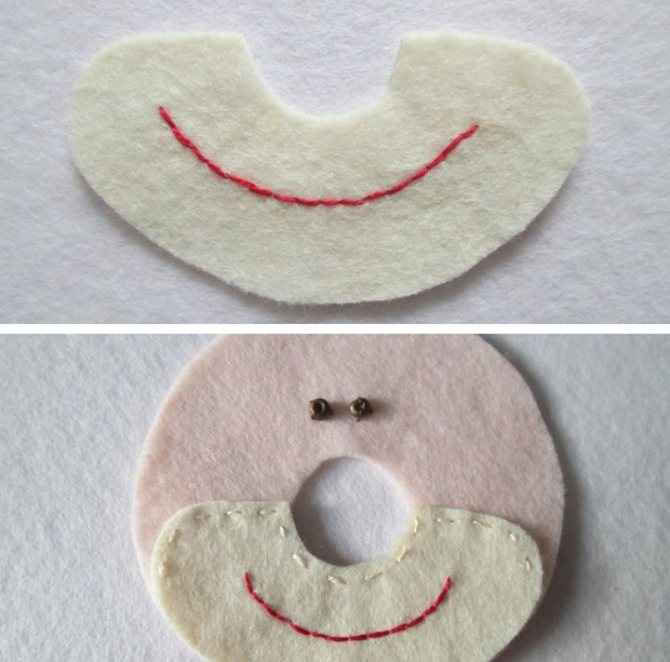
We sew ears on the sides of the face. We place the largest part at the bottom and secure it with glue or thread.
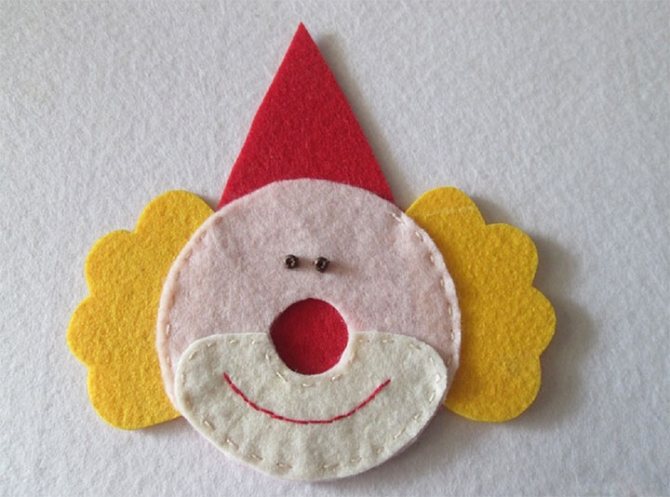
The final touch is to sew on the cap and loop. The toy can be hung on the Christmas tree.
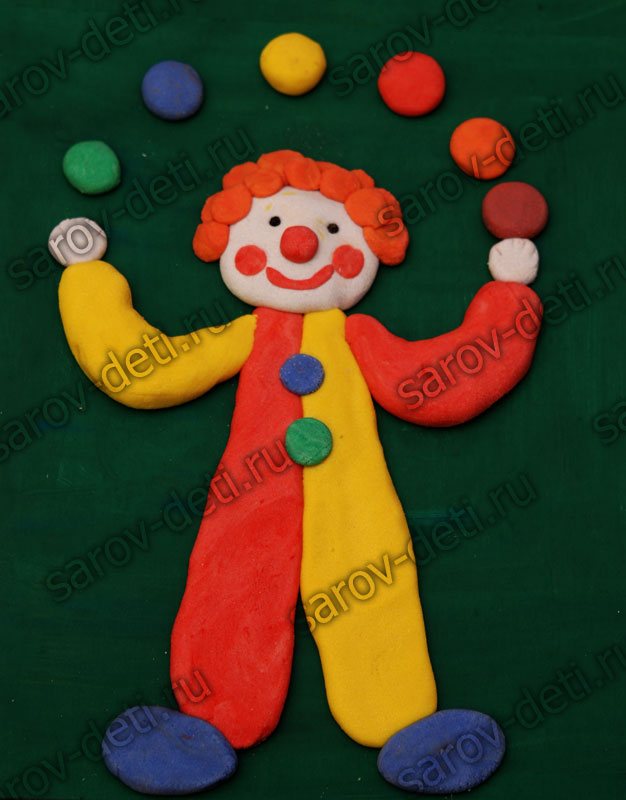
Working with plasticine
An equally original clown is made from plasticine, and even the smallest craftsmen can work with this material under the guidance or together with their parents.
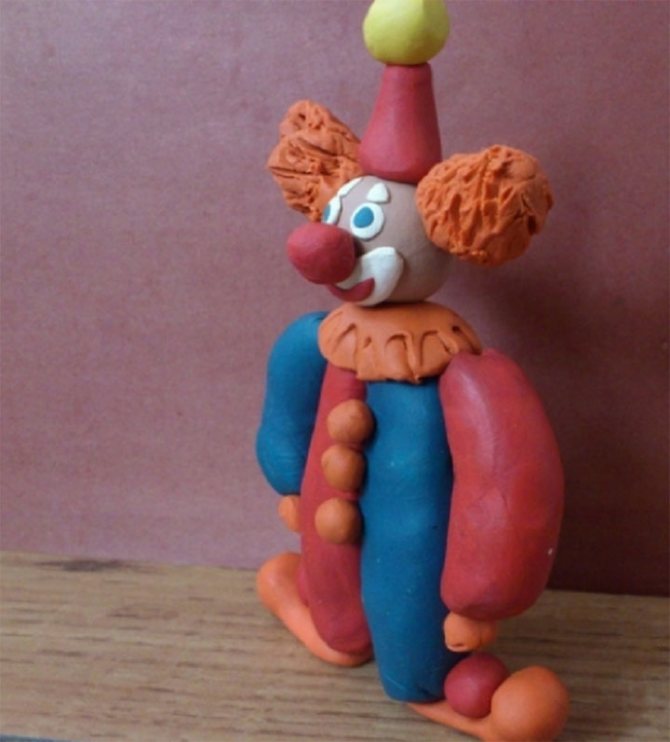
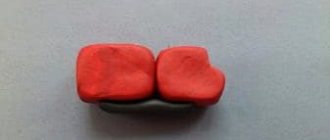
We start work by designing the head.
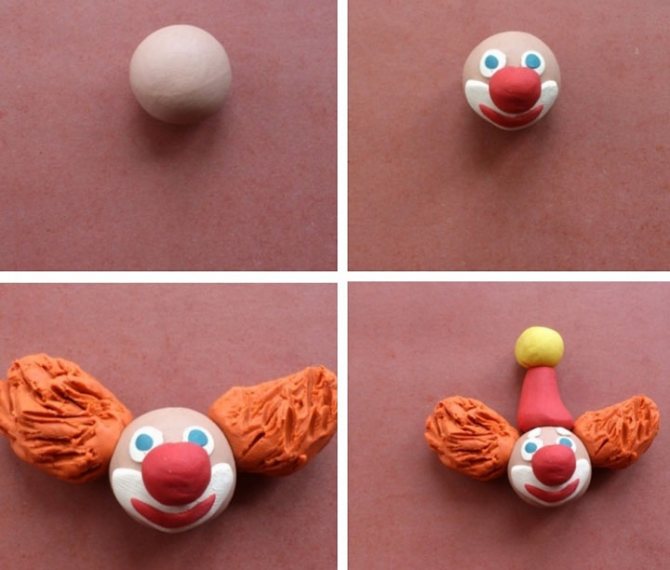
We will make the body from two oblong elements of different colors, and immediately decorate it with buttons and an openwork collar. We insert a wooden stick into the upper part and place the head on it.
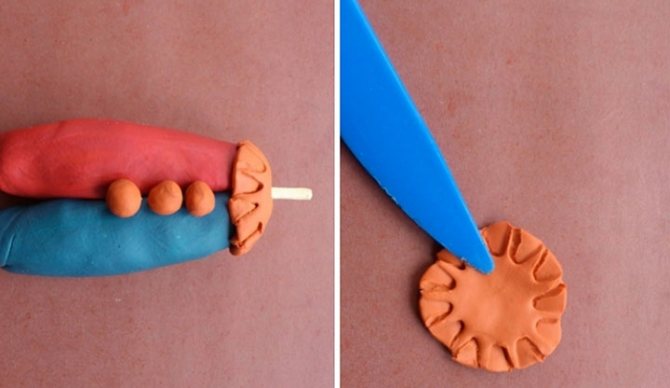
We fashion wide sleeves, attach them to the body, and complement them with yellow “fists”. All that remains is to make boots with plasticine pom-poms.
Pea jesters made of different materials
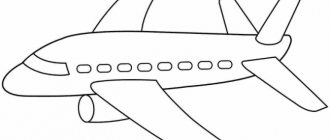
A simple template for making a product from geometric shapes. Transfer them to cardboard and help your child cut them out. Stick on any background. This way you can repeat the learned names of the figures with preschoolers.
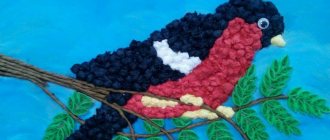
To create, you will need paper tubes. Prepare different colors. Cut into small rectangles and roll them into tubes. Stick them in place of the hair. The bow should be made of tubes. And draw a face.
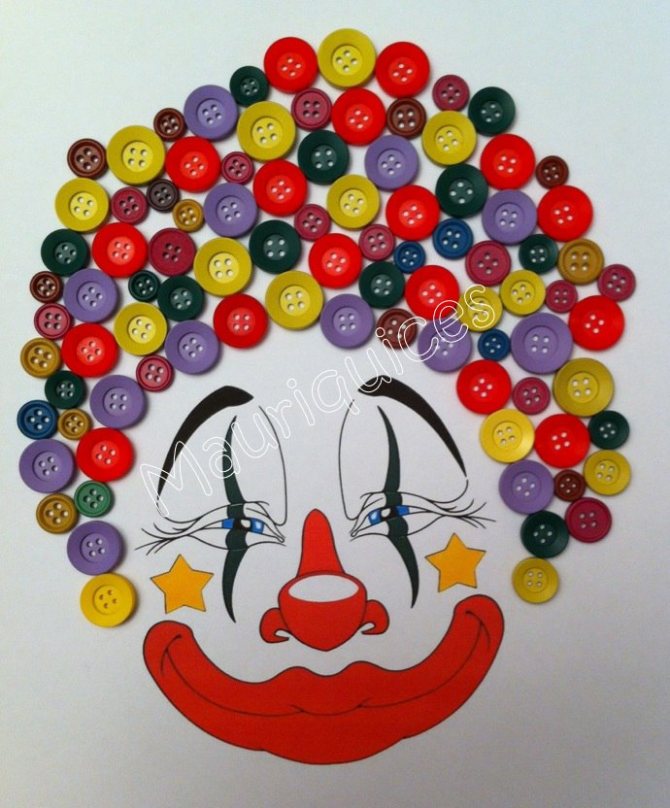
Just make a composition out of buttons. Select brightly colored objects and stick them together. For better fixation, use superglue and thick cardboard.
Pasta compositions are made in a similar way. Only after gluing the pasta are painted with gouache.
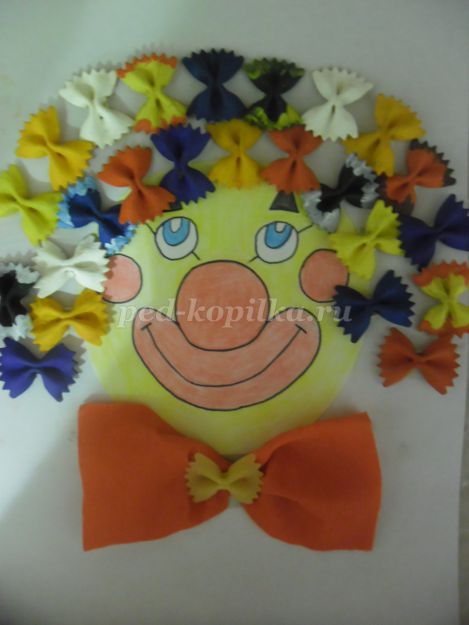
The technique of torn appliqué is also relevant. Often the pieces are cut into arbitrary rectangles, squares or torn by hand.

Children especially like to create with plasticine. Combine business with pleasure and create a funny jester. This is done using plasticine balls (like a mosaic) or two-dimensionally rolling out the plasticine into the desired shapes.
Freeze this product a little and store away from the sun and high temperatures.
Create an interesting creation from mini-modules. Take small squares of double-sided colored paper. Fold them into simple modules.
Fold one corner first.
Then the opposite one from above.
Prepare the stencil. And stick the blanks on it in any order. Even preschoolers can complete such modules.
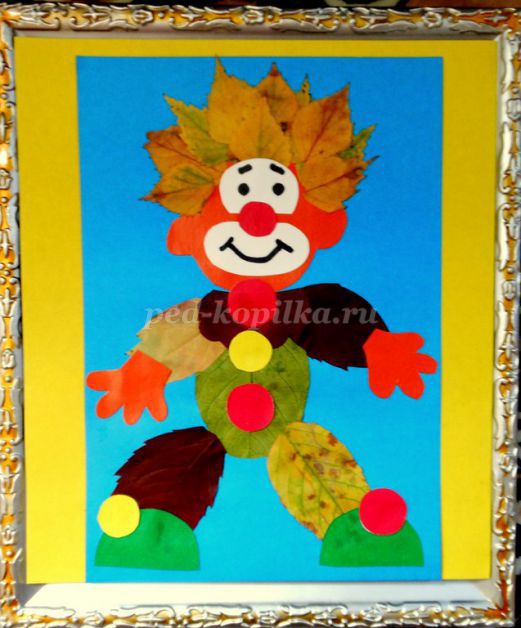
It is also made using mixed technique. Use natural herbarium and ordinary A4 sheets.
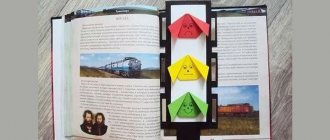
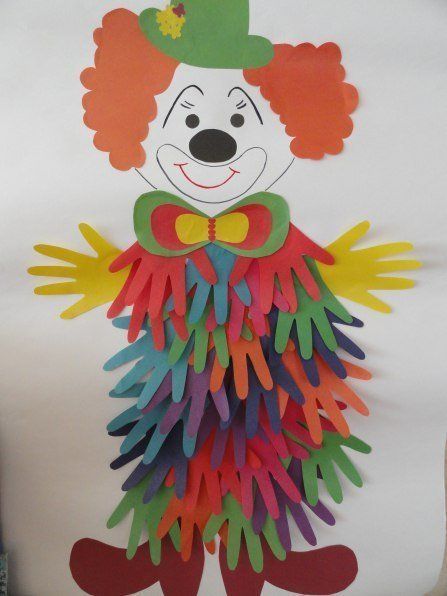
Clown made of paper palms. Offer the children colored A4 and cardboard. Help glue the elements together, and the craft is ready.
For your next masterpiece, prepare colorful fabric, balloons and glue. Roll the strips into tight spirals. Stick them on the desired parts of the picture. The collar may consist of rubber balls.
The eyelashes are made from cotton swabs, and the mouth is made from floss threads.
We will need scraps of old colorful clothes. Prepare 4 different cuts and other necessary things.
Cut out the stencils and transfer the outlines onto the canvas. Choose one that will not come apart during use. If it's satin, burn the edges.
Glue the parts onto cardboard. If the fabric is thick, use superglue. Help identify the front and back of the product. Close the joints with buttons. Lay the collar with an “accordion” made of loose fabric or a candy wrapper.
DIY clown from scrap materials
You can make a fun toy from anything - disposable paper cups, plastic bottles, buttons. The main thing is not to restrain your imagination, to involve your loved ones in creativity, regardless of their age.
Crafts from cups
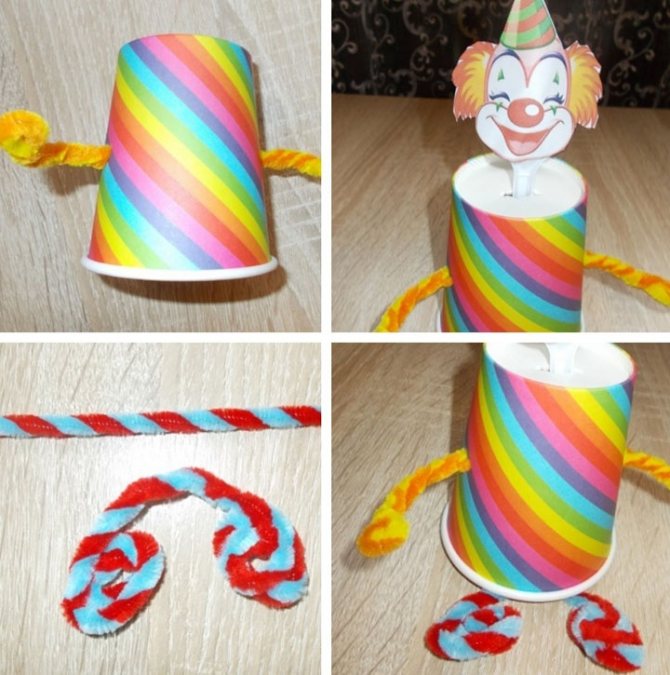
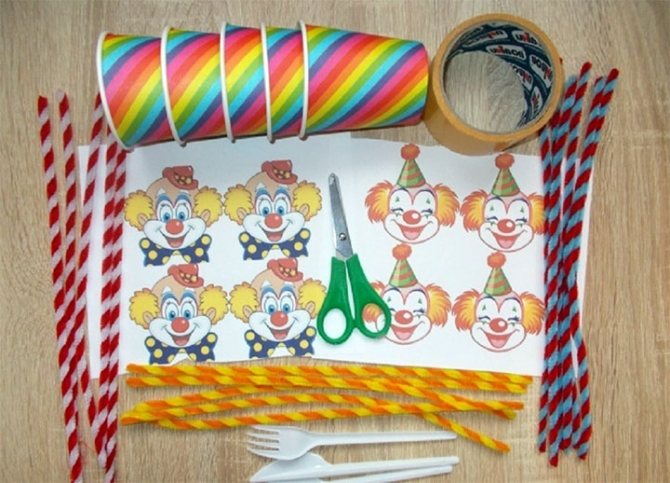
If you have bright disposable plastic cups, forks or spoons left after the holiday, you can turn them into a cheerful circus performer.
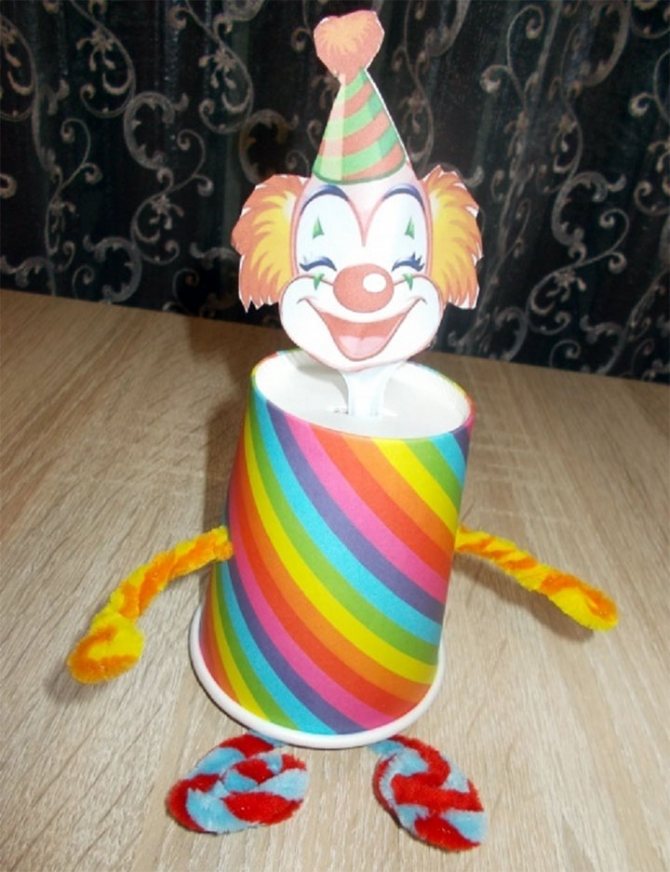
In addition to the basic elements, you need to prepare double chenille wire, double-sided tape and scissors, and print out an image of the clown’s face.
We turn the glass upside down, make two holes opposite each other, thread the wire through them and form handles at its ends. We cut out the face, glue it onto a plastic fork (spoon), and insert it into the hole in the bottom of the glass. We make legs from wire and attach them. The cheerful clown is ready.