Theme of the week: “New Year’s holiday”
Lesson 16. Green Christmas tree
(Modeling from plasticine)
Program content. Learn to convey the structure of a Christmas tree by connecting plasticine columns of different lengths together in a certain sequence. Practice using stacks. Develop the ability to switch attention.
Demonstration material. Subject picture of a Christmas tree.
Handout. Plasticine, cardboard stands, modeling boards.
Progress of the lesson
Read the poem by V. Bardadym to the children:
Christmas tree green,
Shaggy Christmas tree,
Let's play, Christmas tree,
With our guys.
Children stand in a circle, holding hands. Ask them to show what kind of Christmas trees grow in the forest:
“Wide,” the children take a few steps back, expanding the circle.
“Thin,” the children approach the center of the circle, narrowing the circle.
“Tall,” everyone raises their hands up together.
“Low,” they squat and lower their arms. Look at the subject picture of the Christmas tree and determine what
it has a trunk and branches with needles. Offer to make a Christmas tree. To make a barrel from brown plasticine, you need to roll a ball, roll it into a cylinder, narrowing one side by rolling with pressure between your palms. Roll small green balls into sausages and cut them in stacks into short, medium and long pieces. Explain that short sausages need to be attached to the top of the trunk on several sides, medium-length sausages a little lower, and long ones at the very bottom. The resulting Christmas tree can be mounted on a cardboard stand, having previously decorated the stand with white plasticine (snow).
Blue racing car
Before you make a car out of plasticine, you need to draw the desired model and highlight the main parts, determine what colors are needed for the job. For such a racing car you need to take blue, white and black plasticine. Work on the craft begins with the body of the car. You need to knead a piece of material and give it an elongated oval shape. Press all sides down slightly to form the bottom, sides and top of the machine.
Then you need to take a stick and push a strip in the middle of the top. Then first mold a “sausage” from white plasticine and flatten it, you can roll out a thin layer of plasticine on parchment paper and cut a strip with smooth edges with a knife. Attach it in the center of the top. The circle for the racing car number is made as follows: roll out an even ball and flatten it by pressing the thumb and index finger.
A racing helmet is made in the same way. To keep it in place and not fall out of the cabin, you need to press a dent in the center of the body with a round object.
All that remains is to make the spoiler and wheels. To make an even rectangle, use a rolling pin and a knife or stack. Circles are pressed into the circles of the wheels using one half of an untwisted ballpoint pen. Now you know how to make a car from plasticine step by step.
Modern plasticine
Now this material is produced for creative crafts from artificial high-tech materials.
You can find sets on sale with a variety of colors and shades. If earlier plasticine hardened and had to be either kneaded for a long time or heated on a radiator, then modern children no longer have these problems. Plasticine is now a material that is always soft and flexible, does not stick to your hands, holds its shape perfectly and even kids can work with it.
In this article we will look at how to make a car out of plasticine. In addition to colored plasticine, you will also need additional tools for the work - a plastic or wooden rolling pin, stacks, plastic prints, a knife.
Theme of the week: “Winter fun”
Lesson 15. Skier
(Modeling from plasticine using natural materials)
Program content. Learn to sculpt complex objects by combining natural materials with plasticine. Practice the ability to connect parts by pressing them together. To consolidate children’s ideas about clothing and the names of items of clothing.
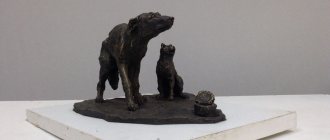
Demonstration material. Sample of a finished craft.
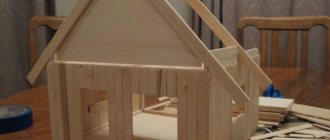
Handout. Pine cone, plasticine, 2 ice cream sticks, 2 wooden toothpicks or juice straws, computer disk as a stand, modeling boards.
Progress of the lesson
Ask the children:
– What time of year is it now?
– What can children do outside in winter? (Sledding, skiing; making snowballs, fortresses, snowmen.)
Show the children a sample of the finished craft and offer to make the same skier. Children place the pine cone vertically, with the sharp end down, attach a round head on top, arms (posts) on the sides, and legs (slightly flattened thick short posts) on the bottom.
Then the children independently design the craft, attaching plasticine eyes, nose, mouth and hat. The man's legs are attached to two wooden ice cream sticks - skis, and ski poles - toothpicks (or matches) are given to his hands. Be careful with toothpicks! You can use juice tubes or sticks made from plasticine. The finished skier is secured to the snow (disc) using plasticine. The disk can be decorated with snowdrifts.
How to blind?
Making a fire truck with your own hands step by step is a simple task for both adults and children. First of all, you need to roll two balls of different sizes from red plasticine. One of them, the largest, will be intended for the car body, and the second – for the driver’s cabin.
After this, you need to form rectangular parallelepipeds from the balls using your fingers. For the smaller of them, you need to cut out the engine compartment using a stack. We fasten these parts together and attach a plate of black plasticine to the bottom.

Now we form four wheels of approximately the same size from black plasticine and, using a stack, make a ribbed pattern on them, which is characteristic of rubber, after which we install a small yellow plasticine cake in the very middle of them. We attach the resulting wheels to the body and driver's cabin.
Theme of the week: “Transport”
Lesson 13. Boat with oars
(Modeling from plasticine)
Program content. Continue learning how to roll out an oval from a ball, flatten it and press the middle with your fingers, tighten and trim the edges. Roll out the sausages, flatten them with your fingers on one edge and attach them to the molded product. Develop fine motor skills of fingers and attention.
Demonstration material. Pictures of airplane, car, train and boat.
Handout. Plasticine, blue cardboard stands, modeling boards.
Progress of the lesson
Place pictures of an airplane, car, train and boat in front of the children. Describe each item, and let the children guess what kind of toy we are talking about:
- It has four wheels. She drives on the roads and carries people. (Car.)
– It is very long and runs on rails. (Train.)
- He flies in the sky. Made of iron. There are two wings. (Airplane.)
– You can swim on it. It is made of wood. (Boat.)
Play the game "What's missing?" The children close their eyes and you remove one of the four pictures.
Offer to fashion a boat out of plasticine. To do this, you need to roll a large ball, roll it between your palms into an oval with back and forth movements, flatten and press the middle with your fingers, pull and trim the edges to make a neat boat. Make oars - roll out the sausages, flatten them with your fingers on one edge and attach them to the side edges of the boat. Place a stand on the cardboard.
How to make a fire truck
The craft will be especially interesting for boys, because a fire truck made of plasticine can either serve as a toy or become a gift for a friend.
To properly make a figurine, we first sculpt the main and largest parts from plasticine step by step, and then add the corresponding parts. The car itself should be bright red and have large black wheels.
A simple version of a plasticine fire truck
The process of making a fire truck from plasticine using simple instructions will not take much time. The result should be a beautiful and neat craft. To do this, you must follow the instructions sequentially:
- Two balls are formed from red plasticine, which are slightly different in size. Next, these balls are given a rectangular shape, then you get a truck body and a driver’s cabin.
- A corner cutter is used to cut a corner on the cockpit blank to show off the engine bay.
- The two parts are fastened together using a black plate placed underneath.
- The wheels are made of black plasticine. You need to form four balls and press them with your fingers on both sides. A yellow flat circle is molded on one side of each ball. Ribbed patterns are added to the black tires and a dot is placed in the center with a match. The finished wheels are connected to the base.
- The next stage is creating the stairs. To do this, take two matches and wrap them in a thin layer of plastic mass. You also need to roll one long thin “sausage” and divide it into five segments, which are then laid out crosswise and connect the resulting parts. The finished roof is placed on the roof of the body.
- A long gray “sausage” produces a twisted hose that needs to be attached to the side.
- Important details for the car are white plasticine windows, yellow headlights and a black bumper.
- The fire truck figurine is complemented by a siren, white stripes on the bumper and the numbers 01.
In the process of sculpting such a craft, young children may need the help of adults due to the presence of even parts.
Flat craft of a fire truck made of plasticine
With preschool children, you can sculpt a non-volumetric figurine of a fire truck. There are several options for making an applique.
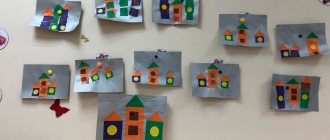
The first method is to apply ready-made flat plasticine figures to cardboard or a sheet of paper.
You should first mark the edges of the machine, and then add the plastic mass. To create even square or round shapes, it is recommended to use a plastic knife. Using this method, you are allowed to stick figures on top of each other.
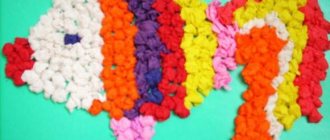
The second option for making a flat applique is very similar to coloring a picture. Only soft plasticine is used, not liquid paints. First, you should thoroughly knead the plastic mass used, then tear off small pieces and smear them with your fingers, without going beyond the edges. In this case, each color must be applied separately in its own part.
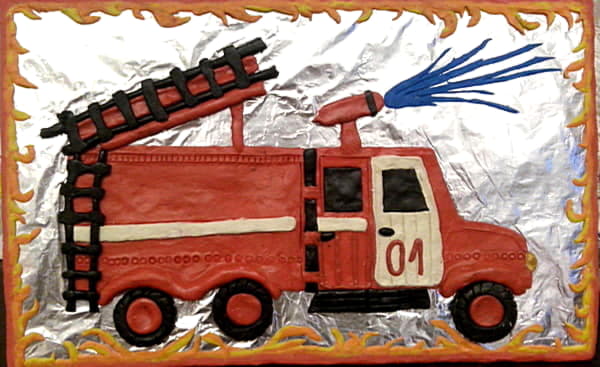
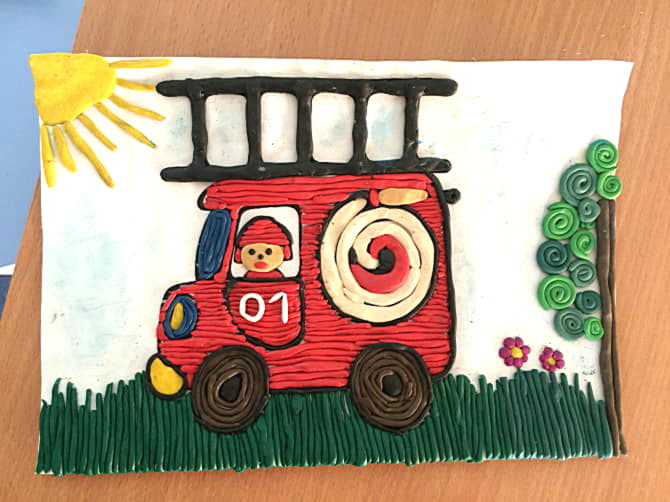
Another option will also appeal to young masters. Here you need to make the base of the fire truck from red cardboard and stick white cardboard on it, marking the windows. The remaining parts (wheels, ladder, hose, headlights, siren and numbers 01) are added using plasticine.
What will you need?
To sculpt a fire truck with your child, you will need two large blocks of red and black plasticine - these colors are the main ones for this figure, and you will need the most of them. You will also need yellow, blue, white and gray plasticine, but these shades will be used to create small details, and therefore very little is required.
In addition, you will need a stack for cutting individual parts, napkins so that you can periodically wipe your hands from plasticine without looking up from the sculpt, as well as a special board on which the main work process will take place.
If there is none, you can use ordinary oilcloth or a sheet of cardboard instead.