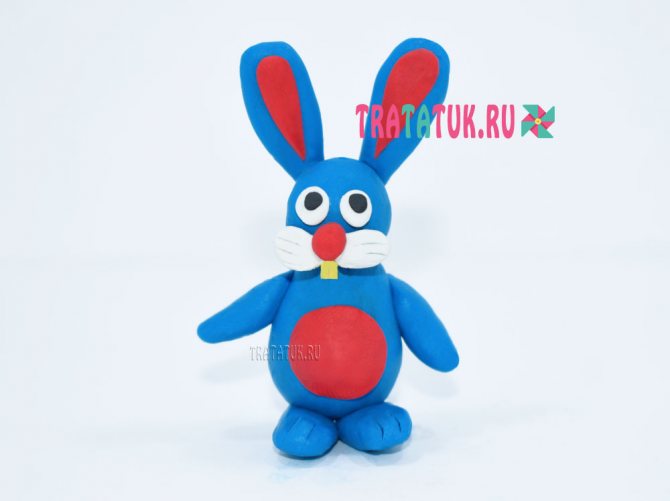
A simple plasticine bunny for children. A step-by-step review with detailed photos that will help you make a hare without much difficulty.
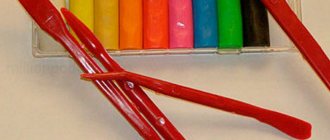
The following materials were used in the work:
- Blue plasticine;
- Red plasticine;
- White and a little black and yellow;
- Stack (knife);
- Modeling board.
Plasticine bunny step by step
Knead the plasticine and roll into balls to later make important parts of the animal out of them. You will need:
- One largest ball for the body of a plasticine bunny;
- One smaller ball is for the head;
- 6 balls for paws and ears. You can make larger balls for the ears;
- It’s not shown in the photo, but the bunny also has a tail.
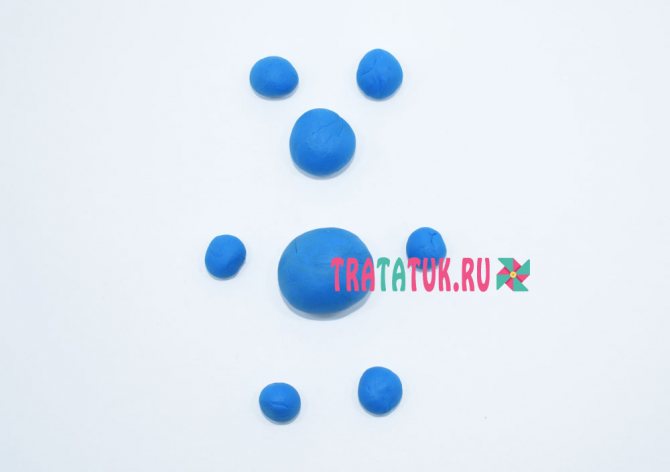
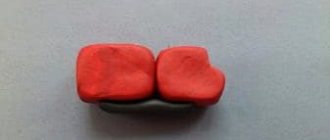
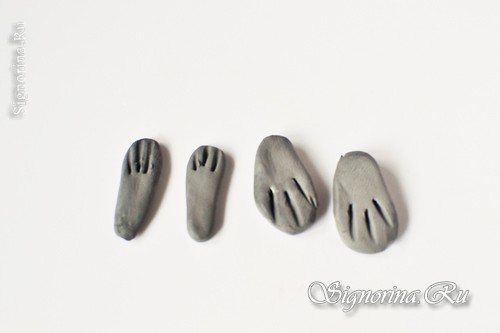
Roll out the balls for the paws, making them elongated. Roll the ears into carrots. Subsequently, they need to be pressed a little. Make the body pear-shaped.

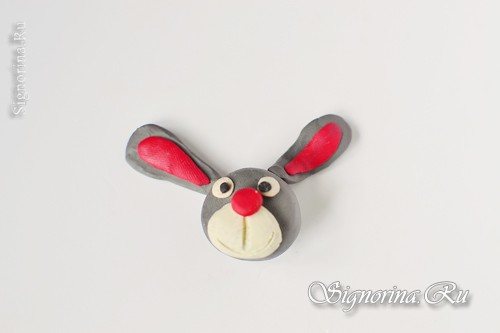
Stick white balls with black ones in the center onto the round ball head to make the bunny's eyes. Also roll two white balls, flatten them and make impressions with a knife. Glue the cheeks onto the head and a round red nose on top. Complete the head with yellow or white teeth.
See also: Crafts from plasticine: TOP step-by-step works.

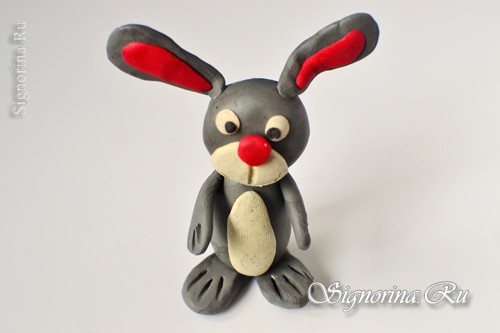
Attach the head to the pre-stretched body, add ears, paws and tail. The plasticine bunny is almost ready.

It remains to add a few touches in the form of a red belly and the same red additional details elongated in the shape of the ears. If desired, you can make small straight impressions on the feet using a stack.
It is possible and even desirable to choose the colors of plasticine at your own discretion, thus developing creative thinking and imagination. In addition, each child can bring something of their own to the work, add various little things, for example, a bow, spots, carrots, expressing their individuality, imagination, and bringing their creative finds to life.
On the topic: methodological developments, presentations and notes
Date: February 21, 2012 Participants: children of the preparatory group Conducted by: educational psychologist Panova M.M. Purpose: to promote formation.
How to make a volumetric applique.
The use of non-traditional means in applique classes with children of senior preschool age.
Integrated lesson in the younger group of kindergarten.
GCD for drawing in the second junior group based on the nursery rhyme “Cucumber, Cucumber.” GCD in the middle drawing group based on the nursery rhyme “Magpie, Magpie” Plan – summary of the GCD in the senior drawing group on the so-called.
Children observe how magnetic forces pass through water, paper, and cardboard.
Lesson notes for the middle group “Dangers around us.” Goal: formation in children of conscious safe behavior in life and everyday life. Objectives: - consolidate knowledge about the source.
Composition options based on theme
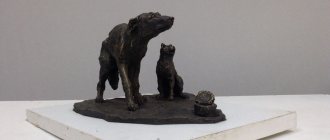
Modeling on the theme “Child with a kitten” in the preparatory group is traditionally carried out in November. As an option, you can offer preschoolers to sculpt a puppy instead of a kitten.
Children can do this according to their choice: some will want to create the image of a cat, and others of a dog.
The main thing is that the craft has a storyline: the person and the animal are interconnected with each other, and not just standing side by side on a stand. You can suggest the following composition options to the guys:
- A child strokes a kitten (or puppy).
- A child holds a kitten in his arms.
- The child sits on the floor and shows the kitten a toy.
- The child walks and beckons the kitten to follow him.
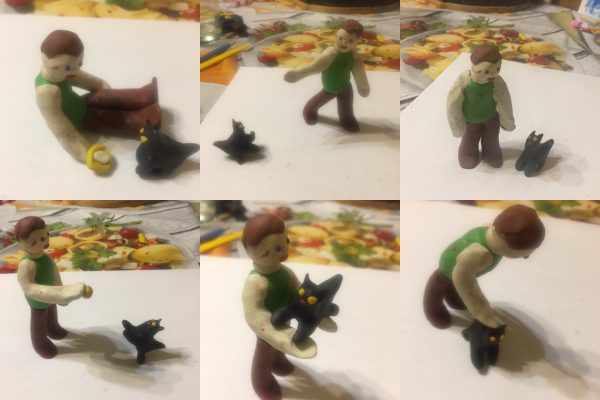
The teacher’s task is to suggest to the children possible plots for the craft.
How to make a hare from plasticine: animal master classes step by step with photos
Are you looking for detailed instructions on how to make a hare from plasticine step by step? In this master class you will find photos and descriptions of each step in sculpting a cute animal.

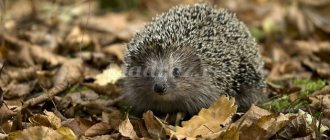
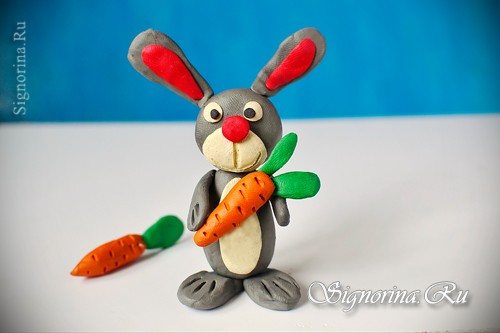
Every kid knows that these animals' fur coat color changes depending on the time of year. We suggest you make a gray bunny. But you can show your imagination and turn him into a pink toy rabbit or make Krosh from the cartoon “Smeshariki”, the owner of blue fur. The main thing is that your baby is happy.
Master class “How to make a hare from plasticine step by step”
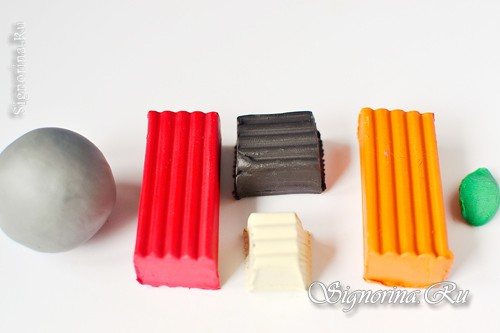
Take yellow, white, green, black and gray plasticine. By the way, the latter is quite often absent from sets. But you can make it yourself: crush part of a black bar and add a light one there, mix. As a result, you will get the desired shade.
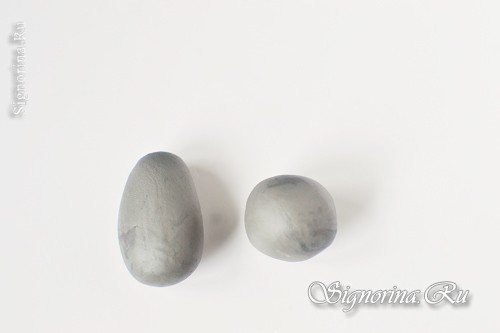
Soften the gray plasticine and divide into three parts. From the first, roll out a round head, from the second - a pear-shaped body, and leave the third for now, it will be used to create small details.
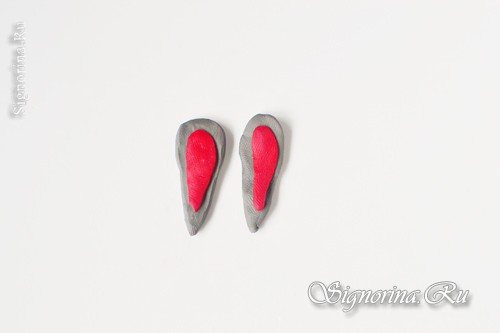
You can start sculpting the long ears of a hare. You need to roll sausages from a piece of gray plasticine, flatten them, you get two oval ears. On top they need to be decorated with red inserts of the same shape.
Now you can start decorating the bunny’s face. Form two round eyes from black plasticine and stick them to the white pancake pupils. At the bottom, stick the cheeks and chin in the same shade as the pupils, after drawing a mouth on them. Then you need to attach a red button nose, and long ears on top.
Take the shape of the body and stick a white chest and tummy on top of it.

Make the hare's feet from gray plasticine, like his entire body. Mark the fingers with claws using a plasticine knife.
Gather all the parts together, you can attach a white or gray tail to the back.
To prevent the gray baby from starving, “give” him a carrot made of red plasticine and leaves made of green plasticine into his paws.
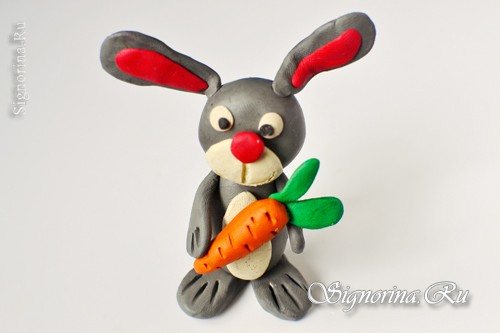
Make another carrot and place it near the bunny. This is his supply in case he gets hungry.
So you have a beautiful bunny. Now you know how to make a hare from plasticine step by step, which means you can easily make different figures of these animals with your baby. Perhaps your child will even decide to “settle” a whole family of rabbits in his room, and you will help him with this.
Lesson notes for the preparatory group. "Modeling hares"
Transcript
1 Program content: State budgetary preschool educational institution kindergarten 97 of compensatory type of the Central region of St. Petersburg Educator Elena Vasilievna Krylova Lesson notes in the preparatory group. “Modeling hares” Purpose: to introduce children to the techniques of sculpting a hare in motion; cultivate a love for animals. Objectives: Educational: teach children to plan their work: conceive an image, divide the material into the required number of parts of different sizes, convey the shape and proportional relationship of the parts; teach children to paint a sculpted figure with gouache; strengthen children's ability to solve riddles; arouse interest in the life of wild animals. Developmental: develop creative imagination, emotional responsiveness, the ability to sympathize with a fairy-tale character. Correctional: activate the vocabulary on the topic “Wild animals of our forest”: little hare, fluffy, stubby (tail), cautious, cheat, etc.; develop fine motor skills of the hands. Educational: to cultivate perseverance and interest in modeling. Technical: teach children to sculpt a hare in motion in a constructive way, using existing skills and abilities to work with plasticine - rolling, flattening, dividing the whole into parts using stacks, learn to combine sculpted parts into one whole, connect them tightly by smearing one part to another and smooth out the boundaries of the connection of parts; to develop in children the ability to convey details in modeling; strengthen children’s ability to hold a brush correctly, show techniques for decorating a sculpted figure with additional elements. Equipment, materials: plasticine (multi-colored), modeling board, stack; brushes, glasses of water, white gouache, paper and wet napkins, pictures of wild animals, beads, a forest composition of plastic trees, a pre-fashioned hare for display. Methodological techniques: guessing riddles; conversation about the hare, encouraging children to take action “let’s blind the hares and put them in a fairy-tale forest”, independent activity of children, physical minute “the little white bunny is sitting”, finger gymnastics, summing up. Preliminary work: reading Russian folk tales; viewing illustrations; reading stories about the life of animals in our forests, conversations about the peculiarities of their body covering (fur, thorns); rolling out columns from plasticine. Progress of educational activities: I. Organizational part Educator: Attention! Attention! Those wishing to take an exciting journey, I ask you
2 take your seats! And where we are going, you will find out if you guess the riddle: 1. This city is not simple, it is dense and dense. (Forest) 2. Stood up like a wall to heaven, A miracle is before us... (Forest) - Yes, we will find ourselves in the forest. But in a forest that is unusual, but fabulous. - To do this, we need to close our eyes and say: “Spin around, spin around and find yourself in a fairy-tale forest” (Children perform movements with their eyes closed, when the children open their eyes, the teacher draws the children’s attention to a pre-prepared composition of the forest made of plastic trees) - Guess the riddles and find out who lives in this forest: I 1. Cunning cheat, Red head, Beautiful fluffy tail! And her name is... (Fox) 2. Fluffy tail, golden fur, lives in the forest, steals chickens in the village. (The teacher puts a fox sculpted from plasticine into the woods) II 1. We have such a custom - We go in a pack for prey, We hide near a dark tree, Who are we, foxes or wolves? (Wolf) 2. He looks like a shepherd: Every tooth is a sharp knife! He runs, baring his mouth, ready to attack the sheep. (Wolf) (The teacher places a wolf sculpted from plasticine into the woods) III 1. He sleeps in a den in winter under a huge pine tree. And when spring comes, He wakes up from sleep. (Bear) (The teacher puts a bear sculpted from plasticine into the woods) IV 1. A thousand needles roam between the pines and fir trees.
3 But you can’t make a single stitch All the needles are without an eye! (Hedgehog) 2. Angry touchy lives in the wilderness of the forest, There are a lot of needles, But not a single thread. (Hedgehog) (The teacher places a hedgehog sculpted from plasticine into the woods) V 1. A ball of fluff, a long ear, Jumps deftly, loves carrots. (Hare) 2. Jumps across the field - hides its ears, Stands up like a pillar - ears sticking out. (Hare) (The teacher demonstrates a pre-fashioned hare) - Why does the hare have white fur? - Why did he change the color of his fur coat? — In what fairy tales did the hare meet the inhabitants of the fairy-tale forest? (Teremok, Kolobok, Hare Hvasta, Fox and the Hare, etc.) - I have only one hare. He will be scared in the forest alone. What to do? (Children are seated at the tables) - You can make a hare in different ways: it can be a small, touching bunny who got lost, or a frivolous hare Boast, a hare offended by an insidious fox, a hare listening to the song Kolobok. In all fairy tales, the hare is bullied, so we will sculpt a hare that can run fast. The back of a running hare is arched, the legs are widely spaced, the head is turned forward, the ears are slightly pressed to the head, and the tail is to the body. II. Practical part Stages of doing the work - Let's think about how many parts you need to divide a piece of plasticine into to make a running hare. - Look, are all the parts the same size? (No) 1. Torso - The largest piece from which we will sculpt the torso and legs. (The teacher draws the children’s attention to colored plasticine; the bunnies will be of different colors, because they are from a fairy-tale forest.) - We mark half of the piece with a stack, and then we will divide one half in half again and cut it with a stack. (Children perform)
4 2. Head - We divide this cut piece into two equal parts: from one part we make a head: we roll out the plasticine in a circular motion into the shape of a ball and flatten it slightly on one side. 3. Ears and tail And from the other part we sculpt - the ears are long, pointed at the tips, the ears are made by rolling out a “sausage”, and the tail is short and round; for the tail, take the smallest piece of plasticine and roll out a small ball. Then these parts are attached to the head and torso. (Children divide a piece of plasticine into the required number of parts.) - Now we will all check together whether we managed to prepare the material for modeling well: - Show us what we will sculpt the body and legs from? — Find material for the head. - What will come out of the remaining piece? (tail and ears). You will divide this piece into parts yourself, and figure out how best to sculpt the tail and long ears. Finger gymnastics: exercise “bunny with a drum” The index and middle fingers are raised up (these are the ears of the hare), the little finger and ring fingers are pressed to the palm. The thumb taps the ring and little fingers. The bunny is drumming on a drum. There-there-there. There-there-there. - Where should we start sculpting a hare? (From the body and legs) - Roll out a piece of plasticine in a circular motion with your palms to form a ball, then with straight movements roll out the plasticine in the shape of an oval or cylinder. (The teacher makes a column, and it is given a certain position and comments further: the ends of the column lowered down are cut in a stack, moved apart and smoothed, then the remaining parts are attached.) (Independent activity of children, observing the work of children, the teacher helps them achieve an expressive representation of the image of the animal. ) Educator: “It’s me, the bunny, the trickster, do you know where my fluffy fur coat went? I’m completely cold!” What should we do guys? How to help a bunny? (Children's answers) (The teacher takes a stick and scratches short strokes on its back, as if drawing fur. Children draw fur on their bunnies.) Physical education: It’s cold for the bunny to sit, the bunny is hungry to sit, We need to warm up our paws. Paws up, paws down,
5 Pull yourself up onto your toes. We put our paws on the side, on our toes hop-hop-hop. And then squat down. So that your paws don't get cold. - We need to go back to kindergarten. Ready? Close your eyes and say the magic words: “Spin around, spin around and find yourself in kindergarten!” — We returned to kindergarten, and our bunnies are still different colors, maybe the queen’s brush can help us? How will she help us? (Children's answers) (Children paint the bunnies with white gouache) 4. Decorating the sculpted figure with additional elements - When you paint, do not forget that the hare needs eyes. To do this, select the material in the box yourself. III. The final part - Well done! Now our bunnies will not freeze, they have a white fur coat, beautiful eyes and they can run fast. And we will put our hares in the forest. —Where were you and me and what did we do? (The teacher invites the children to remember how they sculpted and painted hares)