Making a bas-relief from plasticine
In this master class I will try to explain some of the features of creating a plasticine bas-relief model. The master class is quite complex - we are making a person, and for many it will probably be boring, but for those who are interested in this topic and who want to try it themselves, some details may be useful. The bas-relief is molded in tandem with an existing one. Quite a long time ago I made Assol. Now we need to make Captain Gray.
If the work is paired, then it is logical that there should be one format. Size, configuration, placement of individual pieces, style, thickness, not to mention the plot. Let's try to take all this into account and correctly place it on the plane.
Let's get started.
Assol is made on a figured board. So, for Gray we take the same mirrored board. This is 10 mm chipboard. We saw off the top from Assol and put it on Gray. Uniting by style. Now we place two boards side by side at the same level and look for the size of the figure. We will sculpt Gray on 4 mm glass, just as Assol was sculpted. Yes, I completely forgot. Let's draw a simple sketch. If the work is to order, it must be approved by the customer. The sketch should reflect the character of the hero. The rest is ornament. I don't like to draw things like that. It is much more fruitful to search immediately in volume, but a general idea of filling the plane should be in your head before starting work. This is a sketch.
A stick, a stick, two planks, a little man on the porch. Schematic figure on the floor. He should match Assol in height. Approximately a pose.
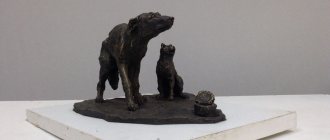
Let's increase the thickness a little and show the plane on which it stands. Already different from the sketch. I placed it on the captain's bridge. It makes more sense to the plot. They look at each other. Below, two crabs hold the captain's bridge. The crabs echo her shells.
Let's go into a little detail. Let's roughly sketch out the crabs and the steering wheel.
Everything is still preliminary. These are sketches, but individual sculpted pieces are always useful. If you need to move or move it, just carefully clean it with a spatula and place it differently.
If you look closely, you can see that the crab clay is darker. This is a different brand. The figure and the bridge are sculpted from soft material (grade M), but it is easier to detail from a harder material. These are the two briquettes. The one at the top is better for detail.
Now for the configuration. The bridge is too inclined towards us. This distorts the perspective, let's cut from the bottom. Let's add a shirt and wind from behind. If Assol has the wind in his face, then Gray has the wind in his back. The shirt swells and the sails also catch the wind from behind. Usually the wind is always from the sea, so everything is quite reliable.
We clarify the figure, add mass and expressiveness. These are almost imperceptible refinements of form that gradually shape our image. The mast is on the left.
Hat, bridge boards.
We form a bridge on the right. Some steps, mechanisms, beams, frames below. It's all an ornament. Even if there are some inaccuracies, the main thing for us is the image, not the documentary. Another important point: you need to correctly place this mechanical ornament in isometry, and then the work will look harmonious. Crabs turn out to have four pairs of legs, not three. This is, of course, a documentary, but a necessary one.
The main pieces at the bottom of the relief are almost finished. They are not yet finished, but that will come later. Now you need to check the location of the extreme points of the relief. I outlined them at the beginning of the work, now let's check them. We measure and compare distances, otherwise Gray may not fit into the mirrored board from Assol. Then we will have to make our own board for it using other patterns, and this is additional work, we don’t need it.
Let's move on to the figure of Gray itself. My image will be a little different from the old Soviet film. I think that freedom of choice is one of the main driving forces in any creative process. Approximately face, side with figured balusters. Filling the middle background. We outline the blocks on top.
We add three birds, as on the Assol relief, and stylized sails. Filling the relief canvas. All elements must carry some meaning and be compatible with each other. At the same time, with the help of small additional parts you can always correct the “weight” balance of the work.
Now that the main parts of the relief have been applied, we are working on the entire surface. We clean, smooth, and cover gaps around the perimeter of each relief element.
Let's work on the face. The size of the work is small, so the face is quite sketchy. Basic parameters must be observed. Excessive detail is not needed here.
While the face and top of the relief were being sculpted, the figure hesitated. It is sculpted from soft plasticine, and touching it erases the design. The shirt is almost the center of the picture. It must be accurately reproduced, so it would be more logical to replace the plasticine with a harder one. We remove the shirt.
We apply the main pieces and form an approximate anatomy.
Add folds, a pistol in the belt, and a sword.
After I placed the curly balusters of the side in the middle at the back, I need to add thickness in the area of his trousers. You can also replace them with hard plasticine, but trousers are less informative than a shirt. So let's just add thickness.
We detail the folds on the trousers. I did a little googling and it turned out that the sword is more likely for lace musketeers. And when the sea is rough, a naval broadsword or saber is more suitable. The dirk will also come in handy.
Let's check the face. Seems to be OK.
Now let's look at the two reliefs together. They should be like two parts of a single whole, and at the same time each as an independent work.
I think quite. Now a couple of hours for final cleaning and smoothing. The relief can be considered complete.
Summarize. Any job can be done, even those that look difficult at first glance. You just need to start small, it’s easier to track your mistakes. Bas-relief, as a rather lengthy process, makes it possible to think about the work during the work itself. This allows you to find the right solution, the missing element. And plasticine, as a material, allows you to make the smallest clarifications and change something throughout the entire work without serious labor costs. But don't delay the work too much. Plasticine becomes covered with dust and random defects, and the desire to finish it may disappear. So try it, and everything will work out.
That's all for now, good luck to everyone.
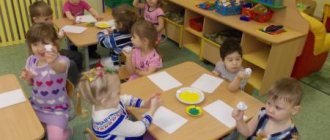
Features of modeling with children 5-6 years old
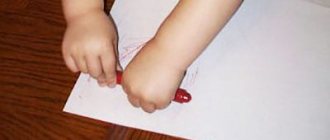
Modeling from plasticine for children 5-6 years old has received an important place in the educational programs of kindergartens. It is a creative process that accelerates the development of psychophysical skills in preschoolers.
Modeling classes help develop:
- fine motor skills;
- concentration;
- imagination;
- memory;
- perseverance;
- patience;
- speech skills.
Modeling stimulates the parts of the brain responsible for fine motor skills, as well as the speech center. Neural connections are created, and children master speech faster.
While sculpting, children learn to fantasize and think creatively; this will be useful both in school and in adulthood.
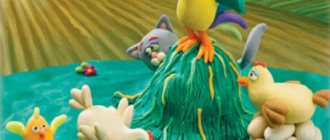
How to make a dragon from plasticine. Master Class
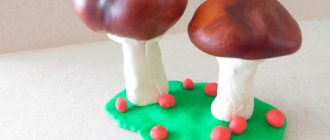
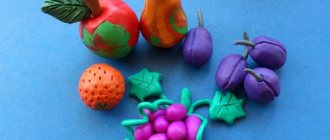
Modeling from plasticine for children 5-6 years old will be even more interesting if they are offered the creation of a fairy-tale character, for example, a dragon.
Step-by-step instruction:
- Creating a dragon begins with the head. To do this, roll a ball out of green plasticine.
- A large green square-shaped tubercle is attached to this ball, which is cut into a stack at the bottom to make a mouth. On the remaining part at the top, make 2 dents for the nostrils.
- 2 small orange rings are placed in the recesses for the nostrils.
- Oval eyes with black pupils are attached above the nostrils.
- Next, a green teardrop-shaped body of the dragon is made.
- A thin sausage is rolled out from orange plasticine and cut into short segments. They are attached next to each other on the dragon's chest and belly.
- Connect the head and body using a toothpick.
- The paws are made from 2 green triangles, the wide part of which is cut in the form of fingers.
- A ball of orange plasticine is added to the tip of each finger.
- The paws of the lower limbs consist of feet and legs bent at the knees. Toes are also made into a stack on the soles of the feet and orange balls are attached.
- The upper and lower legs are attached to the sides of the body. A long green tail is added at the back.
- From an orange sausage, wrapped in a wide yellow flatbread and then cut into rings, triangular two-color dragon scales are formed.
- These triangles are attached in the center of the back from the crown to the tip of the tail.
- Make 2 orange triangular ears and stick them to the head.
- Make a cake from red plasticine and cut it in zigzags into 2 equal parts. To make them look like dragon wings, you need to apply the corresponding lines on them in a stack. After this, the wings can be attached to the back.
Fairytale dragon is ready!
How to mold a human head from plasticine. Master Class
Modeling a human head from plasticine tells children 5-6 years old the body proportions.
By taking your child through a step-by-step master class on sculpting a man’s head, you can develop the child’s ability to detail, since the head has many details. If something didn’t work out the first time, plasticine makes it possible to correct all the shortcomings.
Step by step sculpting:
- A ball is rolled out of beige or pale pink plasticine, which is given the shape of a human head and an oval face with a chin and forehead is formed. This is done using techniques of pressing and pulling with the fingers in the right places.
- From the side of the face, symmetrical recesses for the eyes are made with the flat side of a plastic knife.
- A small piece of plasticine is attached to the center of the face, from which the nose is formed. It should start from the bridge of the nose, gradually increasing the tubercle. The junctions between the nose and the face must be smoothed, then the nostrils should be made with a toothpick.
- Next, using a stack of pink plasticine, the lips are drawn.
- The oval whites of the eyes are attached to the eye sockets.
- Blue circles with black pupil dots are molded onto the eyeballs.
- Thin sausages are used to attach the upper and lower eyelids.
- Small oval ears are added to the head.
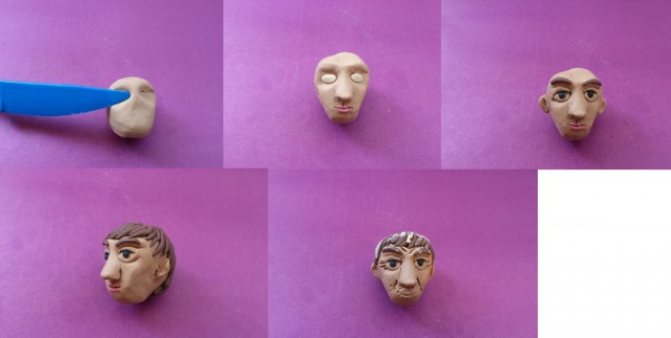
- Brown eyebrows are applied.
- A set of slightly flattened brown sausages is used to make a hairstyle that covers the crown, temples and back of the head.
- To sculpt an older person, you need to add wrinkles to the face using a stack, and make the hair gray with small strokes of white plasticine.
How to make a dinosaur from plasticine. Master Class
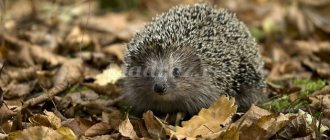
Dinosaurs are unusual animals that lived in ancient times. During the modeling process, the child can be told facts about their life and varieties.
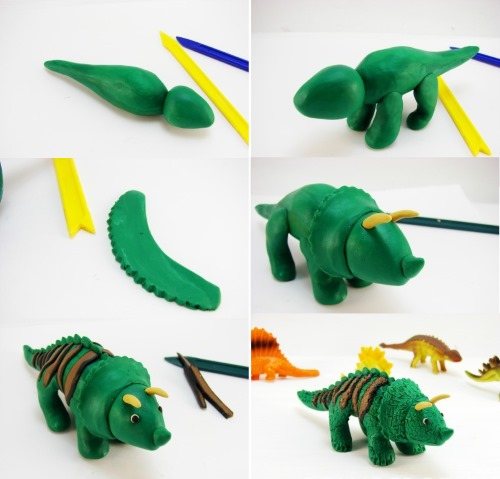
Step-by-step diagram for sculpting a dinosaur:
- Cut off a third of the green block of plasticine and roll it into a ball-shaped dinosaur head. Next, a triangular shape with soft corners is created from the ball.
- For the body you will need a whole block of green plasticine. It must be kneaded thoroughly, then given an oval shape, which should be transformed by stretching into an oblong drop.
- Using a toothpick, both parts are connected together.
- To make massive dinosaur paws, you need 4 green balls of the same size.
- Sausages are rolled out from the balls, then the legs are formed.
- The paws need to be connected to the body; to do this, their edges should be slightly flattened.
- Making a large collar for the dinosaur. To do this, roll out a cake from a piece of green plasticine.
- An arc-shaped strip is cut out of it in a stack, then a zigzag pattern is created along the edge with a jagged stack.
- The collar is glued to the top of the dinosaur's head and the scalloped edge folds back nicely.
- On the head near the collar we attach a pair of beige horns.
- A green horn is glued to the nose.
- Triangular green plates are attached along the back and tail.
- Now you need to make a two-color plate. To do this, roll a piece of brown plasticine into a sausage, which is then wrapped in a thin black cake.
- From the resulting part you need to form a rectangle and cut it into 7-8 strips.
- Stick them on the back of the dinosaur and press it into the body.
- Attach white eyes with black pupils to the head.
- Along the entire surface of the back of the ballpoint pen, the dinosaur skin is given relief.
- In a stack, stripes are drawn along the collar, the line of the mouth and the tips of the paws.
The dinosaur is ready.