Preparatory sketches
Let's start with sketches. Pay attention to the anatomy of the bear: this animal has a very large head, a massive and impressive body, supported by rather short legs.
The inward paws make the animal look clumsy, but this is just an illusion: these animals can run more than humans, and they can climb trees. Therefore, when depicting a bear in motion, it is necessary to be able to convey the flexibility and power of its body. Having noted all these nuances, the question “how to easily draw a bear?” will not arise.
To sketch a bear, it is recommended to start from a side angle, placing the bear on all four paws. It is more convenient to start with the body, which will have an oval shape, from which you need to draw the neck in the form of a short and wide cylinder, and then the head. For convenience, you can draw the muzzle in the form of a long cone that ends at the neck.
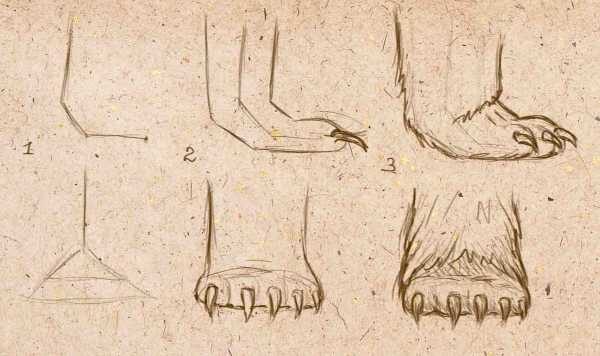
The legs must be divided into three parts:
- shoulder, it can be depicted as a large and long oval;
- the second part is in the form of a cylinder;
- the feet should be drawn in the form of triangles, slightly curved at the sides.
At this stage, evaluate what the proportions of the bear are in the sketch. If you are satisfied with them, you can move on to drawing the details. If the decision is made not just to draw a bear, but to place it in the landscape, then the sketch is carried out in parallel with the drawing of the environment.
Teddy bear for children step by step lesson
This bear will be a real decoration for any card or valentine. It can be drawn by everyone from little preschoolers to novice artists.
- Step 1
Draw the bear's head. For its base, draw an even circle (For its perfect evenness, use a compass). - Step 2
Draw the ears from two semicircles with semicircles inside. We also outline the base of the face from a small oval. - Step 3
The last stage in drawing the face. We draw button eyes and a nose with a mouth. The head is ready! - Step 4
Draw the paws from wavy lines with ovals at the ends - the front paws are drawn. Check that the lines are not too wavy!!! - Step 5
Now you need to give the bear an object on which you can write the name of the postcard recipient or a congratulation. It could be a letter, an envelope, or a piece of paper, but I chose a heart. - Step 6
We finish drawing the lower part of the bear’s body and attach the legs to it. Instead of bear pads on the heels, you can depict a heart, flower or circle. Everything is in the hands of your imagination!!! - Step 7
We outline everything for clarity and ease of painting with a black marker (pencil, felt-tip pen, pen). One more step left! - Step 8
All that remains is to paint it over, and your bear can be any color (yes, you heard right, ANY color! And even purple or green!!!). I wish everyone good luck and pleasure from the results obtained. See you again!
Lesson author: ▒ℙọℓℯċℎᶄᎯ▒
Plush
Remember who was our favorite toy as children? A teddy bear, unchanging and constant, a companion to all children's games. Let's try to lay out step by step how to draw a teddy bear with a pencil. Even small children will be able to do this drawing.
- Draw a circle that will play the role of the teddy bear's head.
- On the sides of the large circle we add two small ones - these will be the ears.
- In a large circle we write an oval (muzzle) and two small circles - the eyes.
- Let's move on to the body of the teddy bear. We draw two ellipses (ovals), with the smaller oval inscribed in the larger one.
- The next step is to outline the front legs, and draw the hind legs in the form of two small circles at the bottom of the ellipse. The teddy bear drawing is ready.
Step-by-step instructions on how to draw a teddy bear
If desired, the teddy bear can be painted or slightly modified. For example, like this:
Drawing tools
Since we have set out to draw a polar bear, before we start doing this, we should stock up on the following things that we will definitely need:
- Sharp pencils. It is best to use pencils of varying degrees of hardness; for example, a soft pencil is ideal for shading.
- Paper. For children who are just learning to draw, use medium-grain paper - it's easier to handle and more pliable for young artists.
- An eraser. The softer the eraser, the more accurately it will erase the failed parts of the bear if the step-by-step drawing fails the first time.
- Ideally, it would be good to stock up on a stick to erase the original contours, but this role can be played by a piece of paper rolled into a cone.
And for some children, the process of erasing contours will be more interesting if you do it with the back of your hand or your fingers.
- Patience. Drawing a bear step by step will require perseverance from children, so this is a great workout for those who cannot sit still for a minute.
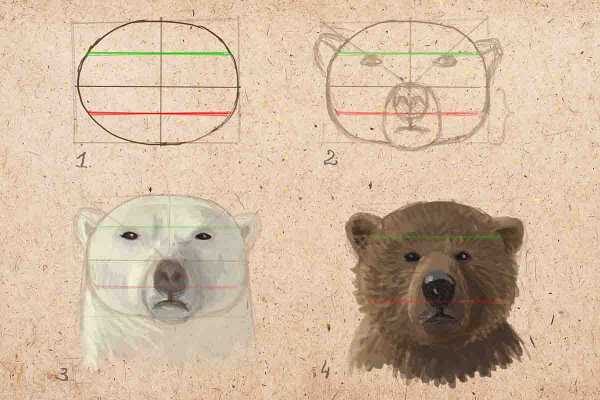
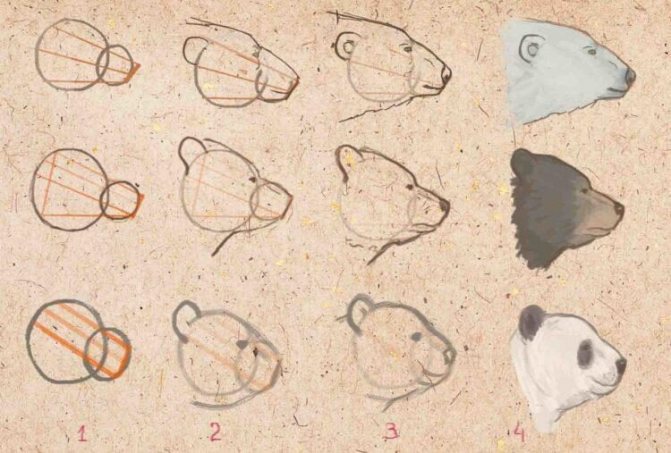
How to draw an ordinary bear with a pencil
1 step. Sketch out the outline of his torso, head and paws. Although the bear’s paws are not large, you need to try to make them look strong and sturdy. We draw ears on the top of the head. Use a thin horizontal strip to mark the location of the eyes. Step 2. Let's move on to the eyes and fur. Draw two small eyes on the prepared markings. They should be symmetrical and the same size. From them we draw a line of the nose, at its end there is a triangular tip of the nose. Add a mouth with a short stroke
Now it is important to remove all unnecessary lines so that they do not interfere when drawing the animal’s fur. Using jerky strokes we depict it on the head, hind legs, and stomach
Between the front paws, on the chest, we make a woolen “collar”. Step 3. The main work is over. It remains to give the beast more volume. Let's make it even more fluffy. To do this correctly, you can look at the photo of a real forest dweller. Step 4 The final stage will be painting the eyes and nose. Make the nostrils darker. Outline the entire outline again to give clear boundaries where they are needed.

Let's start with preparation
Let's decide on the plot of the picture. Our article is designed for teaching middle-aged children. If you are planning to draw a cartoon bear, Winnie the Pooh or a plush toy, nothing could be easier.
You just need to find a suitable drawing on the Internet or in any children's book and draw the hero step by step.
It is much more difficult to depict a real wild animal, ferocious, aggressive and dangerous, as realistically as possible.
If your child is beyond the age of teddy bears, show him how you can convey on paper the power and strength of a real bear.
It is very important to teach children to draw pictures step by step. The essence of this method is as follows: at the beginning a sketch is outlined, a silhouette is drawn with several lines, then details are gradually added and unnecessary sketches are removed
As a result, on the album sheet the child will not have a child’s scribble, but a drawing of a completely recognizable object.
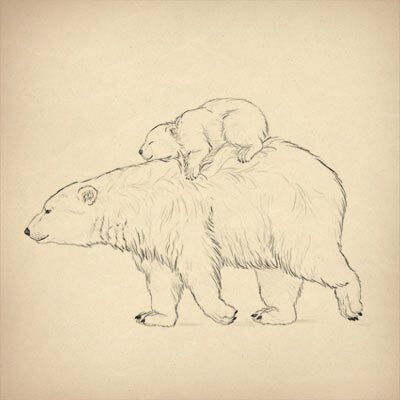
You can depict a bear in several interpretations: the grinning face of a grizzly bear (a kind of portrait), an animal that stands on its hind legs, or a completely peaceful-looking bear walking about its business. It is the last option that we will draw with a pencil. You will need paper and pencils of varying degrees of hardness. And, of course, an eraser.