On the topic: methodological developments, presentations and notes
Summary of a comprehensive lesson for children of the senior group, second period of study.
Lesson notes for the preparatory group on paper construction.
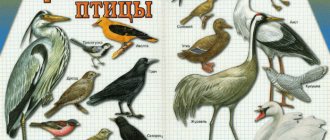
Summary of the lesson “The Arrival of Birds” on consolidating the lexical topic in the senior group of mental retardation (using mnemonics). Expanding and enriching the vocabulary on the topic; development of visual and auditory perception.
Scenario of a thematic lesson (circle “The Light of Orthodoxy”) Forty forties (bird arrival) Program objectives: - introduce children to the calendar.
Topic: “The arrival of birds.” Educational area: “Cognition,” “Artistic creativity.” Integrated educational areas: “Cognition,” “Communication,” “Physical education,” “Artistic creativity.”
This summary is intended to familiarize children with the characteristics of bird life in the spring and to instill in children a caring attitude towards birds.
In the first days of spring, you can watch the birds fly in the area with your children.
Specific options for compositions (including collective ones) within the theme
Drawing for senior group students is offered in winter (December). Traditionally, this is the composition “Birds Blue and Red” (based on the poem by the Japanese poet Kitahira Hakushu “Bird, Red Bird”). The children learn to recreate a poetic image in a drawing, choosing the appropriate color palette and beautifully arranging the birds on the base.
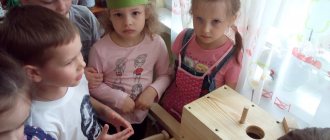
A little later (for example, in February), the children can be offered the composition “Birds at the Feeder” (pigeons, tits, crows, sparrows). Moreover, it can be organized as a team effort. Please note that this work must be preceded by modeling.
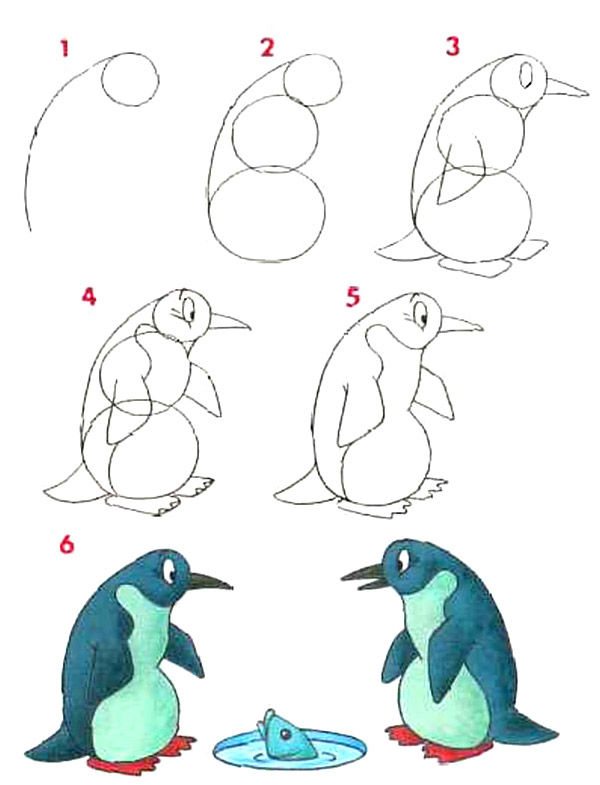
In winter, it would also be appropriate to draw a bullfinch or a penguin.
After sculpting the rooster (in the spring), the teacher invites the children to draw this beautiful bird. The same applies to the turkey, which is designed as a decorative composition in the form of a Dymkovo toy: children draw this bird with its tail spread like a fan and paint it with characteristic patterns. At the same time, the emphasis is placed not only on object drawing, but on developing a sense of rhythm, color and composition in the design of the pattern.
Drawing birds is good to coincide with April 1, when Fr. On this day, children can depict any bird of their choice or those that preschoolers have not yet drawn (for example, an owl, a swan, a stork, etc.).
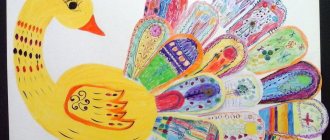
At the end of the school year, the children can be offered a creative topic - drawing a fairy-tale bird.
Note that the plots of the drawings can be associated with outdoor games on a bird theme: for example, “Day and Night” (owl), “Dog and Sparrows.” “Birds in the Nests” “Sparrows and the Cat.” These will be plot compositions.
In addition, preschoolers really love drawing based on fairy tales. In this regard, we can offer them the following topics:
- Based on the plots of Russian folk tales: “Hen Ryaba”, “Finist - a clear falcon”, “Winged, shaggy and oily”, “Cockerel and bean seed”, “Brave cockerel” (“Zayushkina’s hut”.
- “The Swan Princess” (based on the work of A.S. Pushkin “The Tale of Tsar Saltan”).
- “Rooster and Paints” (based on the work of Vladimir Suteev)
- “Cuckoo” (illustration for a Nenets folk tale, it could be a bird with a woman’s face and hair)
Older preschoolers enjoy doing work collectively. The teacher can offer them the following topics: “Poultry farm” (poultry), “Poultry canteen”, “Duck with ducklings”, “Hen with chickens”.
Techniques and techniques that will be used in class
Visual activity has a beneficial effect on the development of the child’s creative abilities, fine motor skills, imagination and fantasy, artistic and spatial thinking, sensory perception and intellectual abilities of the child, and contributes to the formation of an aesthetic perception of the world. In drawing classes, older preschoolers are taught the skills of artistic representation of the surrounding reality, methods of depicting an object with the transfer of simple movements, characteristic features of shape, color and details, and the proportional relationship of parts.
Types of drawing on the theme “Birds”:
Complex large compositions, which consist of various objects and figures, are usually created collectively; children together compose a plot picture on whatman paper, drawing or gluing the silhouettes they have prepared, simultaneously developing spatial thinking abilities, as well as mutual understanding and camaraderie. It is important to pay close attention to the problem of teaching children to understand and follow the correct sequence of work to create a plot composition or collage. The teacher should explain that first you need to prepare a background drawing, painting the entire space of whatman paper, then draw background objects (trees, sun, clouds, flowers, etc.) and only then draw or place previously prepared and cut out silhouettes of birds.
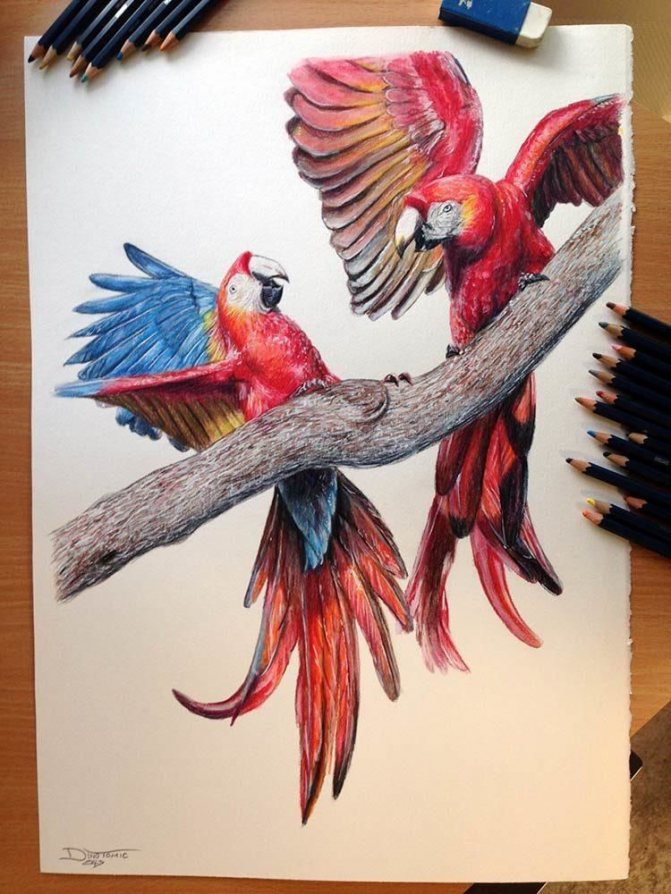
Photo gallery: collective works
Drawing techniques
Classic techniques:
Photo gallery: children's individual works in classical techniques
Non-traditional techniques:
Photo gallery: children's works in alternative techniques
Drawing techniques for older preschoolers
GCD move:
The teacher calls the children to him and a recording sounds with the voices of different birds. The children listen carefully. Then the teacher asks the children to name what they heard.
the birds have flown to us . toy bird appears in the teacher’s hands ; together with the children, the teacher examines the toy and names the body parts).
All birds come to us in the spring from warm countries. So our bird flew to us from warm countries. She really wants to make friends with you and play with you. What do you want? (Yes)
Great!
Conversation about the bird :
Do you like the bird ? (Yes)
What bird ? (small, beautiful)
.
What can a bird ? (fly)
.
What does a bird have to fly? (wings)
.
What else can a bird ? (sing)
.
How does the bird ? (loudly, loudly, cheerfully)
.
Educator: Well done! And now, guys, I suggest playing with the bird .
Game " Birds in Nests "
The game is repeated 1-2 times at the request of the children.
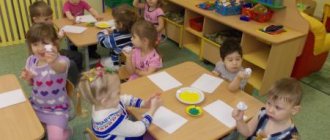
Drawing birds:
Educator: Guys, I suggest you draw small birds with the help of your palms , they will sing and we will all have fun.
(Children complete the task, the teacher controls and helps)
Educator: Guys, while your drawings are drying, you come to me and we will wash your hands.
Using your imagination and imagination, see the silhouettes of birds in the handprints. Then the children add a beak , crest, scallop, paws, eyes and other elements to the image, if desired, and show their work to each other.
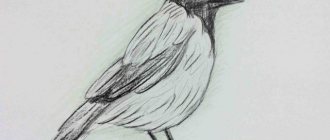
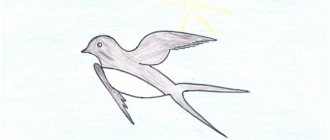
How to draw a bird
The process of drawing birds will be greatly simplified if you follow the recommendations and practice regularly, improving your hand. Master classes will be useful for children of all ages, helping them cope with the difficult task of mastering artistic skills.
Owl
Let's try to recreate this expressive image step by step:
- Work begins with two circles with cross-shaped lines at the smaller top figure.
- We outline them with smooth lines, continuing the back part, ending with the tail.
- We finish drawing the legs with three toes.
- We depict round eyes with eyebrows and characteristic ears.
- Below we place a beak that looks like a hook.
Now we need to display the plumage, which lies in rows on the wing, tail, and the fluff on the chest, conveyed by shading. The pencil drawing of the bird is ready.
Penguin
Not a flying, but a floating specimen, recognizable from cartoons and movies, also belongs to the family of birds; its appearance is not difficult to reproduce in profile. You will need to outline a vertical egg ending in a small head with a beak. Draw a short tail and legs.
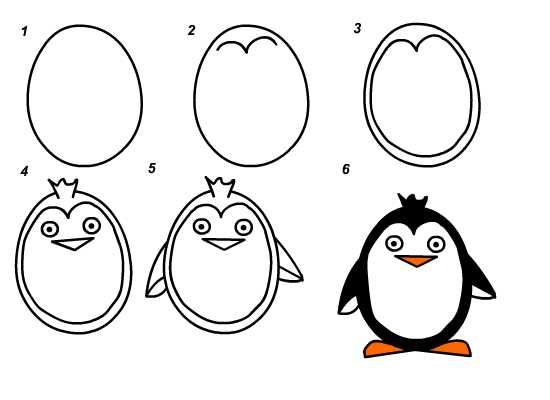
The most important thing is to correctly paint the picture with paints or felt-tip pens - the head area, the back with wings-flippers are black, and the abdomen is white.
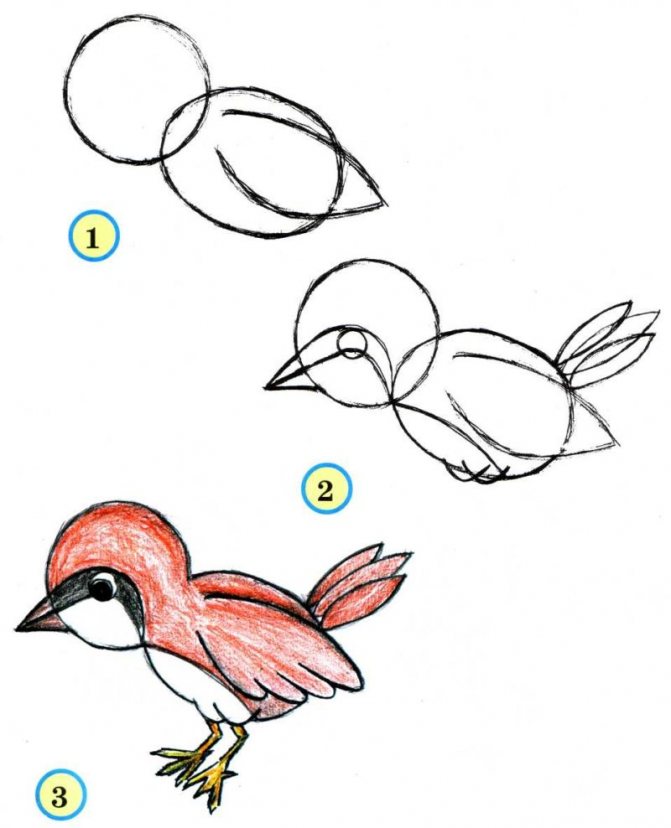
Chick
The proposed version of the image of a chick is simple. We draw an arc from bottom to top, ending with an arrow-nose. We draw the eyeball with the pupil side by side. From the arrow we continue the bow to the starting point, ending it with a tail. We draw on the arched wing and thin legs.
Parrot
Many people keep these bright individuals at home; let’s draw a striking bird step by step:
- We sketch out a diagram of 2 ovals, on the left we draw a back line that turns into a falling tail.
- We use a semi-rounded ruler to mark the bottom of the wing.
- Draw the beak-hook, eyes-circles and paws.
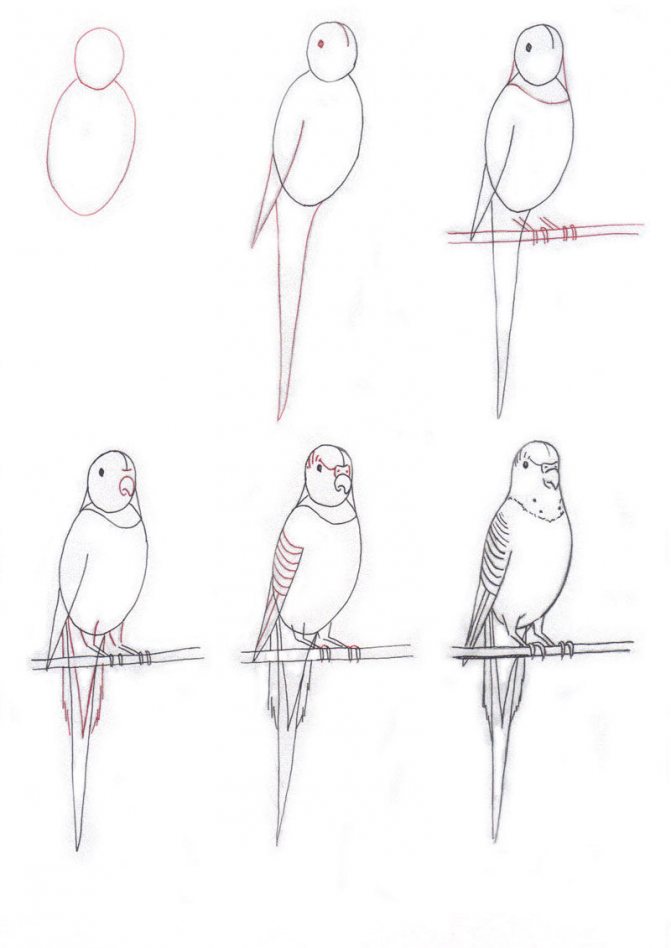
We proceed to contrasting coloring, conveying the feeling of feathers. We use red, blue, yellow. Using a black tone we highlight the base of the beak and the edges of the feathers.
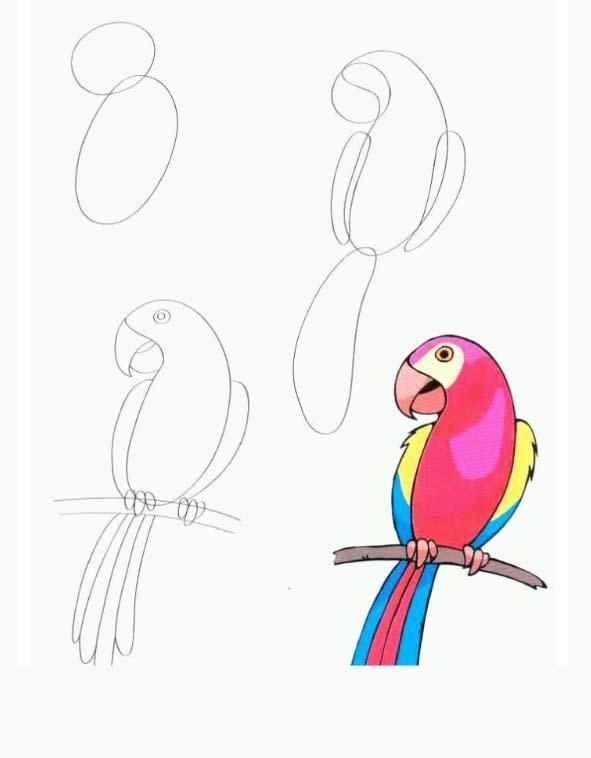
If you want to capture a parrot in flight, use a pair of arched rulers to show outstretched wings with an arched lower edge; its face will be half turned towards us, complemented by a beady eye and a hump nose.
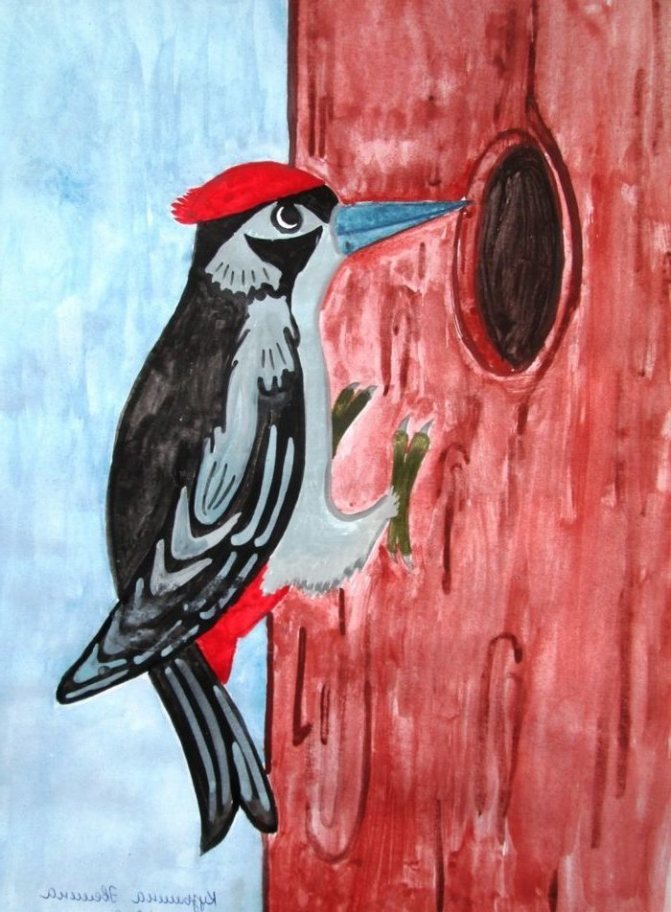
Woodpecker
The cautious and beautiful little bird, by knocking on a tree trunk, not only gets food for itself, but also lets other “relatives” know about the boundaries of its territory, attracting females in the spring. Procedure:
- We draw an oval head and a body with extending wings.
- We draw the line of the beak, legs and move on to the hanging tail.
- We detail the wing by tracing the contours and highlighting the feather strokes.
- We remove unnecessary lines and refine the eye.
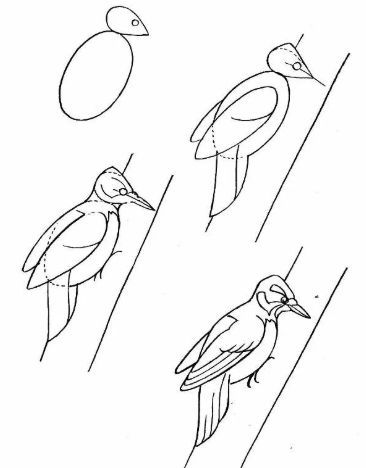
Decoration will add realism - a red head, a white chest. We emphasize the beak and other body fragments with black coloring.
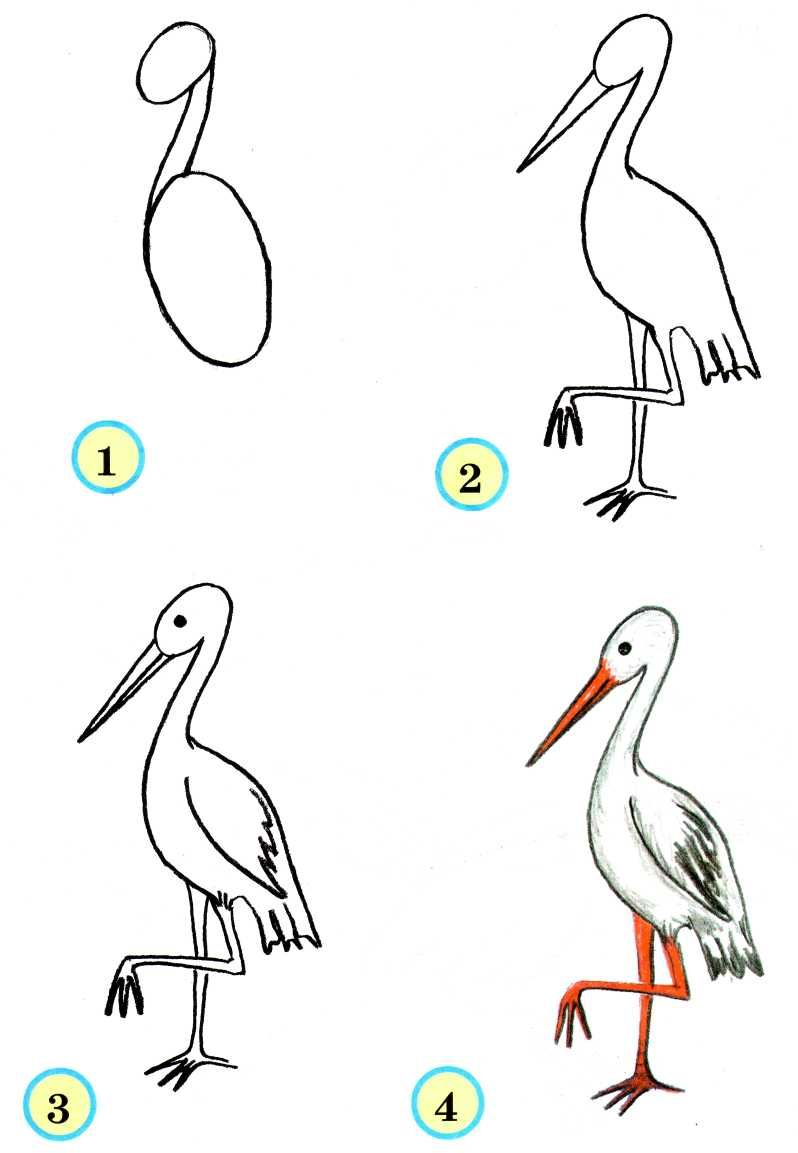
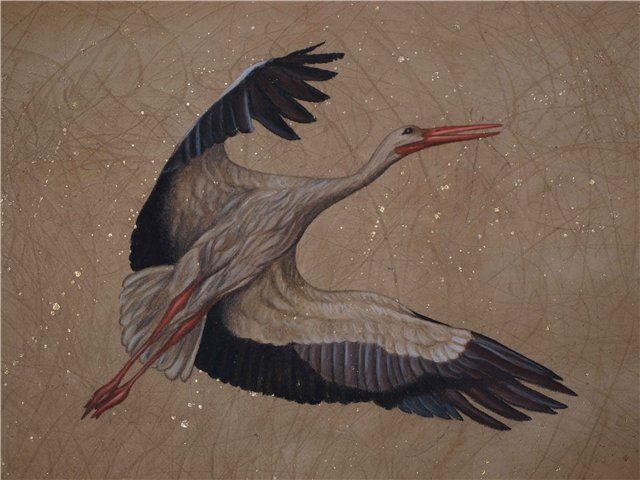
Stork
This handsome guy has long legs, an ovoid body and a small head with an elongated yellow nose. Having completed the sketch, we clarify the details. Using a series of rulers we draw out the raised wings.
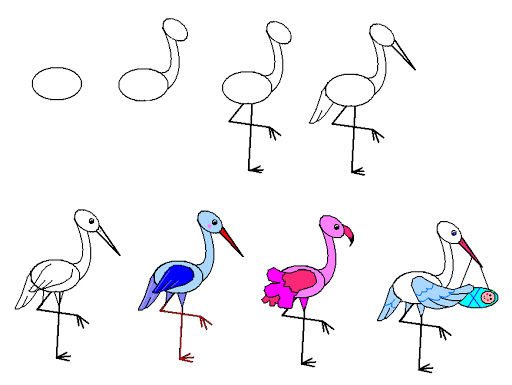
The ankle-shaped, yellowish limbs have a thickening in the middle. The aerial inhabitant has a snow-white color with a gray-blue tint at the tips of the plumage. Using strokes we emphasize the fluff in the chest area.
If you take on a heron, then give its neck a greater bend, and draw a crest on the back of its head, let it keep its balance on one limb, tucking the other, as it is more accustomed to do when hunting for river life.
Bullfinch
Let's depict a small bird with a colorful appearance that does not fly away to hot countries for the winter:
- Draw an oval body and a circle head.
- From them we draw a line that turns into a wing.
- We fix the neck and tail segment.
- The paws will tenaciously hold on to the branch.
We paint the figure - a bright red breast, a white spot under the eye, reminiscent of a bead with a dot, highlighted darkened plumage.
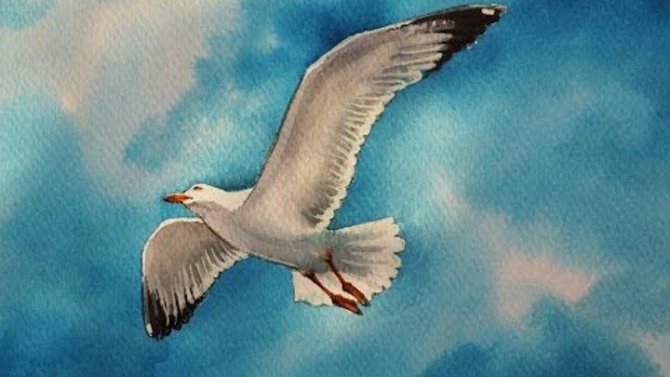
flying seagull
At first, the task seems difficult, however, even a child can do it:
- A round head and an elongated body with a lower convexity are outlined.
- The near wing has a more elongated format compared to the far element.
- The continuation of the figure will be the tail.
- The bird's legs are folded and pressed.
- We display zigzag feathers more accurately.

Hatching shows the fall of the shadow. It is worth noting that the dimensions of the wings of flyers increase in direct proportion to the size of the body.