Date: March 28, 2022 Author: Maria Skopina Category: For preschoolers
In the education and upbringing of children aged 6–7 years, the priority task is to prepare children for school. Each lesson is aimed at forming and consolidating those skills, as well as developing personal qualities that a future first-grader needs to study in elementary school.
Fine arts classes contribute to the comprehensive development of preschoolers: they meet the cognitive needs of children, help expand their vocabulary, and instill a sense of beauty. By drawing, children learn to predict and analyze actions, create a composition step by step, taking into account initial knowledge of perspective, perform various techniques with a pencil or brush, thereby preparing their hands for the most important process in first grade - mastering writing.
For the preparatory group, one of the most interesting topics for a drawing lesson will undoubtedly be “Birds,” where both migratory and domestic birds will be considered.
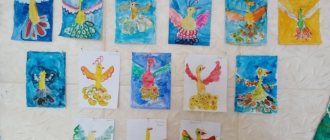
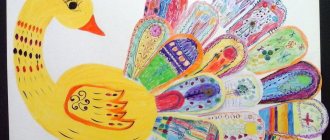
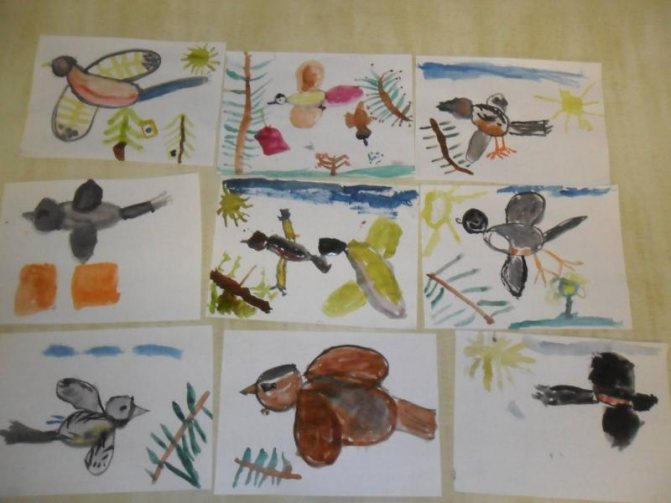
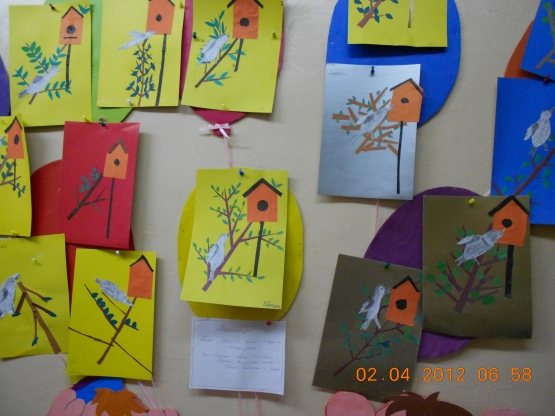
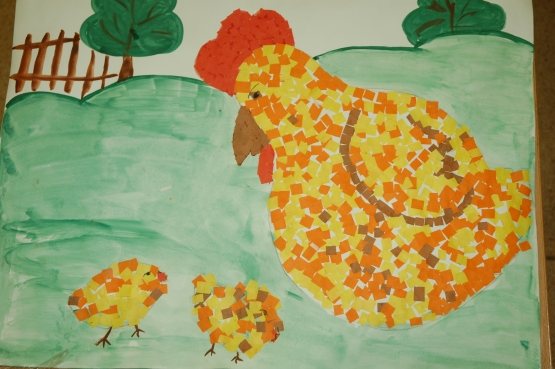
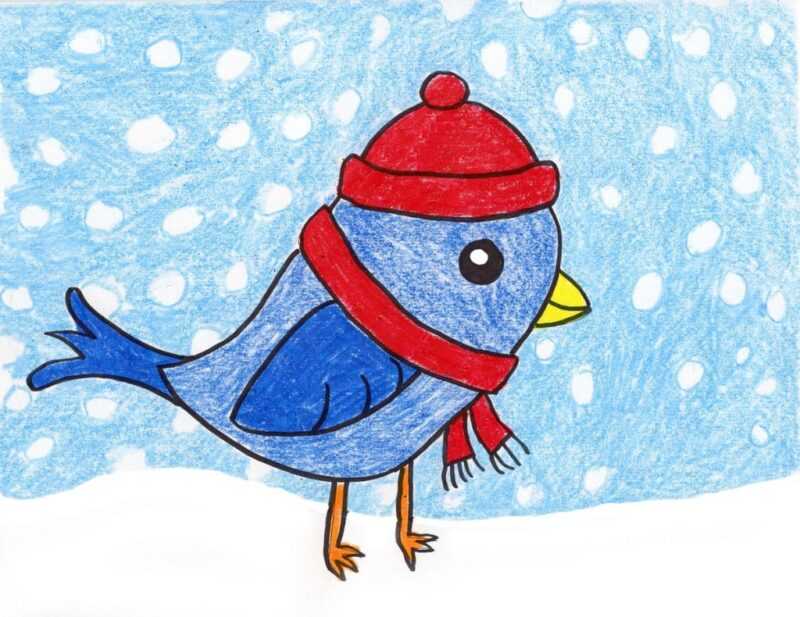
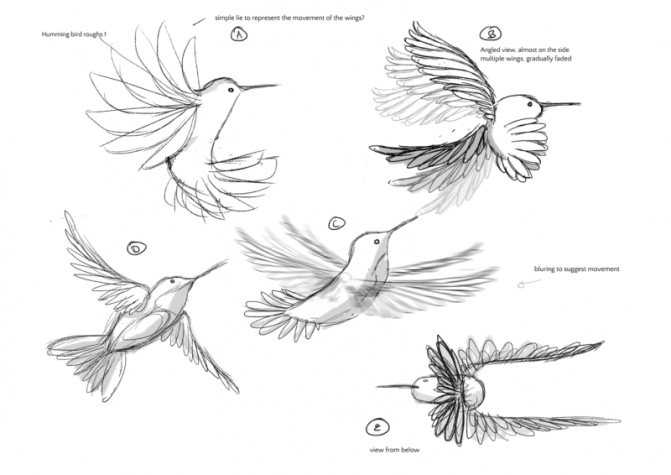
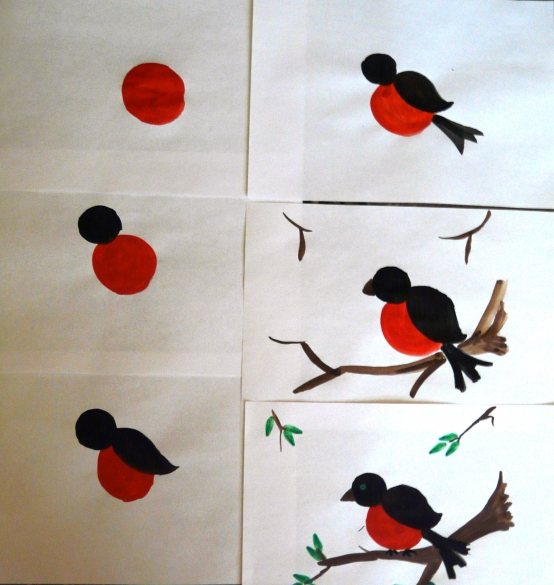
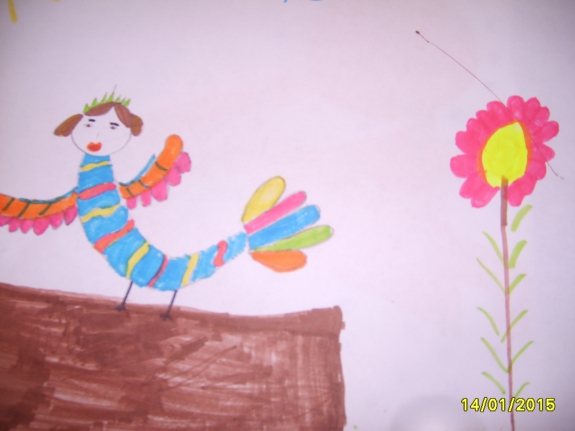
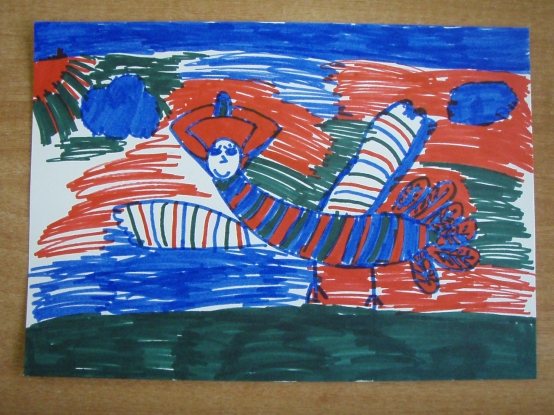
- 1.0.1 Samples of works on the topic “Birds”, made in various drawing methods.
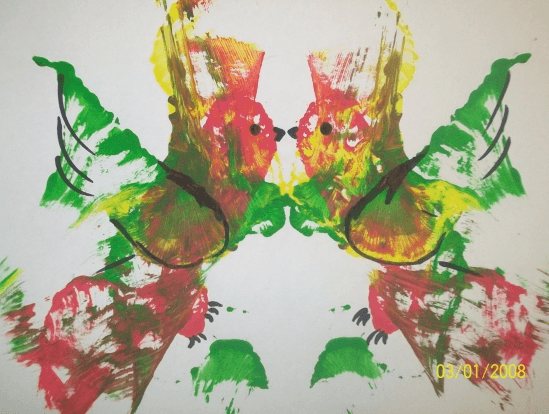
- 1.1.1 Examples of drawings of birds made using non-traditional techniques.
- 2 Motivating start to class
2.0.1 Examples of using motivating materials at the beginning of a lesson on the topic “Birds”.
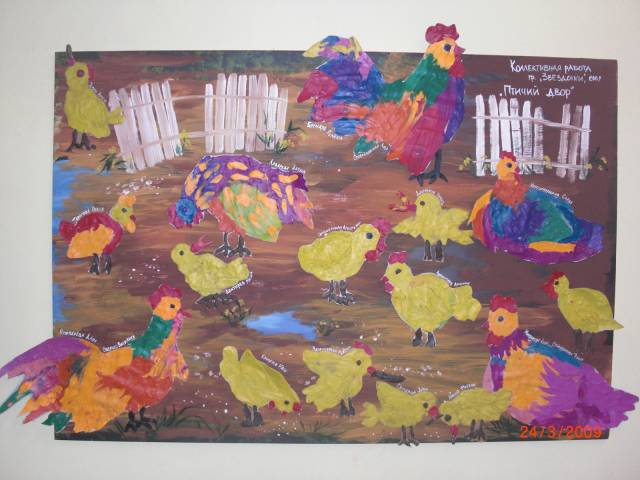
- 3.0.1 Summary of a lesson in visual arts in the preparatory group on the topic “Bird Yard”. Author: Ekaterina Panina.
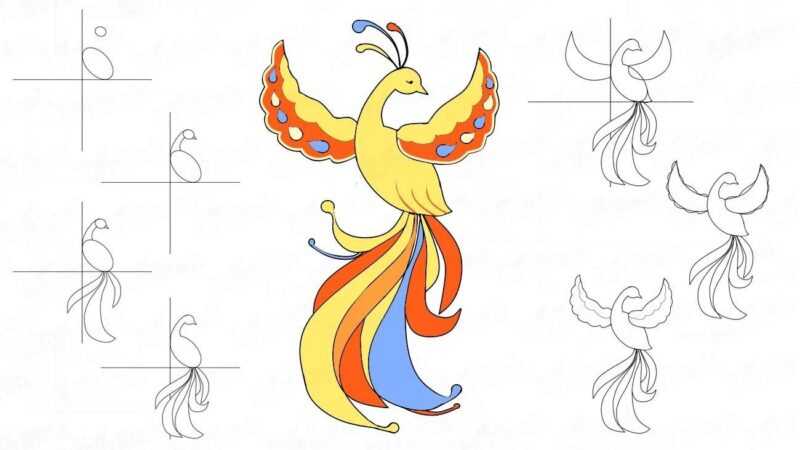
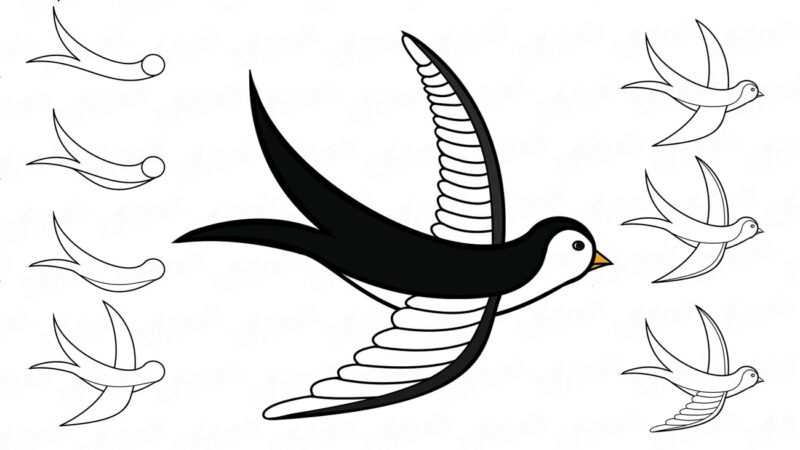
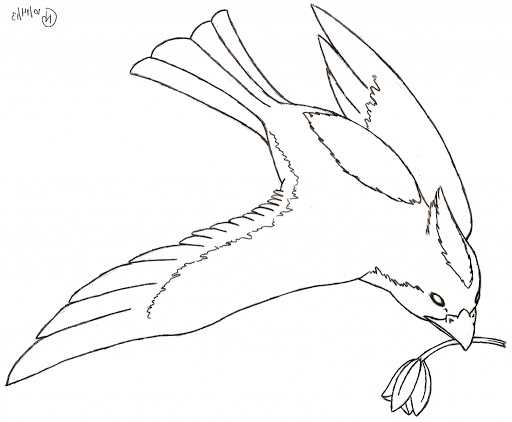
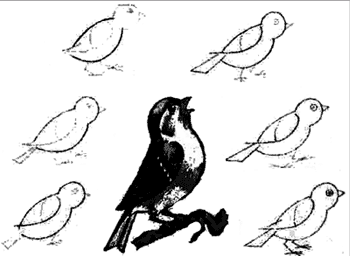
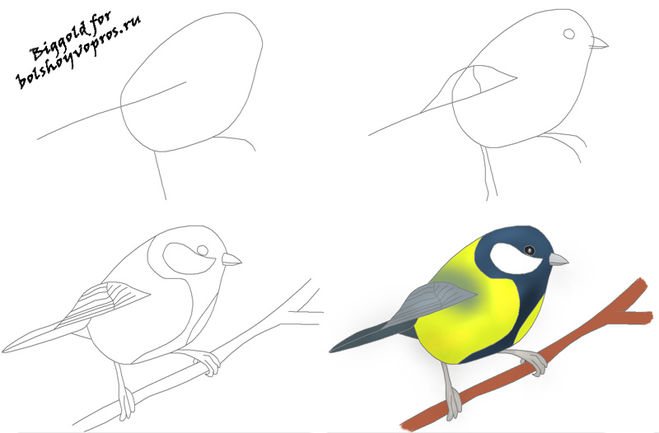
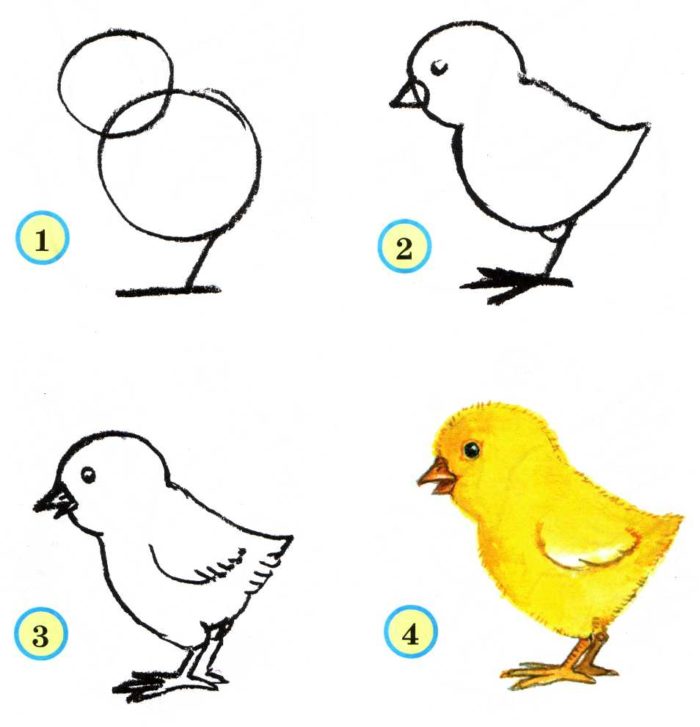
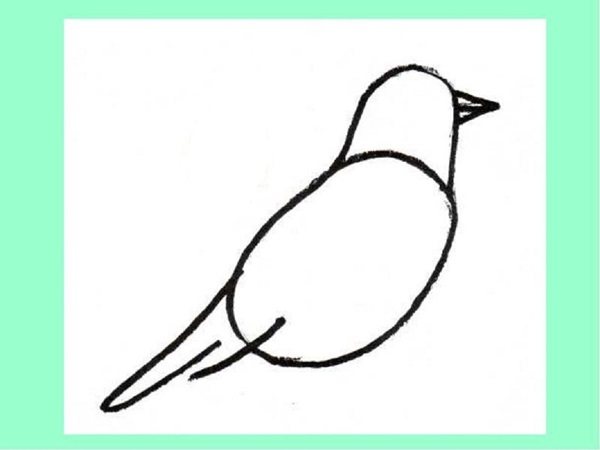
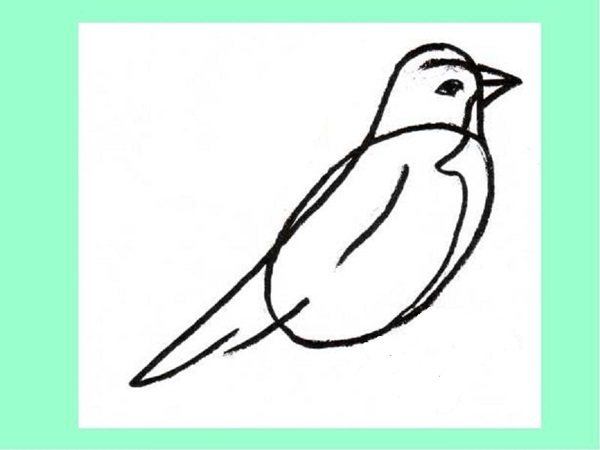
- 4.0.1 Schemes for step-by-step drawing of migratory and domestic birds.
- 5.0.1 Lesson “How to draw a sparrow.”
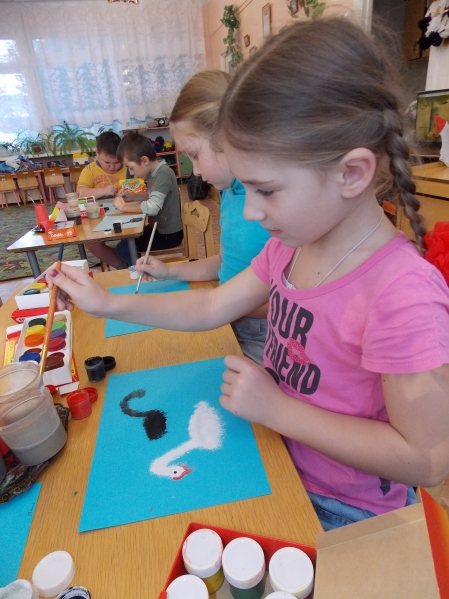
Preparing for a drawing lesson in the preparatory group of a kindergarten.
Classes in visual arts (drawing, designing and modeling) are held with pupils of the preparatory group three times a week. For modeling and appliqué, classes alternate and are held once every two weeks, for drawing - two classes every week.
Drawing lesson in the preparatory group
As a rule, drawing is one of the favorite types of creative activity among children. The process of creating a visual image using simple actions brings positive emotions. The children master basic techniques and techniques and show great independence in drawing. When developing a work program for drawing in the preparatory group, it is necessary to comply with the criteria for conducting classes with children aged 6–7 years:
- Using the children’s existing work experience with the obligatory involvement of something new. Consolidation of drawing skills occurs with the creation of each subsequent drawing, but at the end of the lesson, students should have an answer to the question: “What have you learned today?” Various forms and methods of using existing abilities stimulate children’s interest in creative activities. For example, students in the preparatory group know basic colors and shades, have an idea of color combinations, and know how to mix gouache and highlight watercolors. Based on these children's drawing skills, the teacher teaches them to see the beauty of the color diversity of the world around them and convey what is visible on a sheet of paper with smooth transitions and accents. The guys know how to hold a brush correctly and carefully draw lines and paint over contours; they know different ways of painting with a brush: the whole bristle, the tip, pokes, and applying individual strokes of different thicknesses. But they need to be taught to draw with colored pencils. In the preparatory group, children learn to carefully cover the contours of pencil shading, using varying degrees of pressure.
- Learning to follow verbal instructions and predict actions. Direct demonstration as a method of work is not carried out by the teacher in the preparatory group (the only exception is for the first experience of drawing with new materials - pastels, sanguine, chalk, as well as individual demonstration for those who have difficulties in completing the task). An action plan for drawing an object or plot, and specific practical techniques are discussed with the students. At the age of 6–7 years, children can independently reconstruct the stages of drawing a sample of the finished work shown to them according to the assignment.
- Developing your own idea. Older preschoolers are given maximum freedom in thinking through the image for the drawing, materials and techniques that are needed for visual implementation.
- Play is still the main activity for children, so drawing techniques should be taught with the active use of game forms. The teacher should include surprise and game elements during the lesson based on the established topic.
Drawing lesson in the preparatory group
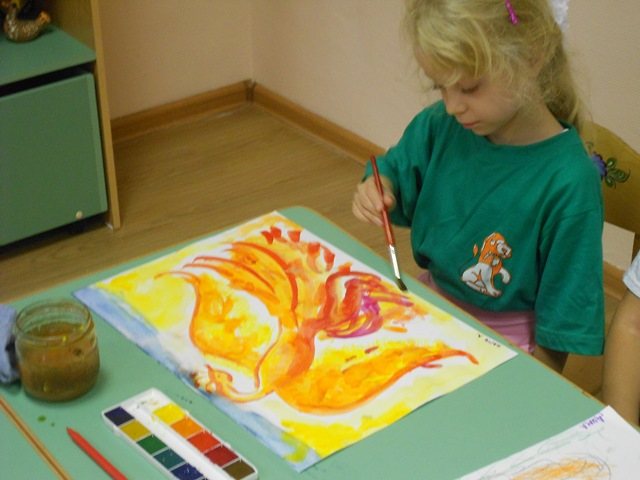
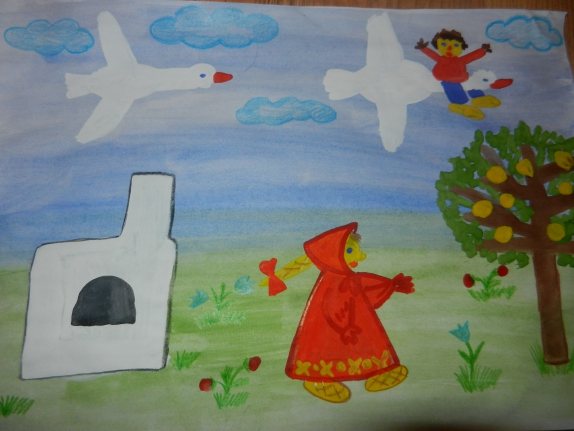
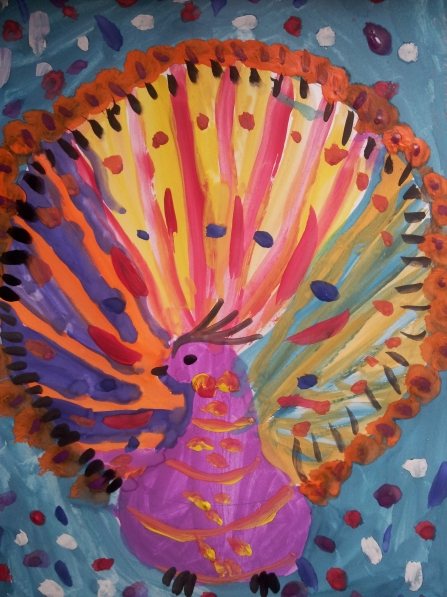
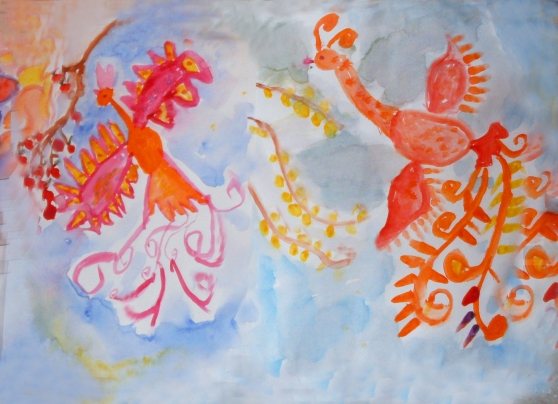
In the senior group, the children got acquainted with three types of drawing: subject, subject and decorative. In the preparatory group, great importance is given to drawing from ideas. Pupils work with visual memory images, analyze demonstrated illustrations and other visual materials. Classes on the topic “Birds” do not involve consolidating and honing the skill of drawing from life. The guys look at images of birds on pictures and posters, the teacher pays attention to the birds during a walk - the guys highlight the characteristics of different types of birds (size, shape of head/body/beak, colors and shades in plumage) and record their characteristic movements: a bird sat on a branch , takes off, pecks berries, swims, etc. According to the presentation, the children also draw images of fairy-tale birds (Firebird, Finist).
Conveying these movements in simple actions is the main task of plot drawing in the preparatory group. The children transfer their feelings from the surrounding reality onto a piece of paper and depict semantic connections between objects and objects. On the topic “Birds,” students think through the plot point, try to fill the entire area of the sheet with an image, keeping in mind the perspective (near objects are drawn lower on the sheet, distant objects are drawn higher).
The theme “Birds” is also revealed in decorative drawing by older preschoolers. These are conventional images of birds as part of a complex pattern for decorating a plate, box, cutting board, tray and other items. Children can draw birds based on Gorodets, Khokhloma and Gzhel paintings, Filimonovskaya, Dymkovo and Bogorodskaya toys.
Samples of works on the topic “Birds”, made in various drawing methods.
Example of object drawing Example of plot drawing Drawing based on the characters in a fable Example of drawing based on the idea
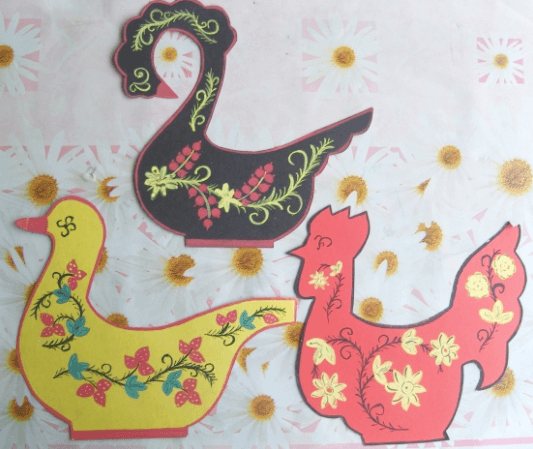
Decorative drawing based on Khokhloma painting Decorative drawing based on Gzhel painting
Decorative drawing based on the Dymkovo toy Decorative drawing based on the Filimonovskaya toy
Techniques and techniques of drawing in the preparatory group.
During drawing classes, older preschoolers create works not only with paints, but also with pencils. At the age of 6–7 years, a child can perform uniform bright shading with slate and wax colored pencils. It can achieve different shades of the same color in a pencil drawing (due to the intensity of pressure during the shading process). Using a simple pencil, the child learns to create a preliminary sketch: he outlines the contours of an object without drawing individual elements. To clearly highlight the contours and details of colored objects, colored felt-tip pens can be used.
Pencil drawing of a preparatory group student
When painting with paints, older preschoolers practice the skills of mixing and whitening paints on a palette to obtain the desired colors and shades. In the preparatory group, the children use the techniques of dabbing and brushstrokes in their work, painting both with the entire bristle of the brush and with the tip.
Watercolors are often used in art classes. By drawing with slate pencils or watercolors, children learn to see the beauty of light shades. Over the entire area of the sheet, students paint a blurry background with watercolors.
Watercolor drawing by a preparatory group student
Gouache is used in decorative drawing or in the creation of those subject and subject works in which, according to the plan, color is applied to color.
Gouache drawing by a preparatory group student
As a basis for the drawings, sets of white and colored paper, special for watercolor and gouache, and Whatman paper are used (usually for creating collective works or implementing creative projects). Tinted paper is rarely used for work, mainly to create a decorative pattern based on folk painting. In subject and subject drawing classes, children learn to create a background on their own (plain or with smooth transitions).
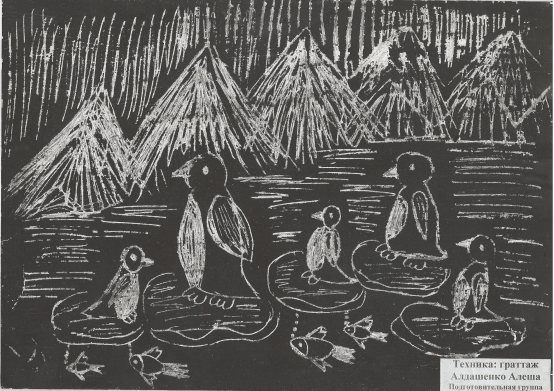
On the topic “Birds,” classes are conducted using non-traditional drawing techniques: wax crayons with sketches in watercolor paint, cotton swabs, chalk on sandpaper, scratching techniques, monotype, etc.
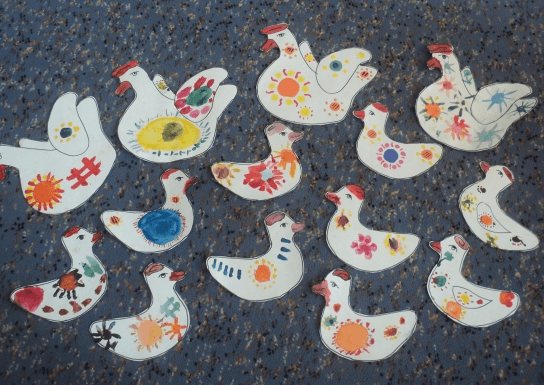
Examples of bird drawings made using non-traditional techniques.
Examples of works using the finger painting technique
Drawing using the scratch technique Drawing using the scratch technique Example of work using the scratch technique (colored base background) Drawing using the printing technique Example of blotography
An example of monotype in a child's drawing Work using the monotype technique Work using the pointillism technique (drawing with cotton swabs)
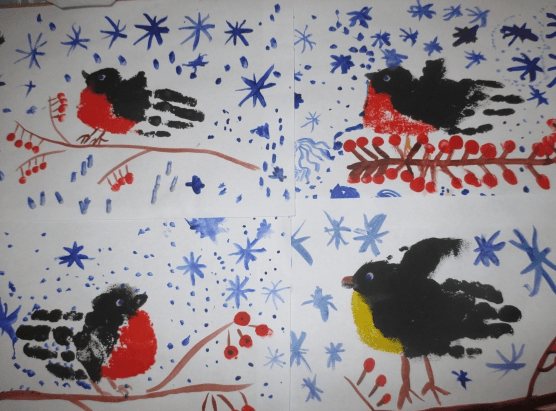
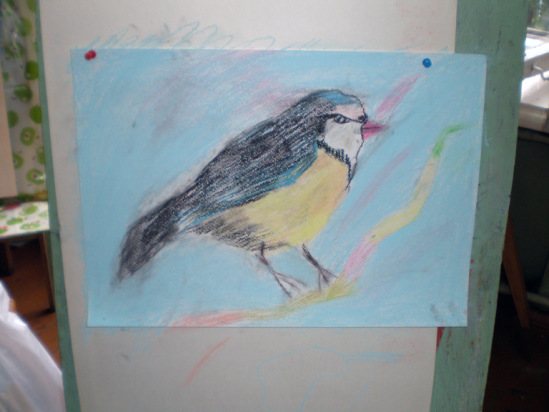
Drawing on the topic “Birds” in the preparatory group can be combined with other visual arts techniques - appliqué and modeling. The guys complement dried watercolor and gouache drawings with details or figures according to the plan. For example, in a drawing of a tit, you can use pencils to glue grains molded from plasticine or crumpled pieces of napkin as “bread crumbs.” It is good to complement the image of the branch on which the bullfinch sat with plasticine rowan berries. The materials for creating the applique in the drawing can be varied: cotton pads, napkin balls, natural material, cut out motifs from candy wrappers and magazines. The use of plasticineography is encouraged - an unconventional drawing technique by smearing plasticine. Plasticine strokes help to beautifully and originally design the background of the picture: the sky, a clearing, tree leaves or snow on a branch.
Examples of drawings of birds in combination with other iso-techniques.
The berries are made using the technique of crumpling paper elements. The drawing is supplemented with plasticine elements
A combination of drawing and appliqué techniques
Combination of drawing and appliqué techniques (team work)
Complementing the drawing with plasticine elements Drawing with paints with plasticine elements
Mixed media (drawing and applique)
Individualization of tasks on the topic “Birds” in the preparatory group.
An individual approach to learning is implemented through a personal approach to students, the development of differentiated tasks (by level of difficulty or by design) and the setting of classes not for the “average student”, but for the development of the skills of each child in the group. For drawing classes in the preparatory group, this approach is carried out through the teacher’s adherence to the following principles and methods of work:
- Knowledge of the individual psychological characteristics of each student. The teacher must know the characteristics of attention and memory, the degree of proficiency in one or another skill, the desire to work in a group or separately for each child. Directly during the lesson, the teacher must pay attention to the emotional state of the students: enthusiastic and active children should receive a more difficult task, and those who are unsure of their abilities or are in a bad mood for some reason are given the task they can do. Options for tasks for high-achieving students: complete the drawing with plasticine elements (rowan berries, bird eyes, leaves on a branch); decorate the work with applique (tree trunk, grass, flowers) or natural material (leaves, twigs); work on the background in detail or using the plasticine technique (drawing grass, tree crowns, clouds, sky and sun with plasticine strokes).
- Stimulating cognitive activity, the desire to share one’s own experiences and examples from life with others. For example, in a lesson on the topic “Titmouse,” the teacher can ask when and where the children saw these birds. Did they feed them? Did you make feeders for them (with parents or in younger groups)? At the beginning of the “Poultry” lesson, it is recommended to have a conversation: which of the children is going out of town on vacation, have they seen a poultry yard, what kind of birds are kept in the villages; who has parrots, canaries or other ornamental birds at home, what features do they have (plumage, vocalizations).
- Freedom of creative idea and its implementation. Children aged 6–7 years actively analyze the work ahead of the assignment and think through the stages of creating a drawing. The teacher should not limit the imagination of the pupils, but direct it in the right direction. Children should be given access to a rack/cabinet with brushes, paints, pencils, tools for non-traditional techniques, and materials for sculpting and appliqué.
- Creating conditions and situations (game or problem) for students to demonstrate their abilities. In the game, children learn to correctly determine the relationships and connections between objects and phenomena of the surrounding world. Children aged 6–7 years play, having previously thought through the plot of the game, jointly distributing roles and the course of the game. When solving problem situations, the teacher should encourage children to actively share personal experiences and examples from life, express their opinions, visions of the situation and solutions. The teacher needs to instill in children the desire to speak openly, engage in discussion and analyze the ideas of others reasonably. Examples of logic games on the topic “Birds”: find identical pictures of birds, trace the outline and name the bird, draw the characteristic pose of the bird yourself, recognize the bird by its silhouette, reduce the image of the bird (draw a similar silhouette of a bird in a smaller size). In problem situations for preschool children, there should be a practical solution (give the answer and draw, show the character a bird, make a picture as a keepsake for a guest).
In drawing lessons, a person-centered approach is implemented through the teacher’s careful development of a lesson program and preparation for each lesson. By consolidating previously acquired skills in the process of creating a drawing, the child feels the significance of what he did previously. At every lesson he learns something new or learns something - the child has interest and incentive to develop. He analyzes the finished work, learns to accept constructive criticism and well-deserved praise.
The topic for a drawing lesson should be general and give each student the opportunity to dream up. For example, the topic “Poultry” can provide children with scope for creative activity based on the following criteria: what kind of bird to depict (the bird lives in an apartment or in the courtyard of a village house), perform work within the framework of subject drawing or plot drawing, choose the level of background detail, etc. For each drawing, children independently choose the color scheme in which they will draw (warm or cool colors), they can use additional materials to complement the work with modeling or paper appliqué, if there is time left after completing the main task.
The topic “Birds” in long-term planning for drawing in the preparatory group.
In the “Drawing” section of the program in the educational field “Artistic and Aesthetic Development” in the preparatory group, the topic “Birds” is presented in many classes. It is revealed when learning to draw from imagination, drawing images of folk tales and works of art, and decorative drawing.
| Lesson topic | Form of organizational activity | Training and development tasks | Techniques used |
| "Migratory birds" | Individual. | Teaching subject drawing based on idea (drawing certain types of birds, depicting the characteristic features of the shape of the bird’s body, head, beak, plumage). | Creating a pencil sketch: highlighting simple geometric shapes in the bird's structure. Coloring the body and head of the bird without going beyond the contours of the sketch. Drawing with individual strokes of plumage. Drawing with the tip of the brush individual details of the image (bird's legs, beak, eyes, tail, crest). |
| “Migratory birds are flying”, “Birds are flying south” | Individual/collective. | Teaching plot drawing depicting the characteristic movements of birds (movements in flight). | Developing the skill of creating a preliminary sketch. Creating a background (sky; possibly drawing a horizon line). Development of composition skills and simple perspective (the further away the bird is in design, the higher its image is located on a sheet of paper). Strengthening the techniques of painting with paints. Developing the ability to work in a subgroup. |
| “Illustrations for the fairy tale by D. N. Mamin-Sibiryak “The Gray Neck”” | Individual. | Formation of the ability to choose an episode for drawing a plot scene, to create images of a work of art. | Creating preliminary sketches when drawing complex figures (duck, fox, hunter). Drawing with paints, painting over the contours of a sketch, working out small details with the tip of a brush according to plan. |
| "Poultry" | Individual. | Development of the ability to draw from imagination (image of various types of poultry with their characteristic features). | Hatching with colored pencils with varying degrees of pressure. Creating outlines with felt-tip pens. |
| "Poultry yard" | Collective. | Developing interest in collective activities. Formation of the ability to draw plot scenes. | Development of drawing skills with pencils or paints. Developing the ability to work in a group: jointly thinking through the plot for the image and the background for the drawing, discussing and choosing a drawing technique (possibly involving appliqué or design with natural materials), analyzing the finished work. |
| "Magic Bird" | Individual. | Formation of the ability to draw fairy-tale images. | Consolidating the skill of drawing with colored pencils/Developing the skill of drawing with pastels or sanguine. Development of compositional abilities. |
| "Swan" | Individual. | Development of drawing by representation. Development of the ability to create images of a work of art (for the version of the theme “The Swan Princess”). | Creating a non-solid background. Drawing with gouache on a wet background. Working out small details with the tip of the brush. |
| “Illustrations for the fairy tale “Geese and Swans”” | Individual. | Development of the ability to create fairy-tale images in drawing. | Strengthening the skill of drawing with colored pencils. Create a detailed background. |
| "Magpie-white-sided" | Individual. | Development of the ability to draw a bird in a certain pose according to an idea (a bird sitting on a branch). | Drawing with colored pencils based on a preliminary sketch. An exercise in arbitrarily pressing a pencil to obtain the desired color intensity. |
| "Owl Owl" | Individual. | Developing the ability to work in mixed media. | Drawing in watercolors from a preliminary pencil sketch. Drawing a contour line of individual parts with a black capillary pen. |
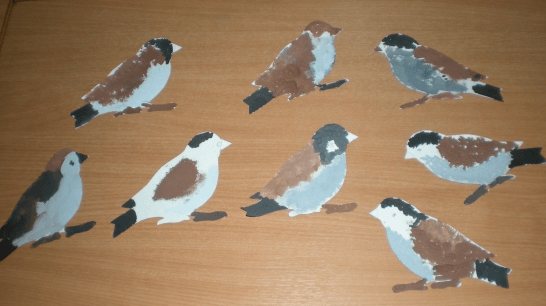
| “Goose”, “Titmouse”, “Swallows”, “Bullfinches on a Branch”, “Sparrows” | Individual. | Development of the ability to draw the figure of a bird in a constructive way (using simple geometric shapes). | Creating a sketch with a simple pencil in a constructive way. Strengthening the skill of drawing with pencils/watercolors/gouache/pastels. In topics on drawing individual types of birds, it is recommended to teach drawing in mixed media. |
| "A Flock of Sparrows" | Collective. | Development of the ability to draw a bird in a certain pose (pecking crumbs/grains). | Drawing with colored pencils with varying degrees of pressure, varied shading (imitation of plumage). Developing the ability to work harmoniously in a subgroup. Activation of imagination in thinking through the details of the drawing (what sparrows peck and how to depict it). |
| "The Golden Cockerel" | Individual. | Development of the ability to draw an image based on a work of art. | Creating a pencil sketch in a constructive way. Drawing with gouache. Consolidating the skill of obtaining different shades by mixing paints. |
| "Kargopol Birds" | Individual. | Development of the ability to draw objects from life (drawing the Kargopol toy “bird”). Development of decorative drawing skills. | Drawing with a simple pencil from life (figurine of a bird). Creation of a decorative pattern in gouache based on Kargopol painting. |
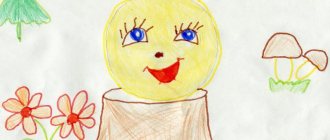
Simple drawing
Children often draw nature and, in general, everything that surrounds them. While walking, or looking out the window, they have the opportunity to watch birds.
If a child wants to learn how to draw birds, you need to use step-by-step instructions for beginners. Then the drawing will definitely please the baby and his loved ones.
Two intersecting ovals are depicted. One of them should be smaller and located on the left. A highly elongated triangle is attached to the bottom of the large oval. A small triangle is depicted near the left oval. Paws are drawn with straight lines. The circuit is ready.
An eye in the shape of a leaf is drawn on the head. The small triangle is divided across by a stripe, finishing off the beak. An oval line is drawn on the body from the head, marking the wing of the bird. On each paw, 4 fingers are drawn, one of them is opposite. Soften lines and erase unnecessary strokes.
It turns out that just drawing a bird is accessible to everyone. The resulting sketch can be colored; the bird looks like a sparrow.
Motivating start to class
One of the tasks of learning to draw from paper is to develop motivation to work with pencils, paints, and pastels. The most effective way to attract attention to the creative process and enhance cognitive activity is to use motivational material at the preparatory stage of the lesson. As a motivating start to the lesson, the teacher can use a variety of techniques and use additional equipment:
- Visual materials: thematic posters (domestic birds, migratory birds, those remaining for the winter), photographs, illustrations in books, bird figurines, bird toys of folk craftsmen.
- Use of texts from folk tales and original literary works.
- Reading poems, nursery rhymes, proverbs and sayings, riddles about birds.
- Appeal to the experience and knowledge of students: conducting a conversation, tasks for reflection.
- Use of technical means: listening to songs about birds, audio recordings of bird voices, viewing slides on a projector.
- Conducting thematic active or logic games, creating surprise moments and problematic situations.
Examples of using motivating materials at the beginning of a lesson on the topic “Birds”.
| Lesson topic | Motivating start |
| “Illustrations for the fairy tale by D. N. Mamin-Sibiryak “The Gray Neck”” | At the beginning of the lesson, the teacher asks the children whether they remember well the fairy tale “The Gray Neck” they previously read. A conversation is held on the content of the fairy tale: for what reasons did the duck not fly away with its flock, what happened in the fairy tale before meeting the hunter, how the fox behaved, and how the duck behaved, how she met the hare, etc. The teacher reads out passages from a fairy tale: with what feeling do birds prepare for a long journey to warm lands; a description of an autumn day when Gray Neck was left alone, and flocks of migratory birds flew in the sky; scene at the wormwood; meeting with a hare, etc. Carrying out a logical game “Find the difference”: two pictures are attached to the board with the same illustration for the fairy tale of Mamin-Sibiryak, but one of them has differences. The teacher stipulates how many differences the children must find. |
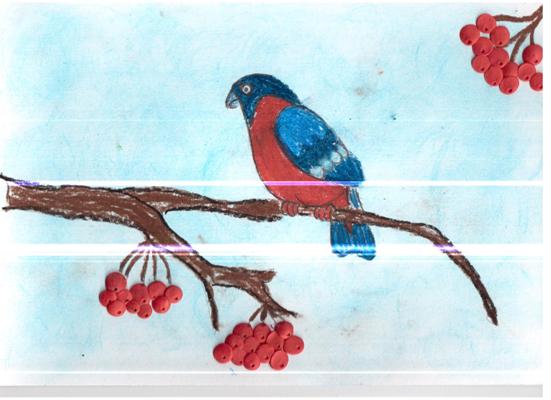
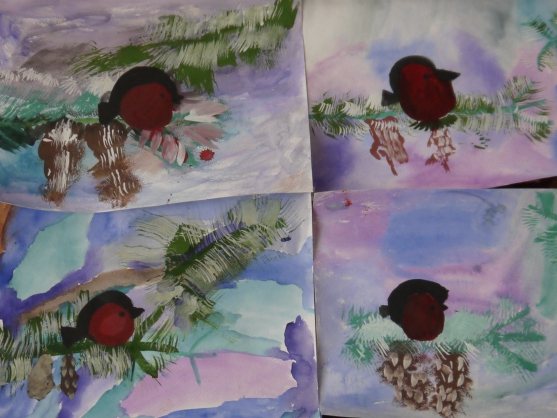
| "Bullfinch on a Rowan Branch" | Creating a surprise moment : the postman brings a letter to the group. It was written by Dunno, he tells the guys that Znayka gave him a very difficult riddle, he just can’t give the correct answer. Dunno asks the child to help him solve the riddle and send him an illustration of the answer in a return letter. Riddle : Red-breasted, black-winged, Loves to peck grains. With the first snow on the mountain ash, He will appear again. Next, a conversation is held to study visual material (pictures depicting bullfinches): the children determine the structural features of the bird, plumage, and posture. Physical education lesson “Look at the branches - bullfinches in red T-shirts.” Perhaps holding a logical game “Find bullfinches in the same poses”: on the table there are pictures of bullfinches (in flight, pecking berries, sitting on a branch, jumping, etc.), the guys must find the same ones. |
| "Owl Owl" | Prepares background accompaniment for the lesson - audio recordings of forest birds singing; visual material – illustrations for fairy tales and nursery rhymes, made by the artist Vasnetsov. At the beginning of the lesson, the teacher takes the child to an exhibition of illustrations and talks about the artist Yuri Vasnetsov. Afterwards, a conversation : what birds did the children see in the paintings, what colors predominate in the works shown, etc. The teacher reads a nursery rhyme : Oh, you little owl, You are a big head, You were sitting on a tree, You were spinning your head, You fell from a tree , Rolled into the hole. He asks what bird this nursery rhyme is about and asks to find an illustration with it at the exhibition. Discussion of the image of an owl: structural features of the bird, plumage, posture, what it sits on, what colors the artist used to draw the bird. The teacher asks if they have met an owl or an eagle owl in fairy tales, poems, songs and cartoons, and perhaps they have seen this bird outside the city or in the zoo. Outdoor game “Owl”: in the middle of the game room there is an owl’s nest, where the first driver stands. The teacher announces that night has fallen in the forest, the driver closes his eyes, and the rest of the children depict various inhabitants of the forest - insects, birds, animals, they run and play. When the teacher says that the day has come, the children freeze, and the owl flies out of the nest and looks to see if everyone remains motionless; those who move, the owl takes to its nest. Afterwards, it is calculated how many the owl managed to catch, and a new driver is selected. |
cartoon superstars
Birds have become heroes of popular games and cartoons, and children are interested in learning how to draw their favorite characters. Using tips on how to easily draw a bird, you can get a funny cartoon character.
- A large circle is depicted on the album sheet. Divide in half with an auxiliary line. A triangle is drawn in the middle of the circle, its angle touching the central point. A second triangle is attached to it, so a beak is formed. The eyes are egg-shaped and share a lower border with the beak. Black dots indicate pupils. There are wide stripes on the eyes, frowning eyebrows.
- On the top of the head there are two oval tufts.
- From the edges of the beak, draw 2 rounded strokes to the edge of the head. This area is painted beige, the beak is yellow, the rest of the space is covered with red paint.
The leader of the flock of birds, Red, is ready. Using these tips, you can draw another cartoon character. The Chuck bird has a yellow coloration and a black mohawk on the top of its head. The bird's body is triangular in shape, the rest of the details are similar.
Compilation of notes on the topic “Birds”.
The purpose of drawing classes on this topic is to create images of various types of birds in characteristic poses, plot scenes, and fairy-tale images. A drawing lesson in a preparatory group lasts no more than 30 minutes and contains the required steps:
- Organizational moment 1–2 minutes.
- Motivating start 6-7 minutes.
- Practical work 15–17 minutes.
- Demonstration and analysis of finished work 2–3 minutes.
- Summing up 1 minute.
The teacher must analyze the lesson conducted and outline ways to correct methods and forms of work in subsequent educational activities.
Summary of a lesson in visual arts in the preparatory group on the topic “Poultry yard.” Author: Ekaterina Panina.
| Target | Expanding knowledge about poultry and their chicks. |
| Tasks | Strengthening the ability to identify the characteristic features of birds. Fostering a caring attitude towards nature. Development of communication and speech skills. |
| Materials | Toned sheets of paper, pictures of poultry, an image of a poultry yard. |
| Preliminary work | Joint reading of educational literature, fairy tales and poems about poultry, looking at illustrations for books. |
| Progress of the lesson | At the beginning of the lesson, a short warm-up is carried out: the children follow the teacher and move to the lines of a poem about a goose. Creating a playful moment: a doll comes to visit the children and invites them to look at her poultry yard; first, she asks the children riddles about birds. The doll shows the children a picture of a poultry yard. The teacher conducts a conversation. What birds are shown on the poster? Why are these birds called domestic birds? Why do people keep and breed poultry? Conducting a physical education session with a poem about poultry. Practical part: the guys make drawings with colored pencils. Demonstration of works. The guys highlight especially successful drawings. The teacher thanks everyone for the work done and interest in the lesson. |
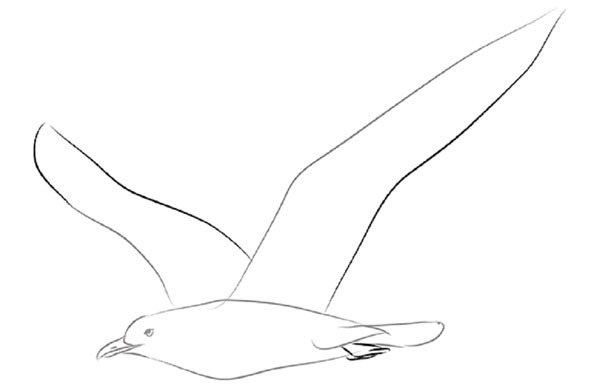
Flying bird
By studying drawn pictures of birds, they get an idea of the mechanism of movement. In flight, birds cut the air with their wings. The larger the bird, the larger its flight feathers. The shape of the wings varies. Short, elliptical ones give maneuverability, pointed ones allow you to quickly gain speed, and wide ones make it easy to soar in the sky.
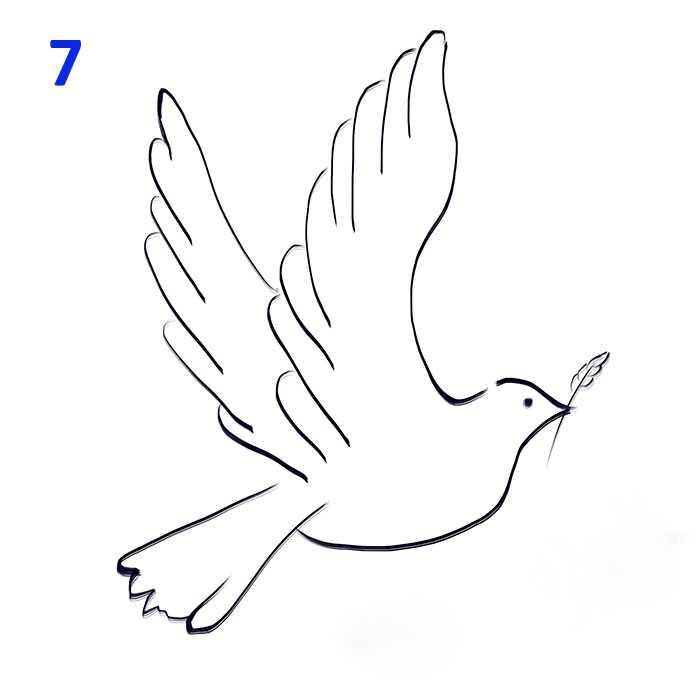
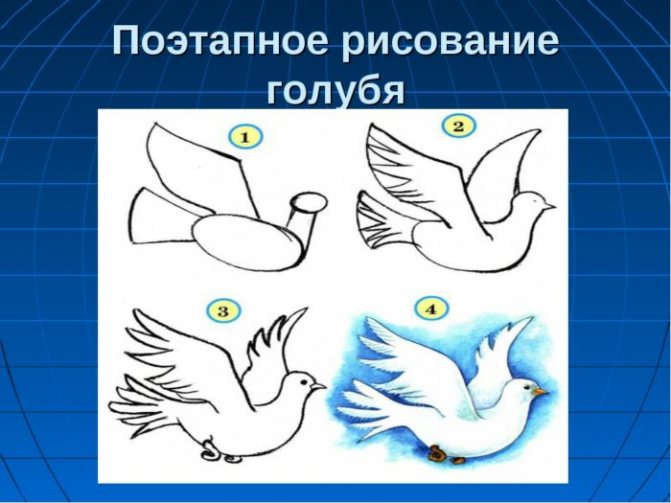
The silhouette of a flying dove is drawn with simple lines.
In the middle of the leaf, the bend of the head with a pointed beak is noted. Draw the line down, forming a convex curve of the chest and a rounded belly. This line connects to the tail.
Draw a line above the head perpendicularly upward, drawing the left wing. Feathers are depicted as wavy. The right wing is made to unfold using straight and wavy lines.
Long thin ovals are connected to form a tail.
The seagull has a different body structure, which will be reflected in the picture.
Draw a rounded head. Connect to two parallel lines forming the body of the seagull. They will separate at the end to form the tail.
Parts of the face are drawn, the eye is made round, with a small glare of light, the beak will be in the shape of a triangle.
To demonstrate flight, the open wings are drawn in a large arc crossing the body in the chest area. The borders are drawn with a wavy line. Remove unnecessary strokes.
The order of drawings on the theme “Birds”.
Pupils of the preparatory group actively develop the ability to follow the teacher’s oral instructions. Therefore, before the children complete the practical part of the task, the teacher should discuss with them in what ways and in what sequence they will draw the figure of a bird, whether they will first create a background and how, what mixed techniques are suitable for completing the task, whether it is possible to use sculpting and appliqué techniques to design of the finished drawing. Through leading questions and hints, the teacher leads the children to the recommended course of action. You can look at examples of finished works on a given topic and invite the children to determine the techniques used to create these drawings. It is allowed to use technocards with step-by-step drawing of a bird figure for those children who have difficulty completing the task.
Schemes for step-by-step drawing of migratory and domestic birds.
Instructions for drawing with a pencil Instructions for drawing with a pencil Instructions for drawing with a pencil
Instructions for drawing with colored pencils
Instructions for drawing with gouache
Instructions for drawing with a pencil Scheme for drawing with paints
Drawing scheme
Drawing Scheme Drawing Scheme
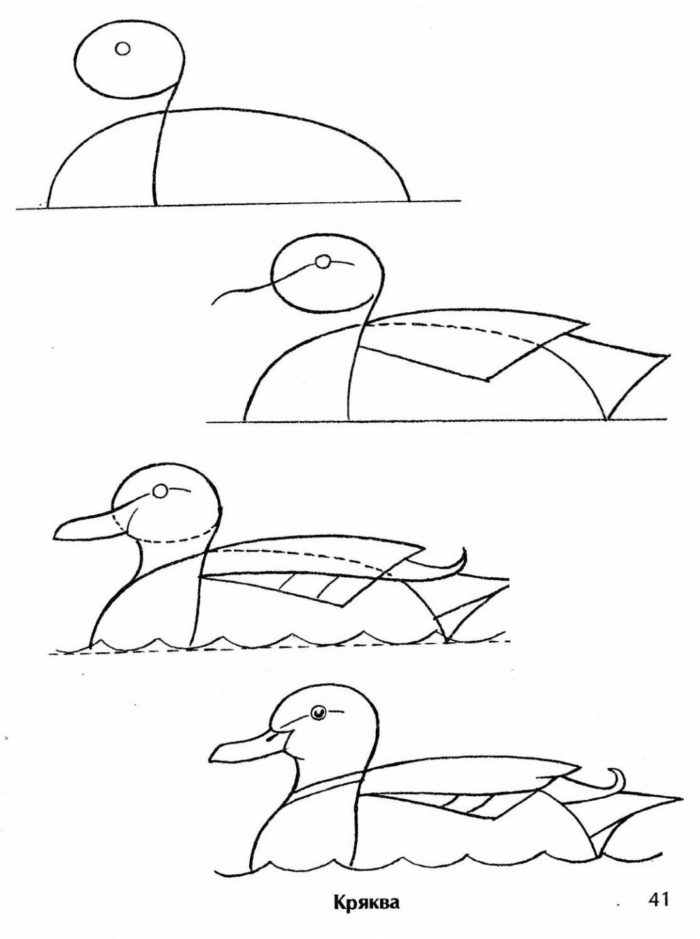
Drawing Scheme Drawing Scheme Drawing Scheme Drawing Scheme Drawing Scheme
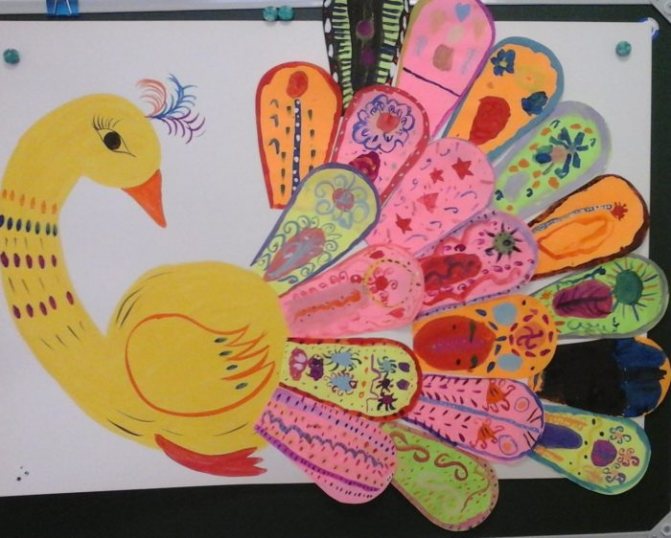
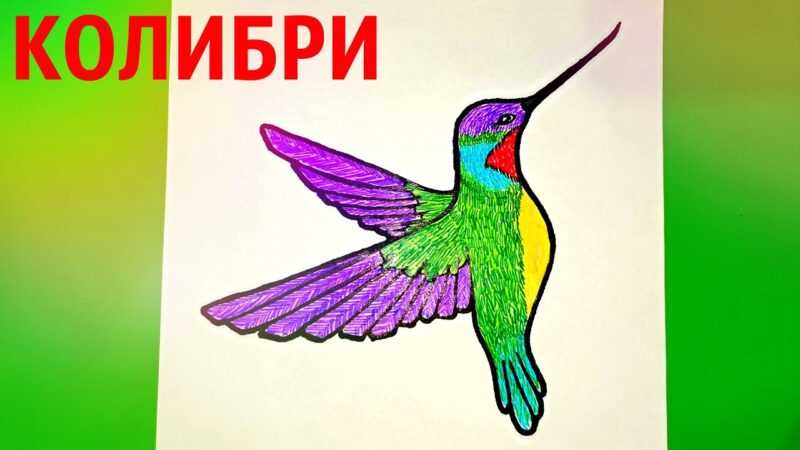
Samples of drawings on the theme “Birds”
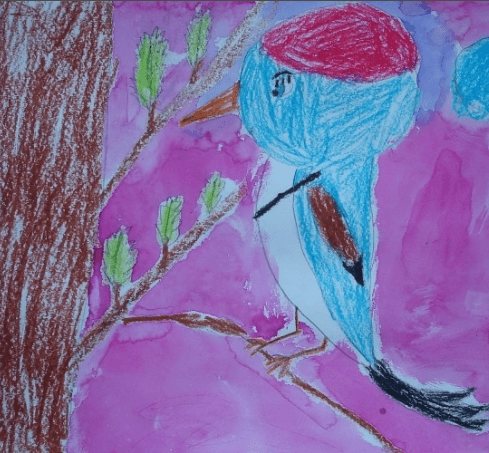
Drawing with wax crayons Drawing with gouache
Mixed media (pencil and paints)
Mixed media (watercolor and gouache)
Watercolor drawing
Drawing an episode of a folk tale Drawing with colored pencils
Gouache drawing
Drawing fairy-tale images Drawing in gouache Drawing an episode of a literary work Drawing from a preparatory group student Drawing a bird from a “drop” shape
Drawing with pencil and felt-tip pens Drawing with watercolors
Teamwork Example of an image of a bird in motion Mixed drawing techniques (colored pencils, wax crayons, watercolor) Teamwork
Pastel drawing
Drawing a fairy-tale image with felt-tip pens
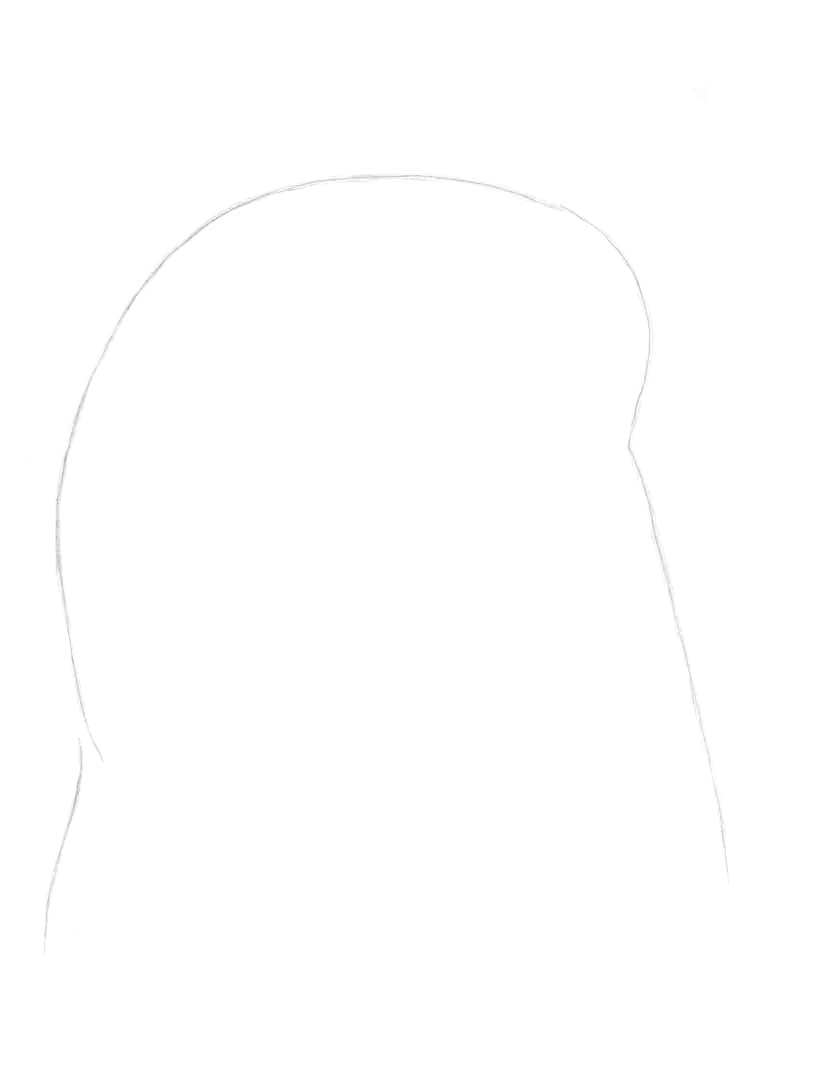
How to draw a bird with a pencil: step by step for children
Drawing a bird is a task that often faces children and their parents. Sparrows, crows, jackdaws, nightingales, bullfinches, eagles, tits and other birds are common objects in children's albums. There is also room for unusual characters - firebirds and Angry Birds. However, everything is not as difficult as it sometimes seems for beginning artists. Using visual lessons and acting step by step, step by step, you can make a high-quality and clear drawing. After several trainings in drawing birds, the child will get better and better.
Step by step bird drawing lessons
Bird drawing lessons with step-by-step photos for beginners will help artists master the art of creating birds on paper.
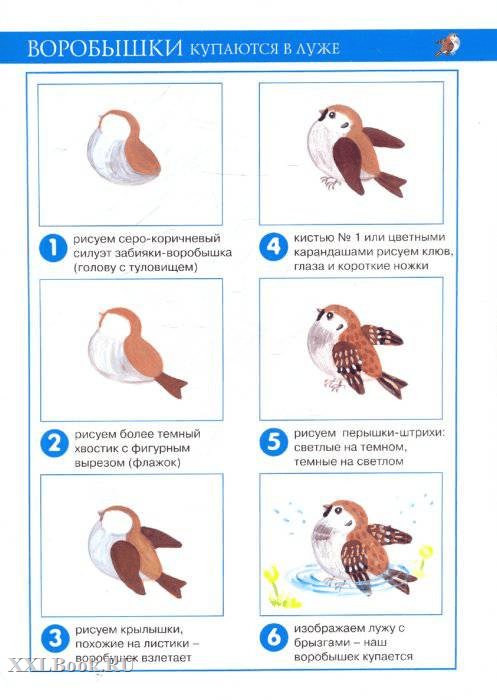
Wintering bird: drawing a sparrow
Among wintering birds, the most popular are sparrows. Creating a drawing of such a bird is quite simple if you proceed in stages.
- You need to draw an elongated oval. This is the base of the bird's body.
- At the top of the workpiece you need to draw a figure with rounded contours. This will be the head. Several straight lines are drawn below. This is the tail of a wintering bird.
- Next, the beak is clearly drawn.
- Then you need to use smooth contours to create the outline of the breast, wings and make the eye.
- You need to draw the sparrow's legs with a pencil.
- All that remains is to color the drawing using colored pencils or felt-tip pens. If desired, you can use paints.
Bird in flight: drawing a seagull
- The process of drawing a bird in flight is much simpler than it seems. Even a child can cope with the task. First you need to draw a circle, which in the future will become the head, and the body of the bird. The bottom and top of the body should be a little sharp. There is no need for roundness here. Then the eye and beak are drawn, after which the contours of the circle must be erased with an eraser.
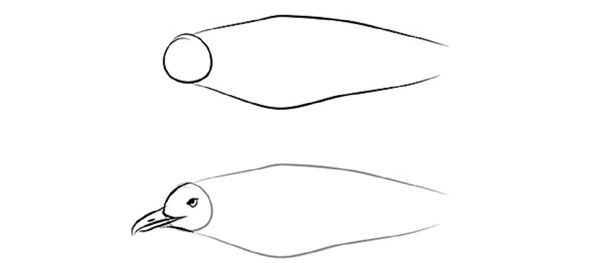
- Now we need to draw the span of the flying wings and the tail. The wing, which is located closer to the right edge of the paper sheet, should be much larger and longer than the second and the body. No need to grind!

- Next you need to finish drawing the paws and wings. The first ones need to be depicted folded tightly to each other.
- Then you need to draw lines that will make the thigh. To do this, the contour is drawn from the seagull's foot down. Next, the feathers on the tail and wings of the bird are depicted.
- It is necessary to remove all unnecessary contours.
- All that remains is to draw the shadows. The wings of the bird in flight should be made almost black and the underside of the seagull should be greatly darkened. Plus, a shadow also falls from the wing on the body. On the second wing, located closer to the left edge of the sheet, you should slightly outline the outlines of the feathers along the entire length. Similar contours need to be made on the body and around the head.
Preview:
GOAL: to teach children to sketch birds in motion, conveying the basic shape and main parts.
Practice sketching with one pencil or one paint. Consolidate and expand knowledge about wintering and migratory birds. Cultivate a caring attitude towards birds.
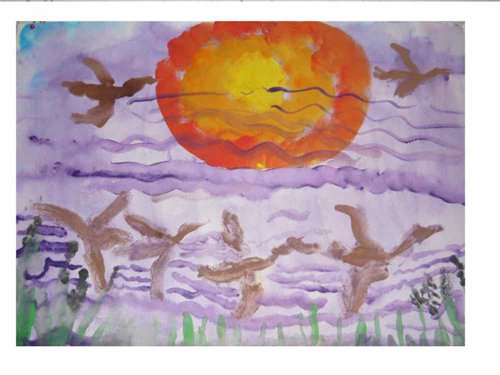
MATERIALS: Landscape sheets tinted with blue-violet color (autumn sky, simple pencils, wax crayons; illustrations depicting birds flying south; reproduction of Stepanov’s painting “The Cranes Are Flying.”
I. Finger gymnastics
Visiting the thumb Put the thumbs of both hands up
Came straight to the house: Index and middle,
Nameless and last. Alternately, the called fingers are connected to the thumbs on both hands at the same time
The little finger itself Fingers are clenched into a fist, only the little fingers point upward
He knocked on the threshold. Fists knock on each other
Together fingers are friends,
They cannot live without each other. Rhythmic clenching of fingers into fists
II. Introductory conversation
- Guys, let's remember what time of year it is (Autumn). Right. And what changes occur in nature with the arrival of autumn (Children list the signs of autumn?)
- Well done! Right! But today I would like to talk about birds. Let's remember what birds we have seen and know (Children's answers). Do they all stay with us for the winter (No? What are the names of those birds that are not afraid of the cold and stay here (Winterers? What wintering birds do you know (Sparrow, crow, tit, bullfinch, dove, owl, woodpecker, magpie?
What are the names of birds that fly away to warmer regions (Migratory? Yes. That’s right. What migratory birds do you know (ducks, swans, cranes, swallows, rooks, starlings, cuckoos? Why do you think they fly away (It’s cold for them here) and have nothing to eat?)
- Right. Flying birds have nothing to eat in winter. Many migratory birds eat insects. However, with the onset of cold weather, all insects hide, so birds fly to warmer regions in search of food.
– Look carefully at the illustrations.
Pay attention to how the birds fly. Waders, herons, and ducks fly in a line, in front or in a transverse row. Geese most often fly in a school. Geese, cranes, swans and other large birds fly in an angle, or wedge.
- Guys, let's rest a little. Imagine that you are birds and repeat after me:
Birds jump and fly. They wave their arms and jump up and down
Birds collect crumbs. "Peck"
The beaks were cleaned. Stroke your hands and noses
Birds fly, sing, wave their arms
The grains are pecked. "Peck"
V. Independent activities of children
– Have you rested? Fine! And now I suggest you draw birds flying south. Look what's on your tables (Children's answers? First we will make a sketch with a simple pencil, and then we will outline and color it with wax pencils.
During the practical part, explain to the children that sketches should be drawn with light lines; they need not be finished, not finished to the end; you can leave the failed form and start another;
I need to try to make more sketches. The resulting sketches are outlined with a wax pencil.
During the lesson, the teacher analyzes the images created by the children, explains mistakes, and guides them in searching for the correct representation of form and movement.
VI. Lesson summary
Educator: Guys, our lesson has come to an end. You have learned a lot about the life of birds. Unfortunately, for a very long time man lived with the confidence that he could take everything from nature without giving anything in return. And now, as a result of thoughtless human activity, our planet is dying. Many plants, animals and birds are completely disappearing or are on the verge of survival. That is why people who cannot look at the death of living nature with indifference have created several volumes of the Red Book, where these plants and animals were listed. They can still be saved.
Educator: Don’t forget that birds are our friends, younger brothers, and we, as elders, must take care of and protect them.
At the end of the work, the children attach the drawings to the board. Demonstration of their works by children; choose the most neat and beautiful works with the children.
– Children, what did we do today (Children’s answers? You did well, you all tried your best and you did a good job. Thank you. This concludes our lesson.)
On the topic: methodological developments, presentations and notes
Children draw according to the “Development” program on easels, and paints are mixed on a palette. Paper size only A3.
Summary of the integrated lesson “Birds” (on getting to know the world around us) + drawing “Invitation card” in the senior group.
Very often children are careless towards the environment and animals. This is primarily due to the lack of proper knowledge. In kindergarten, children have been developed for each age group.
Summary of educational activities “It is difficult for birds to winter, the birds need to be helped” Integration of educational areas (in accordance with the Federal State Educational Standard): cognitive development: social and communicative times.
Games and exercises on the topic.
Summary of continuous educational activities “It is difficult for birds to winter, we need to help the birds.”
Source