Distinguish between "left" and "right"
For studying in general and so as not to confuse the concepts of “clockwise” and “counterclockwise” as well.
Have a general understanding of time
We explain to the child the concepts of “yesterday”, “today”, “tomorrow”; "past present Future"; “morning”, “day”, “evening”, “night”, “day”. Often children themselves associate time with a specific event: “in the morning I did exercises”, “at lunch I ate soup”, “before going to bed I brushed my teeth”, etc. Therefore, when explaining the above concepts, it is best for a parent to tie specific events to them.
Correct your child carefully if he makes mistakes somewhere. It is important that he does not develop a false understanding of time.
Have you successfully completed the preparatory stage? Now we can teach the child to understand time using a clock with arrows.
At what age is a child ready to understand time?
Obviously, it is best for a child to understand how to tell time by a clock before he goes to school. It’s good if the baby himself shows interest in this topic, asking his mother questions: “Is 10 minutes a very long time?”, “How soon will we go for a walk,” etc.

It’s great if the child himself shows interest in the topic of time, the structure of clocks, and asks his parents relevant questions
Before starting training, parents should give the child a general understanding of time (how it moves, what the past, present and future are, the time of day).
This is usually explained to preschoolers in kindergarten. However, not all children attend preschool or do so irregularly.
In addition, in order to understand how the clock works, the child must be able to count to 60 and know how the indicated numbers are written. It will also be great to understand counting with fives and tens (this is not necessary, but will be just perfect).
Therefore, the specific age at which you need to start learning to tell time using a clock cannot be stated unambiguously (each child is individual, as well as the pace of his development). Some people are ready for this as early as 5 years old, others only at 7 years old.
Materials with which we study time
Let me tell you how we managed to figure out this issue.
We teach time using some materials, some of them are purchased, others I made myself and will let you download. Something can be replaced, I will try to give my recommendations. One of the main parts of our knowledge of time was Galina Petrovna Shalaeva’s book “Clocks and Clocks”. I will describe our classes in detail so that it is clear what path we followed in our training. I think that resourceful mothers will be able to organize this process without this book. Although I will still note that we really liked it and will suggest that you can download it on Ozone.
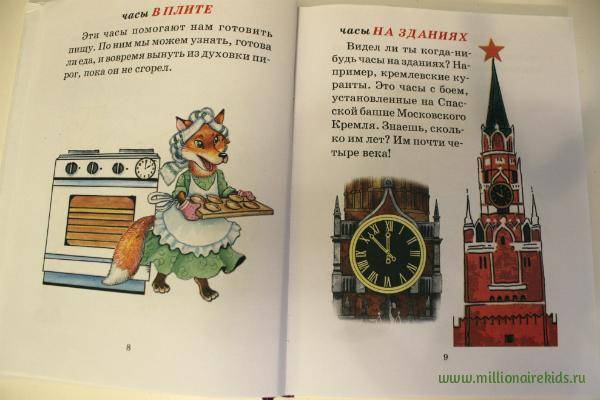
First we found out what kinds of watches there are and why we need them. Literally every type of watch is presented on the page, the text is large and clear:
- wrist;
- desktop;
- street;
- station;
- clock in the stove;
- on buildings;
- electronic;
- alarm;
- with a cuckoo;
- floor;
- floral (these are flowers in Moscow on Kutuzovsky Prospekt);
- underwater;
- airport hours;
- wall;
- sand.
We took out all of my mother’s and father’s watches, the child was simply stunned by their number and shine, he looked like a little crow. We walked around the apartment and looked at what watches we had. It turned out that there were wall-mounted, electronic, alarm clocks, sand clocks.
If you don't have a book like this, you can print out pictures of the missing watch. Then explain to your child about each type in your own words. Or purchase a copy of the book online, it is available in many online stores.
What is day and night: download the book
While reading the book, we talked about what a day is, what do they consist of? From night and day. No wonder they say: “Day and night - a day away.” There are 24 hours in a day. During this time, planet Earth makes one full revolution around its axis. We've already gone through this when... Alexander read a poem on the topic, compiled into a book I made on Doman.
You can download it for free through this link
. Before downloading, review its content to see if it is suitable for your child’s age. If you are not familiar with the Doman method, let me clarify that the book was made for reading practice for preschoolers. There is text on one page and a picture on the other. For printing, use the 2 pages on 1 sheet function.
We read Shalaeva’s book gradually, on the first day we read about what kind of watches there are and looked at the available ones. On the second day about the dial and hands. And when we got to the definitions of “exactly one hour”, “half an hour”, our main assistants were our watch with rotating hands and the Kumon workbook “Learning to tell time. An hour and half an hour.”
Each lesson in the notebook was displayed on our watch. Thus, the child does not just draw arrows on the dial, but practices setting them independently.
A detailed description of the workbook can be read in the article.
Productive and easy techniques for learning how to make a clock
It is advisable to again divide learning to tell time using a clock into separate lessons.
Memorizing and understanding numbers
Many older preschoolers can already count well, some children even up to a hundred. However, in this case it is important to remember the numbers that are multiples of five (5, 10, 15, 20, etc. up to 60).
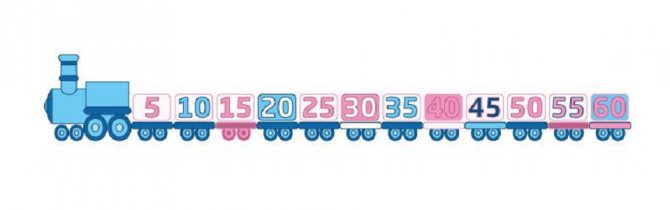
Even if your baby can count well, it is important that he identifies numbers that are multiples of five.
We can explain that we are interested in numbers that end in 0 and 5.
Getting to know the dial and hands
It is easier to introduce a child to the dial on a toy watch. They can be flat or more voluminous. The main thing is that the numbers are clearly visible and the arrows rotate easily.
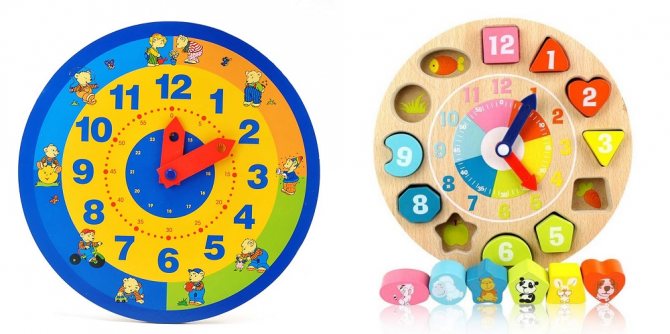
It is better to teach your child not on a real watch, but on a toy one, where the numbers are clearly visible and the hands rotate easily.
You can make such a thing yourself from ordinary cardboard or a disposable plate.
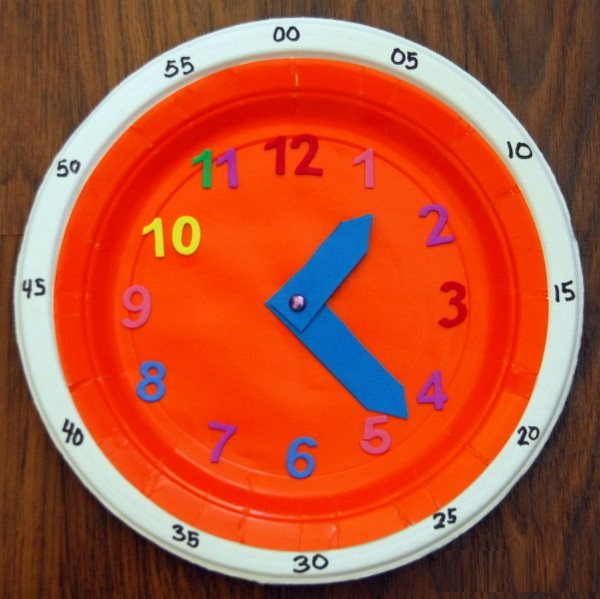
You can make a training clock yourself
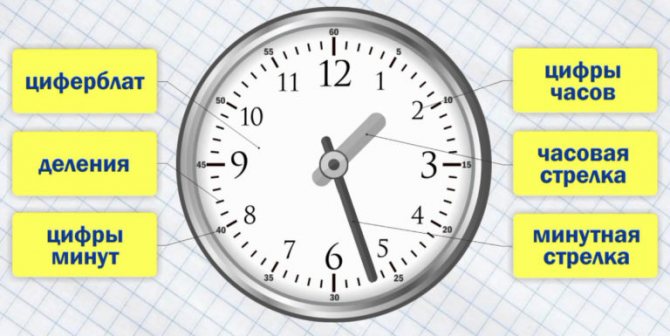
You need to tell your child that the surface of the watch is called the dial. It can be compared to a pie or an orange: it can be mentally divided into pieces or slices. There are two hands on the dial: a shorter one (it shows the hours) and a longer one (it shows the minutes).
It is necessary to briefly mention the second hand and tell you that it is not found on all watches. This is an arrow that moves very quickly, because a second is a very short unit of time, it is literally one moment.
Next, the adult explains that although there are 24 hours in a day, only 12 digits are reflected on the dial. The thing is that during the day the hour hand (short) goes around the circle twice.
We learn to determine the clock on a simulator with a small hand
First, you should focus the child’s attention on the movement of the hour hand (we don’t touch the minute hand yet). For example, we put the short hand on o and explain to the baby that the clock shows 2 o’clock (if the design of a toy clock allows, the minute hand can be removed for now).
Then the preschooler is asked to set the time himself, which the adult will tell him.
First, let your baby learn to tell the exact time (hours only, no minutes)
Let's move on to minutes
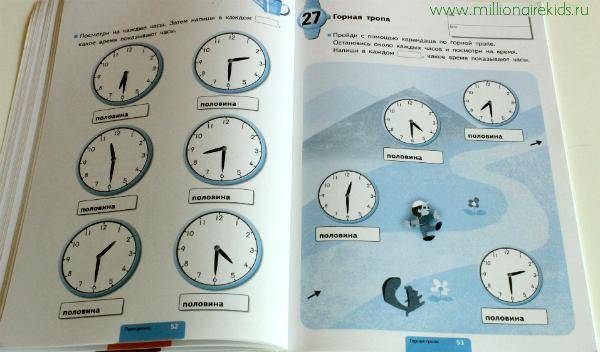
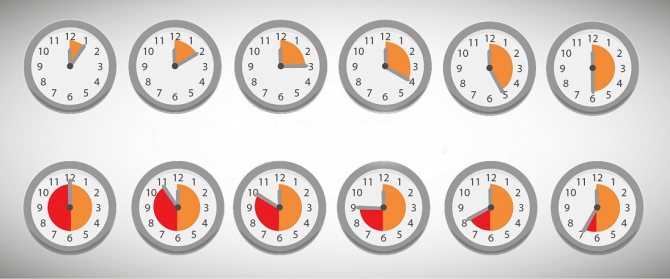
Then the minute hand joins the teaching. First, it is best to explain to a preschooler the concept of “half an hour” - when the long hand is on o (at the same time “30”). You can compare it to half the pie.
After this, we move on to the concept of “15 minutes” (the number “3” on the dial, or a quarter of the pie).
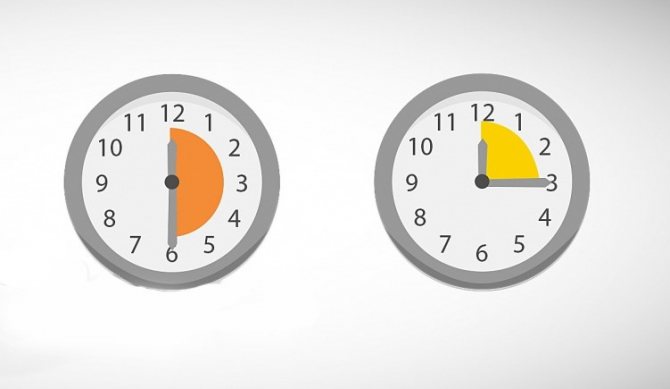
At first it’s easier to show what half an hour and 15 minutes are
After this, we move on to the remaining minute intervals - we show the child all the possible options and invite him to independently set one or another according to the instructions of the adult.
Let the preschooler show a variety of time intervals in minutes on the clock
It may be a little difficult at first, but repeated repetitions will do the trick. In addition, to make it easier to count large intervals, you can first divide them into two parts: 30 minutes and 10 minutes - this turns out to be 40 minutes.
Then you should tell the child that the minute hand can stand not only on a mark that is a multiple of five, but also on other divisions (for example, it can show 6, 14, 27 minutes, etc. You need to draw the child’s attention to the fact that these divisions most often are not signed, but simply marked with short segments or dots to avoid cluttering the dial.
Please note that the arrow may not always point to a multiple of five.
It's also worth noting that adults sometimes round up time. For example, if the minute hand shows 29 minutes, then they often say “it’s 30 minutes now,” etc.
We combine hours and minutes and teach how to tell the time on a watch
When the baby learns to separately show the given hours and minutes on the dial, you can combine these units. Again, first the adult shows various examples, for example, 2 hours 15 minutes. Then the preschooler starts training.
There is one caveat here. The child must learn that when the minute hand moves, the hour hand moves a little. For example, if the time is 5 hours 30 minutes, then the hour hand will not be on o, o in the middle between “5” and “6” (After all, it is not exactly 5 o’clock, but a certain time has passed).
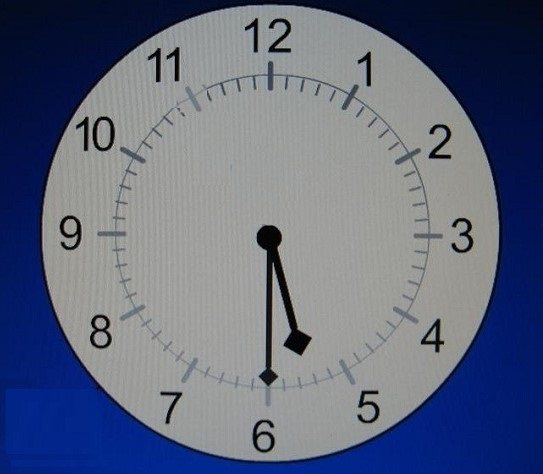
The child must understand that when the minute hand moves, the hour hand also moves slowly.
How to clearly explain “day” and “night” time
And the last stage of teaching is to explain to the child that there is “night” and “day” time (we already told him earlier that there are 24 hours in a day, and the hour hand goes around the dial twice during this time).
The best way to deal with this complexity is to use a special simulator that you can easily make with your own hands:
- You need to cut out two cardboard circles of the same size, but different colors. The first one will be “daytime”, numbers from 1 to 12 are written on it. The second one, accordingly, will be “nighttime” (numbers from 13 to 24). Small cuts are made on the first dial so that the number can be slightly bent. Arrows are also made.
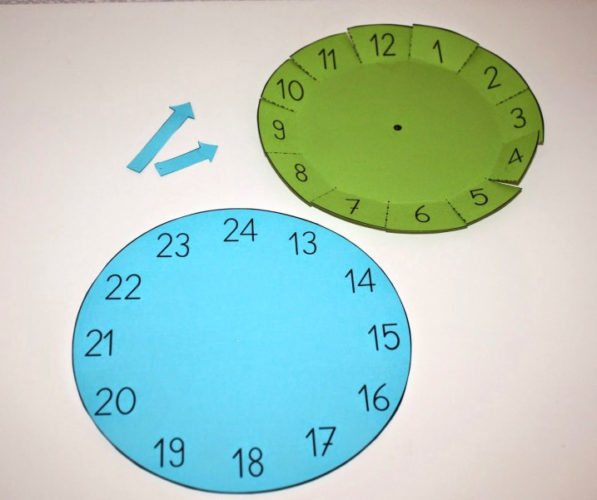
You need to cut out two dials of different colors and sign different numbers on them
- The dials are fastened together (they are fixed by arrows). At the top is the “day” part. Then we show the child, for example, 4 o’clock in the morning and show which “night” number corresponds to this (it will be 16 o’clock).
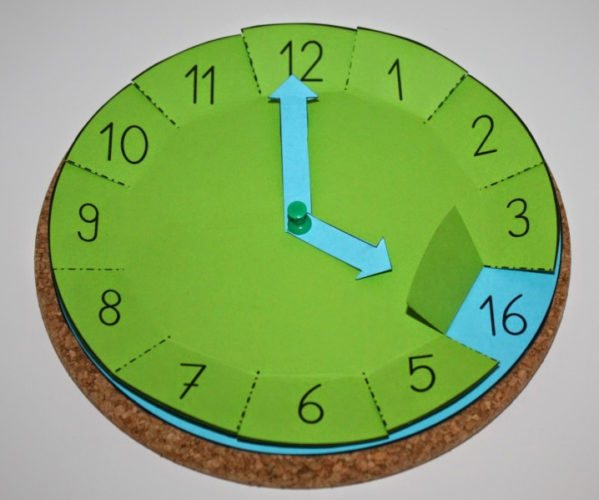
First, the adult shows the “day” hour, and then, bending the window, demonstrates the “night” hour.
It should be understood that the division into “night” and “day” time is quite arbitrary. After all, 2 hours is, in fact, night, not day, and 15 hours is day, not night. The child just needs to understand that when we say, for example, 19 o’clock, then it is evening, but the hour hand will point to the number 7, etc. And he can practice this on the specified simulator.
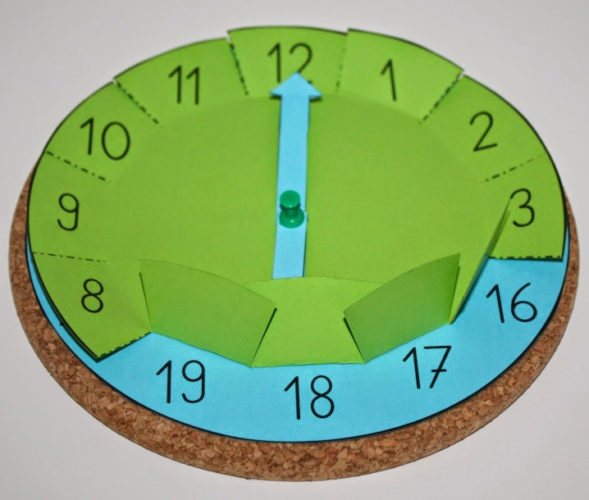
The simulator will help the child remember which “night” numbers correspond to “day” ones.
Time-telling tasks for kids
To consolidate the results obtained and check, the baby is offered to play games. You can remove the wall clock and set a specific time. For example, 10:40, and the baby must say what time it is. The arrows can be moved until he begins to identify numbers more confidently, but it is important not to tire the child. You can play the game in reverse: the adult calls the time, and the baby sets it on the dial.
For the next task, you will need two dials on which you need to set different times (for example, 12:15 and 3:40). The parent shows the dial to the baby and asks what he usually does at this time (has lunch, walks, sleeps).
During the learning process, it is important to be patient and accept failures calmly. It is better to once again praise the baby for his successes, and repeat what is poorly remembered several more times.
Let’s start with the very concept of time: how to navigate it, what a day is
As has already been said, before introducing a child to a clock with hands, it is necessary for him to understand the very concept of time (this can be done long before lessons with a clock, as early as 3–4 years old). The difficulty is that time is abstract; it cannot be seen or touched with your hands. Information should be divided into specific blocks.
- Time does not stand still, it moves all the time, “flows”. There is the past - what has already happened and will never return, the present - one moment that is happening now, the future - events that are yet to come. It is necessary to give specific examples: “This morning you walked in the yard, now we are talking, and in the evening we will have a delicious dinner.” It is also useful to look at a photo album (“Look how small you were and what you have become”). You should definitely use didactic materials, for example, the game “First and Then”. The child is offered pictures of objects and objects, and then other cards depicting what happened to them over time. The preschooler's task is to make pairs of cards.
- There are seasons that follow each other. This is quite easy for a child to understand. The explanation is again supported by clarity. It should also be mentioned that the year is divided into months, the month into weeks, and each week has 7 days.
- The key concept in this case will be parts of the day. The child must learn that the day is divided into 4 parts. In total they last 24 hours. Pictures, as well as associations (“In the morning you go to kindergarten”, “In the evening you go to bed”) will again help you remember the concepts of “morning”, “day”, “evening”, “night”. You can navigate by the sun: in the morning it just rises above the horizon, during the day it is high in the sky, in the evening it descends again, at night the sun disappears, but the moon is visible in the sky).
Kinds
Before teaching children to tell time, you should tell them that there are different types of watches, photos and pictures of which you will find on our website. For example, there are sand clocks, solar clocks, wrist clocks, wall clocks, children's clocks, and even antique cuckoo clocks. Different types of watches work differently. Let's look at each of them.
Solar
The very first clock known to mankind was the sun clock. The first people were guided by the position of the sun, and therefore time depended on it. The sundial can be drawn on the sand or on the ground, but can be made from scrap materials. The sundial has an arrow pointing north. To draw or make a sundial, just attach the arrow to the dial and position it in the north direction. The shadow of the arrow will show the exact time.
Sand
This is an unusual watch. Hourglasses do not have a dial. They consist of two communicating vessels into which sand is poured. When an hourglass is turned over, sand pours out of one container into another over a certain amount of time. You can see in the photo what an hourglass looks like on our website.
Wrist
The most convenient and compact watches are wristwatches. They consist of a small dial and a strap with which the wristwatch is secured to the hand. Wristwatches are very convenient for a person: with their help you can always find out what time it is.
Vintage cuckoo clock
Today, you can only find an antique cuckoo clock in your grandparents’ house. Few people use them because antique cuckoo clocks are very bulky and take up a lot of space. In such a watch, every hour an artificial cuckoo peeked out from the dial and made sounds. That is why such a mechanism is today called an “antique cuckoo clock.”
Wall mounted
There are also wall clocks. They don't take up as much space as an antique grandfather cuckoo clock because they hang on the wall. Wall clocks can be of any shape, and the dial can be of any size. Surely there is a wall clock in every home.
You can see what this type of watch looks like in the photo on our website.