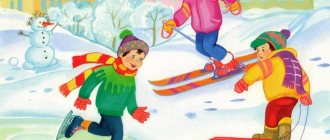
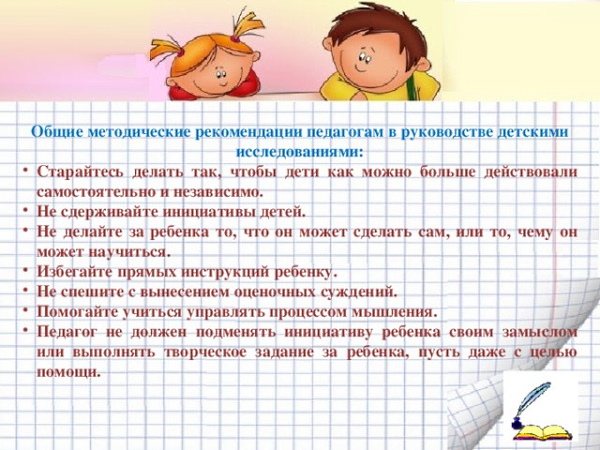
Organization of experimental activities in the senior group
Experimental activity in the senior group is a particularly important process that allows preschoolers to form or expand existing ideas about objects of inanimate and animate nature, which is possible through independent knowledge.
This technique is characterized by its implementation in almost all cases of the teacher’s work, from walks and extracurricular activities, to certain leisure activities based on the topic of the conversation.
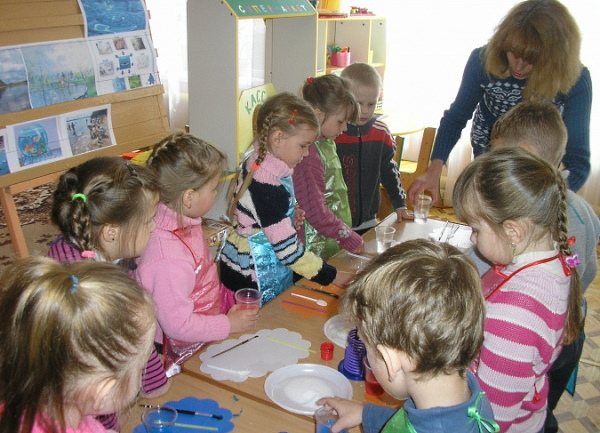
Such a research process significantly increases the overall motivation of students, because in this case there is a scientific methodology - preschoolers experience bright and positive emotions that develop as a result of a sense of self-worth and responsibility within the framework of a certain work.
In addition, the preschooler enthusiastically expects visible results from his own work and tries to gain more information and experience from the teacher and the world around him.
Objectives of experimental activities
Qualities characteristic of research activities are observed in a child from the age of 2. In this case, experiments with objects or phenomena are carried out using the simplest actions: smear paints on a sheet, test something for strength, taste it.
The child reaches out to each object with only one purpose - to explore it.
The development of fine motor skills and general coordination of movements allows the child to conduct his own research much more intensely, while the factor of spontaneity in the experiment is preserved in children up to 5-6 years old.
Preschoolers in the middle group are distinguished by longer observations, through which they can develop vocabulary, due to which there is a desire to use independent activities with the help of which they learn acquired skills.
Therefore, the main goals pursued by experimental activities in a children's institution are characterized and subsequently introduced into the pedagogical process based on the main typology of the task.
Task description:
| Task | Description, details |
| Educational | The child develops a general idea of certain objects and phenomena, which allows them to identify their main qualities and properties. Also, the preschooler begins to determine the presence of any relationship between the objects under study. The ability to draw conclusions or discoveries is formed. |
| Developmental | In this case, the main emphasis is on the development of cognitive or intellectual abilities, the child begins to generalize and analyze. The preschooler also develops fine motor skills, better understands visual, sensory or auditory sensations, improves memory, attention and speech skills. |
| Educational | The teacher creates a unique atmosphere in which the child’s motivation to independently explore the world around him increases. The preschooler develops the skill of working within a team or group and begins to feel mutual assistance. The skills of accuracy and perseverance are also improved. |
During direct exploration, preschoolers acquire important skills that allow them to experiment with objects or the environment. They also learn to draw various conclusions and conclusions based on the experiments performed.
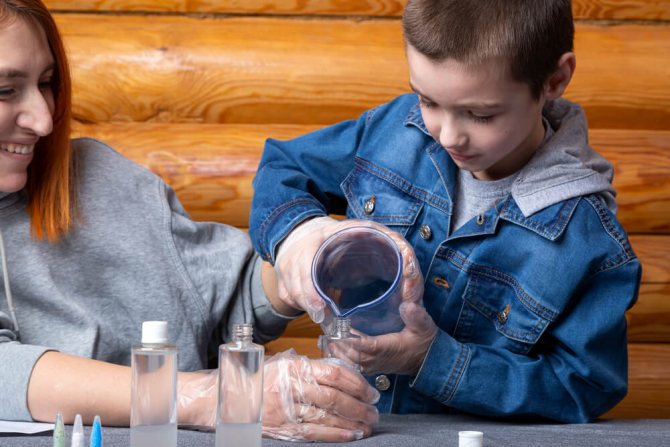
Experiments with water for children
Experiments with water can be carried out with children of any age - such experiments are simple, spectacular and safe. Children can carry out most of the experiments independently under the guidance and supervision of an adult.
Storm (tornado) in a bottle
For children from four years old.
The kid will see how a spiral funnel-shaped vortex forms in a bottle of water - a child of preschool or primary school age is unlikely to understand such complex terms, so you can simply say that now you yourself will make a storm using ordinary water.
What you will need:
- two plastic bottles with a volume of 1-1.5 liters;
- insulating tape;
- water.
Step-by-step instruction:
- Pour water into one bottle so that there is about 1 centimeter left to the neck.
- Using electrical tape, attach the second one on top of the first bottle - the necks of the bottles should coincide with each other.
- Turn the resulting structure over and shake it well - the water will rush into the bottom bottle, simultaneously forming a water vortex.
- By constantly turning the bottles over, the experiment can be repeated many times.
Video instruction:
Experiment with water, oil and salt
For children 4 years and older.
The experience will demonstrate to the child the properties and features of the interaction of substances that we use every day.
What you will need:
- water;
- vegetable oil;
- salt;
- food coloring;
- cup.
Step-by-step instruction:
- Fill the glass two-thirds full with water.
- Pour in a little vegetable oil - it is lighter than water, and a layer of oil will remain on top without sinking to the bottom of the glass.
- For greater clarity, pour food coloring into the glass.
- Slowly pour salt into the resulting solution - about one teaspoon.
- You will see how the oil and tinted salt sink to the bottom - although the oil is lighter than water, the heavier salt drags the oil down with it.
Video instruction:
Walking Rainbow
For children from 4 years old.
During the experiment, the baby will study different colors and simply admire the unusual phenomenon. Using an example, a school-age child can be told a little about the principle of communicating vessels: that identical liquids in interconnected vessels are always at the same level at rest.
What you will need:
- seven disposable cups;
- water;
- multi-colored food colors;
- paper towels.
Step-by-step instruction:
- Pour water into four glasses: the glasses should alternate - full, empty, full again, empty again, the row ends with a glass filled with water.
- Add food coloring to cups of water.
- Fold the paper towels 4-5 times to make tubes - make six paper tubes in total.
- Using paper tubes, connect adjacent glasses: each glass, except the first and last, will contain parts of two tubes.
- Wait until the stripes turn different colors - you will get an unusual walking rainbow.
Video instructions for the experiment:
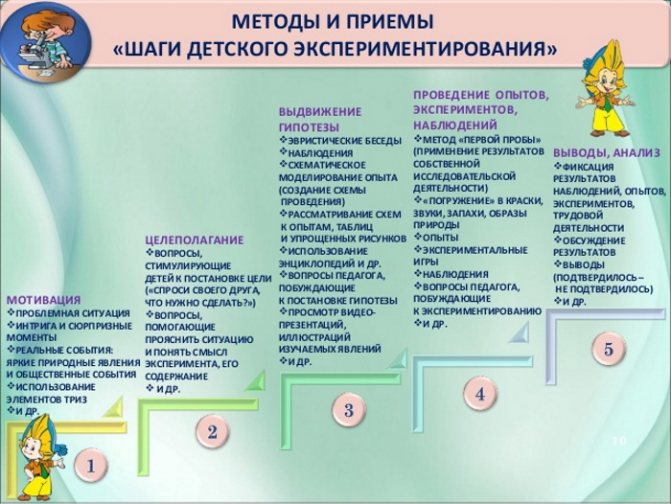
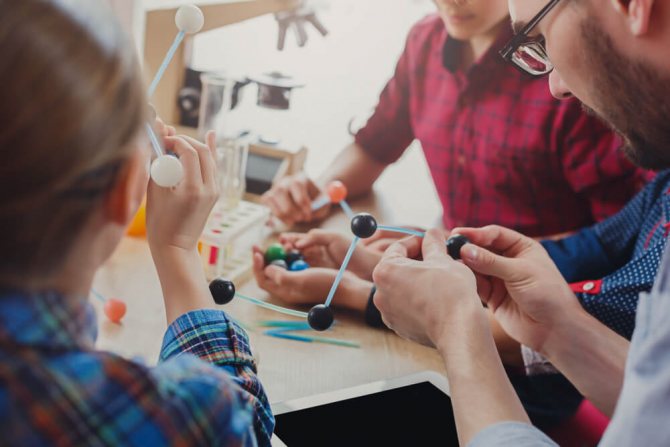
Methods and techniques of experimental activities in preschool educational institutions
Experimental activities in the senior group are characterized by the presence of many techniques and methods that make it possible to improve teaching activities, as well as develop children’s independence skills.
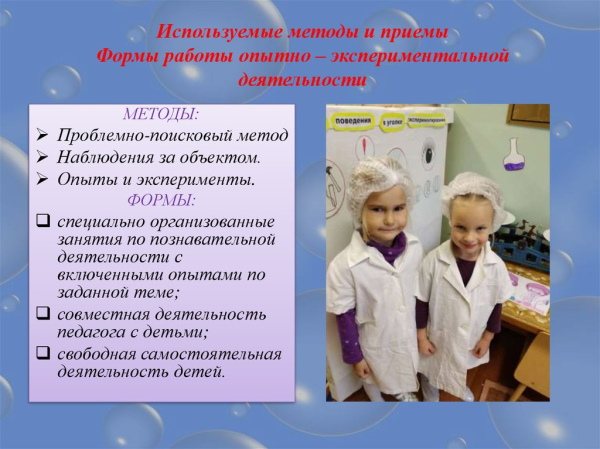
The most relevant of them are:
- Search-problem technique. In this case, through the efforts of the teacher, a problematic situation is created that the preschooler must solve, including putting forward his own hypotheses and methods. This technique is one of the leading methods, which characterizes the high efficiency of modern education. Thus, by searching for a problem, children’s motivation is improved through direct communication with the teacher. The child strives to obtain a high-quality result, thereby increasing his activity in research.
- Observation activity of the object. The perception or sensation of certain objects can be organized both on the street and in a preschool institution. So, directly on a walk, the child begins to immerse himself in the environment, exploring new visual, auditory or tactile images. Such observation refers to one of the most active methods of interaction.
- Experiments and experiences . With the help of various experiences and experiments (throwing things on the floor, trying to break something, make a sound, etc.), the child learns to understand the basic features, properties and qualities of objects or individual phenomena. Students are very enthusiastic about the substance being studied, especially if they already know it. In this case, the preschooler begins to take the initiative and tell other peers about his own experience. This technique can effectively develop activity, observation and independence in a child. It also helps create a friendly, team atmosphere.
The above methods and techniques must be used together. When they are used separately from each other, the main pedagogical goal is significantly lost, which leads to a deterioration in the research process.
Modern pedagogical practice indicates the high efficiency of using these methods in relation to various natural phenomena. In this case, it is especially effective for children to observe living plants, animals or various phenomena.
A good teacher will definitely try to introduce such a feature into educational topics, which will significantly increase the quality of education.
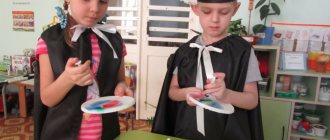
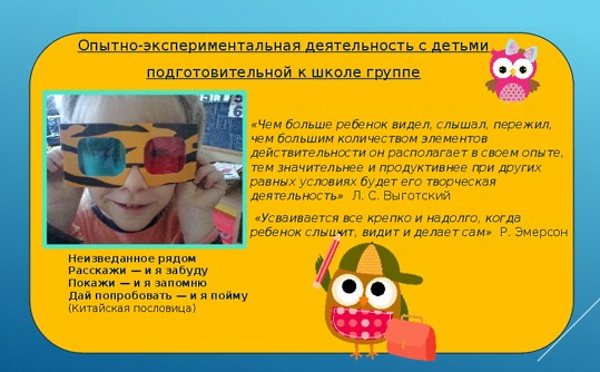
Card index of experiences and experiments for children of senior preschool age
CARD FILE OF EXPERIMENTS AND EXPERIMENTS FOR SENIOR PRESCHOOL AGE.
The main requirements of preschool education in accordance with the Federal State Educational Standard for Preschool Education is the formation of the child’s cognitive interests and cognitive actions in various types of activities. Among the means of developing the cognitive and research activities of preschoolers, children's experimentation, aimed at satisfying the child's need for new impressions, deserves special attention, which is the basis for the emergence of activities aimed at understanding the world around us.
Developing as a cognitive and research activity aimed at knowing the qualities and properties of objects in the surrounding reality, their transformation, children's experimentation helps broaden their horizons, enrich the experience of independent activity, awaken curiosity, children learn to think, analyze, draw conclusions, and is an urgent problem of modern preschool education and education. During experimentation, situations are created that the child resolves through experiments and, by analyzing, draws a conclusion, independently mastering ideas about a particular physical law or phenomenon.
I present to you a card index of experiences and experiments for senior preschool age, which you can use in your teaching activities.
TO

art library of experiences and experiments
Topic: “Magic Magnet”.
Handout
: magnets; objects made of different materials - metal, rubber, wood, plastic, paper; paper clips.
Preliminary work.
Conversations about materials and their properties.
STROKE:
I show the children a magnet.
Educator:
Here in front of you is an ordinary magnet,
He keeps many secrets within himself.
- If a magnet is so strong and attracts objects made of iron, then maybe it should attract other objects as well? To test this, let's experiment. (Children pass and sit at tables)
The important thing is experimentation! Every moment of it is interesting to us.
Each child has a set of objects made of iron, wood, plastic, paper and glass.
— Take a magnet and determine for yourself which objects are attracted and which are not. (Divide into two groups, put in one plate those objects that are attracted to the magnet, and in the other - not). Children draw conclusions about which objects are attracted by a magnet and which are not.
— Zhenya, tell me, what objects are attracted to a magnet? What are they made of? So what are they like? (metal). - Anya, what objects are not attracted to a magnet? — The plastic spoon was not attracted to the magnet, the eraser was not attracted, the wooden cube was not attracted, and the paper toy was not attracted either. This means that a magnet only attracts metal objects.
Each child is given a piece of paper with a picture of various objects around a magnet: a needle, a paper clip, a cone, a button, a cup, a spool of thread, etc. The child must draw an arrow from the magnet to the object that it attracts. (Let’s clarify what happened).
I show the children wind-up toys, a duckling and a frog, but I can’t start them, because... the key accidentally falls into a bowl of water. Condition: the toys will be started by the one who can get the key without getting their hands wet. The water cannot be drained, because there will be no place for the duckling and the frog to plop down (we take out the key using a magnet) - we repeat the experiment twice.
Recall with your children the fairy tale “Cinderella”, where the evil stepmother mixed lentils with peas and forced Cinderella to sort them out. Who helped her? (Birds). And now the evil stepmother mixed the buckwheat with screws, bolts and nuts and again forced Cinderella to sort it out, the birds cannot help this time, they are afraid of breaking their beaks. - Maybe we can help? How can I do this faster? (Using magnets). All children take magnets and choose screws and nuts. (They stand around the steel on which there is a tray with cereal). The children sit at the tables.
Educator:
-I am a sorceress and can move objects without touching them with my hands.
I move a magnet under the table and the key moves. And I move the other one from above, above the key. If the children guessed it, I suggest they do the same with other metal objects.
We conclude: neither water, nor wood, nor plastic, nor other obstacles interfere with the magnet. - Do you want to be wizards? (I show how you can make a long chain of 4-5 pieces from paper clips). The magnet attracts a paper clip to this paper clip - another paper clip, etc. They're holding on for now. I propose to compete to see who can make the longest chain.
OOD – experience in the senior group.
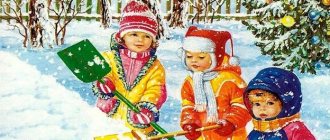
Topic: "Snow and Ice."
Target
: introduce children to the physical properties of ice and snow; teach children to solve cognitive problems and draw conclusions; activate the dictionary by entering words: snowfall, thaw.
Equipment:
two glasses: with ice and with snow, pictures depicting snow and ice, pictures depicting winter fun.
STROKE:
Educator:
-Today we will conduct experiments and find out how snow and ice are similar to each other and how they differ.
Experience No. 1
. "Color determination".
What color is the snow? (white) What color is the ice? (colorless). If children name white, blue, gray, then you need to show them these colors for comparison.
Experience No. 2
. "Defining Transparency."
The teacher places a piece of ice and a lump of snow on the color picture. Offers to compare where the picture is visible and where it is not. The children conclude: you can’t see under the snow, but you can see under the ice. This means that the ice is transparent, but the snow is not. A minute of rest: children imitate the movements of skiing, playing snowballs.
Experience No. 3
. "Impact of Temperature".
Let's look at the snow and ice that were in the cups. What happened to them while we were playing? (They melted) correctly, under the influence of heat the snow and ice turned into water. This means that snow and ice are formed from water under the influence of frost. Conclusion: Let's now put everything we've learned together. Snow is white, opaque, loose, free-flowing, and turns into water under the influence of heat. Ice is colorless, transparent, fragile, and turns into water under the influence of heat. What do snow and ice have in common? Snow and ice are formed from water under the influence of frost. Well done, our experiment has come to an end. During the walk, the children explore the snow and ice once again.
Section "PHYSICS"
Experience. "Cold boiling water."
Target:
make water boil with one touch. Material: handkerchief, clean glass with smooth walls, pharmaceutical rubber band.
Progress:
Actions are performed together with children.
- Moisten a handkerchief with water and squeeze;
- fill the glass to the top with water;
- cover the glass with a scarf and secure with an elastic band, wrapping it around the glass;
- press the scarf in the middle with your finger so that its middle dips 2-3 cm into the water;
- lift the glass and, holding it by the bottom, turn it upside down;
- take the glass with your other hand under the hanging scarf and hold the glass.
Here one hand will support the scarf, and the free end will fall onto the hand. Use your free hand to push down the bottom of the glass.
Result:
water does not pour out of the glass. It seems that she is boiling. Conclusion: water does not seep through the scarf because the small voids in the fabric are already filled with water. We push the glass down. The fabric sags outward. Because of this, a vacuum is formed in the glass, air is pushed through the scarf. Air bubbles form in the water, causing it to appear to be boiling.
Experience. “Drowning or not drowning?”
Target:
demonstrate that salt water is denser than fresh water.
Material:
salt, two transparent glasses, two eggs, spoon, water.
Progress:
- pour water into a glass and lower the egg into it using a spoon;
Result:
the egg sinks.
- pour water into another glass and add 4 tablespoons of salt, stir until completely dissolved;
- Place the egg in this glass.
Bottom line
: The egg does not sink, but floats. Why? In fresh water, the egg sinks because... it is denser than water. An egg floats in salt water because... Salt water is denser than an egg due to its salt content.
Conclusion:
The density of salt water is greater than that of fresh water.
Experience. "Ice is solid water."
Target:
introduce children to the two states of aggregation of water - liquid and solid.
Material:
ice cubes of different sizes (large and small), two transparent cups for each child.
Progress:
- Place a large piece of ice in one glass and a small piece of ice in the other. Children should monitor the condition of the ice cubes in a warm room. Pay attention to how the ice cubes gradually decrease. What's happening to them? Which cube will melt faster?
It is important that children pay attention to the fact that different sized pieces of ice will melt over different periods of time. Result: water appeared in each glass.
Conclusion
: ice is also water, but in a solid state.
Experience. "Air".
Target:
demonstrate that air takes up space. Material: wide-neck jar, glass.
Move
:
- Turn the glass upside down and slowly lower it into a jar of water. The glass must be held straight. Will water get into the glass? Result: no water gets into the glass. Conclusion: there is air in the glass, it does not let water in.
"Air has weight" experiment.
Target
: show that air has weight.
Material:
scales, two balloons. Progress: - place one inflated balloon and one uninflated one on the scales. Result: the bowl with the inflated balloon will outweigh.
Conclusion:
air has weight.
Experiment “Air expands when heated.”
Target:
prove that air expands when heated.
Material:
plastic bottle, ball, bowl of hot water.
Progress:
- place the plastic bottle in the refrigerator for several hours;
- when it has cooled, put an uninflated balloon on the neck;
- then place the bottle in a bowl of hot water.
Result:
the balloon will begin to inflate on its own. - Now put the bottle in the refrigerator again.
Result:
the ball will go down. Conclusion: air expands when heated, and contracts when cooled.
"Magic Mitten" experiment.
Target:
find out the ability of a magnet to attract certain objects.
Material:
magnet, small objects made of different materials, a mitten with a sewn-in magnet.
Move
:
— demonstrate to children a trick: metal objects do not fall out of the mitten when you unclench your hand.
- invite children to take objects from other materials (wood, glass, fabric, paper)
– the mitten ceases to be magical.
- children examine the mitten, find a magnet, and try to use it.
Conclusion
: The magnet only attracts metal objects.
Experience "Magnetism".
Target
: identify the passage of magnetic forces through water and glass.
Material
: magnet, glass vessel, water, paper clip.
Progress:
- throw a paper clip into a jug of water;
— place the magnet against the jug at the level of the paperclip and slowly move it upward along the wall of the jug.
Result:
The paperclip follows the magnet and rises up.
Conclusion:
magnetic force passes through glass and water.
Experience “How to see “lightning”?
Target:
find out that a thunderstorm is a manifestation of electricity in nature.
Material:
pieces of woolen fabric, a balloon, a megaphone.
Move
:
- children rub pieces of fabric folded on top of each other with an inflated balloon;
- bring a megaphone to them (to amplify the sound) and slowly separate the fabric.
Result:
there was a crash.
Conclusion: when rubbing, the fabric became electrified, the appearance of a crackling sound is a manifestation of electricity.
Octopussy experience.
Target:
expand children's understanding of electrical charges.
Material:
a sheet of paper, scissors, a piece of fur.
Move
:
— cut the paper into 8 strips, not cutting 4-5 cm to the edge. Raise the octopus, folding the uncut side into a ring.
Result:
the legs hang down.
— on the table, rub the octopus with a piece of fur, running the fur along the legs;
— lift the octopus, rolling the uncut side into a ring.
Bottom line
: legs spread out like a bell.
— put your free hand inside this bell.
Result:
tentacles grabbed my hand.
Conclusion:
from friction, equal electrical charges were formed on all legs. When the octopus was rolled up, the negatively charged tentacles pushed away from each other and spread out like a bell. When a hand with a positive charge was placed inside, the negatively charged tentacles were attracted to it.
Section "CHEMISTRY"
Experience “Transparent – opaque”.
Target
: recognize objects made of glass, determine its qualities and properties.
Material
: glass cups, colored water, stone.
Progress:
- pour colored water into a glass beaker; - lower a stone into it; Bottom line
: The stone is visible.
Conclusion
: glass cup – transparent.
Experience "Magic Coins".
Target:
recognize objects made of metal, determine its thermal conductivity property.
Material
: a few coins.
Progress:
- invite one child to squeeze one of the coins in his hand and, holding it a little, put it on the table next to the others.
- another child, having touched all the coins, must determine which one was held in his hand.
Result:
whichever one was the warmest was held in the hand.
Conclusion:
the metal heats up quickly and retains heat.
Section "ASTRONOMY".
Experience "Star Hours".
Target
: Find out why stars move across the night sky.
Material
: black umbrella, white chalk.
Progress:
- use chalk to draw the constellation Ursa Major on one part of the inside of the umbrella;
- raise the umbrella above your head;
- Rotate the umbrella slowly counterclockwise.
Result:
the center of the umbrella remains in one place, and the stars move around. Why? The stars in the constellation Ursa Major make apparent movements around one star - Polaris - like the hands on a clock. We see the rotation of the starry sky, but this only seems to us, since our Earth rotates, and not the stars around it.
Conclusion:
The Earth's axis of rotation is directed towards the North Star, and therefore the stars appear to revolve around it.
Experiment “Straight or in a circle?”
Target:
determine what keeps satellites in orbit.
Material:
paper plate, scissors, glass ball.
Progress:
- the adult proposes to solve the problem: what would happen to the satellite (the Moon) if the planet did not attract it.
- cut a paper plate in half and use one half;
- place a ball in it, place it on the table and tilt it slightly so that the ball quickly rolls along the notch in the plate.
Result:
the ball rolls off the plate and moves away from it.
Conclusion:
objects move in a straight line unless a force acts on them.
The Moon would also move away from the Earth in a straight line if Earth's gravity did not keep it in a circular orbit.
Main types of experimental activities
Types of preschool experimentation differ based on the main purpose and purpose or problem that needs to be solved.
Also, experimental activity may differ in the case of the method of application, stage or characteristic features of cognitive operations:
| View | Description, nuances |
| By the nature of research activities | In this case, the activity can be illustrated, search, or used to solve everyday problems. |
| Based on the stage of implementation in educational terms | Experiments and experiments differ in the quality of the primary, final, secondary or final cycle. This feature is especially important when constructing a specific plan of tasks based on the characteristics of the preschool group. |
| By the nature of cognitive operations | In this case, the following types of research activity are distinguished: ascertaining (observation of the properties of an object or phenomenon), comparative (the process of studying an object during its interaction with another process), generalizing (the ability to determine properties or patterns between phenomena). |
| Based on application method | Here the frontal and demonstration methods are determined, the use of which differs based on certain characteristics of cognitive thinking in preschoolers. |
Experimental activities in the senior group are carried out through the systematic improvement of the child’s intellectual and practical skills.
If, during the process of observation, the preschooler was able to obtain new information and knowledge, the experimental work is identified as a cognitive system.
In addition to the main types of classes, based on the methodology, there are varieties in pedagogical practice that directly take into account the process of experimentation.
These are the following classes:
- Game experiments. Since the main activity of preschoolers is gameplay, research can be carried out in conjunction with it. These classes often feature a character from a favorite cartoon or fairy tale who provides children with important information or asks for help. Through this technique, students understand what is said better and act more responsibly.
- Modeling. An understanding of the basic properties or features of an object can be obtained through the process of constructing small copies of real-life objects or phenomena. Most often, children build volcanoes, rivers or small construction complexes. So, a teacher can invite preschoolers to model a vortex flow using pieces of paper.
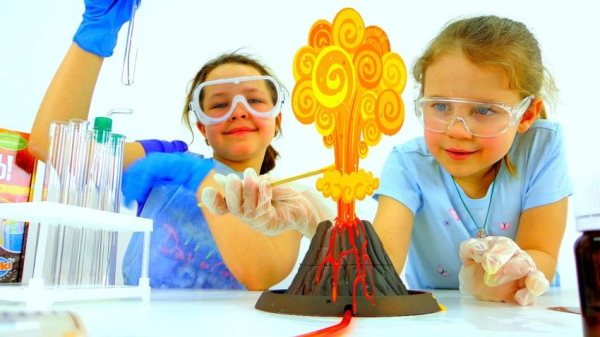
An example of experimental activity in a senior group - modeling a volcanic eruption - Experiments. Conducting various studies or experiments is the basis of a child’s activities. Absolutely all skills acquired in kindergarten are taught through this teaching method. Preschoolers can perform various experiments with liquid, air, magnets or earth. All this can quickly expand your understanding of certain features of the world around you.
The formation of important skills or abilities through experimentation allows you to teach your child how to work with various devices and tools . In this case, experimental activity significantly accelerates the learning process.
It is important that the approach to research activities is exclusively comprehensive. In this case, the child can strengthen the existing basic knowledge about certain phenomena and objects. This pedagogical method is the basis of any preschool education.
Beginning of sap flow.
Sap flow is the process of moving water and substances dissolved in it from underlying parts of plants to overlying ones and from overlying to underlying ones. The upward flow of liquid is due to the activity of the root system. As warm days approach, it begins to absorb water and minerals dissolved in it from the soil and supply them along the trunk to the branches and buds. The downward flow of liquid carries organic substances (glucose, amino acids, biologically active substances) from the places where they were stored in the fall (mainly from the trunk and branches) to those parts of the plants that will grow (to the buds and growth areas of new roots) . Newly formed tissues will be built from them.
Due to the intake of water, the size of the buds increases and they swell. Their metabolism increases.
Thus, the beginning of sap flow is an important turning point in the life of plants. It indicates the end of the period of forced dormancy and the complete awakening of the trees. In phenology - the science of seasonal changes in nature - the moment of the beginning of sap flow is considered a sign of the end of winter and the onset of the pre-spring period. To be more precise, the criterion for the onset of the pre-spring period is the beginning of sap flow in the first awakened trees - warty birch and Norway maple. The remaining trees awaken a little later.
Thus, in practice, determining the end of winter can be done with an accuracy of 1-2 days. Children will be happy to follow this indicator. To do this, at the end of winter, the teacher pierces a tree branch with a sharp awl in front of their eyes. Children watch to see if a drop of juice appears from the hole. After observation, this hole is covered with plasticine and opened every 2-3 days, checking whether sap flow has begun. As warmer days approach, the procedure can be repeated daily.
Demonstrating this experience, the teacher should warn children that extracting sap in large quantities harms the tree. In this case, nutrients do not reach the leaves and their growth slows down. In addition, a large wound is dangerous for a tree, as well as for a person: the integrity of the tissue is compromised, and there is a risk of infection. Although the tree does not experience pain, it is sick. The teacher knows how to make this procedure safe, but children should not repeat it on their own so as not to harm the tree.
Therefore, for the experiment, it is advisable to take young shoots and terminal branches. It is possible that sap flow in the trunk will be seen earlier and the amount of sap released will be greater, but in this case, the difference of several days does not play a significant role, since it is important for children to understand the very principle of the spring awakening of nature.
Observing a branch placed in tinted water. This experience allows you to better understand how water moves along the stem. Ink or (which is better) food coloring is added to the water where the cut twig is placed. After some time, the veins of wood and leaves will turn the appropriate color. Long-term observation shows that the water rises higher and higher along the stem. The result obtained can be recorded graphically by noting the height of the paint on a ruler or paper tape.
If the dense bark does not allow you to see color changes, several branches are placed in the water, and the teacher periodically trims one of them. On the cut, the coloring is noticeably better.
Swelling of the kidneys.
Everyone knows that in spring the buds swell. To see this with their own eyes, children sew onto a common sheet branches of one tree (shrub), cut at different times: late autumn, winter, early spring and mid-spring - just before the leaves bloom.
Swelling becomes noticeable 10-12 days after the start of sap flow.
Features of young leaves.
The young leaves of each plant species look different. In some trees they are covered with a sticky fragrant substance, in others they are covered with fluff. These devices protect the leaves from the cold. Children can easily see both phenomena on the plants in their area.
The general pattern is that on all wind-pollinated trees, flowers bloom before leaves: leaves interfere with the free transfer of pollen. Among the insect-pollinated plants, the willow blooms without leaves. At the end of April, the buds of bird cherry and birch open, in the first half of May - the buds of maple, yellow acacia, apple, pear, and a little later - oak and linden. However, year to year does not happen. By recording the timing of bud break in a special observation diary, children will be able to establish general patterns of development of trees in their area. This diary continues to be kept by the children who replaced those who began the first observations. Data collected over many years have not only practical, but also scientific significance.
Differences between leaf and flower buds.
How to distinguish a flower bud from a leaf bud? In fruit trees, the flower bud is large, dome-shaped, expanded in the middle part. Its top is rounded. It will form a flower and then a fruit. The leaf bud has a conical shape; its top is sharp.
By looking closely at the buds of ornamental trees, children will also easily learn to distinguish flower buds from leaf buds. If the teacher himself finds it difficult to determine the signs of the buds, you can tear them apart and make sure that in one of them there are tightly folded leaves, in the other - the rudiments of flowers. Children can use a ballpoint pen to mark one type of bud with red paste and another with blue, and then, through observation, determine which buds will develop flowers and which will produce leaves.
All trees have different flowers.
Further observations of trees will reveal differences in the structure of their flowers.
Flowers of plants belonging to the Rosanovy family (Rosaceae) have a typical shape. They have large petals, many stamens and one or more pistils. Rozanovs include rosehip, rose, apple tree, pear, cherry, plum, bird cherry and many other plants. These plants are pollinated by insects.
In wind-pollinated plants we will not find the usual parts - petals and sepals; they would interfere with the transfer of pollen by wind. Their small flowers are collected in inflorescences.
All maples have petalless and greenish flowers. Male (staminate) flowers are collected in drooping bunches, female (pistillate) flowers - in drooping racemes. In willow, birch, and beech (the latter includes oak) small flowers are collected in earrings, but the shape of these earrings is species specific. Children will easily remember these differences when they look at the inflorescences.
Willow catkins are fluffy, relatively short and thick. They resemble fluffy balls. The yellow color of the balls is due to the presence of a large number of anthers containing pollen. Looking closely, children will see that each anther (pollen sac) hangs on a thin filament.
Poplar, aspen, alder, birch, and hazel have long and relatively thin catkins. The flowers are arranged tightly in them. The oak tree also has long catkins, but the flowers are arranged loosely in it.
The female (pistillate) alder flowers are interesting: they look like short cones about 1.5-2 cm long and at first glance resemble small conifer cones.
Fruit formation.
After flowering ends, children watch with great benefit how fruits form in place of flowers. At first they are small, tender, and completely different from mature fruits; then they become larger and denser; Finally, they acquire a characteristic shape, are at first immature, and then mature.
To understand general patterns, children collect the fruits of any tree at all stages of development and sew (glue) them onto a common sheet.
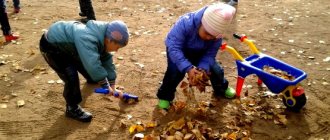
Variety of fruits.
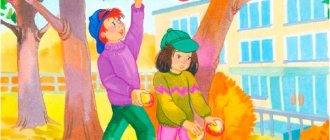
Throughout the summer and autumn, the teacher helps children find and examine the fruits of all tree and shrub plants growing on the kindergarten site and in the surrounding area. Work can be continued in the forest, in the garden, in the square, in the park and in other places visited by children, including dachas and garden plots.
Children should make sure that all plants have fruits, but they look different: they can be large and small, dry and juicy, round, oval, long, and also edible, inedible and poisonous.
So, birch fruits are very small. In the center of the fruit there is one seed, on each side of which there are two wings. These seeds are carried by the wind. Elm fruits also have a wing, but it forms a continuous ring. The elm fruit flies like a glider. The fruits of maple, ash, and linden, which are also lionfish, fly, rotating like a propeller. This can be clearly seen if you stand under a tree during the fruit scattering period in winter or by dropping the fruit from a certain height at any time of the year. With the help of the wind, the seeds of conifers - spruce and pine - are spread.
Poplar fruits are interesting. They are light fluff that flies well in the wind, in the center of which there is a hardening - a seed. Oak fruits are acorns. The variety of plants is so great that it is impossible to list everything. Some fruits ripen and disperse in the summer, others in the fall, and others in the winter. If the teacher himself is not sufficiently familiar with this issue, this does not prevent him from organizing work with children, since he must remember that it is impossible to know everything. But you can easily navigate the process of observation and experiment if you clearly know what you want to know.
To consolidate knowledge about the variety of fruits, the teacher announces a competition in the group “What kinds of fruits are there?” He invites children to bring the fruits of different plants (in this case, trees and shrubs, but the work can be expanded and collect the fruits of wild herbs and cultivated plants grown in the field and in the garden). Children compare each fruit brought with those already in the collection and decide whether it is new to them. The new ones are kept, and the fruits in the collection are used for crafts and games. The method of designing the collection is entirely within the competence of the teacher. The seeds are sewn or glued to a sheet of thick paper, sealed in small bags made of transparent film, which are placed in a neatly made box, a book is created, on each sheet of which not only fruits are glued, but also photographs of plants and their flowers, etc. Juicy fruits are either canned or dried.
Why are fruits needed?
The teacher’s next task is to show that every fruit contains seeds. The fruit is the organ in which seeds are formed, develop and ripen.
To make sure of this, children cut the juicy fruits, and simply examine and feel the dry ones or break them. In many plants, seeds are easy to detect. It is more difficult to find them in poplar, ash, maple, and aspen; in these trees, the seeds appear as compactions or thickenings in the lower or central part of the fruit.
Motivating start to class
Preschoolers, by their nature of thinking, have a strong desire for the process of observation or direct study of the objects and phenomena being studied. It is also especially interesting for children to carry out experiments and experiments on their own.
If the group lacks the necessary motivation for learning, the teacher must organize a lesson on experimental activities in such a way that the main incentive is the desire to acquire new knowledge or skills.
Particular attention should be paid to the fact that the practical side of learning often causes too vivid experiences in a preschooler, which can reduce the overall value and joy from the result of the study.
Based on this, it is best, before starting the lesson itself, to emphasize that the main thing in the experience is the end result, and not the implementation itself.
For such purposes, various visual materials can be used: maps, posters, illustrations or individual images. The teacher should use didactic or outdoor games that will significantly increase the motivational component.
Many experts in the field of pedagogy have proven that short physical education breaks have an effective effect on the learning process itself, which is why preschoolers learn the material better and strive to complete the task.
This is due to the release of additional energy reserves.
Safety regulations

But if you plan to conduct more complex experiments, for example, using matches, a gas burner, or chemical reagents, be sure to follow the safety rules:
- put on both yourself and your child the necessary protective equipment: gloves, mask, gown, goggles;
- Tell your child that you should never lean too close to potentially dangerous reagents or fire, and always follow this rule yourself - such precautions will help avoid burns and other injuries;
- cover the table or other work surface with material that will protect the furniture from damage.
Recording the results of experimental research activities in kindergarten
The process of recording the result when conducting experimental or research work is a particularly important component of any educational activity. Thus, the teacher needs to gradually accustom preschoolers to draw the conclusion of the study, which will significantly reduce the risk of losing the motivational principle.
Recording is especially important to ensure that the entire research process is imprinted in the child’s memory for a long time, including sensory, auditory, motor or visual.
The main recording methods often used in teaching practice:
- Graphic or visual . It is the simplest recording technique, in which the results are presented in the form of cards, diagrams, images or photographs. Despite the fact that this method is best used with younger groups, its use also shows significant effectiveness with older students. The teacher should provide the preschooler with the opportunity to choose the form of fixation that he likes best.
- Mental. In this case, various methods are used to influence the function of the child’s speech apparatus. Thus, a preschooler can tell the teacher about his own research results or point out any errors and discuss them further. This allows you to form a personal opinion and develop the quality of speech. During this process, the senior group improves the skill of generalizing and systematizing the information received about a phenomenon or object.
- Practical. It is characterized by recording the results of the study on paper, in which the child writes down or sketches the conclusion obtained. In this case, they most often resort to using drawings or simple symbols. To increase efficiency, you can keep a journal of observations, a diary of experiments, and also create a special calendar.
Experimental activities in the older group must be carried out in accordance with all the described methods of note-taking and recording, which systematically develops the child in all areas.
Consultation with parents
In order to increase the effectiveness of teaching, the teacher is recommended to hold comprehensive meetings with parents of preschoolers several times a year, which highlight their achievements, the conclusions of experiments, as well as other important aspects.
The teacher must inform each of the parents about the main tasks and goals of setting up experiments and research, which will allow them to understand the significance and importance of such development for the child. It is best to conduct similar experiments at home, which will significantly strengthen the preschooler’s knowledge.
The experimental type of activity of preschoolers of the senior group can be supported by using the following tasks:
- motivating the child through personal example, which helps increase the authority of the parent;
- manifestation of real interest in classes at a preschool educational institution, which is characterized by frequent questions from the child about exercises, acquired knowledge and methods of conducting experiments;
- Stimulating the curiosity of a preschooler by creating experiments at home.
As part of the consultation, the teacher should present to parents the most effective or popular topics for conducting home experiments and research, including outdoor activities.
The parent also needs to point out the importance of reinforcing skills through dialogue or making joint decisions, as well as by taking notes on the results obtained. In this case, the child must choose for himself exactly how he should visualize the experiment.
Many psychologists point out that conducting experimental activities in the family circle, which includes not only parents, but also all relatives and friends, is not only the acquisition of important knowledge, but also bright, positive emotions and experiences for a preschooler from senior group.
Entertaining physics
Using the example of fascinating experiments, you can introduce a school-age child to the laws of physics - it will turn out to be much more interesting than simply learning a rule from a textbook.
Be careful: some physics experiments involve fire, and it is the responsibility of an adult to light matches or a lighter.
Forks and balance
For children 10 years and older.
The experiment proves that bodies can maintain balance even in a position where it would seem impossible to maintain balance - this is due to the fact that the center of mass of bizarrely shaped bodies shifts lower than that of geometrically simple bodies.
What you will need:
- two forks;
- toothpick;
- matches;
- wooden stick.
Step-by-step instruction:
- Place the wooden stick so that it is as stable as possible - for example, you can stick the stick into an orange or other dense fruit or vegetable.
- Connect the forks to each other with the tines.
- Place a toothpick in the gap between the tines of the forks.
- Place a toothpick on a wooden stick: if done correctly, the structure will maintain balance.
- Try rotating the structure and burning part of the toothpick - the forks will continue to maintain balance.
Video for the experiment:
Experience with alcohol and oil
For children 10 years and older.
The child will see from his own experience that each liquid has a different density.
What you will need:
- tall glass tumbler;
- liquid soap;
- vegetable oil;
- water;
- alcohol (ask your parents what kind of alcohol you can take for the experiment)
- a spoon with a long handle or a glass rod;
- coloring (food coloring or any color) – optional.
Step-by-step instruction:
- Pour liquid soap (approx. 100 ml) into a glass glass.
- Add a few drops of dye to a container of water and mix with a spoon or glass rod.
- Add the colored water very slowly to the liquid soap container so that the water does not mix with it.
- Also gradually add oil. Each layer should be approximately 100 ml.
- Pour alcohol into the last layer.
Video instruction:
Experiment with a candle and a glass
For children 10 years and older.
The child will see that the fire burns oxygen, and due to the lack of air, the pressure inside the container decreases and a vacuum is formed.
What you will need:
- candle;
- flat plate;
- two glasses;
- water;
- one package of food coloring;
- syringe;
- pipette;
- matches or lighter.
Step-by-step instruction:
- Fill one glass halfway with water.
- Using a pipette, add two drops of dye to the water - you can do without dye, but with colored water the experiment will be more visual.
- Place the candle in a plate and add colored water there.
- Light a candle.
- Cover the burning candle with an empty, clean glass.
- Due to the decrease in pressure, a vacuum is formed under the glass, water from the plate is “drawn” into the glass and rises to the top, and the candle goes out due to the lack of oxygen.
Video instruction:
Balloon and fire
For children over 10 years old.
Using an example of an experiment, you can show what thermal conductivity is: explain to your child that water conducts heat faster than air, and that is why a balloon filled with water under the influence of fire will not burst immediately, but only when the water warms up enough.
What you will need:
- two balloons;
- candle;
- matches or lighter;
- a measuring cup, preferably with a spout (you can use an iron dispenser);
- water.
Step-by-step instruction:
- Using a cup with a spout, fill the balloon about halfway with water.
- Inflate a balloon filled with water.
- Inflate an empty balloon.
- Light a candle.
- Bring a ball of water to the fire for 10-15 seconds, during which time the ball will not burst.
- For comparison, bring an empty balloon to the fire - it will burst instantly.