DOMOSTROYPlumbing and construction
Albina Dilmukhametova
Summary of a lesson on designing three-dimensional “Mouse” toys from paper
Abstract
on designing three-dimensional toys from paper and
acquaintance with the outside world for children of the middle group on the topic:
Goal: Learn to make a three-dimensional figurine of a mouse out of paper.
Generalize, systematize, clarify ideas about geometric shapes and geometric bodies.
- learn to select projections for geometric bodies; promote awareness of the significant difference between geometric bodies and geometric figures, memorization of basic terminology (geometric bodies, geometric figures, projections).
- develop the ability to perceive objects and phenomena in their relationships; develop constructive knowledge aimed at imagination; develop the ability to analyze circuits and structures.
— To cultivate artistic taste, work culture, curiosity, mutual assistance, independence, interest and objectivity in the buildings of other children.
Paper is one of the simplest, most accessible, and easily processed materials. We become familiar with paper products from early childhood.
Depending on the design and purpose of the product, paper is used that differs in thickness, texture, texture and color. Colored paper, velvet, and cardboard are suitable for applique. For work related to storage, thin writing and colored paper is used. Cardboard, half-canton, thick paper are used for the manufacture of various structures.
There are different types of paper products: products made from strips, products using the appliqué technique, products based on boxes, cones, cylinders; production of various layouts...
Progress of the lesson
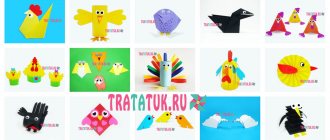
I want to show you the process of making a three-dimensional paper mouse based on cones, it is very simple, accessible, does not take much time, and at the same time, by understanding the basis, you can make other characters from rural life and more using this principle.

Firstly, to make a paper bunny craft we will need colored paper, scissors, a marker and PVA glue. We choose what color we will have a front sight and get to work. We draw the details of our mouse on a selected sheet of colored paper.
Secondly, we cut out parts for our craft from paper of any color: ears, paws, 2 semicircles, for cones. Glue the cone and a small truncated cone together. The truncated cone will be the head, and the long cone will become the base of our mouse.
Thirdly, we draw a muzzle and glue the ears to our mouse.
The final stage.
Fourthly, we glue our mouse. Making a three-dimensional paper mouse craft is complete.
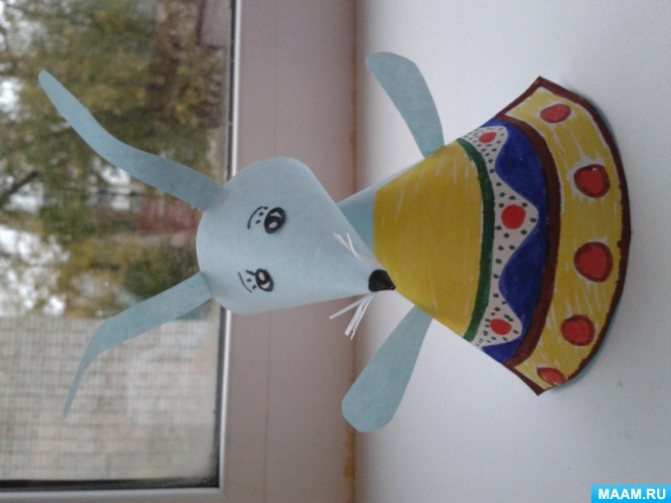
Our mouse is ready!
Summary of an integrated lesson on familiarizing preschoolers with the outside world and designing from paper Municipal budgetary preschool educational institution "Kindergarten No. 23" Summary of an integrated lesson on familiarizing preschoolers.
Summary of a lesson on paper design in the preparatory group “Wintering Birds” Title of the work: “Wintering Birds” Author: Shavlova E. N. MADOU No. 85, Tyumen. Age of children: preparatory group (6-7 years old) Material:.
Summary of a lesson on designing paper using the origami technique “Butterfly” Goal: to develop interest in origami as an activity; develop the ability to perform a butterfly figure using the origami method according to the teacher’s instructions;
Summary of a lesson on designing from paper in the preparatory group “Garland of roses” “Garland of roses” Goal: creating voluminous rosebuds from paper. Objectives: Educational: 1) introduce the technology of making buds.
Summary of a lesson on designing from paper “Valentine “Mouse” from hearts” Summary of a lesson on designing from paper “Making a Valentine. Mouse made of hearts." Krutovskaya Natalya Summary of the design lesson.
Differences between design classes in the senior group
In older preschool age (5-6 years), pupils already know the basic methods of creating paper products. They must become familiar with three-dimensional figures (sphere, cube, cone, cylinder, pyramid, brick) and learn to place them in space, making durable structures.
The teacher teaches children to see familiar elements in product samples, to work not only according to the sample, but also according to the drawings. You can start building with cubes of different shapes and sizes, and then make figures out of paper.
At this time, the already mastered skills of replacing parts with others, connecting them, using different techniques for working with paper of different densities are consolidated. Teachers organize collective activities to create 1 item.
Sometimes classes are held in the form of a role-playing game. For example, an adult says that the hare needs help: his home was destroyed by a fox. Some children can become builders and make a house, another part can become guards and design a fence, a third can design furniture, etc.
The older the children, the more creativity there should be in their work. If with younger students you can limit yourself to creating crafts based on a model, in the middle group you can teach how to work with drawings and diagrams, then in the older group, preschoolers can come up with a product on their own on a given topic.
Theoretical aspects of training
Paper construction (paper-plastic) is a type of activity for preschoolers that involves:
- drawing up an action plan;
- selection of materials for crafts;
- performing manipulations using the chosen technique.
In kindergarten, children construct crafts in classes organized by the teacher in a playful way.
Lesson objectives
Before planning a lesson, the teacher must set a goal that he wants to achieve. It is implemented through several tasks.
Educational objectives:
- introduce the properties of different types of paper (classic, velvet, holographic, crepe);
- develop the ability to cut out the necessary parts for a craft and name them (square, circle, etc.);
- clarify ideas about colors and their names;
- learn to make three-dimensional shapes from paper blanks by bending, crumpling, twisting or tearing them;
- encourage the creation of products according to plan (independently choose the theme and material for the craft);
- learn to combine elements into a composition (for example, roads and houses are a street).
Correction and development tasks:
- develop fine motor skills, thinking, attention and memory;
- improve visual and tactile perception;
- develop the ability to analyze created crafts and, based on this, plan your further actions;
- develop imagination.
Educational tasks:
- develop the ability to maintain order in the workplace and put tools in their place after finishing work;
- cultivate kindness, love of nature, etc. (depending on the craft).
Types of paper designs
Paper plastic is divided into 2 types:
- origami - folding figures by bending paper;
- volumetric paper and cardboard modeling, involving the use of scissors and glue.
Design forms
There are 7 forms of organizing constructive activities:
- Pattern design developed by F. Fröble. The teacher’s actions serve as an example. Children repeat what is shown, learning new techniques for working with various materials.
- Model design proposed by A. N. Mirenov. Instead of a sample, a model is used in classes - a ready-made craft. The method for creating the product is not shown. Students must recreate the model themselves. This form of organizing activities is used when working with children 5-6 years old and older. It helps to activate the thinking of preschoolers, because... they need to mentally disassemble the product into its components and reproduce the procedure unknown to them.
- Design according to conditions, developed by N. N. Poddyakov. He suggested not giving children ready-made samples and ways to solve a problem. The underlying conditions must be problematic in nature. For example, students are asked to make an object out of paper that can be given to their mother on March 8th. This method allows you to develop thinking and imagination. It is used if children have already made given objects or analyzed products that are similar in structure.
- Design based on drawings and visual diagrams. The authors of the method are S. Leon Lorenzo and V. V. Kholmovskaya. When working with preschoolers, templates are used. Children learn to use drawings as a way of understanding an object and how to create it.
- Design by design. For kindergarten students, this activity is difficult. In order for them to think creatively, the teacher must form in children an idea of the objects being created, the ability to repeat the teacher’s actions and look for new ways to create crafts. Only after preschoolers have mastered the existing methods of paper modeling will they be able to creatively use the knowledge they have acquired.
- Design on the topic. This form is close to making crafts by design. The difference is that the teacher limits the idea to the topic. For example, a teacher invites children to create any craft on the theme “Autumn.”
- Frame design proposed by N. N. Poddyakov. This method is rarely used when working with preschoolers. The teacher shows a frame made of any material, and then does something that changes the structure. With such training, children learn not only the structure of the frame, but also how to change it.
Motivation for children
To make it interesting for preschoolers, you can turn the activity into a game: bring a toy (hero) and invite the children to make a house or a gift for him.
It is important that children understand the practical significance of their activities. They will be more motivated if they know that their product can be given to an adult (mom, dad, grandmother, etc.).
Practical aspects
Papermaking classes are organized in accordance with the federal state educational standard for preschool education (FSES), Federal Law No. 273 of December 29, 2012 “On Education in the Russian Federation” and SanPiN 2.4.1.3049-13. Teachers draw up a work plan and technological maps for each lesson.
Technological maps and diagrams
The technological map should reflect the following points:
- topic of the lesson;
- the purpose of the activity and its objectives;
- preliminary work;
- didactic materials and equipment;
- description of the stages of the lesson (organizational moment, main and final parts) indicating their duration, words of the teacher, expected answers and actions of the children.
Lesson duration
The preparatory group conducts design classes lasting 15-25 minutes.
They include the following steps:
- organizational moment - 1-3 minutes;
- demonstration and explanation of working methods - 3-5 minutes;
- independent activity of pupils - 5-10 minutes;
- discussion of crafts - 2 minutes;
- final part - 1 minute.
Introductory materials
To familiarize children with the topic of the lesson and create motivation, game techniques are used.
Their choice depends on the imagination of the teacher:
- riddles (to introduce the hero);
- game “Hide and Seek” (children find a toy using sentences, for example “The doll is behind the closet”);
- exercise “Guess” (the teacher shows 4 pictures and asks to recognize the guest by naming his signs);
- game technique “Letter” (the wizard sends a letter in which he asks the children to help him do something);
- “The fourth odd one” (out of 4 toys, students must choose the one that is different from the rest - it will be the heroine of the lesson).
Card index of topics
When choosing a topic, the teacher takes into account the time of year, public holidays and other important events in people's lives.
A topic index might look like this:
- “Autumn Forest”: mushrooms, trees, animals, etc.;
- “Favorite fairy tale characters”: bun, hare, pig, bird;
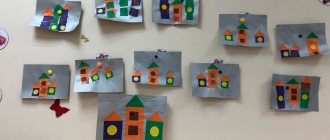
- “My city”: houses, gates around them, streets, traffic lights;
- “My Home”: creation of one- and multi-story houses;
- “Winter”: Christmas tree, bullfinch, snowflake, snowman;
- “New Year”: New Year cards, Santa Claus sticks;
- “February 14”: valentines, paper hearts;
- “February 23”: gifts for dads;
- “Transport”: cars of different types;
- “Furniture”: sofa, bed, armchair, etc.;
- “March 8”: gifts for mothers;
- "Children's Day": paper toys.