Updated: 11/29/2021
Non-traditional drawing techniques are increasingly entering our lives. They provide an opportunity to do interesting things and at the same time earn good money. It all depends on the goal that the creative person sets for himself. People are tired of traditional paintings; they want something new and original. I have compiled a review of the best non-traditional drawing techniques for adults and older children. I hope you find it useful.
Acrylic pouring technique
Description
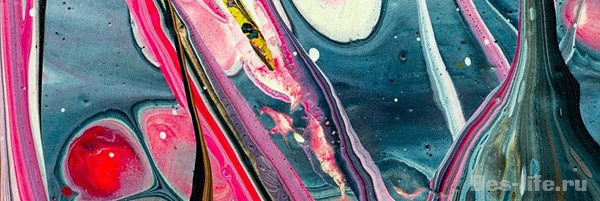
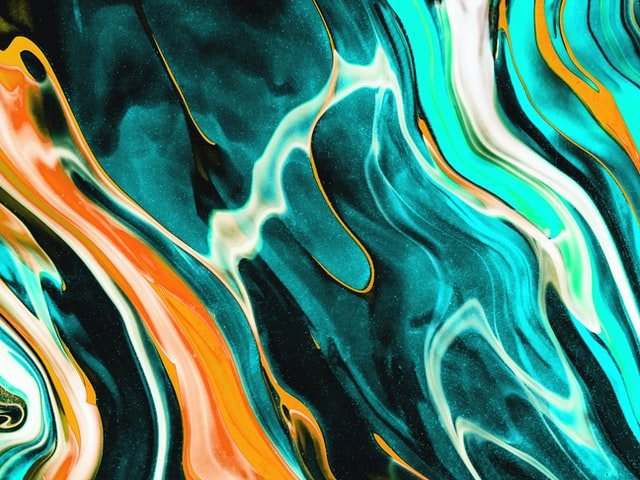
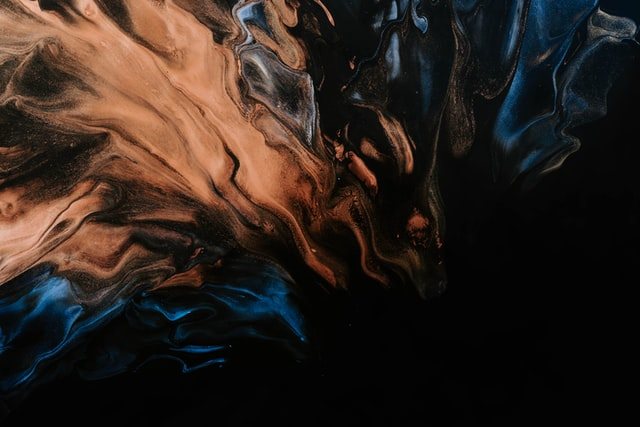
This is an abstract painting with liquid acrylic on canvas, which is called Acrylic fluid art. Paints are diluted with water or a special solution so that they can flow freely over the paper. You can pre-mix several colors. If you add liquid PVA or car oil to acrylic, you will get additional effects.
Abstract fill with a shout
Beginners use the simplest technique. The canvas is tilted in different directions, liquid acrylic (approximately the consistency of shampoo) is freely poured over it.
Examples
The popularity of this method of drawing is explained by the lack of a unified technique (no matter how paradoxical it may sound). Each painting with liquid acrylic is unique; the filling cannot be repeated. The process of painting itself is reminiscent of psychological relaxation: the canvas will absorb everything that is in your soul. You let the paints flow freely across the paper, and you don’t know what will come out. And this is the main advantage of technology.
Acrylic pouring - sea and sand dunes
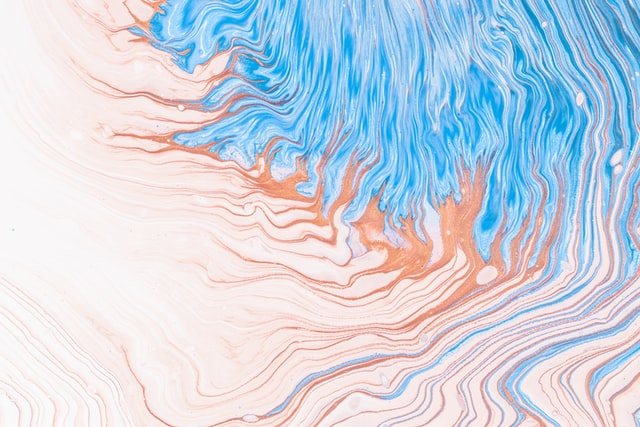
Acrylic pouring - river and sand
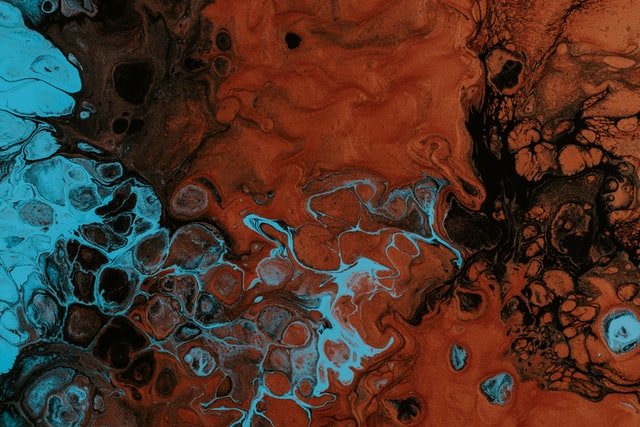
Abstract acrylic pouring in dark colors
What materials are needed
For successful creativity you will need:
- acrylic paints;
- thinner (the simplest is water);
- plastic cups and mixing sticks;
- canvases;
- gold leaf, car oil, glitter - to give additional effects;
- disposable towels, oilcloth, robe - for protection from paint.
The list of basic materials is elementary - canvas, acrylic paints and water. But even with such a minimal set the work turns out excellent!
Instructions
I recommend watching the video for beginners
The author mixes yellow paint in a plastic cup and dilutes it with an acrylic compound (40% liquid PVA glue + 60% water). The composition varies from artist to artist.
Similar actions are repeated three more times with different colors. Then the artist mixes the colors together and begins to create.
Drawing with a sponge and cotton swabs
Description
One of the most striking non-traditional techniques is painting with a sponge and cotton swabs. The results obtained using this technique can be called impressionistic painting. And everything is very simple.
A foam sponge is dipped into paint, then it is used to make prints that create texture on objects: tree crowns, animals, clouds.
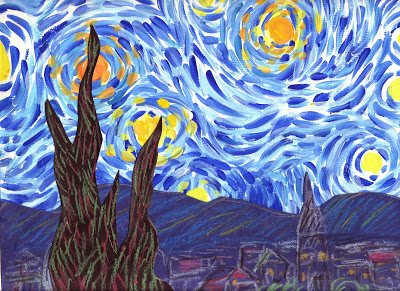
Imitation of the painting “Starry Night” with cotton swabs
Or, as an option, paint is applied to a bunch of cotton swabs, and images are drawn point by point: spruce, teapot, rowan branches or lilac.
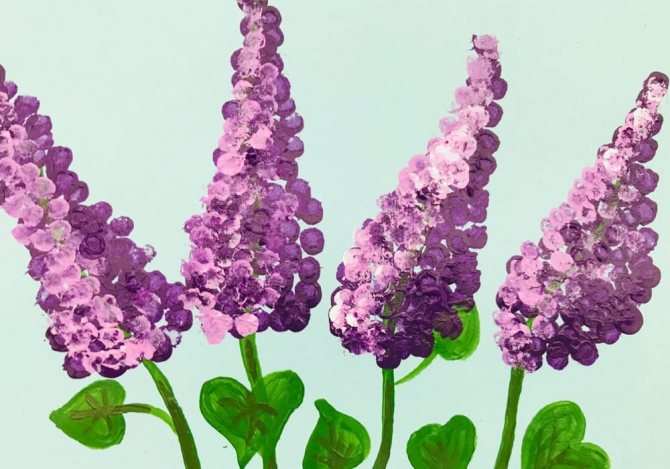
Drawing lilacs with cotton swabs (lesson for this painting)
Examples
It is convenient to use a sponge to convey the roughness of an image, fluffiness, and volume. Geometric shapes, such as squares, look great. It is best to use gouache.
Drawing a tree with a sponge
Cotton swabs work well for small round objects: dandelions, daisies, snowflakes.
Colored dandelion drawn with cotton swabs
What materials are needed
To successfully use this technique you will need:
- gouache or watercolor;
- glass of water;
- cotton buds;
- sponge or parts of a sponge.
Additionally, you can take a plate into which the paint will be poured, and paper napkins.
Videos and instructions
As examples, I will give video lessons that impressed me the most and which I really want to repeat.
Autumn tree with cotton swabs
In the video, the artist, after preparing the background, draws the outline of a tree and branches with a brush. Then he takes a bunch of cotton swabs, dips them in paint and makes a voluminous crown.
Multi-colored dandelions with cotton swabs
The author of this video tutorial promises that such a masterpiece can be completed in 5 minutes. And I willingly believe him! One of the main conditions is to choose the right color. Look at the beautiful shades of paint the artist uses. In this case, it is acrylic.
Standard gouache sets do not have such a variety of pigments and such delicate shades can hardly be achieved by mixing. Therefore, I advise you to still use acrylic paint.
First, the author uses a sponge to apply green paint in dotted movements, creating a gradient background. Then, using a bunch of cotton swabs, he draws dandelion caps and highlights on them. Finishes the work with a brush, drawing the stems of the flowers. And splashes a little yellow paint, imitating the movement of pollen in the sun.
Delicate lilac with cotton swabs
Another video from the same author. The technique is the same - the result is simply amazing. I’m sure after watching this tutorial, you will run for acrylic paint. I have already.
Landscape with a tree using a sponge
In this lesson, the main character is an ordinary sponge for washing dishes, and of course, paint.
The artist paints almost everything with a sponge, applying acrylic paint and a sheet of paper with dotted movements. He only paints the tree trunk with a brush.
Gorgeous lilac tree with sponge and chopsticks
In the next lesson, the author uses a sponge not for washing dishes, but for the bathroom. Using a wide brush, he paints the trunk of a tree, then, using dotted movements, applies lilac acrylic paint to the paper, forming the crown of the tree. Finish off the leaves with lighter highlights applied with cotton swabs. Creates shadows on the trunk using a brush as well. It turns out very beautiful! I advise everyone to try this!
Winter landscape with a sponge
Another example of a mesmerizing landscape, now winter, created using a foam sponge. Of course, small details will have to be applied with a brush, but this will not require any special skills.
The black and white palette makes the drawing very stylish, and the process of choosing paint is simple. Both gouache and acrylic are suitable.
Drawing with an iron sponge
Another very interesting way to create an original painting. Instead of a soft sponge, use an iron scrubber. Use point movements to change the texture of an already applied layer of paint or create a new color layer, as the author of the next lesson does.
In this case, the author first applies acrylic paints to the canvas, distributes them with a brush, and only then works with an iron sponge. The lesson is suitable for beginners, and its result can inspire everyone! Try it and you will definitely succeed.
What techniques are used
Modern methodology contributes to the implementation of the educational task when performing work.
Note! A similar technique is considered for children from 3 to 4 years old. In addition, you can organize additional interesting activities with minimal financial costs.
What technique is used in practice?
Drawing with cotton swabs
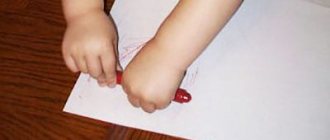
An unusual drawing technique develops a sense of rhythm and color. Cotton swab (stick) - a popular drawing technique is called the “poking method”. When creating a drawing, it is impossible to do without a cotton swab, container, and wet wipes. When creating a new material, little artists place a stick in a container of paint, and then apply imprints to the drawing.
Formation of CGN and self-care skills in young children
Important! Young artists can depict a river, rainbow, grass, rain, snow, sun, tree, sky or something else.
When creating a drawing using a cotton swab on the theme “Trees when autumn comes,” the teacher must show the children how to properly hold this object in their hands.
Instructions: Children receive blanks of tree trunks with branches, cotton swabs, and paints.
Important! To make it easier for the children, you can mark the area of the drawing, indicating the exact location of the foliage.
Finger painting
To implement this method, you can do without certain material. For example, a teacher prepares paint in advance with wet wipes.
Note! Implementing teamwork based on this technique is a great idea for both educators and preschoolers.
The teacher takes into account the mental and physical characteristics of the children and prepares a topic for drawing in advance, for example, “Foliage of autumn trees.” The teacher provides the little artists with a template - a large tree.
Other themes are also covered, such as “Winter” or “Summer is Coming.” In kindergartens, the finger painting “Snowflake” is most often created. To perform it, paints and pencils are used.
Instructions: The teacher distributes A4 sheets. The guys must draw a snowflake. To complete the work you will need a blue and white pencil.
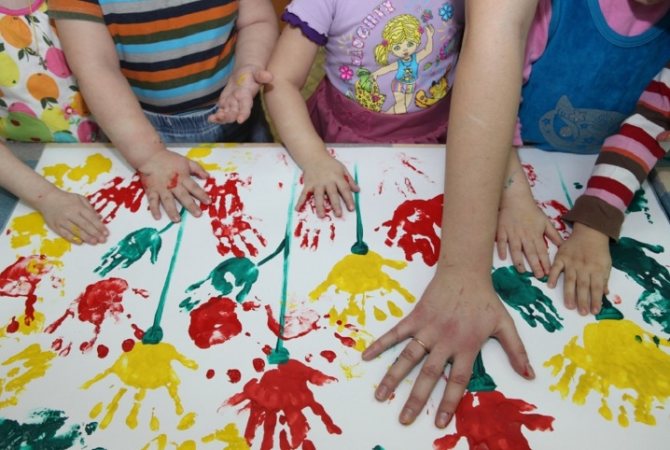
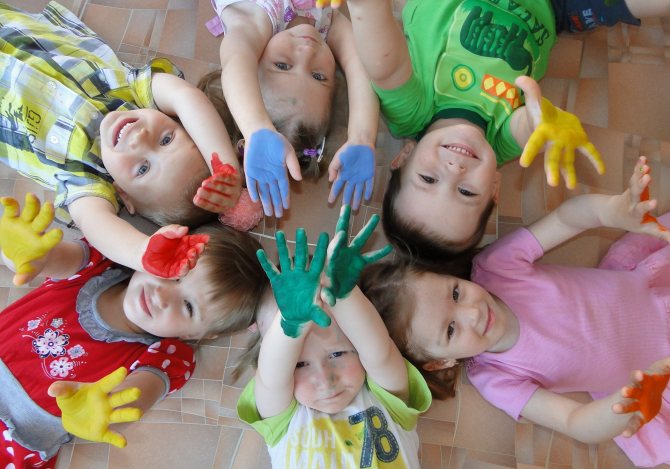
Drawing with palms
This method is not the most accurate, since children must draw with their palms. Before creating a drawing, the teacher must prepare a shallow container of paint. Pour some water inside and drip some gouache.
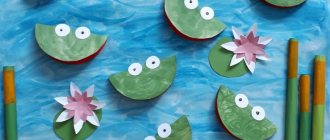
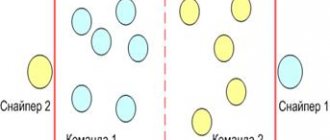
Note! Using this method, you can easily create collective drawings, for example, “Fish in the Aquarium”, “Our Aquarium”, “Merry Matryoshka”, “Firebird”, “Winter has come”.
Instructions: The teacher shows the children the finished substrate. The drawing is created on a sheet with a blue background. The guys must completely dip their palm into the container of paint. Then the teacher calls on the kids to go to the table where the aquarium is located, stand in a circle and leave their imprint there with their thumb up or to the side.
There is no need to put a mark on the one that the first comrade has already put. The teacher also warns that the fish must be located at a certain distance from each other. Then make an eye for your fish using white paint. Dip your index finger into black paint, make a pupil and carefully draw a line near the mouth.
Drawing with soap bubbles
This technique is the most difficult. Here children will have to show their imagination (open mind). Before starting to draw with soap bubbles using the preschool method, the teacher prepares material in the form of liquid soap, baby shampoo, water, watercolors (food coloring), cocktail tubes, and spoons.
Examples of pedagogical technologies in preschool education
Initially, the teacher prepares the mixture, and then pours the mixture equally into small glasses. You can prepare the paint by diluting soap with water (the ratio should be 10:1). After obtaining the mass, the addition of dye and a little gelatin or glycerin is required. Thanks to these components, the bubbles retain their shape for a long time. The finished mixture will have to be placed in a cool place (away from the sun) and kept for 2 days.
Important! It is recommended to strain the mass through cheesecloth. The finished mixture should be placed in the refrigerator for 10 hours. Having received the material, you can make a outlined and regular print.
Instructions: The teacher invites the children to take a sheet of paper, a container with soap solution, straws and disposable teaspoons. Children must blow into the tubes to create foam. Next, a mass of one color is collected and laid out on a sheet. The balls should be placed far from each other. Once the shape of each print is dry, children can add a string to each ball.
Drawing with stamps
Drawing with stamps can reveal the possibilities of using familiar objects as art material. This method promotes the mental development of the child.
Note! When drawing with a stamp, a child develops an interest in inventive art, which leads to increased self-esteem and the development of coordination of movements.
Foam rubber impression
The main goal of this method is to introduce students to an unconventional method of drawing using the “foam rubber imprint” technique, and to develop the ability to arrange the elements of a drawing on a sheet of paper.
Educational qualities: fosters a love of fine arts and nature.
Developmental qualities: to develop aesthetic perception, a creative attitude to work, attention, memory, spatial thinking, fine motor skills of the hands, a sense of composition, color, color perception, to form in children a stable interest in visual arts, creative imagination.
Water painting technique - ebru
Description
This technique was born in the East back in the 12th century. Its essence is as follows: special paints are placed on the water surface to create a film. The artist carefully mixes them in water, creating the intended composition. Then the image is transferred to the surface using paper or fabric.
Examples
First, a background is created - paints are randomly splashed across the surface. You can take several colors, but no more than three. Then a circle is drawn on the water, and with the help of tools it takes the desired shape. For beginners, I recommend starting with something simple – flowers or marine patterns.
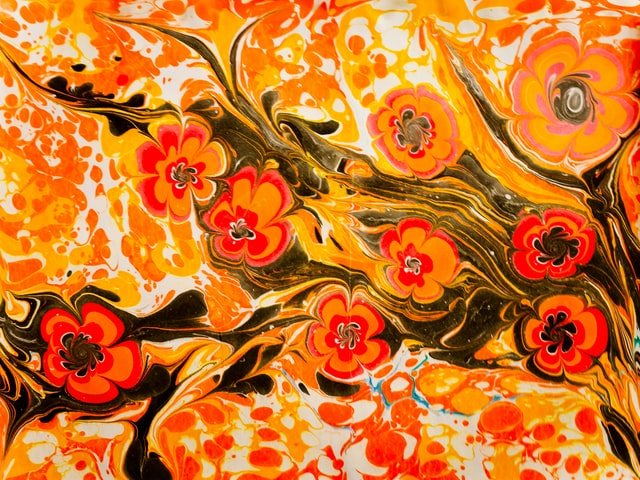
Flower meadow using ebru technique
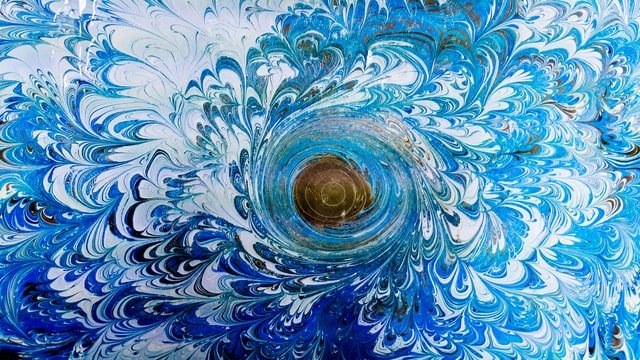
Frosty pattern using ebru technique
What materials are needed
Ready-made ebru kits are sold in stores. These include:
- paints with natural wax from astragalus nectar (a plant from the legume family);
- wooden brushes;
- thick cardboard or paper;
- thickener;
You can prepare all this yourself, but it’s easier to buy a ready-made kit. Additionally, paper napkins and a wide container for water will come in handy.
Instructions
A good video that explains in simple terms the technique of drawing ebru
Video lessons of drawing on water
I have selected 4 interesting video lessons.
How to draw a jellyfish using the ebru technique
Here the artist shows how to draw a jellyfish. The background is made with yellow paint. Blue paint is splattered into the top of the tray. It should be distributed evenly over the surface of the tray. Algae are drawn in green. The jellyfish will be red: dip the brush into the paint and make a circle in the water. Then a brush with orange paint is placed in the center of the red circle. With its help, the circle takes on the desired shape.
How to draw a turtle using the ebru technique
In this video the author draws a turtle
Here the background color is blue. The body of the turtle is made of red paint, the legs are orange.
Ebru - space
A fascinating and easy lesson. First, the artist applies paint using a pipette and splattered with a brush. Then he mixes them with an awl. You can also use the same brush. In order for the planets to look more realistic, after applying paint from a pipette, the author twists it in a spiral inside the resulting circle.
The picture is completed by splashing white paint - stars.
Ebru - tulip
This lesson for experienced artists is dedicated to drawing a tulip.
Spray technique
Description
Another interesting unconventional drawing technique, although it requires a lot of additional materials. To prevent drops of paint from staining everything around, cover the surrounding surfaces with oilcloth. It is best to paint over a sink or bathtub.
The paint is mixed with water to the consistency of thick sour cream. The brush or toothbrush is wetted in water, and excess moisture is shaken off. Splashes cover individual areas of the canvas. If necessary, the position of the hand changes, and the paint is sprayed horizontally, vertically, etc. If you need to increase (decrease) the size of the drops, the bristles are brought closer (further away) from the paper.
Examples
Trees, leaves, the sun and other natural phenomena are produced interestingly using the “spray” technique.
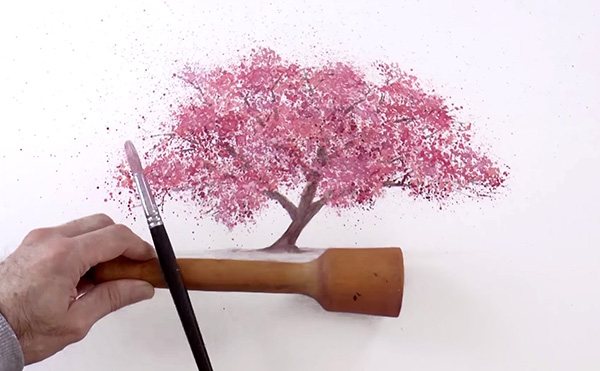
tree created using the spray technique - lesson
You can use stencils, cover certain areas of the sheet with them, and cover the background with splashes of paint.
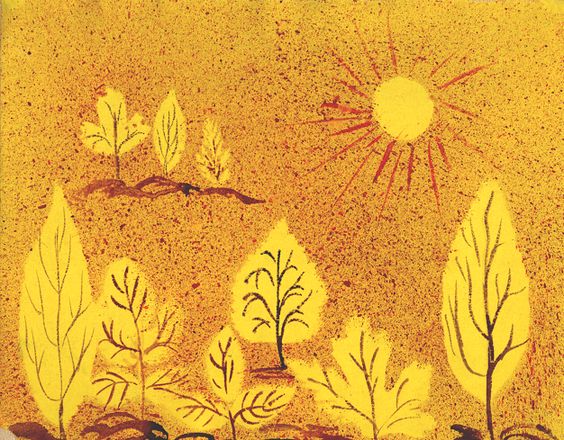
Autumn forest using spray technique
Instructions
Video lesson that can be used as instructions.
The author makes a spray with a workpiece that is pre-coated with acrylic varnish.
Video tutorials on painting using the spray technique
I have put together three video lessons on this drawing technique.
How to draw dandelions
A master class that beginners can take as a basis for drawing. The author sprays three tones of blue paint onto white paper. Then use a cotton pad to wipe away any excess drops in the middle of the pattern. The stems of the flower are already drawn in them with a brush.
How to draw winter
Great tutorial showing how to spray paint a snowy landscape.
Still life with flowers using spray painting
Master class on drawing a still life with flowers
It is carried out by two people - an adult and a child.
Long-term planning for unconventional drawing
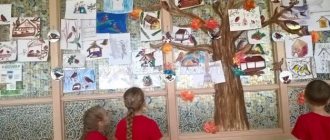
In order to distribute in advance the order of mastering non-traditional drawing techniques according to the topics of the educational process, the teacher draws up a long-term plan for this artistic and aesthetic direction. As a rule, two lessons per month are allocated to non-traditional techniques and two to traditional ones. Regardless of the technique, after the lesson there is an exhibition of children's work.
You can see an example of drawing up a long-term plan for non-traditional drawing as part of the educational process here. In addition, non-traditional drawing can be studied as part of a circle or organized as a project assignment.
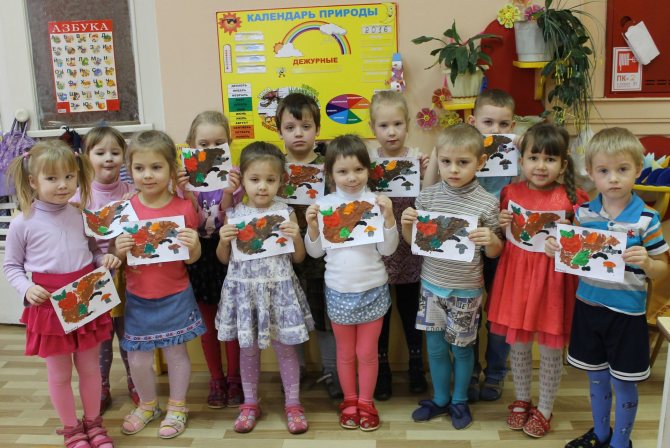
Creative activities teach kids to be proud of the results of their work
Children are tireless seekers of new experiences and knowledge. The task of adults is to find the most suitable ways to make children believe in their strength and uniqueness. Fine arts, in particular unconventional drawing, provide invaluable assistance in this regard. After all, without the usual brushes and pencils, the child feels freer and can fully express his imagination.
One stroke painting
Description
The “one stroke” decorative painting technique is very popular, which translated from English means “one stroke”. It was invented in Europe. Among the Slavs, this technique is known under the term “Khokhloma”. The upper part of the brush is dipped in paint of one color, the lower part in the second. In one motion, images of flowers, trees, and animals are applied. The meaning of the technique is a smooth transition from one color to another. This makes the image very bright and realistic.
Examples
As a basis, you can take a cardboard blank, for example, a flower. You need to paint it with a brush with a beveled edge; it is convenient for making halftones. By painting the petals one by one, you will end up with a wonderful bud.
Birds and portraits come out well with this technique. First, a blank is created on a sheet of white paper with a simple pencil. The brush is dipped in two paints and drawn over the surface of the drawing. It is important to tilt and rotate the brush correctly.
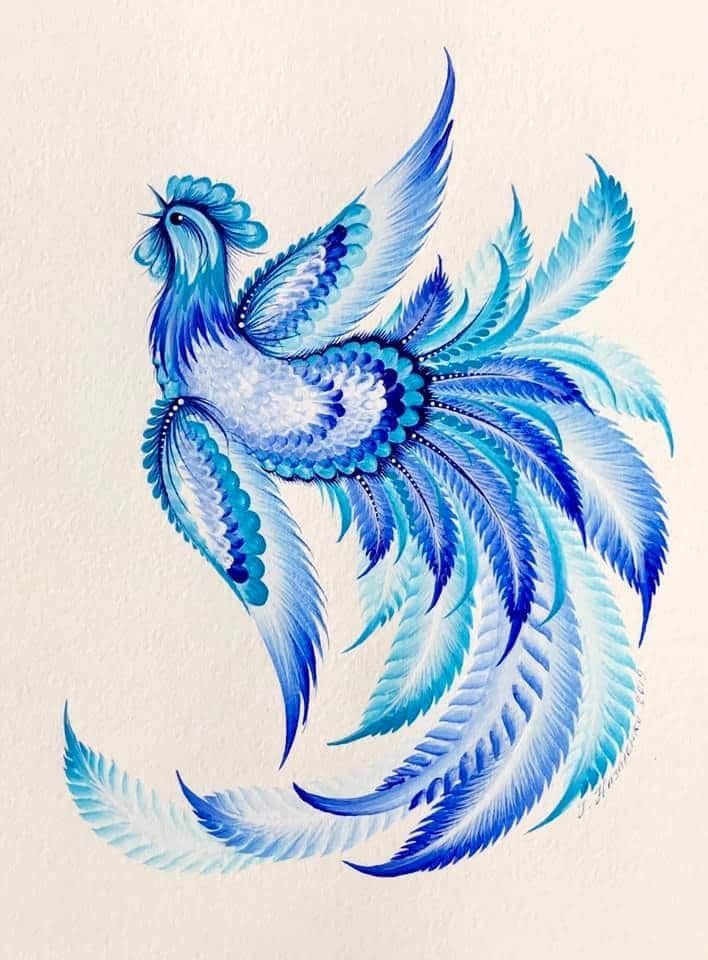
Blue firebird painted using the one stroke technique

Drawing a carnation using the one stroke technique
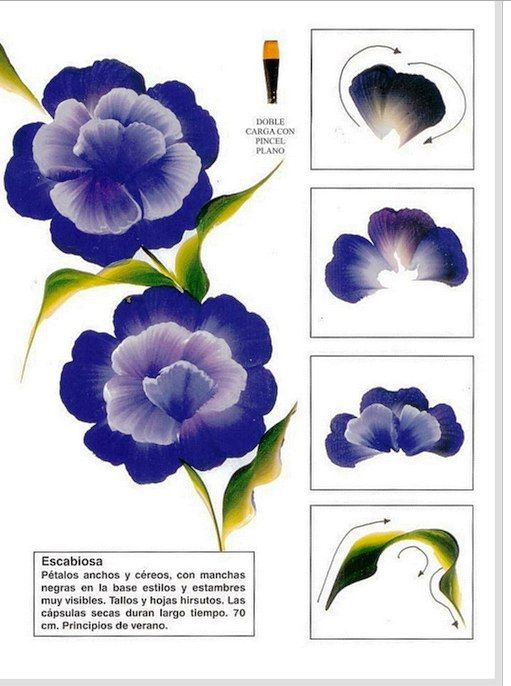
Blue flower using one stroke technique
What materials are needed
To successfully use this technique you will need:
- paints with an acrylic base of medium viscosity;
- synthetic brushes with smooth and beveled edges;
- container with water.
At first, you can use regular gouache.
Instructions
The technique of drawing with one stroke is shown in the video lesson
The artist teaches techniques for putting paints on a brush and two basic strokes.
The materials you will need are 1 paper plate, 1 flat brush, two colors of paint (white and green), paper towels and a glass of water.
Video lessons of drawing with one stroke
I chose two videos on the technique of drawing with one stroke.
Bud and rose in one stroke
Good master class for beginners
The artist dips the top of the brush in white paint and the bottom in burgundy. And he draws a flower on white paper.
Christmas tree in 2 minutes: draw with “one stroke”
In this lesson, the artist draws a New Year's tree.
Painting with foil
Description and examples
Another interesting unconventional drawing technique that has gained recognition among beginners and professional artists. And its meaning is simple. Take a small piece of foil from which a lump is formed. Then it is lowered. into paint and applied with dotted movements onto a sheet of paper or canvas.
There is another option when the paint is first applied in thick layers, and then it is shaded using crumpled foil.
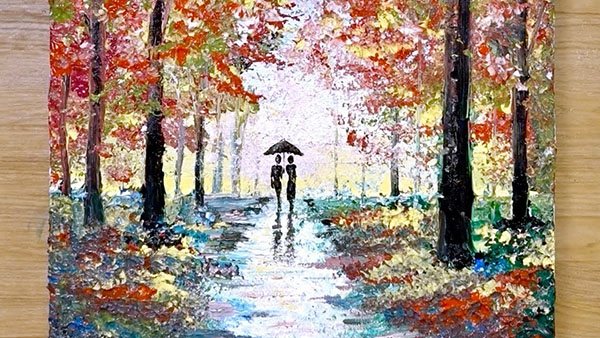
Photo source - youtube.com
Typically, this technique uses acrylic paint or gouache. Landscapes are the best. A brush is used to work out small details.
The peculiarity of this technique is that the paint, under the influence of foil, acquires a heterogeneous texture and looks voluminous after drying.
Video tutorials on painting with foil
Here is a list of lessons that I found easy to review.
Moonlight night painted with foil
First, the author attaches a moon stencil (circle) to the paper to preserve a white background for it. Next, apply drops of paint around the moon. Using a wad of foil, shades the paint. The surface is textured. A lot of paint is applied and it takes the form of the curves of an improvised “brush”.
After the paint has dried, the artist begins to work with the texture of the moon, applying the paint in dotted movements.
Attention! To prevent layers of paint from mixing, you need to use different pieces of foil for different colors. For the background - one, for the moon - the second, and so on.
Smaller details, trees, a ballerina against the background of the moon are painted with a brush.
Spring bouquet painted with foil
And again my favorite lilac. In this lesson, the author mixes two painting techniques - sponge and foil. Using the first, the background is drawn, and using the second, the lilac. And this is justified. Flowers look voluminous against a shaded background. Their textures don't mix.
Winter night using foil painting technique
Romantic, atmospheric design, quite easy to reproduce.
What is the essence of non-traditional drawing for children 4–5 years old?
Non-traditional drawing is a method of visual activity that is not based on the traditions of this type of creativity in terms of the choice of materials for applying paint, but uses cotton swabs, fingers, foam rubber, crumpled paper, etc.
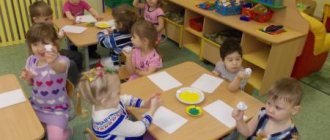
In kindergarten, non-traditional drawing is notable for the fact that all (!) kids get different pictures. For children in the middle group, these techniques of visual creativity, first of all, stimulate the development of research abilities, as they open up wide scope for experiments: applying dyes to materials of natural origin, drawing through gauze, etc. In addition, non-traditional drawing:
- trains sensorimotor coordination and fine motor skills, which is a key factor in speech development;
- develops memory, attention;
- promotes the development of imaginative thinking;
- forms the prerequisites for harmonious social and communicative development - children in the process of work turn to each other and to adults, ask questions;
- develops aesthetic taste and ideas about harmony.
Non-traditional drawing in individual classes, as well as as a type of work in lessons of various educational areas in preschool educational institutions, helps solve the following problems:
- expand children's understanding of ways to depict objects;
- develop interest in teamwork;
- practice working with different materials - to realize a creative idea, children draw using cotton wool, palms, stamps, etc.;
- activate children's creative abilities and imagination;
- create an emotionally positive climate in the team (the children’s work looks like a game - to make the lawn more beautiful, they draw dandelions with a poke of a cotton swab, and using their fingers to depict raindrops, they say: “Rain, rain, drip-drip-drip”);
- develop self-confidence.
Non-traditional drawing classes create an atmosphere of goodwill in the team