Leading psychologists and teachers have long approved the most useful and interesting drawing techniques for children. They are sure that such creative activities not only influence the acquisition of artistic skills and the development of imagination, but also stabilize the child’s nervous system and have a positive effect on his psychological development.
Among the most popular drawing techniques with a preschooler or elementary school student, experts highlight:
- Frottage;
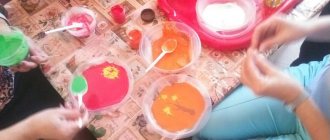
- Air paints;
- Marbled paper;
- Soap painting;
- Blotography (drawing with splashes);
- Drawing on a wet surface;
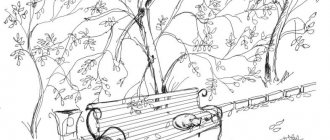
Frottage is an artistic technique using the rubbing motion of a pencil.
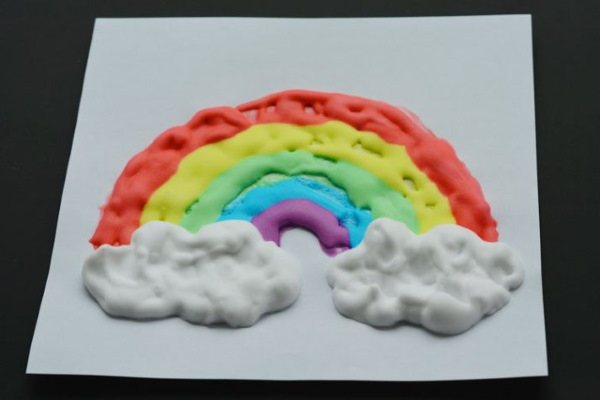
Drawing with air paints
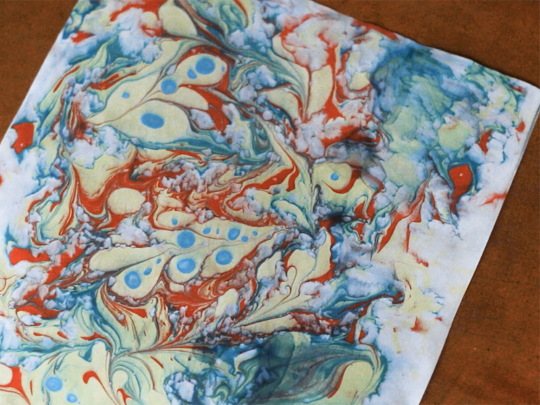
Drawing marble paper
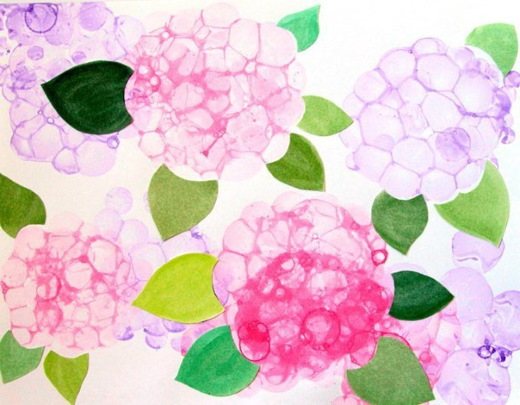
Soap painting
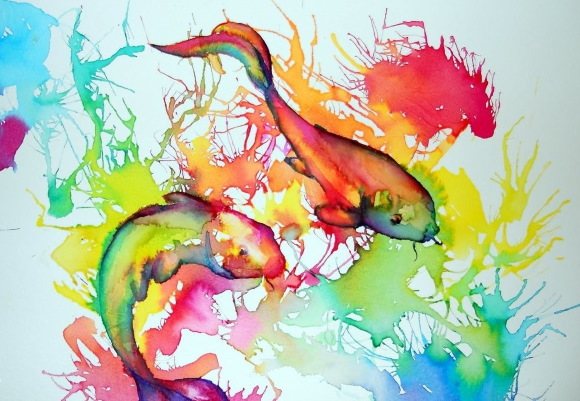
Blotography - splash painting technique
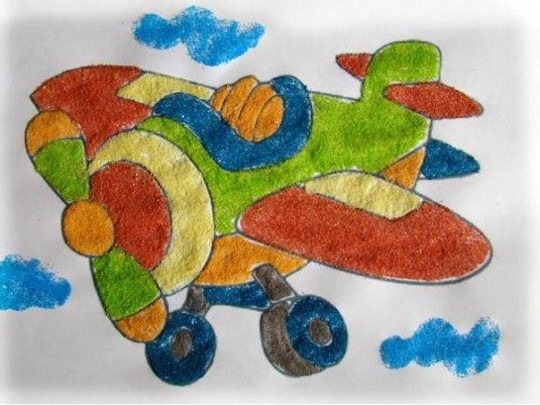
Drawing with salt and glue
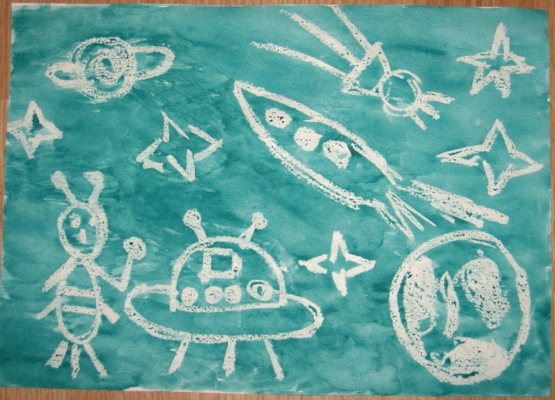
Drawing with wax crayons
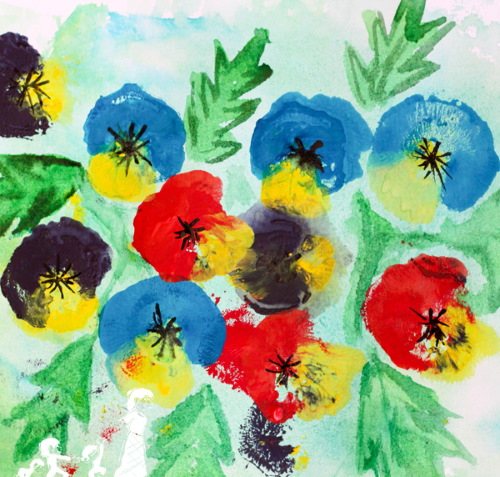
Balloon drawing
- A bunch of pencils;
- Crayons and starch;
- Multi-colored glue;
- Drawing with salt;
- Wax painting;
- Foam rubber or sponge;
- Drawing with cotton swabs;
- Drawing with handprints, fingers, palms, feet;
- Drawing with balls.
The benefits of creativity for child development
Drawing lessons are a mandatory element of comprehensive development for children 6-7-8 years old.
In particular, they provide:
- Stimulation of fine motor skills, which makes it easier for preschoolers to prepare their hands for writing.
- Development of the right hemisphere, and with it imagination, creativity, creative thinking.
- Conscious perception of real objects, deep knowledge of their properties.
- Education of aesthetic feelings.
- Mastering relaxation techniques, since creativity in any form is considered a powerful meditative tool.
- It works like art therapy: creativity allows, through a concrete or abstract plot, not only to express a personal opinion, but to throw out emotions, reduce fears and anxiety.
- A useful pastime that can later turn into a stable hobby.
- Improving communication and cooperation skills when working in a group.
Do you need a drawing class?
Sometimes parents think about teaching their children in a special creative school. There are also different sections that help the child learn a new skill.
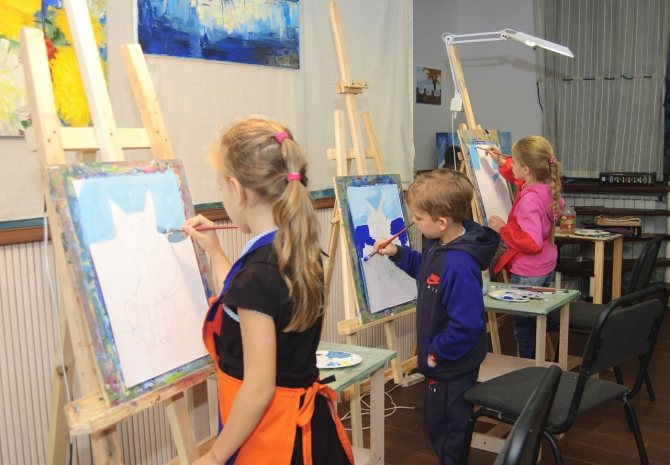
Experienced teachers know teaching methods. Therefore, they interact more effectively with students
Graphic skills will help a preschooler master writing. It will be easier for him to hold a pen, navigate a sheet of paper and control pressure.
We wrote earlier about how to teach a child to hold a pen correctly.
Art school promotes the development of imagination and creative skills. In the future, a person will develop an aesthetic taste that will help in life.
How to get your child interested in drawing
Encouraging a child to engage in creativity and maintain his interest is the main task of a parent or teacher. Often children refuse to even try to draw, or, as soon as they pick up a brush, they quickly switch their attention to something else, and eventually give up.
To interest your child, you need to:
- propose a topic that is relevant to him, for example, pets, superheroes or favorite cartoon characters.
- experiment with materials: watercolors, finger paints, pastels, painting with light. Some children may not like holding a brush, but they are happy to use their own palms for art, while others, on the contrary, will prefer a pencil, since the structure of the paints is unpleasant for them.
- you need to watch the child, perhaps he himself will tell you what interests him in painting. Once the initiative has been taken, it must be supported.
- the most important thing is to lead by example. A child will be more actively involved in any process if an adult regularly studies and offers to study together.
List of recommendations and advice from teachers in teaching children to draw
When teaching a child to draw, it is necessary to take into account the advice of teachers:
- There is no need to limit the child in drawing a specific object; it is better to give free rein to his fantasies. And the end result cannot be assessed negatively. It is better to discuss the content of the drawing so that the child can describe what exactly he depicted.
- The age of the child must be taken into account. If the child is under three years old, he needs to be given paints to draw, since during this period he will not be able to hold a pencil or felt-tip pen well. And at four years old, a child should already be able to draw well with a pencil. But it is recommended to choose soft pencils so that getting visible lines does not require strong pressure.
- Take into account the individual characteristics of the child. Some children are afraid of getting dirty, so they may avoid finger painting. In this case, you need to immediately teach your child to paint with a brush.
- Do not compare the child’s work with the model. Of course, the result will be different. It is better to show your child how to draw his chosen object using various techniques.
- If your child draws well, there is no need to rush to send him to appropriate classes. Art school should become a conscious choice of a child. The most suitable age to start training is 10-11 years old.
By following the above recommendations, you can help your child learn to draw faster. But if he doesn’t have a penchant for fine art, there’s no point in forcing him.

Organization of the workspace, course of the lesson
Training should be done at a table or easel. There should be no unnecessary, distracting items in the workplace, only materials necessary for the current lesson. The surrounding space can be protected from possible exposure to paints by laying down a film.
You should sit in the illuminated part of the room and turn on the light if necessary. It is also necessary to limit the room from the possible influence of extraneous phenomena or sound.
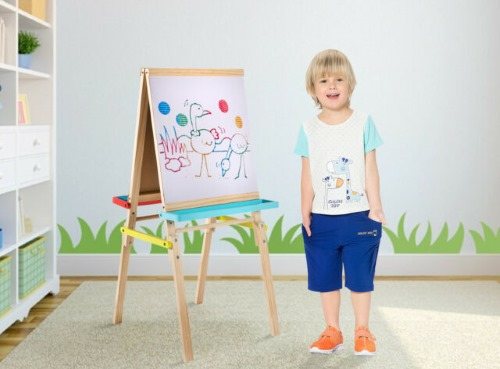
Drawing lessons for children 6-7-8 years old can be conducted using an easel
Drawing lessons for children 6-7-8 years old begin with the preparation of tools that the child is introduced to. It is useful to inform the child about the topic of the lesson and briefly explain what will happen.
The creative process depends on the level of children's skills. So, if children are little familiar with this art and have not drawn before, first of all, an adult breaks down the artistic image into elementary figures.
You can start drawing both from the background and from the main object, gradually painting over the remaining areas. The lesson ends with cleaning the workspace. The finished painting can be hung on the wall or framed.
A reminder about the basic materials, suitable tools and their specifics is indicated in the table.
| Material | Mandatory accessories | Possibilities of the material, features of technology |
| Colour pencils | Plain paper, eraser (knead) | One of the most accessible materials will allow you to both practice basic skills and depict realistic objects. |
| Pastel (pastel pencils) | Pastel paper, napkins, nag | Similar to colored pencils, but allows for better shading of the work. |
| Gouache | Plain paper, a set of brushes of different sizes and structures, palette | Budget paints, suitable for beginner artists. |
| Acrylic | Thick paper, brushes: synthetic and bristles, palette knife, palette, tablet | Creates bright, detailed images, adheres well to paper and allows for multiple layers. |
| Watercolor and watercolor markers | Watercolor paper, soft brushes, napkins, palette, liner, tablet | The ability to paint airy pictures and abstractions, use unusual wet technique. |
| Oil | Canvas, set of synthetic brushes, palette knife, palette | Complex and expensive material, used by professional craftsmen. |
Teaching drawing to preschool children
Bibliographic description:
Fomina, V. S. Teaching drawing to preschool children / V. S. Fomina. — Text: direct // Education and upbringing. — 2022. — No. 1 (11). — pp. 24-28. — URL: https://moluch.ru/th/4/archive/52/1919/ (access date: 01/19/2022).
This article provides an overview of the author's initial experience of teaching drawing and arts and crafts to children of preschool and early preschool age in children's development centers.
Keywords: drawing, arts and crafts, gouache, creative education of a child, pedagogy, psychology, early age, motor skill development, fairy tales, thematic assignments
From early childhood I loved to draw, attended drawing and arts and crafts clubs. I really liked painting with gouache, then at art school I was taught batik and clay modeling, I was interested in learning these techniques. Subsequently, I independently mastered other techniques of decorative and applied art. At the age of 18, she entered the university - serious training in drawing, attending lectures on the theory and history of architecture, and studying sculpture. While studying at the university, I decided that I would connect my life with children and teaching them a job that I like. Already in my 3rd year, I began working at a children's development center as a teacher of fine and decorative arts, began to study articles by senior teachers with extensive experience, and the work of psychologists, which greatly helped me in working with children.
The subject “Fine Arts” is compulsory for study in primary and secondary schools. Most parents are interested in raising their child creatively from an early age, or they want to occupy their child’s time with something useful and send him to a drawing club.
Drawing is the art of depicting existing or imaginary objects on a piece of paper, outlining their shapes with lines, giving them color. It is one of the most important means of understanding the world and developing aesthetic perception, since it is directly related to the independent, creative and practical activities of the child. Drawing, as an activity, allows children to express their ideas about the world around them in their works, convey their mood at a given moment, and express their attitude towards the world around them through a sheet of paper and paint. Therefore, mastering visual activities from early childhood is of great importance for a child: to create a positive emotional mood, which contributes to the development of creativity, aesthetic sense, sense of imaginative representation and imagination, the preschooler also gets the opportunity to independently create a drawing, show it to his parents and give them joy, receive encouragement
Parents often ask the question: “At what age can a child start drawing, when should you give your child a box of paints and brushes?” Children need to be taught drawing from an early age, that is, from two to three years old. The experience of senior teachers suggests: children who start painting earlier become more attentive and observant. Earlier, they begin to compare the colors of different objects with each other, which means they can distinguish and more accurately select shades of colors and tonal relationships, reflect and analyze. More precisely, they express their feelings and thoughts on paper with pencils, paints, crayons and other coloring materials.
Of course, everything will not work out right away; time is needed to interest, show and teach the child to “use” his hands. First, the parent himself can try to interest the child by drawing the simplest geometric shapes on paper. Mix paints and show how the shade changes, how the face of a kitten or a person is obtained from an ordinary circle, how colors are mixed: from white and red, a completely new color is obtained - pink.
The beginning of a child’s visual activity is aimed at active cognitive activities, and at the child’s study of materials, their properties and experimentation with them.
The process of drawing is the development of fine motor skills (movements of small muscles of the hands), their variety and repetition. It is necessary to remember about hand-eye coordination, since the development of small hand movements occurs under the control of vision. It is known that in the human brain the centers responsible for speech and finger movement are located very close to each other. By developing fine motor skills, we activate these centers. In the future, the child will need these skills to use motor activities to draw, write, dress, and so on. Thus, we can conclude that the development of muscle movements when drawing stimulates areas of the brain that will help the child acquire the skills necessary for a full life.
In my practice, there are age groups with children from 11 months, whose mothers are interested in their development and are directly involved in the “creative” process. Classes are held in the form of a game: I tell a fairy tale and gradually we fill out a sheet of paper with the characters of this story. For example, the fairy tale “Kolobok” can be divided into 4 parts:
- The main character Kolobok, whom we sculpt from plasticine, trains the hands by pressing, kneading the yellow piece;
- The house where Kolobok lived before he left Grandma and Grandpa. From cotton swabs we make a square - the base of the house and a triangle - the roof;
- Glue the pre-made Grandmother and Grandfather onto a sheet of paper;
4. Breathing exercises: we make small adjustments to the fairy tale - the actions take place in winter, so snow is necessary. Instead of cotton wool, we took cotton pads, from which it is convenient to “make” a snowman or tear them into pieces to get snowflakes. We blow on the “snowflakes” and ask the baby to blow on them too. This process is interesting for children. Then, we glue snowflakes on the roof of Kolobok’s house, on the ground, under Grandmother and Grandfather’s feet, on the sky, creating the appearance of falling snowflakes [Fig. 1].
Fig.1. Fairy tale "Kolobok"
Game exercises can be carried out both with the whole group and with one child separately. Exercises must be repeated periodically to consolidate new knowledge, acquired skills, clarity of movements and forms.
My main task, as a teacher of the younger group, is to provide children's drawings with content that can be filled with game exercises, and you can add to them those details that the child deems necessary. For example, draw eyes and a smile on the apples [Fig. 2].
Rice. 2. Eyes and smile on apples
In drawing classes, a thematic task is essential, which can be used individually, for several students, or for the entire younger group.
When offering a thematic task, I need to connect it with preliminary impressions, tell a story from a fairy tale, or come up with a kind image, ask about the child’s observations, for example, about the changed weather or what kind of fruit he likes, about the color and shape of the fruit. That is, in a short introduction it is necessary to give an image of the object, sometimes show it, or let it be touched. You can ask your child which cartoon is his favorite, which character he likes the most. And make drawings based on it [Fig. 3, Fig. 4].
Fig.3. “Smesharik” Fig. 4. "Kotofey"
At the end of the lesson, you should not conduct a general review of the pictures or their analysis. Children are still too young for this; one of the children may take the teacher’s advice as an unkind word that will greatly offend him. However, children's work should be laid out on a separate table so that they can once again admire their drawings and the drawings of their peers.
Teaching drawing to preschool children involves solving two interrelated problems:
- It is necessary to awaken children's interest in learning;
- To develop their visual skills and abilities.
In the process of drawing, a child’s observation, aesthetic perception, artistic taste, and creative abilities improve. Almost all children draw, but subsequently very few take up drawing.
To summarize, I can say that drawing can become an integral part of a child’s life for exploring the world around him, for learning how to convey emotions and memories on canvas. Teaching a child fine arts independently or in children's development centers is the decision of every parent. This is a labor-intensive task, but over time the efforts invested in the child will be justified.
Key terms
(automatically generated)
: arts and crafts, child, sheet of paper, world around us, drawing group, fine motor skills, junior group, early age, thematic task, aesthetic perception.
Principles of drawing with children aged 6-8 years
Drawing lessons for children 6-7-8 years old should be interesting and bring visible benefits.
Therefore, to get results, you must adhere to a number of rules:
- For creativity, you need to allocate a corner where the child can retire and take the necessary materials for the lesson.
- Drawing should be done in stages - from simple to complex, or from general to specific.
- If it is difficult for a child to come up with a plot on his own, you can ask a specific topic.
- It is advisable to continue the lesson until all the work is ready. You can take short breaks. If a child becomes tired, he should not be forced to continue drawing.
- Classes should be diversified with new tools and non-standard techniques.
- You need to sit down to draw in a good mood. The preschooler should be alert and focused.
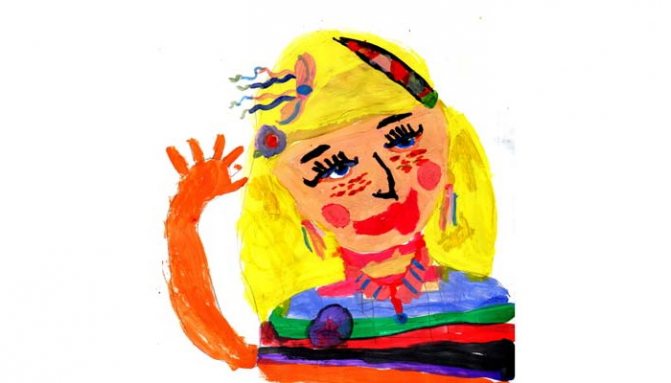
You cannot scold a child for drawing incorrectly - the little artist has the right to his own vision of the future image
- The thing to remember is that it can't go wrong. The child has his own vision of an object or landscape; in this regard, creativity allows for greater freedom of expression. At the end of the lesson, you must reward for your efforts.
Drawing with pencils with children 6-7-8 years old
Drawing techniques
Pencil drawing styles:
- An outline drawing is an image of the appearance of an object or character.
- Adding volume - drawing details, working with light and shadows.
- Hatching : involves making short straight sections. The length, density, and direction of the stroke depend on the author’s idea.
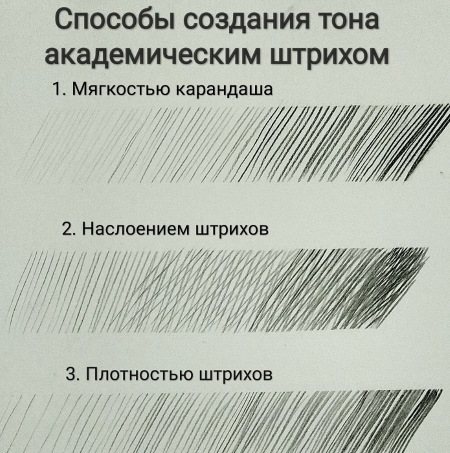
- Shading, or rubbing , of the main lines in whole or in part. The boundaries become less noticeable, the entire image softens. The technique is used to convey the realism of the picture.
Ideas and themes for drawing
List (approximate) of ideas and topics:
- Pet (kitten or dog): 2 large ovals - body and head, 4 smaller ones - paws. Long ears and a tail are added. The muzzle contains a mouth, eyes and nose, and a mustache. A dog may also have a bone, a cat may have a bowl of milk. The animal is painted over by shading or shading.
- Kindergarten (school): ask them to draw their friends, choosing a special color of pencils and shading for each.
- Bright abstraction : secure several pencils together with an elastic band and draw patterns in this way.
- Drawing on tinted paper : paint the paper with watercolors in the chosen color, draw on top with colored crayons or pencils.
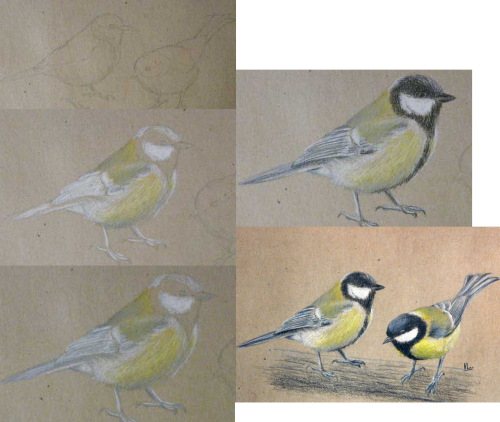
Thus, you can depict a field with dandelions on a dark green or blue sheet. To make a flower, you need to draw a circle and a lot of short strokes from it; complement it with a long stem and elongated leaves.
Master class 1
Colored pencil image of “Northern Lights” - materials:
- Colored or pastel pencils.
- Plain white (or pastel) paper.
- Paper napkins.

Work steps:
- Place the sheet vertically.
- The lower part, about 4-5 cm, is the ground. It is painted over in any form in black or dark green.
- The northern lights appear as sinuous lines that go from one edge of the sheet to the other. The segments are about 1 cm wide, they are hatched with straight lines. For shine, 4 or more shades are used; colors can mix and overlap one another.
- With similar elements the entire space is painted over to the dark bottom.
- Finally, you need to paint the trees and bushes in black (dark green). For Christmas trees, first draw a vertical axis - the trunk; straight or slightly rounded lines extend from it to the right and left. The bushes look like dashes extending from one area in different directions.
Master class 2
Creative work “Cat with a ball”, drawing with pastel pencils.
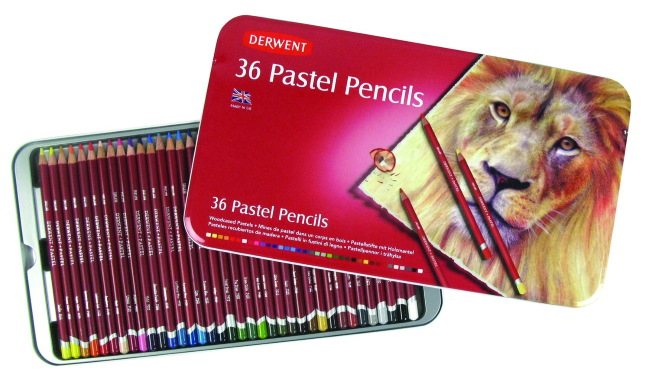
To create this drawing you will need pastel pencils.
Preparation of tools:
- Pastel pencils.
- Pastel paper.
- Napkins.
- Nag.
The working process:
- The paper is arranged in a vertical format. The work is done in pastels, as it allows for better shading, but it is acceptable to use soft colored pencils.
- The cat's body is an oval, occupying about 2/3 of the sheet. You can immediately draw it with yellow pastels without a simple pencil sketch. Paws extend from the body - 2 more elongated ovals.
- The head is a circle, located on the body, approximately in the center of the sheet. On the head there are triangular ears, they depict 2 smaller triangles as the inner part of the ears.
- At the bottom of the sheet there is a pink ball of round thread.
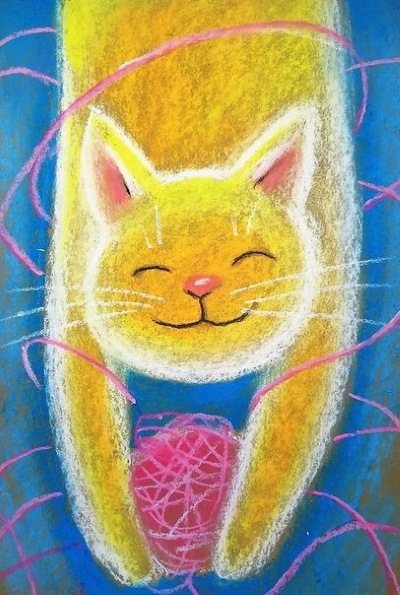
Cat with a ball of pastel pencils
- First of all, the background is painted over. Light blue, blue and a little black around the edges of the paper are used. Shading can be done with napkins or fingers.
- The cat's body, paws, muzzle and upper part of the ears are painted completely yellow. In the central part of the head, as well as on the legs and body, you can add a little dark yellow to create volume. The contours are outlined in white.
- Muzzle: the nose is drawn pink with a white spot in the middle; for the eyes and mouth, curved lines should be drawn in black. The cat also has light eyebrows and long straight whiskers. The inner areas of the ears are painted with pink and white pastels. The boundaries of colors are blurred.
- The ball is painted pink in combination with purple, individual threads are drawn in pink and white. Also, the threads lie in semicircles around the cat and encircle its body and paws.
Drawing with paints with children 6-7-8 years old
Drawing techniques
Methods of working with gouache and acrylic:
- “Dry brush”: put a small amount of paint on the tool and make light movements over the picture. This way the colors are muted, creating the effect of old paintings.
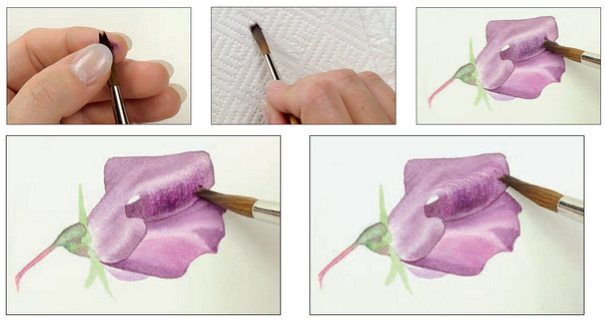
Dry brush painting
- “Dipping” and “poking.” Grass and plants, animal fur, glare of light - everything can be done by applying perpendicular pressure with a brush onto the paper.
- “Liquid acrylic” is a mixture of acrylic paint with glue and silicone. Thanks to its structure, it allows it to flow across the canvas in different directions, creating surreal patterns.
- The right-hemisphere type of drawing is painting in an intuitive manner without preliminary drawing of details.
- Using stencils. They can be figures cut out of cardboard, which are transferred to paper and then painted.
- Prints – creating a design using stamps, rollers, hands, natural elements, such as dry leaves.
- Drawing with thread: dipping a thread into paint and moving it randomly along the paper.
Examples of watercolor techniques that are suitable for teaching drawing lessons to children 6-7-8 years old:
- Wet: multi-colored spots are placed on a sheet moistened with water, creating an airy, delicate picture. It can serve as a background, and other layers can be applied on top to refine the elements.
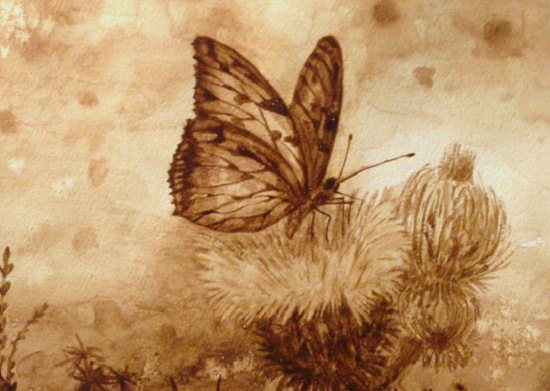
Grisaille style
- Watercolor spots – filling the image with abstract color spots.
- Grisaille is a style made in black and white or simply one color.
- Blowing: A straw blows air onto a large spot of watercolor paint, causing it to stretch into intricate shapes. This way you can create the sun and grass, a flower, a balloon, and sea creatures.
Ideas and themes for drawing
List of ideas:
- Autumn in the style of Afremov: by applying the fleecy surface of the brush, create multi-colored leaves throughout the image. After drying, paint the path and trees along it with a dark color. For this work, gouache or acrylic and a medium brush with a semicircular or square cut are suitable.
- Fantastic blue forest: complete the craft in only one color, varying its saturation. If this is a winter landscape, using the tapping method you can create splashes of white on top, which will look like falling snow.

Space in watercolor
- Space: paint a large landscape sheet with a purple tint and put yellow dots (stars) around the entire perimeter. Then cut out cardboard circles of the required size (planets) and decorate them with wet-on-wet watercolors. The child can experiment with the colors of celestial bodies or rely on their appearance presented in books.
- Bouquet of palms: draw a free-form vase. Then paint the child’s palm with gouache and attach it to the paper, do this several times. Add twigs and greenery.
- Fruit still life: depict a semicircular plate; use a large foam brush to stamp the shape of apples onto the paper, and use a small brush to make a bunch of grapes in the same way.
Master class 1
Drawing lessons for children 6-7-8 years old in the direction of right-hemisphere techniques, exercise “Seascape”.
Required tools:
- Set of gouache, whitewash.
- A sheet of white paper.
- Synthetic brushes: medium No. 7 and small No. 3.
- Container with water.
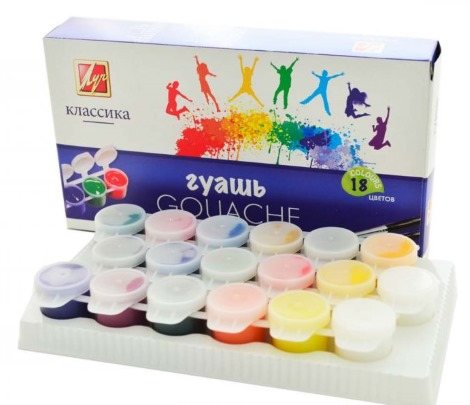
. Work progress:
- The sheet is laid horizontally and divided into 3 approximately equal parts: the upper third will be the sky, the rest will be water.
- In the sky area, a few drops of white and blue paint should be placed on the sheet, then stretched across the entire upper space. The sky needs to dry before the next step.
- Clouds: white gouache is picked up on a round brush or fingertip, and the paint is smeared in a circular motion on a certain area. The number of clouds is optional; they can be of different sizes and shapes.
- The sea is performed similarly to the sky. Only when creating it, in addition to white and blue paint, blue and a little green (turquoise) are taken. A few drops are placed on the sheet, they are mixed in horizontal masks.
- There will be an island with a tree in the left corner. The first layer of earth is black; ocher and greenery are added on top using the poking method. It is convenient to paint the island with a brush with bristles.
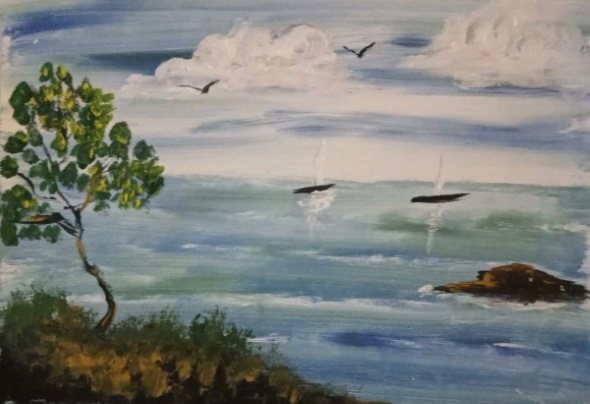
Seascape in gouache
- A tree consists of a trunk and thin branches. First, they are drawn with black gouache - shadow areas; ocher is superimposed on it in some places, imitating light. The leaves are predominantly green, with some yellow in some places.
- There is also a piece of land in the sea - an elongated, uneven oval of black color combined with ocher.
- Ships: dark boat and light sails. The bottom is a thick horizontal line, and the sails can be drawn as elongated semicircles. These elements are created with a thinner brush. A shadow from the boats can be seen falling on the water; it is depicted using whitewash and looks like a tapering zigzag.
- The picture ends with the image of 2 flying birds: they are drawn in the form of checkmarks.
Master class 2
Drawing lessons for children 6-7-8 years old with watercolors, “Flowers in a vase.”
What you need for work:
- Watercolor.
- Watercolor thick paper.
- Tablet.
- Brushes: large No. 30, medium (for example, No. 6 or 7) and small (No. 1-2).
- Water in a glass.
- Palette.
- Paper napkins.
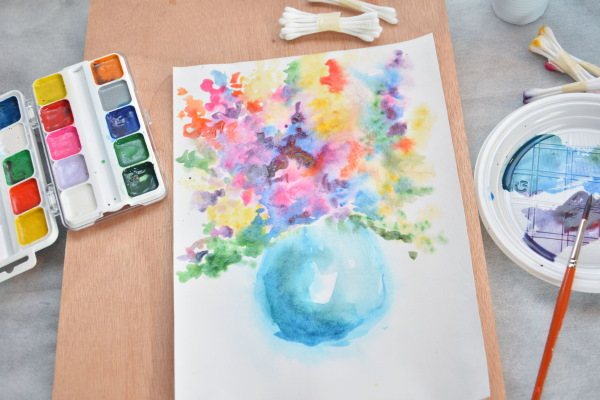
Work progress:
- The paper lies vertically in front of the child, for convenience it is fixed on a special tablet or taped to a flat surface. Using a wide brush, wet the entire paper surface with clean water; While the sheet is wet, you need to draw the main details.
- The vase is depicted in the form of a circle or oval in blue watercolor. A shadow is created on the left side of the vase: blue must be drawn up and down several times, the center remains white as the most illuminated place.
- Flowers. First you need to do a tone fill. To do this, take pink watercolor, diluted with a large amount of water, and use a round brush to place large spots in different places. Yellow, purple and green shades appear in the same way.
- Flower detailing. Use a small brush to add red, orange, blue and deep purple dots on top of the first abstract layer. The flowers extend from the vase and can go up and to the side.
- A shadow falls next to the vase on the left; it can be made faded lilac. The same paint is used to depict the table on which the vase stands in horizontal strokes.
Step by step teaching a child to draw
Step-by-step lessons will help your preschooler master a new skill. Due to his age, it is still difficult for him to imagine a detailed drawing plan. For example, a chicken can be easily depicted in stages:
- A circle is drawn in the center of the sheet with a brown pencil.
- A slightly smaller circle is drawn on top of the object.
- Make two black dots in a small circle.
- Between them, draw a beak with a red pencil in the form of a pentagon.
- Brown paws are added to the bottom of the large circle.
- The body and head are painted over with a yellow pencil.
Note! Any object can be roughly decomposed. It is important to teach the child to see an object as a combination of several geometric shapes. Gradually he will be able to do this without using hints.
Calendar plan in the preparatory group for each day according to the Federal State Educational Standard
Using pencils
It is better to choose hexagonal colored pencils. They are easy to hold and easier to grasp with your fingers. To get started, a set of 12 colors is enough - it’s enough to make a simple drawing and a real masterpiece. An adult shows how to use pencils. Combine colors, change the pressure and the way you hold it in your hand. You can learn to draw through coloring books. With their help, the child will get used to not going beyond boundaries and making small details.
Application of paints
It is impossible to say for sure where to start learning to draw. Each individual has an individual learning path. Finger paints can be used from the age of one year. You can smear your hands with them and make unusual drawings. At an older age, it is better to take gouache or watercolor. With its help you can draw anything. Children are taught how to use paints correctly. First, prepare the workplace, pour water into a glass and take brushes.
Important! During the lesson, the teacher explains that the paints are slightly moistened and only then used.
The process is no different from using pencils. Geometric shapes are depicted step by step. Snail drawing is easy to make:
- First, make a large yellow circle.
- An elongated loop is depicted under the cinnamon object.
- At the right side of the loop, strings-eyes are drawn.
- The yellow circle is decorated with a spiral pattern.
Repeating each step will improve the skill. Gradually the goals become more complicated. The smaller and clearer the drawing, the better the child’s higher mental functions develop.
Recommendations from psychologists and teachers
Experts recommend following these tips when drawing with children:
- The time for the drawing lesson should be clearly defined. The child must understand when and what is required of him.
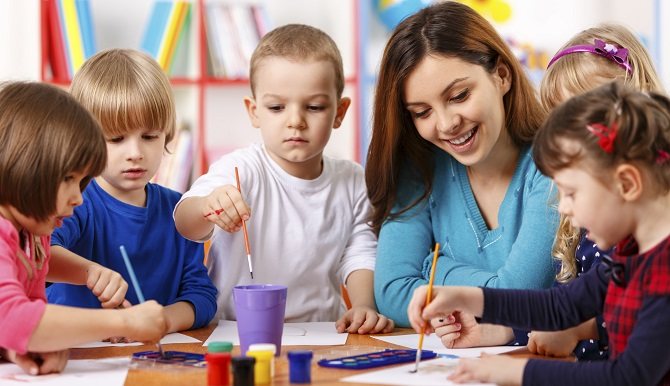
Psychologists recommend creating a curriculum for drawing lessons for children
- It is useful to draw up a training program, gradually supplement and complicate it.
- The chosen topics for creativity should be within the child’s area of interest.
- There is no need to do for the child or intrusively tell him how to do it. Explain the topic, show an example of an image or creative technique - the child tries to do the rest himself, as best he can.
- The process may require the parent to maintain interest by commenting on the work and asking leading questions about the plot and characters.
- Often, music is turned on to create an atmosphere: classical or a calm, relaxing melody without words.
Drawing lessons for children should be focused on the child’s age of 6-7-8 years and his development zone. Closer to school and in the primary grades, children are already able to hold attention for a long time, but you should not offer to make an overly complex picture or more than 2 drawings at a time.
With the right approach, attentive attitude and patience, you can instill in your child the desire to develop such an exciting and multifaceted activity as drawing.
And if a little person has not only a desire, but also at least a little talent, such an activity will not only help develop most creative skills, but can also develop into an artistic profession in adulthood.
Image techniques
Parents don't always know how to teach their child to draw. This needs to be done in stages. Visually effective techniques must be used. First, an adult shows how lines are drawn at different angles, then connects them into geometric shapes.
Important! There is no need to rush your child and force him to do everything perfectly right away. Mastering any skill occurs gradually.
You can quickly draw a car or other object using circles and rectangles. Another popular technique is for an adult to take the child's hand and lead it. The teacher’s task is not to analyze the finished work, but simply to show it and emphasize its uniqueness. Experts recommend gradually involving children. Parents do not always understand where to start learning to draw. You can use templates that require little modification. The child is asked to add threads to balloons, etc. In preschool age, you can offer to depict simple still lifes of fruits or flowers. Children don't have to portray everything exactly. It’s more important to show them how to draw.


