How to make a frog from plasticine
Plasticine is an amazing material that allows you to develop not only creativity and imagination, but also fine motor skills. You can make a frog from plasticine using a master class, where everything is described step by step and is understandable even for children. Follow the instructions exactly or apply your own ideas - everyone decides for themselves.
A simple do-it-yourself plasticine frog
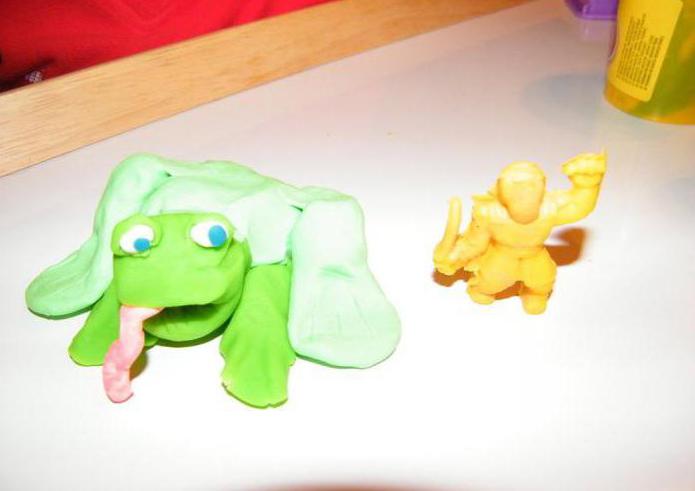
Any child can make a frog from plasticine with their own hands in the simplest way. Just 8 main parts, 5 additional ones and the little toad will be ready. The child can complete large parts independently, and one of the adults will help him with small ones.
Sculpting process:
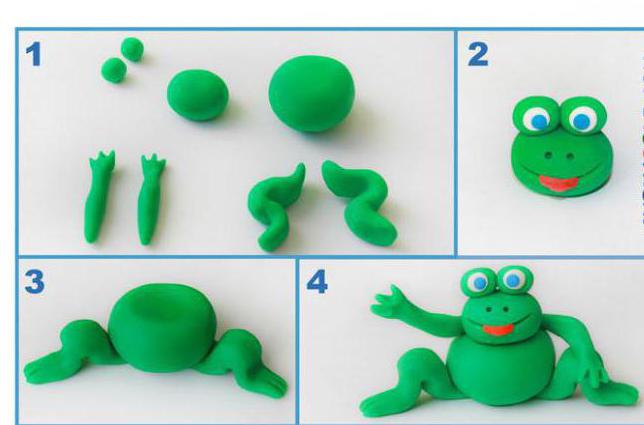
- Roll 2 balls from the green material - one larger than the other. Connect them together - this will be the torso and head.
- Make two identical small balls and attach them to the top of the head. Thin white plasticine circles are glued on top of them. Pupils of blue or another color are sculpted on them.
- The mouth and nose are cut using stacks or toothpicks. Attach a tongue made of red plasticine.
- Roll out two green bars. Flatten on one side, giving the shape of fins. The legs are bent and fixed on the frog's body.
- For the front legs, the blanks are made thinner and shorter. The lower part is made flattened. Cut out 3 toes on each foot, making membranes using a toothpick. Attach the legs to the body.
Frog princess made of plasticine
To get your child interested in modeling, you can make a frog princess from plasticine. To do this, first make the frog itself and add just a couple of additional details - a crown and an arrow:
- Roll the green mass into a roll and cut it into 3 pieces - 1 small and 2 larger.
- Prepare a blank for the head. One of the large pieces is rolled and flattened, giving it an oval shape.
- Roll the second large piece into a ball. Stick a toothpick or match into it and connect it to the head blank.
- From the last piece, four sausage-shaped legs are created. Bend them in half and connect them to the base.
- 2 small flat cakes are connected to the paws. 2 slightly larger cakes are attached to the body in the abdominal area.
- Make 2 balls from the remaining piece and attach them to the top of the head.
- On the base for the eyes, fix 2 white circles and stick black pupils on them.
- A stack is used to cut through the frog's mouth. Roll small balls from pale green plasticine. Slightly flattening them, place them on the head and body. The same details indicate the nostrils of a frog.
- The abdomen is made from light green material and attached to the body.
- Using the stacks, cut fingers at the edges of the foot cakes. White mini-highlights are placed on the pupils.
- To make a crown for the princess, you will need yellow or light orange plasticine. Make a sausage and roll it into thin strips. Sharp teeth cut along the edge of the stack.
- Cut a part from the jagged strip so that it has 5 teeth. They fold it into a crown, which is placed on the frog's head. The sharp ends are slightly twisted in different directions.
- A small tongue is created from a piece of red plasticine and glued to the line of the mouth.
- The arrow is molded from plasticine in brown, yellow and white colors.
Frog made of light plasticine
Making a frog from light plasticine is easy step by step. For example, you can create the heroine of the cartoon “Frog Traveler”. Parts made of this material hold their shape well, and the mass does not stick to your hands.
Important! This material is afraid of moisture, both during the work process and in finished crafts.
- Take a small piece of green mass. They give it the shape of a head with chubby cheeks. Particular attention is paid to the mouth - making it slightly pointed. Designate slightly raised areas for the eyes.
- Roll out yellow plasticine and frame the lower part of the head. A thin strip marks the opening of the mouth.
- The eyes are made from the white mass. To make them look funny and cheerful, the pupils are sculpted in different shapes, blue with black splashes.
- To save material, you can use foil for the frog’s body, which is crumpled into a pear-shaped shape and covered with a thin layer of green mass. To highlight the frog's abdomen, the front part is covered with a yellow mass.
- The bases for the frog's legs are made in the form of rounded blocks of the required size.
- The fingers and toes of the frog are squeezed out with a stack. Give them the necessary bends. Add a yellow mass to the middle of the palms.
- Connect all the parts together. For a strong attachment, the head is “set” on a match or toothpick.
- Smooth out roughness and unevenness. Add dark green splashes to the arms and legs of the frog.
Craft with a frog made of plasticine
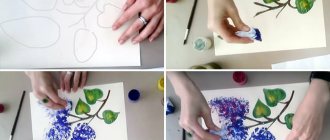
To captivate your child, you can make together with him not only one frog from plasticine, but an entire craft. A step-by-step analysis will help you understand how to sculpt reeds using toothpicks. How to make a pond and a water lily leaf on it:
- To create a reed, you will need toothpicks, brown and green plasticine. The bottom is wrapped in green plasticine, the top in brown. Leaves are sculpted separately. Everything is connected and fixed to the surface.
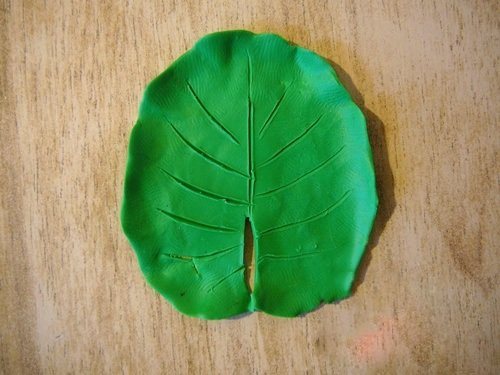
- To make a water lily leaf, roll out the green mass and flatten it into an oval with your fingers. Using a stack or a knife, draw veins and make a cut in the bottom of the sheet.
- Cut out a circle or any shape large enough from cardboard to accommodate the wah and additional accessories.
- The cardboard is coated with a thin green layer.
- On top of the green layer, pieces of blue and light blue material are laid out and smeared in a chaotic manner.
- Reeds are placed at the edges.
- A water lily leaf is placed a little away from the center, on which the main character is planted.
Summary of the modeling lesson “Meeting of Ivan Tsarevich with the Frog Princess”
Summary of organized educational activities in the preparatory group “Meeting of Ivan Tsarevich and the Frog Princess”
Koklyaeva Anna Viktorovna
Preparatory group teacher
MADOU d/s "Parus"
Notes on the lesson modeling in the preparatory group
Meeting of the frog princess with Ivan the prince.
Program content:
Development of creative abilities through modeling. Improving the skill of using plasticine. Formation of a sense of composition, proportion, and dynamics of action.
Improve the ability to work with various materials (plasticine).
1. improve knowledge of the concepts of round, rectangular and square shapes; consolidate the skill of forming in two ways (patterning and in-depth relief), teach children to carefully use plasticine.
2. develop children’s constructive abilities;
develop memory, logical thinking and attention. Cause the need to supplement the main image with details
3. cultivate respect and attention, and patience for each other, careful attitude towards surrounding objects, cultivate the ability to correlate one’s actions with the actions of an adult.
Equipment
: arrow with a note, pictures - with the image of a frog, plasticine, stacks, cardboard.
Demo material
: cards with images of frogs, a book with illustrations (a large book of fairy tales)
Handout
: plasticine, stacks, cardboard.
Preliminary work:
reading the Russian folk tale “The Frog Princess”, looking at pictures of a frog, guessing riddles. Conducting didactic games: lotto “In the world of fairy tales”.
Progress of classes:
The children are engaged in independent play activities.
1. Introductory part
Educator: Guys, I was watering the flowers here, I don’t understand what this is lying here? Let's collect the toys and see what they are?
Children's answers (arrow)
Educator: There’s another note here, let’s sit down on the chairs and I’ll read you what’s written here.
“Hello guys, my name is Ivan Tsarevich and I need your help. My bride is lost, help me find her."
Educator: Guys, can we help Ivan Tsarevich?
Children's answers (yes)
Educator: Wait, Ivan Tsarevich, arrow, bride, what fairy tale is this from?
Children's answers (The Frog Princess)
Educator: let's guess the riddle:
“An arrow flew and fell into a swamp,
And in this swamp, someone raised her.
Who, having said goodbye to green skin,
How else can you make a croak with your own hands?
Here's another way to make a frog from plasticine:
- Take green, red, white and black plasticine.
- Roll out a short thick sausage from green plasticine and cut it in half.
- From one half, make another sausage with one end pointed. And slightly flatten the other end with the pads of two fingers so that you get two oval depressions, and above them a protruding forehead.
- Using a toothpick or a plasticine knife, divide the forehead into two parts, depicting the brow ridges.
- Make two very small balls from white plasticine and attach them to the bottom of the recesses.
- Make small pupils from black plasticine and fix them on the white base of the eyes.
- Push through the mouth using a plasticine knife or toothpick. Make a tongue out of red plasticine and stick it in your mouth.
- Press the two nostrils with your mouth.
- From the second part of green plasticine, roll out the sausage, divide it into 3 equal segments, one of which, divide into two more parts.
- Roll the smaller pieces into short sausages. Flatten their edges a little and make three “fingers”. These will be the front legs.
- Using the same method, make the hind limbs from the remaining plasticine. They should be slightly longer than the front ones, and also curved.
- All that remains is to attach the legs to the body, and the plasticine frog is ready.
Fairytale heroine
Just one small addition, and an ordinary animal will turn into a fairy-tale heroine. To do this, you simply need to build a royal crown from a yellow piece of plasticine. The simplest version of the crown is to roll 5 small droplets, pointed at the ends, from the working material. Connect these droplets together and press down so that they do not crumble. The crown should be attached to the toy's head.
A small cake is made from the same material, which is attached to the front of the body. The “Frog Princess” craft is ready for play, participation in a competition, even a talent show in kindergarten.
Let's make a frog together
Below we will look at how to make a frog from plasticine. There's nothing complicated about it. But to make a plasticine frog beautiful and believable, follow the mandatory tips.
- Prepare green and white plasticine.
- Roll two balls from green plasticine. One ball should be slightly larger than the second.
- Stick these two balls together.
- Make two more small green balls and attach them on top, next to each other.
- To make the eyes, stick thin white circles onto two small green balls. Now form pupils from any other color, for example, blue and stick them to a white base.
- Push through the nostrils and mouth with a toothpick.
- How to make hind legs? Roll two sausages from the green mass, then bend them and flatten the front part so that it looks like flippers.
- Secure the limbs to the lower body.
- Make the front legs shorter than the hind legs. They will be straight, but the foot should also be flattened. The frog has three “fingers” on each leg. Mark the membranes with a toothpick. The plasticine frog is almost ready.
- You can place it in any position. She can sit, lie on her belly, or even stand.
- The assembly order can be changed, as well as the colors.
The plasticine frog is ready. It turned out cute, and the child will certainly be delighted with his own craft.