Lesson notes
An art lesson on the topic “Soldier on duty” in the senior group of a kindergarten can be timed to coincide with two holidays: February 23 and May 9. In both cases, the main direction is getting to know the Russian Army and the defenders of the Motherland.
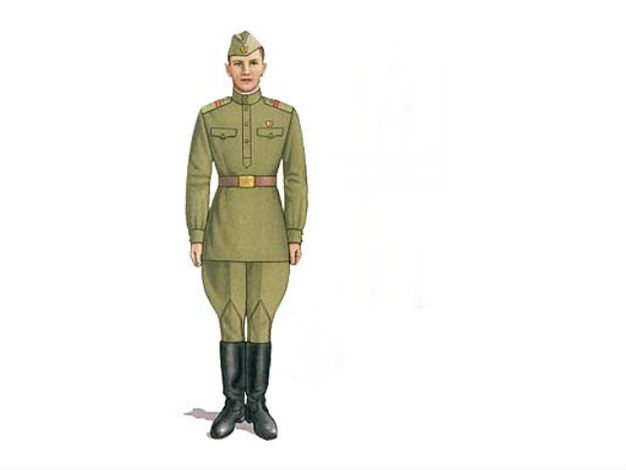
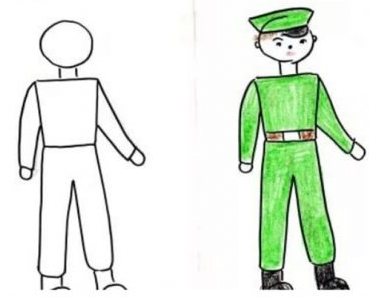
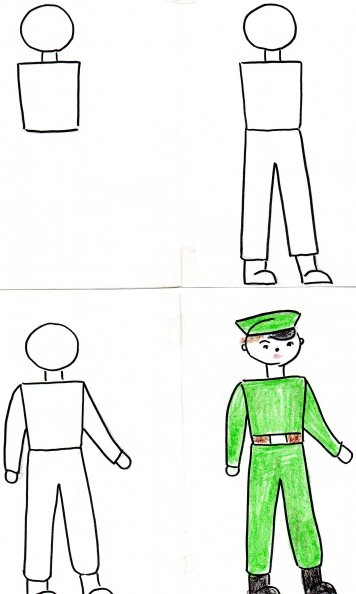
Soldier figure
In the methodological manual by T. S. Komarova “Visual activities in kindergarten. Senior group" drawing in the senior group of soldiers at the post is scheduled for February. The book provides the following sample lesson summary:
- Program content. Teach children to create the image of a warrior in a drawing, conveying the characteristic features of costume, pose, and weapons. Strengthen children's ability to place an image on a sheet of paper and draw large. Foster interest and respect for the Russian Army.
- Methodology. Check with the children about the clothes and posture of the border guard or soldier standing at the post.
- Using illustrations, determine the composition of the drawing, drawing techniques with simple and colored pencils. Draw children's attention to careful painting.
- Materials. A simple pencil, colored pencils, 1/2 landscape paper (for each child).
- Connection with other activities. Learning poems, songs, talking with children about the Russian Army.
Note! In May, you can plan to create an invitation for parents to celebrate Victory Day. You can also place a drawing of a soldier on one of the pages of the ticket.
The creation of this invitation can be designed as a project consisting of several stages. Each stage is the design of one page. For example, the first page is an appliqué (as suggested in the manual), the second is an image of a soldier, the third is an image of a military vehicle using the plasticine technique, etc.
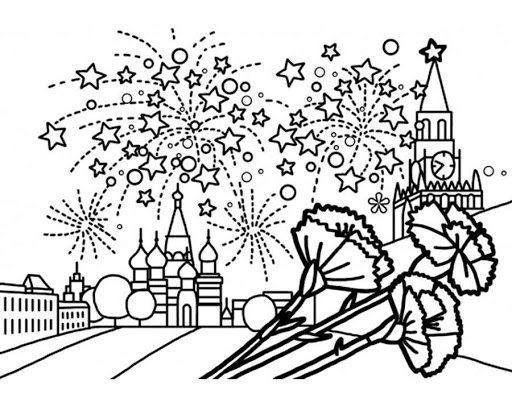
The most unusual and very beautiful drawings for May 9th for sketching
If you don’t have any special skills, but your soul requires creative expression, which is especially great when it comes to such bright and patriotic holidays as Victory Day, then you can use the following universal templates for copying or sketching.
If you don’t have enough talent for independent art, you can always use ready-made templates for sketching or copying
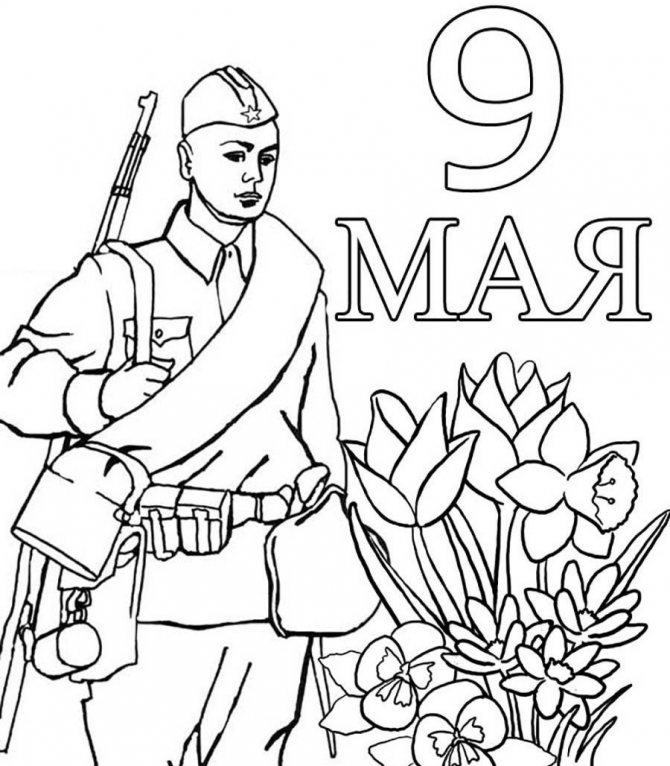
Or you can make it even easier by printing a ready-made template and coloring it at your discretion
Our T-34 made a huge contribution to bringing the Great Victory holiday closer! So why not depict this iron hero on paper for the holiday?
Victory Day is an excellent occasion to tell the younger generation about the exploits of our ancestors. Tell them everything you know about this holiday and the events preceding it, and be sure to give the children the opportunity to convey their impressions of what they heard in a drawing.
Lesson Objectives
First of all, you need to decide on the tasks of the NOD: developmental and patriotic-educational.
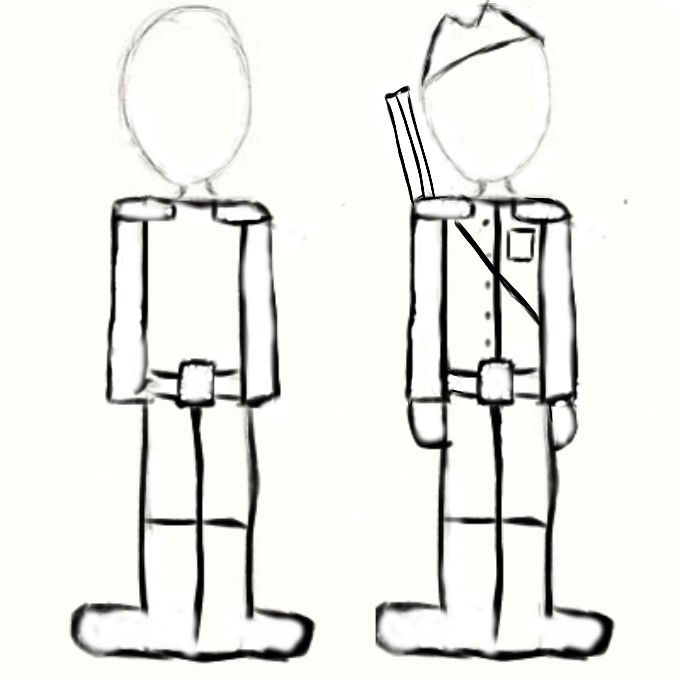
Plan diagram of a step-by-step drawing of a soldier figure
Educational:
- development of children's creative abilities;
- improving spatial thinking and visual perception;
- strengthening the skill of drawing geometric shapes: rectangle, oval, triangle;
- development of fine motor skills of the hands, consolidation of the skill of neat coloring.
Patriotic-educational - instilling a sense of patriotism through:
- expanding knowledge about the history of Russia and our native land;
- developing a sense of respect for Defenders of the Fatherland, soldiers, border guards;
- instilling a sense of pride in the heroic deeds of participants in military operations.
Plan of educational work according to the Federal State Educational Standard
Necessary materials and equipment
Demo material:
- color pictures, clippings, posters with images of soldiers of various troops;
- plan - a diagram of a step-by-step drawing of a soldier's figure. It is better to depict each stage on a separate sheet of A4 format and hang it up for display during the lesson;
- cap (real, not a drawing);
- army belt, shoulder straps.
Handouts (for each child):
- a simple pencil;
- eraser;
- colour pencils;
- album sheet, 1/2.
Important! The teacher will need a computer or laptop with an interactive screen to view the presentation about military professions.
GCD move:
Didactic exercise: “What words are there?”
— Guys, do you think there are many or few words around us?
— We are surrounded by a huge number of words.
— I suggest you search among the many words for “sweet words”
.
(Candy, sugar, strawberries, chocolate, etc.)
- Now remember and name the “funny words”
.
(Holiday, circus, gifts, laughter, tickling, etc.)
-Now name “kind words”
.
(Sun, smile, thank you, etc.)
- And there are also sad words. What "sad words"
can you name?
(Tears, illness, separation, etc.)
.
- And among the many sad words, there is a terrible word - this is the word “war”
.
— Why the word “war”
so scary? (Because people die, and those who remain alive suffer during the war, starve, get sick, see the tears and suffering of loved ones and relatives.)
- Guys, we are also surrounded by sounds. Let's name what sounds surround us? (Birds are singing, the wind is rustling the leaves on the trees, a car has passed, people are talking, music is playing.) These are good, peaceful sounds.
Summer night at dawn
When the children slept peacefully
Hitler gave the troops an order
And he sent German soldiers
Against the Russians, against us!
— Many years ago there was a summer Sunday on June 22. The sun was shining tenderly, warming the earth with its rays. The birds were singing. People woke up and made plans for how to spend their day off. (slide No. 1)
- Nothing foreshadowed trouble. And suddenly the terrible news came from the loudspeakers that Nazi Germany had attacked our country.
These were the sounds heard from all sides. (Listening to an audio recording of the sounds of the bombing.)
— Did you like the sounds of war? (Children's answers.)
These are terrible war sounds.
People vowed, as one, to defend their Motherland.
— Poet V. Lebedev-Kumach wrote the verses of the song “Holy War”
, and the artist I. Toidze
painted a poster “The Motherland is Calling!” Both the song and the poster called for the defense of the Fatherland (the phonogram of the song “Holy War”
and slide No. 5 of the poster “Motherland” is shown
-Our soldiers went to the front to defend their Motherland, relatives, and children to the accompaniment of this song.
-All the people, young and old, stood up to defend their free, beloved Motherland. Not only men, but also women fought in the war. They were nurses, doctors, orderlies. (slide No. 6)
Women grew bread, vegetables, and livestock to feed our army, and in factories they worked at machines and made guns and shells to protect our Motherland from fascist invaders (slide number 7)
.
Old women knitted mittens and scarves for the soldiers so that they would not freeze and could safely beat the enemy.
“The children also took an active part; boys and girls now had no time for games. Together with their mothers, they worked in the fields, growing vegetables and bread, so that later they could give everything to the front. (slide no.
.
To beat the enemy, you need a strong army, the soldiers need to be fed. Together with nurses, the guys looked after the wounded: they fed the seriously wounded, wrote letters to their families. But most often they performed concerts in front of the wounded: they read poems, sang songs, danced, raising their spirits. (slide number 9)
- The war lasted four long years. People died from hunger and cold. A piece of bread the size of a matchbox was given per person per day (slide No. 11)
.
- But it was not as tasty and aromatic as it is now. It was baked from grass and straw, because the Nazis set fire to and bombed grain fields. This was done so that our soldiers were weak and powerless, in order to quickly conquer our Motherland.
Drawing “Soldier on duty”: senior group, lesson stages
Preliminary work in this lesson is aimed at patriotic education of preschool children, as well as motivation to create a drawing. This could be reading poems on a military theme and works in prose. The analysis of Russian folk proverbs solves patriotic and educational problems well:
- As a Russian takes a bayonet, so the enemy shakes,
- Russians don’t joke with rolls or swords,
- Russian soldier knows no barriers,
- The whole world knows: there is no stronger soldier than ours.
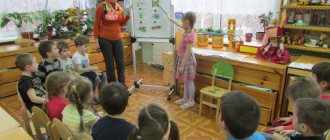
Note! The most complete picture of the Russian Armed Forces is given by an oral history of military professions with the display of illustrations or viewing of a presentation.

Schematic drawing of a cap
For your information! Types of military professions: border guards, tank crews, artillerymen, signalmen, sailors, pilots, submariners, paratroopers, sappers, snipers.
Before the next stage of the lesson, a physical education session on a military theme is held.
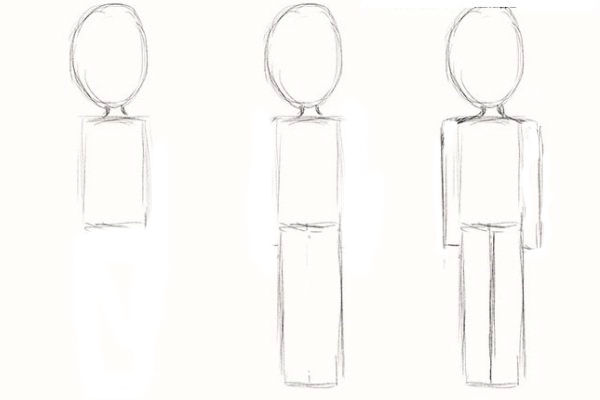
In the main part of the GCD, the task is announced (to draw a soldier at a post) and methods of action are shown. It is necessary to analyze the soldier, to make out what geometric figure each part of the body resembles: the head is an oval, the torso is a rectangle, the legs and arms are elongated rectangles.
Important! Before you start working, you need to remind the children that you should press lightly on a simple pencil, the lines should be thin, barely noticeable. This is done to make it easier to erase inaccuracies with an eraser.
Drawing the features of a military suit
Drawing step by step:
- Outline the location of the future soldier in the center of the sheet. Just above the middle of the page, draw an oval, a small neck and a rectangular torso.
- Draw the legs and then the arms.
- Examine the cap, analyze the shape, draw a triangle, erase the extra lines.
- Draw the details: weapons, belt, shoulder straps, buttons, pockets, boots, star on the cap.
- Draw facial features. Acquaintance with portraiture as a genre of painting is carried out in previous classes (portrait of father, mother, friend). At this stage, only consolidation of the material covered occurs.
- Coloring the finished image with colored pencils according to the sample.
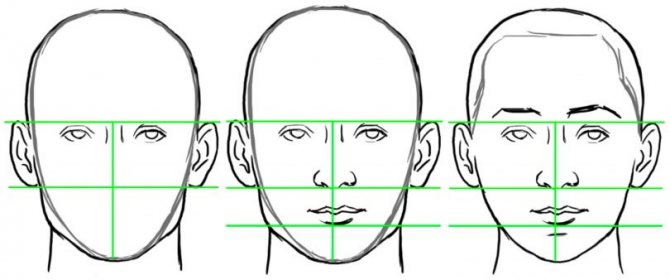
Scheme for drawing a face
Important! It is worth recalling the rule of coloring with a pencil: painting within one contour occurs in one direction (top-to-bottom, left-to-right or oblique).
Sound culture of speech in the second junior group
During the lesson it is worth using the traditional technique of drawing with pencils, since the topic is already quite complex.
How to easily draw holiday symbols step by step
Some may be surprised, but even a person who does not draw can easily depict any figure or composition using the method of step-by-step drawing. The main thing is to find a suitable template, following the step-by-step algorithm for its execution.
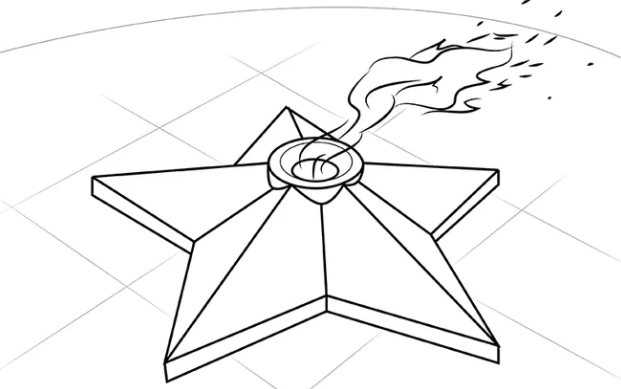
Step by step we draw the “Eternal Flame” monument or obelisk
One of the symbols of the May 9 holiday is the eternal flame. There is one like this in every city - newlyweds and those mourning those killed in the war offer flowers to it.
As for the technique of drawing it, it consists of the following steps:
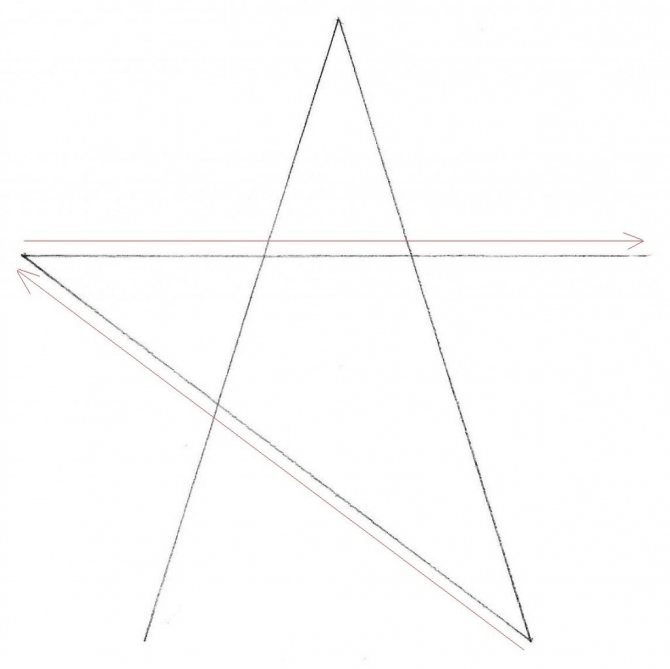
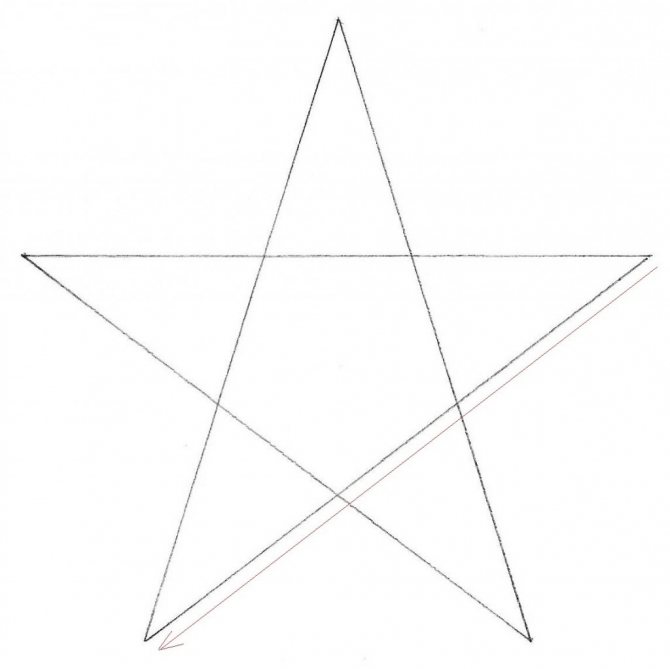
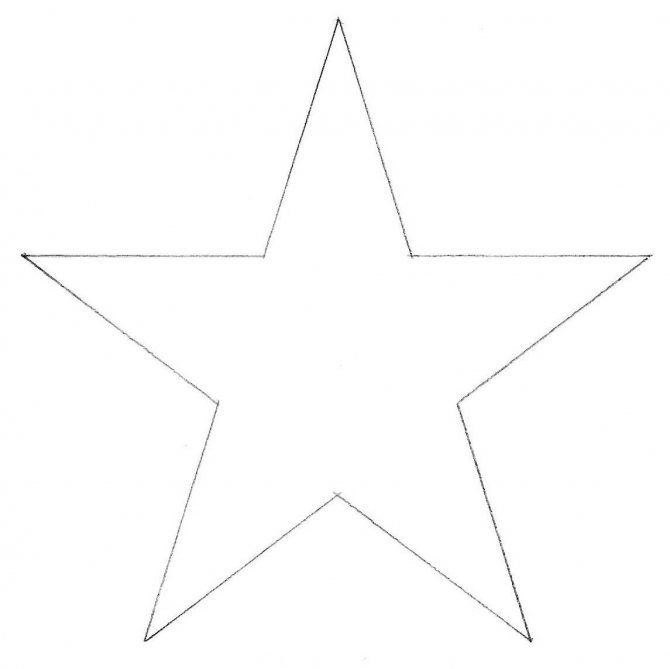
- First of all, it is necessary to depict the center of the pedestal in the form of an oval and the rays diverging from it in different directions (guides for the star base).
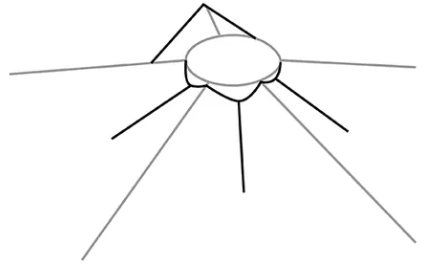
- Next, we connect the vertices of these guides, completing the five-fingered star.
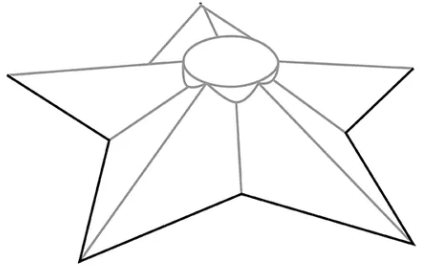
- Let's draw the details.
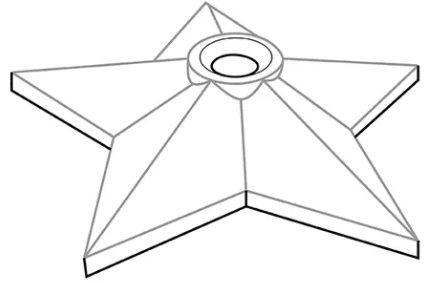
- Add an eternal flame by drawing translucent flames.
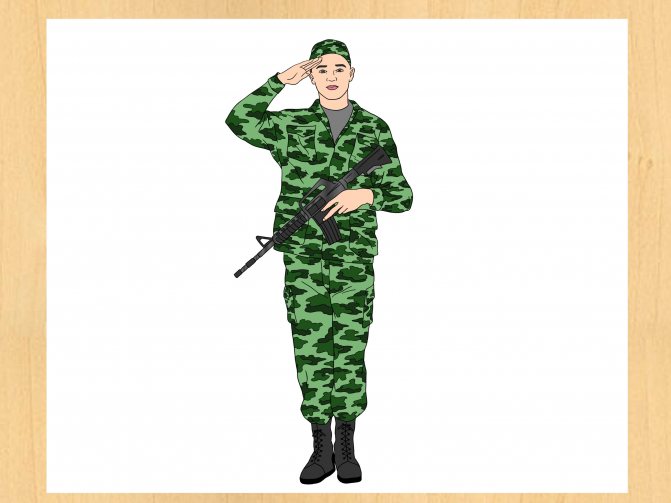
How to draw a soldier
It will not be particularly difficult to draw a figure of a soldier, especially if you do not use complex detailing, making the drawing heavier with orders, chevrons and other accessories of a military uniform.
Sketch drawing is performed in accordance with the following algorithm:
- First you need to draw a figurine of a man using the simplest geometric shapes.

- Details are drawn and color is added (using pencils).
Yes, the soldier turns out to be quite simple, but even such an image of him will evoke a response in the hearts of our veterans, of whom, unfortunately, there are only a few left.
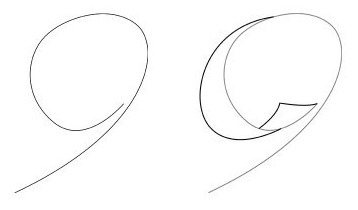
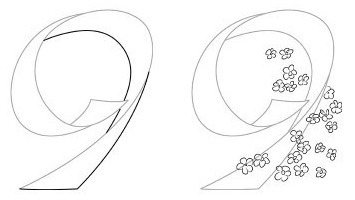
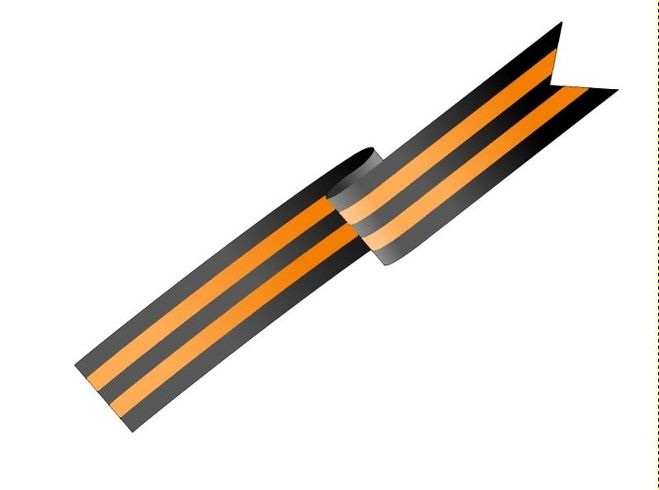
Beautiful curved St. George's ribbon
It’s even easier to draw a St. George’s ribbon, the beautiful bend of which can turn even the simplest drawing into a real postcard.
The stages of execution of the general composition with the St. George ribbon are as follows:
- First we draw the number 9, combining the beautiful bend of the ribbon with the significant date.
- We add decorative elements (in this case, forget-me-nots, which even a small child can draw).
- Using a black liner, rapitograph or gel pen, draw black stripes along the entire ribbon.
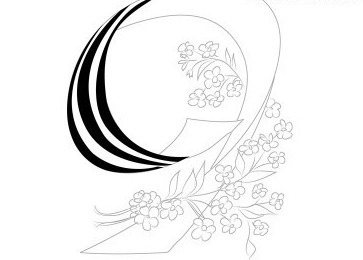
- We add color using the technique of tinting with watercolor paints (you can use other materials if desired).
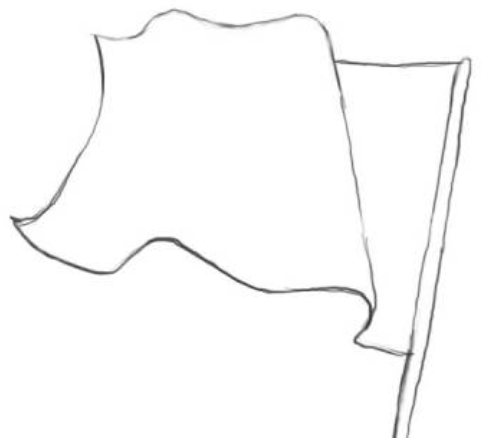
Victory Banner
What is Victory Day without a red banner flying in the wind? This symbol can also be considered one of the main ones, so its display in thematic drawings is, if not mandatory, then very desirable.
And it’s not so difficult to depict it, especially if you follow the following step-by-step algorithm:
- You need to start with the flagpole, using it later as a starting point and a kind of “support” for the banner itself. Drawing this element is as easy as shelling pears - just draw two parallel lines, connecting them at the bases.
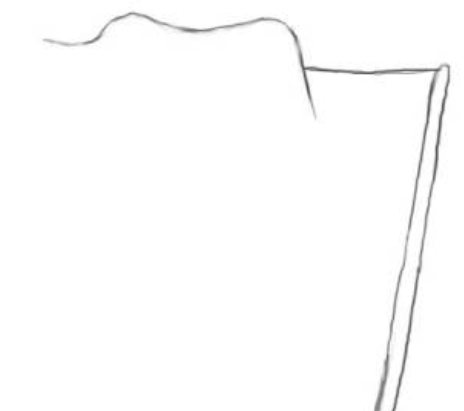
- Next, the banner itself is drawn, which, if you do not display a straight immobilized canvas, will require a lot of effort, although if you do not rush, you can cope with this task.
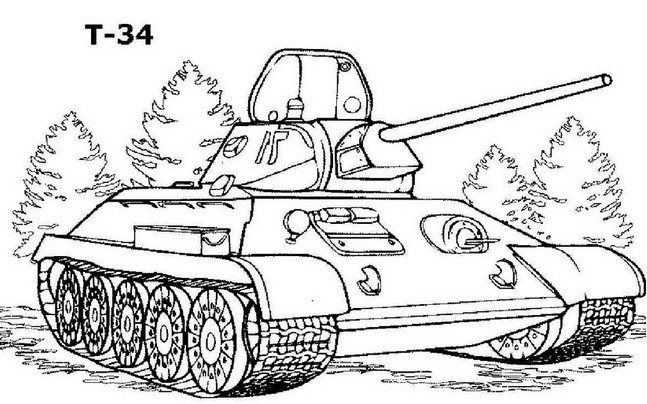
How to draw a tank easily
And, of course, the tank, as another important symbol of the Great Victory, because without our equipment it would hardly have been possible to survive on all fronts. Drawing an element does not require special artistic skills, mainly consisting of simple geometric shapes, which, moreover, can be drawn not by hand, but using a stencil ruler, simplifying the task to the maximum.
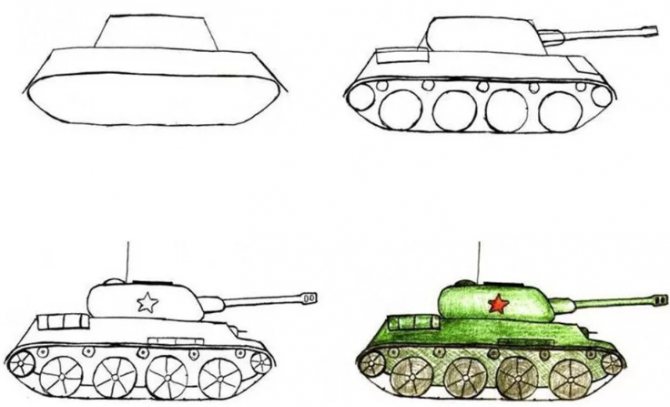
And even drawing a tank won’t be particularly difficult, because if you figure it out like this, it consists of the simplest geometric shapes
Techniques and techniques
It is still difficult for preschoolers 4-5 years old to draw straight lines and large rectangular objects, so it is advisable to draw in the middle group of soldiers using an unconventional technique. Thus, even in the absence of well-developed drawing skills, kids will receive satisfaction from the result of their work.
Cotton swabs
Handouts for each child: stencil (template) of a soldier’s silhouette, brown and green paints, cotton swabs.
Progress of work: applying multi-colored spots with cotton swabs to imitate the protective coloring of the form.
Protective coloring of border guard clothes
In move
Drawing a soldier in the preparatory group step by step has its own characteristics. The difficulty is that the person needs to be conveyed in motion. To make it easier to convey the position of the arms and legs when walking or running, a child is called in to help. He takes the desired position, and the other children watch him. You can also offer diagrams of a person in motion.
Since children of older preschool age already have well-developed hand coordination, they easily use not only pencils, but also practice different ways of working with a brush.
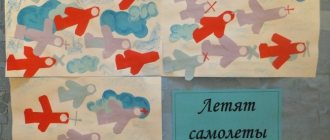
Note! Children's works can be combined into a common composition “Our Army” by adding images on the theme “Military Equipment”.
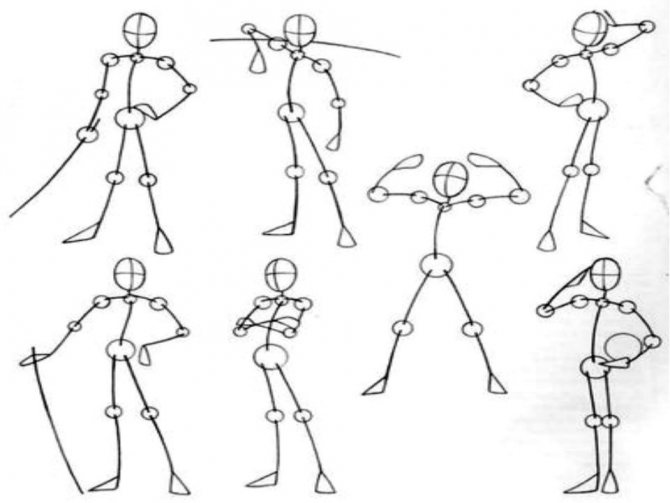
Schematic representation of poses
Children's drawings of Victory Day in kindergarten, ideas step by step
Red Star
- Using a pencil and ruler, draw an angle following the drawing.

- Draw another corner like in the picture.
- Connect the end of the segment to make a star.
- Erase any excess lines in the center with an eraser.
- Color the drawing.

Soldier
- Draw a circle with a small rectangle underneath it. Connect.
- Add legs to the soldier as in the picture.
- Draw two hands.
- Design the face, small details, color the drawing.
St. George Ribbon
- Draw the bend of the ribbon.
- Duplicate the resulting bend five times.
- Mark the tip of the tape and the fold line.
- Remove unnecessary lines.
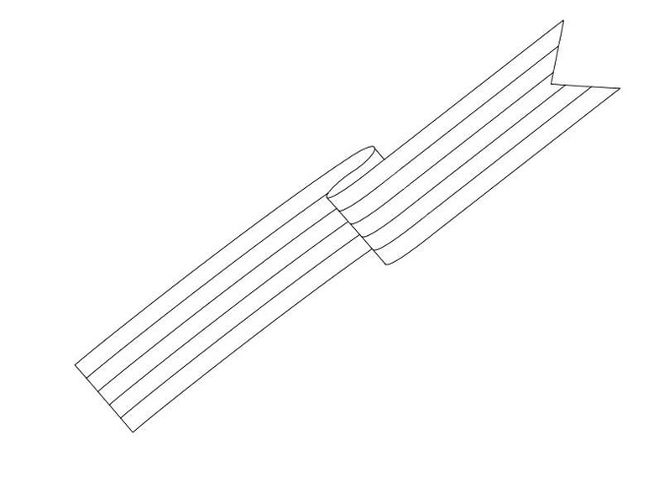
- Add color to the ribbon.
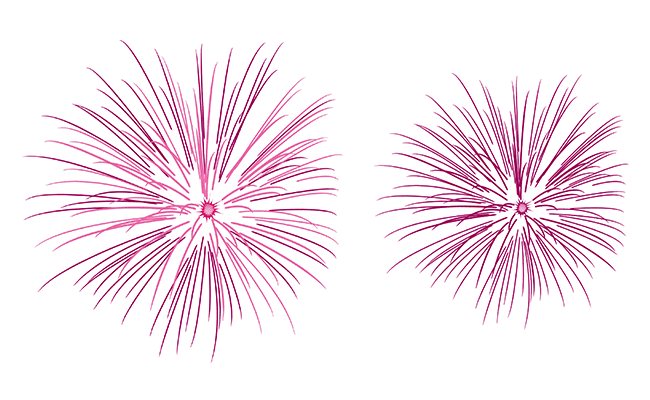
Fireworks
- Draw a point in the center and curved lines coming from it.
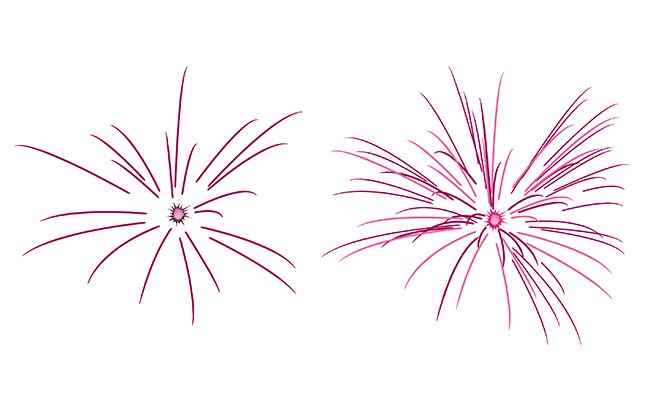
- Gradually add lines, using different colors to make them more saturated.
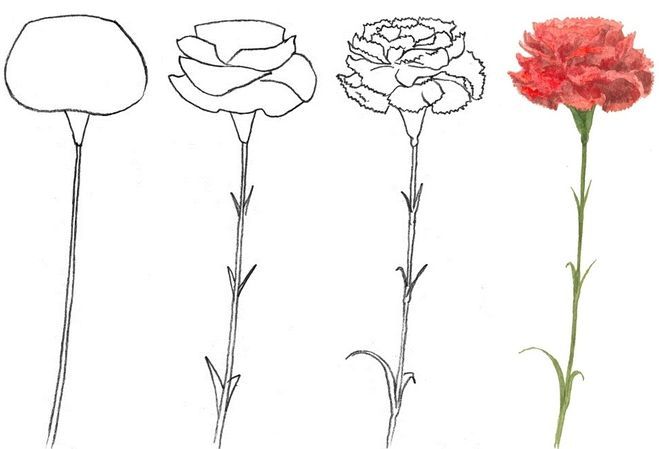
Carnation
- Draw the stem with the base of the bud.
- Add leaves and petals.
- Draw in the details.
- Color the stem and leaves green and the petals red.
Analysis of the resulting works
The final stage of the lesson is analysis of the drawings with the children:
- What do you like about your drawings and those of your friends?
- what was the most difficult?
- what can you add to the background?
Important! To reinforce the patriotic theme, new concepts and words, you can play the didactic game “Get a ring - say a word.”
Work on honing human drawing skills, as can be seen, is carried out purposefully throughout the entire development process of preschoolers. In parallel and in a complex manner, additional educational and educational tasks are solved in accordance with the standards of preschool education. The main thing is to draw up a detailed outline of the lesson and clearly outline the stages of drawing.