Drawing with paints
Paints are considered a more complex medium for drawing than pencils. A pencil mark can be erased with an eraser; nothing can correct a painted surface.
However, this is an interesting way of creating images on paper, which has a much wider range of possibilities in terms of technique and number of shades. There are many types of brushes for different types of painting.
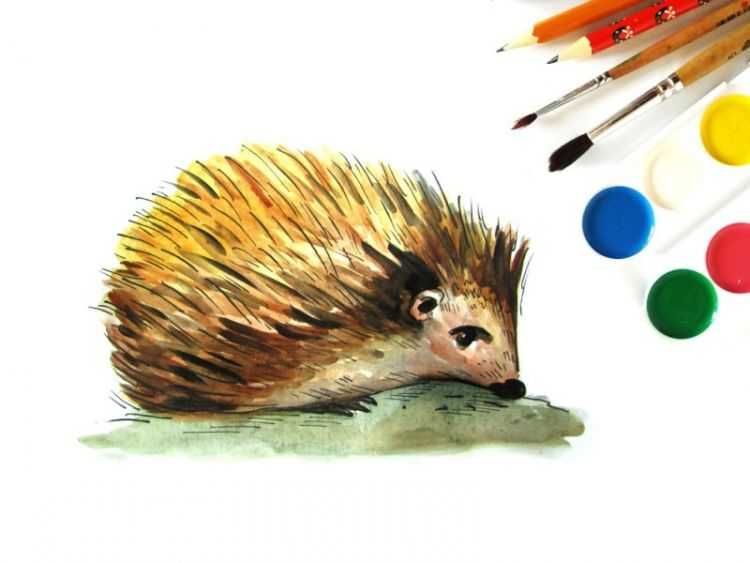
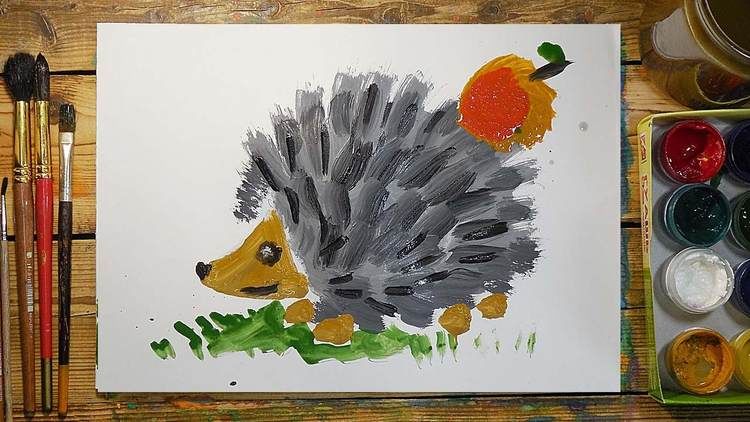
Let's try to draw a hedgehog for children with paints:
- Place a sheet of paper horizontally and dip the brush into white paint.
- Draw a circle in the middle, completely filling its insides. This is the basis of the future drawing.
- On the side we draw an elongated pointed oval. This is the face of a hedgehog.
- We wait until the white background dries and you can paint on it with other colors.
- We put black paint on the brush, having previously washed it of white.
- We draw black needles on a single body. We draw lines in the opposite direction from the muzzle, shading the entire surface with them. A wide brush is suitable for this.
- Dip the brush into brown paint, washing it off before doing so.
- We draw the muzzle and paws located under the body.
- Take a thin brush and pick up some black paint.
- We depict needles, draw eyes and a nose on the muzzle.
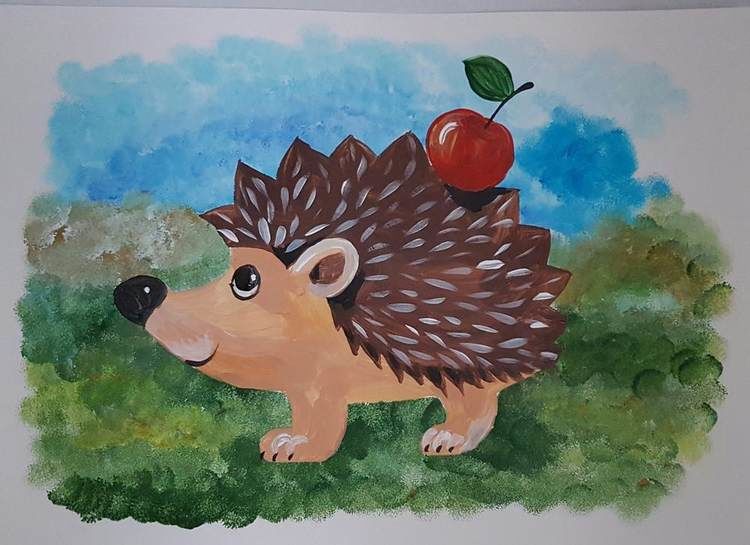
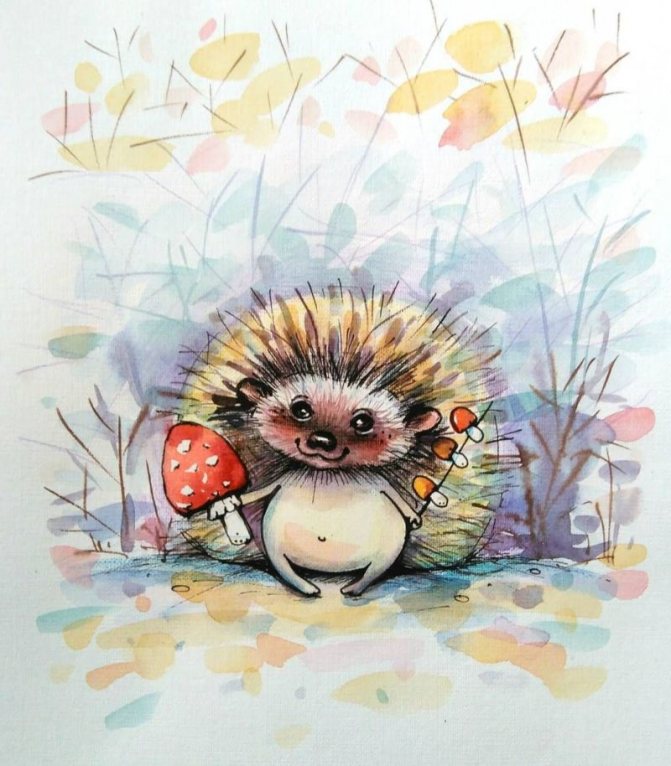
To give the image some life, you can put an apple on the hedgehog’s needle-like back. On the ground we draw grass, mushrooms and other possible details.
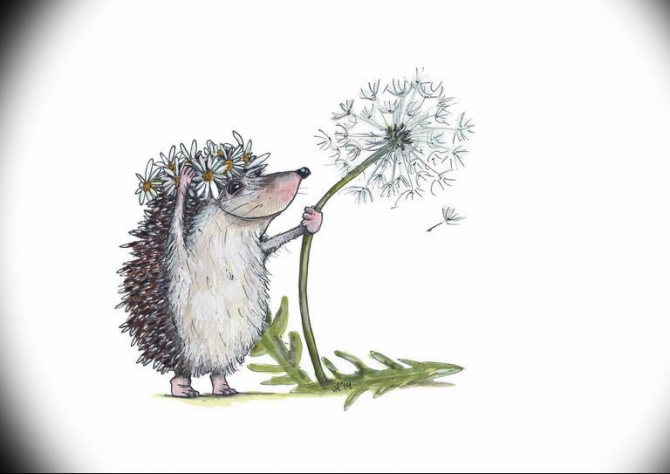
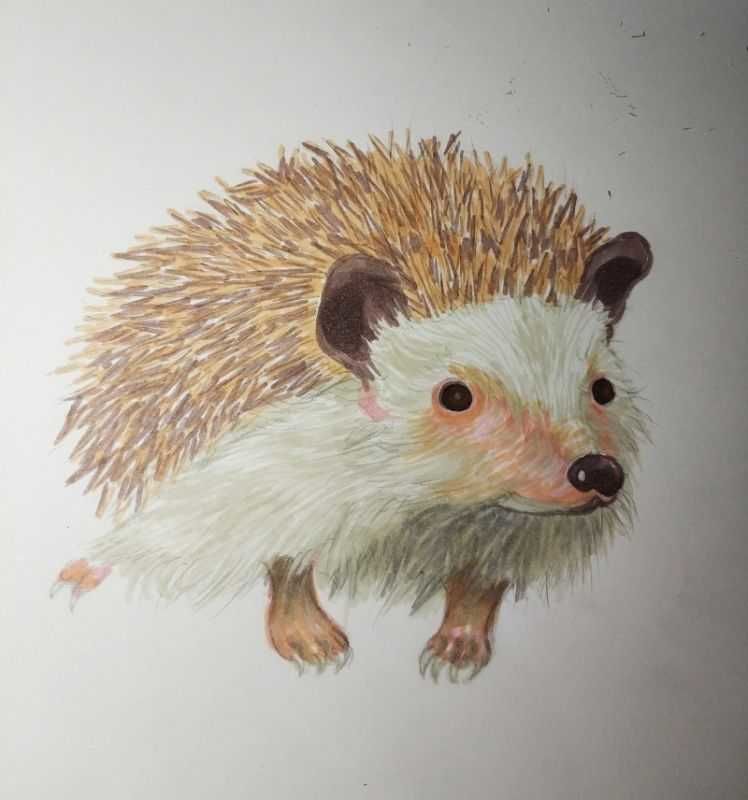
Let's depict a hedgehog with an acorn in his hands. For the painting you will need gouache paints, various brushes, a palette, a container of water, scissors:
- We denote the boundaries of the picture with two lines, upper and lower.
- Just below the upper border we draw two arcs and continue them down, slightly narrowing them.
- From below we draw rounded paws, continuing the lines.
- Draw a nose. Draw an inverted triangle on top. Above it we draw a small soul. From the lower apex of the triangular nose we draw two curved lines. Between them we draw two arcs, indicating the mouth.
- On both sides of the nose we draw two round eyes. Above them we draw eyebrows in the form of two oblique ovals. We add curved triangular eyelashes to them.
- We outline the hedgehog with an arc passing through the top line. Make the line zigzag. We erase the excess pencil mark.
- Draw the front paws. Between the bottom ones we draw a line connecting them. Draw the stomach in the form of an arc.
- On the head we draw a hat in the form of the top of an acorn.
- Mix white paint and ocher on the palette. Paint the body this color using a wide brush. We make the needles brown.
- We leave the oval next to the lower paws and the muzzle white.
- Add more white to the ocher. Paint the belly with this color.
- We outline the outline of the hedgehog's body and mouth with black, paint over the nose and eyes.
- We paint the cap with ocher. We draw a lot of vertical strokes on it.
- We take lightened ocher and make strokes on the hedgehog’s needle-like coat. We draw them from the center to the edges.
- Create highlights on the eyes and nose.
- On a separate sheet we draw an acorn. We draw the lower part in the form of a pointed oval, the upper part in the form of a semicircle, from which the stalk extends.
- We paint the lower part with dark brown, the upper part in the same way as the hedgehog’s hat.
- Cut out the acorn. We glue it between the animal’s paws.
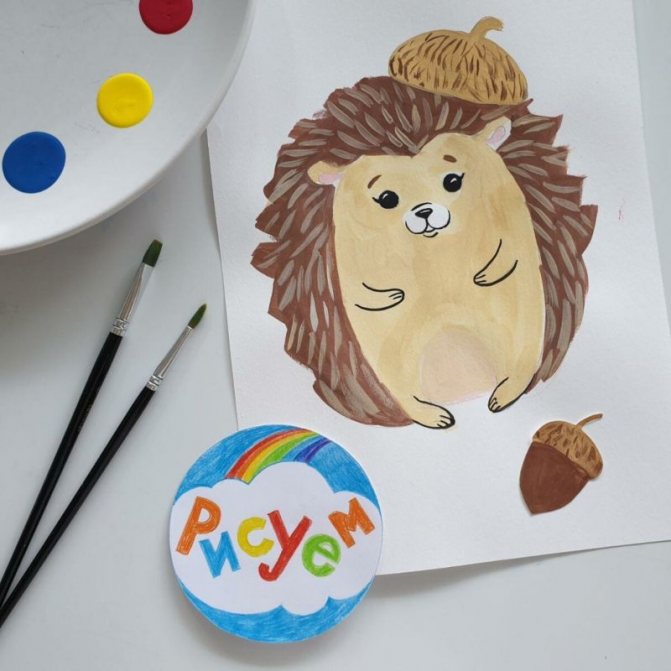
The drawing is completed, the hedgehog is drawn. Most of all, he resembles a cartoon character.
Pencil drawing of a hedgehog
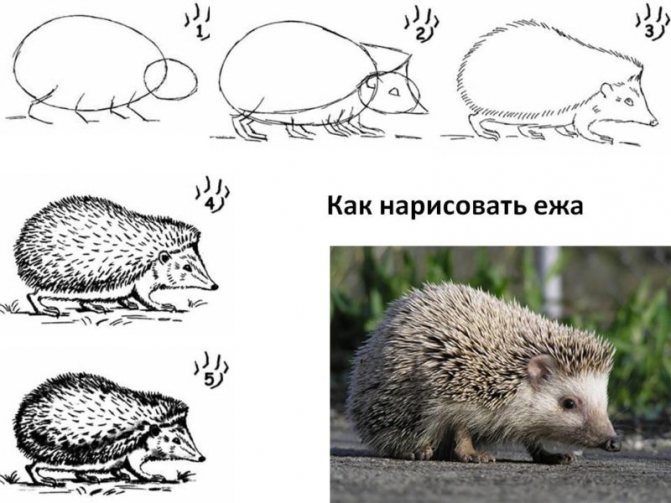
Let's draw a hedgehog in profile step by step. To draw you will need a sheet of paper, a pencil, an eraser:
- Take a landscape sheet and lay it horizontally. On the left and right sides of the sheet we place dots marking the middle of the side. These are the dimensions of the animal's body, showing its width. From the top of the sheet we place another point, at the height of which the animal’s back will be located. The result is a triangle.
- We begin to draw a broken line with small links, starting it between the left and top points and ending at the right. This is the needle-like covering of the animal's body.
- Draw the face of a hedgehog. We depict it in the form of an elongated oval, ending at the left point. We draw two small oval ears near the end of the zigzag, and between them we also draw needles.
- Let's detail the muzzle. We draw a smile in the form of an arc, two small round eyes in which we mark the pupils. We complement the row of needles by drawing a zigzag next to the ears and near the extreme part of the leaf.
- Draw the belly of a hedgehog. We draw an arc, starting from the middle of the muzzle and leading to the edge of the needles. At the same time, we leave space for the paws, which we draw on the left and right sides of the arc, two pieces at a time.
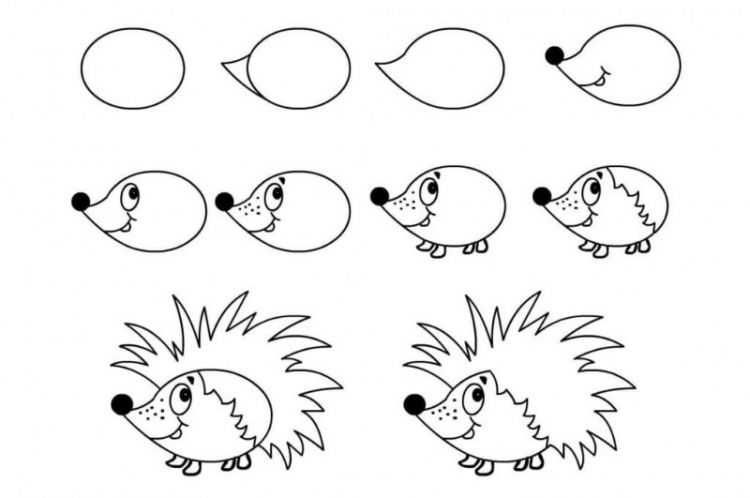
A drawn hedgehog looks from the picture at the artist. Now you can color it. We paint the needles dark brown, the paws, muzzle and belly beige, the eyes, mouth and nose black.
Let's draw another hedgehog with a pencil.
This work has more small details and a more complex construction. The drawing turns out to be more elaborate.
Any child of primary school age can cope with drawing, especially if he is helped by an adult:
- In the center of the sheet we outline the boundaries of the hedgehog’s face. Draw two points at a distance of 2 cm, top and bottom.
- Draw a line between two points.
- Place a mark just below the middle of the segment and draw a horizontal segment through it. Its length should be equal to the distance between the mark and the top point.
- At the edge of the horizontal line, draw a circle that will represent the hedgehog’s nose.
- We outline the nose with an oval edging. The left side should be placed under the circle, the right side should be left uncovered.
- Below it we draw the hedgehog’s mouth in the form of two semi-ovals.
- Right above the nose we draw the eyes of the hedgehog. We draw one oval in the area of the muzzle, and another - slightly going beyond the contour. We draw two circles in them to depict the pupils.
- We draw the cheeks, depicting them in the form of a line leading from the bottom of the mouth to the side and to the eyes. Draw semi-ovals above the eyes.
- We begin to draw a broken line at the edges of the muzzle and continue it along the entire length of the body. Draw the paws under the needle layer.
- We outline the outline with a black felt-tip pen and draw eyebrows. Paint over the nose, mouth and pupils with black. We make the body and legs brown, the needles gray, and shade them. We give the eyes a blue color, and the line of the mouth is made red.
You can add background details to the finished drawing - for example, blades of grass, butterflies or mushrooms.
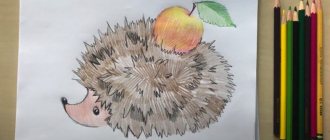
Let's depict a hedgehog carrying an apple on its needles:
- We draw a horizontal wide oval, indicating the torso.
- At the top we draw a circle from which we will make an apple.
- We make a rounded notch on the left side of the oval, lengthen it and bend it from the bottom. At the end we draw a small oval nose.
- We draw a stalk on the apple, add a leaf to it, and make veins on it. Give the apple a more natural shape by making an indentation on the top.
- We make the contour clearer by increasing the pressure of the pencil. We create a needle-like layer around the body by drawing a zigzag line with links of different lengths. A triangular muzzle should look out of it.
- Draw the eye in the form of a small circle. Inside we make a black pupil with a small white highlight. Paint over the nose with black, leaving a small white spot.
- Paint the apple yellow. We outline the outline with pink. We make pink strokes on top of the yellow surface.
- Shade the area of the leaf with a light green pencil. We paint the top half dark green, and outline the bottom half with the same color.
- Color the hedgehog needles light brown. We use strokes in several rows, from outer to inner.
- We make several zigzags with black lines on a light brown background, highlighting individual needles on the hedgehog’s body.
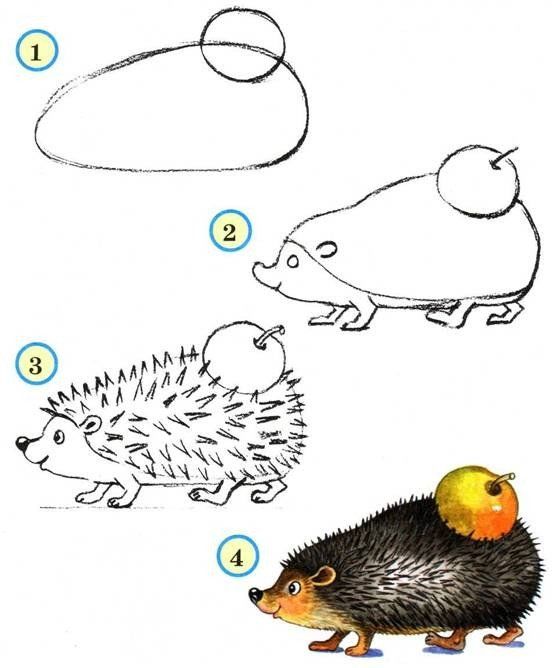
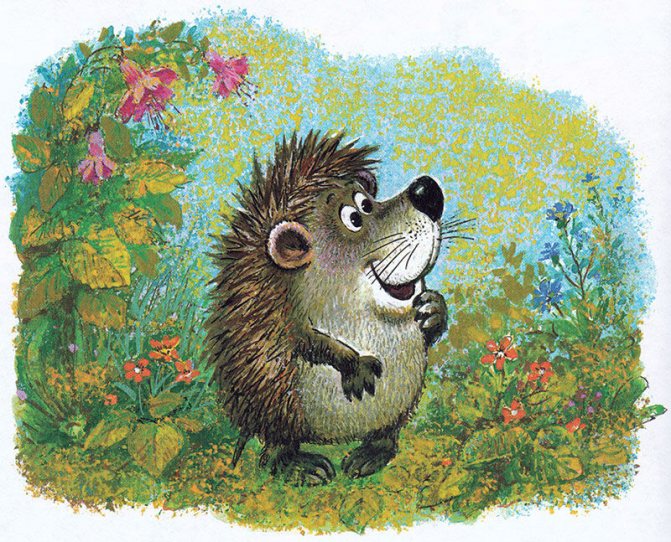
Drawing of a hedgehog with an apple on its back. This is a classic image of a hedgehog from children's fairy tales.
Progress of the lesson
Invite the children to go for a walk in the forest: “Let's go to the forest. Stand one after another and walk along the path. Do you hear? Someone is rustling! (Subtlely rustle the crumpled paper.)
Who is this? Hedgehog! (Show the children a hedgehog cut out of cardboard, Say hello to the hedgehog."
Invite the kids to tell the hedgehog a poem:
We walked slowly through the forest, - Hedgehog, hedgehog, - we are friends,
Suddenly we saw a hedgehog. Let us pet you.
Pet the hedgehog with your children and draw their attention to the fact that it is somehow strange - not prickly.
Hedgehog. For some reason I don’t have thorns, and all the animals in the forest offend me. Please make me some thorns.
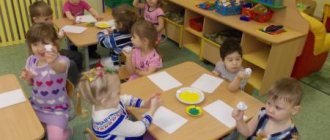
Let the kids attach clothespins along the edge of the hedgehog's back on their own.
Tell the children: “Now you need to draw needles for the hedgehog.”
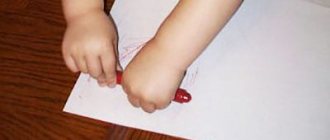
. Place in front of each child a landscape sheet on which a hedgehog without needles is drawn, and ask them to draw needles. First, the children show with their fingers where I will draw the thorns, then they take pencils. Remind how to hold a pencil correctly and control the pressure.
At the end of the lesson, the hedgehog thanks the children.
Summary of direct educational activities on modeling “Wild Animals. Hedgehog" for children of the younger group Tasks. 1. Introduce the plastic properties and proper use of plasticine. 2. Teach the technical methods of making rolling.
Summary of the educational activity “Hedgehog in the Forest” on application in the second junior group Teacher: Taichina D. F. Program content: • Learn to paste ready-made forms (leaves, carefully use a brush, glue, napkin.
Summary of the lesson on the art activity “Two cheerful geese” for the second junior group Topic: “Two cheerful geese” (palm drawing) Purpose: familiarization with the technique of palm printing; Objectives: learn to complement the image of a detail.
Summary of the lesson on the art activity “Fence near the house” for children of the second junior group Topic: “Fence near the house” (painting with a brush) Purpose: teaching children to draw various objects consisting of combinations of lines; Objectives: teach.
Abstract of educational activities on speech development “Little hedgehog, four legs” for children of the first junior group. Synopsis of direct educational activities for speech development “Little hedgehog, four legs” for children of the first junior group.
Summary of the organization of productive activities for sculpting “Hedgehog” in the second junior group Theme Hedgehog Objectives: 1. Educational (skills, abilities) in the priority educational area - Improve the ability to roll plasticine.
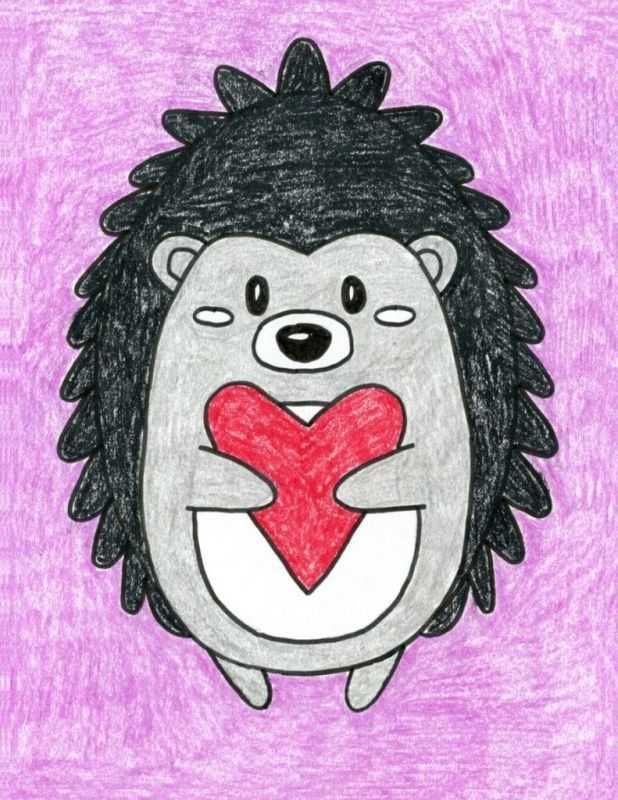
Summary of a lesson on art activities using natural materials. Group work of children 4–5 years old “Hedgehog” Purpose: to arouse interest in creating a hedgehog from seeds, carefully press the seeds in the form of needles into plasticine - a hedgehog blank. Bring up. Master Class. Application “Heart Hedgehog” for children of the second junior group I will cut out a heart, give it to Mom, and say the words: I love you! How can a small child please his mother? For example, meet in the nursery.
Theme of the week: “Autumn”
Lesson 7. Autumn rain
(Drawing with colored pencils)
Target. Teach children to draw short lines with colored pencils, conveying falling raindrops; strengthen the ability to hold a pencil correctly. Learn to analyze and understand the content of a poem.
Demonstration material. Toy hare.
Handout. A landscape sheet on which clouds are drawn or glued and a picture of a hare sitting on a bench, colored pencils.
Progress of the lesson
Show the children a toy hare and read A. Barto’s poem “Bunny”:
The owner abandoned the bunny,
A bunny was left in the rain.
I couldn't get off the bench,
I was completely wet.
Ask the guys: “Who did the mistress leave? (To the bunny.) Where is the bunny? (In the rain.) Why did the bunny get wet? (I couldn’t get off the bench.) What kind of bunny?” (Wet, sad, long-eared, frozen.)
Invite the kids to draw rain. Place in front of each child a landscape sheet with clouds drawn or pasted on it and a picture of a bunny sitting on a bench. Remind children how to hold a pencil correctly and draw short strokes with it, freely placing them over the entire surface of the sheet.
Theme of the week: “Autumn trees and bushes”
Lesson 6. Autumn leaf fall
(Painting with a brush using the “dipping” method. Gouache)
Target. Teach children to paint with a brush using the “dipping” method, changing the color of the paint; strengthen the ability to hold a brush correctly, pick up paint on the bristles, and rinse the brush. Learn to distinguish and name colors. Develop speech and thinking.
Demonstration material. Basket, multi-colored tree leaves cut out of cardboard (yellow, green, red, orange).
Handout. A landscape sheet on which a tree is drawn, gouache, a brush, a jar of water.
Progress of the lesson
Start your lesson with a physical education session.
Read the poem to the children and ask them to perform the appropriate movements:
The wind blows in our faces
The tree swayed.
The wind is quieter, quieter, quieter,
The tree is getting higher and higher.
On the first two lines of the poem, children raise their arms and swing their bodies in different directions, on the third line they quietly squat, and on the last line they slowly stand up.
Ask the guys: “What falls from the trees in the fall?” (Leaves.)
Scatter colorful leaves cut out of cardboard on the floor and invite the children to collect only yellow leaves in a basket, then green, red, orange. Leaves can also be collected into four boxes of matching colors. Then place a landscape sheet with a tree on it in front of each child and ask them to draw falling leaves. Remember to hold the brush with your thumb and middle finger, holding it on top with your index finger, not too close to the sharpened end.
Show the children how to draw paint onto the pile and apply it sideways to the sheet. First, you can practice the guys in the technique of “dipping” with a dry brush.
Encourage little ones to spread the leaves all over the leaf. Remind that in order to change the color, you need to thoroughly rinse the brush in water and pick up another paint.