On the topic: methodological developments, presentations and notes
The purpose of this lesson: Fostering children's love for decorative and applied arts, Forming the ability to correlate images by shape. Development of attention, logical thinking, observation skills.
Learn to draw a Christmas tree with branches elongated at the bottom.
Drawing material.
summary on the topic of mother's holiday.
Notes on drawing in the middle group on the topic: “Winter Forest” (non-traditional drawing techniques). Goal: To summarize children’s ideas about winter phenomena in nature, to teach them to convey them in rice.
Source
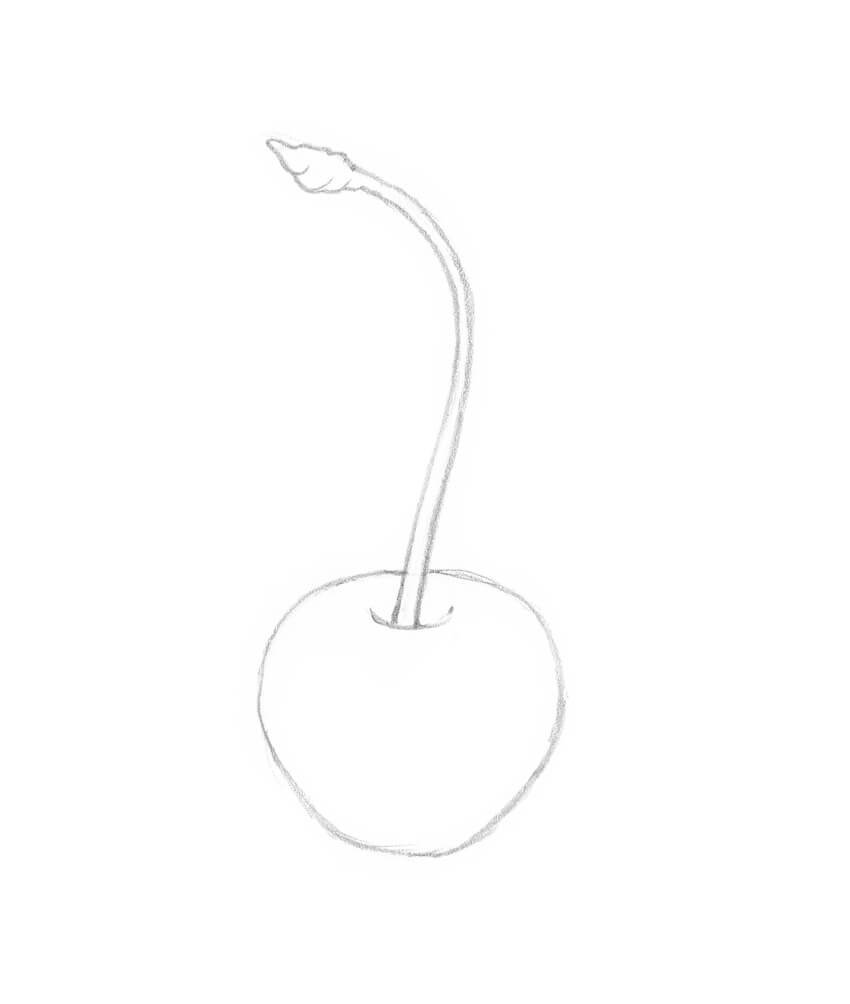
Draw Cherry
Draw the cherry shape using an HB pencil. This figure resembles a circle with a narrowed lower part.
- Next, add a curved line as the stem.
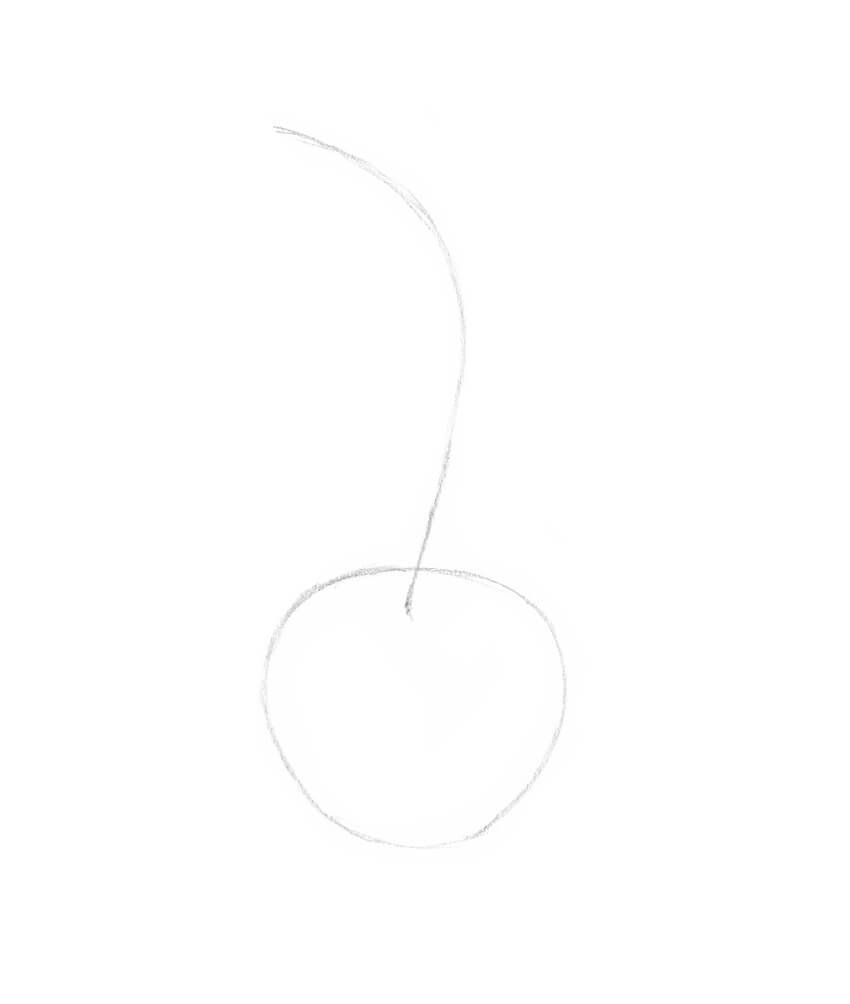
- Add a small indentation to the top of the cherry and also add some finishing touches to the stem.
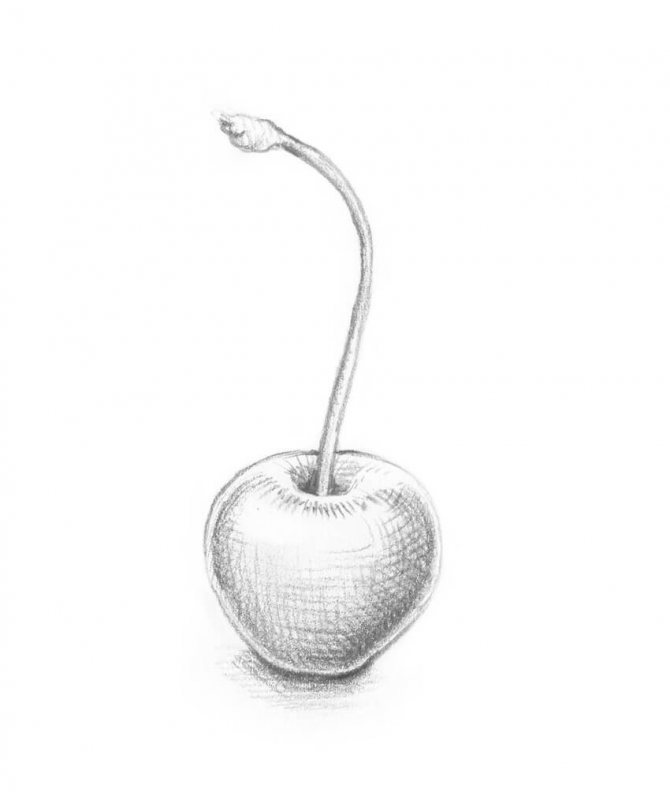
- Using a 3B pencil, add shadows.
- Accentuate the hollow and sides of the cherry with contour shading. Then add graphite strokes to the stem and also add shadows.
- It is important to keep the highlights light as cherry is a smooth, glossy object.
ECD for drawing with cotton swabs with children of the middle group “Berry by berry”
Olesya Akinina
ECD for drawing with cotton swabs with children of the middle group “Berry by berry”
Direct educational activities
with children in the middle group in visual arts using modern technologies.
«Drawing with cotton swabs»
.
«Berry by berry«.
Goal: Learn to depict objects using non-traditional drawing . Develop children's sense of composition and color.
Objectives: Show a variety of non-traditional drawing . Identify the positive impact on the child’s psychological state. Develop creativity, curiosity, observation. To form an ecological culture (understanding of the intrinsic value of nature)
.
Types of integration of educational areas:
Cognition: Clarify children's knowledge about types of berries . Summarize children's understanding of the diversity of flowering plants.
Social and communicative development: Create the need to share your impressions. The ability to correctly combine words in phrases and meaning. Form a friendly relationship between children .
Artistic creativity: Development of children's creativity in artistic activities using a new non-traditional technique.
Preliminary work: viewing the presentation
«Berries on the bushes»
.
Demonstration material: pictures of berries , blank for drawing .
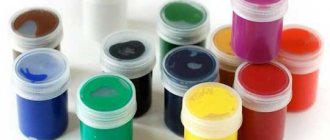
Equipment: Sheets of white or light blue paper, cotton swabs , gouache (2 contrasting colors, colored pencils or markers, paper napkins.
How to learn to draw berries
You don't need anything fancy to complete this tutorial;
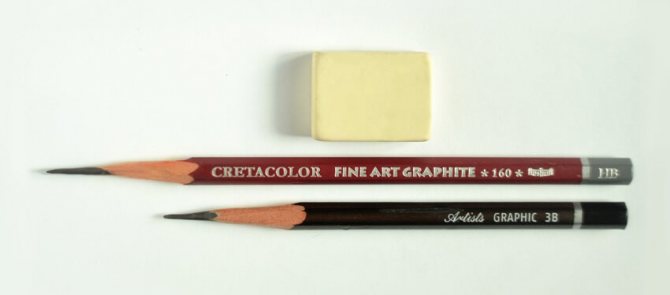
just two pencils, an eraser, a few sheets of drawing paper and, of course, the desire to experiment with your toolbox and express your creativity! A background in your drawings is desirable, but not required. To understand and follow the steps, you just need to become familiar with the shading techniques and take a close look at my illustrations.
Nothing helps an artist more than thoughtful observation and daily practice!
What you will need
You will need the following tools to complete this tutorial:
- graphite pencil HB
- graphite pencil 3B
- eraser
- paper
Progress of the lesson:
View a presentation about berries .
Tasks: The ability to form coherent speech, listen to other children. Anwser the questions. Increase knowledge of the names of berries .
Educator: Guys, listen to the poem “Currant”
Currant berries
There is an old recipe
Educator: Guys, today I brought such a wonderful chest.
A riddle will tell us what lies in it:
I'm friends with a pencil
Where he passes, he places a drawing. (Paper)
.
Educator: That's right guys, this is paper. How did you guess? What words did you suggest? (children answer)
.
magically draw on it “ Berries on the bushes .”
Educator: Guys, I have another wonderful chest.
And what lies in it will tell us the verse - a riddle:
Like on a stitch, on a path
I found this earring.
I bent down for one,
And I came across ten! (Strawberry)
Educator: That's right guys, it's Strawberry!
Educator: Guys, let's draw a wonderful strawberry bush with you! The teacher shows the children how to create a rhythmic composition - on a flannelgraph or magnetic board by laying out a row of berries (circles)
red, green, etc
Next stage: Drawing .
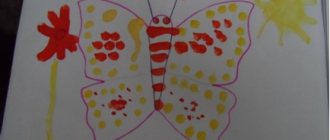
Children draw berries using cotton swabs .
take a sheet of paper A-4 white or blue
use a felt-tip pen or pencil to draw a twig
take a cotton swab , dip it in red paint and draw berries
Educator: Guys, let's read a poem about strawberries!
I was walking in the forest, carrying strawberries,
I looked for it, collected it.
I'll bring it to kindergarten -
You guys are great, you make wonderful berries . Now let's play with our fingers a little.
Finger game (Raspberry)
(T. Koti)
Raz-raspberry, two - raspberry, (clap your hands at the right ear, then at the left)
Marinka ate (touch the fingers of the right hand, gathered in a pinch, to the left palm - “eat”
)
And in Marinka’s basket (Place slightly rounded palms towards each other - “basket”
)
Not a raspberry left. (look in the "basket"
then spread your arms to the sides)
Who will go for berries ? (stomp)
He'll take the basket! (clap)
Educator: Guys, was it interesting in our group ?
What new did you learn about berries ?
What did we achieve in the lesson?
How did we draw berries on the bushes ?
What did you like?
Educator: Thank you guys!
Summary of visual activities in the middle group. Topic: dishes drawing cups and saucers. Objectives: To form a correct idea of tableware, its purpose, to learn to differentiate objects within the same kind (teaware,...
Summary of a lesson on drawing with cotton swabs “Berry by berry” (second junior group) I present to your attention a summary of an unconventional lesson on drawing (by cotton swabs) in the junior group of the kindergarten “Berry by.
GCD in the senior group for drawing with cotton swabs and familiarization with the surrounding world “Rowanushka” Summary of educational activities on artistic and aesthetic development in the senior group. Developed and conducted by G. V. Grigorieva.
Non-traditional drawing technique - Pointivism (with cotton swabs) In order to teach a child to draw, along with software teaching methods for each specific age, it is very useful to use. GCD for drawing with cotton swabs “Snowball flutters and spins” Topic “Snowball flutters and spins” GOAL: To introduce children to new techniques of non-traditional drawing techniques (with cotton swabs, to introduce.
Summary of educational activities for drawing with cotton swabs “Seeds for birds” Purpose: To teach children to draw with cotton swabs, create a rhythmic composition (grains). Develop a sense of rhythm. Cultivate interest.
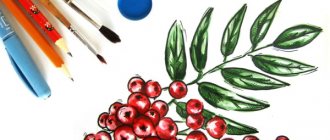
Drawing with Graphite Pencil
This part of the lesson is devoted to tips and tricks for using graphite pencils. We'll look at different ways to apply shading and provide a starting point for developing your skills.
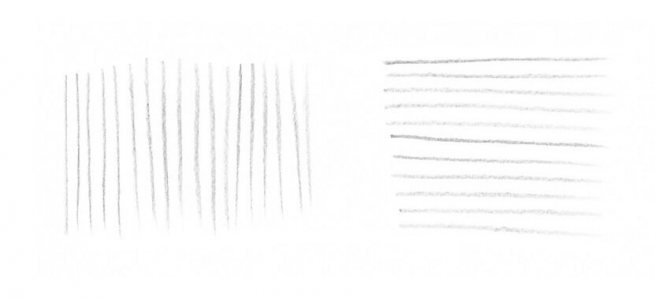
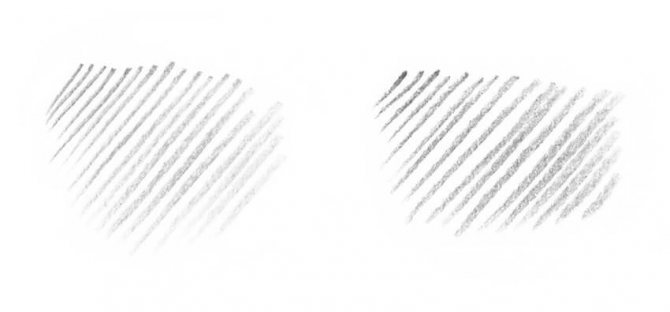
The first type of hatching is a group of straight lines that have the same direction and approximately equal length.
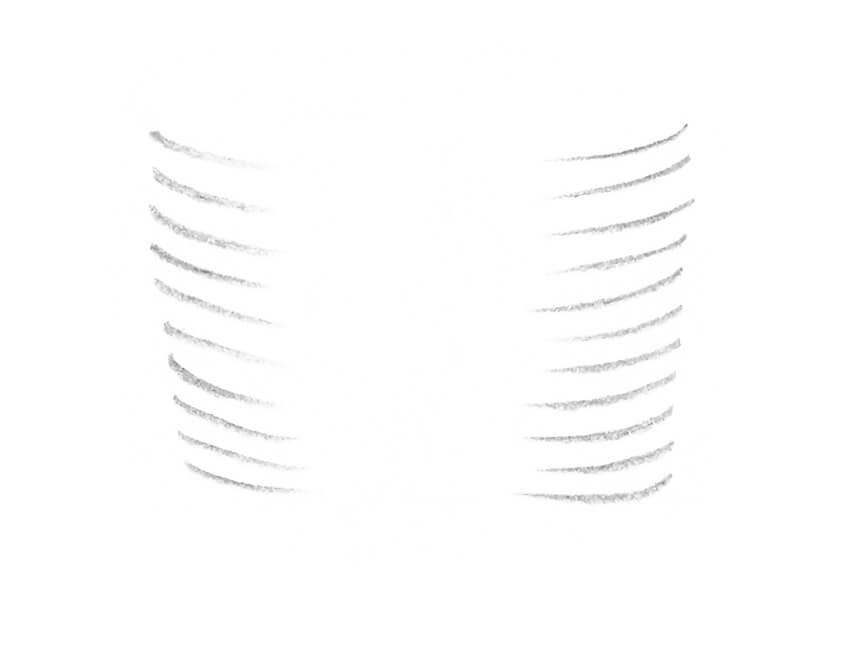
Another important method for creating the illusion of three-dimensionality is contour shading.
As you can see in the screenshot below, the lines are slightly bent, as if they were following the contours of the object.
Let's compare the capabilities of our pencils. We have two types: HB and 3B.
- Create two swatches with simple parallel shading just to see how they look next to each other. In the screenshot below, sample HB is on the left and 3B is on the right.
- The HB pencil leaves lighter marks on the paper and we will be using it mainly for creating the initial outlines as well as sketching.
- Lines made with a 3B pencil are darker and more intense, making this tool the best choice for shading.
Let's create a beautiful, velvety texture. I apply the lines using soft buffing strokes, holding the 3B pencil at an angle.
Try varying the pressure of the pencil and the layer of graphite strokes; this way you can create a dark surface that appears almost black.
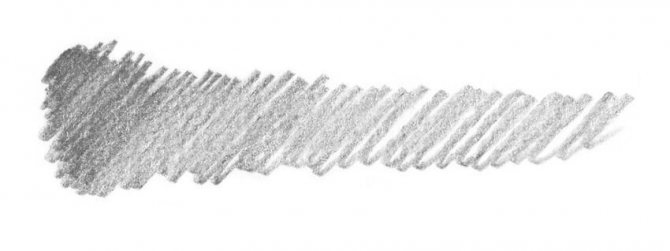
- Sometimes it's nice to smooth out the appearance of graphite strokes by making them blurry. To do this, I use my finger, gently rubbing the tip over the crosshatch pattern.
- Please make sure your hands are clean and dry before you start blurring. Human skin has natural oils, so you can ruin the pattern.
- If you don't want to use your hand, you can use a blender or a regular cotton swab.
Leave your comment
Responsibility for resolving any controversial issues regarding the materials themselves and their contents is taken by the users who posted the material on the site. However, the site administration is ready to provide all possible support in resolving any issues related to the work and content of the site. If you notice that materials are being used illegally on this site, please notify the site administration using the feedback form.
All materials posted on the site were created by the authors of the site or posted by users of the site and are presented on the site for informational purposes only. Copyrights for materials belong to their legal authors. Partial or complete copying of site materials without written permission from the site administration is prohibited! The opinion of the administration may not coincide with the point of view of the authors.
Source
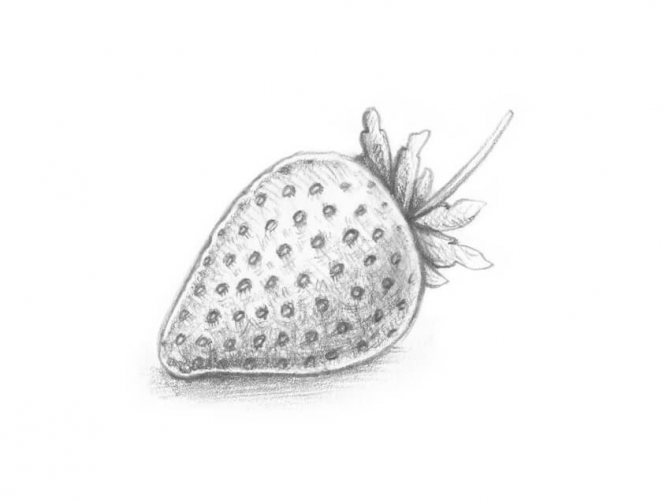
Drawing Strawberry
Technically, strawberries are not a berry - they are a composite fruit. However, for the sake of this lesson, let's close our eyes to this fact.
Using an HB pencil, draw the approximate shape of a strawberry. Next, add the leaf and stem shapes.
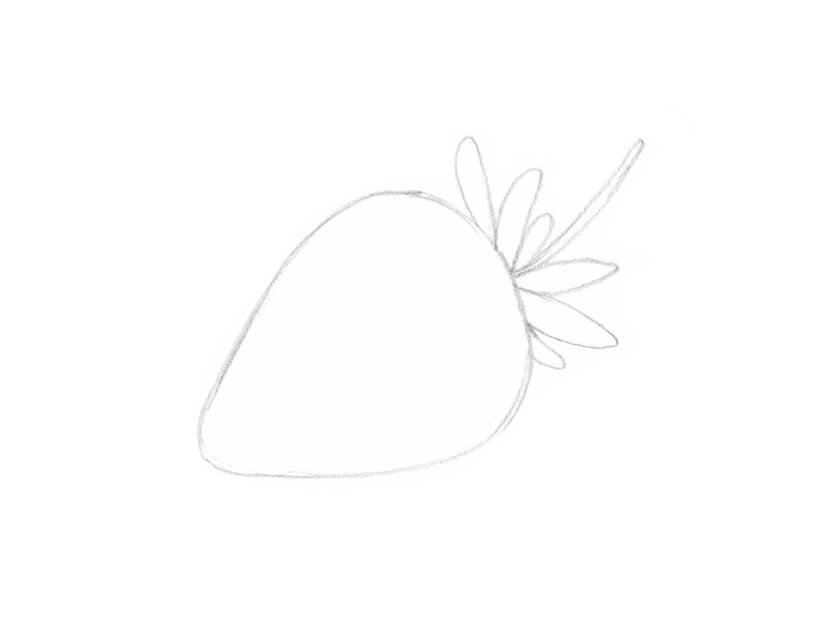
Improve the shape of the strawberry and the contours of the leaves.
Also add auxiliary lines; they will help us highlight small seeds on the body of the fruit. Our goal is to create a sense of volume, so the lines should be slightly bent.
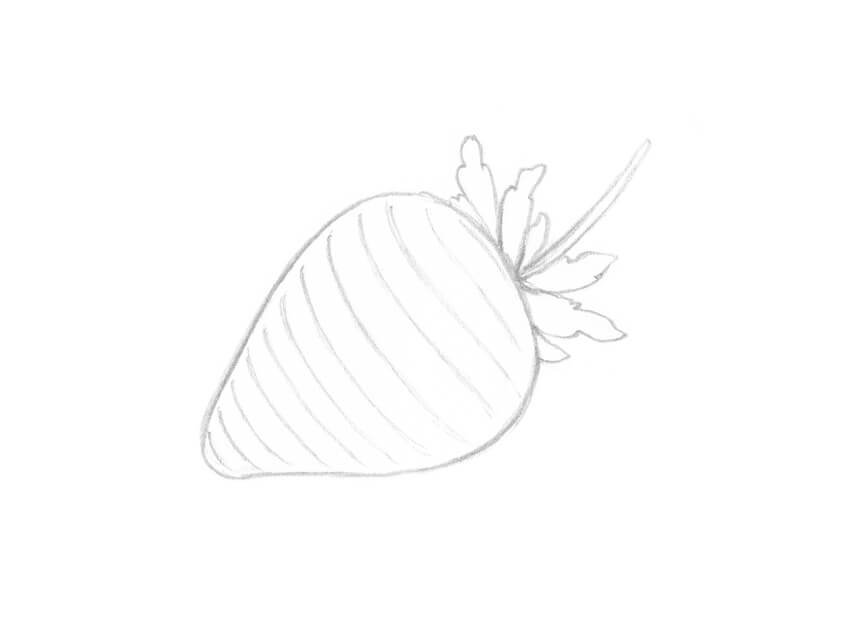
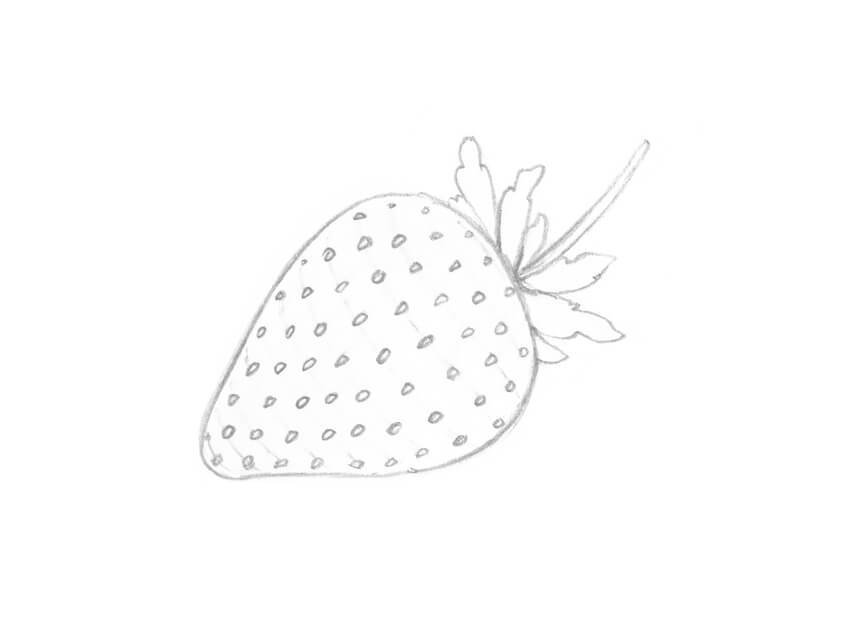
Soften the guide lines with an eraser until they are barely noticeable, and then draw the seeds. Distribute them in a checkerboard pattern.
- It's time to apply the shading using a 3B pencil. Accentuate the sides of the strawberry by leaving subtle lines of reflective light and darkened leaves.
- Also highlight the small depressions (where the seeds are located) and then add shadow. Please don't forget to add some light highlights on the top of the strawberry.
- This drawing already looks as if we have been working on it for a long time!
Types of berries: educational activities for children
All people, and especially children, love berries. An educational activity for children types of berries there are .
To prepare for this lesson we used:
- The “School of the Seven Dwarfs” manual for classes with children three or four years old: “What is in the basket?”
- Developmental lotto “Gifts of Summer”
- Textbook for kids by V. Stepanov “Native Nature”.
Pictures of berries
It is advisable to divide the educational lesson for children “Types of berries” into several blocks:
- We give the child a general idea of the types of berries.
- We read poems about berries to the child
- Coloring the contours of the berries
- Let's make riddles about berries
- Making berries from plasticine
- Let's play the lotto "Guess the Berry"
- Recognizing berries in a plate
Berries: general introduction
At the beginning of the lesson, show your child a variety of pictures of berries.
Share your knowledge about berries with your child. Even if you are not entirely sure about something, it’s okay.
It is not so important for a three-year-old to know subtle details.
The main thing is for the child to feel how beautiful and diverse our world is.
You can tell about berries that they come in garden and wild varieties. Berries grow on bushes. The bush consists of a stem and leaves.
Types of berries
When you feel that you have told all the most interesting things about berries, it’s time to read poetry.
Poems about berries
- Gooseberry (V. Stepanov)
Every gardener
There is a gooseberry bush in the garden.
Prickly, angry,
But very tasty.
- Strawberries (V. Stepanov)
The berry turned red, the berry in the forest.
I take home ripe strawberries.
Ripe strawberries are delicious food.
I’ll treat the titmouse, I’ll treat the blackbird.
Berries coloring pages
All children love to draw and color, so encourage your child to color the berries.
Berries coloring pages
Option 1. You can invite your child to color the berries as they are shown in the picture.
Option 2. If you remove the pictures, the baby will color the berries the way he wants.
Pictures of berries
It is optimal to combine both options. You show your child a picture of a berry and ask him to color it as in the picture.
And then you take away the color pictures and give your child complete creative freedom.
Riddles about berries
All kids love riddles. I offer you a few riddles to practice:
- Inside it is scarlet, sugar, the caftan is green and velvet. (Watermelon).
- This beauty berry is loved by many in the forest. And the bear likes the beauty the most in the forest. (Raspberries).
- A little raspberry, a little blueberry. What kind of berry? (Blackberry).
- What kind of berries are on the hummock? Autumn brightens their cheeks. Lean over and see if it’s ripe... (Lingonberry).
- There is a red maiden in the garden bed. To see her, you have to bow. (Strawberry).
- Little dark, little, yummy, sweet. It's cute for the kids. (Blueberry).
- These are three sisters. At first they are green. Then one turns red, the other turns white, and the third turns black. (Red, white and black currants).
You will find several more riddle options in the picture from the board game “Gifts of Summer”:
Riddles about berries
Making berries from plasticine
It is very easy to sculpt berries from plasticine. A three-year-old child will cope with this task perfectly.
Almost all berries are made the same way: roll a ball (berry), make a sausage (stem), flatten the ball, make a leaf.
After this, we make the distinctive features of each berry. Let's look at a few examples.
3.1. We make white currants.
We make one long sausage from green plasticine and several small ones.
The result is a stem and branches. Attaching the branches to the stem
Roll balls of white plasticine. We make balls of different diameters.
Attach larger balls closer to the base of the stem.
And we attach small balls at the top.
We attach a small black ball to each ball.
Let's make a leaf. To do this, roll a large ball and flatten it.
In the middle we cut the veins with a stack, and along the edges of the leaf we make cuts with a stack to give the leaf shape.
The white currant sprig is ready.
Pictures of berries
3.2. Let's make blueberries.
We make blueberries, similar to white currants.
We make several blue balls and attach small black circles to the balls.
Roll the green sausage and make a stalk.
We sculpt green leaves, processing the edges and the middle with a stack.
Pictures of berries
We make strawberries (garden strawberries).
The main difference in sculpting strawberries is the berries.
Strawberries are larger than currants and blueberries.
In addition, the shape is not round, but elongated (although there are different varieties of strawberries).
We make yellow dots on the red berries.
We got this strawberry.
Pictures of berries
Let's play lotto: guess the berry
The stores sell board games with various types of berries (Gifts of Summer, Berries, Garden Berries, etc.)
Or you can make the lotto yourself.
To do this, we take old magazines and cut out pictures of berries from them.
Pictures of berries
Glue the pictures onto cardboard. We write cards with the names of the berries found in the pictures.
Our picture matches the cards with riddles presented in the “Riddles about berries” section.
The rules of the game could be like this.
We give the baby a field with pictures of berries.
Then we take a card with the name (drawing) of the berry. We describe the berry, and if the child names it correctly, we give him the card.
If it is incorrect, then we help you find the correct answer with leading questions.
We are extremely happy when a child guesses the riddle.
After the child fills the entire field with berries, we begin the most interesting part - tasting the berries.
Find out the types of berries in a plate
At the end of the lesson, offer your baby to eat berries.
If possible, you can pick berries together in the garden, field, or forest.
Types of berries
If not, then buy berries (fresh or frozen) in advance at the store.
When a child holds, smells and tastes berries, he will quickly remember all types of berries.
Educational activities for 3-year-old children: “ Types of berries ” can be done at one time, or can be divided into several lessons. It all depends on the interest and perseverance of your child. Have fun!
And here you can watch a video with a music lesson on the topic “Wild berries”:
wunderkind-blog.ru