Preview:
Summary of GCD in the middle group
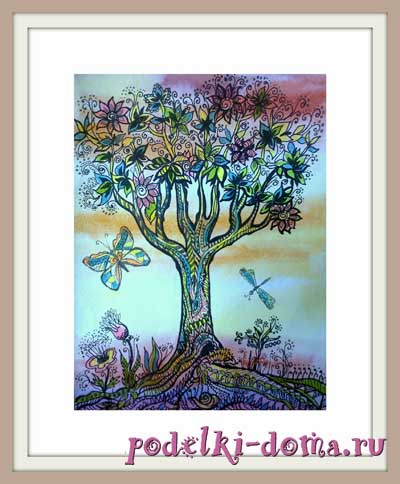
Theme: “Fairytale tree”
Educational field "Artistic and aesthetic development"
Goal: to exercise the ability to convey the correct structure of a tree. Software tasks.
Developmental: develop a sense of color, rhythm, imagination, fine motor skills; expand children's vocabulary.
Educational: to cultivate interest in drawing using non-traditional techniques; cultivate neatness and kindness towards each other; induce in children an emotionally positive attitude towards nature.
Preliminary work: looking at trees in kindergarten, looking at illustrations depicting fairy-tale trees, reading K. Chukovsky’s poem “The Miracle Tree”.
Educator: Children stand in a circle, perform movements according to the text:
Hello, right hand,
Hello left hand,
Hello, our cheerful circle!
— Good morning everyone!
— Guys, this morning the postman brought a letter from a bear cub to our art workshop. What happened to him? Let's read it.
“In autumn, all the leaves fall off the trees. It’s becoming empty and ugly around my den. I know that the guys can draw magical trees that can delight me all year long. Help me please!".
Educator: Shall we help the bear cub? Now we will draw magic trees, and the little bear will plant them near his house. Do you agree?
Think about where we start drawing a tree?
Children: Branches Educator: Correct. They grow from the trunk. The lower ones are longer than the upper ones. Large branches have small twigs.
- Guys, did it turn out to be a tree?
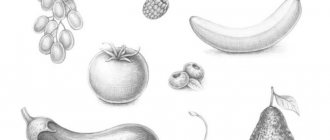
Educator: To make a fairy-tale tree, what color paints will we use to depict the leaves and fruits?
Children: Yellow, red, orange, blue, etc.
Educator: Guys, we will draw fruits and leaves in an unusual way - with our fingers. My tree is ready, but note that the image of the tree takes up almost the entire sheet of paper, but does not extend beyond the edge of the sheet. Before we start drawing a fairy tree for our little bear, we need to stretch our fingers.
"Gymnastics for fingers"
Here are my assistants, turn them any way you want: (Rotate your hands)
And this way, and this way, they won’t be offended in any way. (Rub with hands)
One two three four five. (Clap)
Turned it around. Turned it around. (Circular rotations with a brush)
And they wanted to work. (Rub with hands)
Now let's go to the tables and start drawing.
The children take their seats. The teacher helps children in the process of work with leading questions, advice, showing them to those who need it, and receiving images.
Educator: That's how many beautiful, colorful trees our little bear will now grow near the house. When the works are dry, we will mail them to the bear cub.
Educator: Guys, what did we draw? What did we draw today?
Drawing a “Fairytale Tree”
We will prepare all the necessary materials. We will need:
- watercolor paper,
- brush,
- napkin,
- markers,
- markers,
- colored text highlighters,
- black gel pens,
- simple pencil.
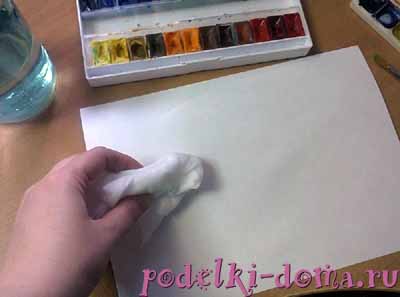
First you need to prepare the background for the drawing. To do this, we will use several colors at once; they can be chosen arbitrarily, for example, red, purple, blue, yellow, green. Ask, how is it possible that there are so many colors? Will the result not be a mishmash of an indeterminate color? I assure you, it won’t work, because we will be spreading the paints on damp paper. First of all, we will moisten the sheet with a damp cloth. In the process of applying watercolor, it will spread picturesquely over the paper, the borders of different colors will intricately merge with each other and we will get a beautiful background for further work.
So, we wet the paper and apply paint, color by color, leaving no gaps with the white paper, the entire sheet should be covered with watercolor.
Let the background dry thoroughly. If the paper bends a little during the drying process, no problem! Let it lie under a press (a stack of books) or carefully, so that there are no creases, roll it into a roll in the opposite direction to the bending and immediately straighten it.
Now you need to figure out what kind of tree you will draw today.
And most importantly, you need to understand exactly how you will draw it, what means of expression you will use, how your materials will help you do this.
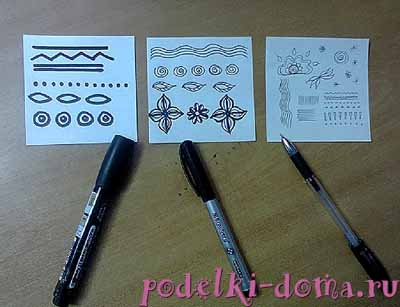
We have already said that today you will need markers, felt-tip pens and gel pens. Ask why? These materials produce a line of varying thickness. For the composition that we will draw, this is a very important point. While the watercolor is drying, take pieces of paper and try what lines you can make with a marker with a line thickness of 2.8 mm, a marker with a line thickness of 1 mm, a gel pen with a line thickness of 0.38 mm - 0.5 mm, at the same time you can play with the decorative elements with which you will decorate the tree.
Don’t forget, ours is fabulous, that is, it’s not the same as in life. So, fantasize, remember your dreams, listen to musical compositions with sounds of nature, read or remember your favorite fairy tales. Think about how you want to draw the tree - with a round crown, flexible branches. Or it will be rigid in shape, with broken branches. There is no need to draw naturalistically. Our task is to make the tree stylized, that is, not the same as in life. We will intensify and exaggerate, embellish the shape, scale, characteristic features. You can look out the window or look in the interior for photographs of trees and plants to take something as a basis.
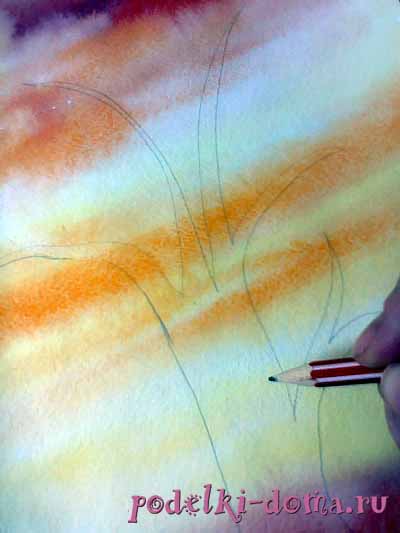
Use a simple pencil to outline a preliminary drawing; you don’t need to do a detailed one. We draw the trunk, main branches, crown, tie the base of the trunk to the ground, maybe someone will draw knotty roots, and someone will draw soft grass around it. We remember that the tree is fabulous, and everything around the tree is also fabulous. It can be various insects, animals, birds, the sun, clouds. You draw all this to match your tree, in the same style as it.
Start drawing the main lines with a marker, gradually filling the composition with details.
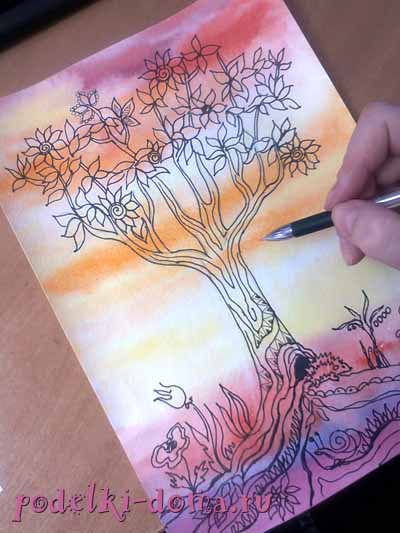
If necessary, add additional color. To do this, we take colored markers, highlighters, and pencils.
You will definitely feel that the drawing is “leading” you, and at some point you will understand whether you should continue or it’s time to stop. Remember that it is better to leave a little unfinished than to overload the drawing with unnecessary details and details. If you are not sure, it is better to put off work for a while. Later you will come back to it and see whether something is worth adding or not.
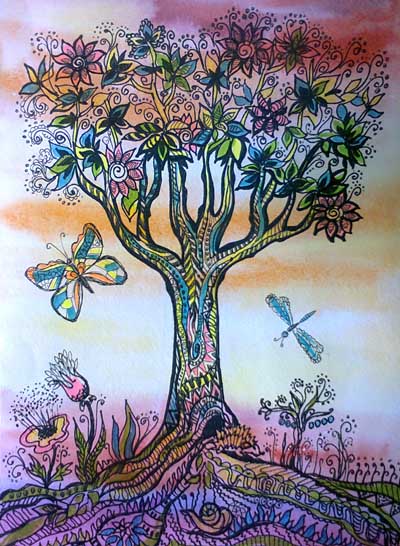
And one little piece of advice: appreciate your work - be sure to frame your finished work under glass. If possible, do it yourself; if not, any art salon will help you arrange it correctly. May the time you spent on this work pass in the joy of creativity, and may your drawing decorate your home or become a wonderful unique gift for your friends and loved ones.”
In order not to forget the page address and share with friends, add to your social networks:
On the topic: methodological developments, presentations and notes
Topic: “Magic Tree” Goal: Consolidation of the material covered Objectives: Educational: - Strengthen children’s understanding of geometric shapes; ability to recognize geometric shapes by touch: circle.
The summary was compiled for an average mixed-age group (most children are 4-5 years old).
Integration of OO: Tasks: “Cognition” - consolidate knowledge about the parts of the day, the ability to distinguish and name the seasons; consolidate knowledge about numbers from 1 to 5, the names of geometric shapes (circle, oval.
Learn to cut strips of colored paper in green, red, yellow into squares.
Developing the ability to round corners and cut straight.
Source
Summary of GCD for drawing in the middle group “Fairytale Tree”
Svetlana Sergeevna Khatko
Summary of GCD for drawing in the middle group “Fairytale Tree”
Khatko Svetlana Sergeevna
Abstract of educational activities on the public organization “Artistic and aesthetic development”
(
drawing ) in
the middle group on the topic “
Fairytale tree ” .
Goal: to consolidate “ finger painting ”
, technical skills.
Developmental: develop a sense of color, rhythm, imagination, fine motor skills; expand children's vocabulary.
Educating: to evoke in children an emotionally positive attitude towards nature in the fall through the use of literary words; cultivate interest in drawing using non-traditional techniques; cultivate neatness and kindness towards each other.
Materials and equipment: sketch with the stage of drawing a tree , palette with paint, wet wipes, brushes, jars of water, autumn leaves, letter.
Stages of work:
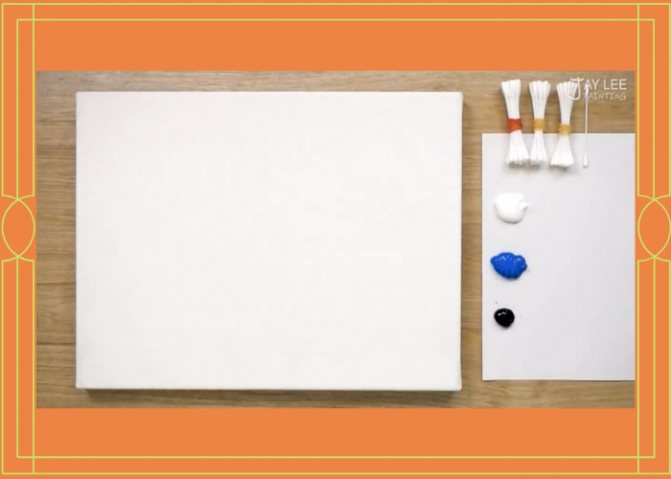
1. Preparatory stage
Place and tape the paper sheet.
Combine 10 cotton swabs. You will get 3 “bunches”. One will remain for drawing finer details.
Pour paint onto the palette: white, blue and black.
2. Using a medium brush, draw the tree trunk, its roots and branches. See fig. 1-7
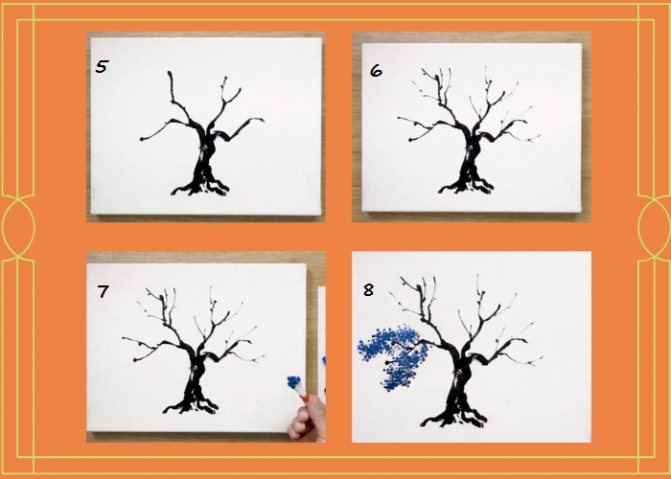
3. Take the first set of cotton swabs to mix some of the blue paint and a small amount of black on the palette. The result will be a dark blue color.
Using the resulting shade, draw the crown of the tree on the branches, simply creating imprints of a “bundle” of cotton swabs. See fig. 8-9
4. Dip cotton swabs into blue dye to lighten the color. Continue drawing the crown. Rice. 9-10.
5. Add more black to the dark blue shade on the palette. Use the resulting color to make prints of cotton swabs. Rice. 11-12
6. Now dilute the dark shade with the original blue to make the crown on the right lighter. Rice. 12
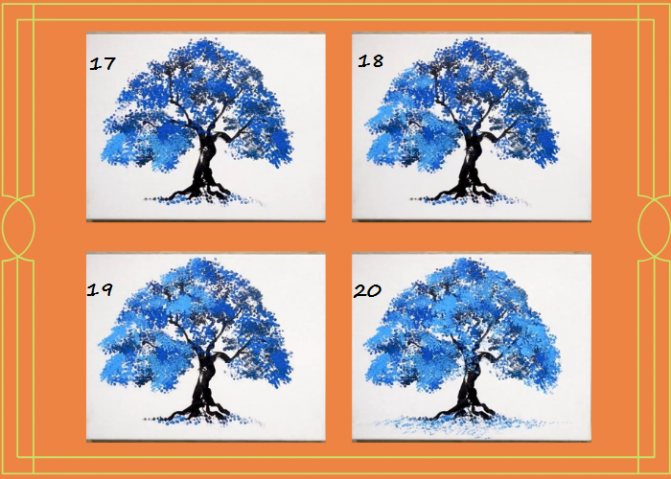
7. Take a bunch of clean cotton swabs and add leaves of the original blue color to the left, center and right of the crown. Draw fallen leaves on the ground. Rice. 13-16
8. Take the third “bundle” of cotton swabs and dip them in white paint mixed with a small amount of blue. It should turn out light blue.
Add light leaves to the crown. Draw blue fallen leaves on the ground. See the example in Fig. 17-20
9. Add more white paint to the light blue. Use the resulting pale blue to draw new leaves, sometimes on top of the ones already drawn.
This is how we create the appearance of sunlight. Fig.21-24
10. Take a medium or thin brush and paint the branches with black paint in some places. Rice. 23-24
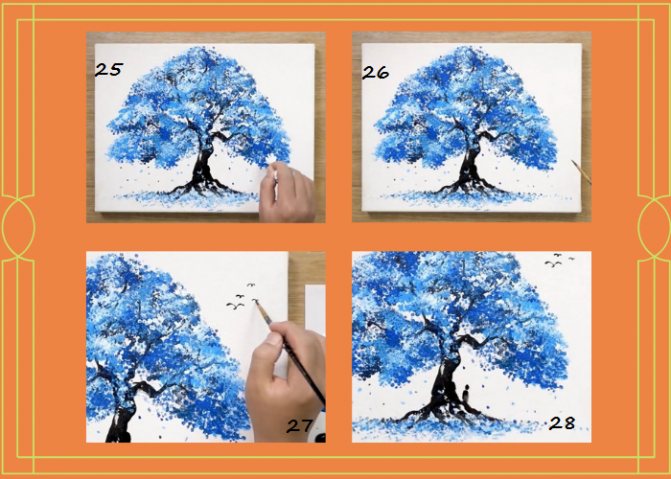
11. Use the remaining cotton swab to draw single leaves that fall to the ground. Rice. 24-26
12. Using a brush, paint flying birds with black paint. Rice. 27
13. Draw the outlines of a person sitting near a tree. His image is very simplified, so you can easily cope with it. Draw the head and body, then the arm and legs. Finally, add a staff stick to him. See fig. 28-32
Your fairytale landscape is ready!
The lesson was created based on videos from the YouTube channel Jay Lee Painting
Progress:
All the children gathered in a circle,
Let's hold hands together
And let's smile at each other!
So you and I greeted each other, and now listen to the riddle and determine what time of year it talks about:
Leaves fly off the branches,
Birds fly away to the south.
“What time of year is it?”
- we’ll ask.
Educator: correct, what changes occur in nature in the fall?
Children: the leaves are turning yellow, it’s raining, it’s getting cold, birds are flying to warmer places, etc.
Educator: Guys, we received a letter today (reads the letter)
In a certain kingdom, in a distant state, there lived Tsar Demyan. And he had a garden so rich that a better garden could not be found in any kingdom. Various expensive trees , and there was one apple tree there that brought golden apples. But trouble happened: the Firebird flew into the garden and nibbled all the golden apples. The king was saddened and asks for help to revive the garden, and for this he needs paintings with painted apple trees .
Summary of the drawing lesson “Fairytale Tree” in the middle group
Lyudmila Dudnyak
Summary of the drawing lesson “Fairytale Tree” in the middle group
Goal: to exercise the ability to convey the correct structure of a tree . Software tasks.
Developmental: develop a sense of color, rhythm, imagination, fine motor skills; expand children's vocabulary.
Educators: cultivate interest in drawing using non-traditional techniques; cultivate neatness and kindness towards each other; induce in children an emotionally positive attitude towards nature.
Materials and equipment: pencils, 1/2 album sheet. letter.
Preliminary work: looking at trees in kindergarten , looking at illustrations depicting fairy-tale trees , reading K. Chukovsky’s poem “ The Miracle Tree ”
.
Step-by-step drawing of the composition “Fairytale Tree”
Let's consider a scheme for drawing classical compositions (without unconventional techniques and decorations).
Colored pencils
- Draw a triangle and a circle.
- Paint over the trunk.
- Draw magic fruits on the crown.
- Paint over the crown without going over the contours of the fruit.
- Can be painted in several colors.
- The drawing is ready.
With paints
- Draw the outline of the trunk - a rectangle.
- Paint over the trunk.
- Draw the outline of the crown - a circle.
- Paint over the crown using strokes.
- You can combine several colors in painting.
- We draw the grass with thin strokes.
- Trying to make a watercolor background. The drawing is ready.
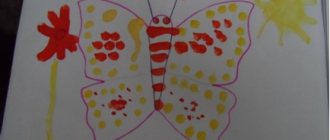
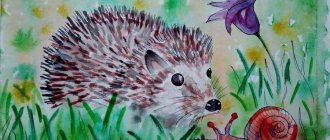
Photo gallery: examples of work
Magic stories take children into an imaginary world. From this fantastic journey, the child brings back interesting images and draws them on paper with pleasure.
Course of the lesson
Educator: Children stand in a circle and perform movements according to the text:
Hello, right hand,
Hello left hand,
Hello, our cheerful circle!
— Good morning everyone!
— Guys, this morning the postman brought a letter from a bear cub to our art workshop. What happened to him? Let's read it.
“In autumn, all the leaves fall off the trees . It’s becoming empty and ugly around my den. I know that the guys can draw magical trees that can delight me all year long. Help me please!".
Educator: Shall we help the bear cub? Now we will draw magic trees , and the little bear will plant them near his house. Do you agree?
Think about where we start drawing a tree ?
Educator: Correct. They grow from the trunk. The lower ones are longer than the upper ones. Large branches have small twigs.
- Guys, did it turn out to be a tree ?
Educator: To make a fairy-tale tree , what color pencils will we use to depict leaves and fruits?
Children: Yellow, red, orange, blue, etc.
Educator: Before we start drawing a fairy tree for our little bear, we need to stretch our fingers.
"Gymnastics for fingers"
Here are my assistants, turn them any way you want: (Rotate your hands)
And this way, and this way, they won’t be offended in any way. (Rub with hands)
One two three four five. (Clap)
They can't sit again. (Shake your brushes)
They knocked. They knocked. (Knock on the desk with our fingertips)