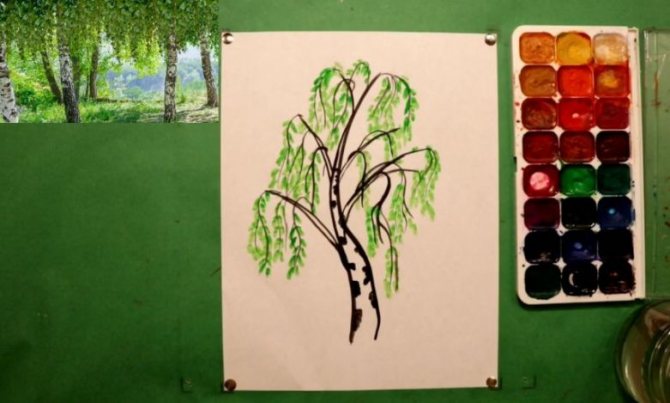
Simple drawing of a birch tree
Drawing an elegant tree is not at all difficult, as you might think at first glance. Training should begin with the simplest image of it, which will be within the power of every novice artist, gradually complicating the work.
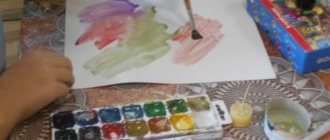
So, to begin with, you will need: a checkered notebook sheet, simple and green pencils, an eraser, black and green ballpoint pens for drawing outlines.
If this is your first experience of drawing a birch, we recommend working with a simple pencil first so that you can correct some things along the way. Let's get started.
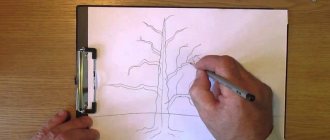
In the center of the notebook sheet, using a simple pencil, draw the trunk of the future birch tree.
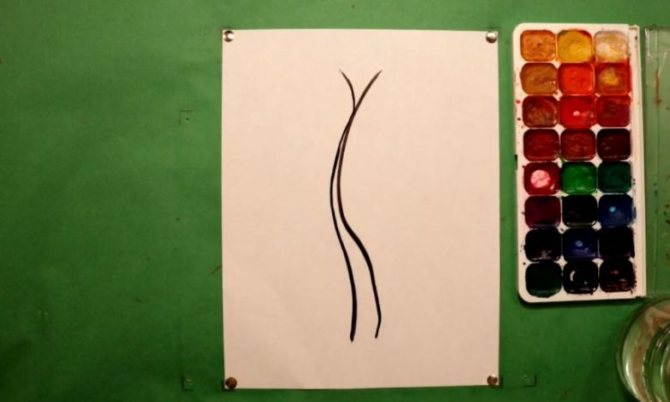
Two vertical lines, slightly widened at the base. The height of the trunk should be approximately half the size of the leaf.
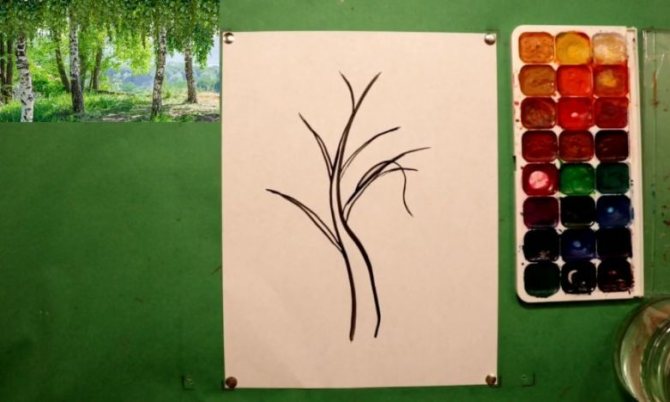
- Continuing the lines of the trunk upward, we draw three large branches, i.e. the tree trunk smoothly branches first to the right, then to the left and again to the right. Make them not too wide. The ends of the branches should smoothly fall down. You can add several medium-sized branches.
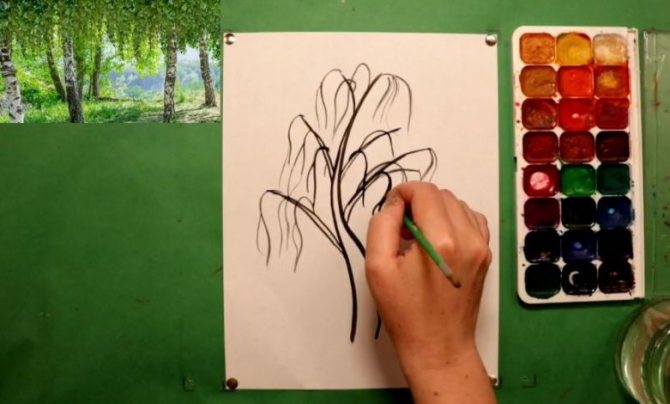
- Evenly along the large branches, using falling wavy lines, we draw many thin branches up to the level of the middle of the trunk, giving the crown the most natural “weeping” look. We complete the pencil drawing by drawing the grass around the base of the tree in the form of a broken curve.
- If necessary, erase all unnecessary strokes and lines with an eraser. Draw all the lines with a black ballpoint pen. This way, the contours will become clearer.
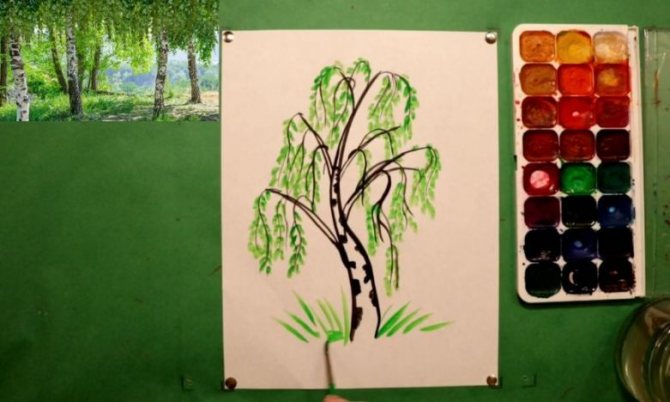
- Take a closer look, is our tree missing something to make it look like a birch? Well, of course! Let's add distinctive black patterns resembling semicircles on the trunk and large branches in a checkerboard pattern.
It turned out to be a very nice birch tree.
Now let's move on to working on the color design of the sketch. Use a green pencil to color the grass and boldly draw the contours of the thinnest branches.
Next, along the entire length of the thin branches, with a green pen you need to draw small leaves, which are shaped like an inverted drop.
We arrange the leaves alternately, applying them to the fragile branches, left and right. To make the foliage look denser, try to space them fairly close to each other.
If your child easily managed to cope with the task, doing the work step by step, then we offer a more complex, but much more interesting technique for depicting birches below.
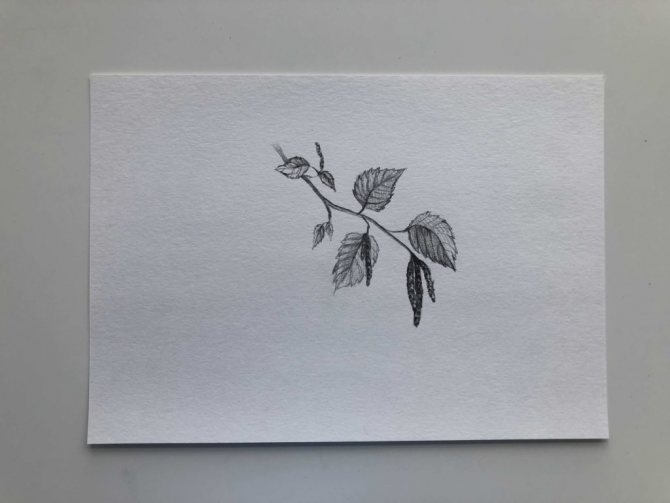
How to draw a birch tree in spring with earrings
Stage 1 – outline the drawing

In previous master classes we have already shown how to draw a birch, so in this master class we will tell you how to draw a branch with an earring so that you can add them to your drawing of a spring birch.
At the first stage, with an HB pencil we outline our branch, on which the earrings and several leaves will be located. We draw the twig as plastic, more rounded and smooth.
At the same stage, we outline the earrings. They have the shape of thin, elongated ovals. But some earrings need to be drawn slightly curved so that they don't look exactly the same. We draw earrings of different sizes, lengths and thicknesses.
Then, draw the leaves. In the same way, of different sizes, placing them in different directions - some grow from above, some from below.
Stage 2 – using shading to create a tone
Using a 4B pencil, using shading, we cover, first, the twig. We make it in different tones - in some places we apply a little more pressure, in others less. We emphasize it in the same way. On some sides we apply more intense pressure so that the branch is more voluminous. We also cover the leaves and earrings with a light tone. We try to make the leaves of different colors. Somewhere on one leaf you can show that it has both a shadow and a light side. Some leaves can simply be toned down so that they are in the background, in the shadows.
Stage 3 – apply shadows, draw details
In the same way, we draw leaves with a 4B pencil. Veins and darkening should be shown on the leaves. The darkening occurs along the edges, where the leaves should be sharp and uneven.
On the earrings we show small strokes and pencil strokes to show the texture of the earrings. And they should be darker than the leaves.
Thus, using this and the previous master class, you will get a birch tree drawn in spring with a simple pencil.
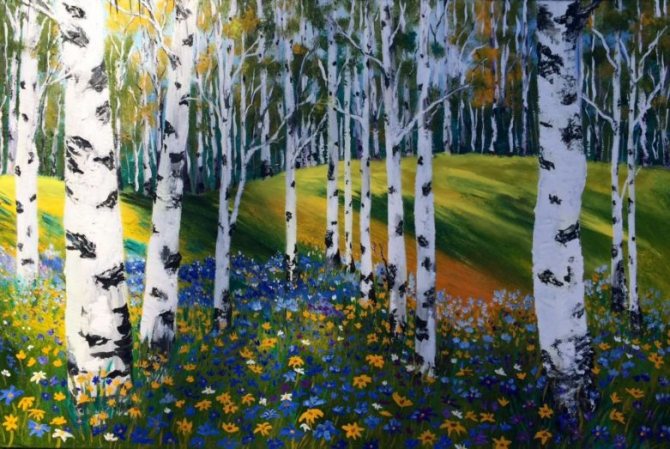
Drawing birches with gouache, an unusual technique
First, you need to know that landscape is a genre of fine art in which the main subject of the image is nature, where special importance is attached to the construction of the composition, as well as the conveyance of the atmosphere, the state of the air and light.
Get ready, we will learn to draw a beautiful landscape with birches. Now we will introduce you to one interesting way of painting with gouache.
For this work you will need very unusual materials:
- a circle cut out of a white sheet of paper;
- used plastic payment card;
- adhesive masking tape 1 cm wide;
- set of gouache paints;
- paint brushes;
- a sippy cup with plain water;
- scissors.
We draw a landscape step by step:
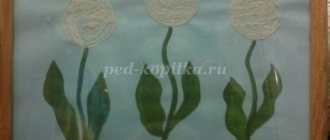
- We place the paper circle on the surface of the desktop on the backing. We cut the masking tape with scissors into five strips, approximately equal in length to the diameter of the circle. Cut one strip in half lengthwise.
- We glue the stripes as indicated in the diagram, first the wider ones, and then in the center of the composition, at an angle, thin strips of tape. Using the sticky edges of the strips protruding beyond the circle, we secure the circle to the work surface. Now is it clear that the areas covered with tape are the trunks of the birch trees in our picture?
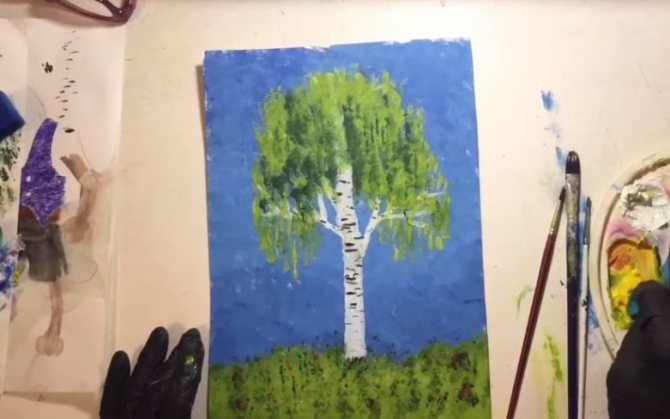
- Next we work with gouache. Taking a medium-sized brush, paint the sky with blue gouache, using light strokes to paint the upper part of the circle with a smooth increase in the intensity of the blue color towards the very top edge of the sky.
- To the middle of the circle, paint the space between the trees with strokes using gouache paint in green tones: from light green to light green. In the middle part of the composition we diversify the palette of colors with orange highlights.
- And now we work in the same manner to the very bottom, applying dark green gouache to the very bottom of our drawing, smoothly creating transitions from one shade of green to another. The background forbs are ready. Now let’s add red and yellow colors with a few strokes. Look at the resulting picture from above, did you really see blooming summer grasses?
- And now, let's return to our birches.
- Carefully remove the tape. Inside the circle, the slender outlines of trees remained.
- Let's apply a characteristic black pattern to the white bark in an unusual way. Attention! Apply a little black paint to the edge of the used plastic card.
- We apply the painted edge to either side of the selected trunk and, pressing tightly, stretch the card to the other side. If you did everything correctly, you will get the effect of birch bark on the trunk. Great?
- We will do a similar procedure with other birches, changing the direction of action on some of them, for example, from right to left and vice versa.
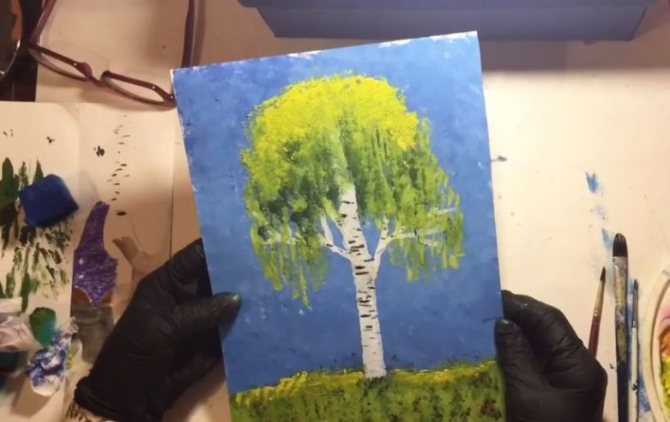
- At the top of the birches we will draw branches.
- Paint them with black paint using a thin brush.
- Finally, we casually paint the branches with green paint to create foliage.
The result was a picturesque landscape. Through the whitish trunks of birches one can see the blooming, juicy May herbs, and the expanse of heaven soars upward! The work is really worth the result, but very little time is spent on it.
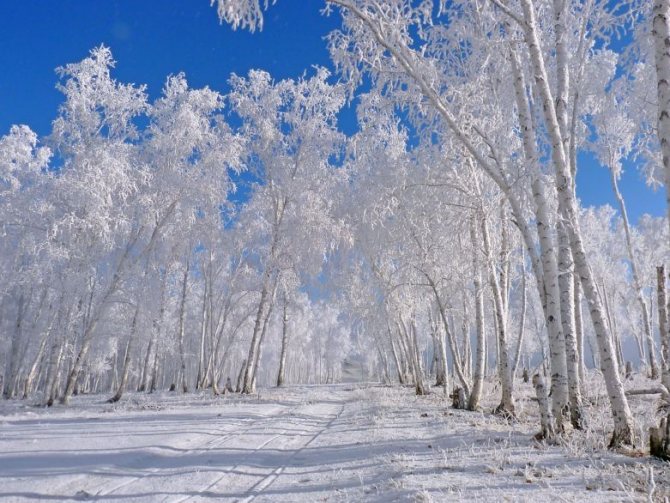
Let's move on to the next master class. We will learn to draw a winter birch grove.
Non-traditional drawing techniques: meaning and tasks in the preparatory group
Children aged seven years confidently use classical drawing techniques. Colored pencils and paints are used for the work. The techniques of folk painting are studied for their technical aspects. Classical drawing classes in the preparatory group are aimed at developing independent composition, the ability to convey movement and plot on a sheet of paper. Monotonous brush strokes and pencil shading can provoke emotional burnout in students. The desire to draw fades away.

Monotony in classes discourages the desire to draw and fantasize
Unconventional drawing techniques are the creation of an image using unusual tools/materials or alternative techniques. It is recommended to combine or alternate classical drawing classes with non-standard techniques. Children gain a sense of novelty in the creative process. The imagination is activated. The use of unexpected tools - threads, toothbrushes, straws, etc. - is experimentation for a child. Children gain new knowledge and new opportunities in non-traditional drawing classes.
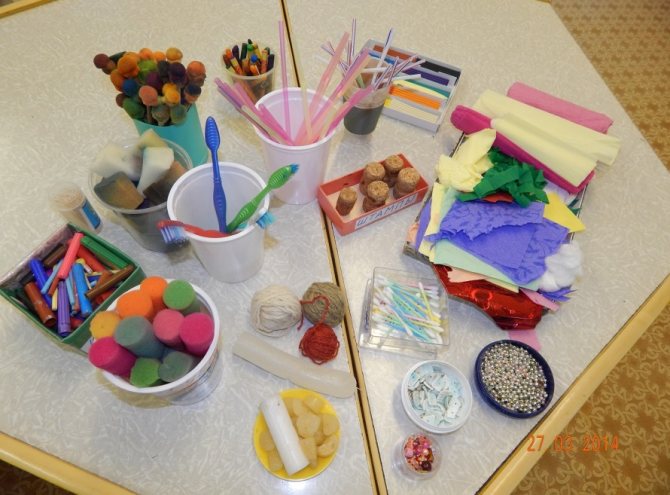
Unusual materials for drawing attract children and make them want to start drawing right away
The inclusion of non-traditional drawing techniques in the educational process is carried out within the framework of the preschool education program. The importance of alternative fine art techniques is significant for the education of a well-rounded personality, as required by the Federal State Educational Standard. In the preparatory group, non-traditional techniques contribute to the fulfillment of educational tasks:
- improving fine motor skills and motor coordination of hands,
- preparing the brush for writing,
- forming an idea of the properties of certain materials through research and experimentation,
- development of imaginative and logical thinking,
- development of a sense of color and shape,
- maintaining the psycho-emotional health of children,
- stimulating imagination
- the formation of a sustainable interest in independently thinking through a plan and implementing it,
- development of aesthetic taste.

Unconventional drawing is a good mood, self-confidence and the fight against fears
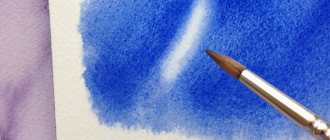
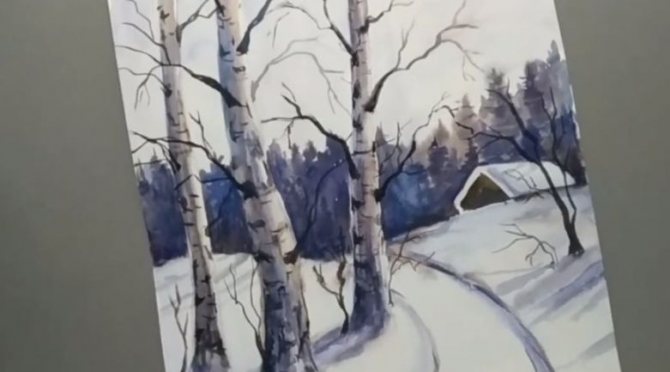
Winter landscape with birches in watercolor
Birches are especially beautiful in winter. Their white trunks look even thinner and more transparent, as if dissolving in space.
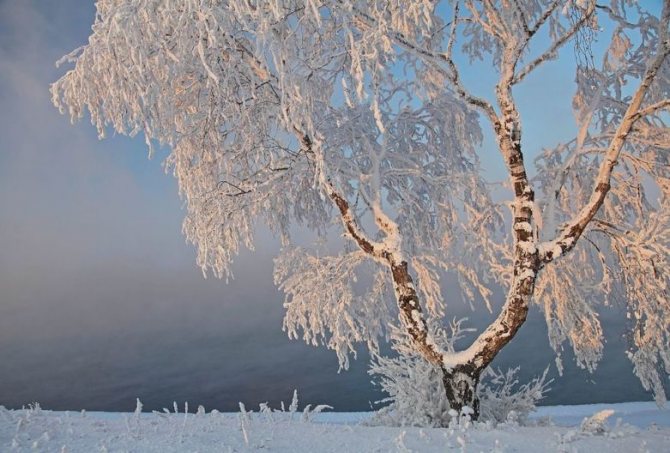
You can convey lightness and airiness using watercolors.
The tendency of this technique is that for work we take watercolor paints, which are first diluted with water before painting. Paints are applied in thin layers. Sometimes we additionally moisten the parchment.
The paper here is not just a canvas, but also a pictorial element: the background will become space and “air.”
If you love winter and nature, then this master class is just for you. We are starting to work on a winter landscape with birches.
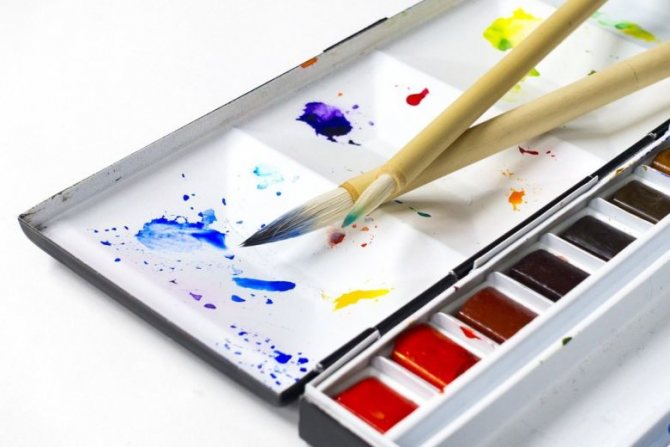
Prepare the following materials:
- watercolor paints;
- paint brushes of different sizes;
- a small container of water;
- watercolor paper;
- masking tape;
- used plastic card.
Introduction
Birch is a unique symbol of our country. Beautiful and stately, birch is a wonderful tree that you can easily learn to draw with a simple pencil.
We show you in three simple step-by-step master classes how to make an easy drawing of a beautiful birch tree, even if you have never drawn!
You don't need any special equipment, just simple pencils and paper. After reading this article, you will be able to easily and simply draw a birch tree with catkins, a white birch tree in winter, a spring birch tree with leaves with a simple pencil.
At the end of the article you will also find a video with a master class, and photo references, according to which you can draw a birch tree step by step for beginners at home, on your own.
How to gradually create a winter landscape with birches using watercolors:
- Use tape to secure the watercolor paper to the work surface. Pre-soak the following paints with water: blue, brown, yellow and white paint.
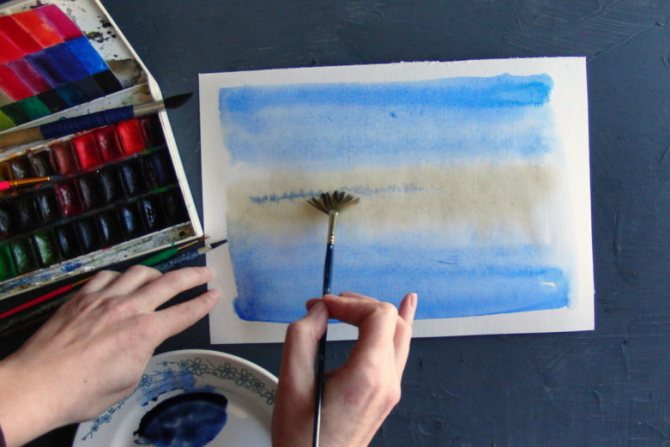
- Visually divide the sheet in half horizontally.
- At this stage, we moisten the upper part of the sheet.
- This is done using a wide brush dipped in clean water.
- Using a wet brush, pick up blue paint and a little brown paint and mix them. Using the resulting grayish-blue tint in the upper third of the sheet, we create the background of the composition, in the form of wavy transparent stains in shape reminiscent of trees.
- A little closer, using dense blue paint, we will draw in a zigzag pattern the pyramidal silhouettes of the fir trees.
- At the left edge there is a larger one, in the center there is a smaller one. The bottom background edge is located in the form of a convex arc.
- Using brown paint, closer to the right edge, draw two vertical lines.
- The result was tree trunks.
- As soon as the wet image dries and becomes slightly damp, take a plastic card and apply a thin layer of white paint of a thicker consistency to its edge. On a blurred background of the forest, vertically and obliquely applying and stretching the card, we draw white silhouettes of several birch tree trunks and branching zones. This group of birches will form the center of the composition.
- Next, we add black paint to the edge of the card and make marks on the white silhouettes of birch trunks. Then, we move to the lower plane. And on the white section of the sheet, in a similar way, we finish drawing the lower parts of the trunks. Pay special attention to the location of birch trees, as well as giving them advantageous shapes.
- While the upper part of the drawing dries, we will draw a stream in the foreground. Moisten the bottom of the sheet. Let's paint the open surface of the stream with mixed blue-gray paint. We apply the strokes in several steps, layer by layer, to create the effect of living water. Using darker, thicker paint, we will paint several streaks of the reflection of the birches. Using white watercolor paint we apply highlights on the surface of the water, and with blue strokes we shade the trunks from the main mass of snow.
- The top half of the drawing is completely dry. Using a thin brush, paint gray, thin, protruding branches at the tops. Around the central birches and along the banks of the stream we will depict gray tufts of dried grass. You can add some warm accents to the overall picture by applying yellowish-brownish paint to the trunks and grass.
- Using a thin brush, to give it a snowy look, we’ll “walk” along the branches of the birch trees with white paint. And finally, to add dynamics to the composition, we will depict falling snow with white paint with chaotic pokes. That's all. Carefully remove the strips of tape.
Take a look at the image from the outside and evaluate it. The result was a magnificent winter landscape.
Such a picture can take its rightful place in your home gallery.
And it will be a good gift for your family and friends.
This job is not easy!
But if you want, if you are careful and consistent, anyone can cope with it, even a child! We wish you success!
Monotype
One of the types of printed graphics, for which you will need paints, a brush and white paper. We fold the sheet in half, then unfold it and apply a design on one half. Then we fold the sheet back, pressing the drawn part tightly against the empty one. Let's unfold it and see what happens!
Butterfly drawn using monotype technique
Video lesson on drawing using the monotype technique
Photos of painted birches
How to make notes for a lesson on drawing in non-traditional techniques
The lesson notes indicate:
- goals and objectives,
- preliminary work (if carried out),
- materials and equipment,
- progress of the lesson.

Working on organizing the lesson is the responsibility of the teacher
According to SanPiN standards, a drawing lesson in the preparatory group lasts 25–30 minutes.
- Organizational moment - 1 minute.
- Introductory stage – 4–6 minutes.
- Practical part - 16–20 minutes.
- Display and discussion of works - 2–3 minutes.
- Reflection and summing up - 1 minute.
Between the structural elements of the lesson, didactic games and dynamic pauses are included.

Outdoor games and warm-ups are a form of health protection in drawing classes
Table: summary of a lesson on drawing in an unconventional technique, scratch paper “Dinosaur Excavation” (preparatory group)
| Author | Semenyako T. |
| Tasks |
|
| Preliminary work |
|
| Materials and equipment |
|
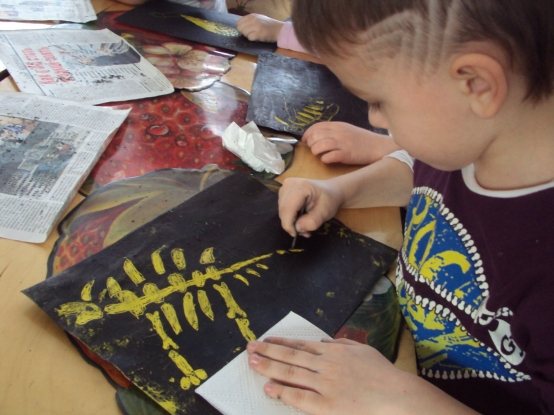
| Contents of the lesson | Children sit in a semicircle on chairs on the carpet. V.: Guys! Today we will meet dinosaurs again! She will be unusual. Want to go in search of dinosaurs? (Children’s answers are usually positive.) Reading the poem “Dinosaurs” by E. Aerova V.: Guys, why can’t we meet dinosaurs anywhere other than the museum? D: Because dinosaurs became extinct. They don't live now. Q: How then did dinosaurs get into the museum? Maybe they live in a museum? (Children's answers) V. gives the correct answer: Of course, dinosaurs do not live in museums. There they are kept in the form of stuffed animals, skeletons or fossils. In the museum you can find out what dinosaurs looked like, their height and weight, and coloring. Let's remember which scientists helped us learn everything about dinosaurs? How did they find them and where? (Children's answers) <…> V.: Let's imagine that on your tables there is an excavation site. Here is a “piece of earth” (shows the prepared cardboard for scratching), and tools (shows a sharp stick and a napkin). Using a sharp stick, you will “find” the dinosaur you want on a black background. But this work is not only interesting, but also difficult, and you need to prepare for it. Let's stand freely in front of the chairs and warm up. Physical education Setting an educational task V.: Guys, how to “find” a dinosaur? It’s very simple - you need to scratch it on a black background with a sharp stick. This image method is called “scratching”, or in other words, scratches. Think about what kind of dinosaur you want to find and scratch the drawing. Think about whether your dinosaur is tall or short, what kind of neck, tail, paws does it have? Are there horns, spikes or claws? You can draw a dinosaur as if it were alive, or you can draw its skeleton. Look what dinosaur I recently dug up. Next, show a sample and explain the scratching technology. Practical work for children At the end of the lesson, an exhibition is organized and the work is analyzed. V.: Well, our excavations have come to an end, and now I invite young paleontologists to tell us what they managed to find, what are the names of your dinosaurs. 2-3 children speak, and the opinions and assessments of those interested are heard. You can suggest making an illustrated magazine: “Dinosaurs”. |
| Quote from: https://www.maam.ru/detskijsad/konspekt-zanjatija-po-risovaniyu-v-netradicionoi-tehnike-gratazh-raskopki-dinozavra-podgotovitelnaja-grupa.html | |
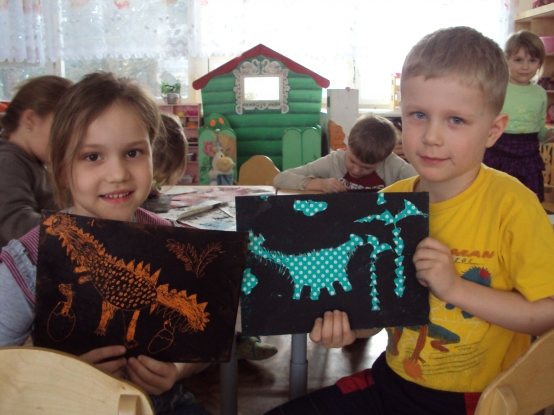
Non-traditional drawing classes are often conducted in a playful way, for example, children go on a dinosaur dig
Dinosaur Dig is an ideal pedagogical development. The lesson is combined with topics on studying the surrounding world (“Professions”, “Animal World”), satisfies children’s desire to experiment and undoubtedly develops their imagination. The list of preliminary work includes a visit to a paleontological museum - unfortunately, they are located in only a few cities of the Russian Federation. Make a presentation and let the children visit the Museum of Antiquities virtually!
This is probably every child's dream - to become a paleontologist and dig up a dinosaur.
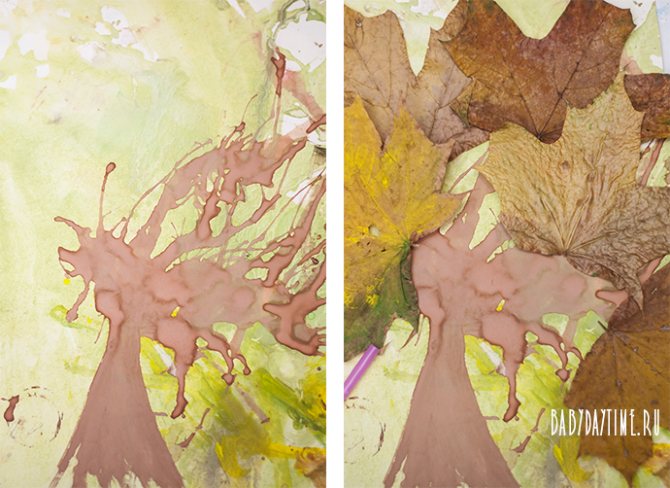
Drawing an autumn tree. Blowing
Materials:
- sheet A4
- tassels;
- cocktail straw;
- freshly picked tree leaves;
- paints: yellow, green, red and brown.
In our case, we prepared the background in advance. When the background dried, a huge brown blot was dropped in the center of the sheet. And they began to take turns blowing out the trunk and branches of the trees with a cocktail straw. The branches turn out thin and unusual. By the way, it also turned out to be an excellent breathing exercise. And the dried tree was additionally decorated with tree leaves.