Summary of GCD for drawing in the middle group “New Home”
Abdulova Dzhume Sirazhutdinovna
Summary of GCD for drawing in the middle group “New Home”
Goal: learning to convey in a drawing impressions of the surrounding life, the correct location of the image of a house on a sheet.
Objectives: to teach children to draw a house, maintaining its proportions and relative size, to draw the outline of objects with a graphite pencil, without pressing it hard, without drawing details of the image with it, to carefully paint over the drawings; consolidate the ability to hold a pencil correctly, draw lines smoothly, use learned methods of drawing rectangular shapes; practice ease and freedom of movement when drawing with a pencil; instill in children a caring attitude towards their home.
Material: pictures depicting a residential building, construction site, builders’ work; visual aid “Building a house”; simple graphite pencil; colour pencils; 1/2 landscape paper; sample made by the teacher; easel for display.
Contents of organized activities
Introductory word from the teacher.
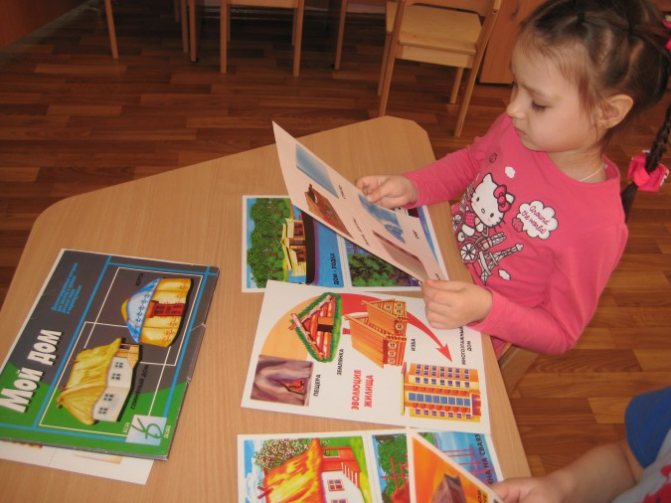
In front of the children on the stand are pictures depicting a residential building, a construction site, and the work of builders. The teacher suggests considering them.
Remember with the children that during the walk they saw how a house was built, how a crane worked. To say that in our country many houses are being built so that everyone can live well, that the builders make the walls smooth, straight, so that the house is strong, beautiful, so that it serves people for a long time and it is pleasant to live in it; The windows in the houses are also arranged in even rows. The teacher’s story is accompanied by a display of the visual aid “Building a House.”
Didactic exercise “In order to...”.
Children repeat the beginning of the sentence after the teacher and finish it independently:
“A house needs a roof in order to...”
“The house needs doors in order to...”
“The house needs windows in order to...”
“A home needs a kitchen in order to...”
“A house needs electricity in order to...”
“The house needs furniture in order to...”
– Do you think it’s easy to build a house? Why do you think so? (Building a house is not easy, because you first need to invent it and develop a design.)
Practical part.
Invite children to remember how lines are drawn from top to bottom and from left to right. Ask why they need to draw like this, what rule do they know? Determine which part of the house you need to start drawing from, what to draw next. Determine where the house will be and where the crane will be. Call one child to show how he will draw, ask the rest to see if he uses the correct method of drawing walls and window openings. Invite all children to take a pencil, show how they hold it, and start drawing.
– Start drawing along the bottom edge of the paper, but leave a strip of dirt at the bottom. You can draw a house under construction, a crane and whatever you want.
During the drawing process, it is necessary to monitor the location of the drawing and the use of the previously shown pencil drawing techniques. Those who act incorrectly should be reminded how to draw. Make sure that children hold the pencil correctly and freely when drawing lines and painting pictures, and adjust their hand if necessary.
Result (reflection).
View children's works, pay attention to straight walls and differences in the structure of the walls. Invite some children to choose the most interesting drawings and analyze their choice.
A story about a bear and the New Year according to middle school children (or a drawing lesson on a New Year's theme) Hello everyone! Now there is a wonderful post-holiday period, when many activities are related to the New Year theme. I suggest you get acquainted.
Abstract of the educational activity “New Year” in the secondary speech therapy group Abstract of the educational activity in the educational field “Speech development” Topic: “New Year” Program objectives: 1. Enrich and activate the vocabulary.
Notes on drawing in the middle group “Sailor” Goal: expanding knowledge about the navy, creating an image of a sailor using visual materials. Tasks: Form primary ones. Notes on drawing in the middle group “Snow Maiden” Notes on drawing in the middle group on the topic: “Snow Maiden” Goal: to develop artistic abilities in the process of drawing. Tasks:.
Notes on drawing in the middle group “Postman” Objectives: to reinforce the idea of the need for adult labor; drawing postman attributes. Objectives: summarize children’s knowledge about the profession.
Summary of GCD for drawing in the middle group “Snowman” Program content. To develop children's ability to draw round objects; promote the development of imagination and creative initiative.
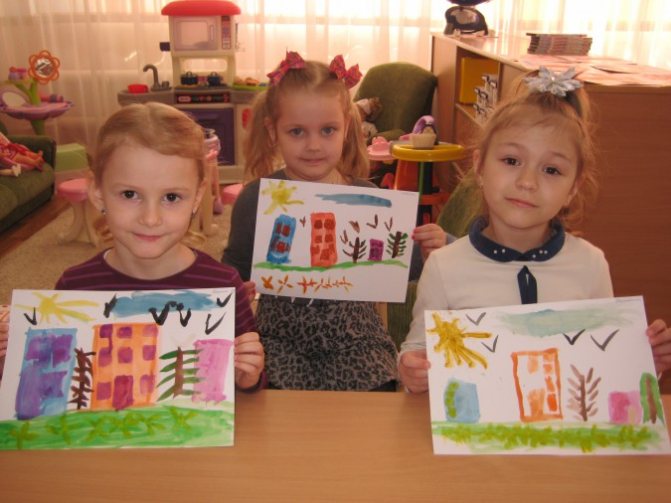
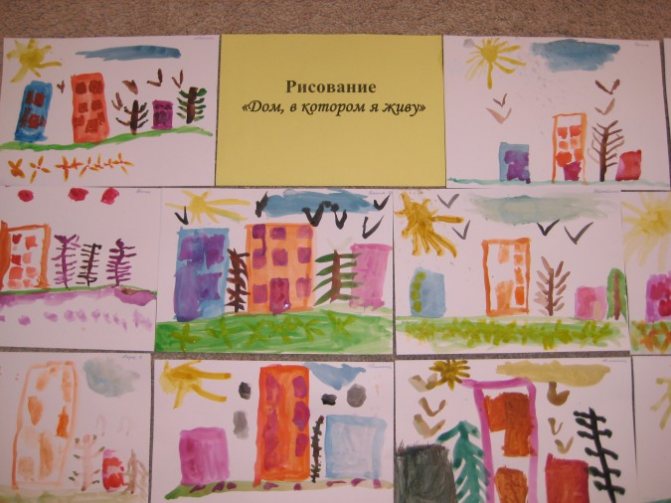
Drawing in the middle group “The house you live in” (photo report)
Irina Chirkova
Drawing in the middle group “The house you live in” (photo report)
Drawing on the topic : “The house where you live .”
April 1, 2016
1. Teach children to draw a big house , convey the rectangular shape of the walls, rows of windows.
2. develop the ability of preschoolers to complement the image based on impressions of the life around them.
3. Nurture aesthetic feelings.
Preliminary work. Observations on walks with a teacher and parents. Reading and looking at illustrations.
Material: watercolor paints, album sheet.
Remember with your children what kind of houses they live in. Clarify their proportions, location of floors, doors. Offer to draw a street from different houses, on one sheet prepared by the teacher. Children take turns drawing the walls of the house, windows, doors and additional elements. Next, each child begins to draw his own house . For those who quickly draw a house, suggest drawing something additional: grass, trees, benches, the sun.
This is such an exhibition of works we have!
Collective hand painting in the middle group (photo report) We all know that creativity plays a huge role in a child’s life. But how to present this to a little person so that his development will occur.
Summary of a comprehensive lesson for the middle group “Drawing by design. Drawing a favorite toy" Summary of a comprehensive lesson for the middle group "Drawing a favorite toy" (drawing according to plan) Objectives: to introduce children to the names.
Summary of an integrated lesson on familiarization with the outside world in the preparatory group “How are you doing, frog?” Summary of an open integrated lesson on familiarization with the outside world in the preparatory group “How do you live, a frog?” Software.
Preview:
Summary of a lesson on drawing in an unconventional way “The House You Live In” in the middle group
The ability to expressively convey images of objects in the surrounding world, to depict typical and some individual, characteristic features of objects and phenomena. Acquire skills and abilities of your own creative visual activity.
— teach children to draw a big house, convey the rectangular shape of the walls, rows of windows.
- consolidate the idea of the size of objects.
— continue to develop the ability to draw individual objects.
-teach children to depict the world using unconventional techniques - drawing with wax pencils and watercolors.
— clarify your idea of your hometown.
- fix colors and their shades.
– develop the ability to complement the image based on impressions of the surrounding life.
- develop the ability to work independently.
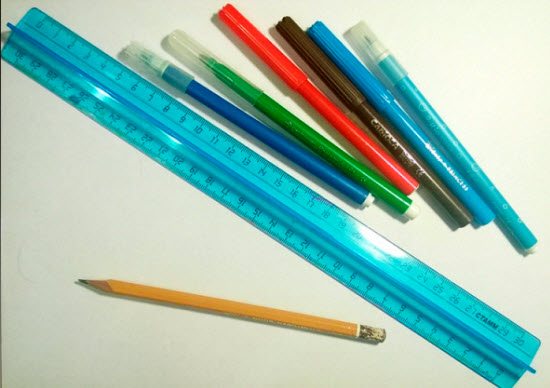
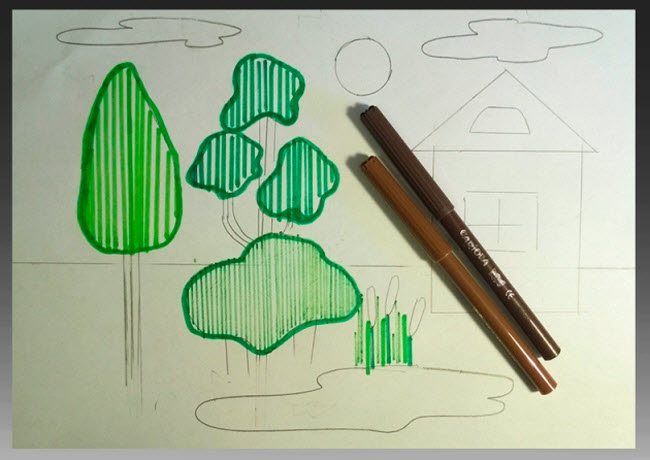
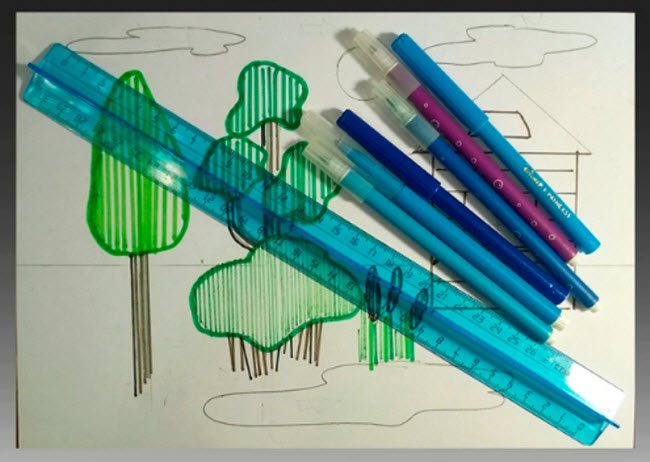
Today we will try to depict a landscape using an unusual technique - architectural graphics. Don't be scared, it's not difficult at all. This lesson will allow your child to master a ruler, develop hand strength and eye strength. For the lesson we will need:
• a sheet of plain A4 paper; • a simple pencil; • eraser; • ruler no less than 30 cm; • felt-tip pens of different thicknesses and different colors (or colored pencils); • circle-template, if the child does not yet know how to draw this geometric figure.
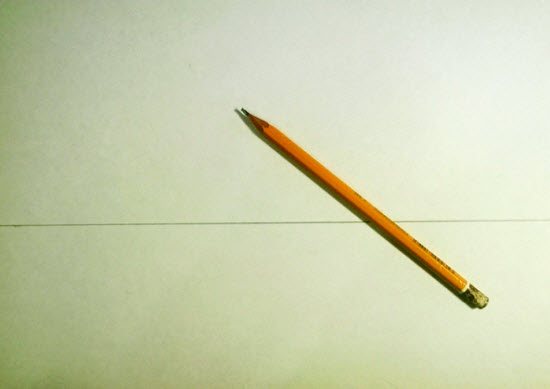
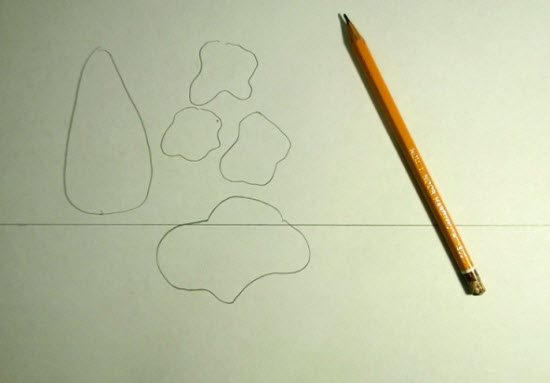
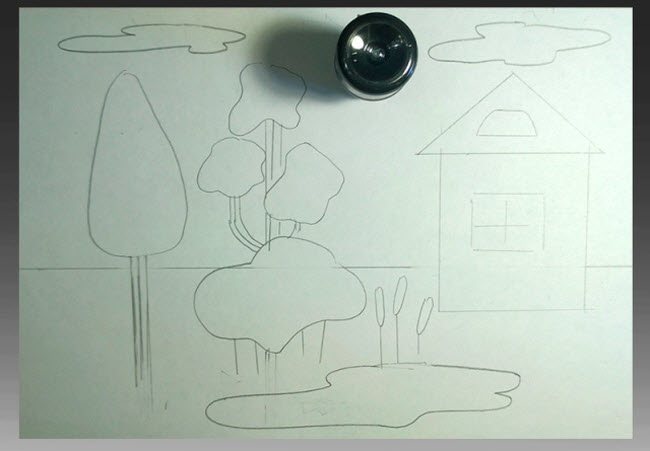
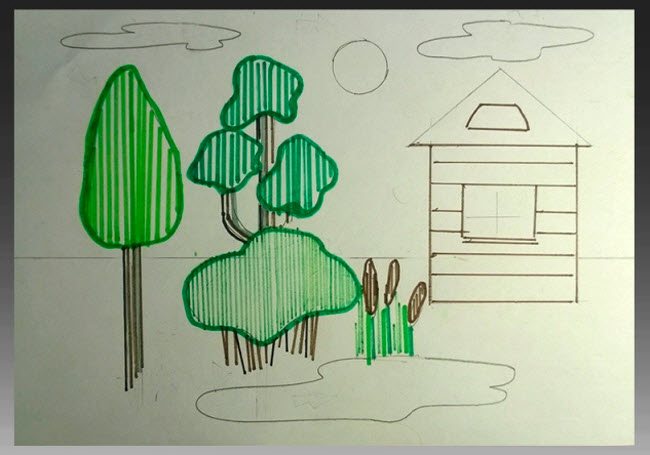
Place the sheet horizontally. Mark about 8 cm from the bottom edge and draw a line.
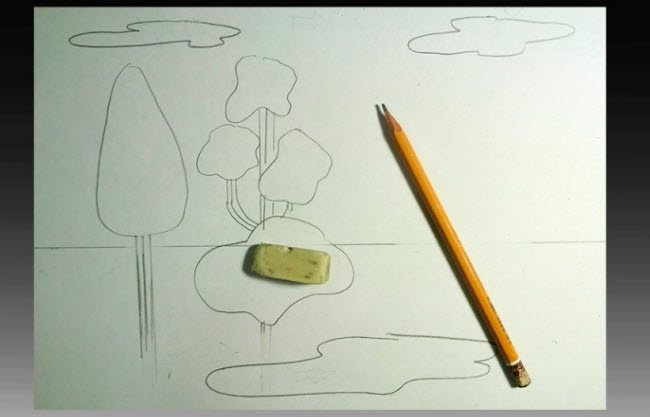
We randomly outline the objects of the future landscape on the sheet: a triangle with rounded vertices - a pyramidal poplar. Using a broken oval line we outline the future bush and pine crown. Do not forget that near objects will be larger, distant objects will be smaller.
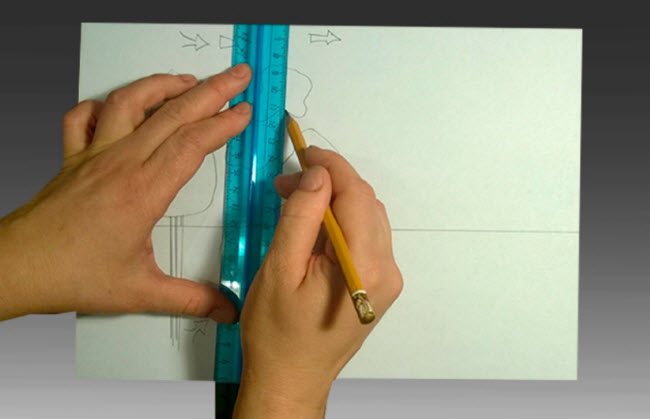
We draw the trunks using a ruler, as shown in the figure.
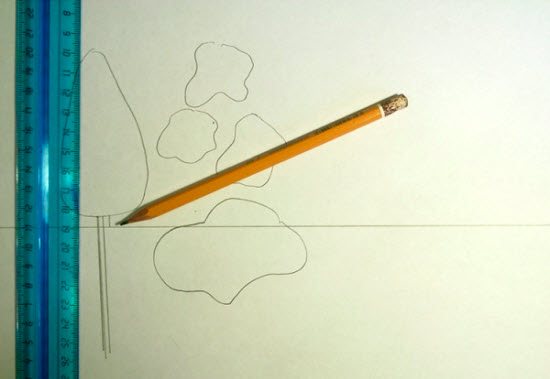
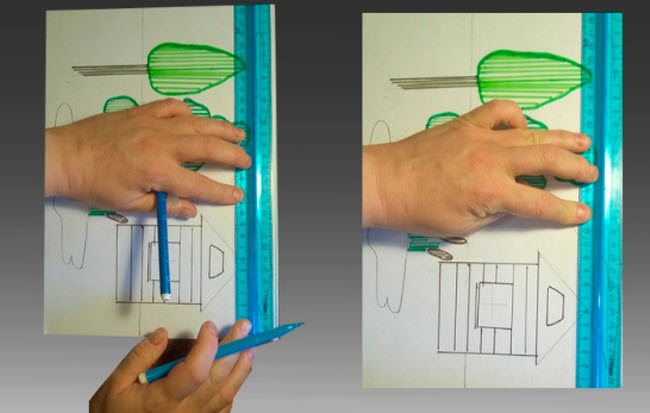
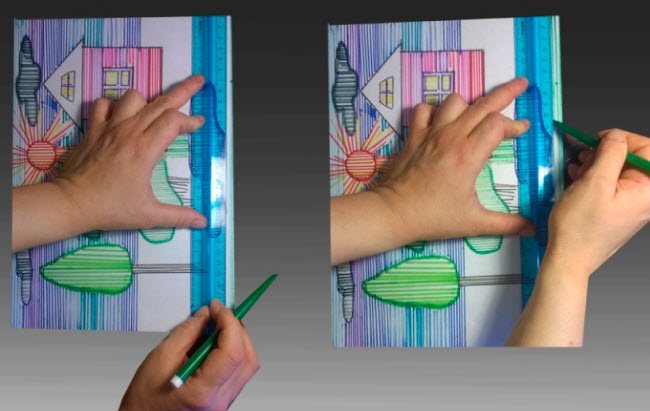
Since our trunks are quite wide, we draw several vertical lines by moving the ruler approximately 2-3 mm to the right, each time drawing the next line with a pencil. The ruler needs to be pressed against the paper as hard as possible so that it does not move back and forth, and the lines turn out parallel. This is a very difficult job for a child, but the sooner he masters this technique, the easier it will be for him to study at school, including developing writing skills.
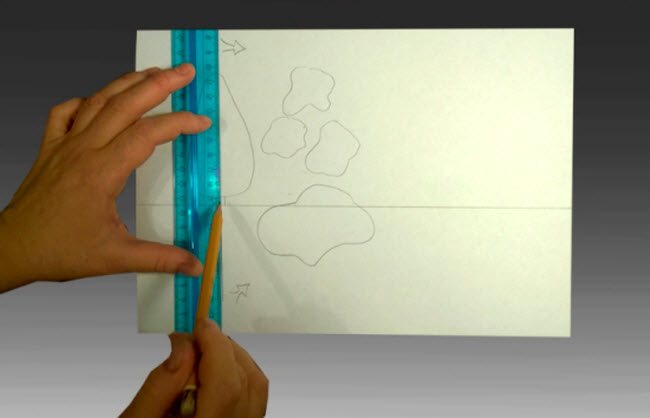
Now in the same way we draw the trunk of a pine tree and the branches of a bush. The latter may be a little unparalleled
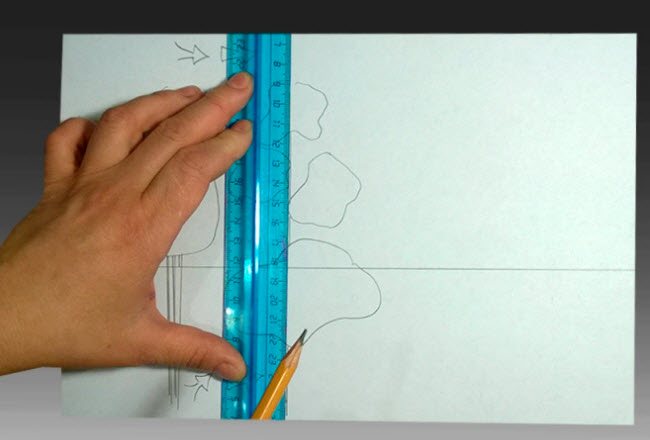
The arrows show how to move the ruler to the right (2-3 mm). You can even start by doing 4 mm or more.
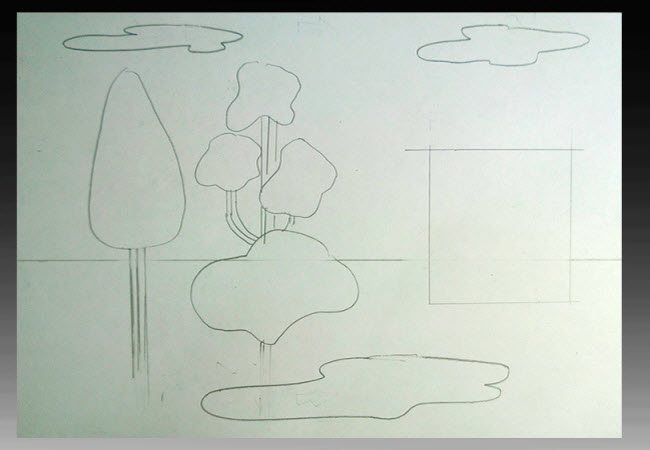
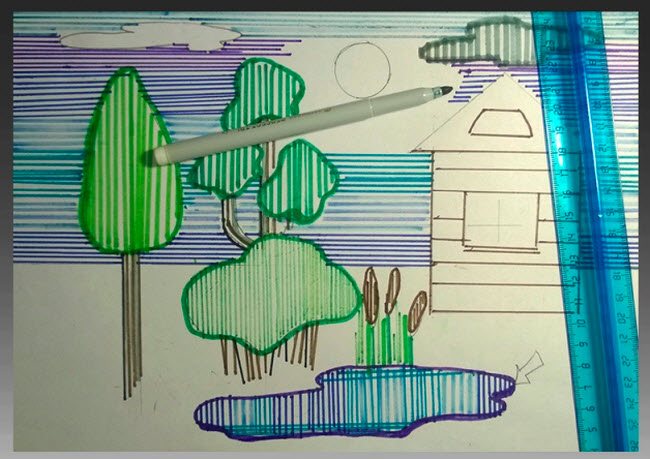
We outline the pond and clouds with a pencil.
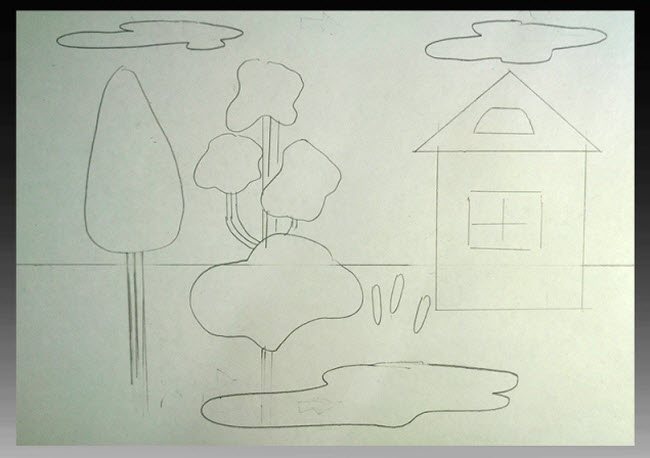
On the right, boldly draw a rectangle along the ruler. This will be a village house.
Don't forget to draw the roof and windows. We mark the reeds near the pond.
Using a lid or jar, draw the sun. If your baby is confident in his abilities, he can draw it without using improvised means.
So, we have prepared the drawing for coloring. The work is challenging, so if your child complains of fatigue, you can take a break and return to it later.
Choose different shades of green. We will use them to draw the crowns of trees, bushes, stems and leaves of reeds, and grass. We apply the ruler vertically to the paper and, using the method described earlier, draw parallel lines of tree crowns with a green felt-tip pen, without going beyond the pencil line.
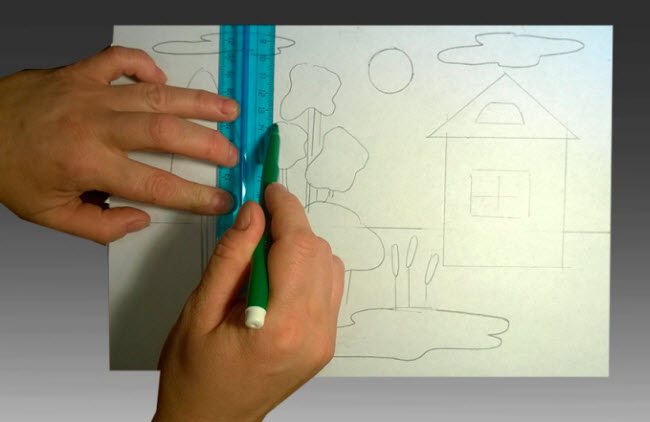
Move the ruler slightly to the right and draw a line again. We continue to work until we have lined the entire crown. It’s okay if at first the lines are at different distances from each other. The main thing is that the child is not afraid to use the ruler.
Green colors can be changed. For example, a bush will be lighter than a pine. We use the same technique all the time.
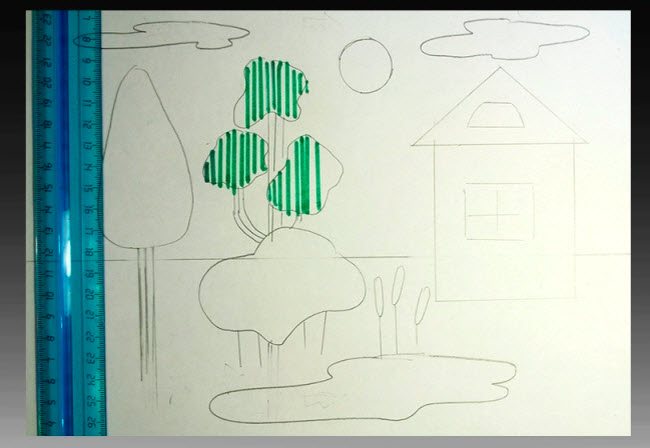
And then the bushes appeared. You can outline your greenery as shown in the picture.
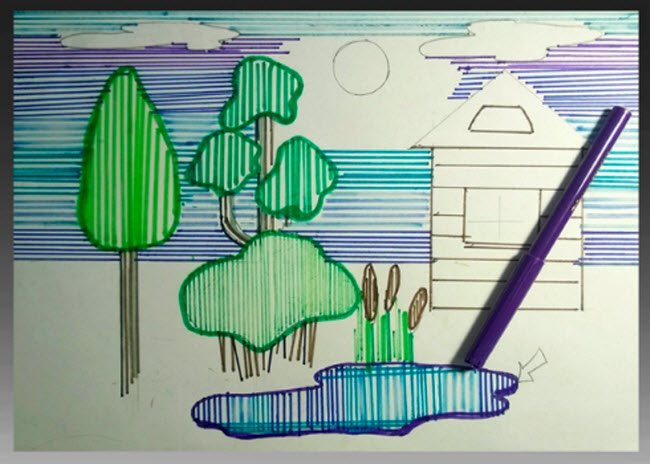
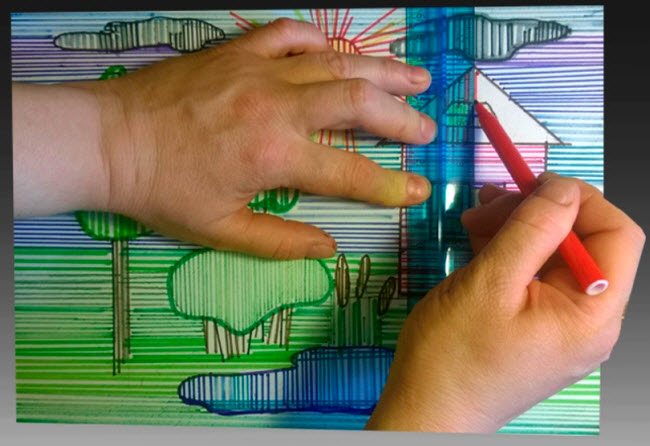
We take shades of brown for tree trunks, houses and reeds.
We use the same technique. Only we will draw the house differently - placing the ruler horizontally. However, in the future we will also draw the sky and grass horizontally.
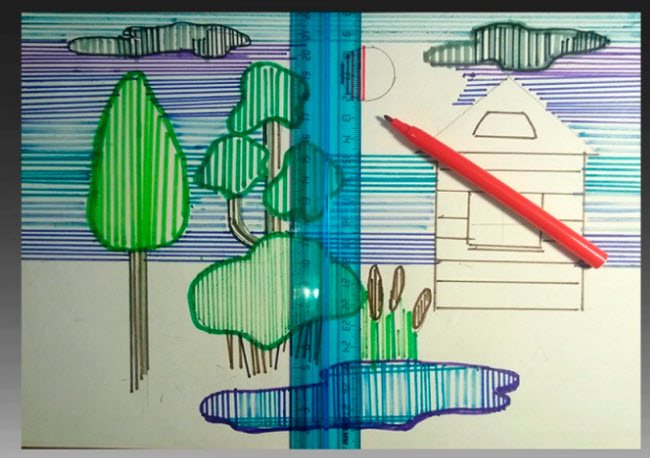
Here comes the turn of shades of blue and cyan. We use them to draw the pond and the sky.
We place the sheet vertically, as shown in the figure. We apply a ruler to the sheet in the place where the sky begins. Now we will move the ruler from right to left, drawing lines in different shades of blue or blue. You can even add lilac or purple.
Using the same method, we draw the water of the pond.
Let's make the clouds gray and, so that they don't get lost against the sky, draw them with vertical lines.
We draw the sun with red vertical lines.
And this is what the rays should look like
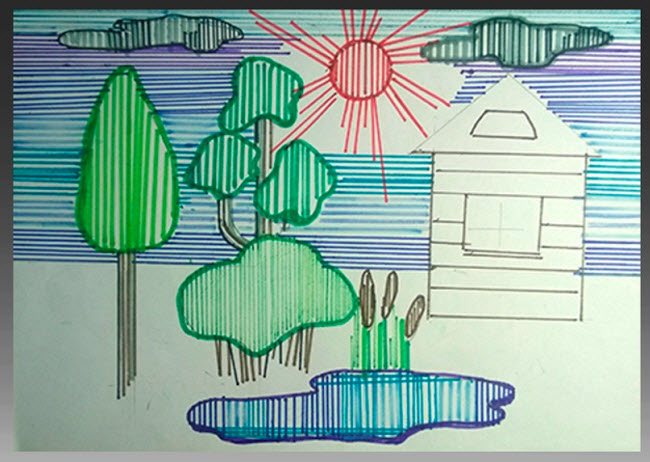
Now let's take shades of yellow. They can “revive” the sun and light in the windows.
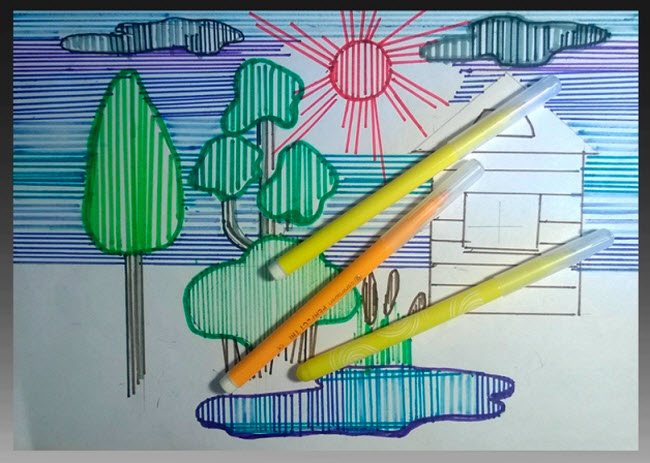
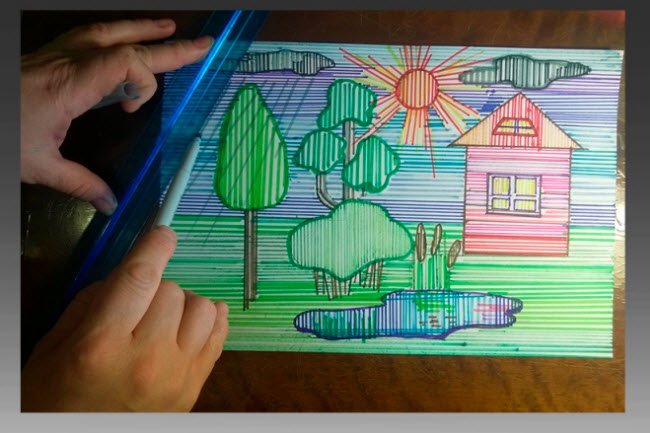
Now you can start weeding. Turn the sheet over vertically. And in the same way as we painted the sky, we outline the grass with different shades of green.
All that remains is to paint the house. I decided to make the body of the house itself with pink and lilac horizontal lines. And the triangular roof is orange vertical.
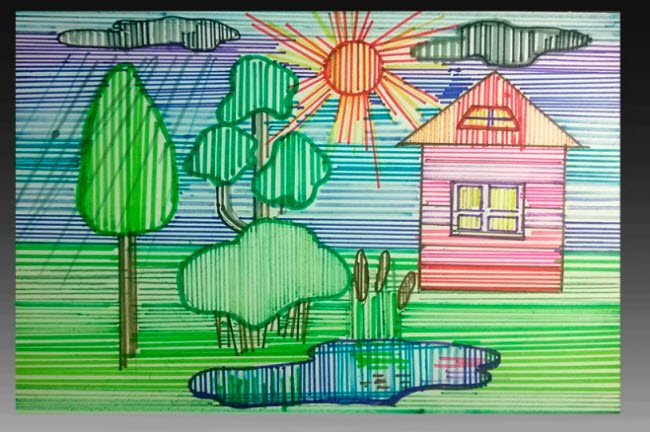
Using brown or purple felt-tip pens, carefully trace the outlines of the windows along a ruler.
Applying a ruler to the cloud diagonally, we use gray and blue felt-tip pens to imagine rain. But you can do without rain.
If you wish, you can turn the poplar into an apple tree by “hanging” red apples along the crown using template lids. You can “let a gray-brown duck swim” in the pond. But I just added a reflection of greenery and a house in the water, as shown in the picture.
Good luck in mastering the new technique.