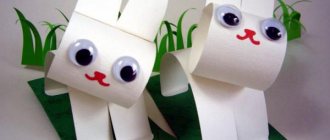
Summary of an open lesson on manual labor for older children “Surprise Toy”
Objectives: -improve the ability to work with paper: bend the sheet in different directions, smooth the folds, cut along the folds. - develop creative imagination and artistic taste. — cultivate accuracy, teach how to treat finished products with care. Goal: - consolidate acquired skills in creative transformation of objects. Materials: colored paper, scissors, glue, napkins, Pinocchio toy, audio recording with the song 'Bu-ra-ti-no!' (from the movie 'The Adventures of Pinocchio'), tray, wonderful bag with surprises. Preliminary work: reading A. Tolstoy’s fairy tale “The Golden Key or the Adventures of Pinocchio.”
Progress of the lesson.
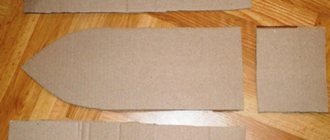
Children, together with the teacher, enter the group. The guys greet the guests. Voss: - Guys, do you like surprises? Children: Yes. Voss: -I really like surprises. There is one fairy-tale hero who cannot live without surprises. Guess the riddle. My father has a strange boy, unusual, wooden. He is looking for a golden key on land and under water. He sticks his long nose everywhere. Who is this? Children: Pinocchio. Question: Pinocchio wanted to make a gift for his friends from the fairy tale in which he lives, but he didn’t succeed. Oh, Pinocchio, where are you? Oh, here he is, why are you hiding? (Pinocchio whispers something in his ear, the teacher nods) Voss: Guys, Pinocchio asks you to help him make surprises for his friends. Do you agree? Children: Yes. Voss: (addresses the toy Pinocchio) -Who are your friends? (Pinocchio is silent). Voss: - Guys, help. What are the names of Buratino's friends? Children: -Malvina, Pierrot, Harlequin, poodle Artemon, tortoise Tortila. Voss: Which other fairy-tale characters do you know? Children: - Karabas Barabas, talking cricket, dad Carlo, Giuseppe, cat Basilio, fox Alice, Duremar, rat Shushara. Voss: (shows a box with a surprise) - This is the surprise we will help you make Pinocchio. The teacher places the Pinocchio toy at the table with the children. Vos-l: (Explanation of work) - And it’s done like this. First you need to make a box: take a rectangular sheet, 2 stripes are drawn on it, you need to bend it along the stripes. We bent it in strips, turned it around, put the narrow side towards us and bend corner to corner in half away from us and again in half away from us. Let's expand. In the top row we got 3 squares, cut out the outer ones along the fold line, leaving 1 square - this is the lid of the box. We make 2 cuts from the lid of the box and 2 more cuts at the bottom opposite the first ones. Our box is almost ready, all that remains is to glue it together. I spread glue on the 2 outer squares near the lid and the 2 outermost squares. We do it like this: bend over, spread, bend over, spread, glue one, then the other, put on top of each other, bend the bottom squares, spread, glue everything in the middle of the box, you get a box. Voss: - Pinocchio, do you understand how to make a box? Aren't you tired? And now a surprise, we have a cheerful face from the box. The face is held on the paper by a folded spring. Take 2 strips of paper. Glue the 2 ends together and bend one or the other strip to the end. The result is a two-color spring. Glue a spring to the bottom of the box, and glue a cheerful face to the top tip. Look what happened... Voss: - And now the guys will do it. Guys, tell me, do we make a box or a spring first? Children: -A box, then a spring. (Explaining to children how they will do the work). Voss: -Pinocchio is tired, let's stretch his arms and legs.
Physical education minute:
Pinocchio stretched, 1 - bent over, 2 - straightened up, spread his arms to the sides, Apparently he didn’t find the key. To get the key for him, you have to stand on your toes. Stand tighter than Pinocchio, Here is the golden key. Voss: - Sit down guys. Well done, you need to stretch your fingers.
Finger gymnastics:
Katina's dolls are sitting in a row on a large sofa. Two bears, Pinocchio, and cheerful Cipollino, And a kitten and a baby elephant. One, 2, 3, 4, 5 Let’s help our Katya count all the toys. Voss: - Now you will make the surprise yourself. Remember to use scissors carefully. And you Pinocchio, sit and look carefully, the guys will work for a long time, but diligently. The guys make surprise boxes and place them on a tray. Voss: - Thanks, guys! They helped me out, now I will give gifts to my friends, and leave surprises for you as a gift. (wooden eggs for painting). Pinocchio leaves.
Author: Kozaeva Svetlana Aleksandrovna, teacher, MBDOU kindergarten No. 55 “Cornflower”, Murmansk, Russia
The article is published in the author's edition
planetadetstva.net
Lesson notes for the senior group of preschool educational institutions. Manual labor
Summary of the organization of labor activity (manual labor) in the senior group
Title of work : Summary of labor activity (manual labor) in the senior group in accordance with the Federal State Educational area : Social and communicative development. Program development : Involve children in design creativity, through which decorations for the walking area and birthday gifts for peers will be made. Develop skills in working with cardboard and colored paper when making birds and in weaving bracelets and jump ropes from rubber bands. Improve skills in gluing cardboard onto a sheet of colored paper, folding paper diagonally like an accordion, weaving on a machine and slingshot in different ways. Develop image perception, color perception when choosing the color of rubber bands when combining them, paper when combining the color of a bird and wings; recreating and creative imagination, hand motor skills. Foster love for kindergarten by creating decorations for it; peers of the group, creating gifts for them. Friendly relations when performing work, the ability to work in a team, to help comrades. Equipment: Cardboard bird shapes, colored paper, paste, oilcloth, brushes, paste, scissors, twine; sets with elastic bands, hooks and weaving machines. Preliminary work : Examination of decorations for kindergarten areas, cutting out birds along the contour, learning to weave from rubber bands. Vocabulary activation: Weaving, hook, loop, loom, cardboard decoration, designers. Motivation: 1. Contribute the painting “Waiting for the Birds” Conversation about the content of the painting and what awaits us in the near future. Children answer the teacher’s questions, note what needs to be done in order to attract birds to their site, and how to please their peers on the day birth.
2. I propose to consider the material from which children’s crafts will be made. 3. I invite the children to divide into subgroups and choose a senior assistant in each subgroup. The children are divided into subgroups and choose a senior assistant. Subgroup 1, in collaboration with the teacher, makes birds to decorate the area. Subgroup 2 independently weaves bracelets from rubber bands. Main part:
The teacher gives instructions for the practical activities of children and directs the work of children in subgroups: 1 demonstrates folding paper with an “Accordion” and methods of weaving with rubber bands.
2 helps with difficulties and gives verbal and practical instructions when children perform work. After listening to the task and discussing how to complete it with the teacher, the children begin to complete the work; if necessary, they turn to the teacher for help. Senior assistants in subgroups help peers when necessary. Subgroup 2 independently chooses the type of weaving and works in collaboration with peers. The teacher's leadership of this subgroup is indirect. Health-saving technologies: 1. I suggest performing the finger game “Friendship” before completing work and after completing work. 2. Gymnastics for the eyes after completing work 3. Offer to perform dance movements to music. Reflection: Reviewing the work, noting why and for whom it was done
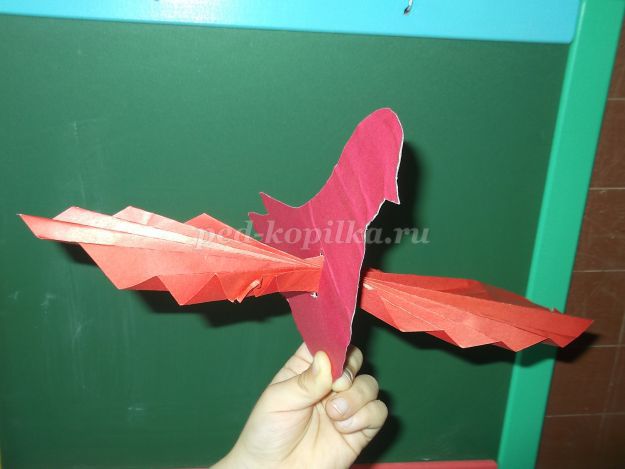
The area was decorated with these birds, and now they will greet feathered guests. And the bracelets were presented to the guests who attended this event.
We recommend watching:
Summary of educational activities in the senior group “Journey to a Fairy Tale” Summary of a mathematics lesson for children of the senior orthopedic group Summary of educational and gaming activities in the senior group in the section of the “Childhood” program Synopsis of educational activities for the perception of music in the senior group of kindergarten
Similar articles:
Lesson in the senior group of kindergarten on the topic of February 23
Lesson notes for children of senior preschool age. Topic: Invisible air
Summary of organized educational activities for children of the senior group
Notes for mathematics classes in the senior group
Lesson summary on the topic “Reserve” in the senior group
Summary of the organization of manual labor in the senior group of kindergarten. Topic: “Gluing up books”
Summary of the organization of manual labor in the senior group of preschool educational institutions
Topic: “Gluing up books”
Educator: Tishchenko T.N.
Goal: Formation of readiness for joint activities with peers.
Objectives: To introduce the procedure for gluing a book, to teach them to negotiate among themselves, distributing individual labor operations. To cultivate hard work, a desire to help, and a caring attitude toward books.
Equipment: Books, paper, colored paper, scissors, glue, brushes, napkins, oilcloths, pencil.
Vocabulary work: “Consultant”, “conveyor”.
Preliminary work: Conversation about people of different professions creating a book; introduction to the new word “typography”; reading poetry - B. Zakhoder “The Bookbinder”, S. Marshak “How your book was printed”, V. Kashinkin “The First Book”.
Progress of the lesson.
- Guys, yesterday we were looking through the books in our library and noticed that some were in need of repair. There were few of us and we didn’t have time to repair everything. I propose to open a book repair workshop today. You will all be masters, and I will be the main consultant. Do you know what this means?
- I will give you the necessary consultations, or advice, tips when doing the work. To complete a large amount of work, I suggest setting up a working conveyor. Do you know how it is?
- This is when the entire work process is divided into parts. And everyone does only their job, one after another. Now we will distribute who will do what.
- Who will inspect the books and cut out patches from paper?
Katya and Christina are attentive, work well with scissors, and know how to choose the right color of paper. I think you can do the job. Get your seats ready for work. (Children take a set of colored paper, white paper, a simple pencil, scissors, pre-selected books for repair)
- Marina will carefully spread glue on the strips of paper prepared by the girls and pass them on. Take everything you need for work.
(glue, brush, oilcloth, napkin)
—Who will complete the work by putting a patch on the book? Well, Zhenya takes her work responsibly and diligently. Let's trust her with the final stage.
- Is everyone ready? The workshop is open!
(Children do the work, the teacher provides individual assistance.)
- Look how much fun the books have become! Let's count how many books we have glued. A lot of. Could I glue that much on my own? (No!)
“If we do all the work in unison, together, then everything will be fine in our group.” Thank you very much to all my masters!
Publication address:
Summary of a lesson on manual labor for schoolchildren
“Flower Kaleidoscope” - a manual labor lesson.
A manual labor lesson (working with paper). Author: Irina Aleksandrovna Medvedeva – teacher at an orphanage in the city of Nizhnyaya Salda, Sverdlovsk region. This material will be useful for educators, teachers and parents to strengthen children’s skills in using different techniques when working with paper. The lesson material is intended for children of primary and secondary school age. The material can be used in the manufacture of postcards, paintings, and gifts. Goal: to create conditions for the manifestation of creative abilities in manual labor. Objectives: - learn to create a composition of flowers from paper; — develop creative abilities; — consolidate the ability to use different techniques when working with paper; - develop patience, perseverance, accuracy; - to form a sense of color, aesthetic taste; — develop communication skills that ensure verbal communication; — to cultivate an interest in flowers, a desire to preserve and protect them. Individual work: Train Lena to use the template and confidently cut out details for flowers. Preliminary work: -examination of photos, illustrations of indoor, garden, forest and wildflowers; -making holiday cards using different techniques; -drawing indoor flowers from nature; -quiz about flowers; -evening of flowers and riddles; -conversation in the eco-club: “Flowers and their meaning in human life.” Methodological support: - colored paper, cardboard;
— rolls for quilling; — strips of colored paper for iris folding; - squares of colored paper for cutting; - pencils; - tools for work: scissors, glue, tweezers, sticks. Progress:
Listen to the poem: I walk through a green meadow, The dew dries on the leaves, The wind sways the grass elastically, And I hear the voices of flowers.
They whisper: don’t tear us apart, don’t! Don't crease our flexible stems! We are a delight for the eyes and the heart, an adornment of our native land. Tell me, do you like flowers? (children's answers). For what? What do flowers mean in people's lives? Children answer (beautiful, cause joy, a feeling of beauty, delight the eye, decorate the house, garden, vegetable garden, forest and field, our life). What flowers do you know? Where do they grow? (children's answers). How can you call them in one word? (garden). What other flowers are there? (indoor, field, forest). Name them too. After listening to the children’s answers, I summarize. There are a lot of flowers, and they are different: by name, color, type, place of cultivation. Our lesson today will also be devoted to flowers, only the flowers will be unusual, they will be made of paper. You will choose what kind of flowers you will have: indoor, garden or even fabulous. What technique to use is also up to you to decide. Today we will show you what we have learned over the year, what techniques we have mastered. Look at what technique this work was done in? (quilling). Let me remind you a little about this technique. Quilling - translated from English this word means bird feather. This technique is very similar to another, no less popular - origami. But, if you look at the history of the emergence of these types of arts, you will notice that Europe is considered the birthplace of quilling, and Japan is considered the birthplace of origami. But paper rolling itself originated in Europe at the end of the 15th century. It was during this period of time that the monks created unusually beautiful medallions by curling the edges of bird feathers with gilded edges. Today we will not be able to see this beauty made at that time in any museum due to the fragility of paper, but if we saw it, we would certainly be delighted. But, despite this, the technology itself and its history have still been preserved to this day. Moreover, it has become very popular as a hobby among needlewomen. Of course, in those days, not everyone could afford to use this technique - due to the expensive material - because the work required colored paper. But nowadays, we can afford to purchase this paper; moreover, we even purchase special paper for quilling. Quilling paper - consists of strips of paper of different colors and widths. Thanks to this material we can create our masterpieces. It is not only entertaining, but also has a calming effect on the nervous system. What technique was used in this work? (showing the painting “Flowers in a Vase”). (iris folding technique). What is needed to complete this painting? After listening to the children's answers, I add. Listen again a little about this fascinating technique. Iris - Folding (Iris - Folding) is a technique of folding strips of colored paper at an angle in the form of a twisting spiral. Works performed using this technique are often similar to the aperture of a camera or the iris of an eye. This is where the name of the technique comes from - Iris Folding. The iris folding technique originated in Holland (Netherlands), local craftsmen performed their work from colored paper. Currently, to work in this technique, not only various types of colored paper and cardboard are used, but also tapes. Today Iris Folding is used to decorate cards, notes, books, photo albums, collages, etc. Designs made using the iris folding technique look very unusual, at least for a person who is not involved in daily production of works using this technique. Iris folding can be used in works in its pure form, or it can be a “decorative” addition to works made using other techniques. What technique requires a stick, glue and pieces of colored paper napkin? That's right, for trimming. Paper cutting is a fairly new technique for paper crafts. But even despite its young age, this technique already has a lot of fans. But paper crafts made using this technique turn out very beautiful and unusual. The trimming technique is very simple: the prepared template is pasted over with special paper. You can take different templates. But the paper cutting technique also makes it possible to create large multi-colored paintings. You can also make various decorative elements using paper cutting. So, you can frame small cross-stitch or satin stitch embroidered pictures in decorated frames. And to make the frame look very gentle and neat, you can further decorate it by gluing small beads, flowers or beads to it. For paper cutting, use corrugated paper or napkins. First, think and tell me what flowers you will make and in what technique. Listen, help choose a topic of work and technique. Look, there is everything on the table to create a beautiful picture or card with a floral theme, we have prepared everything in advance. We consider materials, tools for work, specify for what equipment, what will be useful. Game break with a flower: I give the flower to the children, they guess the riddles. And now, my friends, guys, guess the riddles. All the poems here are about flowers. I know them, but what about you? - it grows in snowdrifts, drinks snow water... ( snowdrop) Where does it grow? -He is a stepmother and mother, what is this flower’s name? (mother and stepmother) - the grandfather is standing in a white hat, if you blow, there is no hat! (dandelion) - which flower are they guessing on, do they tear off the petals? (daisy) - along the road, near the boundary, in the golden, ripe rye, like a blue eye, looking into the sky... ( cornflower) - above the sharp thorns there is a motley bunch of buds, they give a delicate aroma, decorating the summer garden, I would like to hug them a little, but palms will prick...( roses) -bush - window and balcony, the leaf is fluffy and fragrant, and the flowers in our window are like a hat on fire...( geranium) -small, tender right next to the water, as if in the midday heat they are asking for a drink, with the blue of the sky These cute flowers are friends, I know them, Raya knows them, but do you know them? (forget-me-nots) Sit down at the table and start working. Children select materials and tools on the table and begin to work. I approach Lena and help her figure out the template and stencils. I encourage confidence in using scissors. During activities, I help children with advice and suggestions. As soon as the work is ready, it is fixed at the exhibition stand: “Flower Kaleidoscope”. If the children have time left, I suggest doing one more job or helping others. Look, we have a real floral kaleidoscope. We are looking at the exhibition. -What did you like about yourself and others? — What technology do you like to work with most? -What was successful or not very successful today, what would you like to improve, what else would you like to learn? Well done! I really like our exhibition! Over the course of the year, you have learned a lot, mastered various techniques for working with paper, and today you saw and will see it all at the exhibition stand. Even Lena tried especially hard today, she did the job carefully and cut it well and confidently with scissors. I think that all the skills will be useful to you in later life. With your own hands you can make gifts for your loved ones and decorate the interior of your home. Thank you for your work! You made me happy today. At the end I want to read a poem, listen We live in the same family, we live in the same circle, Walk in the same land, fly in the same flight. Let's save the chamomile in the meadow, the water lily in the river and the cranberry in the swamp. N. Starshinova
We recommend watching:
Quiz with answers for grades 5-9 on technology Decorative window decoration Making a painting from leather
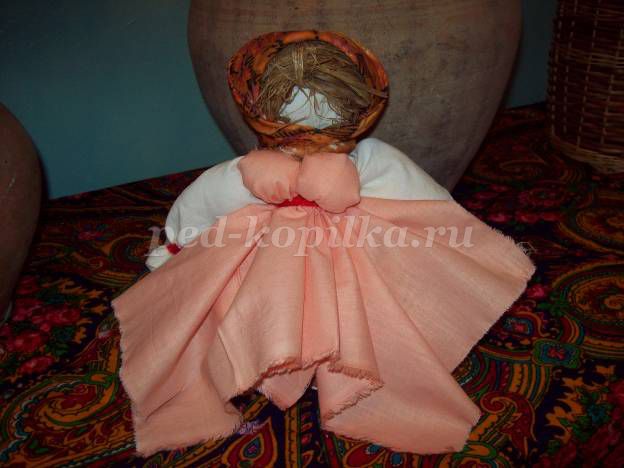
Maslenitsa doll
Similar articles:
Promising directions for studying technology by schoolchildren
Home economics project “Little Housewife”
Iris folding for beginners