The essence of the application: goals and objectives in the middle group
Applique is a type of isotechnics that is based on the creation of a plot composition using paper, fabric parts, elements made from natural materials, cereals or grains, located and glued/sewn onto a dense backing - cardboard, paper or draped with fabric.
In the middle group, children become more independent when performing appliqué
The mission of appliqué classes is as follows:
- enriching children's ideas about the world around them, in particular about the concepts of shape, shades of colors, an initial understanding of proportionality and the arrangement of elements in a limited space (on a sheet of paper or cardboard);
- forming the basis of critical thinking, that is, the ability to compare, generalize, and draw simple conclusions;
- development of logic, imaginative thinking, speech through composing stories based on applications;
- hand motor skills training;
- awakening a taste for creative work, the desire to harmonize color and shape in holistic subjects;
- nurturing initiative, self-organization and the ability to work with a partner or in a group.
The objectives of classes in this type of visual creativity in the middle group are:
- mastering the skill of straight cutting in different (!) directions, as well as with elements of creating rounded shapes by cutting off the corners of a square;
- developing the ability to combine elements to obtain a complete composition (if you put squares on top of each other, you get a tower, and if you place a triangle over a square, you get a house);
- training in composing plots from geometric shapes of different sizes (10–12 parts), in particular in the shape of a triangle, circle, square, rectangle;
- developing the skill of finding aesthetically attractive combinations of appliqué with other types of art;
- develop the skill of working in pairs;
- develop the ability to evaluate your work.
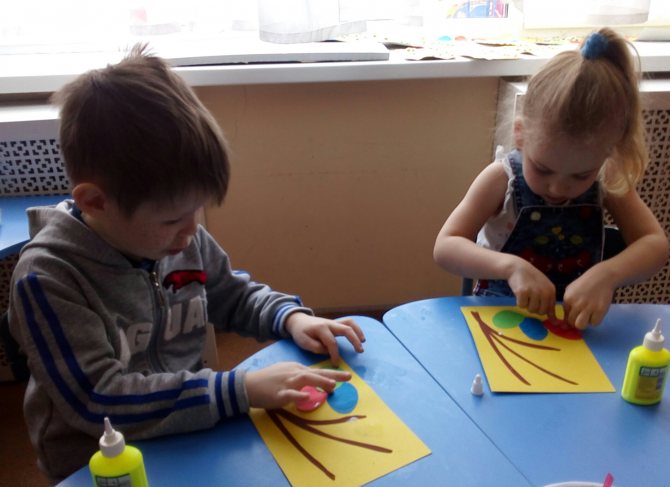
Children learn to work just side by side, and in pairs, mini-groups
New appliqué skills for the middle group
The main “acquisition” of middle preschool age is training in the ability to use scissors. In addition, children 4–5 years old:
- arrange and glue plot elements onto a base that has an irregular shape;
- learn to form parts of the required shape and size by cutting off corners, cutting an element around the entire perimeter or only from the bottom/top/right/left, for example, making a circle by cutting off the corners of a square;
- improve the cut-off appearance of the applique, including during the preparation of materials (cut off or tear off the corners of the rectangle so as to give the workpiece a square shape, etc.).
Long-term plan for design and application in the middle group
Tsareva Maria
Long-term plan for design and application in the middle group
September
1 Week
“Buses on our street”
(collective)
.
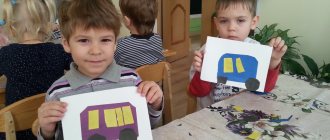
Goal: continue to learn how to cut out bus windows, learn how to cut out circles by cutting off corners.
Literature:T. M. Bondarenko “Complex classes in the middle group of kindergarten ”
page 188.
2 week
“Hedgehog from a small cone”
(from natural material)
Learn to work with natural material - cones. Exercise children in various ways to connect craft parts together. Develop creative abilities. Evoke positive emotions.
3 week
"Beautiful Pyramid"
Practice cutting out rounded shapes from squares by smoothly rounding the corners. Reinforce scissor handling techniques. Learn to choose colors beautifully.
Week 4 “Carpet of leaves”
(based on a sample)
(from natural material)
Learn to compose a composition from autumn leaves, creatively complement the composition with details, develop imagination and creativity
October
1 Week
"Treat the bunny with a carrot"
Goal: teach children to cut carrots from a rectangle by cutting off the corners.
Literature:T. M. Bondarenko “Complex classes in the middle group of kindergarten ”
page 47.
2 week
"Bunny"
(based on a model
(from natural material)
Teach children to see an image in natural material, use plasticine to secure parts, make crafts neat and stable.
3 week
"Birds on the Branches"
Goal: teach children to use glue carefully.
Literature:T. M. Bondarenko “Complex classes in the middle group of kindergarten” , p. 151. Topic:
4 week
“Two-story house”
(based on a model) (from building material)
Teach children to build tall buildings with ceilings, use a model to determine from which parts the individual parts of the building are made, in what sequence to carry it out, introduce the concept of
“foundation”
.
November
1 Week
"Christmas trees grow in the forest"
Learn to cut out triangles and make a Christmas tree out of them, varying the size of the parts; stick to the base.
Week 2 “Furniture”
(from building material)
Learn to determine the sequence, select material, plan construction , choose a size commensurate with the toy for which the construction is being made.
3 week
"Little Red Riding Hood"
Learn to convey the image of a fairy tale in an application . Continue to learn how to depict a person (the shape of a dress, head, arms, legs, characteristic details (a hat, observing the ratio in size. Strengthen the ability to carefully cut and paste.
4 week
"Bird"
(based on a model
(from natural material)
Learn to compose an image from parts, connect the parts together with plasticine.
December
1 Week
"Snowman"
Continue to learn how to stick shapes at the bottom of the sheet, making them into two or three parts. Fix the sequence of spreading and gluing.
2 week
"Lanterns"
(as shown
(from paper)
Learn to fold 3 circles in half, glue them together, act harmoniously as shown by the teacher, clearly connecting the halves of the circles.
3 week
"Christmas tree decorations"
(as shown
(from waste material)
Learn to make toys from various materials, develop fine motor skills and creative abilities.
4 week
"Herringbone"
(based on a model
(from paper)
Practice tearing paper along the contour, rolling paper balls, composing an image from parts on a plane.
January
1 Week
“Let’s help the squirrel prepare mushrooms for the winter”
.
Goal: to teach children to cut corners with scissors, rounding them. Strengthen the ability to hold scissors correctly.
Literature:T. M. Bondarenko “Complex classes in the middle group of kindergarten ”
pp. 123-124
2 week
"Puzzles"
Strengthen the ability to correlate flat geometries. figures with the shape of parts of objects, create an image from ready-made parts, cut out small parts yourself. Practice gluing carefully; develop creativity.
3 week
"Snow Maiden"
(according to the condition
(from natural material)
Learn to make buildings from snow, use water for fastening, watercolor for decoration
4 week
“Cut out and paste what is round and oval”
To consolidate ideas about basic building materials (brick, cube, block)
; learn to close the space by rhythmically arranging details.
February
1 Week
« Application based on the Gorky fairy tale “Sparrow”
.
Purpose: to teach children to determine the shape of the main parts. Find pieces cut out of paper yourself. Fold and stick the image of the bird.
Literature:T. M. Bondarenko “Complex classes in the middle group of kindergarten ”
p. 218.
2 week
“Trucks”
(from building material)
Give children a general idea of freight transport; exercise in its design , in analyzing samples, in transforming structures ; give an idea of the construction part - the cylinder and its properties. Develop the ability for planar modeling.
3 week
"Rug"
Learn to identify corners and sides. Reinforce knowledge of round, square, triangular shapes. Teach shape transformation by cutting a square into a triangle, a circle into semicircles. Develop compositional skills.
4 week
“Postcard for Dad”
(from paper)
Reinforce the ability to fold a rectangular sheet in half; compose a composition, supplement the work with details. Create a need to make pleasant surprises for loved ones.
March
1 Week
“Gift for Mom and Grandmother”
(made of paper)
Learn to make simple crafts. Develop creative abilities. Develop the ability to bring your plan to completion. Cultivate an attentive, responsive attitude towards mother and grandmother.
2 week
“We are builders”
(collective)
.
Goal: to arouse the desire to participate in collective work, to be able to compose a whole from parts, to add individual details by cutting them out of paper.
Literature:T. M. Bondarenko “Complex classes in the middle group of kindergarten” p . 242.
3 week
"Planes fly through the clouds"
Learn how to correctly compose an image from parts, find the place of one or another part in the overall work, and carefully stick it on. Consolidate knowledge of the shape - a rectangle, learn to cut corners smoothly.
4 week
Fourth week of Origami “Butterfly”
Learn to fold a square diagonally and in quarters. Develop creative abilities. Develop the ability to bring your plan to completion.
April
1 Week
"Magic Garden"
Goal: learn to cut in a straight line with scissors, rounding the corners of a square, develop imaginative thinking.
Literature:T. M. Bondarenko “Complex classes in the middle group of kindergarten” p . 282.
2 week
"Rocket"
Goal: to consolidate paper gluing skills, develop imagination, and interest in the astronaut profession.
Literature: Lesson notes on application in the middle group .
3 week
"The bright sun is shining"
Learn to make an applique from parts (stick a circle, and around the stripes there are rays at the same distance from each other).
4 week
“Spider on a cobweb” (from natural and waste material)
Develop an interest in working with waste and natural materials, expand knowledge about insects, and develop hand-eye coordination.
May
1 Week
"Cut and paste whatever you want"
Teach children to conceive an image and subordinate subsequent work to the plan. Learn to cut out rectangular and round parts of objects, small parts from paper. Foster independence and creativity.
2 week
"Glorious Victory Day"
Goal: to consolidate the ability to fold circles in half, aligning the sides, ironing the fold line to make a flower
3 week
Walnut bird (made from natural material)
Learn to create a composition. Strengthen various methods of connecting parts. Learn to supplement the work with missing details. Develop creative abilities. Evoke positive emotions.
4 week
"Truck"
Goal: continue to learn how to cut paper in different shapes (rectangle, square, circle)
details. Literature: T.
M. Bondarenko “Complex classes in the middle group of kindergarten” , p. 201.
Place of appliqué lessons in the educational program for the middle group
Application is not only a separate lesson in the artistic and aesthetic cycle of lessons, which includes a detailed consideration of the topic and the implementation of application in one technique or another, but also:
- a way to consolidate the learned material in classes within other educational vectors (for example, in a lesson on speech development on the topic “My City,” children make a geometric appliqué “My Street”);
- assignment of project work (for example, kids, together with their mothers and fathers, make an application on the topic “Unusual professions,” which is accompanied by a story about the specialist presented in this way);
- the essence of the activities of the art activity circle.
For children 4–5 years old, an appliqué club is possible only if the group is mixed - middle-high, since in the middle group the applique club gives way to a drawing circle.
How is the time spent working on the application distributed in the middle group?
A lesson within the framework of a creative course of the educational process lasts 20 minutes, and all this time is allocated for preparation - up to 3 minutes, execution - up to 12 minutes, and evaluation of the application - up to 3 minutes (the remaining minutes are left for organizing the work of the group). Finger gymnastics is introduced into the preparation stage, and at the stage of performing crafts there is a mandatory (!) physical education break - up to 2 minutes.
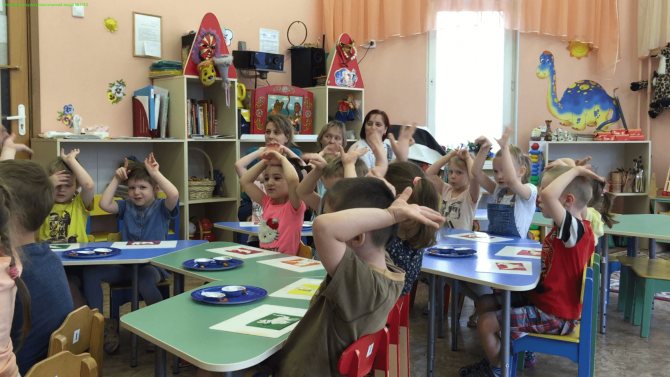
Finger gymnastics is a mandatory element of appliqué classes.
If the application is a separate type of work in non-creative lessons, then a quarter of the class time is usually allocated for its implementation. As a rule, the application is part of the stage of consolidating the material, that is, it is performed at the end of the lesson.
Typically, a project, the ultimate goal of which is to complete an application, in the average group is limited to a fairly large time period - from two days to a week. In addition, the project requires the active assistance of parents. However, if a project application is a task that is performed during the educational process in a group, then the timing of its creation will be the same as in a regular lesson.
Work on applications in a circle activity can be carried out according to a lesson or project scenario, depending on the topic of the lesson.
What is the teacher's participation?
When working with children 4–5 years old, the teacher voices the task, shows a sample, and then gradually completes the task, which the children repeat step by step. In addition, the teacher:
- provides practical individual assistance with the implementation of individual details of the composition, for example, cutting out small details (for example, grape leaves in the “Fruit on a Plate” appliqué);
- helps to arrange the elements of the composition on the substrate;
- controls the accuracy of applying glue and pressing down elements;
- gives recommendations on the most harmonious use of decorative elements (for example, for a paper “Matryoshka”, sundress decorations can be made of plasticine and buttons, but rhinestones and sequins will violate the style of the folk costume).
Video: teacher’s activities during an application lesson on the theme “Tulips” in the middle group
What artistic techniques can the applique be combined with?
By the middle group, children are familiar with all visual techniques designated as software in the Federal State Educational Standard (FSES). However, the level of proficiency in many of them is still low. For example, design is mastered at the initial stage. Therefore, the application can only be combined with a drawing or plasticineography.
Photo gallery: examples of combinations of applications with other types of isotechnics
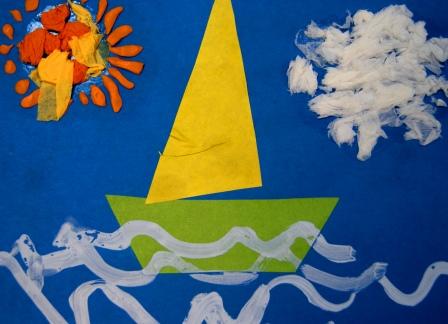
To make the work look neat, there should not be a lot of plasticine elements
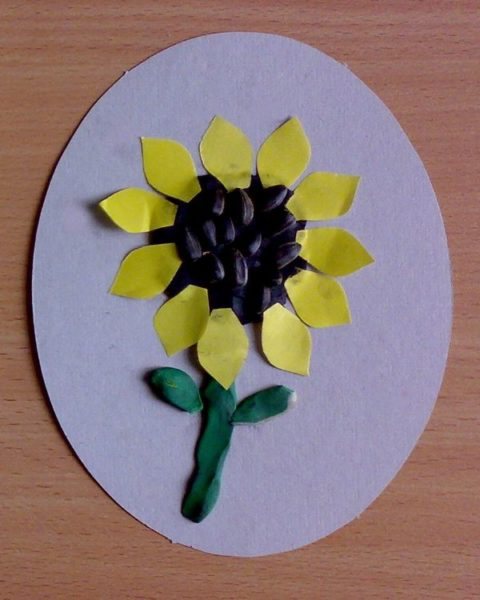
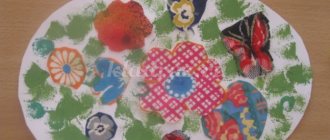
Some crafts combine not only isotechnics, but also different types of applique
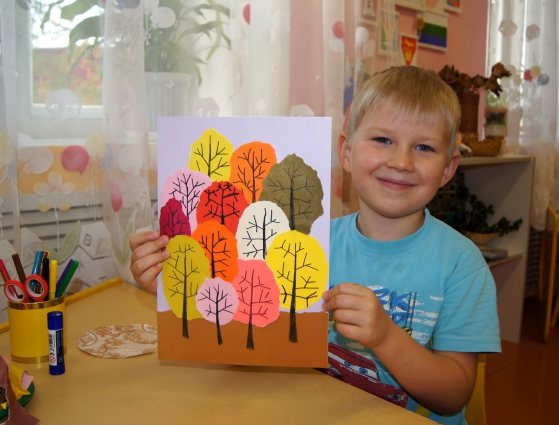
Children in the middle group can make hand-drawn additions to the applique in the form of non-solid elements themselves.
Table: types of applications for children of middle preschool age
| Technique | Application type, material | Features of use in the middle group |
| Traditional | Flat - solid elements cut out of paper are glued onto a backing. | In the second youngest group, children used the parts that the teacher prepared; in the middle group, they cut out large parts themselves without unnecessary bends. In addition, children 4–5 years old master the skills of multi-layer appliqué, when parts overlap one another. |
| Mosaic - cut pieces of paper are laid out within the boundaries of the design. It is mastered in parallel with the tape one. | On a mosaic applique, children practice direct movement with scissors to cut out parts. The ribbon type involves children folding paper like an accordion and then cutting it into pieces. | |
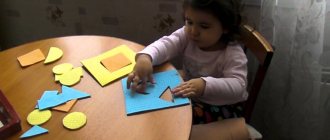
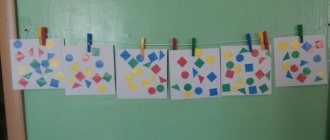
| Geometric - the composition is made up of elements of geometric shape. | Children aged 4–5 years practice laying out plots in triangles, squares and rectangles of different sizes. Last year, parts of the same shape were used to create compositions; in the middle group, kids combine several. | |
| Unconventional | From napkins - elements or individual parts are made from napkins, often folded in several layers to give the image volume. | In the middle group, children learn to fold napkins to create a multi-layered piece. |
| Tear - paper or napkins are torn into pieces of different sizes, which are then used to lay out the picture. | The type of appliqués familiar from last year in the middle group can be complicated by the fact that children twist balls from torn parts with their palms, which are then laid out in mosaics along the contours of the image. | |
| From cotton wool or cotton pads - the image is filled with pieces of cotton wool or discs (whole or cut). | In the middle group, cotton wool and discs become an additional element of other types of applications. | |
| Palm - the composition is made up of children’s palms outlined and cut out. | The teacher is responsible for cutting out palms, since children 4–5 years old do not use scissors at such a level to cut out rounded parts. | |
| From cereals, grains - individual elements of the composition are filled with buckwheat, rice, semolina, etc. | Kids are familiar with this type of crafts from the second junior group; in the middle group, children learn to combine cereals in one composition. | |
| Fabric, that is, suggesting that some elements are cut out of fabric. | Working with fabric is a very troublesome task, so the fabric elements are prepared by the teacher in advance, the children only glue the blanks onto the base. | |
| From dry leaves, pine needles - the image or its elements are laid out with natural material. | When performing such applications, it is important to apply the required amount of glue so that the fliers “do not drown,” so children master the technique under the guidance of a teacher. | |
| Quilling - a picture or its details are laid out with elements of paper twisted in different ways, usually in the form of circles or loose circles. | Children 4–5 years old learn to twist tight circles, loose ones, that is, with a displaced center, are made by the teacher. |
Photo gallery: examples of different types of applications in the middle group
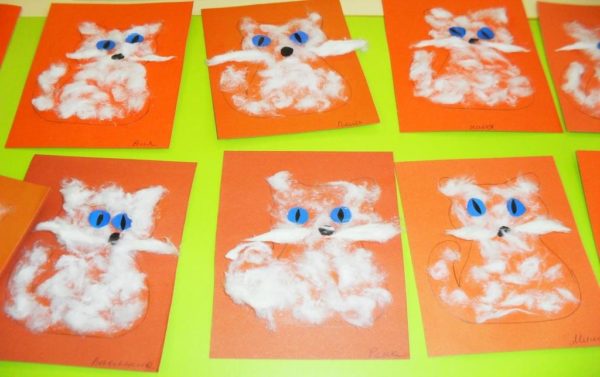
For cotton wool applications, children 4–5 years old learn to pinch off small pieces of cotton wool.
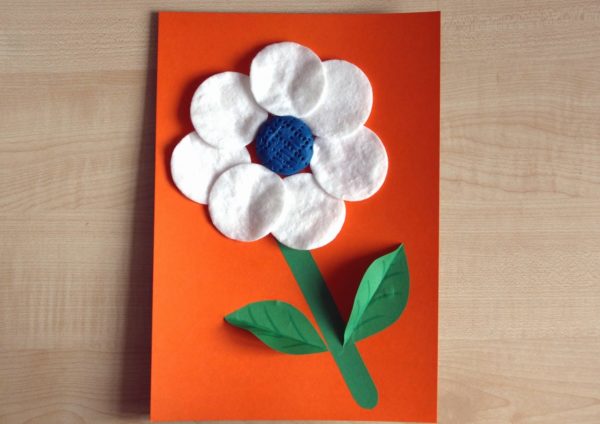
Cotton pads can be applied in two layers to add volume to the application.
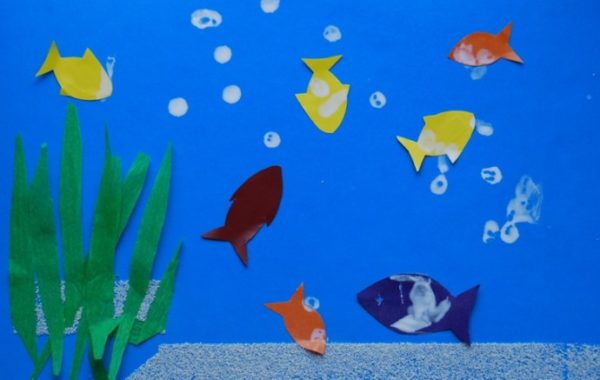
When performing flat appliqué, children independently choose the location of the composition elements
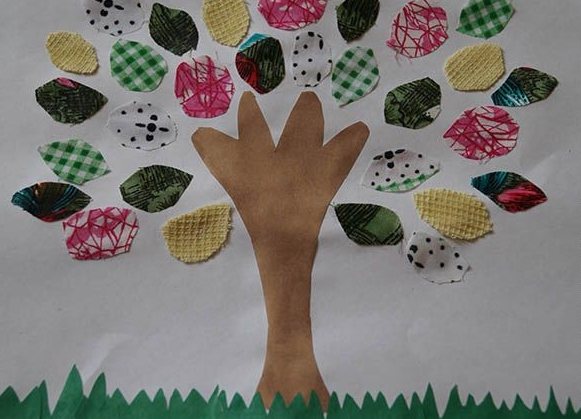
The fabric elements are prepared by the teacher, the children just place them in the picture and glue them
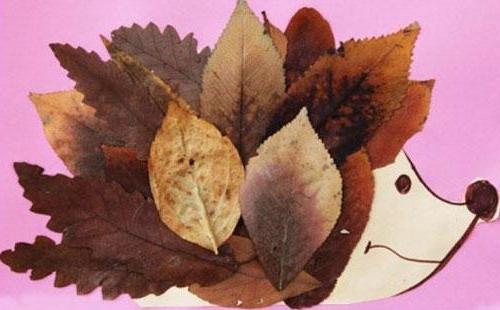
Working with leaves requires kids to carefully select the material according to shape and size.
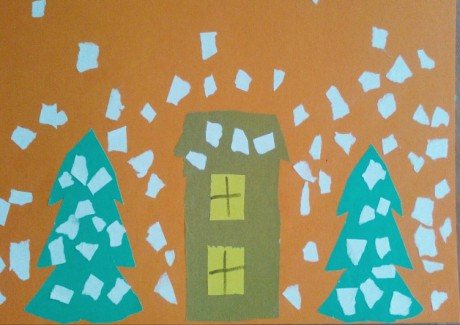
The broken look is the most commonly used type of applique in the middle group
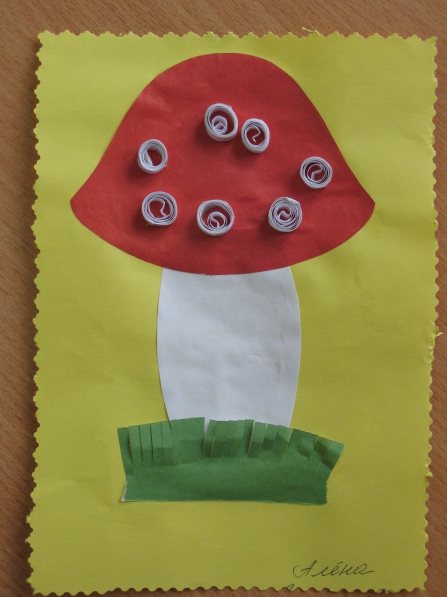
Children try to twist parts themselves using the quilling technique
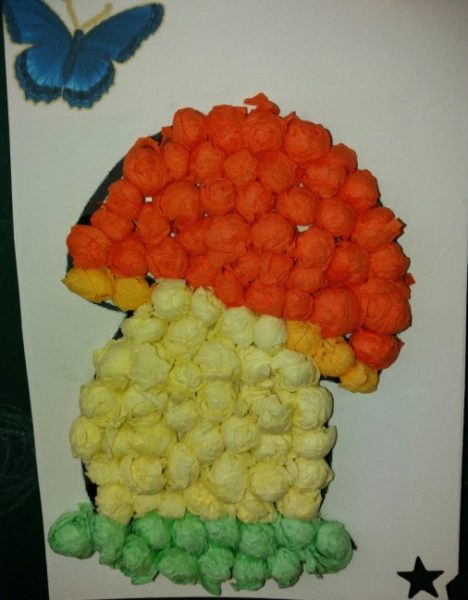
For napkin applique, children roll balls from pieces of thin paper and lay out a picture with them.
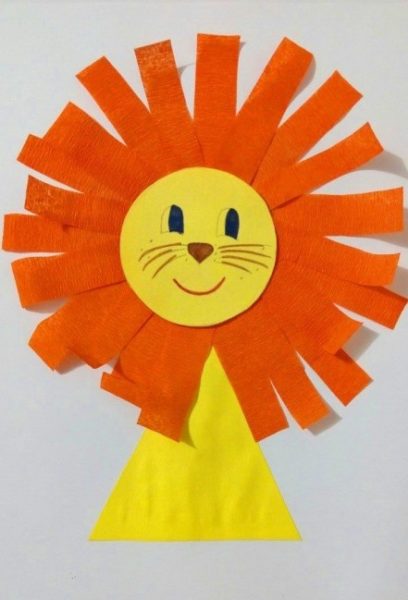
Geometric applications are familiar to children from the second junior group

In the middle group, kids lay out cereal elements that require delimitation by contour lines
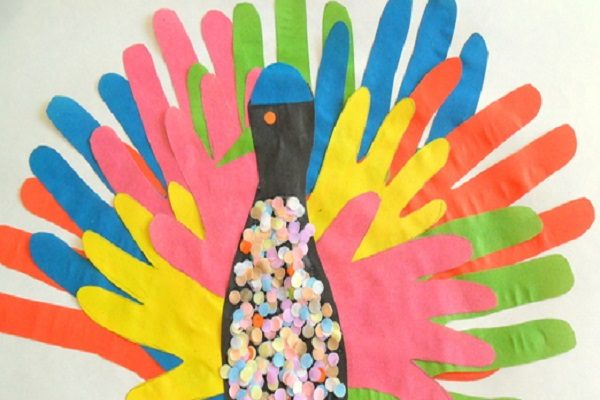
The teacher cuts out the palms for this type of applique.
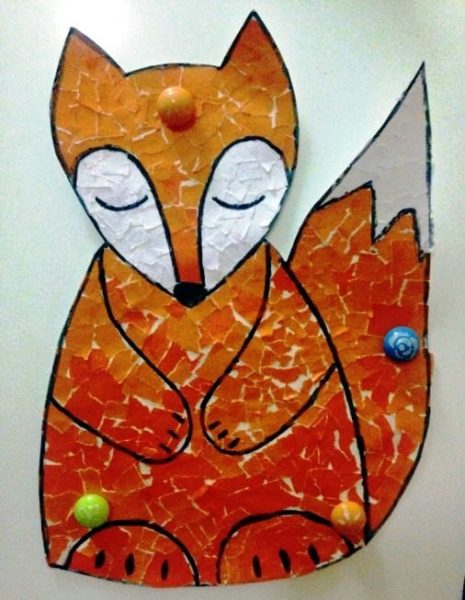
Mosaic applique is most often combined with a broken one
Video: lesson on flat appliqué on the theme “Flag” in the middle group
Video: lesson on flat multi-layer appliqué on the theme “Flowers” in the middle group
Important issues of individualization of work with children
The key factor determining the degree of adult participation in the application is the child’s degree of confidence in using scissors. If a child copes well with cutting out large silhouettes, rhythmically squeezing and unclenching scissors to perform forward movements, then he will be able to work in ribbon appliqué. But if the baby cannot hold the scissors and has difficulty cutting, then he should practice: perform finger exercises more often, cut out silhouettes with right angles, gradually moving to round shapes.
From my experience, I can say that the cutting skill is perfectly trained by the “Labyrinth” exercise: the teacher draws lines on a sheet of thick paper (in the case of children 4–5 years old, the lines should be straight, with turns at an angle of 90º), and the child “looks for a way out” from the labyrinth, cutting through the passage. Moreover, in the second half of the year, when the skill has already been mastered, this simulator can prepare children to become familiar with the basics of cutting out rounded silhouettes. To do this, the guys also practice the size of the paper cut: opening the scissors wide, they take “giant’s steps,” and as soon as they open the blades, they “walk like dwarfs.”
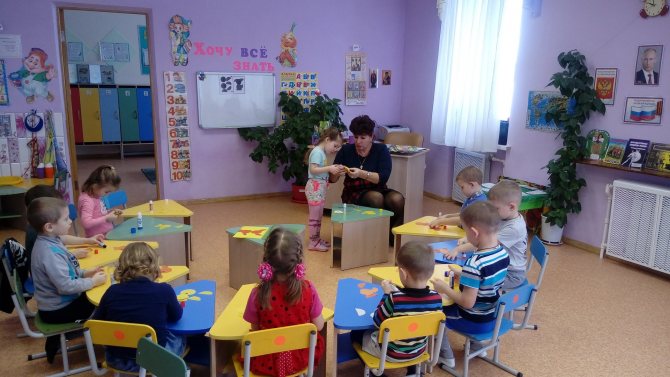
Small details of the applique are cut out by the teacher
Sample lesson notes on applications in the middle group
An application lesson in the middle group is held once a week and, as noted above, lasts 20 minutes. This time includes:
- the introductory stage, at which the teacher updates the children’s knowledge on the topic - 2-3 minutes (usually in the form of solving riddles, reading poems or watching a cartoon);
- the main stage, divided into a preparatory stage - preparing the background, materials, tools for appliqué, performing finger exercises - and doing crafts - children, with the help of an adult, create, cut out parts, stick them on a backing - 15 minutes (in the middle of the main stage there is a physical education break);
- final stage - the teacher thanks the children for their work, gives an assessment of their activity - 2 minutes.
An example of the implementation of all three stages could be a lesson on geometric appliqué on the topic “Decorating a Handkerchief” by O. Rasseikina. A sample lesson summary, which combines application with drawing, is presented in the work of I.E. Ulyanina "Skiers". An interesting version of the technique for practicing direct movement with scissors is presented in V. Zolotareva’s summary “Colored Cubes.”
Tear-off applique occupies a special place in the system of practicing this type of creativity, since children really like to tear paper, and this, in turn, is an excellent training for fine motor skills. In addition, crafts made from scraps of paper or napkins look original. An example of a lesson on broken appliqué can be found in the notes “Letter from an Unknown Friend” by O.G. Lebedeva.
Subjects for application in the middle group
The composition for applications in the middle group is selected according to the theme of the lessons of the cycle “Artistic and Aesthetic Creativity”, designated by the Federal State Educational Standard, as well as to the theme of lessons in other areas, if this type of work is appropriate for its disclosure.
The list of application lesson topics includes, among others:
- "Kindergarten";
- "Garden. Fruits";
- "Vegetables. Garden";
- "Forest. Mushrooms. Berries";
- "Trees";
- "Wild animals";
- "Furniture";
- "Transport. Traffic rules";
- "Winter";
- "Birds";
- "Toys";
- "Dishes";
- "Space";
- "Victory Day";
- "Summer is coming soon".
In classes on speech development, applications are used on the following topics:
- “Friendship” (kids make a palm applique “Tree of Friendship”);
- “Professions” (children stick blanks of tools onto the “suitcases” of representatives of a particular profession);
- “My City” (children do the craft “Winter covered the houses on my street” using geometric shapes and cotton pads).
Lessons on FEMP can be diversified by performing applications on the study of the following topics:
- "Form. Color" (the guys make an applique of geometric shapes "Traffic Light");
- “The simplest geometric shapes: rectangle, square, circle” (if this topic is close to the celebration of National Unity Day, then the kids can be invited to make a craft from colored napkins “Flag of Russia”);
- “Quantitative and ordinal counting. Day" (children perform a flat applique "Night").
Another educational cycle where applications are very appropriate for reinforcing material is classes on familiarization with the outside world. In particular, topics such as:
- “Fire” (the guys perform the applique “Fire Truck”);
- “Harvest” (children make an applique of paper and seeds “Golden Sunflowers”);
- “Zimushka-winter” (pupils of the middle group make snowmen from blanks cut out of cotton pads).
Photo gallery: samples of finished work during appliqué classes
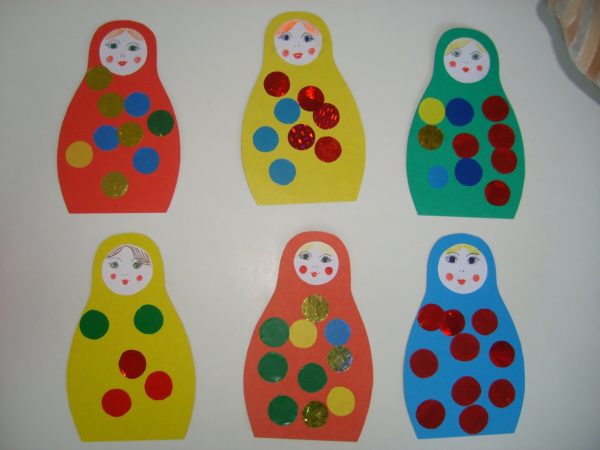
In the “Toys” theme, special attention is paid to nesting dolls as a type of folk art.
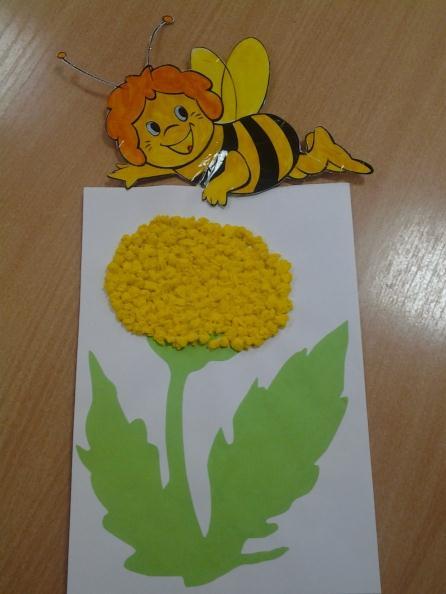
When making the “Summer is Coming” applique, kids roll up small scraps of napkins for the flower head.
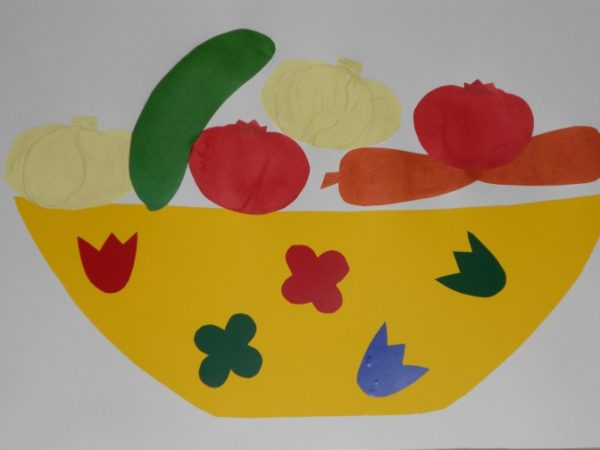
For the application on the theme “Vegetable Garden”, the children cut out the dish themselves
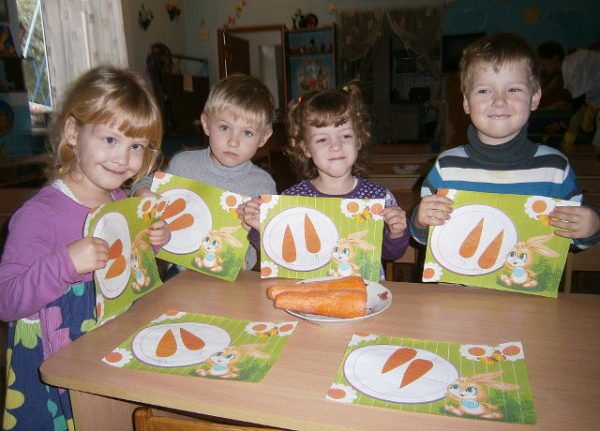
Carrying out an application on the topic “Vegetables”, the guys make a carrot for the bunny
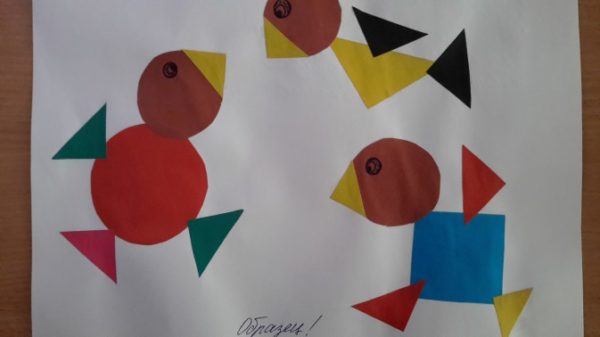
When working on the “Birds” theme, children themselves choose color combinations of parts
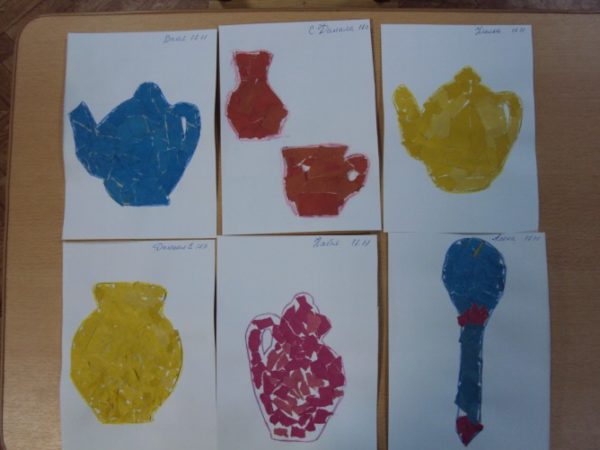
By working to fill in the outlines of the dishes with scraps of paper, children learn to combine two colors

An application for Victory Day can be used as a postcard design
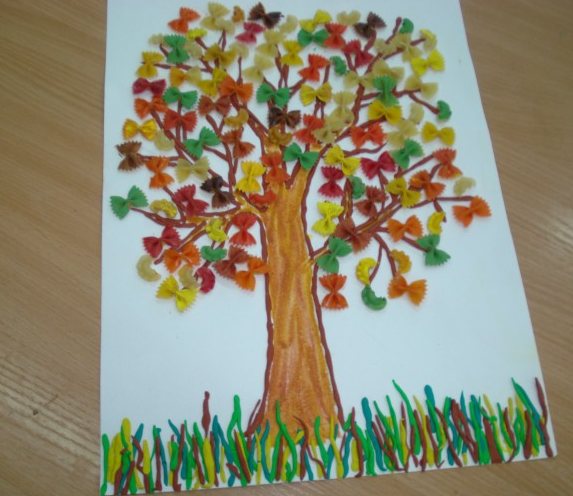
The theme “Trees” in non-traditional appliqué technique can be a project task
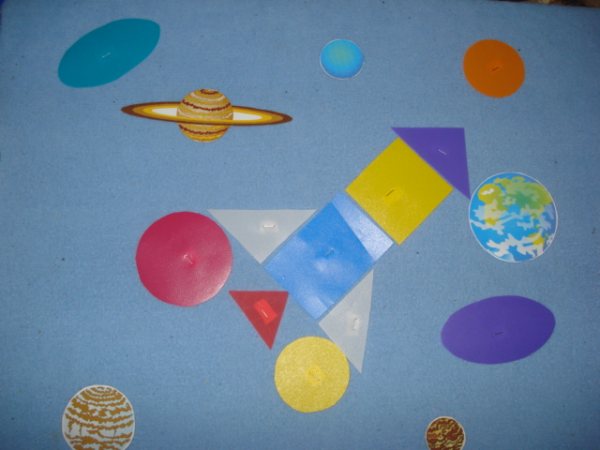
The geometric applique “Rocket” is a kind of puzzle, which the children first fold and then glue to the base
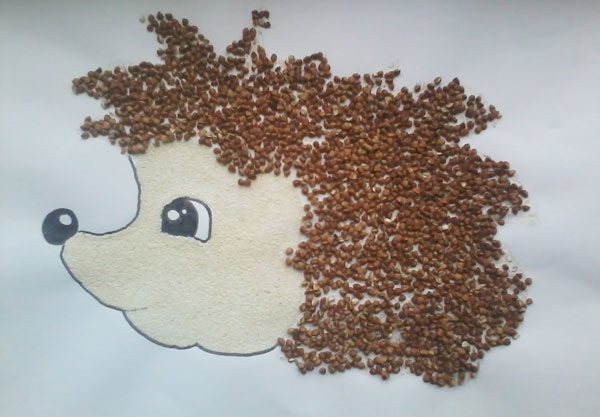
In the middle group on the topic “Wild Animals”, children learn to combine two types of cereals or grains
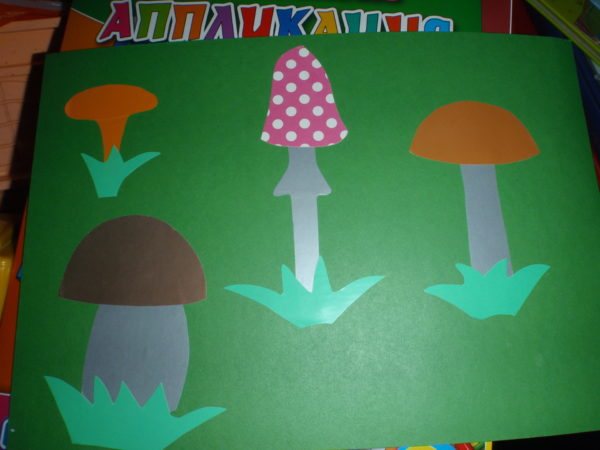
When making an applique on the “Mushrooms” plane, the children’s task is to correctly position the parts on the backing for the collective applique
Photo gallery: examples of applications for speech development lessons
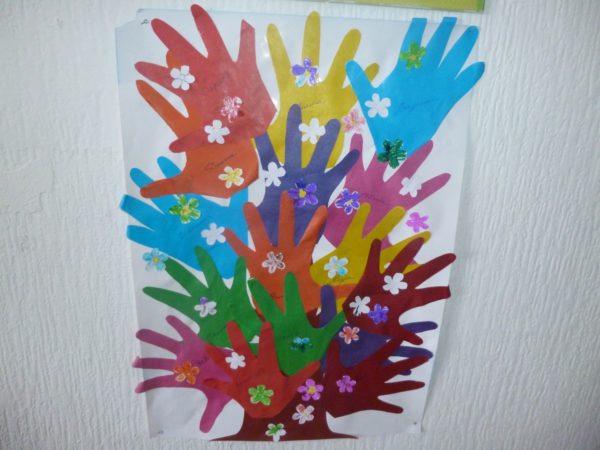
When creating a collective application on the theme “Friendship”, the teacher helps to cut out palms
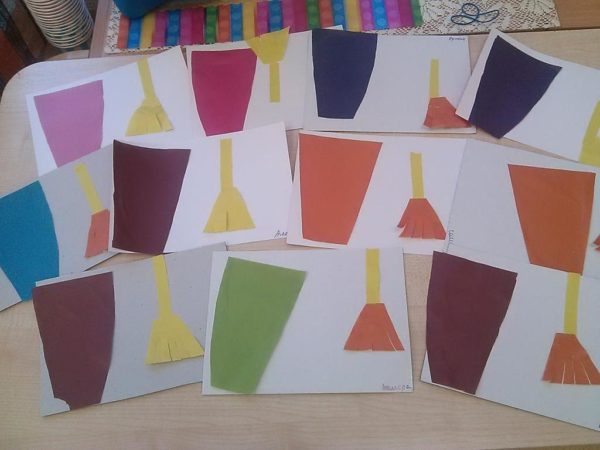
One of the options for an application on the theme “Professions” is to create a composition from the tools of representatives of various types of activities
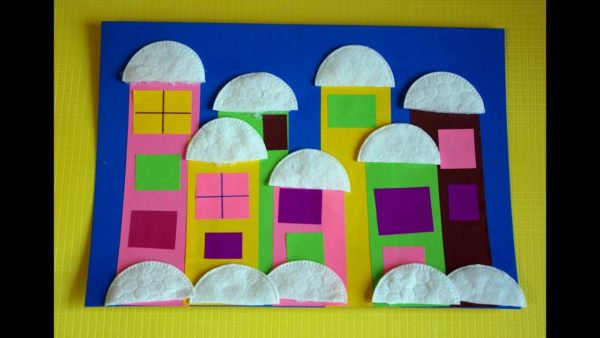
In the “Houses on Our Street” applique, kids combine several types of isotechnics: applique on a plane, geometric and from cotton pads
Photo gallery: examples of applications in FEMP classes
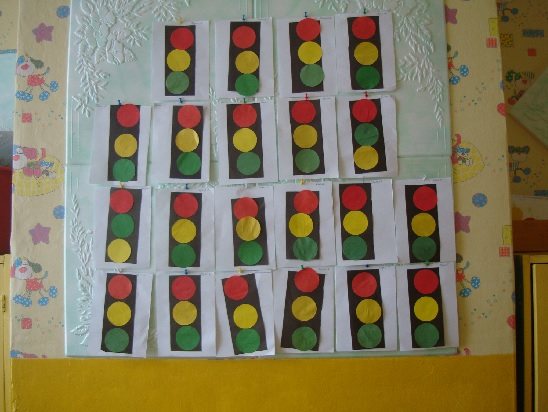
For the flat applique “Traffic Light”, children use three round and one rectangular element
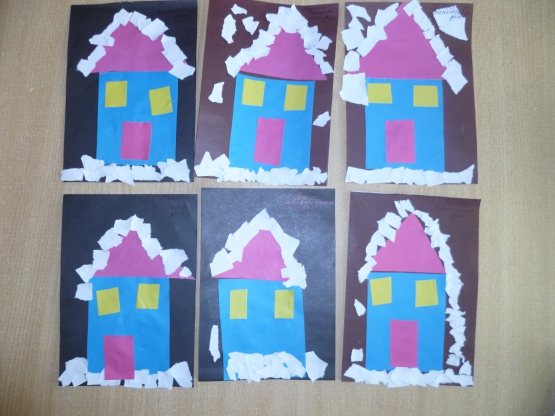
Night in applications is shown as a background, that is, a black or dark sheet of colored paper
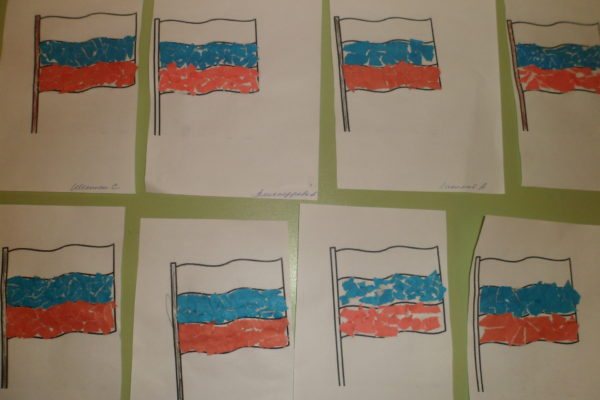
In the “Flag of Russia” applique, children repeat geometric shapes in the process of cutting elements to fill the borders of the image
Photo gallery: examples of applications in lessons on familiarization with the environment
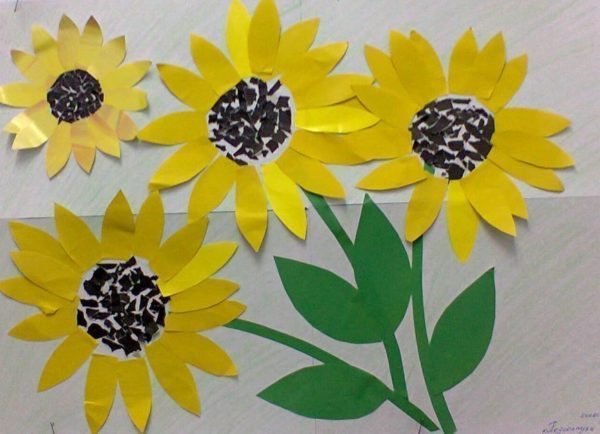
In the “Golden Sunflowers” applique, children combine the cutting technique with multi-layered
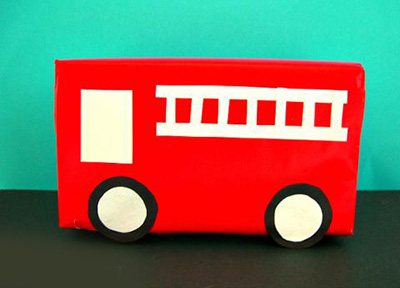
To complete the “Fire Truck” applique, children cut out the body of the machine and the window themselves; the teacher helps with the rest of the elements.
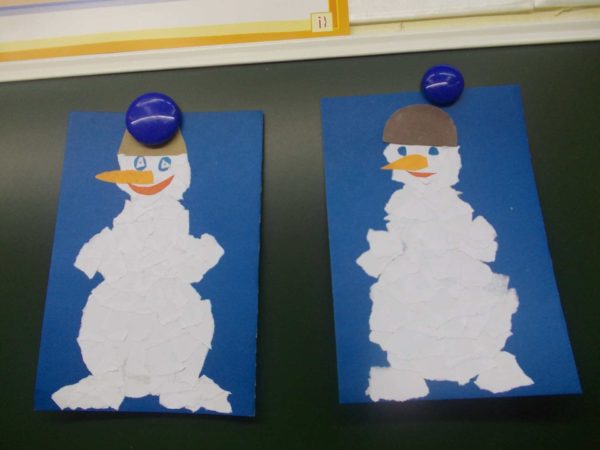
The “Snowman” applique can be made from cut white sheets that are laid out within the borders of the image
LESSON SUMMARY ON DECORATIVE APPLIQUE IN A MIDDLE GROUP TOPIC: “Beautiful Plate”
LESSON SUMMARY ON DECORATIVE
APPLICATIONS IN THE MIDDLE GROUP
TOPIC: “Beautiful plate”
OBJECTIVES: To teach children to place pattern elements in the center of a round shape and along the edges, combining them differently in color and shape.
Continue learning to cut a square diagonally to obtain two triangles, cut a circle from the square, gradually rounding its edges, cut the square into strips.
Reinforce safety rules when working with scissors.
To cultivate aesthetic perception, the ability to see beauty.
Develop children's creativity.
EQUIPMENT: cut out squares on serving plates, paper circles of different colors, glue stick, napkins, backing sheets, audio recording of calm music, tape recorder, illustration “The Sorceress”.
PROGRESS OF THE CLASS:
Guys, I want to tell you one sad story. “Once upon a time there lived a sorceress named Ivanessa. She was once cheerful, kind, and had many friends. But one day, she fell ill with some rare and strange disease - she stopped seeing beauty. Everything around her seemed bad and ugly. She stopped doing good deeds and quarreled with all her friends. And worse than that, she began to do evil deeds. Just recently, I took and blew away beautiful patterns from all the plates.”
Take a look. (Showing round shapes for applique).
But first, let's look around us and look for beauty. Outside the window I see the beauty of white clouds in the blue sky. Where do you see beauty? Outside the window? In a group room? Among your comrades? (Children's answers).
Your hands, although not very big yet, already know how to create beauty. Let's try to decorate the dish with patterns.
Now we will prepare our fingers for work.
Wizard.
If I take out the scissors, (depict “scissors”)
Then I will become a wizard, (arms and hands up)
I’ll create one for you out of paper (depict movements with scissors)
Birds, cars, boats, flags. (depict “birds”, steering movements, “boat”, “flag”)
Now our fingers are warmed up and ready to work.
You have multi-colored squares on your plates. You can cut out various shapes from them. What shapes can we cut out of them? (circle, triangle, stripe).
Guys, we place one figure in the middle of the dish, and try to place different figures at the edges. It will work out beautifully if the shapes alternate, for example: a square and a triangle, a circle and a strip.
Fairytale music will help us do beautiful work. (Audio recording starts).
Let's get to work.
Let's start by decorating the middle of the dish.
What shape can be used to decorate the middle of the dish?
Think about it, Kolya.
What will you use to decorate the middle of the dish, Masha? Who can remind me how to cut a circle out of a square?
Tell Matvey.
You need to cut off the corners of the square, gradually rounding its edges.
Let's remember how to cut a triangle out of a square?
You need to take the square by the corner and cut from corner to opposite corner.
Guys, do not forget about the safety rules when working with scissors: do not bring scissors close to your face, and do not leave them with open blades.
Arrange your shapes on the platter to create a beautiful pattern.
Whoever made the pattern can start gluing it.
Try to paste carefully so that glue stains do not spoil the beauty.
What beautiful dishes you turned out! Now we will place our dishes on the easel. Maybe the sorceress Ivanessa will see your works, notice their beauty and begin to recover from her strange illness.
Methodology for preparing an open lesson on application in the middle group
The work of drawing up a script for an open lesson on application in the middle group is not much different from writing notes for a regular lesson: the same three stages, the same distribution of time between them. However, there are a number of features at the content level:
- An open lesson must have a plot basis; in the middle group it is convenient to work with fairy tales, the heroes of which come to the kids for help or advice on the topic;
- For the lesson to be successful, the type of application being practiced must already be familiar to the children;
- At the final stage of the lesson, children should be given the opportunity to evaluate their application - like it/don’t like it and why.
From the standpoint of implementing these conditions, the summary of an open lesson on application on the topic “The Best House” by E.A. is interesting. Iyutinskaya.
Criteria for assessing an open lesson by inspectors
The demonstration lesson is assessed both by the teacher himself and those present according to a single scheme:
- compliance of the goals and objectives of the lesson with the topic and requirements of the Federal State Educational Standard;
- effectiveness of techniques;
- the presence of suitable and understandable visuals for children;
- consistency of types of work and teacher’s explanations;
- conducting physical education breaks during class (finger exercises and physical education sessions);
- forms of implementation of an individual approach;
- the general atmosphere of the lesson, its pace;
- evaluation of finished work;
- recommendations to the teacher (what levels of methodological work need to be adjusted).
If the analysis by those present involves a written form, then you must first indicate the full name, regalia of the teacher, as well as the age of the children and the number of people present at the lesson.
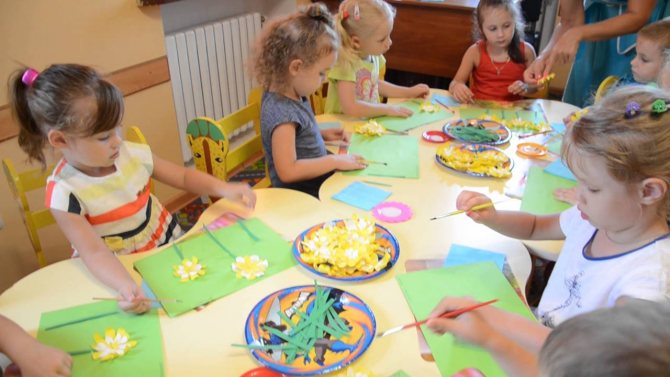
In the middle group, children learn to give their own assessment of their work in class
Middle group. Junior preschool age. Children 4 - 5 years old
Summary of GCD for application in the middle group “Christmas tree made of triangles”
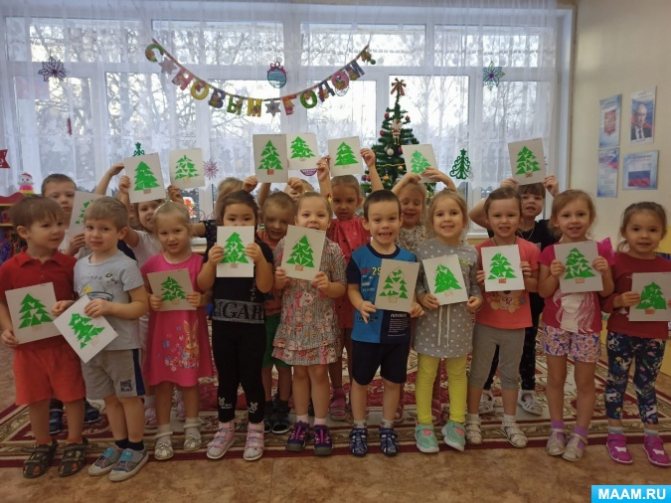
evenly filling the silhouette image; 2. Continue to teach how to make triangles by cutting...
Abstract of GCD on application with drawing elements “Herringbone” for children of primary preschool age
Application 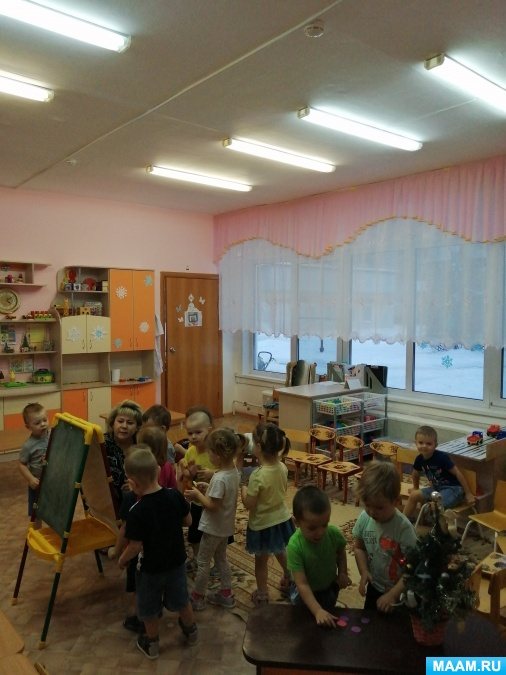
.
Work for children of primary preschool age Goal: Create a festive mood Objectives: Learn to stick ready-made shapes (circles)
Develop imagination Fine motor skills Strengthen correct sticking skills Learn to draw snow...
Methodological literature on application
When preparing lessons on application, the teacher will find the following manuals useful:
- Applications and paper crafts. - M.: Dragonfly, 2012.
- Grigorieva G. The use of gaming techniques in the management of visual activities. / Preschool education, 1991.
- Gusakova, M.A. Application. - M.: Education, 1987.
- Dubrovskaya N.V. Applications made from natural materials. - M.: Astrel, Sova, 2012.
- Dubrovskaya N.V. Applications from seeds and seeds. - M.: AST, Sova, 2013. Dubrovskaya N.V. Application from corrugated paper. - M.: Detstvo-Press, 2013.
- Komarova T.S. Methods of teaching visual arts and design. - M., Education, 1991.
- Kosminskaya V.B., Khalezova N.B. Fundamentals of fine arts and methods of guiding children’s visual activities: Lab. workshop: Textbook for pedagogical students. Institutes - M.: Education, 1987.
- Malysheva A.I., Ermolaeva N.V. Application in kindergarten. – M.: 2000.
Samples of drawing up lesson plans for applications can be found in the manuals:
- Koldina, D. N. Application with children 4–5 years old. Lesson notes / D.N. Koldina. - M.: Mosaika-Sintez, 2016.
- Komarova T.S. Lessons in visual arts in the middle group of kindergarten: lesson notes. – M.: 2008.
- Lesson notes on application in the middle group.
A lot of time is devoted to the creative development of children aged 4–5 years in the kindergarten educational program. At the same time, applique classes are of particular importance, allowing children not only to learn how to use scissors, practice skills in working with glue and brushes, but also to learn about the visual possibilities of paper and other materials for crafts. All this develops important learning skills in children and introduces them to an interesting activity that awakens their imagination.
Collective application in the middle group on the theme: Winter
Summary of educational activities in the middle group using non-traditional forms.
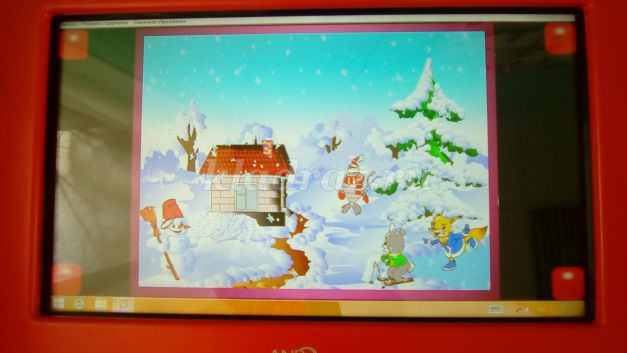
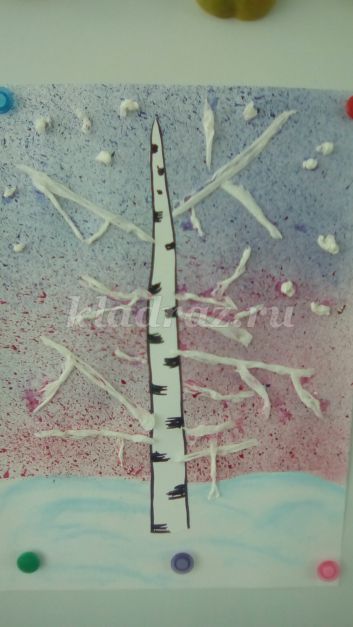
Collective application “Winter tree”. Goal: Continue to teach children to use a non-traditional type of appliqué; Develop dialogical speech, activate vocabulary; Promote the development of cognitive interest; Cultivate accuracy when working with glue; Development of fine motor skills in the hands of preschool children through the use of non-traditional forms of appliqué. Materials: White napkins, PVA glue, brush, oilcloth, brush stand, wet napkin, tinted sheet of Whatman paper, illustrations of trees in winter, interactive table. Preliminary work: Examination of paintings on the topic “Seasons”. Reading stories and poems about winter. Listening to the album "Seasons". Guessing riddles about winter. Organization and methodology of educational activities. Educator: Guys, what time of year is it now? (children's answers). Educator: Let’s remember the main signs of winter, and for this I suggest you play a game: Game on the interactive table “Seasons” : children choose from the proposed items those that are suitable for the winter season (consolidating the signs of winter).
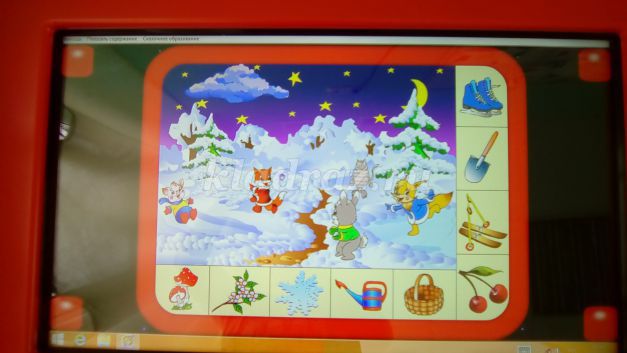
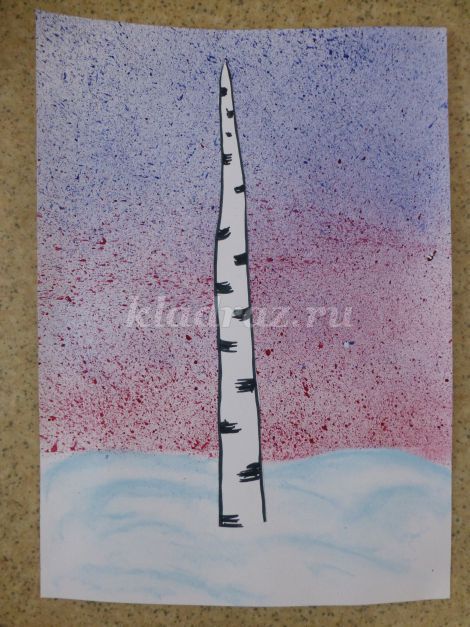
Educator: Well done guys, you tried very hard. Everyone worked together and you ended up with a very beautiful winter tree.
We recommend watching:
Summary of GCD in the middle group “Mushroom Glade” Summary of GCD. My city Zheleznogorsk Summary of GCD in the middle group with elements of experimentation Integrated GCD for speech development and artistic creativity in the middle group
Similar articles:
Lesson summary for the middle group: Safety at home
Summary of a lesson in kindergarten “Receiving guests.” Middle group
Lesson summary for the middle group on the topic: Properties of glass
Lesson in the middle group of kindergarten. Village courtyard
Summary of a lesson on cognitive development in the senior group. Rules of conduct in the circus
