DIY finger puppet theater
If you want to develop your baby’s fine motor skills, speech, thinking and simply be able to lift the mood of the whole family, then turn the room into a temple of art. To do this, you need to know how to make a finger puppet theater with your own hands.
For this you will need:
- felt;
- threads;
- scissors.
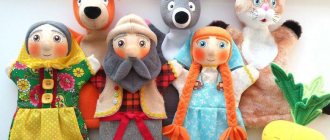
As you can see, the characters in the fairy tale “Turnip” are cut out very simply.
Each hero consists of two identical parts. But on one side you need to embroider facial features with threads. You can make them by cutting them out of dark felt and then gluing or sewing them on. Fold 2 character blanks with the wrong sides together, sew along the edge using a machine or with a thread and a needle on your hands.
To make a beard for your grandfather, wrap several rows of thread around your fingers and cut them on one side. Fold these identical threads in half and sew the beard in place.
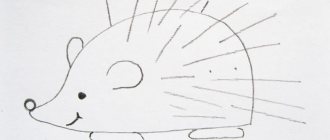
And here’s what the heroes of the fairy tale “The Ryaba Hen” might be like. Cut out your grandfather's beard and bangs and grandmother's hair from gray felt. It will also help you create a mouse with a long tail. These are the kind of dolls you can sew for a puppet theater. If a baby will wear them, cut them so that they are the size of his fingers. If the performance will be performed for children by adults, then the fabric dolls should be slightly larger.
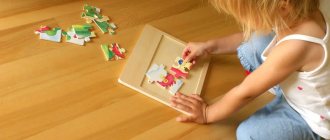
Check out another interesting idea. This could be a home puppet theater for staging the fairy tale “Turnip”. In kindergarten, it is better to have larger characters so that the whole group can see them from afar. But you can do something like this by taking:
- modeling paste (preferably Jovi, which does not need to be burned; it hardens in air);
- yellow and green paste Jovi Patcolor;
- acrylic paints;
- tassels;
- markers;
- stacks.
- Let's sculpt the grandfather first. Take a piece of pasta measuring 2x3 cm, roll it into a sausage, and form a cylinder. You should end up with something like a nesting doll with a body and head, and at the bottom there will be a notch for your finger.
- Separately sculpt the arms and attach them to the body. But outline the facial features, beard, and mustache using a stack.
- Using the same principle, sculpt the grandmother, granddaughter and animals. Once these characters are dry, paint them with acrylic paints.
- For the turnip, roll a ball of yellow paste, pull it out a little from the top, insert green plastic tops here, and secure.
When sculpting with paste, you will find that it dries quickly in the air, so periodically wet your fingers with water.
This is how you will get a finger puppet theater; with your own hands, a child will be able to act out the fairy tale “Turnip” or come up with his own plot with some of these characters.
Accessories
Photo stand
Crafts from plastic bottles
You need to have a fork and pliers with you. It can be done by separating the outer and inner teeth, thus we get excellent support. How can you make a phone stand out of a fork? To achieve this goal, you need to take a fork and repeat the same thing as when creating a photo stand.
You need to process it so that it looks like a handle, then attach it to the cabinet door.
You need to do one action. Cut off the stalk. The buffet fork is ready.
Egg cup
It is necessary to bend the device so that the fragment with the teeth takes a horizontal position. Next, use a tool to move the teeth in different directions and the accessory is ready.
DIY table theater
If you want to have a tabletop theater with paper dolls, then enlarge the following image. Print it on a color printer on thick paper. If this is not possible, attach a sheet of thin paper to the screen and transfer the outlines onto it. Then place it on cardboard, draw outlines, and let the child decorate the characters with colored pencils or paints. All that remains is to cut out the images, glue each on the side and glue the top of the head to the head.
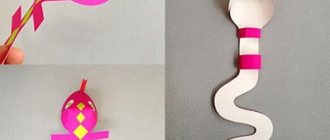
And here are some more templates that can be used to easily make theater dolls. With your own hands or by giving the blanks to your child, cut them along the contours and glue them in pairs. If a small rectangular sheet of colored paper is glued on the side, you get a small tube. It should be such that it fits well on your finger. Glue the ears, nose, eyes, front paws to the blank, and you will get a finger puppet theater hero. These characters can be made from the most unexpected materials. See how to turn plastic spoons into stage plays. To make these toys for the puppet theater, take:
- plastic spoons;
- colored paper;
- scissors;
- ready-made plastic eyes;
- glue gun;
- textile;
- narrow tape, scissors.
Next follow these instructions:
- Using a glue gun, glue the finished eyes to the convex side of the spoon.
- Turn a piece of fabric tied with a ribbon into a dress. For a male character, just glue a bow tie to his neck.
- Cut strips of colored fringe paper on one side and glue this hair. They will also be replaced by pieces of colored cotton wool.
That's it, the children's puppet theater at home is ready.
Take a large cardboard box, cover it with colored paper, and turn it over. Make slits in the bottom with a knife, insert spoons here and move the dolls along these holes, like along a path. Other characters are controlled in the same way, to create which you will need:
- ice cream sticks;
- children's magazines;
- glue;
- scissors.
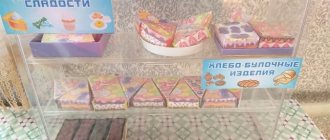
Let the child cut out pictures of people and animals from a magazine or an old book and paste them on sticks. If you want to make another tabletop theater, then milk bottle caps will come into play. Plastic yogurt cups. Glue paper fairy tale characters to the back of these items, and you can play out old stories with them or invent new ones. The background is created from a large sheet of cardboard, which is painted to match the theme.
Flowers
Plants are a pleasant decorative element in a family nest, but they cannot live long, so they are replaced with plastic analogues, which are crafts from disposable spoons and are made with your own hands.
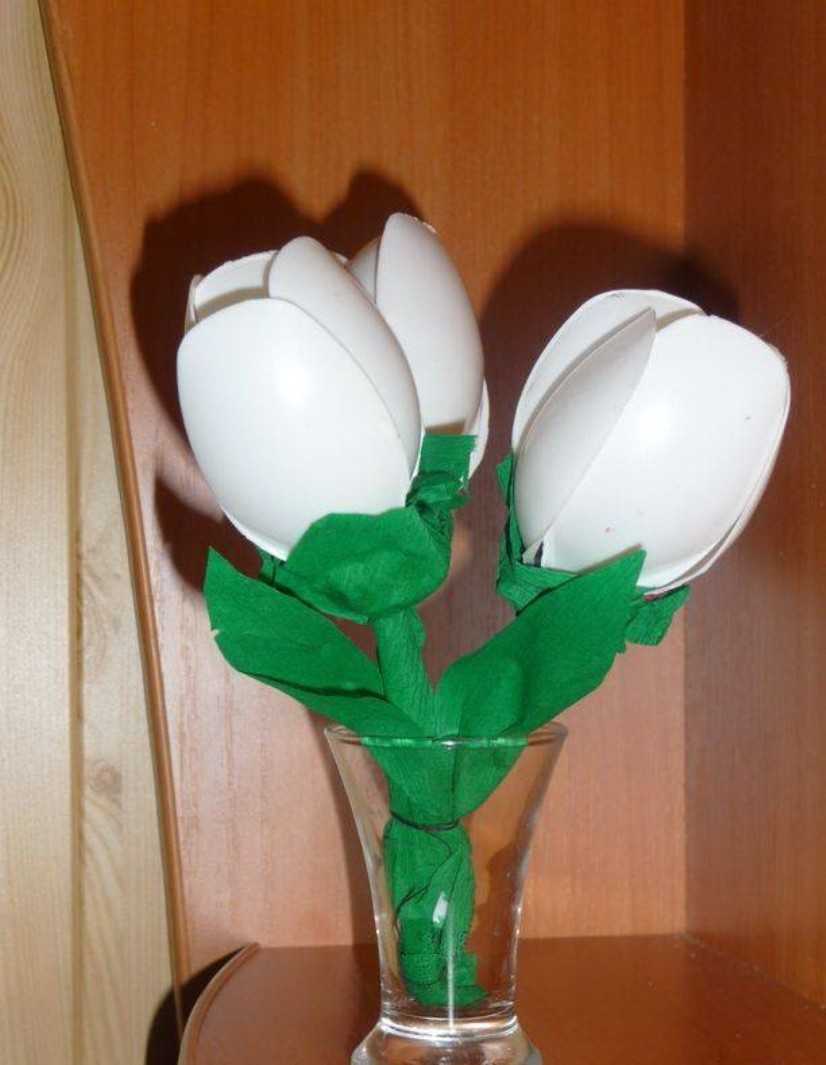
Tulips
Let's start with the simplest flowers - tulips. The product will require five spoons, a sheet of green paper, PVA, scissors, electrical tape, and cocktail tubes.
We cut equal squares, wrap spoons in them and seal them so that they look like petals. Then, we simply glue the ladle together and assemble a full-fledged flower.
To fix the result, attach a stem from a tube and cover it with tape. Glue the pieces of paper onto a tube and the masterpiece is ready! Such tulips made from disposable spoons will not leave anyone indifferent and are suitable as an element of decoration or a hand-made gift.
Lotus
Let's move on to a more beautiful, but also complex - lotus. You should have spoons of different sizes, a glue gun, hot glue gun, yellow watercolor, scissors and a plastic bottle on hand.
We completely cut off the handles of small spoons so that only the petals of the future lotus remain. We glue them together with a gun. In the same way, we make the next rows, using spoons in ascending order, then glue all the layers into one flower.
We create the core from bottle plastic. We cut the lid and paint it yellow, then glue it to the center. Take a green bottle, cut out the leaves and glue it to the flower. This is such a wonderful water lily made from plastic spoons that we made.
Rose
Rose, another craft made from disposable plastic spoons. Required: spoon, lighter, scissors, pliers, glue gun. Hold the spoon over the flame, giving it the appearance of a bud
It is important not to overexpose it, otherwise the plastic will start to drip.
We repeat the same with the rest of the scoops, but they will be petals, so we shape them more voluminous. Cut off the stems, leaving the stem with the bud. We stick all the petals to the bud, and then paint it in any colors.
Snowdrops
The next artificial plant will be snowdrops. To make them, you need spoons, plasticine, tubes, scissors, cardboard, colored paper, a jar of cream, woolen threads and double-sided tape. Cover the jar with tape. We glue woolen threads to the second side of the tape.
We make a cake from plasticine and place it on the bottom of the jar. Cut off the handles from the spoons. We make a receptacle from green plasticine. Using white and yellow, we sculpt the pistil of the flower. We connect the receptacle and pistil, after which we attach three petals to one base. We make the stem from tubes.
We connect everything together and then insert the resulting flower into the pot, fixing it tightly in plasticine. We cut out thin leaves from cardboard and place them next to the flowers. Snowdrops made from plastic spoons are ready.
How to make a screen for a puppet theater?
This is an essential attribute of puppet theater. Check out the simplest options:
- Cover the hole under the table with a cloth, tying its two corners to the top of one and the other leg. The child sits on the floor behind him and leads the characters at the level of the table top - just above it.
- Take an old curtain or sheet. Gather any of these fabrics onto a rope, tie the ends of the thread on one and the other side of the doorway. Make a rectangular cutout in the center of the top of any of these pieces. It should be at such a height that it is not visible to a child or adult sitting behind the curtain who are playing the role of puppeteers.
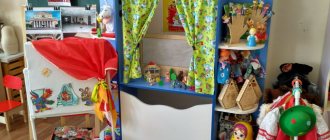
- A tabletop screen is made for the finger theater. The easiest way is to make it from cardboard. Take the box. It needs to be disassembled, covered with wallpaper or colored paper, and 2 sides bent so that a canvas of sufficient size remains in the center. There is a cutout in it through which the puppeteer shows finger toys.
Here's how to make a plywood screen. For it you will need:
- plywood;
- jigsaw;
- fabric or piece of wallpaper;
- glue;
- small door hinges.
Manufacturing instructions:
- Based on the presented dimensions, cut out 3 blanks from plywood: a central one and 2 side panels. Cover them with fabric.
- When the canvas is dry, attach the loops to the designated areas so that you can close the puppet theater screen and fold it.
See how to make a screen out of cardboard so you can show performances with mitten, glove, and cane puppets.
It should be such that the puppeteer can fit there freely, standing up to his full height. If the performance is performed by children of different ages, then the tall ones will kneel, placing a pillow under them. In order to make a screen, you will need:
- PVA glue;
- rope or lace;
- carton boxes;
- wallpaper;
- stationery knife;
- awl;
- roulette;
- wide brush;
- long ruler;
- rag.
You can make a screen for a puppet theater with your own hands as follows:
- The drawing is given for teenagers or adults whose height is 1 m 65 cm. If you are making a screen for children, reduce this figure.
- To make it durable, make it three-layer. To do this, stick a second one on one large sheet of cardboard, then a third one on the other side. Apply PVA glue with a wide brush. This way you will make the front part - the apron.
- The side elements are also made in three layers, but the folds, which you then glue to the apron, should consist of one layer.
- Connect the parts by gluing them. When the glue has dried, sew in these places with a lace, having previously made holes in the fastening points. Attach the top arch in the same way.
All that remains is to cover the screen with wallpaper of a dim color so that it does not distract from the theatrical performance.
Mirror with plastic spoons
Crafts from plastic bottles
You will need: mirror, chipboard plywood, saw, simple pencil, plastic spoons (200 pieces), scissors, glue, spray paint.
Master Class
- Draw a circle on the plywood, the diameter of which is 2 times larger than the mirror.
- Cut out a circle.
- Cut off the handles of the spoons.
- Glue the spoons tightly to the plywood, starting from the outer edge. Leave a space of one spoon between spoons - do this in each row.
- Glue the second row of spoons overlapping onto the top row. It should be glued in a checkerboard pattern, that is, in the intervals.
- Fill the entire circle of plywood with spoons in this manner.
- Wait until completely dry.
- Paint the entire circle of spoons.
- Wait until completely dry.
- Glue the plywood circle to the mirror.
I recommend watching the video master class!
We have offered you 5 ideas for crafts made from plastic spoons. This is just a small part of what you can do with them. Learn to create simple crafts from plastic spoons, get creative and create masterpieces.
We make do-it-yourself glove dolls
These can be seen in a real puppet theater. Dolls put gloves on their hands. By bending your fingers, you can make the fabric character tilt its head and move its arms.
Children's puppet theater will have many characters if you use the proposed template. But it is not necessary to create all the heroes at once. Let's start with two - bunnies and piglets. Having understood how to make such doll gloves, you will be able to sew others, thereby gradually replenishing your theater.
If you then make human dolls, you can make the hairstyle from fabric or thread.
The thickness of the character's neck should be such that the puppeteer inserts his middle and index fingers here to control the hero of the play.
Before sewing puppets for the theater, place a puppeteer's glove on the re-cut pattern to decide whether the base is suitable. If not, then increase or decrease it. You can do without a glove by placing the puppeteer’s hand on the base pattern. Please note that the character will not be static, so you need to add a little on all sides for a loose fit so that the fabric of the action hero does not stretch while controlling him.
So, here's what you need to sew a glove doll:
- faux fur and/or plain fabric;
- tracing paper or transparent paper or cellophane;
- pen;
- scissors;
- threads;
- buttons for eyes.
Enlarge this pattern.
Attach a transparent material (cellophane, paper or tracing paper) to it and redraw it. Cut along the outline. Place the pattern on the fabric folded in half, cut with a 7 mm seam allowance. For a bunny it is better to take gray fabric or white fur, for a pig - pink. If you want to draw facial features, tails, hands, hooves, then do it now, before sewing both halves of each character. Take special fabric paints that do not fade when washed. If there are none, then use watercolor, gouache, but first apply a PVA solution to the fabric, after it dries, paint this place, but use a minimum of water. When the paint is dry, add another layer of PVA on top to secure it. But it is best to embroider the nose and mouth by stretching these areas onto a hoop or sewing blanks of appropriate colors and eye buttons.
Cut out a shirtfront from white fur for the bunny glove doll, sew its triangular part to the front half, and the semicircular part, in the form of a collar, to the back half. The tail is attached to the same reverse side, and white paws with or without pink claws are attached to both parts.
When small parts are sewn on, you can sew both halves of the doll on the inside out using a machine or on the face using your hands. In the latter case, use an over-the-edge seam or take a tape of a matching color and edge the side seam with it.
Other glove dolls, for example, a pig, are also created using this technique.
When the sides are stitched on all sides, hem the bottom. The characters' ears can be stuffed with cotton wool or padding polyester. Fill the pig’s nose with any of these materials, only after that sew this “patch” to the head. Applique it on his cheeks, giving them a blooming look. It remains to sew a few yellow threads between the ears, and another glove doll is ready. Now you know how to sew characters for a puppet theater, if you want to see this too, then watch the following stories.
Pedagogical project
"Theater of Plastic Spoons"
Educator:
Project topic: Preparing characters for dramatization of a Russian folk tale
"Teremok" for showing a puppet theater made from disposable plastic spoons.
Project type: children's, short-term
Project participants: teacher, senior children, parents of students.
Relevance of the topic:
The most popular and exciting area in preschool education is theatrical activities. From the point of view of pedagogical attractiveness, we can talk about the versatility, playful nature and social orientation, as well as the correctional capabilities of the theater.
It is theatrical activities that make it possible to solve many pedagogical problems related to the formation of the expressiveness of a child’s speech, intellectual and artistic-aesthetic education. By participating in theatrical games, children become participants in various events from the lives of people, animals, and plants, which gives them the opportunity to better understand the world around them. At the same time, theatrical play instills in the child a sustainable interest in his native culture, literature, and theater.
The educational value of theatrical games is also enormous. Children develop a respectful attitude towards each other. They learn the joy associated with overcoming communication difficulties and self-doubt. Children’s enthusiasm for theatrical play, their inner comfort, relaxedness, easy, non-authoritarian communication between an adult and a child, the “I can’t do it” complex disappears almost immediately - all this surprises and attracts.
Fairy tales serve as the first lesson for children about morality and ethics by which people live. This sets the child up for an optimistic perception of life, develops positive character traits and social behavior skills. Work on the theatricalization of a fairy tale contributes to the development and correction of all mental cognitive processes. Learning the words of a fairy tale helps develop memory, expand vocabulary, automate sound pronunciation, and expressiveness of speech. Thus, work on the theatricalization of fairy tales contributes not only to the replenishment of knowledge and skills, but is a means of developing general gaming skills, speech, personal qualities of the child, and his adequate behavior in various situations.
Goal: to prepare the necessary equipment and material for the staging of the Russian folk tale “Teremok”
- To promote the development of dialogic and monologue speech, to develop the ability to pronounce words clearly and clearly, and to develop intonation expressiveness. Develop the ability to imitate the characteristic actions of characters. Involve parents in family reading of Russian folk tales and help in the creation of characters and attributes for fairy tales.
Project implementation stages.
Preparatory stage.
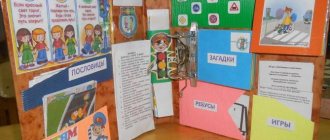
- Exhibition of books of Russian folk tales in the book center. Selection of visual teaching aids and illustrations for fairy tales. Acquisition of the necessary equipment and material for the creation of the Russian folk tale “Teremok”.
Main stage.
- Reading a fairy tale with parents at home and with the teacher in kindergarten. Listening to a fairy tale in an audio recording; viewing . Retelling a fairy tale using a tabletop theater Manual labor - making fairy tale characters with children and parents from scrap material (plastic spoons)
The final stage.
- Showing the Russian folk tale “Teremok” for children of other groups. Conversation with children (What happened? What did you like? etc.) Conversations with parents and their feedback on the children’s show of the staged puppet fairy tale “Teremok”
“Development of event content with parents”
Master class “Do-it-yourself spoon theater”
Form of delivery: master class.
Audience: middle school parents.
1. Increase the pedagogical competence of parents in matters of education and development of preschool children.
2. To develop skills of interaction with a child at different stages of his development.
3. Contribute to increasing the effectiveness of interaction between parents and preschool educational institutions.
4. To form parents’ ideas about the importance of theatrical activities for comprehensive education.
5. Learn to make riding dolls from spoons.
Expected results:
Increasing the pedagogical competence of parents in matters of education and development of preschool children.
Formation of skills to interact with a child at different stages of his development.
Increasing the effectiveness of interaction between parents and preschool educational institutions.
Formation of parents' ideas about the importance of theatrical activities for the comprehensive development of the child.
Making riding dolls from spoons for the fairy tale “Zayushkina’s hut.”
Information and technical support: projector, tape recorder.
Materials and equipment: 7 unpainted wooden spoons; acrylic paints; brushes; textile; braid; pieces of fur; animal caps for the dramatization of the fairy tale “Teremok”; puppets for different types of theater.
Logic of implementation.
1. Game with a parachute “Dash”.
Goal: promote group cohesion. (Annex 1) .
2. Message from the teacher “The importance of theatrical activities for the comprehensive development of the child.”
Goal: to form parents’ ideas about the importance of theatrical activities for the comprehensive development of the child.
(Appendix 2) .
3. Survey of parents “What types of theater do you know?”
(Appendix 3) .
4. Message from the music director “Types of theater in kindergarten” followed by a show of puppets.
Goal: to introduce parents to the types of puppet theater in kindergarten. (Appendix 4) .
5. Master class on making dolls from wooden spoons.
Goal: learn to make riding dolls from spoons. (Appendix 5) .
6. Parents dramatize the fairy tale “Teremok” with musical accompaniment.
7. Summing up. Final message from the teacher.
(Appendix 6) .
Annex 1.
Game with a parachute "Dash".
Goal: promote group cohesion.
Progress of the game: parents stand holding the colored sector. They raise and lower the parachute with the words: “We’re tired of standing, we need to run across!” »
At the leader’s signal: “1, 2, 3 – blue (any other color) run! "- those who stand in the sector of the named color run across under a parachute and change places.
Appendix 2.
The importance of theatrical activities for the comprehensive development of a child.
In modern society, the social prestige of intelligence and scientific knowledge has increased. Associated with this is the desire to give children knowledge, teach them to read, write and count, but little attention is paid to the ability to feel, think and create.
In addition, recently children have been fascinated by computers and other newfangled toys, with which parents are trying to replace their peers, protecting the child from troubles, from “bad influences”; adults are also trying to fill the lack of children’s community, help and participation of adults in the development of the child, Without this, full mental and emotional development of the individual is impossible.
The shortest path to a child’s emotional liberation, relief from constriction in learning, feeling and artistic imagination is the path through play, fantasy, and writing.
The solution to these problems is theatrical activity.
The importance of theatrical activities in the development of a child can hardly be overestimated, since theatrical art occupies a special position among other types of arts due to the possibility of a direct emotional impact on a person.
According to researchers (, and others, theatrical activities allow solving many pedagogical problems, especially speech, intellectual, artistic and aesthetic development and education of children; it is an inexhaustible source of development of emotions and feelings, a means of introducing a child to spiritual values, and performs a psychotherapeutic function .
Theatrical activity, being a type of game, is initially synthetic in nature: it is a literary text and the sounding word, the plasticity and actions of the actor, his costume and the visual space of the stage (light, color, music, etc.).
Thus, children's theater allows the teacher to solve problems not only of an executive nature, but also cognitive, social, aesthetic, and speech.
Appendix 3.
Parent survey “What types of theater do you know?”
Goal: to identify parents’ ideas about types of theater.
What types of theaters do you know?
What types of puppet theater do you know?
Do you think it is possible to make theatrical puppets at home?
Appendix 4.
Types of theater in kindergarten.
Puppet theater is a magical world - one of the greatest models of Man and Humanity. Unlike drama theatre, where live people play instead of puppets, puppet theater is more durable. Its actors are capable of living for many centuries, and any museum doll, guided by the hand of an experienced puppeteer, at any moment is capable of coming to life and playing in front of us the same puppet comedy that was admired by the audience - kings, artisans, nobles, merchants, hired soldiers - and a hundred and two hundred and four hundred years ago.
There are several classifications of puppet theater games for preschool children:
tabletop puppet theater: theater on a flat picture, on circles, magnetic tabletop, cone, toy theater. (The music director tells an excerpt from the fairy tale “Turnip” using a cone theater).
stand theater: flannelgraph, shadow, magnetic stand, stand-book. (The music director tells an excerpt from the fairy tale “The Tale of the Stupid Mouse” using a flannelgraph).
theater on the hand: finger, pictures on the hand, mitten, glove, shadow. (The music director tells the nursery rhyme “Cockerel, cockerel” using a cockerel mitten).
floor dolls: marionettes, cone theater.
living puppet theater: theater with “living puppets”, life-size puppets, human puppets, mask theater, Tanta Moreschi. (The music director recites A. Barto’s poem “I Love My Horse” using a life-size puppet - a girl).
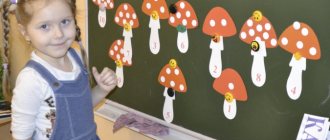
riding dolls: on gapit, on spoons, bibabo, cane. (The music director tells an excerpt from the fairy tale “Zayushkina’s Hut” using a doll on a spoon).
Appendix 5.
Stages of making dolls from wooden spoons.
1. On the outside of the spoon, draw a person’s face or an animal’s muzzle.
2. Decorate with braid, pieces of fur, and ribbons.
3. Sew a skirt out of fabric and put it on a spoon.
4. Tie the skirt tightly at the “neck” of the spoon.
Appendix 6.
Final message from the teacher.
Dear parents! Today you learned about the importance of theatrical activities for the comprehensive development of a child, got acquainted with types of theater that can be used in joint games with children, and also learned how to make dolls from spoons yourself, and tried yourself as an actor.
We hope that all this will help you spend time together in an interesting and beneficial way for your child’s development.
After all, with the help of playing theatrical games together, you can easily and naturally form the correct model of behavior in the modern world, improve the child’s general culture, introduce him to music, fine arts, etiquette rules, rituals, and traditions. Then the love for the theater will not only become a vivid childhood memory, but will also remain a feeling of celebration from the time spent with you in the unusual magical world of the theater.
We wish you good luck!
Theater! How much he means to a child’s heart, how impatiently children look forward to meeting him! The art of puppet theater is folk in nature.
Dolls can do everything or almost everything. They work wonders: they entertain, teach, develop the creative abilities of preschoolers, and correct their behavior. Children are happy to join in the game: answer the dolls’ questions, fulfill their requests, give advice, and transform into one image or another. They laugh and cry along with the dolls, warn them about dangers, and are always ready to help their heroes. How can you make the joy of communicating with them become daily? We need to create a puppet theater in kindergarten and at home! Children are introduced to puppet theater from the 1st junior group. Educators and older preschoolers show small performances to children, using various types of theaters for this purpose: the well-known picture theater (flannelgraph, parsley theater, in which glove puppets are occupied. With great pleasure, children watch the figures moving on a brightly lit screen. The shadow theater is riveting their attention, develops the ability to concentrate. Theater on the table is the simplest and most accessible theater for all ages of children. The torso of the dolls is made in the form of a cone, to which the doll's head and arms are attached.
By the end of the year, children of the 1st junior group, having accumulated some experience, try to independently participate in a puppet show. This desire must be supported, developed and strengthened. A finger theater is suitable for this purpose.
Mitten dolls were born from ordinary knitted mittens. The imagination of teachers and children can turn the most ordinary mittens into animals and people. They are very easy to operate and are intended for very young children.
For children of the 2nd junior group, the simplest and most accessible theater is a puppet theater on a table. You can use different types: “disc” theater, three-dimensional toys made of cylinders and cones, boxes of different heights. Origami theatre, mug theatre, lollipop theatre, kinder theatre, washcloth theatre, magnet theatre. Glove puppets are very mobile and expressive. Glove puppets can be used as funny assistants in kindergarten classes. Bibabo dolls usually operate on a screen behind which the driver is hidden.
In the middle group we move on to more complex theater. We introduce children to theater screens and cane puppets. These dolls are larger than glove dolls (head size can be up to 20 cm). This doll is raised above the screen with the help of a rod inserted inside, which is called a "gapit". Canes are attached to the doll's hands - sticks, which the puppeteer moves. But before staging a play with these dolls, you need to give children the opportunity to play with them. The Spoon Theater, being a simplified version of the performance with the participation of riding puppets, helps children master puppeteering techniques.
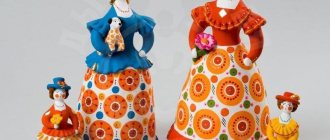
My dolls turned out to be very cute, strong and attractive.
Materials:
A set of spoons, cardboard, any fabric, woolen threads, felt or other material, ribbons and eyes.
Preparation method:
Hair. We use wool threads to make pompoms. They are instantly glued with glue to the inside of the spoon. Thread colors can be completely different. For the grandfather doll, we used a ready-made pompom and a dress from a New Year's hat.
Cloth. It’s better, of course, to sew a dress - a felt cone, then you won’t have to hem it. But you can also use other fabrics, preferably dense, to keep their shape.
We sew the cone together and make a cut in the upper part, just below the corner. We insert a spoon into the cut and tie it tightly with a ribbon, maybe with a bow.
Eyes. You can draw eyes on the spoon, stick on ready-made running eyes, or make them.
In my case, it turned out to be such a bright royal family.
Have you ever eavesdropped on children playing? If yes, then you know that children are amazingly artistic creatures. Mom’s and dad’s intonations are easily distinguishable, scenes from everyday life are recognizable... Transformation is a child’s second nature. He tries on different roles and plays them brilliantly. Inspire a young actor to experiment creatively and give him a puppet theater!
As always, we will use available materials, and the little artist himself will participate in the creation of his own theater.
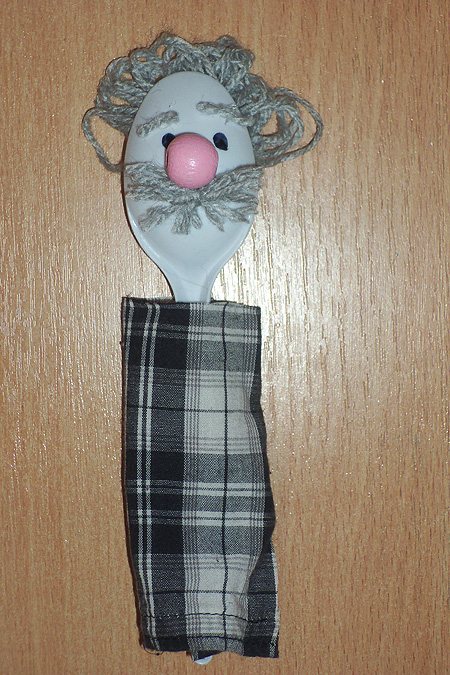
Dolls made from... spoons
Bright and unusual theatrical dolls can be made from disposable spoons in half an hour. By the way, such toys are an ancient tradition; our ancestors painted and even decorated wooden spoons.
You can choose a fairy tale to make a doll set especially for. For example, the fairy tale “Turnip”.
You will need:
Disposable spoons (10-20 pieces); hot gun and glue; scissors; markers; yarn of different colors; accessories (buttons, beads, small parts).
First you need to think through the details for each doll.
For grandfather, for example, you can use gray yarn to make hair, eyebrows and mustaches, a large bead for the nose, dark fabric for clothes. You can simply draw the eyes with a marker or glue store-bought ones.
To make doll hair, wind the threads around two fingers, remove the skein and tie it in the middle with thread of the same color. Cut the loops, trim the ends. Apply hot glue to the back (in this case concave) side of the spoon and glue on a bunch of threads. We also glue on the mustache and nose.
Grandfather has a double body - a second spoon is glued to the base spoon, masking the underside. To do this, drop glue onto the top of the cutting and connect the parts.
Wrap a piece of fabric around the handle of the spoon so that it sits loosely (to add volume to the body). Tie fabric clothing, disguise this place with decorative tape.
To make a hairstyle for your grandmother, you need to wind a thread around your palm, make two bunches, and glue them on the concave side of the spoon on the sides (attachment points are marked with black dots). After the glue has hardened, lift the strands up and tie them in the form of a bun. We wrap long strands around the bun and secure with thread of the same color. (Since the grandmother’s hairstyle is voluminous, the second spoon (the back part) may protrude and lie sloppily.)
A turnip can be made from a spoon and from half a Kinder Surprise box. First you need to cut an oval piece of fabric of such a size that it can easily decorate the front part, and still be enough to overlap the back part and secure it. The fabric is attached from the back (concave) side with hot glue. After all, the turnip head is attached to the spoon.
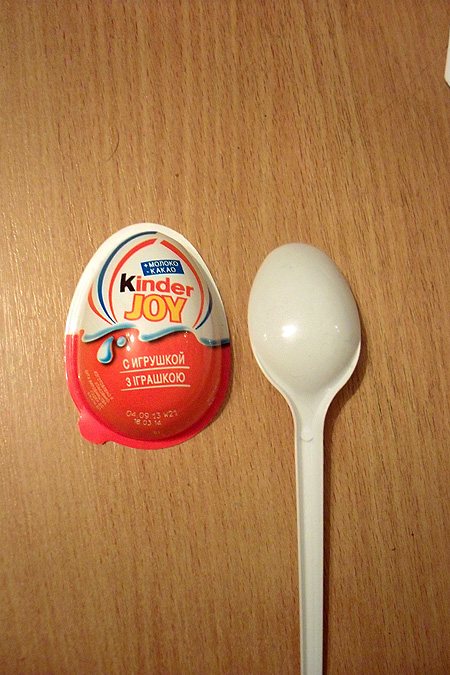
The turnip may have eyes, a mouth painted with red varnish, and on the top of the turnip’s head there may be a bun decorated with a ribbon.

You can give your granddaughter a more “free” hairstyle, and make the dog’s ears and tongue from the remains of a rubber glove or pieces of fabric.
Cone finger puppets
These dolls are relatively fragile - they cannot be crushed, and their strength is not the same. But cone dolls are very funny and dynamic, because wolves and bears sit right on the tips of children's fingers.
You will need:
Colored paper; PVA glue; scissors.
You can also choose which fairy tale heroes to make. For example, “Teremka”: a mouse, a frog, a hare, a fox, a wolf and a mischievous bear.
Cut a circle with a diameter of 13 cm into 4 equal parts. One of these quarters will be the template for the base of the toy. The rest is a different set of details for each character.
The workpiece must be rolled up and glued.
Glue the remaining parts - ears, eyes, whiskers, paws, tails, etc. to the finished body. You can curl your mustache using a pencil or using a scissor blade.
Functional crafts made from plastic spoons
Crafts from plastic bottle caps, buckets, sour cream
Surprisingly, from such a seemingly trifle as disposable spoons, you can create many useful and functional items for the home. For example, a mirror, a candlestick or a lamp.
Beautiful and unobtrusive light sources will never be superfluous in the house. An unusual lamp made from disposable spoons, made by yourself, will be of particular value.
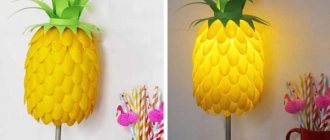
One of these options is a pineapple lamp, which can be made in the company of children.
Craft materials
For the “pineapple” from plastic spoons you will need to prepare:
- A small oval-shaped lamp;
- 125 white plastic spoons;
- Wide plastic bottle;
- Glue gun;
- Yellow acrylic paint;
- Stationery or kitchen knife;
- Green cardboard.
Before you start making crafts, it is better to free up more work space.
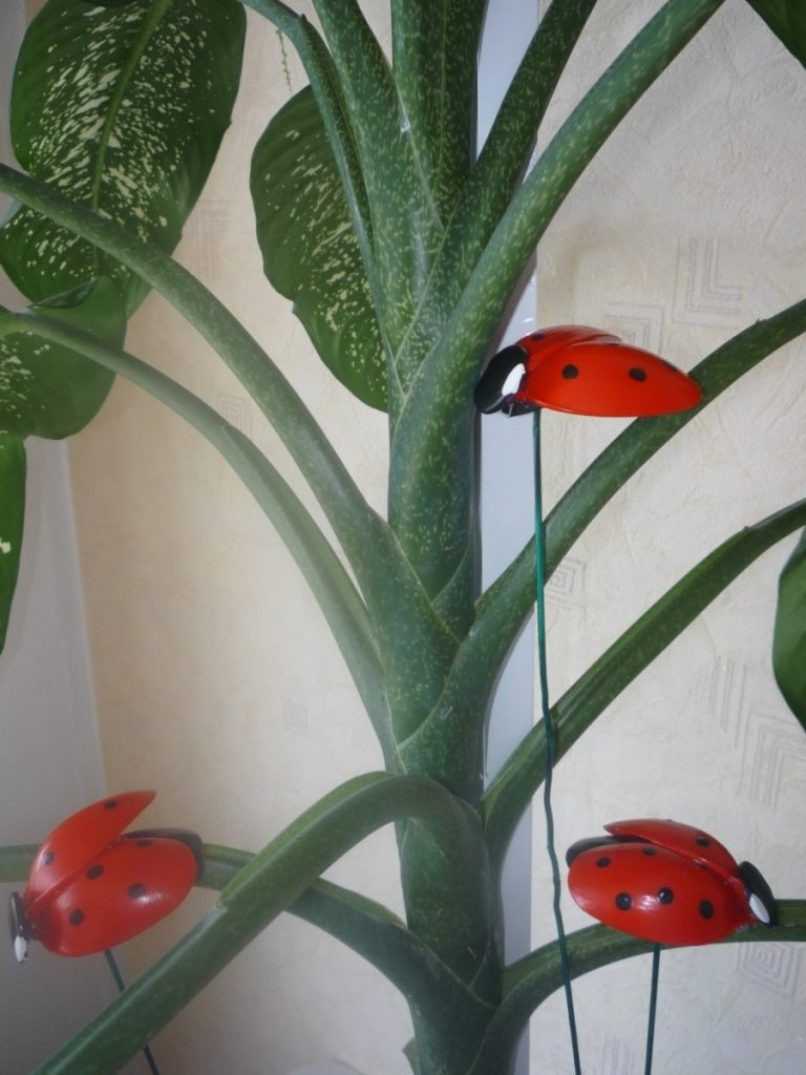
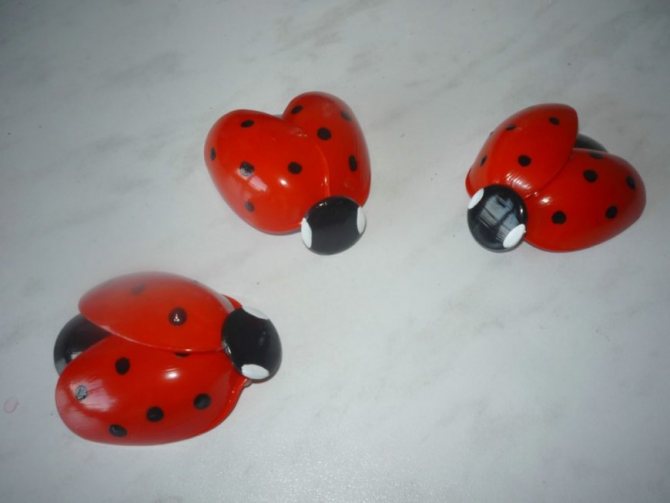
Ladybug
What is needed: plastic spoons (3 pieces per ladybug), paints (white, black, red), plastic bottle caps (1 piece per craft), glue, scissors.
How to do:
- We paint the spoons (everything except the handles): one with black paint, two with red. Apply black dots to the red spoons:
- cut off the handles;
- we paint the bottle cap with black paint and draw eyes on it;
- Glue the wings onto a black spoon - red spoons, and glue the head - a prepared bottle cap - to the resulting structure.
As you can see, you can make many different beautiful crafts from the most ordinary disposable spoons. Take time for this activity and give free rein to your imagination - and your interior will noticeably transform.
Lily from plastic spoons: instructions for beginners
You can make an original craft in literally half an hour using the proposed master class.
To work you need to prepare the following:
- disposable plastic spoons;
- scissors;
- a sheet of green cardboard (for the base);
- glue gun;
- cocktail straws;
- yellow paint.
Progress
- First prepare the base on which the flower will be attached. You can cut out a water lily leaf from green cardboard, or you can simply paint an old disk with green paint.
- Take the spoons and use scissors to cut off the handles. The handles can be broken off, but there is a risk of injury to your hands. Therefore, if you decide to get rid of handles by breaking them off, then to avoid injuring your hands, wear regular gloves.
- Take 3 spoons and glue them at the base, pressing them together as tightly as possible.
- Glue 4 spoons around the resulting part from below.
- In the next row, increase the number of petals by 1-2 pieces. There should be a total of 5 rows of petals.
- Take 3 cocktail tubes, paint a section equal to 3-4 cm on top with yellow paint. After the paint has dried, cut off the painted part and glue it in the middle of the flower in place of the stamens.
Advice! Cotton swabs would also look good as stamens. First, dip one end of the stick in yellow paint, then cut it to the desired length and attach it to the middle of the bud.
- Glue the finished flower to the base. You can glue a figurine of a ladybug or a butterfly onto a water lily leaf as decoration.
The charming flower is ready! This craft can be placed on a table or hung on the wall, after making a small loop at the back.
A few final ways
A disposable product opens up new boundaries for creativity and creation. Plastic forks and spoons can be used as hangers, hooks or coasters. Crafts from such material can be made in two ways. The first method is based on the use of glue.
As a result, you can get a fan or an umbrella. Another method is to heat the feedstock. This way you can make flowers or a Christmas tree. These are unique New Year's crafts made from forks. The integrated use of different types of disposable tableware makes it possible to create complex designs.
Kitchen utensil masterpieces pave the way for unleashing creativity. The main component of success is improvisation and the desire to move forward. There are many video lessons and master classes on similar topics. Crafts made from disposable forks deserve special attention.
Lamp
Another craft with practical application is a lamp. It is convenient to use a plastic bottle with a volume of 5-10 liters as a frame for the craft. In total you will need about 110-130 spoons.
Manufacturing procedure:
- The top part of the eggplant is cut off. The conical section and the cylindrical part, if necessary, are completely preserved.
- Holes are made in the lid of the eggplant for the wire and fastening of the cartridge.
- The handles of the spoons are removed.
- Gluing the spoons begins from the top, from the point where the threaded part transitions into the cone. The elements are laid in a circle, in tiers with a gap of 5-10 mm.
- The placement of spoons in the shape of a lampshade is carried out similarly to the placement when forming a vase.
In the final version, you can use staining. In this case, the lamp can be monochromatic or with inserts of a different color.
New Year's crafts
When preparing for the New Year celebration, it is worth showing special imagination. You can make various crafts from plastic spoons for this joyful event:
- Christmas tree. The easiest way to make it is to use a frame in the form of a cardboard cone. Spoons freed from handles are glued to it, starting from the bottom. Each subsequent row is overlapped. A more complex option is to make several cones with a gradual decrease in their diameter as the height increases. Essentially, a cardboard frame forms a stepped Christmas tree, and spoons glued on top imitate pine needles. Confetti, sparkles, and “rain” will provide decorations for the Christmas tree.
- Snowmen for kids. A clay pot or plastic glass is used as the base for the craft. It is given a New Year's look (blue color, snowflakes). A snowman's face is drawn on the spoon. A scarf made of a felt strip 1-1.5 cm wide and 4-6 cm long is placed on his “neck”. A hat (triangular or round) is also made from felt. Snowman spoons are installed in a base, inside which pieces of foam plastic or cotton wool (imitation snow) are placed.
On top you can put additional gifts for the child - candy, cookies, and other sweets.
Christmas tree decorations provide a large area for activity. The photo shows Santa Claus for the New Year tree. The face is drawn on the scoop. The handle is carefully wrapped with red ribbon. For convex elements, you can use paper and cardboard.
Using your imagination, patience and a little skill, unusual crafts can be made from disposable plastic spoons. The manufacturing process is not very complicated and is accessible even to children
It is important to choose an idea you like and implement it successfully
(Visited 13 times, 1 visits today)
Master Class
Preparing the foundation
Manufacturing stages:
— Take a jar of cream - this will be a vase for snowdrops (photo 1)
.
— Cover the jar with double-sided tape (photo 2)
.
— To make the jar look original, decorate it with woolen threads. Wind twisted white and blue wool threads around it. And on the top and lid of the jar (it will serve as a stand), wind twisted white and brown threads (photo 3, 4)
.
- Make a round cake from plasticine (2-3 cm thick). Place it on the bottom of the jar and press down. With the help of a cake, the snowdrops will stay firmly in the jar (photo 5).
- The vase is ready! Well, let's start making snowdrops! To do this, take disposable plastic white spoons and scissors (photo 6,7)
.
Making snowdrops from spoons
— Cut off the handles of the spoons to make petals (photo 8)
.
- Using green plasticine, mold a receptacle (the base for the flower). Mold it in the shape of a cone (height 2 cm) (photo 9)
— Make a flower pestle by mixing yellow and white plasticine. Attach it to the receptacle (photo 10, 11)
.
— Plant 3 petals from spoons one by one (photo 12)
. Make as many of these flowers as you wish. (I have 7 of them.)
— Make the flower stem from cocktail tubes (green) (photo 13)
. If the tubes are transparent, then roll green colored paper into a thin roll and insert it into the tube.
- Connect the parts: the stem (tubes) with the plasticine base of the flower (photo 14).
— To make the bouquet lush and beautiful, it is best to make flowers of different heights (for this we cut the tubes) (photo 15)
.
— Place the flowers in the plasticine base of the vase. Cut out narrow long leaves from green cardboard (photo 16).
Glue them carefully to the snowdrop stems.
The bouquet of snowdrops is ready!
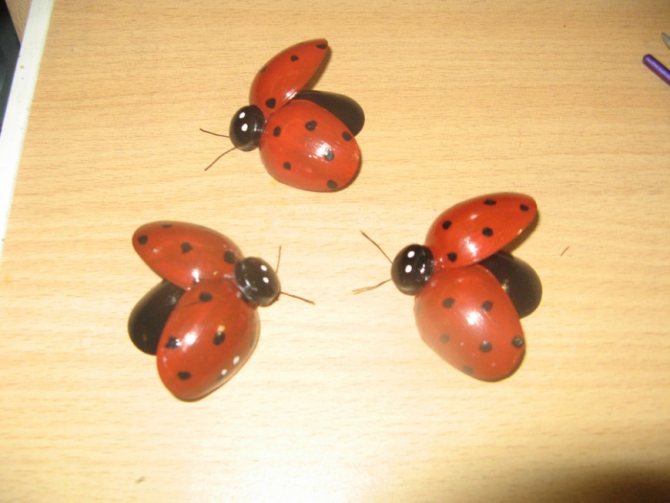
Steps for creating ladybugs from disposable spoons
Performing such crafts will certainly be very interesting for children, but some manipulations can only be done with adults.
- All spoons need to have their handles cut off, but it is best to do this after the spoons have been painted and the paint has dried.
- One spoon should be painted black, and two should be painted red. For red spoons you need to add black dots.
- To create the “head” of a ladybug, you need to put 2 white dots on the lid or button.
- We glue the “insect” - two red spoons are glued onto a black spoon in an A-shape - the “wings” of a ladybug.
- Glue a button or lid to the base of the structure. And here we have the cutest craft, which will take no more than 10 minutes to make.
Any craft made from plastic spoons is always attractive for its simplicity and at the same time beauty. No special tools are required for production, and almost every craft can be completed even by the youngest inventors.
You can absolutely not limit your imagination and go beyond the master classes you study, creating unique products. In addition, such crafts can be incredibly useful in everyday life, which makes them especially valuable.

https://youtube.com/watch?v=hMNGw4PaAUs
https://youtube.com/watch?v=VJS1rjKZMxw
Source
Interior decoration
To make these decorations look better, you need to purchase colored devices or paint them only with spray paint. This way there won’t be streaks left on the spoons from the brush. Below are described in detail 2 options that are easy to implement.
Sunflower mirror
This craft is suitable for decorating a kitchen, bathroom or nursery.
What materials and tools are needed:
- small round mirror (10-15 cm in diameter);
- thick cardboard (a box from under household appliances will do);
- pencil;
- scissors;
- glue gun;
- glue Moment;
- yellow and black spray paint;
- 80 white spoons or 16 black and 64 yellow;
- screwdriver.
Step-by-step instruction:
- Draw 2 circles on cardboard: 25-30 cm in diameter and 5-7 cm in diameter. Cut circles with scissors. Determine the center of the large circle and glue the small one to this place, then find the center of the small circle and glue the mirror evenly.
- Paint 16 spoons black and the rest yellow. If the dishes are already painted, then simply cut off all the handles under the base.
- With the concave side up, the black petals need to be glued to the cardboard with a glue gun so that the bases of the spoons fit into the gap under the mirror, which was formed due to the small cardboard circle.
- Glue all the yellow spoons in a circle in a checkerboard pattern so that they cover the gaps between the petals in the previous rows. The bases of each of them should not be visible.
To hang a mirror on the wall, you need to make a hole on the back side with a screwdriver, closer to the center. The cardboard is thicker in this area due to the small circle. Now you can “stick” the mirror onto the nail.
Clock for the kitchen or cafe
For this craft, disposable utensils do not need to be cut or deformed. It is the original shapes that will help you create a kitchen-themed watch.
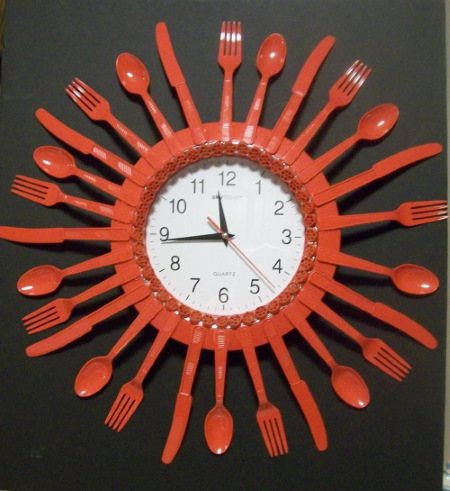
What you will need:
- a small round watch with a flat frame around the dial;
- A4 office paper;
- compass;
- pencil;
- scissors;
- 10 disposable forks, 10 knives and 10 spoons;
- glue gun;
- a handful of small pasta in the shape of a wheel;
- spray paint.
How to design a watch:
- First of all, you need to protect the dial glass from glue and paint. Using a compass on paper, draw a circle equal to the diameter of the glass. Cut out and apply to the dial.
- Glue cutlery to the frame in a circle, alternating them (fork, knife, spoon).
- Glue the pasta in a circle, separating the handles of the cutlery from the glass.
- Hold a piece of paper and spray paint onto the clock.
It is important that all parts are well coated with paint, so 2 cans may be required
Fan of forks
This fan is suitable for decorating a room in an oriental style or for performances and masquerades.
What materials and tools are needed for work:
- 23 plastic forks;
- hot glue;
- thick cardboard;
- acrylic paint;
- wide artistic brush;
- marker or pencil;
- scissors;
- 45 medium size beads;
- satin ribbon 1 cm wide, 1.5 m long;
- 1.5 m of lace ribbon or ruffle of different colors.
How to make a fan:
- Cut out 2 rectangular blanks with sides 10x15 cm from cardboard. Draw a semicircle on each of them. For convenience, you can use a small saucer. It needs to be attached to the cardboard and circled with a pencil.
- Cut out the blanks and paint each one with acrylic paint on one side. Let dry.
On the unpainted side inside 1 semicircle, draw another, 1.5 cm away from the edge. No need to cut. This line will help glue the forks evenly to the cardboard. Using a glue gun, glue all the devices to the cardboard with the teeth facing up.
It is important that the end of each handle does not extend beyond the mark. When the entire workpiece is filled, you will need to hide the ends of the forks
To do this, you need to apply glue to the 2nd workpiece and place it evenly on top. Take the ribbon and thread it between the forks like a snake. There should be 1 cm ends left on each side. They should be folded and carefully glued. From above, between the teeth, thread lace or ruffles in a similar way. Apply glue to the teeth that remain visible from the front side and carefully place the beads. Thread a ruffle or lace of a different color between the forks, on top of the ribbon, in a checkerboard pattern. That is, this strip should cover those parts of the handles that remained open when the tape was threaded. Cut off the excess and glue the ends. By analogy, from above, thread 1 more piece of satin ribbon and secure the ends.
The fan made from plastic forks is ready. From the remnants of the satin ribbon, you can twist small roses and glue them to the cardboard along the edge.