Theater is a magical world, which is based on an action that is understandable and close to children, such as a game. The sooner a child gets acquainted with the theatrical art, which can quietly teach and develop, the richer his emotions will be.
You can bring a child to the theater for the first time at the age of 2-3 years. And then make interesting crafts on the theme of “theater” and play at home or in kindergarten. All kids like theatrical play.
Important! Schoolchildren will be able to better understand what they saw during the performance if after the performance they make a craft with their own hands and try to reflect their experiences in it.
Choosing a piece
You will need to decide in advance on the characters of your theatrical production in order to find suitable templates for the paper finger theater. Most often, for the very first children's productions, teachers and psychologists advise taking simple, long- familiar fairy tales and stories. On the Internet you can often find templates for finger theater made of paper for such fairy tales as Turnip, Teremok, Kolobok, Masha and the Bear, Three Little Pigs and so on /
When organizing a holiday for a child, it is important to take into account all the nuances. One of the main things is not only impressions, but also memories that need to be recorded. You can order lively and bright photographs from children's parties here at an affordable price. A team of professionals will capture all the brightest moments and convey the most vivid emotions in the photographs.
In any case, you should take for the game a work or story from a book that is familiar to your child. Perhaps you have even been to a real puppet theater, have already seen some kind of play, and the child liked the plot.
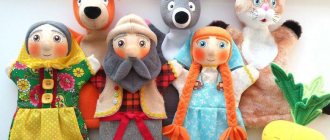
Felt finger puppets
Here we will talk about felt crafts for elementary school on the theme of theater. This dense material will allow you to create many detailed and at the same time simple dolls. They are usually the right size for a finger theater.
To make them you will need:
- Felt in several colors
- Threads, needle,
- Scissors,
- Glue,
- Paper and cardboard.
Tabletop theater at home
So, what should you choose for home education and development for children from one to three years old? Of course, any activity at this age should be based on play .
Do you have an active child and dream of a quiet activity together? Then a tabletop theater can help you! It turns out that making it with your own hands is not so difficult. A puppet theater for kids can be made from many materials. The most difficult and labor-intensive option is to sew dolls or cut out figures from wood. The simplest and most suitable for a busy mother is to print from paper or cardboard at home.
Where to start if you want to make a paper theater for your child with your own hands? First of all, prepare your materials. You will definitely need:
- color printer;
- thickened paper or cardboard;
- scissors;
- glue;
- scotch;
- templates for crafts in electronic form or your own drawing.
Second way
As a base for the characters' bodies, either homemade paper tubes or ready-made paper towels or toilet paper are used.
Depending on whether the doll will fit on your hand or on your finger, the size itself is selected. The scene is also made out of the box, as in the previous version.
This craft can be made for kindergarten or for some event.
The first do-it-yourself puppet theater - printable templates
Traditional fabric dolls are more difficult to care for and are not suitable for all children. But any child can handle paper products. Place a cone with a picture on the finger, suitable for each child.
It is advisable to introduce the little ones to simpler fairy tales:
- Teremok.
- Kolobok.
- Chicken Ryaba.
- Turnip.
We will need:
- scissors;
- Printer;
- PVA glue.
All templates must be printed, cut out and connected together. Fairy tale “Teremok”.
An audio tale will make the task of voicing paper characters easier. You will only need to carry out what you hear.
Scene selection
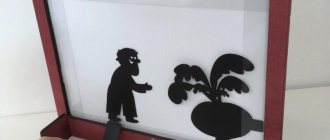
The best place to start is with folk tales. They have a simple plot and not many characters. By the way, in China, where shadow theater comes from, up to a thousand figures could be used during one performance.
Before giving a performance, you need to understand the mystery of shadow theater. For example, in order for a doll to disappear unnoticed (or suddenly appear), you need to turn it with its edge towards the screen and remove it.
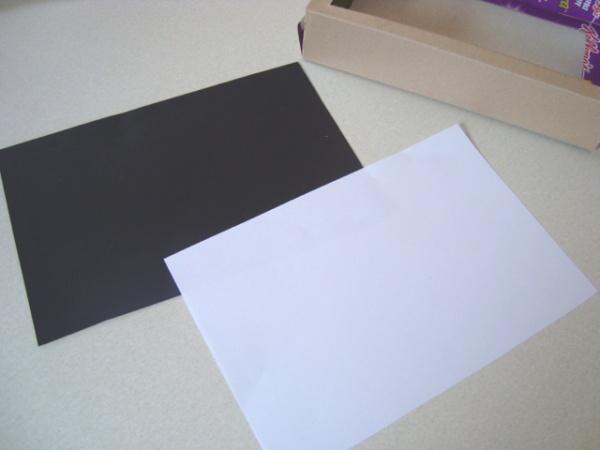
Before giving a performance, you need to learn the secrets of shadow theater. For example, in order for a doll or decoration to disappear unnoticed (or suddenly appear), you need to turn it edge-on towards the screen and move it.
So that the audience does not languish while waiting for the “actors,” the dolls must be arranged in order in advance. When creating a theater on sticks with your own hands using a template, it is worth adding additional effects - sound. You just need to choose the right music. And if you move the light source, you can depict bad weather, a storm or snowfall.
Shadow theater has not changed much since ancient times. The lighting setup and use of silhouettes are exactly the same. But now for home performances it is much easier to find and print the necessary stencils. And in the past, dolls were created by masters who worked on the figures down to the nuances.

Table theater for senior group
When a child is well versed in the plots of longer fairy tales like “The Three Little Pigs,” it is worth expanding the supply of theater sets.
The “Three Little Pigs” finger toys will surely be loved by little ones due to their bright design and ease of use. The set also comes with a script that will serve as a cheat sheet for older children.
The Masha and the Bear walker will save time on making additional decorations.
The Puss in Boots set comes with a script and the figures are reversible. This bright set will be a delight for your child or a great gift for friends.

For any paper puppet theater it is necessary to make a stage. For the finger version you will need a tall structure, which is easiest to make from an ordinary cardboard box. Make the design foldable, then it will be convenient to store.
A low stage is suitable for flat figures. It is best to store paper puppet theater kits in one place. A large plastic or cardboard box with a lid, divided into several sections, will greatly facilitate the storage and use of the figures. Such a “chest” is not convenient for everyone.
Replace it with a flat “case”. However, you won’t find a ready-made option; you’ll have to tinker with the cardboard yourself. But the result will be a convenient case that can easily fit under a bed, sofa, or in the gap between the closet and the wall. Cover it with self-adhesive paper or similar material, then it will not get too dirty.
Cardboard theater
An ordinary cardboard shoe box will become magical if you decorate it with fabric, secure it in the form of a curtain, and place a picture based on the plot of a fairy tale on the backdrop. You can make the decorations yourself: print or draw a chair, a chair, a table, a magic castle or a hut.
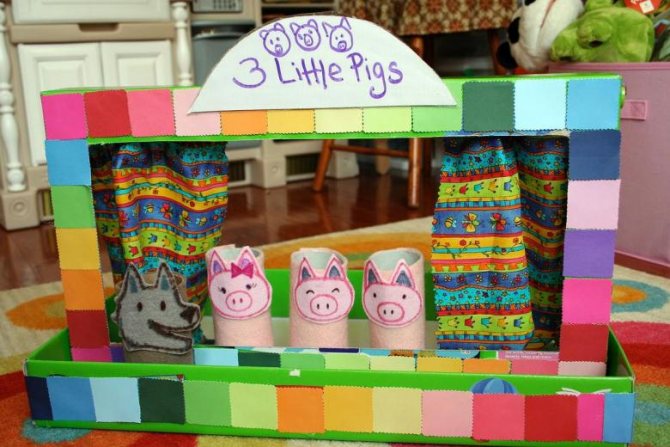
Cut a hole in the bottom of the box and attach ribbon to the side walls. Such a theater can be hung on your neck, then it will be very convenient to show scenes from figures attached to wooden skewers.
The characters are simply cut out of paper, and the manufacturing process itself is an act of improvised theater. The child can try himself as a costume designer and artist, choosing characters and scenery or a director, changing the plot at will.
Make little characters to put on your fingers. This is a very fun activity for a child.
Paper figures
Just make heroes out of cardboard. You can use colored paper. You can choose any product sizes. Kids will love creating a paper puppet theater with their own hands.
If a fairy-tale hero breaks, it’s easy to replace it with a new one. You will need special templates that need to be cut out. Two parts of one character are glued together.
Dolls
Fairy tale characters are made from a variety of materials. It is possible to focus on finger puppets or make individual figures. Doing this activity will help develop the baby’s speech and imagination.
It is not difficult to make such products. Do-it-yourself patterns for dolls for the puppet theater. A fairy tale is pre-selected, and then you need to think about how to make the main characters.
For one doll, two blanks are cut out and sewn together. Then they are decorated. If it is planned that the finger characters will be worn by a child, they should be made in the appropriate sizes.

Plastic spoons
Dolls are often made from various available materials. It’s easy to make figures from plastic spoons. To do this, draw eyes, a mouth and a nose on the convex part.

If a female character is needed, then the spoon is wrapped in cloth and a belt is selected for it. For a male character, you can use a tie or bow tie. Hair and hat are made of paper. The parts are then glued to the base.
Paste
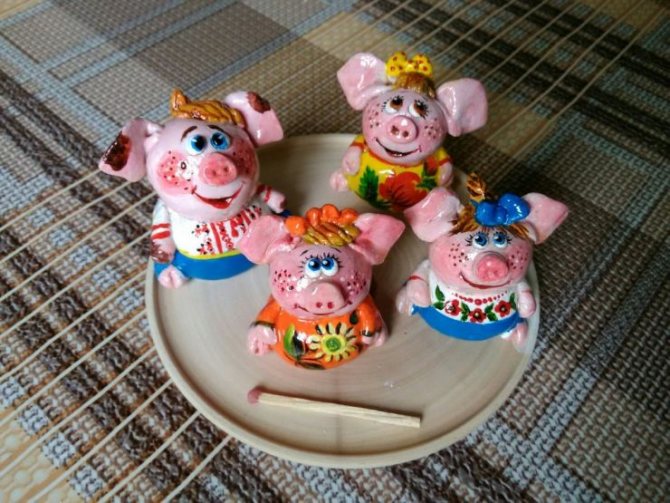
Special modeling material is perfect for creating figures. It is replaced with ordinary plasticine, and salt dough is also made. Ordinary figurines and finger products are created from such materials.
It is difficult for a child to sculpt, so parents will need help. If the figurine is ready, you should wait for it to dry. Then you can start painting it.
Screen
Beautiful design will only evoke positive emotions in children. A do-it-yourself screen for a puppet theater is made from fabric, cardboard, boxes, and plywood. You can cover the hole under the table with a blanket.
The base is made of plywood, which will last a long time. Before starting work, a drawing is made and all dimensions are noted. Then you can cut out the workpiece.
All elements are covered with fabric; you can use wallpaper that was left after the renovation.
The parts are connected with door hinges to easily close the screen. The same method is used to make a cardboard product. The parts of the workpiece are sewn together.
Felt
Characters are made from any materials, but it is better to buy thick fabric. If the chosen option does not hold its shape, use doublerin.
The pattern is made according to the hand size of the person who will perform the performances for children. You can use mittens as a base. Be sure to allow seam allowances. The parts must be sewn by hand or by machine.
Now you need to make the head. Its size depends on the personal wishes of the master. Two circles are sewn together. The head is shaped using filler. Cotton wool and padding polyester are suitable for this.
The same pattern is used to make tails and paws for animals or pets. Now you need to draw a face, glue ears and hair. The eyes will become beads or buttons.
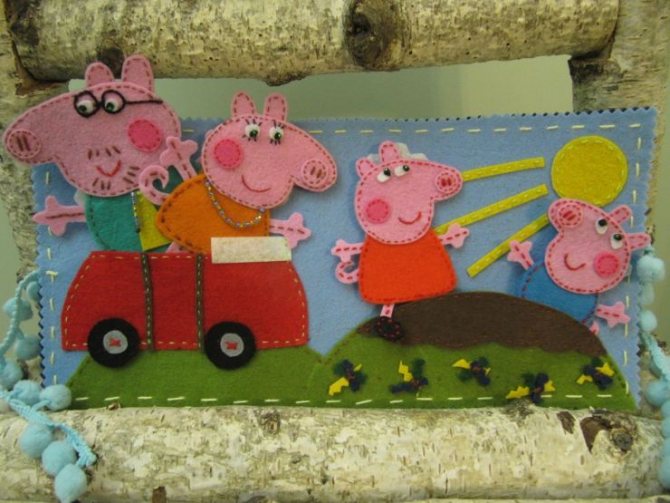
Felt doll
Will need
- Sketch of a puppet toy.
- Two sheets of felt, A4 size.
- Small pieces of colored felt.
- Thread and needle.
- Glue gun.
- A sheet of thin cardboard.
We start work by creating a pattern. To do this, draw the sketch onto a sheet of cardboard and cut it out. You will get the main pattern of the figure and individual small details: eyes, muzzle, palms, tummy, ears. The number of details depends on the choice of sketch of the puppet hero.
Then we transfer all the details onto felt. We select the color scheme according to our taste or the content of the fairy tale. The hare can be white, gray or pink, and the fox yellow or orange. If you are doing a craft with your child, let him choose what color the characters in your play will be.
We cut out the parts and pre-assemble the toy, placing all the parts in the places where they should be. If the result is satisfactory, we begin the final assembly. First, we make one main piece out of felt. We sew on all the parts that can be sewn. We sew with a buttonhole stitch. We glue small parts with a glue gun. We put all the parts together in accordance with the sketch.
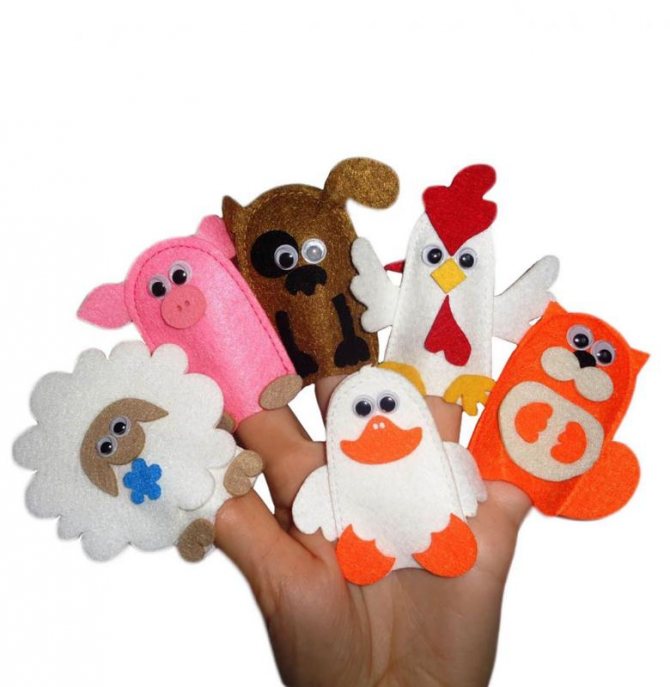
If the toy has ears, we attach them last. To do this, we fold the two main parts with the right sides facing inward. We apply the ears in such a way that the edges of the part coincide with the edges of other parts, and the tips of the ears look inward. We sew all the details along the edge with a buttonhole stitch and turn the toy inside out. The glove puppet is ready, and the ears will stick out funny on the top of the head.

Felt
This dense fabric is great for making finger puppet theaters. You will need:
- multi-colored felt;
- scissors, thread, needle;
- cardboard.
Felt dolls should be the size of a child's finger, so you need to attach the child's hand and trace it. Let the child draw the characters himself, mom or dad will just have to make a pattern from this, transfer it to felt and sew the parts. Elements of the dolls' faces or muzzles can be glued on.
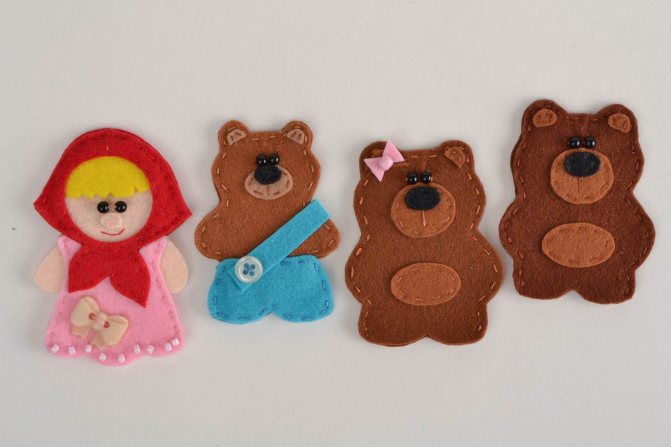
It’s easy to sew felt theater characters by watching the video with the master class.
The scenery for such a theater is made using felt sheets of A4 format.
Progress:
- Draw a pattern diagram of the scenery (forest, house, field).
- Cut out all the details and sew them onto the front side of the felt base sheet.
- Sew two sheets together on three sides: a base with decoration and a backing sheet of A4 felt without decorations.
- Insert a sheet of cardboard cut to size through the unsewn bottom side. The cardboard should protrude 5-7 cm from the bottom.
- Fold the excess cardboard to make a stand.
Sock puppet
Original dolls are made from ordinary children's socks.
To make it you will need a sock, cardboard, a small skein of thick thread or yarn, pieces of fabric for the mouth, sewing thread and buttons, and a glue gun. You can take a sock in a plain color or with a pattern, polka dots or stripes - all this will create the image of a future toy.
We make a blank for the mouth from cardboard. To do this, fold a cardboard rectangle 7 cm wide and 20 cm long in half. We round the corners along the width. From the fabric for the inside of the mouth we cut out a blank according to this template.
Trim the toe of the sock. We cut off the edges along the edge of the workpiece. Glue the cardboard blank inside the sock using a glue gun. At the same time, we fold the edges of the fabric onto the cardboard. Glue the fabric interior on top.
Making a hairstyle for the puppet. Take thread or yarn and wrap it around your hand several times. Tie in the middle and cut the ends. If you spread your fingers wide, you will get a long hairstyle. Sew the hairstyle to the sock.
Work in the theater corner
Activities related to theatrical performances in kindergarten are implemented by several types of play activities:
- Director's games. In them, the child only leads the doll, conveying the image of the character with intonation and some other techniques. The possibilities of pantomime here are also very limited, because the toy is almost static (puppets on canes, puppets).
- Dramatizations. The baby plays the role himself, without resorting to the mediation of dolls. The young actor is able to actively use intonation, facial expressions, movements and gestures to enter into the character of the hero.
- Dramatizations with bibabo, finger, floor or scarf puppets. The baby acts for the character, giving him his voice. The work is carried out from behind a screen or with a character in hand.

Working with floor dolls is very difficult, but exciting for children - you cannot use facial expressions
- Improvisation. Children act out themes, not plots. Such theatrical activity requires almost no preparatory work, but is the most complex type of game. Various theatrical props can be used for improvisation.
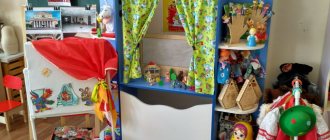
The theater corner, which has everything necessary for the relevant activity, allows you to create a comfortable environment in the group for the development of the creative abilities of students. Theatricalization is a special area of the educational program for preschool institutions, because it gives children the opportunity not only to explore the world around them, but also to learn to live in harmony with it. In addition, theatrical performances help children become more self-confident, which is also important for their personal growth - which means that a kindergarten cannot be without a theater corner.
Non-traditional types of theater
In addition to the usual materials for puppet theaters, alternative types can be used.
These can include plastic and wooden spoons. Images of characters are drawn or attached to them. When painting on plastic, you should use acrylic paint. If you have to paint with gouache, it is mixed with a small amount of PVA glue.
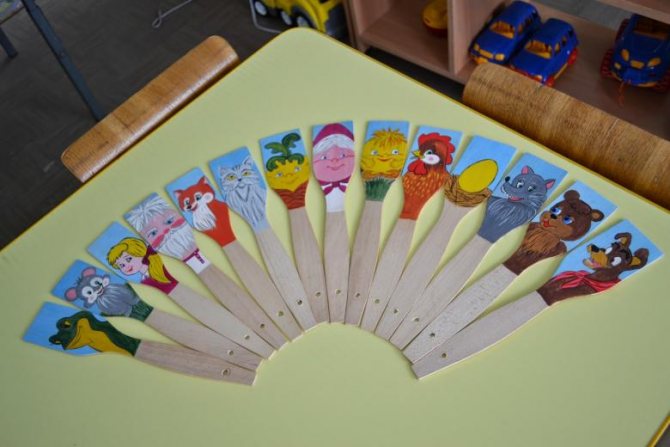
Interesting options are made from yogurt jars and plastic bottles. They are covered with colored paper, images of characters are attached and fragments of scenery are added. The results are voluminous mini-stories. Such figures do not require additional decorations and develop children's imagination.
Playing theater is a useful and interesting activity. It improves memory and develops oratory skills. The child learns to retell the text, highlight the main points, not be afraid of public speaking, and parents have the opportunity to discern the child’s talents.
Finger Theater
Finger theater is very simple and accessible, but no less interesting: figurines of characters, often just heads, are made miniature and put on the fingers.
You can play this “theater” outside the home, on a trip, at a clinic appointment: the child will spend time educationally and usefully.

Wooden puppet theater for children
Honestly, we have different types of theaters at home, for example this is a wooden one .

My kids love it very much, because it is so funny and exciting when I show them a fairy tale and they sit and listen. Now I have an older son, he can show and tell fairy tales himself. Just think, this is very cool, because while playing, a child learns to retell his favorite fairy tale, build a dialogue, etc.
I think that all preschool children, as well as most children of primary school age, will not remain indifferent to such theaters. And if you come up with your own fairy tales with a funny plot and an intriguing ending, then it can actually turn out to be a real holiday for a child.
The simplest version of a do-it-yourself puppet theater is a paper one. It's easy to make it yourself. Well, or together with the child.
master class: Organization of theatrical games. Tabletop theaterarticle
Master class on the topic: Organization of theatrical games. Tabletop theater.
Target:
- To interest and encourage teachers to make theatrical dolls and then use them in the theatrical activities of preschool children.
Tasks:
- Introduce teachers to tabletop theater.
- Arouse interest in theatrical and play activities.
- To train master class participants in specific skills for making toys for a cone table theater.
- Involve teachers in joint activities with children: playing tabletop theater in kindergarten.
“The theater is a magical world. He gives lessons in beauty, morality and ethics. And the richer they are, the more successful the development of the spiritual world of children is” (B.M. Teplov)
Theatrical activities in kindergarten are an opportunity to reveal the creative potential of a child and nurture the creative orientation of the individual. Children learn to notice interesting ideas in the world around them, embody them, create their own artistic image of a character, they develop creative imagination, associative thinking, and the ability to see the unusual in the ordinary.
There are a huge variety of different types of theaters: puppet theater, finger theater, tabletop theater, shadow theater, bibabo theater, spoon theater, etc. Children enjoy using all types of theater in their activities. But let’s take a closer look at the tabletop theater.
The history of the development of tabletop theater is no less rich than any other theater, but in the specialized literature about theaters we are unlikely to be able to get acquainted with it, as, for example, with the history of the theater of shadows, puppets, and Parsley. We will not know the exact time of the emergence of the table theater, but we will not be mistaken if we say that it is very ancient and arose even before the table itself appeared in its modern form. It arose and lived in every family, every nation, in every country. And every child, having picked up a toy and having a support nearby - be it a bench, a stump or anything else, will want to “revive” the doll by starting to move it along the support and comment on its actions. This means that the child has already taken the first steps towards play, including theater - theater on the table, table theater.
The emergence and existence of tabletop theater, as well as its widespread use in working with preschool children, is very natural, since it comes from the main activity of children - play, and the entire theatrical action is built on the same principle as any children's game: dolls are moved and spoken people do it for them, while creating the impression that the dolls themselves are doing it. Therefore, although the theater is called tabletop, it is clear that the main thing in it is not the table, because instead of it any other support can be used (an inverted box, a bench, etc.), the main thing in this theater is the dolls: dolls toys and picture dolls.
The role of puppet theater in the education and comprehensive development of children is enormous. This:
— Raising a creatively active personality, revealing new talents in children through the means of theatrical art.
-Organization of leisure time through involvement in productive creative and theatrical activities.
-Mastering practical skills in the field of theatrical art.
-Development of speech culture and mastery of speech expressive techniques.
-Creating a creative atmosphere in the children's team, mutual understanding, trust, friendly attitude towards each other.
Unlike the book, the characters on the tabletop stage acquire volume and some “freedom” of movement; the figures move back and forth, “talking.” When showing a child such a performance, we depict how the characters snort, sniff, squeak, tremble, fall, etc. – i.e. “we complete” the text through additional movements and sounds, endowing it with those mimic, non-verbal qualities that are characteristic of live communication, but are absent in the book.
In tabletop theaters, factory-made toys are most often used, but it is very good to use toys made by yourself. Therefore, the tabletop theater is also a field for joint productive activities of teachers, parents and children. It is very interesting for children to make figures for the tabletop theater themselves. They draw, cut, sculpt and of course play with great interest. These are like new toys for them, only they are expensive because they are made with their own hands. By creating a tabletop theater, we allow the child to experience the birth of puppet characters and fall in love with them with a new love.
When manufacturing, as well as when selecting finished toys, it is necessary to observe
1) principle of proportionality:
for a tabletop theater, you need toys that are not very large in size, about 30 cm high or lower, taking into account the ratio of toys in size in relation to each other, as well as in relation to the playing space 2) the principle of single-texture:
toys for one performance are most often selected so that they are made from a material of the same texture (fabric, plasticine, cardboard, natural material).
To stage fairy tales, it is necessary to use additional decorations: houses, trees, etc. These decorations can also be made from any available and even waste material. It all depends on your capabilities and imagination.
When preparing performances for children, you should select works with a simple, clear and funny plot, familiar characters, and a happy ending. The best performances for preschool children are based on folk tales “Turnip”, “Teremok”, “Hare, Fox and Rooster”, etc.
Theater is a magical land in which a child rejoices while playing, and in GAME he learns about the WORLD! Happy creativity!
Master class on making a cone theater
Stages of making puppets for a cone theater:
- We cut out the pre-printed templates.
- Coat one side of the blank for the cone with glue, roll the blank into a cone and press it.
3.Glue the doll’s head onto the finished cone
4.Then glue the arms, legs, tails
5. Next, accessories are glued on (Little Red Riding Hood’s basket, a gun for the hunter, a sock for grandma).
The dolls are ready.
Reflection: Teachers present their work in the form of a fairy tale presentation
Paper puppet theater “Walkers”
This kind of theater is very popular with young children; for such a theater you need your favorite characters and a couple of holes.
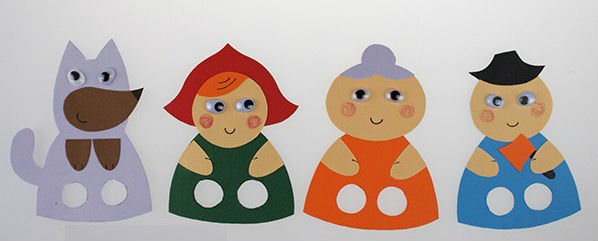
Believe me, children will happily play such games.
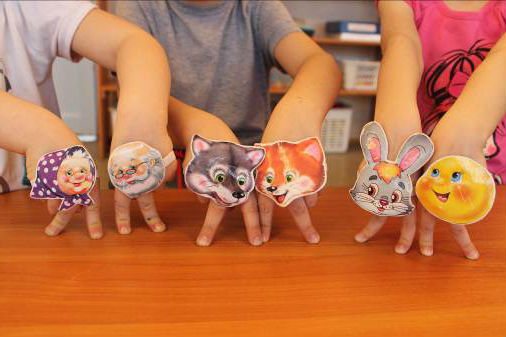
And if you invite friends over, it will be even more fun to play. You will also receive samples of walkers of your favorite characters to your e-mail address.
Complicated version
You can create a shadow theater for children using templates with your own hands in half an hour, but if you have more time, it’s worth thinking through additional details. For example, add decorations. They are created from cardboard and attached tightly to the screen using tape or paper clips. Then the decorations will not fall unexpectedly.
It’s easy to “revive” the figures - make them more mobile using soft wire. It is used to wrap arms, legs, wings and other parts.
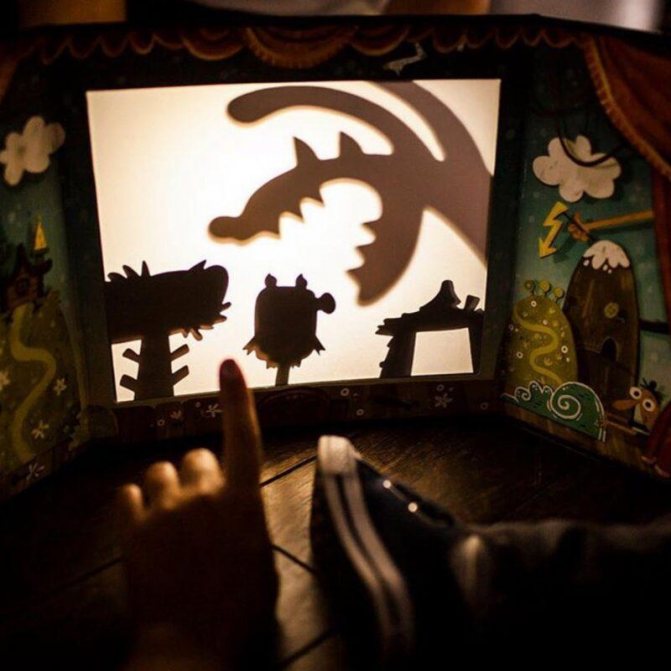
It’s easy to “play up” an evening with a performance: decorate the curtain and draw bright tickets. And if several performances are planned, print out programs for spectators. And, of course, you need an intermission, during which you can treat the audience to delicious home-cooked food.
DIY glove puppet
In reality, there are a lot of puppet theaters that can be built. Even at almost no cost. You just need to use your wits and do it! You can sew it, for example.
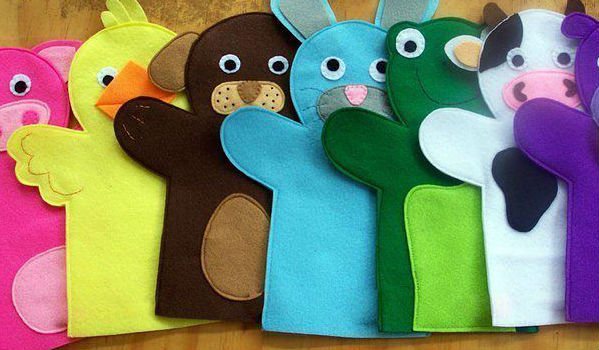
Or you can learn to knit and knit these cute little characters:
Honestly, I used to knit well, but now I don’t have enough time for it all. But I never liked sewing. But, as an option, you can also create a theater for those who love this business.
Although here is the simplest master for you - a class on sewing a puppet theater from fabric using gloves. Anyone can do it, even those who do not know the art of sewing.
We will need:
- household gloves, knitted - 2 pcs., buttons for the eyes - 2 pcs., thread, scissors, braid, stationery knife
Stages of work:
1. Take the first glove and steam the seam thread on the cuff, it is usually red or yellow. Tuck the little finger, thumb and index finger in so that they do not come out, sew them up. You should end up with a head with ears and a hare neck. Sew the bases of the ears to prevent your fingers from getting in there.
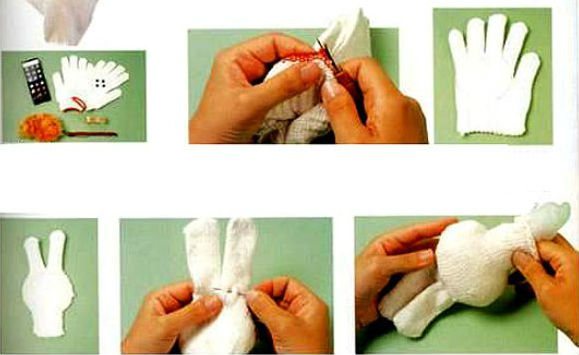
2. Now take the next glove and hide your ring finger in it, sew up the hole. Place your middle and index fingers together and now place the hare's head on them.
3. Sew the head to the neck. To hide the seam on your neck, tie it with a bow or tie in the shape of a butterfly. Sew button eyes and embroider a muzzle, or you can draw it with a marker. You can decorate a bunny using fluff or knitted threads by gluing a cute forelock to his head.
Secrets of successful theater productions
How to make a paper theater more durable? After all, paper parts often tear and become unusable. And, most likely, this will happen after the first production of your play. Here is another option for making a theater at home, which, although more time-consuming, will last longer.
The first stage of production remains unchanged - we find templates (you can even draw them yourself if there are no ready-made ones). We print them on a color printer. Then we cut out the largest decorations, glue them to cardboard and additionally seal them with tape - this will add strength to them, and they will not get dirty.
Then we start making fairy tale heroes. At this stage we will need additional materials, namely:
- Small plastic jars for yoghurts like Rastishka or Agusha.
- Wooden ice cream sticks (if you don’t have them, plastic forks or spoons will also work).
- Stationery knife.
We cut out the characters and glue them onto a cardboard base. If your paper is quite thick, then you don’t have to do this. But most often, thicker paper is not “grabbed” by the printer for printing. Keep this in mind and try using different paper weights in your printer.
Be sure to tape it with tape to prevent the parts from fraying. Then we take ice cream sticks or plastic spoons and tape them with tape to the back of the paper blank so that the stick is “behind” the hero and has a free part at the bottom (3-4 cm). Using a utility knife, we make two cuts on the bottom of the yogurt jar - you should get a cross - and then simply insert the stick with the doll into this hole. All is ready! You can start playing!
As you can see, a home theater is a great way to diversify a child’s leisure time without much expense, because printing and cutting out the templates is not at all difficult. In addition, this is a good option for spending time together, which children always like, and also strengthens family relationships.
Shadow play. How to do it quickly and easily
Step 1. Setting the stage
Take a medium sized box. Preferably 10-15 cm wide, but a box of a different width will do. You will need a ruler, pencil, stapler, scissors. We separate the box from one long side. You should get a large rectangle, one plane of which is flat without bends. ON this side we measure 5 cm from the edge. Draw the frame of the screen and cut it out. We fasten it with a stapler at the corners so that we get an L-shaped structure with a vertical future screen. Cut off the excess.
We measure out the paper that will cover the screen with an allowance for gluing. The top of the screen can be secured with a stapler. Apply paper glue to the remaining sides.

Step 2. Create characters
You will need a pencil, cardboard, scissors, a stapler, and straws for drinks. We draw characters and cut them out. In addition to action heroes, you can make the sun and clouds, birds and trees, houses and castles. Using a stapler, we attach the figures to the straw.

Step 3. Play the play
We learn a fairy tale, install a table lamp behind the screen, and play the fairy tale. Don't forget about sound effects.
