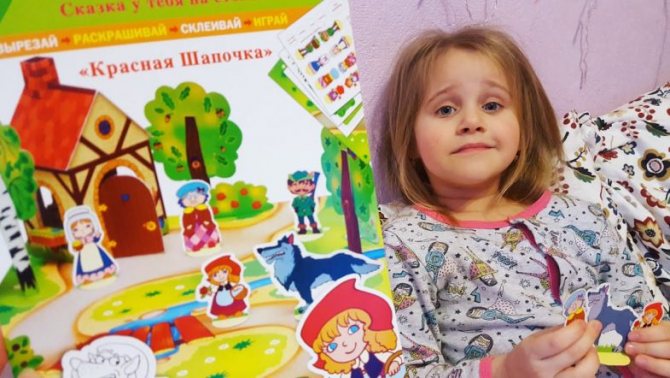
Carnival masks made of paper with your own hands: we make them with children. Master classes for preschool children, notes for teachers, a collection of ideas.
In this article you will find 5 master classes on making carnival masks from paper with children:
- Mask using paper cutting technique,
- Master class on making a paper headband mask (approximate scenario and step-by-step master class)
- Father Frost's workshop and making masks by children together with their parents (approximate scenario and step-by-step master class)
- Master class on making a caranival mask using papier-mâché technique with children.
- Master class on making a simple mask from paper or cardboard.
All master classes were prepared for you by readers of the Rodnaya Tropinka website - participants in the New Year's Masquerade competition of the Rodnaya Tropinka website and the free magazine for parents and teachers Games and Toys.
Master class 1. DIY paper cutting technique mask
Author of the master class: Alena Bernikova.
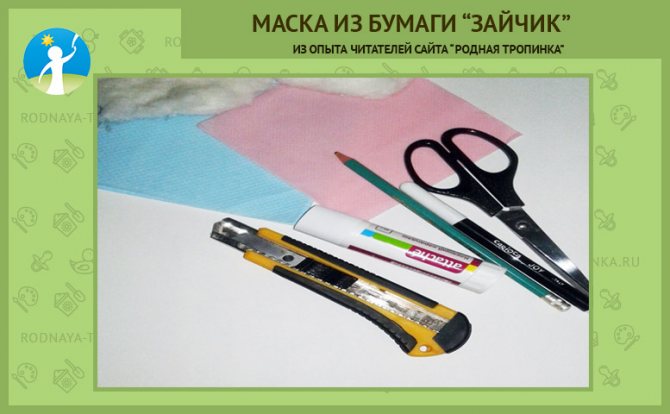
Paper cutting is an appliqué technique in which small pieces of paper are glued onto the base - the design. In this master class we will learn how to use this technique to make a hare mask with your own hands together with your child.
Tools and materials
To make a carnival hare mask we will need:
- White cardboard
- cotton wool
- Napkins (various colors)
- Scissors, stationery knife
- Glue stick
- Simple pencil
- Black felt-tip pen.
How to make a carnival bunny mask with children: step-by-step description
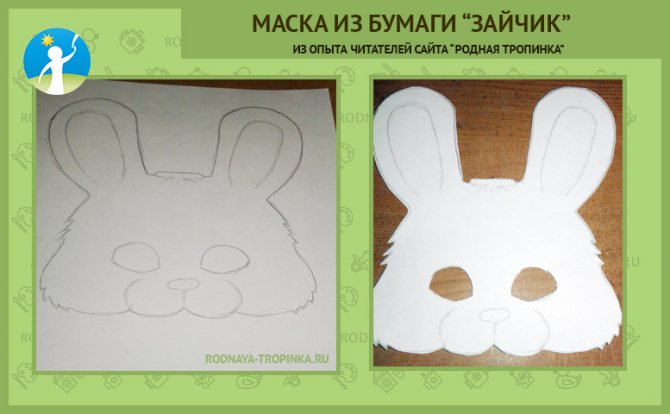
Step 1. Draw a bunny’s face on cardboard paper or print out a ready-made mask template. Cut out the mask.
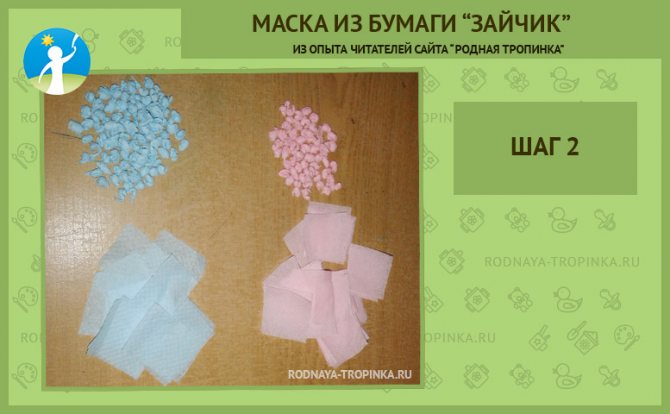
Step 2. Next, take the napkins and cut them into small pieces and make balls out of them.
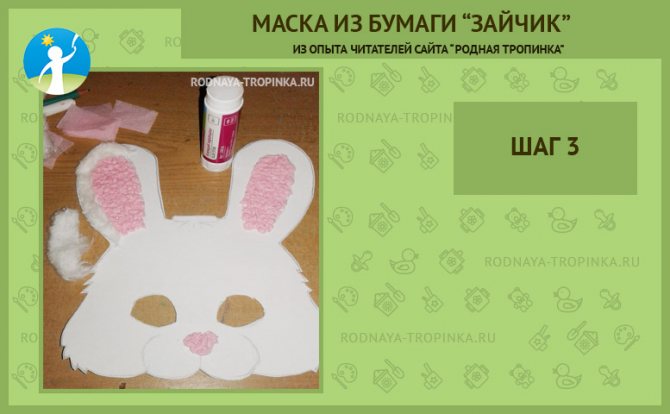
Step 3. Next, take the glue and start creating. We figure out which parts of the bunny’s face will be voluminous and glue napkin balls onto them close to each other. We make the fluffy parts of the muzzle using pieces of cotton wool.
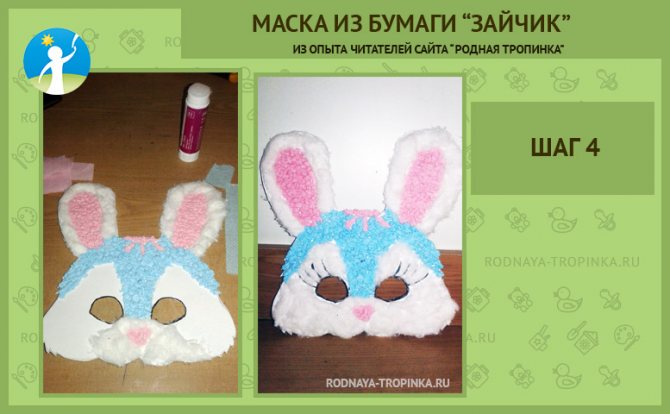
Step 4. Using a felt-tip pen, draw the eyes and eyelashes of the hare on the mask. The carnival mask is ready!
Paper
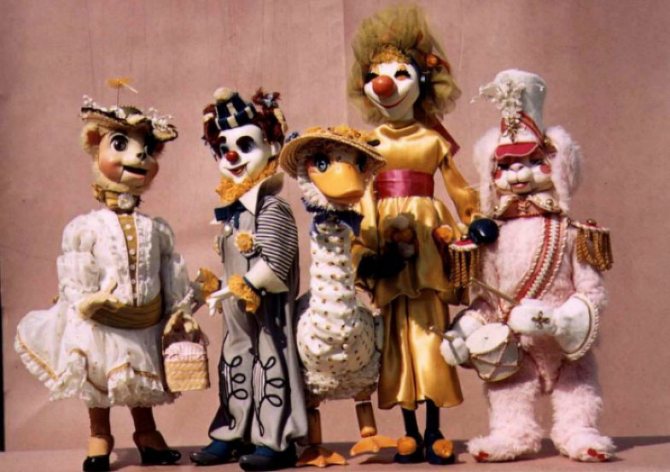
Paper is one of the simplest and most accessible materials for creating crafts on the theme of puppet theater.
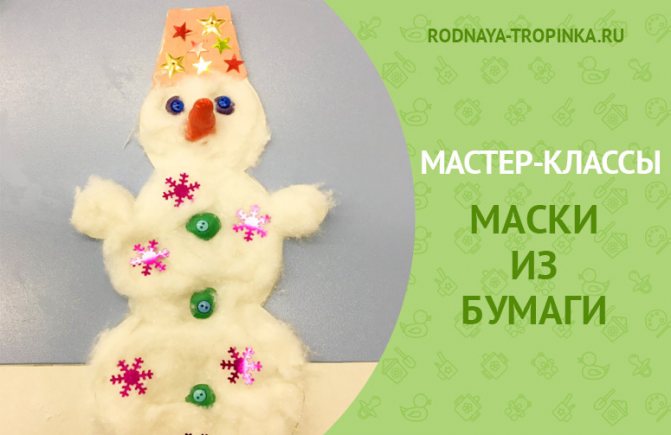
Father Frost's Workshop"
The author of the master class and photographs is Yulia Anatolyevna Bogomolova, teacher at State Budgetary Educational Institution Lyceum 1564, educational institution “Raduga” (Moscow).
Progress of a master class for children on making carnival masks from paper “Snowman”
Children join the group to the accompaniment of music (the song “New Year’s Toys”).
Educator : Hello, guys! New Year is approaching! This is a magical holiday that both children and adults look forward to equally. To make the New Year's holiday fun and memorable, we must prepare well for it. Today we invited you to our creative workshop and offer you to make a New Year's craft - a mask. Look what I found near our kindergarten - what a big bag! And there was a letter attached to it. Let me open it and read what is written there (reads):
“Hello, dear children and kindergarten teachers! It’s snowing outside the window, which means New Year is coming! I’m going to visit you for a holiday, I’ll be walking to you for a long time, Through snow-covered fields, through snowdrifts, through forests... I’ll bring you a Christmas tree covered in snow-covered needles. I will congratulate you on the New Year and leave you gifts. You don’t sit idle, decorate the group with snowflakes, firecrackers, garlands, toys with frosty patterns, silver rain, multi-colored flags, noticeable drawings...
Therefore, throughout the Russian country I am issuing a Decree: to open all children’s institutions without delay, without any doubt, “Father Frost’s Workshops.” Let everyone come to glue, and sculpt, and cut out... Invite everyone to the workshops! See you soon, friends!”
Educator:
This is the necessary decree that Grandfather Frost issued! What's in the bag? Let's open! (Children and teacher open the bag). Look how much Santa Claus gave us - scissors and colored paper, cotton wool, plasticine, glue and a template. Let's try to guess: who does this template look like? (children answer). Of course, for the snowman.
Now the girls will tell us poems about a snowman:
Three balls, a bucket, a carrot and two coals for the eyes; Let's deftly insert the hand sticks: We glue the snowman.
The yard is full of snow. I made a snowman. Arms, legs, head, carrot nose, two eyes. I'll paint the mouth. Let the people rejoice!
Educator:
Well done girls!
Now we'll play a little. Physical school:
We are making a snowman - (Children show everything they talk about) Hat, nose, eyes, sides. He is neither small nor big (squat, stand up) A nice snowman came out! (Hands placed on the belt, body turns Left - Right)
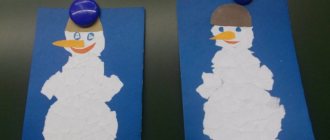
Let's make a New Year's craft together - a snowman mask. Let's make a New Year's craft together - a snowman mask. Next, the teacher shows the children the stages of making a mask - a “Snowman” headband. Children perform a mask. How to make a snowman mask with preschool children is presented in the step-by-step photos below.
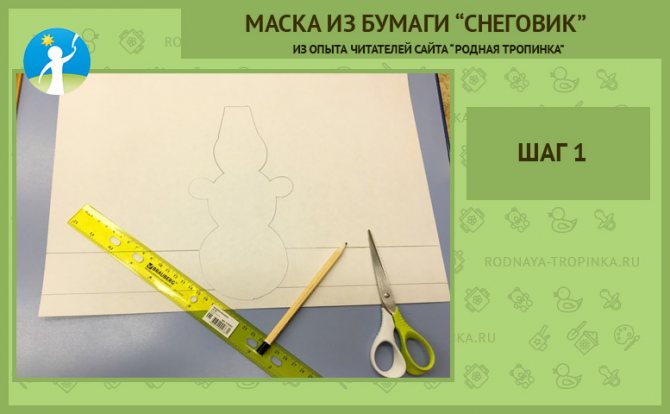
Step 1. Trace the snowman template.
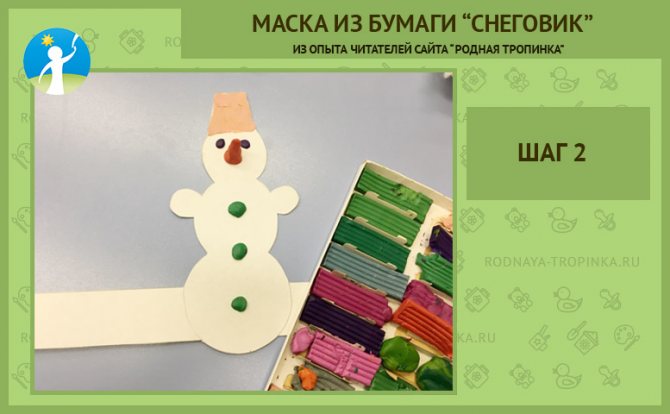
Step 2. Sculpt a snowman's nose from plasticine, make eyes and buttons. Using the method of spreading plasticine along the contour of the part, make a bucket.
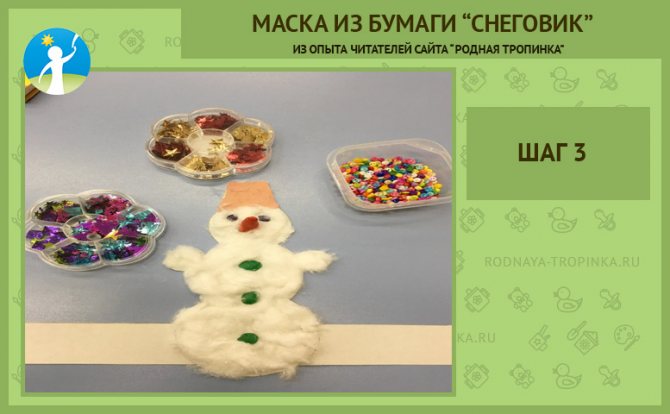
Step 3. Apply glue to the snowman using a pencil. Glue fluffy cotton wool.
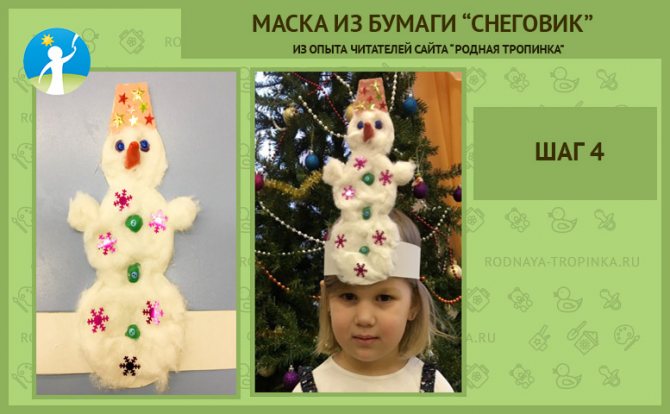
Step 4. Decorate the snowman with snowflakes.
Educator: What great fellows! What beautiful snowmen we made. Let's take a photo together in our carnival masks and send a photo to Grandfather Frost. He will be very pleased that you made such beautiful crafts and that we are all looking forward to the New Year. The master class “Father Frost’s Workshop” is ending. Snowman mask" tea party.
Decoration and background
- Prepare in advance a diagram according to which the scene will be created in the future.
- The cut out elements are sewn onto the front side of a thick sheet of A4 felt.
- The next step is to sew together 2 sheets: a blank with decor and a felt backdrop.
- Cardboard is inserted between two fabric sheets for compaction. It should protrude a few centimeters. This strip is folded to form a stand.
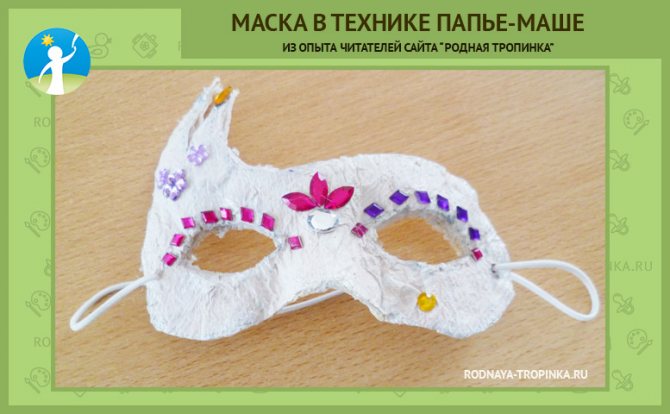
Master class 4: papier-mâché carnival mask
Another traditional mask-making technique available to children aged 6 years and older is the papier-mâché technique. Using this technique, you can fashion a mask of any, even the most bizarre shape. You will learn how to make a papier-mâché mask from an ordinary roll of toilet paper in this step-by-step video. Children can also be involved in making papier-mâché. Of course, it will still be difficult for them to fashion a mask, but they will be happy to paint it with acrylic paints.
An example of a children's carnival mask using papier-mâché technique
This is the kind of mask Daria Kholina (6 years old) made from paper using the papier-mâché technique. Educator - Elena Anatolyevna Rim (MBDOU “Combined kindergarten No. 75 “Fairy Tale”, Moscow region, Sergiev Posad district, Shemetovo village, Novy district).
How to make such a mask:
Step 1. Make a cast from plasticine - the basis for making the mask. You need to make the shape of the mask that you want to make. In this case, you need to pay special attention to the impression of the nose and eyes. it is very important.
Step 2. Layer by layer, place pieces of paper (toilet paper) on the base using PVA glue. There should be 5-6 such layers (for the strength of the product).
Step 3. After 2-3 days, after the mask has dried, we give it the desired color, decorate it and thread an elastic band to the size of the head. This is what happened to six-year-old Dasha.
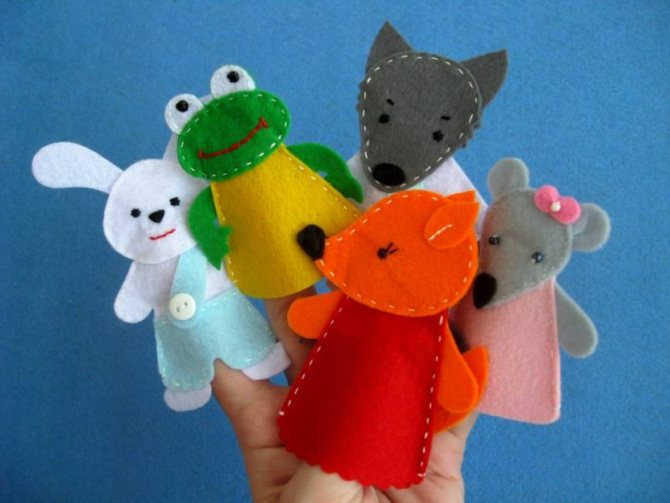
Option with puppets
- To do this, you need to prepare a sketch in advance. There should be several elements: a large main part, hair, clothes, handles, and for animals - a muzzle.
- The next stage is transferring the pattern onto felt. Colors can be chosen to suit your taste or the child's wishes. So in photos of various theater-themed crafts you can often see pink bunnies or multi-colored cats.
- Next, once all the parts are cut out, it is better to carry out a test assembly. Thanks to this, it will be possible to correct possible errors or remove inaccuracies in a timely manner.
- The final assembly of the character should begin with the main part, adding other elements to it. You can fasten them either by sewing or using a glue gun.
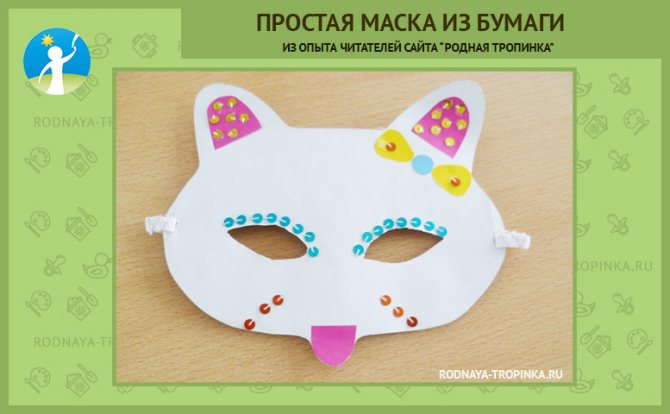
Master class 5. Simple carnival mask made of paper
You don't have to make a complex mask at all. The simplest paper mask can be made very simply and quickly, and even kids can make it.
Here are examples of such masks.
Example of mask No. 1
The first mask was made by Kristina Shmatkova, 6 years old. Educator - Yulia Mansurovna Abasheva (MBDOU “Combined kindergarten No. 75 “Fairy Tale”, Moscow region, Sergiev Posad district, Shemetovo village, Novy district).
How to make such a mask quickly and easily:
Step 1. Come up with an image of a mask for the child.
Step 2. Cut out a mask from thick cardboard.
Step 3. Decorate with applique and sequins. Insert the elastic according to the size of the child's head.
The mask is ready!
Useful tips for making this type of mask
Tip 1. Such masks can be made based on a ready-made template. In this case, a picture of the mask is printed on a printer and cut out with scissors. It is glued onto thick cardboard. Holes for the elastic are made on the sides of the mask with a hole punch. An elastic band according to the size of the child's head is inserted into the mask.
Tip 2. You can sew parts to the mask. In this case, a part is cut out for the reverse side of the mask, which exactly follows the contour of the mask in shape. The seams are hidden under this part.
Tip 3. Any mask can be painted. It is better to paint masks with acrylic paints, because... They are durable and do not get dirty in the future. The mask can be stored and used in subsequent years.
First way
You will need:
- Paper or cardboard,
- Cereal box/desired size,
- Plastic straws,
- Wooden sticks,
- Glue,
- Scissors,
- Paints,
- Pencils.

Progress:
- On thick paper, depict the characters of the chosen fairy tale or story.
- After they are cut out, glue tubes or sticks on the inside.
- The box will act as a stage, so you will need to cut out the "screen" or one of the larger sides.
- A slot is also made in the lower part. Prepared figures of heroes on sticks should be inserted there.
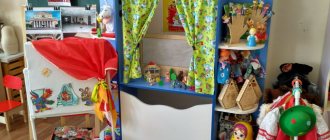
Such a theater is either installed on a stand or hung around the neck thanks to a ribbon attached to the box.
Shadow play
One of the famous and interesting types of puppet theater. The main focus is on the silhouettes of the dolls, so the main challenge is to make the characters recognizable through their outlines.

A short master class on creating crafts related to shadow theater will help you organize an exciting performance at home.
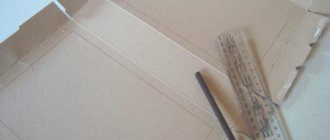
Stage 1. Scene
Materials:
- Medium size box
- Ruler,
- Scissors,
- Pencil,
- Paper,
- Glue or stapler
- You need to get a large rectangle from the box. One of the main sides should be without folds. The outline of the screen is drawn on it, with an indentation of five centimeters from the edges. The resulting rectangle is cut out.
- The size of the paper sheet should be larger than the resulting hole. The screen is glued on the back side. Additionally, it is secured with a stapler for strength.