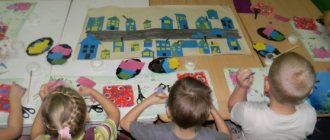
Applications for children are one of the most favorite games and fun. But it’s by playing that the little ones learn! They gradually become accustomed to the world of colors and shapes. And they also get satisfaction from the fact that they themselves, with their own hands, can create beauty. And if parents want to help their child, we will give you ideas for appliqué made from colored paper.
What we can offer:
- Schemes and stencils for applications of different figures: flowers, animals, insects and fairy-tale characters.
- We'll show you what interesting, non-traditional appliqué techniques there are.
- And, of course, we will give you a lot of positive emotions! We are sure you will have fun with us!
And most importantly, all these children's applications are for toddlers of different ages. And in one year the child will be interested in playing, and the older one will enjoy this activity. Why? Because we have prepared a collection that includes applications for children with different abilities.
For the little ones
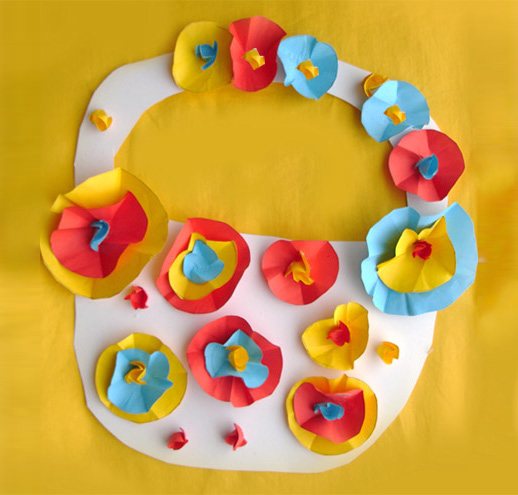
Who said that plot application is difficult? Even the younger group can cope with some types of applications. Now we will create a beautiful basket with flowers in it.
What we may need for the application:
- Colored thin paper;
- Cardboard;
- Pencil;
- Stencils;
- Glue.
Step 1 . If possible, draw a basket, there is no way to draw it, then you can print it from our website. Choose the color yourself, just remember that there will be flowers on her, and she is the background for them.
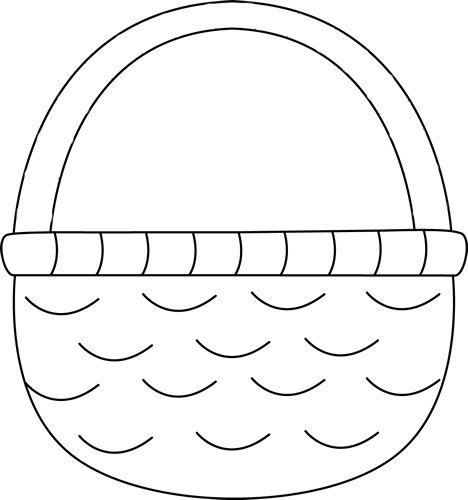
Glue the basket to a thicker paper base or cardboard. Then our difficult volumetric paper applique will hold firmly. Let's start creating.
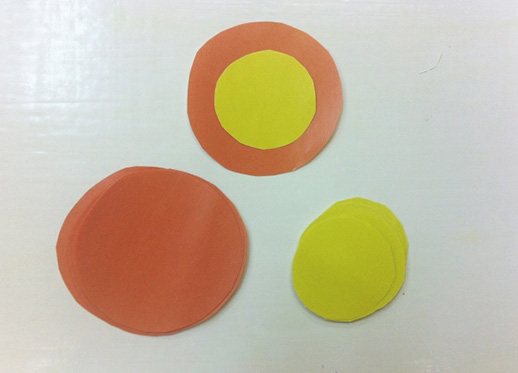
Step 2 . Using a stencil, cut out circles from a sheet of paper. A stencil can be different objects: small cups, coins, round bottles, cups.
We take paper of bright colors, since the pictures should be colorful and joyful. Just the right entertainment for children 2-3 years old, exactly what they love.
Step 3 . Place a pencil on the colored part, in the middle of the circle, and wrap paper around it. In order for us to get voluminous applications, it is enough to even slightly press the circles against the rod.
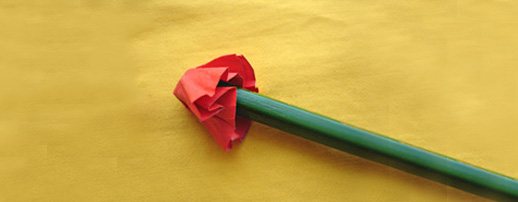
Step 4 . Without removing the pencil, dip the center of the future bell or orchid into glue and press it with a pencil. You can continue and stick a second circle of smaller diameter into the very center in the same way to create voluminous poppies and daisies.
You can also keep children occupied with plasticine, for example, Hey Clay Sticky Packs. It differs from the usual one in that it does not stick to hands or furniture, and is much brighter and easier to mold. After 24 hours it hardens and becomes a toy. Includes a free application for step-by-step modeling training.
Materials and tools needed for work
- Colored paper single-sided and double-sided
- Glue stick
- Scissors must have blunt ends
- White paper
- White and colored cardboard for the base
- Ruler
- Simple pencil
- Markers or felt-tip pens
Hedgehog
Applications for the little ones are creativity, where the abilities of even the tiniest fidget are taken into account. And this example with the “hedgehog” is just right for toddlers who, by the age of three, still cannot cut and glue, but they will be great at participating in the work. How?
- There are two options for preparing to make this applique for kids.First
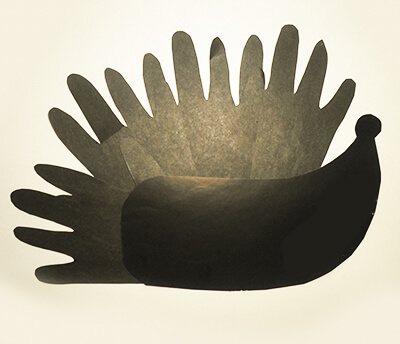
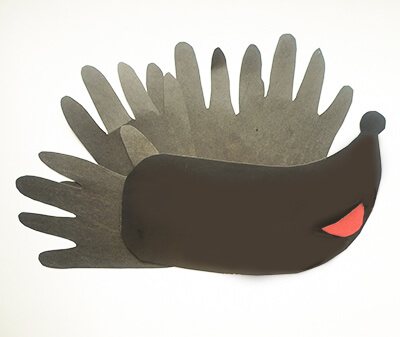
. We trace the baby's palm on a sheet of black or brown paper. Cut it out. Glue it. Four palms will be enough.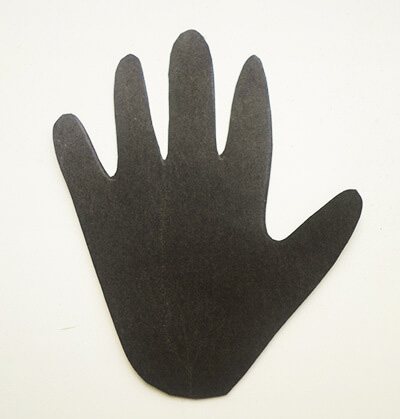
Second option
. Or we use finger paints. The child dips his palm, and we help him put his palm in this way several times, at different angles in the upward direction, to make a fan. - Cut out something like a boat from paper of the same color. This is the body and nose of the hedgehog (cut out a small circle and glue the “nose” to the edge of the muzzle).
- We place the body under the “needles”.
- You can draw a mouth and an eye, or make semicircles from red and white paper. Don't forget about the pupils.
- Paper applications would be incomplete without a plot. We come up with a story with the baby. Our hedgehog is coming from the forest, so we’ll cut out and glue his “prey”: an apple and a mushroom.
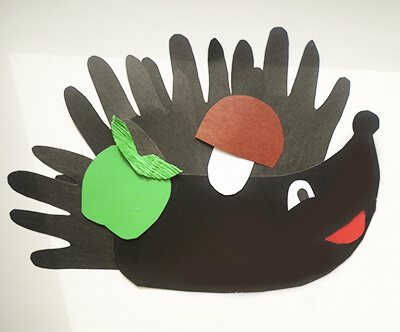
- We complement the paper applique with small black paws.
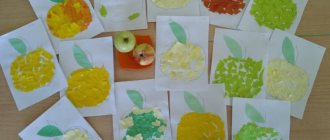
Cherry applique
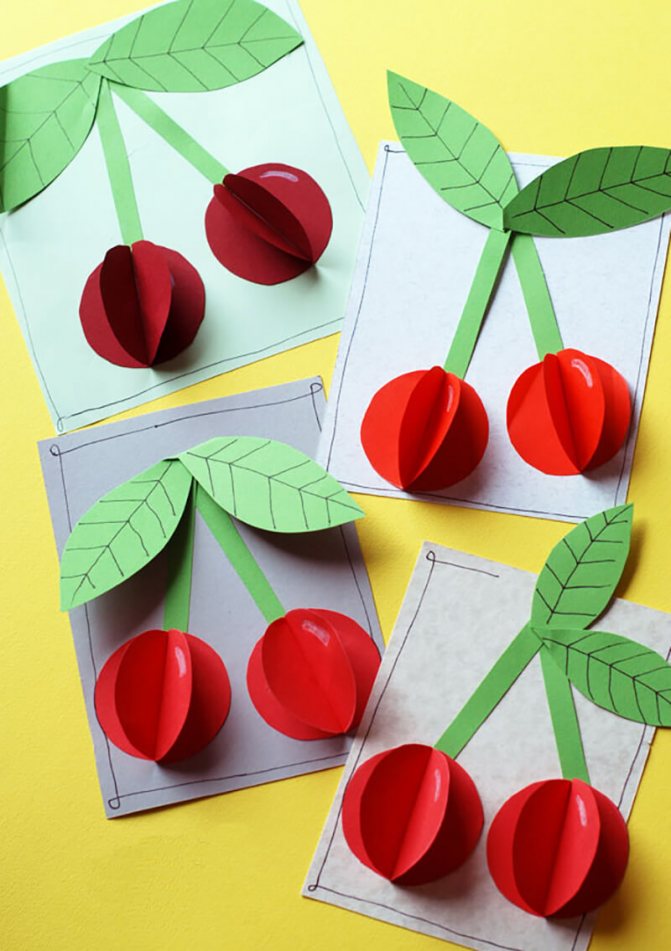
And another applique with the image of delicious cherries.
Having mastered this simple technique, you can make applique with your child of absolutely any fruit, berries and even vegetables. The main thing is to choose the right color and cut out the desired shape.
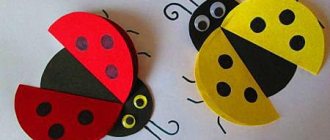
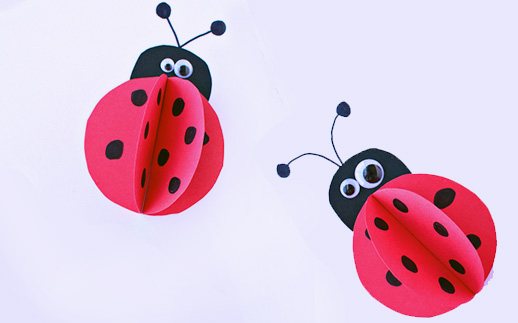
Volumetric ladybug
This application is perfect for children 3-4 years old. It is very easy to make.
Application execution sequence:
- Cut out 2 circles from red paper. And from black - 2 semi-ovals.
- We bend the circles in half and glue one half, connecting them at the fold line. We connect the semi-oval at the top in the middle above the circles.
- Draw black dots on the circles. In this applique for children, all that remains is to design the antennae and eyes.
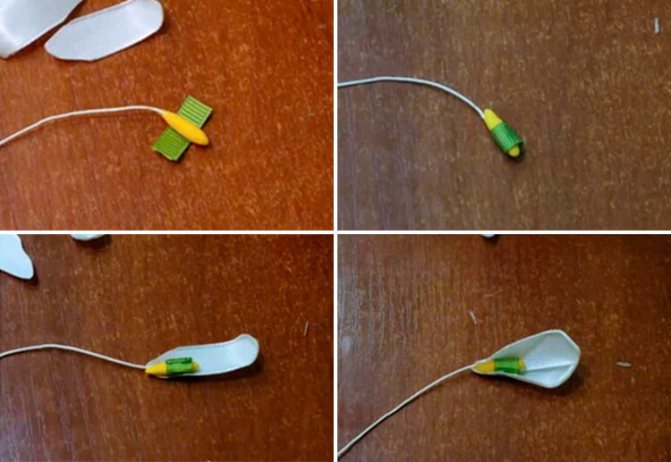
DIY snowdrops made from ribbons
This is very painstaking work, but the ribbon craft looks gorgeous, so it’s worth spending time on creating it.
To make a snowdrop from satin ribbons, we will need:
- Satin ribbon 0.8 cm wide
- Rep ribbon 0.5 cm wide
- Stamens
- Ruler
- Hot glue
- Scissors
We cut the white satin ribbon into 4 cm pieces. For one flower you need 3 pieces of ribbon. Round them at the edges and scorch them over the fire.

Stamens can be bought ready-made, or you can make them yourself.
We make the centers of the flowers.
We need a piece of light green ribbon to wrap the stamen. Glue it and cover the stamen with petals.
At the bottom of the flower we make several turns of green grosgrain ribbon and secure it with glue. We make several flowers this way.
Cut off pieces of green grosgrain ribbon for the leaves. Thin and singe the edges of the segment.
Fold the future leaf in half and glue it to the bottom of the flower bud.
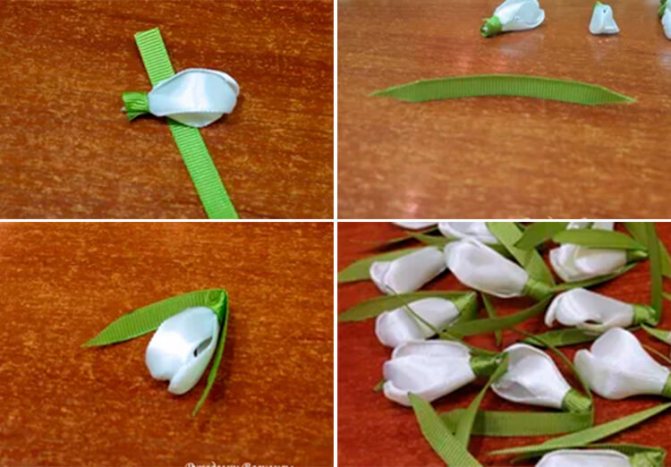
Such snowdrops can be used to create a wreath, topiary, or decorate some kind of craft.
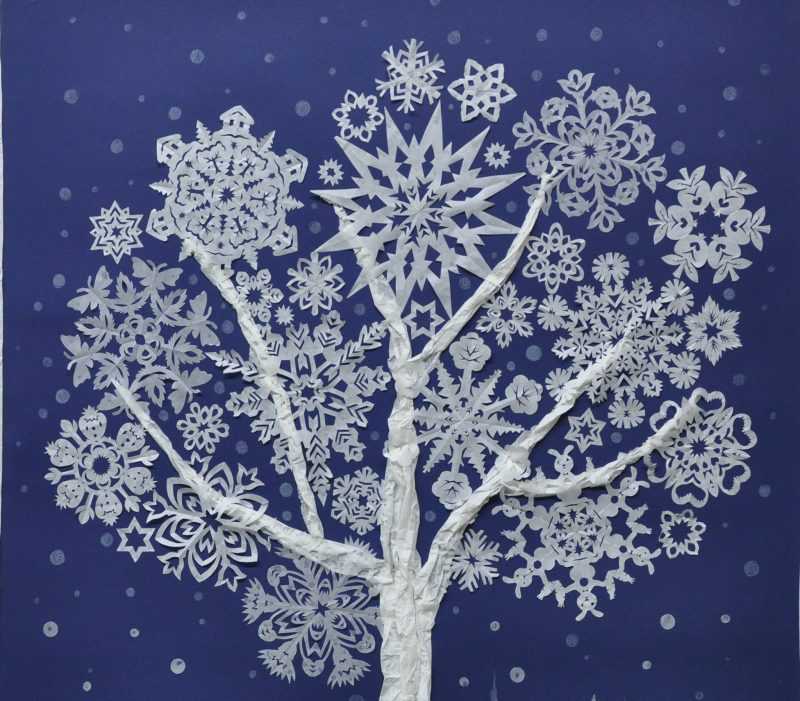
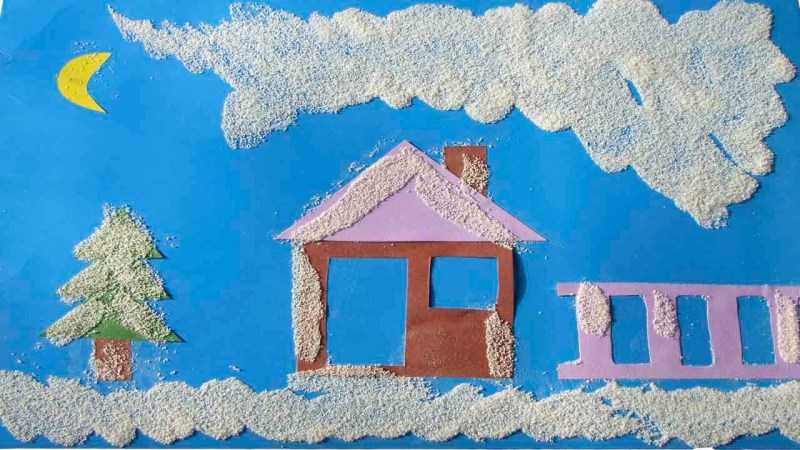
Night in winter
A wide variety of materials are used for winter nights. Therefore, this application is suitable for schoolchildren. For better results, just watch the video and repeat the finished master class. The result will be a nice decoration for your apartment.
At the initial stage, you should decide what will be depicted in the picture. On a winter night there is always a birch tree with a house and a fence, and everything is covered with snow. The desired idea should be sketched on cardboard.
The next step is to prepare a mass of papier-mâché. To do this, napkins are manually crushed and filled with hot water and finally beaten with a blender. Excess moisture is removed by normal squeezing.
PVA glue is added to the finished material until a plastic consistency is formed. The mass is thoroughly mixed and oil is added.
Using plasticine, snowdrifts, logs and branches are formed. The entire drawing is processed with the finished mass. The top of the product is coated with PVA glue. The work must dry well.
The final stage will be painting with gouache. Blue or black would be perfect for it. For snow, you should choose white, and light blue should be used as a shadow. Draw black stripes on white birch. For the house and fence you should choose the desired shade of brown.
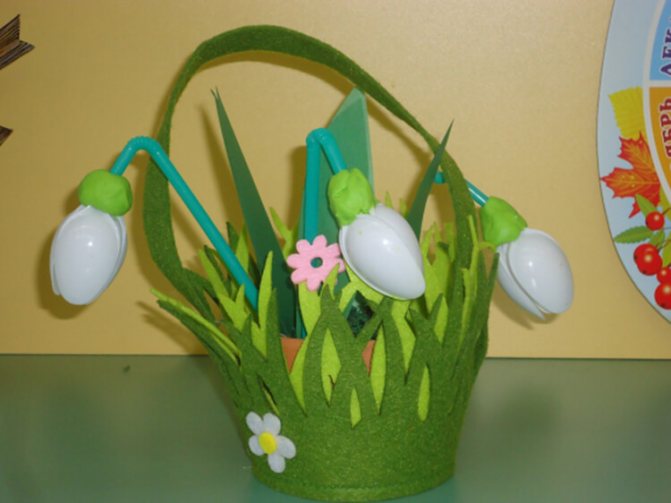
How to make snowdrops from disposable spoons with your own hands
Crafts made from plastic products have recently become popular. To make snowdrops, disposable spoons are ideal. Such a craft can stand for a long time and decorate the room.
Materials:
- Plastic spoons (the quantity depends on the type of bouquet. One flower requires 3-4 spoons)
- Plasticine
- Colored paper
- Scissors
You can prepare a jar for flowers as you wish - take a ready-made one, or decorate it in advance.
The handles of plastic spoons need to be cut off. We make a base for the flower from green plasticine and insert petals - spoons - into it.
We make a flower stem from a spoon handle - wrap it in green paper and secure it with glue.
Curly hole punchers to help
If you haven’t yet appreciated the convenience of using shaped hole punches in applique, then it’s time to buy a couple. Perfect little snowflakes that come out with just one click are simply miraculous!
Children will “spank” them with delight, and any applique decorated with such snowflakes will look much more interesting.
Polar bear
Foam board, which is easy to work with, can be used to create applications. The parts are cut out using the template and glued together. The tail is glued to the product and you can make a pendant from the bear by fixing a light braid on the product.
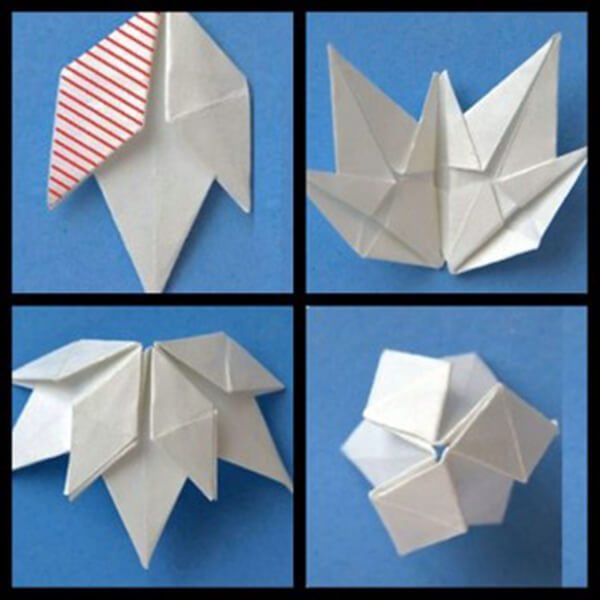
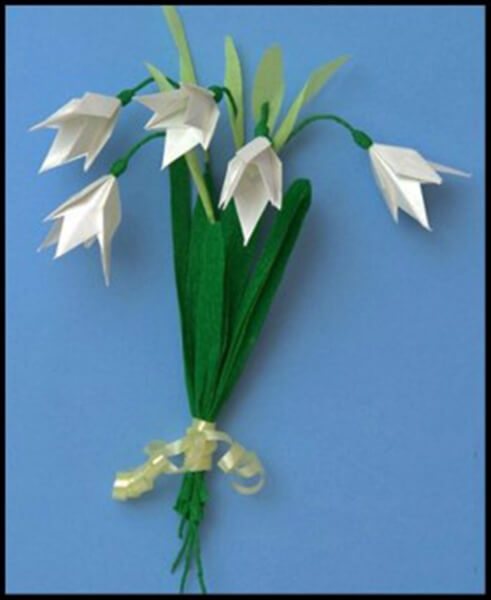
Snowdrops using paper origami technique: folding diagram
Such a bouquet made from a simple sheet of white paper can please the owner for a long time; snowdrops made using the origami technique will last a long time and will not wither.
To place such a bouquet in your home, all you need is a sheet of paper and a little patience.
Each snowdrop will consist of three parts (modules) called trefoils.
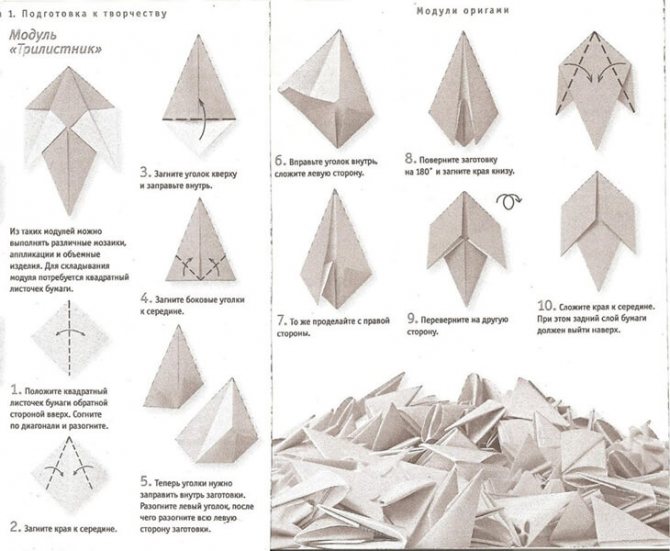
In addition to a white sheet of paper, you need to stock up on wire and green paper.
The first step will be three modules
Lubricate the small petal with glue. Let's insert it under the right petal of the second module, into the pocket.
We will also glue the third module into the pocket.
The modules need to be closed by gluing the outer petal into the pocket opposite. Space must be left between modules.
You will need 23 cm wire and 1 cm wide corrugated paper. We wrap the paper on the wire. The finished flower needs to be put on it. Make thickenings at the base of the flower.
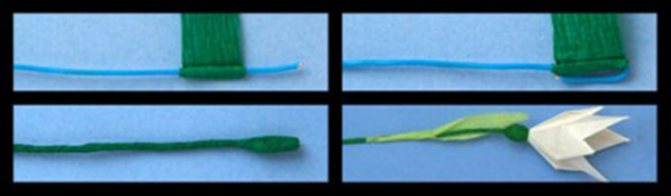
Glue the leaves to the flower, created from a thin strip of crepe paper.
Snowdrops from foamiran: DIY master class
On the eve of the winter holidays, the topic of snowdrops becomes quite acute. Everyone remembers the fairy tale about 12 months and wants to bring a piece of the fairy tale into their home. Foamiran is one of those materials that more accurately conveys the real appearance of a flower.
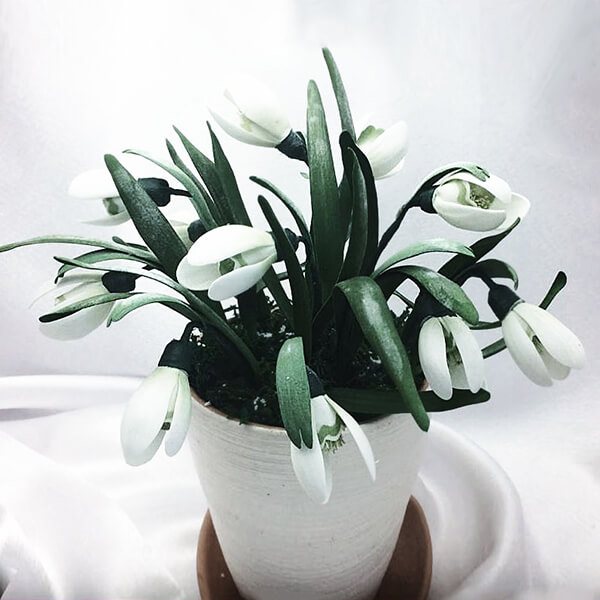
Let's look at how to make a flower from foamiran below.
Materials:
- Candle
- Tweezers
- Wire
- Toothpick
- Foamiran
- Pastel green
- Tape
- Hot gun
- Stamen
- Scissors
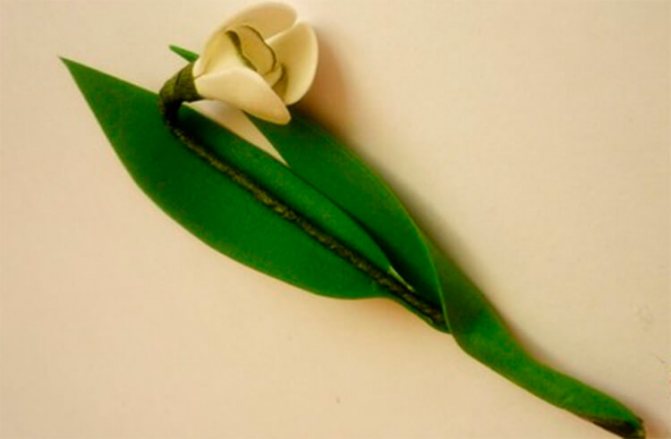
Petals should be of two types. Those in the middle should have the shape of an elongated heart 1.5 * 0.8 cm. The second petals will be located outside and measure 2.5 * 1.5 cm.
You need to make three petals of each size
Now we need a candle. We need to hold each petal over the fire so that they become voluminous.
The upper edges of each petal must be tinted with green pastel
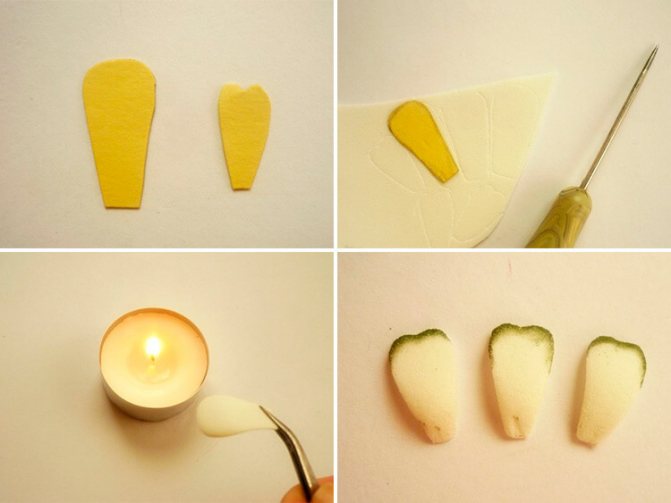
Glue the stamen to the edge of the wire and glue three smaller petals with green edges in a circle. Next we will attach three large petals.
Wrap the wire with tape, starting from the place where the flower bud is formed.
We cut out leaves from green fom and glue them to the stem of the flower.
Winter house
The white sheet is torn into small pieces - this will be snow. This activity is great for developing fingers. Ready-made house templates are printed and cut out. The house is pasted onto the main background, the roof is decorated with cotton wool. Nearby, snowdrifts are created with cotton material.
And at the final stage it is decorated with a previously prepared paper snowball.
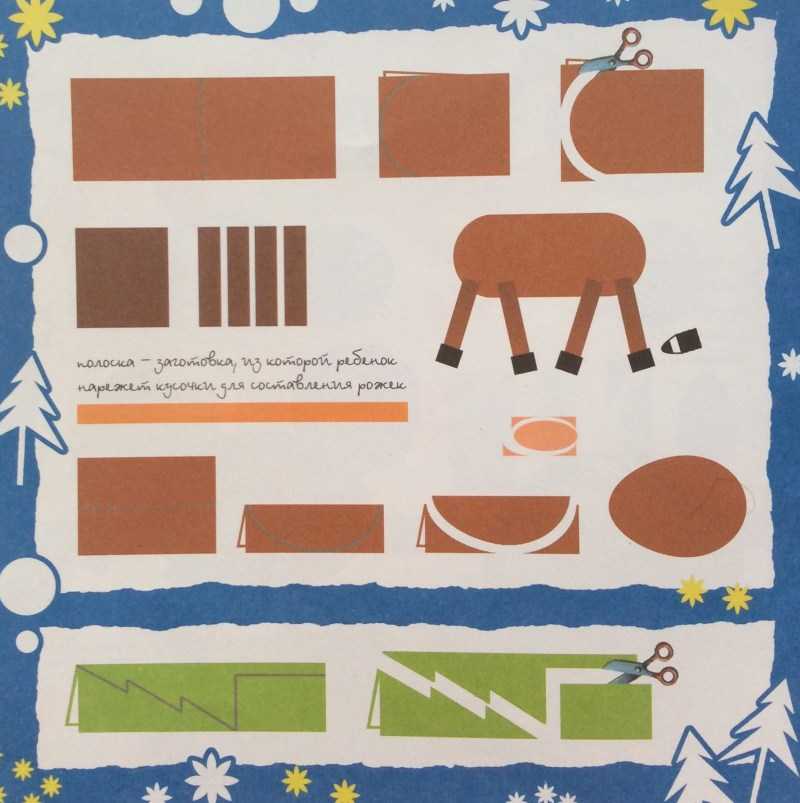
Deer
Disposable plates are very good as an applique on the winter theme. You can easily make a Christmas reindeer out of them. The plate is painted brown. Horns are created using handprints.
Cardboard rectangles are suitable for paws. All parts are cut out and attached to each other. Eyes made of beads or paper are glued onto the muzzle.
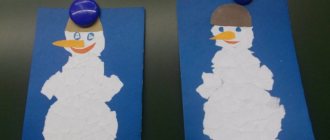
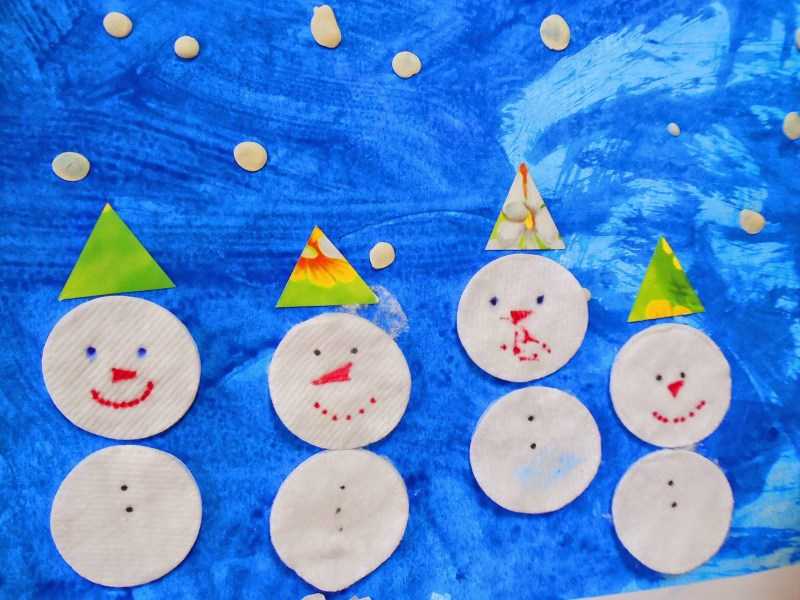
Snowman
To form a snowman, you will need to cut out the base from a white sheet. Cotton balls are glued to the prepared material. A cap, eyes and a nose are attached to the snowman. Handles and pom-poms can be added if desired.