Starting from an early age, a child will probably ask his parents the following question: “what is my body made of?” To help him understand this, build a human structure using paper along with the craft. There are many master classes with step-by-step instructions, with which it is not difficult to create a paper applique.
Application of a man from geometric shapes
Different techniques allow you to captivate children of any age with applique. For the first experiment, an applique of a person made from geometric shapes is good.
This method of execution will help develop the child’s associative thinking, help him understand the shapes of body parts and identify similar shapes.
In the photo of the applique, a full-length person is shown using simple shapes made of colored paper. You can also use blanks made of fabric or thick cardboard.
To ensure that classes with your baby are as educational as possible, adults should use the following techniques:
- Say out loud the names of body parts, show them on the child’s body;
- Say the names of the figures and demonstrate their similarity to parts of the body;
- Help the child understand where this or that part of the body should be in space and place it correctly on paper.

As for practice, for younger aunts you need to prepare templates of geometric shapes, which all you have to do is glue them correctly onto a sheet of paper.
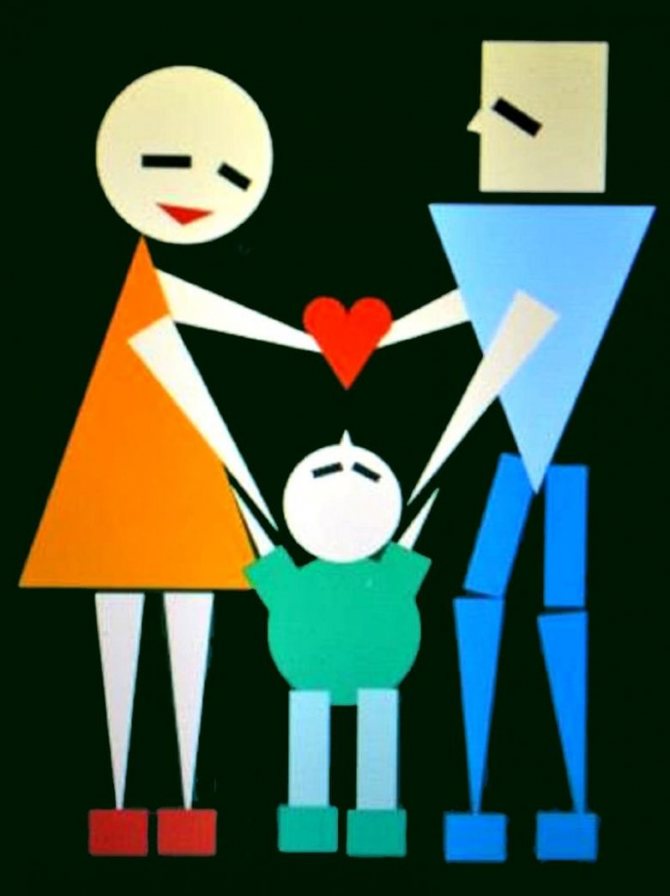
The places for gluing the figures can be marked on paper with an outline to make it easier for the baby to determine how to position the parts of the body relative to each other, or you can leave the baby a chance to determine for himself where the legs and arms of his person will look best.
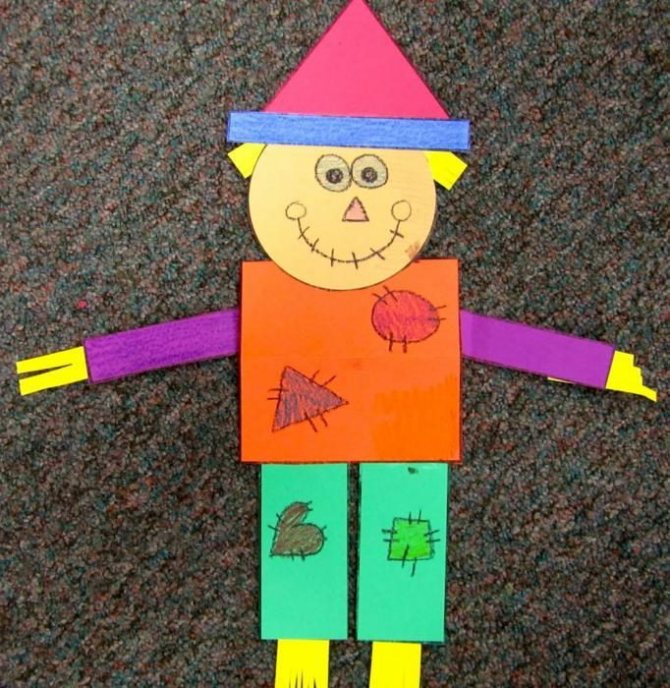
Older children can be trusted to cut out geometric shapes themselves and place them on paper. As you acquire skills, the task can be complicated by asking your child to make a composition with the image of several people.
Internal structure of a person
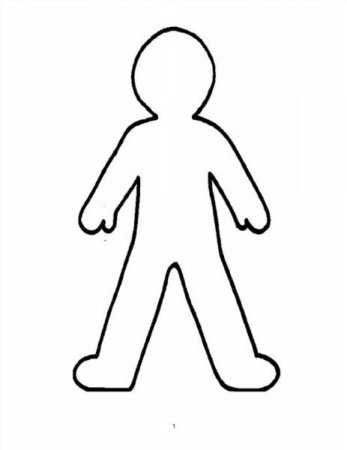
It helps the child quickly learn the basic human organs. Step by step execution:
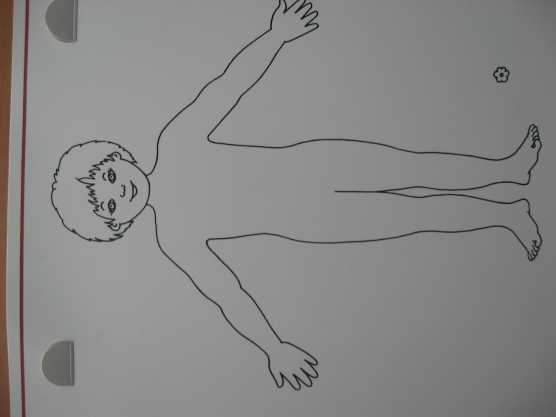
- Draw the outline of a person on white paper. To make it easier, find a ready-made convenient template on the Internet and print it.
- Separately, we draw the contours of the organs: brain, heart, lungs, liver, stomach, bladder. It will be most effective to do this on colored paper. The child will probably like the idea of pictures of the food he ate today. Therefore, select food cards and stick them inside the stomach in advance.
- Carefully trim the organs according to their outlines.
- We glue the details onto the sheet where the previously drawn outline of the person was. Do this in the right places: the brain - in the head, the heart and lungs - in the chest, the liver and stomach - in the stomach, the bladder - in the lower abdomen.
All that remains is to label each organ and cut out the outline of the person. A useful craft is ready.
Application of a person's face made of paper
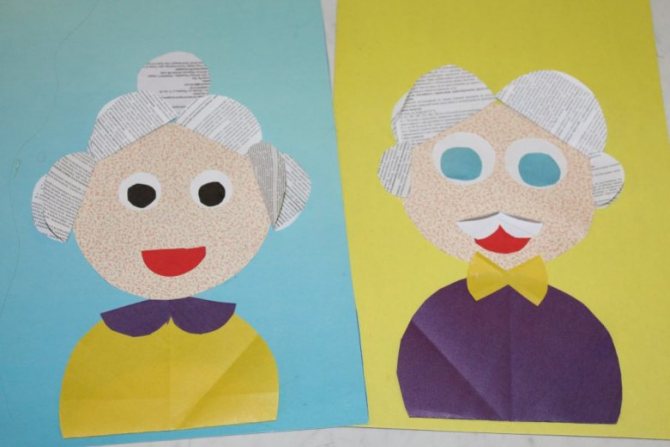
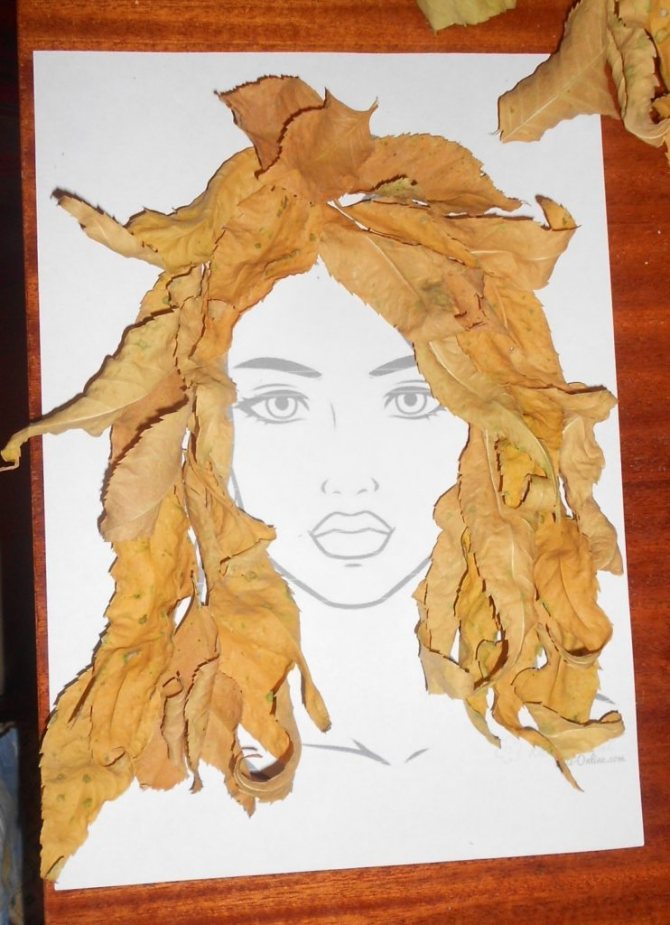
Having seriously studied body parts and geometric shapes, you can distract yourself a little and do more creative things - applique of the human face.
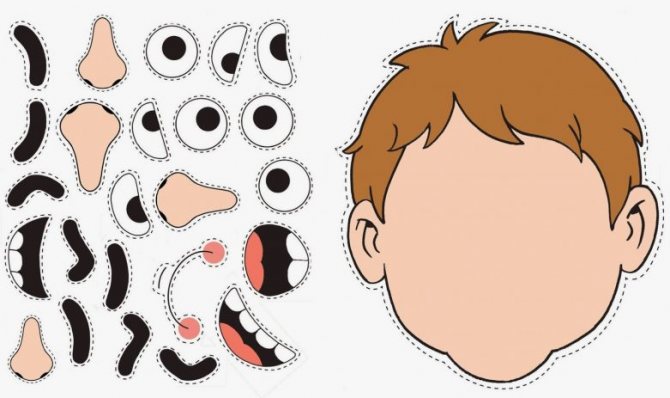
Here the child gets more space for imagination and enjoys studying not only the parts of the face and their names, but also practices using facial expressions to distinguish and show different emotions.
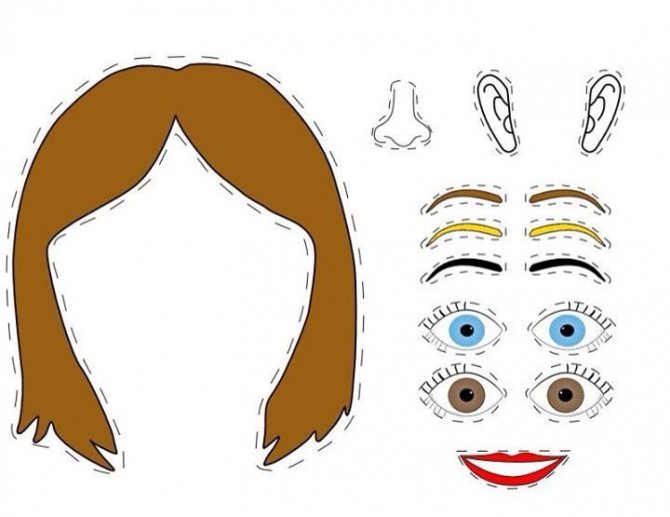
As with other applique techniques, parents need to talk about the face, sensory organs and their functions, show them to the baby on the body and discuss their position relative to each other.
On a sheet of paper, you should mark the outline of the face with a pencil, or prepare a circle or oval from paper, which will become the basis of the face and the rest of the elements will be placed on it.
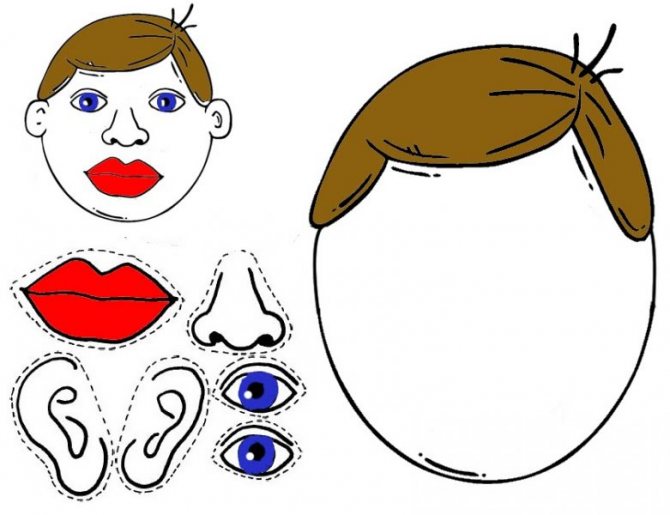
You should try to prepare several variations of facial elements in advance:
- Different eye colors and sizes;
- Eyebrows of different shapes
- Several nose options;
- Several smiles expressing different emotions;
- Ears of different sizes and shapes;
- Hair: hairstyles for boys and girls;
- Additional accessories (bow, hat, etc.).
In the process of making the applique, it is better to help the child stick the base face onto a sheet of paper and place the eyes correctly on the face - they will become a reference point for the baby, relative to which all other elements of the face need to be positioned.
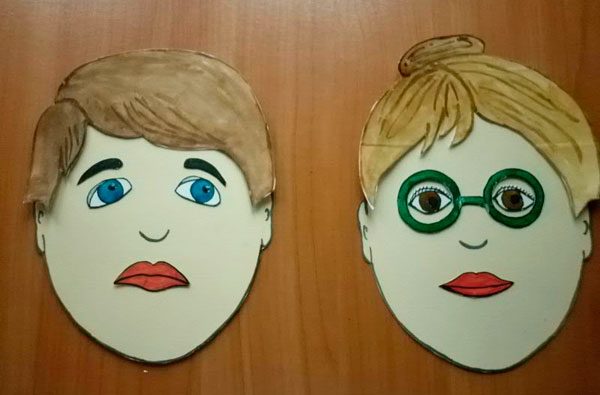
By gluing eyebrows above the eyes, a nose in the center of the face, ears parallel to the eyes, the child learns the basics of symmetry and proportions. Several stencil options will add an element of play and fun to this process.
A beautiful applique will not only delight your baby, but will also immerse him deeper into the world of creativity.

Text of the book “Lessons in visual arts in kindergarten. Middle group"
LESSON 7. INTRODUCTION TO ART – ILLUSTRATIONS BY E. RACHEV FOR RUSSIAN FOLK TALES
Software tasks.
Introduce children to E. Rachev’s illustrations for the fairy tales “Kolobok” and “Teremok”; help to notice characteristic features in the depiction of fairy tale characters (humanization, poses, clothing), in the landscape; develop attention to details that enrich the content of the work and help to better imagine what is happening.
Material.
Books of fairy tales (“Kolobok”, “Teremok”, “Masha and the Bear”) with illustrations by E. Rachev and books with illustrations by V. Lebedev.
Progress of the lesson.
Show the children V. Lebedev’s illustrations to S. Marshak’s books “Mustachioed and Striped”, “The Tale of a Stupid Mouse”, then add to them one or two more books by the same author, for example “The Multi-Colored Book”.
Help you remember who drew the illustrations for these books. To say that today children will see illustrations by another artist - Evgeny Rachev.
Show the illustrations on the covers of the books “Teremok” and “Kolobok” and ask what these fairy tales are called.
- How did you know, children, that this is the fairy tale “Kolobok”, and this is the fairy tale “Teremok”?
Confirm the children's answers that on the cover of each book are those about whom this fairy tale is drawn.
- Here is a sly smiling fox holding Kolobok on his paw. He opens his mouth wide and sings his boastful song. On another cover, the artist painted a mansion with happy animals looking out of it. Contentment can be seen by the expression of their faces.
Next, slowly look at the images of animals in the fairy tale “Kolobok”:
- Here is a bunny in a white embroidered shirt. What do you think, children, where did the bunny come from? (From the garden.) How did you guess about this? (The artist drew him with a carrot under his arm.) Look at his face. How does he look at Kolobok? (The bunny is surprised and delighted.)
– This illustration shows a wolf. How does he look at Kolobok? (Evil, staring with yellow eyes.)
– How did Rachev portray the bear? (The bear holds a log in which bees live and eats honey with a spoon. He opened his mouth and rolled his small eyes with pleasure, he likes honey so much. It is clear that the bear is clumsy, and it will not be difficult for Kolobok to run away from him.)
- Let's look at the fox. See how elegant she is. What's on her head? (Kokoshnik with patterns.) What sundress did Rachev draw for the fox? What's on your neck? (Beads.) What is the fox doing? Why is she holding her ear with one paw? What kind of face does she have?
– The artist depicted the fox in such a way that we see what a cunning deceiver she is. Rachev drew each animal differently. But they are all dressed like people, and the expressions on their faces are the same as people have (joyful, surprised, angry, cunning). His animals are completely different from those in the pictures of the artist Lebedev.
Then you can look at the illustrations again and draw the children's attention to the landscape.
– Where did Kolobok meet the bunny? (In the spruce forest, on the path.) And where with the wolf? (In a dense forest.) Where did the meeting with the fox take place? (At the edge of the forest.) The evening sky is visible through the trees.
– So, the artist Rachev shows us different places where Kolobok met with animals. But the artist Lebedev draws animals and people, but does not show where this happens. His illustrations are done on white paper.
You should also point out the decoration of pages with the text of fairy tales with decorative patterns.
When looking at the illustrations in the book “Teremok”, you should invite children to tell what these or other characters look like (what they are wearing, what they are holding in their paws, what expression is on their faces). Ask if the characters from this fairy tale are similar to people, what are the similarities.
Then it is advisable to see in the pictures how, as the pot is populated by residents, it changes and becomes more and more like a small house.
– First a window appeared. It was probably made by a fly and a squeaking mosquito. And to make the pot more stable, they propped it up with sticks.
- What new appeared when the frog-frog approached the tower? What else will be new at the tower? Let's take a look (ladder, roof).
– How did Rachev manage to show us that there was a stove in the mansion? (There is a chimney on the roof, smoke comes out of it.) This means that the hare, fox, and wolf no longer saw a pot, but a real house-teremok, and they also wanted to live in it.
When looking at the illustration with a bear, you need to draw the children’s attention to the bright red, crimson color of the sky, as if there was a fire. This color is disturbing and disturbs those who look at the picture. Something bad is about to happen. And indeed, a misfortune happened. The bear crushed the tower, and all the animals fled.
In conclusion, ask the children if they liked the illustrations by the artist E. Rachev. Show the cover of the book "Masha and the Bear". Ask which artist, in their opinion, drew the pictures for this fairy tale (Rachev). To say that children will look at this book for themselves and see how the illustrations are similar to the pictures for the fairy tales “Kolobok” and “Teremok” and how they differ.
LESSON 8. GAME EXERCISE WITH MOSAIC “ANIMALS FROM CIRCLES”
Target.
Give children an idea of how to transform a real image into a stylized one, preserving several characteristic features by which a specific animal can be recognized; develop creative imagination; learn to independently choose animals to lay out their images from circles and semicircles.
Material.
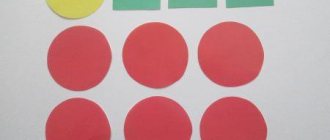
Subject pictures with realistic images of animals: dogs, cats, squirrels, foxes, bears, elephants, giraffes, tigers, etc.; cards with images of several animals made up of circles and semicircles (in fewer numbers than realistic pictures); circles, semicircles made of colored cardboard of different sizes (diameter of circles 8 cm,
6
cm,
4
cm,
2.5
cm,
1.5
cm
); chips.
Progress of the lesson.
In the first part of the lesson, children gather near the board. On the top shelf of the board, place subject pictures with realistic images of animals at some distance from each other. On the bottom shelf are cards with stylized images of animals made of circles and semicircles (in fewer quantities than subject pictures).
Ask the children who is in the pictures. Add to the children’s answers the names of any characteristic features of this animal: “Yes, this is an elephant. He has a long trunk and thick legs"; “The squirrel has a big fluffy tail”; “The giraffe has a long neck and long legs,” etc.
Draw the children's attention to the cards that depict animals made of circles and semicircles, and give the task: “Guess what animals are depicted on the cards, and place them next to the pictures that show the same animals, but real ones.” Children complete the task one by one, or the teacher gives them one card each, which they each place next to the picture. Ask each child: “Why do you think this is a dog (giraffe, elephant, squirrel, etc.)?” Or: “How did you guess that it was a fox?” The child names one or two signs characteristic of this animal. You can give children chips for completing the task correctly and giving the correct answer. At the end, ask which animals were left without a mate. Say that animals can be depicted in different ways: the way we see them (point to the pictures), or made up of circles and semicircles, or something else. But in order to be able to find out what kind of animal it is, it is necessary to preserve in it what distinguishes it from other animals. For example, if an elephant does not have a trunk, and a giraffe has a long neck, then no one will recognize them.
…
Rice. 61.
Approximate images of animals made from circles and semicircles
You can do the “Correct your mistakes” exercise. The teacher asks the children to turn away or close their eyes and rearranges pairs of animals or places next to those animals from the circles that remained on the bottom shelf of the board.
Those whom he called must place identical animals next to each other: two foxes, two elephants...
The second part of the lesson is held at tables that are arranged so that the children can see each other's work. Boxes with circles and semicircles are placed on the tables.
Remove stylized images of animals from the board, leaving substantive pictures. You can add one or two new pictures (lamb, horse) and invite children to draw any animal from circles and semicircles, selecting them by size and color.
At the end, each child turns to his friend by name and asks him to guess who he is. If the answer is correct, the “artist” takes the chip from the tray and gives it to his friend. If no one can guess the image, the teacher asks the author who he depicted, and the children - why it was impossible to guess who it was. Invites those who want to change something in the image to highlight a characteristic feature so that the animal becomes recognizable.
Say that in the next lesson the children will again make up whatever animal they want from circles and semicircles and stick it on a piece of paper.
Leave the mosaic and pictures for the free use of children for independent exercises.
LESSON 9. APPLICATION. “DESIGN A FUNNY ANIMAL”
Software tasks.
Develop imagination and creativity (the ability to independently assemble an animal from circles and semicircles of different sizes and colors); continue to practice children in cutting circles from squares and semicircles by cutting the circles in half along the fold; compose an image from parts in a certain sequence, placing first the large parts in the middle of a sheet of paper, then the small ones.
Material.
The teacher has a decorated box for the didactic game “Funny Animals”, cardboard circles and mosaic semicircles (see lesson 8). Children have sheets of thick paper or cardboard the size of 1/2 a landscape sheet. Squares of three or four sizes for cutting out circles and semicircles and ready-made small circles in one box for two children; scissors, glue.
Progress of the lesson.
Remind the children that they made various funny animals from a mosaic. To say that today everyone will come up with a little animal and compose it on a piece of paper from circles and semicircles. Children will cut out large circles and semicircles from squares, and keep small circles in a box. If they need small half circles, you can cut the small circles in half.
In conclusion, say: “Then we will make a board game “Funny Animals” from your applications and play it. I have already prepared a box for cards with animals. Here she is".
During the lesson, remind, if necessary, how to cut circles from squares. Ask some children what kind of animal they are going to depict, from which figures they will make this or that part of the body. Encourage those who decide to depict an animal in motion (sitting, running, etc.). Make sure that the children first lay out the large parts of the animal (torso, head), and do not rush to stick them on right away until they select the most suitable shapes and sizes for certain parts of the body. You can invite individual children to replace some figures with others and see if it works better. We should approve of those children who add interesting details to their images and decorate them with small details.
At the end of the lesson, put children's applications on the stand and examine them. When pointing to a particular work, ask what kind of animal is depicted on it. If identical animals are named, draw the attention of all children to their differences, emphasizing that the children portrayed the same character in their own way. Mark original works with characters that children had not previously created while playing with mosaics.
If time permits, conduct several play exercises with children's appliqué:
1. Place one of the cards in front of the children and offer to pick up cardboard figures - circles and semicircles of the same size and the same amount as it took to draw the animal on the card. The color of the figures is not taken into account.
2. Place another card in front of the children and ask them to count how many circles and how many semicircles went into the image of the animal, and determine which figures were used more.
3. Find figures of the same color as those used in the image of the animal. If the color was repeated in several parts of the animal, then it is enough to select one circle of this color.
Note. Game exercises should be carried out with children in their free time, giving each a card with an image of an animal. You can select other game actions.
LESSON 10. APPLICATION. “FUNNY PEOPLE FROM CLUBS”
Software tasks.
Continue to develop children’s imagination and creativity, the ability to independently invent human figures from circles and semicircles; convey simple movements of the arms or legs of the figures; make human figures starting from the head.
Material.
The teacher has 3-5 samples with images of different people made from circles and semicircles. Children have several squares: 7.5x7.5 cm
;
6 × 6 cm
and 4 × 4
cm
and ready-made small circles (see mosaic figures made from material for the lesson

Progress of the lesson.
The teacher addresses the children:
– In the last lesson, you yourself came up with and depicted various funny little animals from circles and semicircles. What do you think, children, is it possible to use circles and semicircles to depict something other than animals?
– So I decided to make little men out of circles and semicircles. Look what funny little people I came up with. (Shows 3-5 images.) Are these people different or the same? Why did they turn out different, since they are all made up of circles and semicircles? Yes, all parts of the human body are made up of circles and semicircles of different sizes, colors and numbers. One man’s body is made up of two or three small circles, another’s is made up of one large circle, the third’s is made up of a circle and a semicircle. (You can also compare their heads, legs, arms, costume details and movements.)
…
Rice. 62.
Figure options
– All these little men are made up of circles and semicircles of different colors. And who will notice which parts of the body all the little men have the same color? (Pink face and pink palms.) These little men want you to invent and portray friends and girlfriends for them, but only so that each new little man is different from the others. They will not accept the same people into their company.
The teacher removes the samples and invites the children to start working.
If necessary, reminds the children that they will cut out large circles and semicircles themselves from squares, and they have small figures ready in boxes.
During the lesson, the teacher makes sure that the children first make a figure of a man, and then stick it on, starting from the head. It suggests that the head should be glued a little away from the top edge of the sheet of paper so that hair, a cap, etc. can be depicted on the head.
Encourages to depict various details on the costumes of the little men: collar, pockets, buttons, bows. This will help give the characters expressiveness and variety.
At the end of the lesson, you can put samples on the stand and say: “Little people have come to meet their new friends. But first they want to see if the new kids are different from themselves and from each other.” Invite four or five children to place their images separately from the samples, and everyone to see how the characters differ from each other. Then place them next to the samples.
Carry out the same work with the applications of other children. In conclusion, it is very interesting to look at these little men, because they are all different, and each child came up with and portrayed a funny little man in his own way.
LESSON 11. COLLECTIVE APPLICATION. "RESIDENTS OF THE ROUND CITY"
Software tasks.
To develop in children the ability to independently, based on previously acquired knowledge and skills, choose the content of their work and carry it out independently; continue to develop an interest in teamwork and a desire to do one’s part well; strengthen the skills of cutting circles from squares.
Material.
The teacher has a screen with the image of a “round city”, at the bottom of which there is a narrow pocket for children’s work and separate small screens with two or three pockets. Children have sheets of thick paper the size of 1/4 of a landscape sheet or cardboard; colored squares 6×6 cm,
ready-made mugs; scissors, glue.
Progress of the lesson.
The teacher says:
– In one fairy-tale country, they built an extraordinary city and called it the City of Circles. Everything in it was round (he puts a screen with a picture of the city on the table): round houses with round windows, stairs and balconies near the houses were also made of small circles. The trees and flowers were also round. Such a city should also have special residents. What do you think children should be like?
Confirms that in the City of Circles the inhabitants must also be special - consisting of circles. These can be people, animals and birds. He says that today everyone will decide for himself what kind of resident he will invent and portray for the fairy-tale city - a little man, an animal or a bird.
At the end of the lesson, you can say: “The City of Circles began to be populated by residents.” Take ready-made applications from children and insert them into the pockets of the screen and into separate screens, giving each character one or another characteristic. Gradually create a panorama of the city - in the background there is a screen with the image of the city and several residents at the bottom of the screen, in the foreground (table) there are residents placed in small screens (animals should be placed in a horizontal position if they are depicted on the cards in this position).
From some applications you can create plot groups (a man with an animal, etc.).
Invite the children to the table, listen to their statements, move certain screens with characters at their request and summarize: “Today you all together populated the fabulous City of Circles with extraordinary inhabitants. Everyone came up with their own resident, and together they got the population of the whole city. All the residents in it are different, although they are all made of circles.”
Leave a panorama of the city for a few days in a group for children to play with.
Application of a man in motion
The next level of complexity is considered to be the appliqué of a person in motion. This application for children will seem more painstaking and will require their concentration.
But, in addition to basic skills, it will allow children to study the structure of the body, the names of poses and directions of movements. The basis of this technique is the application of a person from geometric shapes.
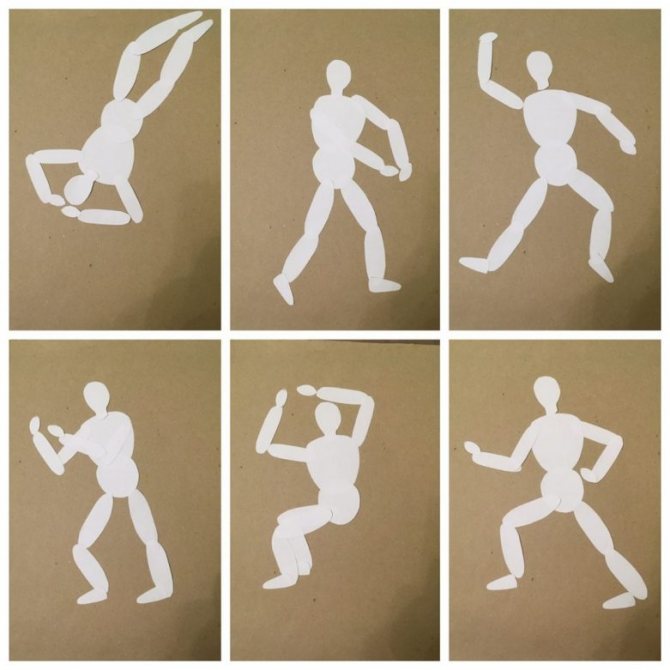
This time you will need to make more smaller pieces:
- The arms and legs are depicted from two thin rectangles;
- The human torso is a square or rectangle;
- The head is a smaller square or circle;
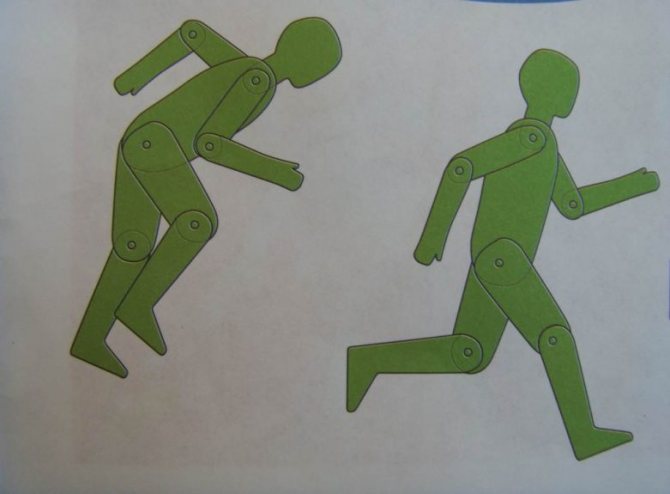
For clarity, you can always offer the child a basis from which he can start and continue to act independently: for example, glue torso figures for two people at once onto a piece of paper, and invite the child to glue his hands so that the figures are in different poses.

Of course, all the names of the poses need to be voiced and shown to the baby by example. As experience accumulates, the child will be able to create compositions from several figures depicting active ball games, physical education lessons, swimming, dancing and many other movements familiar to him.
Studying human anatomy using application
Older children can also use appliques to learn body anatomy. The older the child, the more elements of internal organs will be needed. To begin with, it is enough to use blanks to illustrate the brain, lungs, heart, stomach, liver and kidneys.
The more organs the child knows, the more new elements can be added, for example, adding intestines, spleen, etc. to the application.
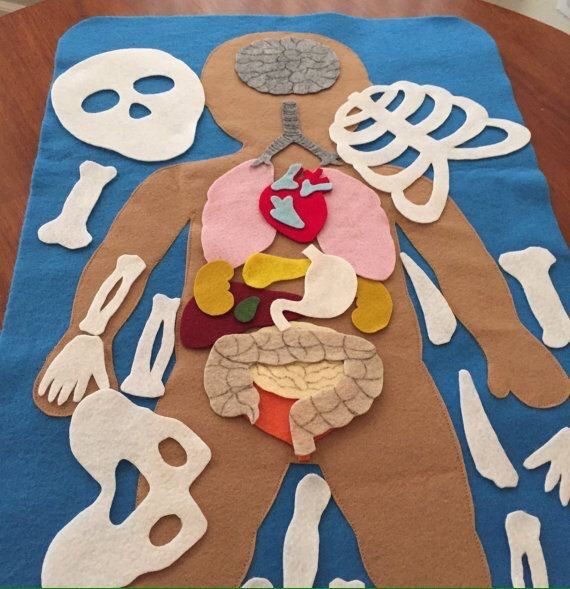
Since studying anatomy is a lengthy process, appliqué elements are usually made of durable multi-colored materials, such as felt or colored cardboard.
Organ templates can be taken from human anatomy atlases.
Studying anatomy
Older children will be interested in studying human anatomy using the applique as an example. This game will not only develop fine motor skills and perseverance, but will also introduce children to the structure of internal organs.
Depending on age and level of training, the number of organs may vary. To play you will need:
- template (contours of the human body);
- organs (brain, stomach, lungs, liver, heart, intestines and others);
- diagram with the location of organs on the template and their names;
- glue.
The essence of the game is to introduce the child to internal organs.
- Each organ is taken in turn. Its name is clearly pronounced and shown on the diagram where it should be located. For older children, the purpose of this organ is explained.
- The child takes the organ shown and glues it onto the person’s stencil for appliqué.
- The actions are repeated with each organ.

If this is not the first time an acquaintance with the internal structure of a person occurs, then the child can be asked to independently glue the organs onto the template.

Applications for advanced
All creative tasks develop imagination in children and adults, a craving for handicrafts and art. When we learn to make appliqués with our own hands, then, as with any task, we can approach the matter precisely and strictly “as per the manual,” or we can add elements of play and even mischief.
To further involve your child in the process, use other, non-standard materials in addition to paper:
- Thick knitting threads that can be woven into braids are well suited for hair;
- For hairstyles and beards - cotton wool;
- To depict clothes, you can mix different materials: paper and fabric, glitter, paper curls;
If you have mastered paper applique, you can safely move on to other types: appliques made from beads, from seeds, from autumn natural materials.
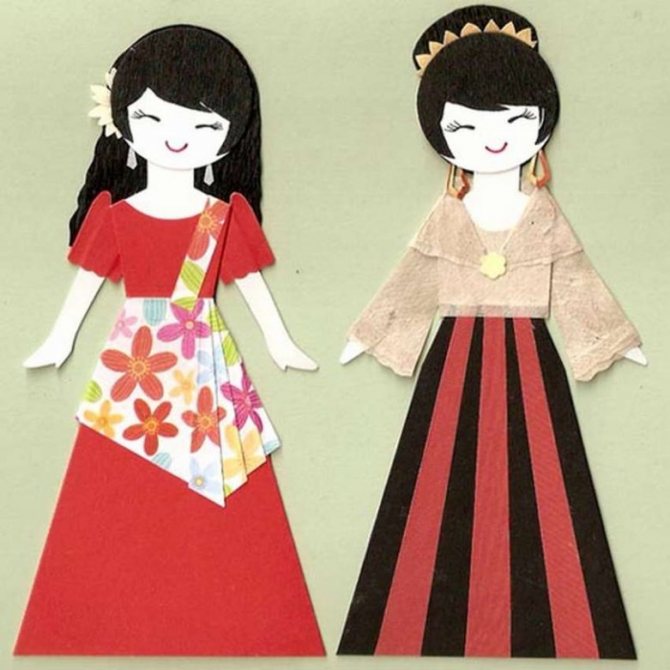
The main thing is that children and adults enjoy this process.
