Preparation of materials
Before starting work, you need to assemble a “utility box”, it will include all the necessary tools and materials that you cannot do without, namely:
- multi-colored soft felt 1 - 2 mm thick (country of production does not matter);
- a simple pencil and pen (professionals prefer self-disappearing fabric markers, in this case colored and white);
- 2-3 crayons with thin edges (since the details will be small);
- 2 types of sharp scissors (with blunt and sharp ends for ease of cutting patterns);
- pins or needles (the thinner the better);
- glue (as an option, “Moment Crystal”; ordinary second glue is not suitable, since it impregnates the felt and leaves marks), or a glue gun (if available);
- hole punch (for cutting out small circles);
- ready-made eyes for fairy tale characters (they are sold in handicraft stores) or beads;
- multi-colored cotton threads for hand and machine sewing;
- multi-colored satin ribbons 5 mm thick;
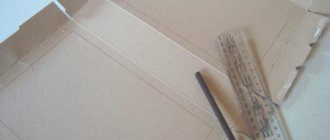
- thick cardboard measuring 20 cm by 30 cm (more is possible), you will need 2 sheets;
- padding polyester for stuffing the house (sold in Fabric stores).
Felt and working with it implies knowledge of the characteristics of this type of fabric , which will greatly simplify the process of sewing finger theater with your own hands and creating a pattern, namely:
- there are many types of felt (to create small parts it is more convenient to work with soft synthetic felt 1 mm thick);
- You can buy felt fabric in handicraft stores or on the Internet (both in sheets and by the meter). For fairy tale characters you will need many different colors, so it is better to purchase plain felt in sheets;
- felt does not fray or crumble when trimmed, which allows you to avoid processing the edges of the products;
- it is wear-resistant (however, with intensive use, pills form on some types of fabric);
- felt toys are very light due to the porous structure of the material;
- the fabric is very plastic and does not break when bent (hard felt can form creases when bent, so it is used for working with large parts).
How to make patterns
Before you start making patterns, it is useful to get acquainted with the types of finger theaters, which will help determine the direction of work.
Classification of finger theaters:
- A collection of toys that fit onto children's fingers, hiding them inside the doll.
- A set of characters with 2 round holes in the lower part of the body, into which the child’s index and middle fingers are inserted, creating movable legs for a fairy tale or cartoon character.
The first option is more practical and durable; these are the pattern patterns that will be offered in this article. However, if desired, any template can be slightly adjusted by adding holes and sewing the toys using the second method. You can make a finger theater from felt yourself, or find ready-made templates in books on handicrafts or on the Internet.
To make your own pattern, you need:
- determine which characters are to be “brought to life” and find what they look like;
- draw on paper the characters of the required size and all the details separately (arms, legs, cheeks, ears) or print a ready-made template from the computer screen. As a rule, toy patterns consist of the main part and the front parts;
- cut out parts;
A felt finger theater is made in several stages
- attach with pins to felt fabric and cut out according to the design without deviations;
- if the characters are planned to be double-sided, then the number of pattern pieces will double (the main thing here is consistency and not to get confused, first cut out one character and put the pieces together, then proceed to the next one). For beginning craftsmen, it is easier to start with single-sided dolls.
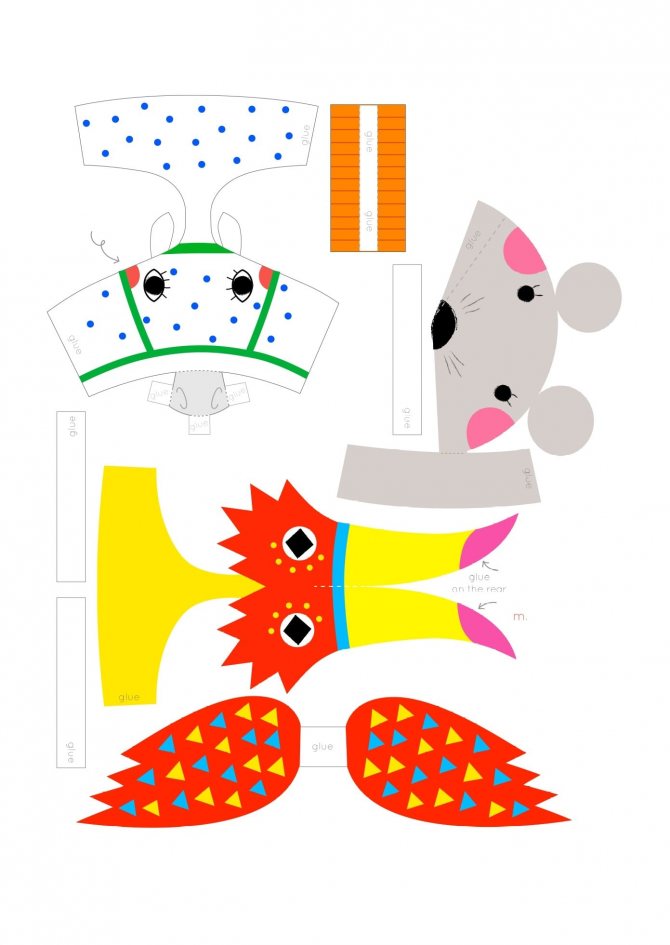
DIY paper finger theater
To make a finger theater from paper, you will need: a printed template, scissors, felt-tip pens or pencils for coloring, and tape.
Print out the paper dolls and cut out a few millimeters from the outlines, except for a small strip around the finger, which you can cut exactly according to the template.
Wrap the strip around your finger to get the correct diameter of the finger puppet ring, secure the strip with tape.
If you want to color your little characters, do it before cutting, or at least before you fold the strip, it will be much easier!
Finger Theater "School"
Among these finger characters you will find a teacher and students.
Family
Finger Theater “Animals”
Zoo
Spring
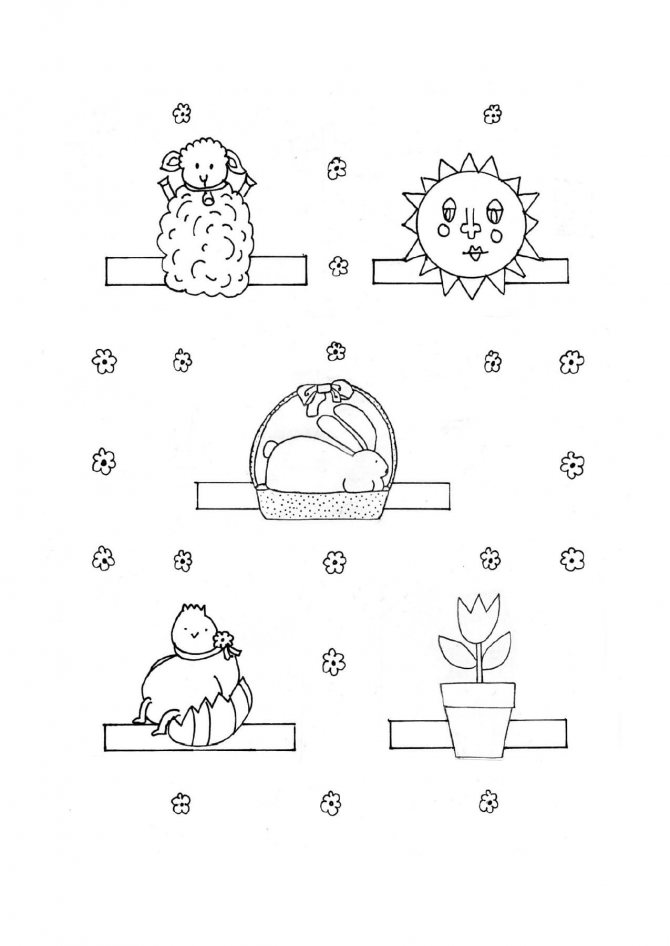
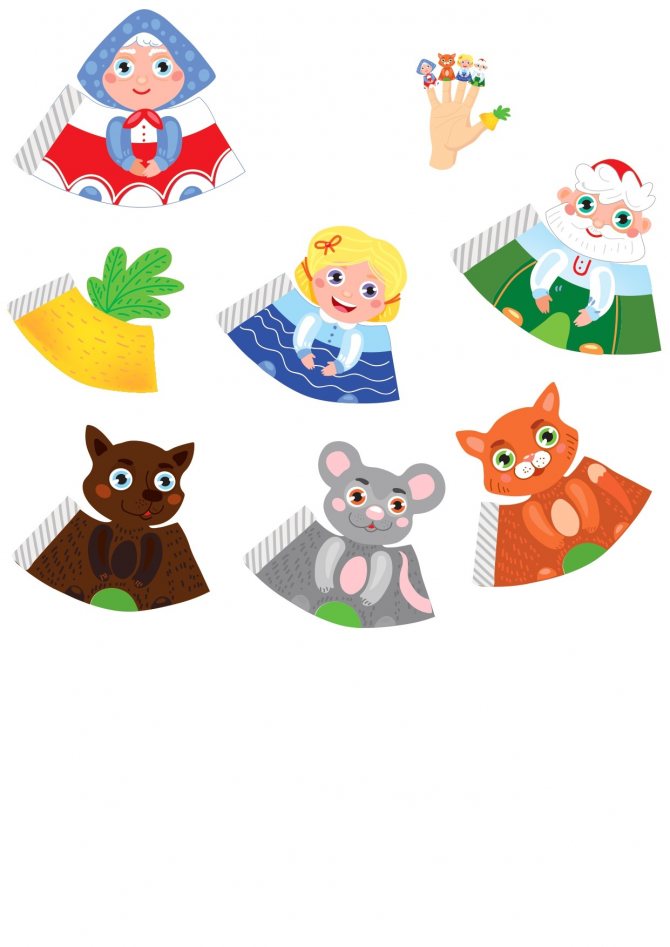
turnip
The Repka Finger Theater is presented in two versions - choose what you like best!
Finger theater made of paper “Summer”
Piglets
Farm
Funny snakes
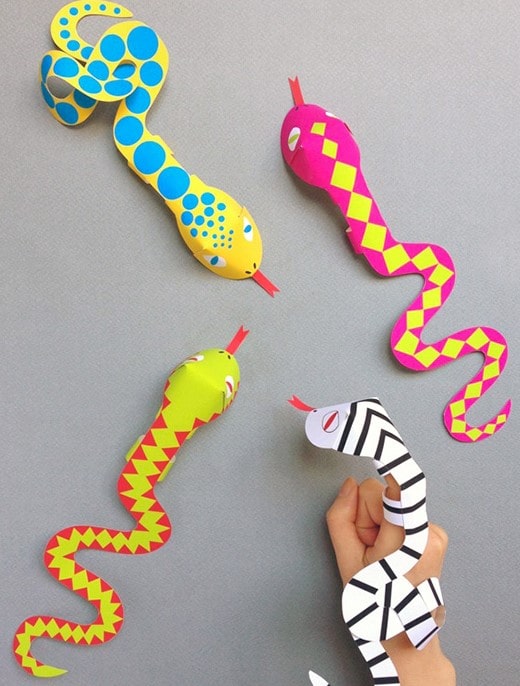
Print the template in color or black and white. For children's fingers, you may want to reduce the size of the snakes - use the "Scale" print setting.
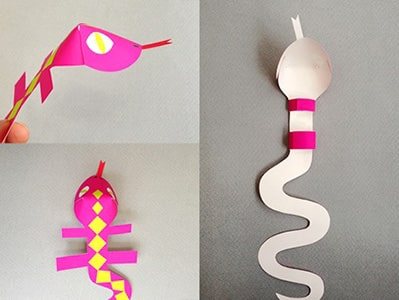
Cut out the snake's body along the contour and glue it together, as in the photo.
Here are the paper finger theater snake templates:
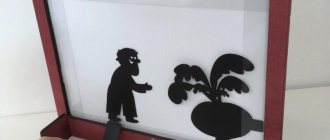
Finger theater made of paper - three-dimensional puppets
Scene
For easy storage of dolls, the stage can be made flat in the form of a book spread or voluminous from hard felt. This creates a finished decoration and an envelope for storing the toys.
Stages of creating a flat scene in the form of a book spread:
- Take 4 pieces of felt measuring 20 cm by 30 cm (or larger), 2 of which are green (this will be the inside of the scene) and 2 more pieces of any other color for the cover.
- Make flat one-sided patterns of trees, a house, the sun, clouds (they will serve as permanent decorations for the intended fairy tale (for example, in a “kolobok” it makes sense to sew a house, a path, several trees, grass and the sun).
Here is an example of the scenery for the fairy tale “At the Order of the Pike”:
- Sew the decorations onto the green pieces of felt.
- Sew 2 sheets together along the inner edge (like the binding of a book).
- Sew the cover to the finished inside of the stage and trim the edges (decorate with braid).
This is roughly what it should look like:
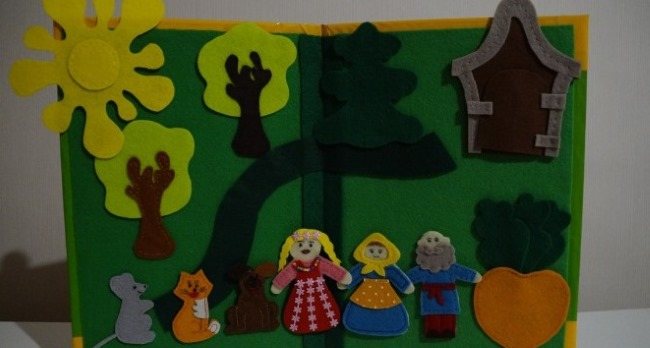
The advantage of a flat stage spread is its versatility for several fairy tales at the same time with similar scenery (only the characters change).
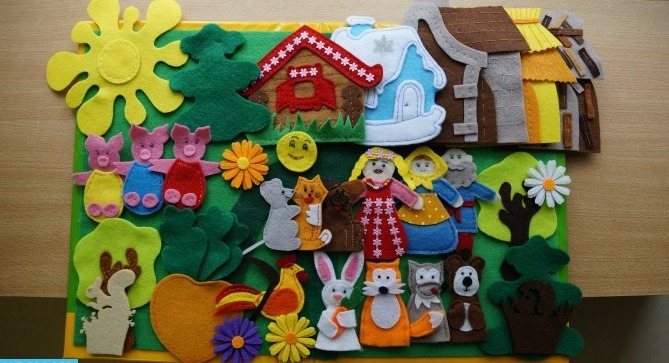
And if the decorations are not sewn on, but placed on Velcro tape, then there are even more options. An example of such fairy tales: “Kolobok”, “The Three Little Pigs”, “At the Command of the Pike”, “Turnip”, “The Thirtieth Kingdom”, “Geese-Swans”. An example of such a theater from one scene and the characters of 3 fairy tales is given below.
Stages of creating a three-dimensional scene from hard felt:
- Gather materials: 3 large sheets of hard felt, 30*30 cm (or 30*20 cm) in size and 3 mm thick (it is possible to use thinner felt, but for strength and stability it will need to be sewn to cardboard).
- Draw a pattern on paper of the desired shape of the scene (front part and two side parts), transfer it to the fabric, trace it with a marker and cut it out with a stationery knife or scissors.
- Decorate the main facade of the stage with lace curtains or fabric.
- Connect the three parts of the stage together with seams.
This is what the approximate result should be.
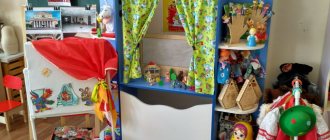
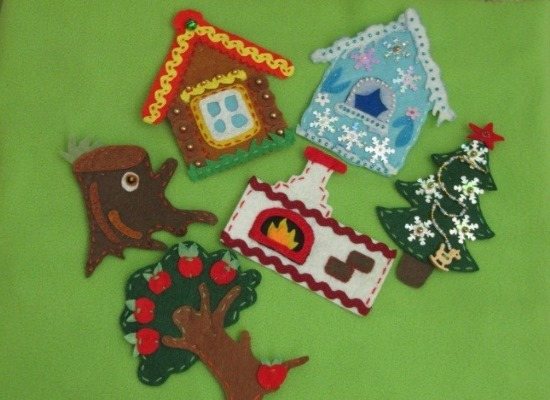
House for finger theater
If you plan to sew a finger theater for a fairy tale, the action of which mainly takes place in a house (for example, “Teremok”, “Three Bears”, “The Wolf and the Seven Little Goats”, “Masha and the Bear”, “Hen Ryaba”, “Zayushkina’s Hut”), then it makes sense to make the scene in the form of a house book.
Like in this photo:
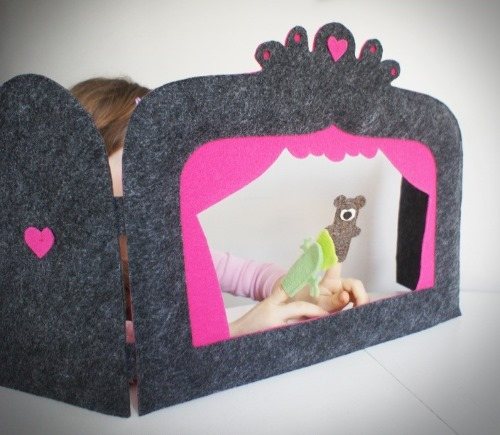
And if you want to complicate your task, then you should try making a three-dimensional house from felt. Like in this picture:
How to sew a three-dimensional house - step-by-step description (guideline photo above):
- Prepare materials (felt in 4 colors (light brown for the house, gray for the roof, orange for balconies and green for the large base), 2 types of braid for curtains).
- Make a paper pattern of all parts of the house (according to the table):
| House detail | Pattern | How many felt pieces will you need? |
| House walls | 1 square with all sides 20 cm long | 6 |
| Window | 1 square window with sides 5 cm long | 2 |
| Balconies and door | 1 rectangle 3*10 cm | 3 |
| Front and rear parts of the roof | 1 equilateral triangle with edges 25 cm long | 2 |
| Roof base | 1 rectangle 20*25 cm | 1 |
| Roof roof | 1 rectangle 50 cm by 20 cm | 1 |
- Cut out all the details of the house according to the pattern.
- First you need to sew windows, a door and a balcony onto the square walls of the house.
- Sew curtains on the windows from braid, decorate the balcony with lace.
When sewing on the balcony, form a pocket so that later you can put a finger toy there.
- Sew the walls of the house from 6 parts and fill it with synthetic padding.
- Sew a balcony onto the front part of the roof and decorate it.
- Similarly, sew a roof from 2 triangles, a base and a roof. Also fill with padding polyester.
- Sew the roof to the base of the house.
- For greater stability, it is recommended to sew the house to the base (which is made from 2 large identical sheets of green felt, between which cardboard is inserted and everything is sewn together at the edges).
Presentation “Master class on making a cone theater “Turnip”
Maria Vladimirovna
Presentation “Master class on making a cone theater “Turnip”
budgetary institution of vocational education
"Nyagan Technological College"
Master Class
Cone theater " Repka "
Student: Maria Vladimirovna Pavlova
I bring to your attention the cone theater " Repka "
.
Older children can easily cope with its production .
Younger preschoolers can complete the finished parts. For this you will need: colored paper; white paper A4; scissors; glue; hold on pencil. Step 1. Prepare everything you need to make the theater .
Step 2. Cut out circles from colored paper and one circle from white paper (you can choose the scale as you wish)
.
Step 3. Take one circle and divide it into 4 parts.
Step 4. Cut out the triangle.
Step 5. We roll up the resulting workpiece to form a cap.
Step 6. And so on with the rest.
Step 7. On white paper, draw the faces of the characters and cut them out in the shape of a square.
Step 8. Carefully cut out their faces.
Step 9. Glue the characters' faces to one of the cones .
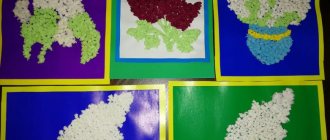
Step 10. Draw a bush like this on green paper and cut it out.
Step 11. Glue the yellow circle to our green bush. a turnip like this !
Step 12. Glue the turnip to the cone .
Step 13. Take two white A4 sheets and glue the other to the edge of one white paper.
Step 14. Glue blue paper on top of the first sheet of paper, and glue green paper to the second white paper.
Step 15. Cut out a house like this from brown construction paper.
Step 16. Making windows for the house. Cut out a yellow circle and a yellow square. We glue them to our house.
Step 17. We glue our house to the left corner of the blue background.
Step 18. Glue a path of brown paper to the green background.
Step 17. Place the turnip and our characters . Our cone theater is ready ! After finishing the work, ask the child to tell him what he did, and be sure to praise him, he tried.
Thank you for attention!
Attached files:
Master class for teachers of preschool educational institutions “Making a tabletop cone theater” The relevance of the master class lies in the fact that theatrical activities are one of the most popular and exciting areas.
Master class for parents in the junior group “Making a tabletop cone theater” Master class for parents in the junior group “Making a tabletop cone theater” Goal: to disseminate experience in manufacturing.
Master class on making a bibabo doll for a puppet theater Prepare everything you need for work: Fashion a blank from plasticine. Cover the first layer with newsprint soaked in water.
Presentation “Master class on making felt puppets for the finger theater” Theatrical action is intended not so much to entertain the viewer as to educate, learn lessons from what is seen, and project a fictional one.
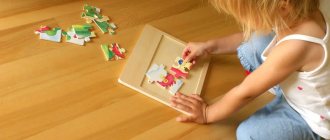
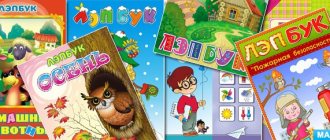
Master class on making a lapbook based on the fairy tale “Turnip” Didactic manual “Lapbook based on the fairy tale Turnip” for younger children. I started making this teaching aid after determining the topic of the project.
Master class on making a finger theater “Geese-Swans” Stage 1. Knitting a finger puppet Alyonushka Cast on 4 chain stitches with pearl yarn and knit in single crochet stitches. Then decrease while knitting.
Master class on making a knitted theater “Teremok” The topic of my self-education plan: “Developing interest in the world around us through theatrical activities” One of the tasks: consistent. Master class on interaction with parents on making a tabletop theater “Turnip” I present to your attention the making of a tabletop theater “Turnip” from scrap and waste materials from Elina Lazareva’s family. To.
Source
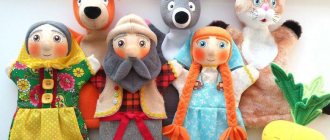
Masha and the Bear
This DIY felt finger theater (patterns are included) includes several funny characters (the girl Masha, a bear, a pig, a rabbit, a bear and 2 wolves).
Since the cartoon takes place in a bear's hut and in a vegetable garden, it would be interesting to create a scene in the form of a double-page book (as described at the beginning of the article), making a hut on one page, and on the second - scenery in the form of a vegetable garden with trees and vegetables, as well as Wolves Ambulance.
Examples of decorations (they can be movable or Velcro):
- Ambulance of two wolves from the cartoon (pattern);

- Trees, vegetables in beds, fence.
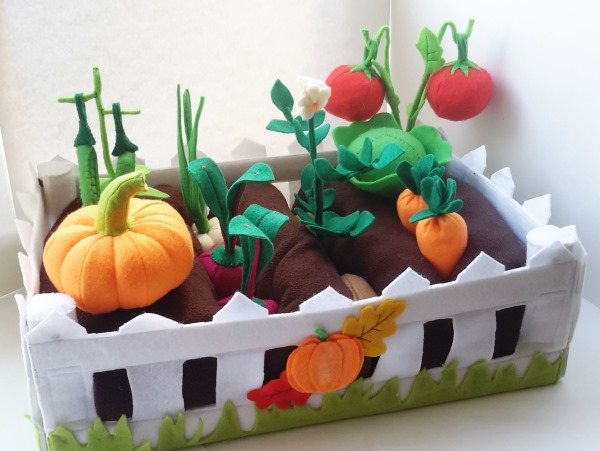
It will be very interesting for children to play if, instead of a stage, you sew a voluminous vegetable garden and a house (which move and create more opportunities for imagination), as in this photo.
Step-by-step description of sewing heroes
You can start with sewing the characters of a fairy tale, as well as with the scenery or stage.
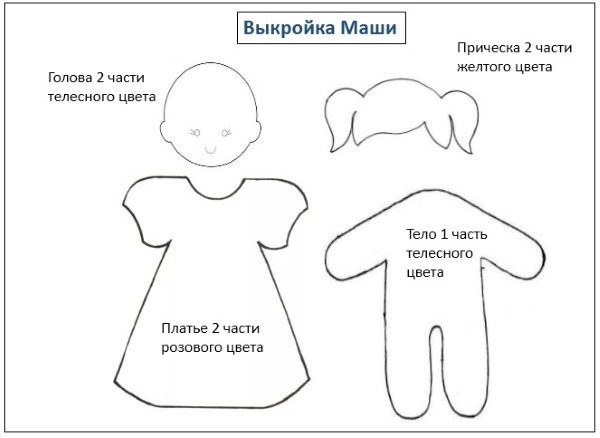
Masha
To sew the heroine of a fairy tale - Masha, you will need:
- felt in pink, flesh, light yellow colors;
- eyes and beads, pink ribbons;
- prepare a pattern from a template on paper;
- transfer to felt, trace and cut out all the details.
Assembly of Masha:
- Sew a hairstyle onto the front part, glue on eyes, embroider a smile.
- Sew the 2nd piece of hair to the second part of the head and sew the head, stuffing it with padding polyester.
- They put 2 dresses on the body so that the body remained inside. Secure with pins and sew, leaving a hole in the hem of the dress for your finger.
- Sew the head and dress.
- Tie ribbons to the waistband of the dress and to the hairstyle.
Bear
How to sew a bear is described in detail in the fairy tale “Teremok”.
Ursa
The bear's girlfriend is sewn similarly to the bear, only with the addition of a 2-piece dress (yellow with decoration at the discretion of the master), which is sewn on top of the finished base.
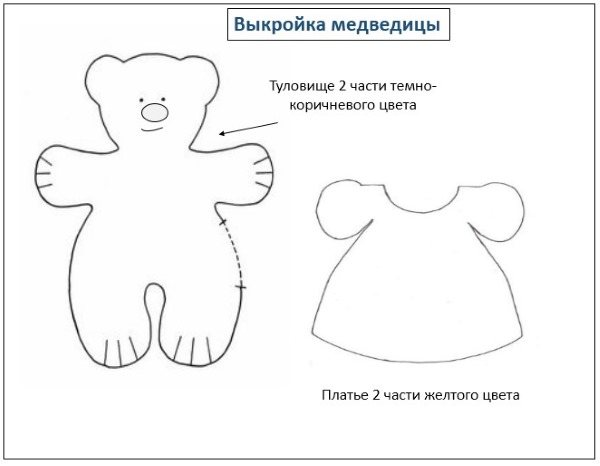
The pattern is attached.
Pig
To sew a funny cartoon pig you will need:
- Pink felt in 2 shades (the patch should be darker);
- Transfer the paper pattern to the fabric, cut out 2 parts of a pig and 1 part of a snout.
Pig parts connection:
- Sew on the patch, embroider the nostrils and glue on the eyes.
- Fold the two parts of the body and sew, leaving a hole between the legs.
Rabbit and wolves
How to sew a hare and a wolf is told in the fairy tale “Teremok”. The second wolf can be made a little darker or lighter in color.
Bear House
To make a bear’s dwelling, you can take as a basis the hut described in the fairy tale “Ryaba Hen”, or the recommendations for sewing a stage or house at the beginning of the article.
Paper finger theater: benefits for child development
Speech development
As children interact with and play with the puppets, they organize their thoughts and improve their language.
Children naturally develop sentence structure and use active vocabulary to express their points of view. Their interactions often reflect their experiences and knowledge of the real world, giving children the opportunity to better understand this information through play.
Development of imagination
Dolls are the main toy for role-playing games and allow children to improve their creative imagination.
When a child plays, stories and characters with personalities emerge. They may feel happy, sad, or sassy and stupid.
With animal dolls, kids can simply waste their time meowing like a cat and mooing like a cow. This is, of course, good too!
The process of finger play offers a leap forward for their creativity, and as role play progresses, children will develop their language and storytelling skills without even realizing it.
Development of fine motor skills
When children manipulate finger puppets to make them move, changing their position from finger to finger, children's fine motor skills are involved.
The act of playing with dolls is also beneficial for hand-eye coordination.
All these useful skills are developed while playing with finger puppets. And if a child helps you make a finger theater out of paper with your own hands, he improves:
- cutting and gluing skills,
- motor skills,
- graphomotor skills
- creativity,
- perseverance.
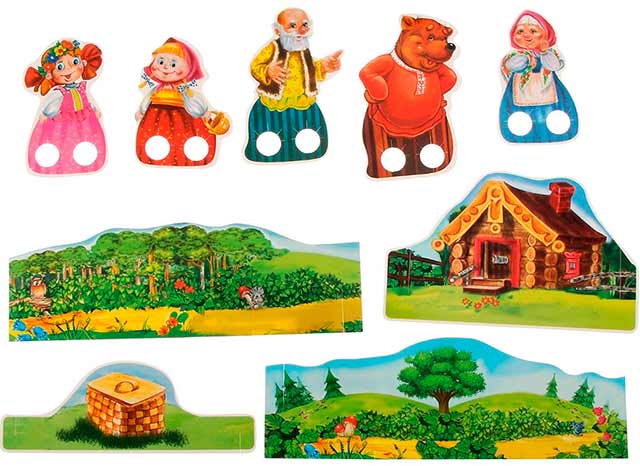
turnip
Everyone's favorite children's fairy tale "Turnip" is represented by the following characters: grandmother, grandfather, granddaughter, cat, dog, mouse. The action takes place in the garden near the hut. Accordingly, the ideal stage would be a flat composition in the form of a fold-out book with a hut, trees and a large turnip (you can see how to make such a scene at the beginning of the article).
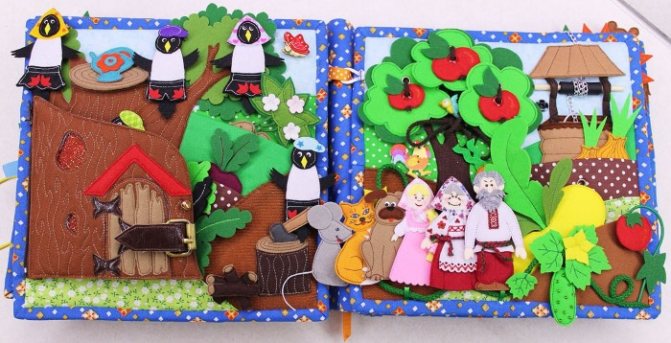
Example scene above.
Step-by-step description of sewing characters from the fairy tale “Turnip”
An important aspect before starting work will be the step-by-step production of characters in order to maintain their sizes (animals should be correspondingly slightly smaller in size than people).
Grandparents, Granddaughter
The sewing algorithm for Grandmother and Grandfather is described in detail in the fairy tale “Ryaba Hen”. To sew a granddaughter, you should use the description of the creation of Masha from the cartoon “Masha and the Bear”.
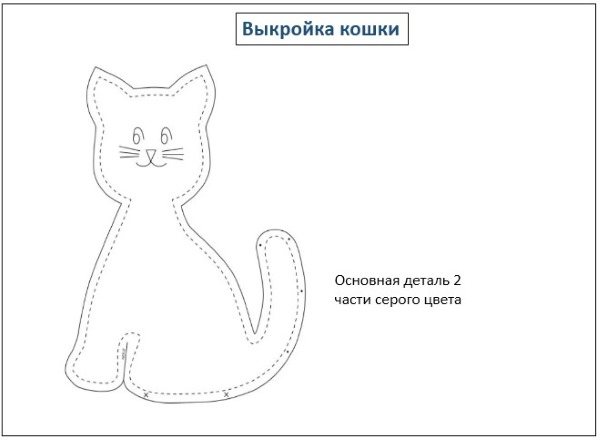
Cat
To sew a cat for the fairy tale “Turnip”, you will need:
- 2 pieces of gray felt;
- eyes or 2 black and 1 pink beads;
- prepare a paper pattern using the template and transfer it to felt;
- cut out 2 parts.
Cat assembly:
- Glue eyes to the face, sew on a nose, embroider a mustache and a smile.
- Connect and sew the 2 main parts, leaving a bottom hole for the finger.
- You can decorate it with a bow around your neck.
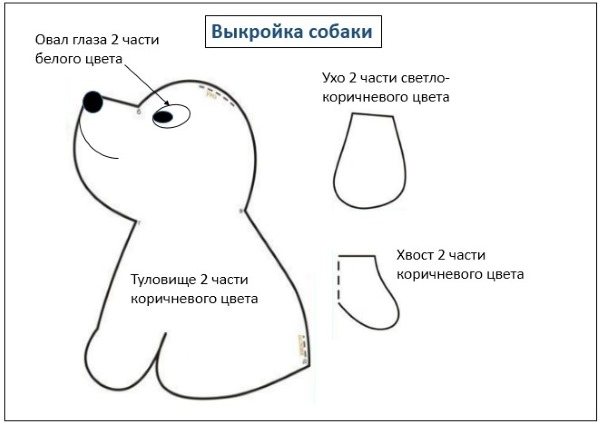
Dog
To create a dog you need:
- Have brown felt in 2 shades and a white piece for the eyes.
- Black buttons or beads.
- Create a paper pattern and transfer it to felt.
- Cut out pieces from fabric.
Dog Bonding:
- Sew on eyes and ears.
- Sew the tail.
- Embroider a smile and mustache, sew on a nose from a button.
- Connect the 2 parts of the body and sew, not forgetting the tail and the hole at the bottom.
Mouse
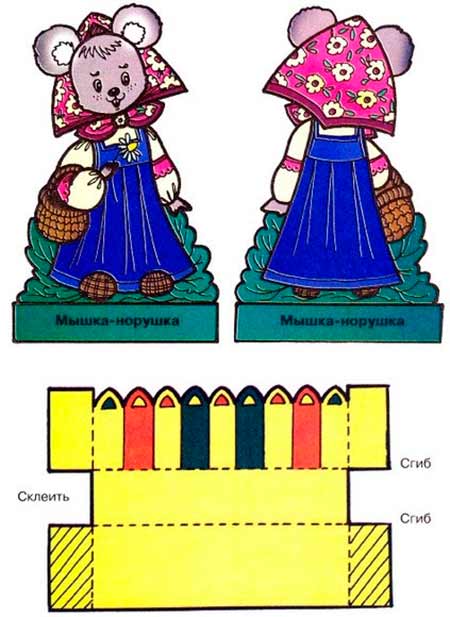
The method of sewing a mouse is described in the fairy tale “Teremok”.
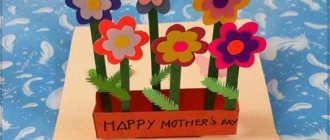
turnip
The turnip is sewn very simply from 2 yellow pattern pieces and green felt tops.
In this case, you must fill it with padding polyester. Do not leave holes.
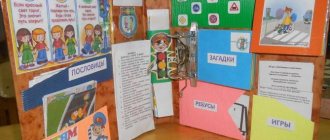
Educational book “Turnip” (master class for mothers, grandmothers and older sisters)
Our master class demonstrates how to make a soft book “Turnip” with your own hands from felt and fabric, which can be used for games and mini-performances.
Thanks to this fairy tale-toy game, the child will be able to get acquainted with the content of the folk tale, with its characters, count them, play theater with them - pulling out the orange beauty known and loved by all children. A mother or grandmother can make such books herself from fabric, felt or fleece scraps and various small items. The craft is not complicated, so even young craftswomen (girls aged 8-10 years old) will be able to make it.
Starting to sew a turnip book
To create a craft you will need:
- a piece of cotton fabric;
- felt or fleece fragments of bright colors;
- scissors;
- gun for working with silicone glue;
- threads with needles;
- ribbons for decoration;
- plastic eyes intended for toys;
- double-sided Velcro tape (velcro type with hooks).
First of all, prepare the textile base of the book, consisting of one spread. It is necessary to prepare 4 identical rectangles, 2 for each sheet of the book. On the front side you can immediately glue or sew the name of the fairy tale from colorful felt or fabric letters. Then the rectangles are folded in pairs with the wrong side out, they need to be stitched, leaving a small hole, each sheet turned out through it “exposed” and carefully sewed up the holes.
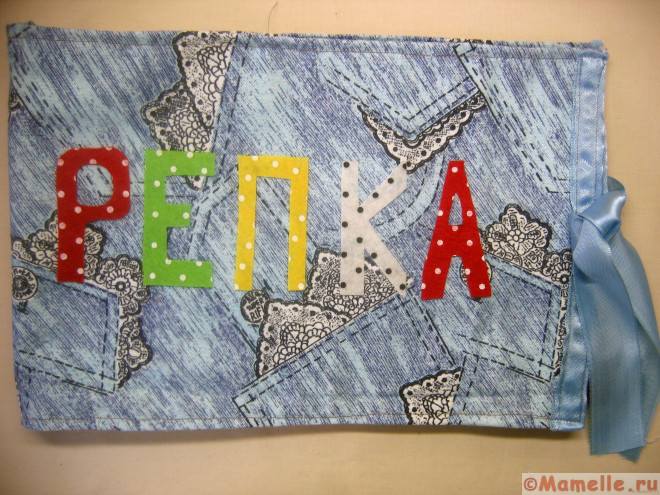
Both sheets are connected with a common seam. The outer edges of each sheet can be trimmed with satin ribbon. One string of equal length is sewn into the center of the front panel.
We sew fairy tale characters: Turnip, grandfather, grandmother, granddaughter and others
After the preparatory work has been done, you can begin filling out the book. From felt fragments you need to cut out the details of the house in which the heroes of the fairy tale will live.
These details are drawn up and attached one by one to the inside of the left sheet of the book.
Figures of characters are created from felt of different shades: grandfather, woman, granddaughter, dog, cat and mouse. The patterns for the fairy tale Turnip are very simple; you can make them yourself according to our sample, or use ready-made images from the paper book “Turnip” or from the Internet.
Kolobok
One of the oldest and most popular fairy tales is represented by the following characters: grandparents, fox, wolf, hare, bear and bun. A fold-out book is perfect as a stage.
Step-by-step description of sewing characters from the fairy tale “Kolobok”
First, it’s better to sew the characters together, and then proceed to the stage and decorations:
- Kolobok
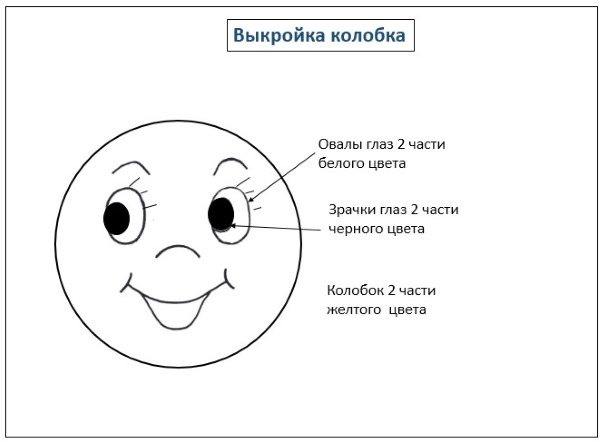
It is sewn from 2 circles of yellow felt, on one of which facial features (eyes, smile and rosy cheeks) are embroidered.
- Grandmother and grandfather. The algorithm for sewing toys is described in detail in the fairy tale “Ryaba Hen”.
- Fox, Wolf and Bear. These characters can be sewn based on algorithms.
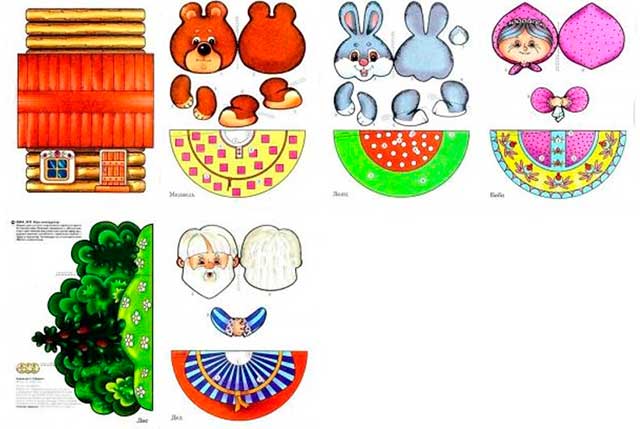
The first do-it-yourself puppet theater - printable templates
Traditional fabric dolls are more difficult to care for and are not suitable for all children. But any child can handle paper products. Place a cone with a picture on the finger, suitable for each child.
It is advisable to introduce the little ones to simpler fairy tales:
- Teremok.
- Kolobok.
- Chicken Ryaba.
- Turnip.
We will need:
- scissors;
- Printer;
- PVA glue.
All templates must be printed, cut out and connected together. Fairy tale “Teremok”. The details are presented in the form of a regular tabletop puppet theater. This is the basis for the tower, scenery and characters. The main advantage of this performance is free hands.
Fairy tale “Turnip”. Contains images of more modern graphics. The theater is easy to use, which all kids will appreciate.
For variety, take note of another version of the fairy tale “Turnip”.
The same fairy tale, only in the form of a didactic game.
Fairy tale “Kolobok”. It is presented in the form of a walking theatre, which makes it easy to involve children in participating in the performance. The templates have special holes for fingers to control the figures.
Consider the second version of templates for the fairy tale “Kolobok”.
And here is the third option.
Fairy tale “Ryaba Hen”. Includes figurines of fairy tale characters in two versions. The background for the performance can be constructed from scrap materials.
Are your kids excited for the New Year? Then involve New Year's characters in your theater. Cool scenarios can be found on the Internet or come up with yourself. Below you will find matching figures and decorations.
And here is the New Year's fairy tale theater “Moroz Ivanovich”. With script, bright pictures and instructions.
An audio tale will make the task of voicing paper characters easier. You will only need to carry out what you hear.
Three piglets
This DIY felt finger theater (patterns will help you make original characters) is represented by two animals: a pig and a wolf.
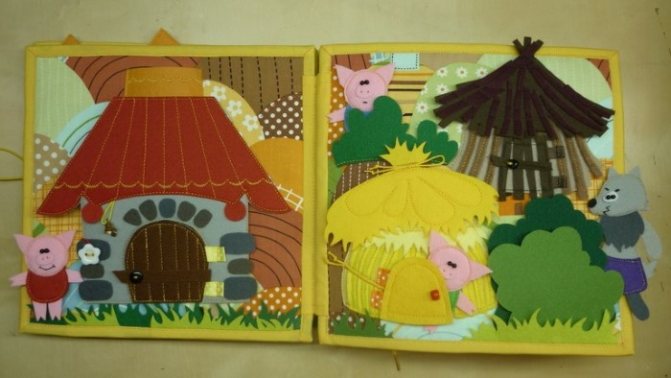
To increase interest in the game, it is better to use three different piglet patterns and sew a voluminous hut house and a flat scene in the form of a forest with a path and trees.
Piglet 1
To sew your first pig you will need:
- 2 shades of pink felt;
- ready-made eyes, ribbon or lace for the tail;
- Using the template, make a paper pattern of all components;
- transfer it to the fabric, outline and cut out all the parts.
Connecting the parts of 1 pig:
- Sew a snout and ears onto the front part, embroider nostrils, and glue on eyes.
- Sew hooves onto the upper and lower limbs.
- Fold the 2 parts of the body and sew them together, inserting the hooves. Don't forget to leave a hole at the bottom between your legs for your finger.
- Sew the head from two parts and stuff it with synthetic padding, then attach it to the body.
- Form a tail from ribbon or lace and sew on the back.
Piglet 2
To sew the second pig you need:
- the other 2 shades of pink felt;
- eyes and pink lace;
- Similarly, we prepare the pattern and felt parts.
Assembling the parts of the second pig:
- Sew a patch to the head, form nostrils, embroider a smile and make eyes.
- Sew 2 parts of the head and stuff with filler.
- Sew all the hooves onto one part of the body.
- Sew the body parts together, leaving an opening at the bottom.
Piglet 3
To make the third little pig, instructions from the fairy tale “Masha and the Bear” are suitable.
Wolf
The wolf is sewn according to algorithm.
House and stage
These parts of the decoration can be sewn using the examples and descriptions at the beginning of the article.
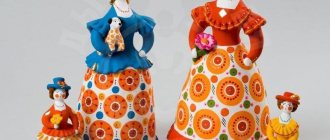
Master class on making a tabletop theater from cups “Turnip Fairy Tale”
Natalia Kabanova
Master class on making a tabletop theater from cups “Turnip Fairy Tale”
Creating theater from disposable cups .
-Learn how to make dolls .
We will make an unusual doll from an ordinary glass . Many people throw away this material, thereby harming the environment.
Using available materials in our work, we keep the environment clean and instill in children a concern for the planet Earth.”
For the craft you will need:
Plastic cups .
Necessary tools and accessories
Pictures of fairy-tale characters .
1. Print and cut out fairy-tale characters .
2. Glue a piece of double-sided tape to the wrong side of the picture of the fairy-tale hero.
3. Glue the doll’s body to the jar.
4. We use the same principle to make other fairy-tale characters .
Well, here is the tabletop puppet theater
" Turnip " is ready.
Such dolls are very stable and quite decorative.
Have a nice ogre with the dolls of the table theater " Turnip ".
Master class “Making tabletop bottle theater puppets based on the fairy tale “The Frog Princess” I would like to introduce you to the technology of making theater puppets using a plastic bottle. An example is the fairy tale “The Frog Princess”. Master class on making a puppet for a tabletop theater Description of the work. My work is made entirely of paper of different quality and structure. The doll can be easily made by any adult or senior. Master class on making a tabletop theater Theatrical games in preschool age are considered as a means of comprehensive personality development. They enrich children with new experiences. Master class on making a tabletop theater based on the fairy tale “Kolobok” from pine cones and plasticine for joint creativity. Everyone knows the sad fairy tale about Kolobok very well from childhood. How the cunning Kolobok left his grandparents, the bear, the wolf, the hare, and here. Master class on making a theater on sticks “The World of Professions” Familiarization with the work activities of adults is crucial for the formation of a child’s initial ideas about the role of work. Master class on making a theater on clothespins “Turnip” Goal: Involving teachers in the making of theatrical dolls, with their subsequent use in theatrical activities with preschool children. Master class in the preparatory group “Making characters for a tabletop theater” Goal: making characters for a tabletop theater (shadow and finger) Objectives: Educational: learn to cut out images of characters from paper.
Source
Seven kids
To bring this wonderful fairy tale to life, you will need patterns of 3 animals (a wolf, a goat and a kid), as well as scenes with a house.
This is what the finished composition might look like.
Goats
You will need seven baby goat patterns, but to make them different from each other, the finished toys need to be tied with multi-colored bows or numbered.
To make kids you need:
- white and gray felt;
- black beads or eyes (7 pairs);
- multi-colored ribbons;
- prepare a paper pattern and transfer it to fabric;
- trace and cut out 7 sets.
Assembling the kid:
- Glue eyes to the face, embroider a nose and a smile.
- Sew the head from 2 parts, stuff it with synthetic padding, and sew on the horns.
- Sew 2 parts of the body, leaving a hole at the bottom.
- Connect the head to the body, attach a bow to the neck.
- Repeat for 6 more kids.
Goat
The mother goat is sewn from 2 main parts of white fabric according to the pattern.
The eyes are glued on and the nose and smile are embroidered.
Wolf
The wolf is created using an algorithm.
House and stage
These parts of the decoration can be sewn using the examples and descriptions at the beginning of the article.
Three Bears
The tale “The Three Bears” is created very quickly, since one pattern of a bear is used (the clothes of the heroes and the size of the figures change), a pattern of a girl and scenery with a scene.
This is what the scene looks like.
The Bears
To make bear parents, you can take patterns from the cartoon “Masha and the Bear”.
Make the teddy bear similar, but smaller in size.
Girl
To create a girl, use Masha’s pattern from the same cartoon.
House and stage
The scenery is created by analogy with “The Pockmarked Hen”.
Smeshariki
A DIY felt finger theater (patterns with step-by-step descriptions are included) for “Smeshariki” will attract the attention of fans of the animated series. The game set consists of heroes and a scene.
You will need 9 characters (teenage children (Krosh, Hedgehog, Nyusha, Barashik), adults (Losyash, Pin), and elderly (Kar Karych, Sovunya, Kopatych)). All patterns are quickly made, since they are based on a circle (recommended diameter is 5 cm).
Patterns with templates:
Making Smeshariki:
- create a paper pattern using the template;
- attach it to felt fabric, trace and cut out all the details of the toy;
- connect the parts and sew one by one, starting from the front part;
- Don't forget to leave holes for your fingers.
The stage for playing an animated series can be the technology described at the beginning of the article - a spread in the form of a book with scenery (forest type).
Turnip pattern:
You can easily and quickly sew such a wonderful puppet theater with your own hands Or you can even involve them in this exciting process! In this case, the toys will be educational in every sense.