Each child is unique, you just need to find your own approach to him. Creating applications with your child can be an interesting and entertaining activity. Such creativity not only makes you fantasize, but also promotes the development of fine motor skills, which is important for the mental development of the baby.
Also, during the lesson on appliqué, perseverance and accuracy are developed. By creating “Vegetables” applications from paper with your baby, you open up a huge world of fantasy and creative thinking for him.
If you choose the right materials and take into account the child’s age, you can create original crafts for each age group of the kindergarten. When making crafts, it is important to consider the age of the child and the materials from which you will create your work of art.
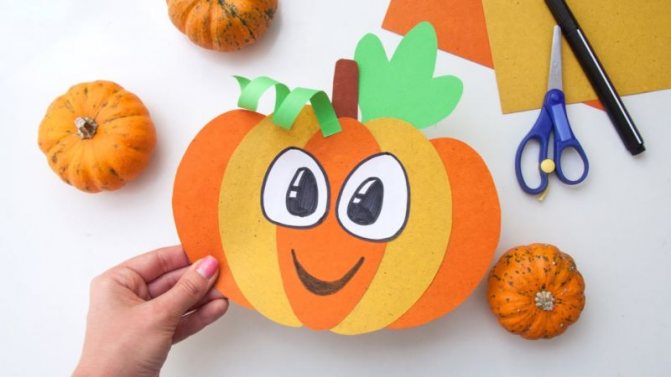
Pumpkin
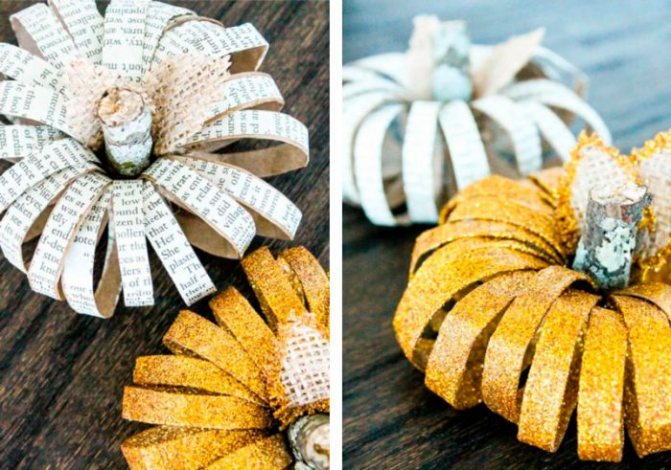
You will need: rolls of toilet paper or paper towels, scissors, twine or rope, stick, pva glue, for decoration - glitter or book pages.
Master Class
- Cut the sleeve into circles.
- Apply glue to one piece, sprinkle with glitter or glue a piece of page and leave to dry.
- Decorate with glitter or book pages with every detail.
- Gather the circles onto twine to form a pumpkin.
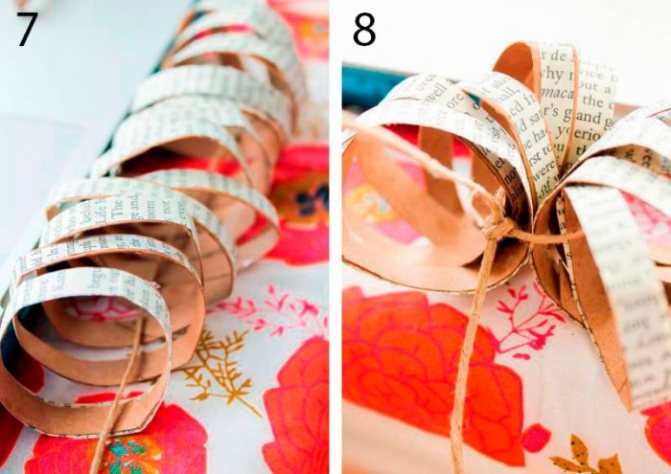
- Glue the stick into the middle of the pumpkin.
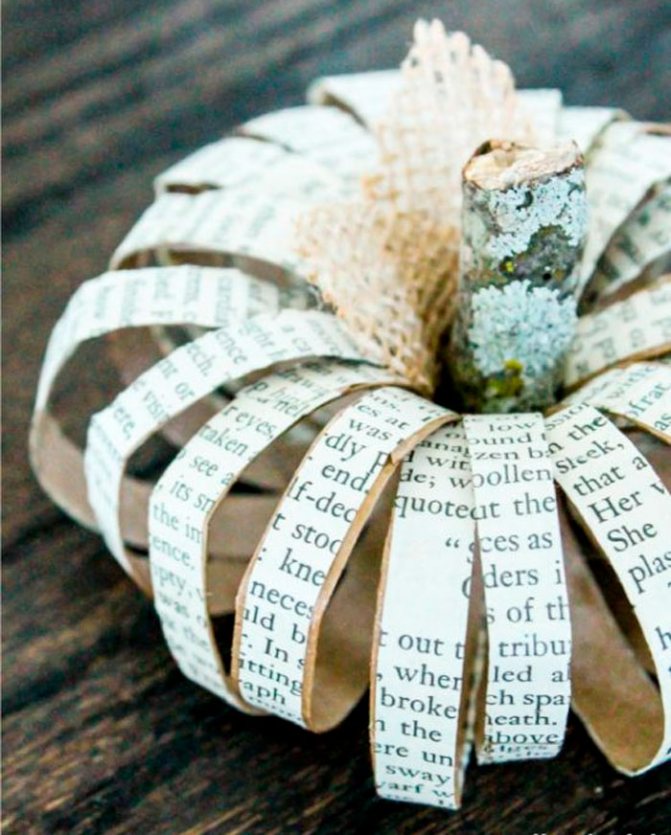
The pumpkin made from bushings is ready! You can find even more crafts made from bushings HERE.
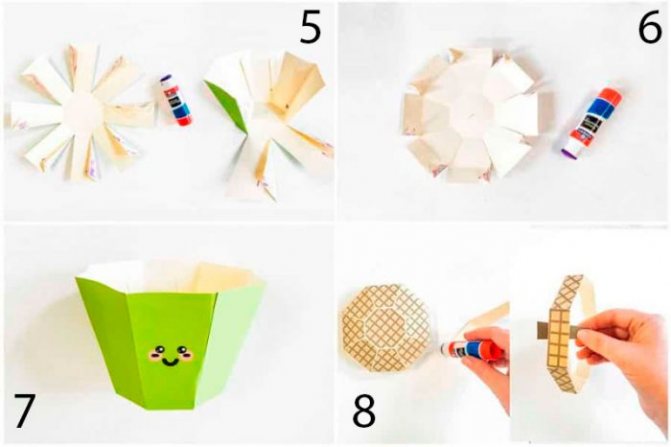
Volume umbrella
You will need: double-sided colored paper, a compass, a simple pencil, scissors, a glue stick or adhesive tape, thick wire, thread.
Master Class
- Cut out 16 circles of the same diameter from colored paper.
- Fold each circle in half twice.
- Secure each piece in the upper round part with glue so that it is opened only at the bottom and does not open at the top.
- Take 2 blanks and glue them at right angles to each other.
- Glue the remaining pieces together in a circle, forming the upper part of the umbrella.
- Form an umbrella handle with a wire loop, then attach it.
- Prepare a piece of string and hang the umbrella by the loop.
A voluminous umbrella made of colored paper is ready! I recommend watching this video!
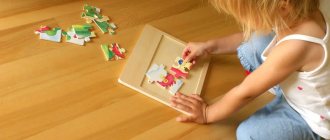
Acorns
You will need: cardboard, scissors, glue stick, marker, templates.
Master Class
- Print out the lid template.
- Print out the box template.
- Cut them out.
- Make folds in the marked places.
- Fold the box and lid as shown in the photo instructions.
- Secure with glue.
- Make a small leaflet out of paper and draw a face for it.
- Make a whole collection of brightly colored acorns.
Acorn boxes are ready! I recommend watching this video!
You will need: a thin book without a cover or a magazine, colored paper, scissors, black marker, glue, pompom, decorative eyes.
Master Class
- Fold the top and bottom corners of the first page as shown in the photo. Repeat this process with all pages until the middle of the book.

- Fold the corners of the pages, changing their direction on the second half of the book.
- Cut out 4 paws from colored paper and mark the claws with two stripes using a marker.
- Glue the paws at different corners.
- Make a face for the hedgehog by gluing eyes and a pompom nose.
The hedgehog from the book is ready!
Rainbow in the clouds
You will need: colored cardboard, scissors, glue stick, cotton wool, stapler.
Master Class
- Cut 7 strips of paper of different colors so that each piece is shorter than the previous one. The red stripe should be the largest and the purple stripe the smallest.
- Arrange the stripes in the following order: red, orange, yellow, green, blue, indigo and violet.
- Fasten the strips of paper together using a stapler.
- Roll 6 cotton balls.
- Glue 3 cotton balls at the base of the rainbow as clouds.
Rainbow in the clouds is ready!
Corrugated paper mushrooms
You will need: corrugated paper, scissors, glue, paper straw, honeycomb paper, paints as desired.
Master Class
- Check out the mushroom template.
- Cut 2 rectangles from corrugated paper.
- Form a mushroom cap by gluing them together as shown in the photo.
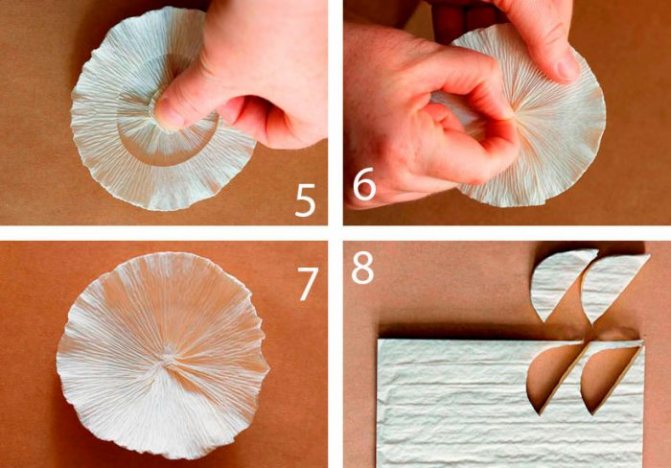
- Cut out a small circle of corrugated paper and glue it in the center, covering the hole in the cap.
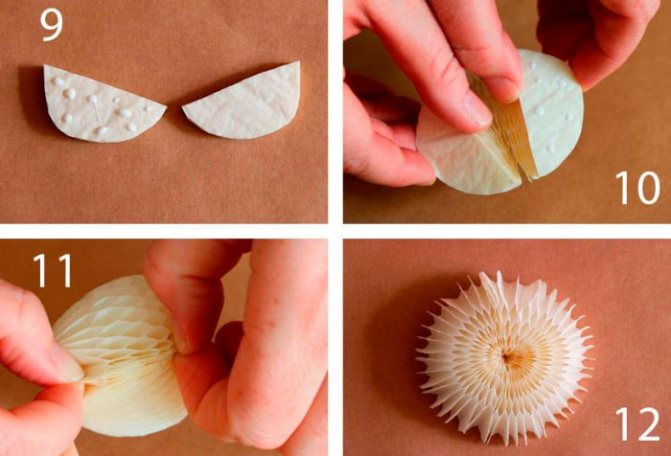
- Take honeycomb shaped paper, fold it several times and cut out a semicircle. Make 2 of these multi-layer blanks.
- Glue the semicircles together and form mushroom plates as shown in the image.
- Glue the plates to the bottom of the mushroom cap.
- Cover the straw with corrugated paper and glue it as a mushroom stem.
- Make a whole collection of mushrooms of different sizes.
- If desired, paint or tint them.
Corrugated paper mushrooms are ready!
Autumn leaves
You will need: double-sided colored paper, scissors, glue stick, ruler.
Master Class
- Prepare 10 squares of colored paper measuring 8x8cm.
- Take one square and fold it as shown in the photo instructions. It should look like a rhombus.
- In this way, fold a total of 6 blanks.
- Take 3 squares and fold them to form triangles.
- Glue 2 rhombuses together and one triangle in the center.
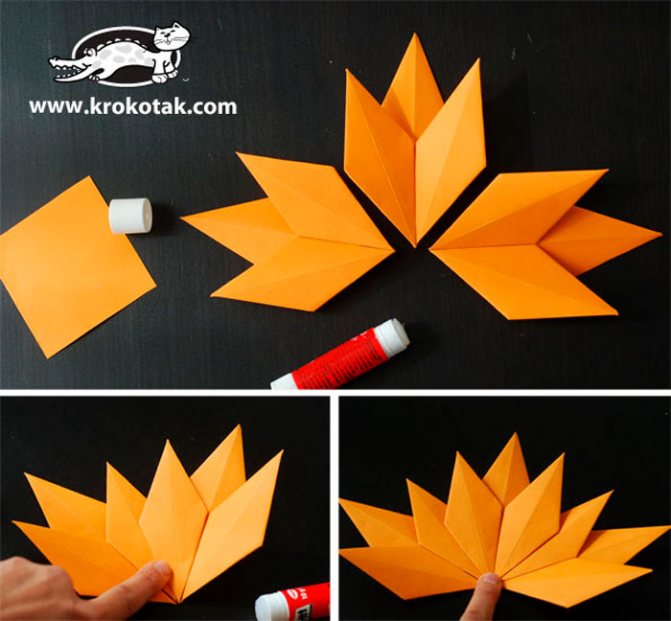
- Do this process with all the parts.
- Glue the blanks together to form a leaf.

- Make a total of 8 leaves of different colors in the same way.
- Glue the leaves together in a circle, then decorate a couple of them by making a face.
Bright autumn leaves made from colored paper are ready! I recommend watching this video!
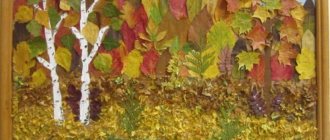
Notes on application in the preparatory group “Autumn Still Life”
Notes on application in the preparatory group “Autumn Still Life”
Notes on application in the preparatory group “Autumn Still Life”
Goal: Implementation of independent creative activity of children (constructive-model).
Program content
Educational objectives: teach children to create plot compositions using the entire area of the sheet;
Developmental: develop children's creative abilities, fine motor skills;
Educational: to cultivate interest in artistic creativity; independence; artistic taste.
Preliminary work: Excursion along the ecological trail. Consideration of autumn compositions.
Vocabulary work: reading poems about autumn by A. S. Pushkin “The sky was already breathing in autumn”, A. Fet “In autumn”, K. Balmont “Autumn”.
Materials and equipment: scissors, cardboard of different colors, colored paper of different sizes and shapes, glue, glue brush, napkins; autumn leaves, rowan branch, vase.
Progress of activities
1 part. Organizational
Educator: Guys, look what's new in our group?
Children's answers: Autumn bouquets, rowan branches.
Educator: Children, what is autumn?
Children's answers: Autumn is when the leaves on the trees turn yellow or red, they fall and cover the paths in the park, the tropics in the forest... There are a lot of fruits and vegetables in autumn. Collective farmers are reaping a rich harvest. They take him in cars to the city.
Educator: Why do you think the harvest is brought to the city?
Children's answers: People and pets need vegetables, fruits, and grains for nutrition.
Educator: What do birds and animals in the forest eat?
Children's answers. Berries, mushrooms, forest apples.
Educator: That's right.
Part 2. Practical
Educator: Children, you would like to create an autumn still life.
Children's answers.
Educator: But first, remember what colors autumn gives us.
Children's answers: yellow, red, brown.
Educator: Okay. Try to create an autumn composition yourself. Children, you can create the same still life, only with paper, scissors and glue.
Children's answers: Yes, we'll try.
Educator: Guys, our leaves are square. How to make berries from them?
Children's answers: Cut off the corners and you will get a circle. It will look like a berry.
Educator: Well done. Please look at our composition. What shape are the leaves?
Children's answers. Carved, oval.
Educator: Yes, they are carved. Guys, aren't you tired? Isn't it time for us to get some rest?
I ask you to rise this time.
The head turned - that's two.
Hands up, look forward - that's three.
Let's spread our arms four wide.
Squeeze your fingers with force, unclench them - that's five.
All the guys sit down quietly - it's six!
Educator: Guys, what do we have left to make an autumn composition?
Children's answers: Cut out a vase, a basket.
Educator: Correct.
Part 3. Independent work of children
Educator: Let's prepare our fingers for difficult work with paper.
One two three four five! (bend your fingers, starting with the thumb);
We will collect leaves. (clench, unclench fists);
Birch leaves (bend your fingers, starting with the thumb);
Rowan leaves,
poplar leaves,
Aspen leaves,
We will collect oak leaves.
Let's take an autumn bouquet to mom! (“walk” on the table with the middle and index fingers
fingers).
Educator: Have you rested? Fine. Before we get to work, let’s say the magic words: “I’ll sit up straight, I won’t bend, I’ll get to work.” Now you can get to work.
Part 4 Final
Educator: Well done, guys! Look how beautiful our pictures turned out! What are the names of these compositions?
Children's answers: Still life. "Autumn still life"
Educator: Correct. Children whose work did you like best? Why? What should we do now with our still lifes?
Children's answers: You can make an exhibition; I can hang my work on a stand so mom/dad can see my work.
Garland of leaves
You will need: colored paper or cardboard, a simple pencil, leaf templates, scissors, a needle, tape, thin rope.
Master Class
- Transfer the leaf templates onto colored paper.
- Cut them out.
- Thread the leaves onto a string through a needle.
- The number of leaves and the size of the garland depends on your desire.
- Hang the garland on the wall, securing it with tape.
The garland of autumn leaves is ready!
In 1st-2nd grade
In kindergarten, applique of autumn leaves most often consists of complementing a ready-made figurine proposed by the teacher. The main goal of the lesson is to develop fine motor skills and develop skills in working with glue.
For school classes, the difficulty needs to be increased:
- abandon template solutions, allow children to find their own way to depict a face or background landscape and choose the right tones and shapes;
- give the opportunity to work with symmetry and reflection, showing examples of work in this technique;
- to focus on working with scissors, to complicate the silhouettes of the works proposed for repetition.
You can base your work on meeting exotic fauna or fantastic creatures. Perhaps children will be more interested in composing a scarlet flower or a firebird, a chameleon or a dragon, rather than the hedgehogs and bunnies that have been boring since kindergarten.
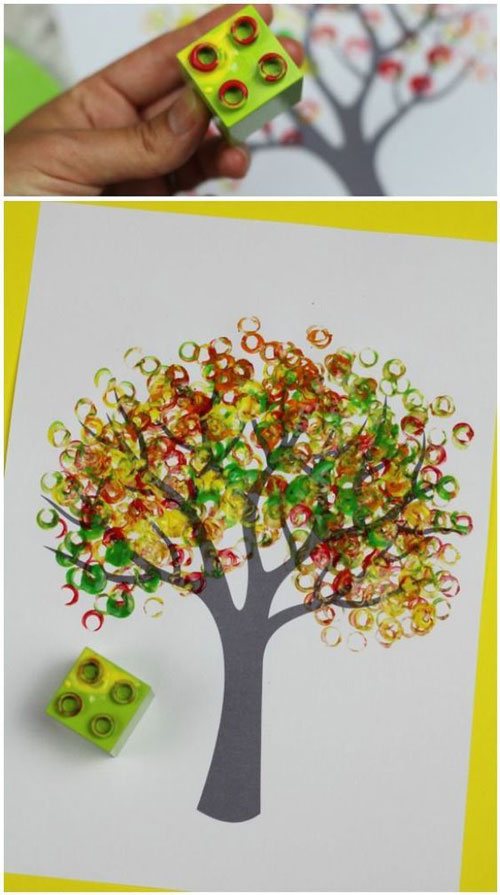
Tree
By the age of 7-8, children already understand the difference between oak and birch and can describe their appearance. This should be reflected in appliqués made of autumn leaves.
The teacher only suggests the corresponding thought with suitable associations:
- oak is strong, knotty;
- birch is thin, flexible;
- Weeping willow, hanging branches over the water.
Children draw the trunk, emphasizing its characteristic features. And the leaves peek out, choosing the appropriate colors and sizes.
Vase
Children usually make autumn leaves not into the vase itself, but into its filling - a bouquet. To simplify the task, a symmetrical vase is cut out of colored paper, folding the sheet along the axis.
Working step by step:
- Studying possible options and shapes of the vase. Cutting out.
- Gluing the vase onto the background.
- Adding a bouquet of leaves.
Additionally, you can add small larch cones or beads imitating berries to the bouquet
For children 10-12 years old, you can offer to decorate the vase itself using the mosaic technique. To do this, segments are cut from leaves of different colors, and then laid out end-to-end, secured with glue on the background.
An applique with a basket is created using the same principle. To complicate the work, you can invite children to place not just leaves, but flowers made from this material in a basket or vase. The variety of colors of the material allows you to create complex compositions.
Corrugated paper aster

- Secrets of builders: working with couplings

DIY New Year's crafts - 9 best options
- DIY sweet crafts
You will need: corrugated paper of purple, yellow, green and light green, scissors, wire, glue gun, pencil, ruler, watercolor paints, brush.
Master Class
- Prepare a strip of purple corrugated paper 4 cm wide.
- Tint one edge of the strip with purple paint and set aside to dry.
- Fold the strip several times.
- Make cuts along the unpainted edge. The first blank is ready.
- Make the second blank in the same way, only take a purple strip 6 cm wide.
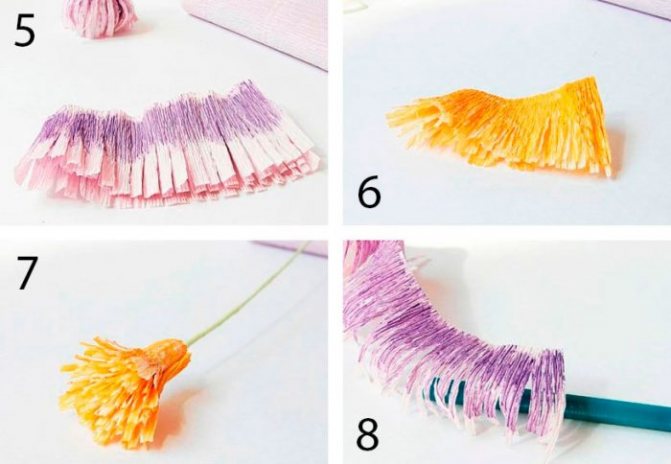
- Prepare a strip of yellow paper 3 cm wide.
- Fold the yellow strip several times and make cuts.
- Wrap the wire with a light green piece of corrugated paper and secure with glue. This will be the stem.
- Wrap a yellow blank around the end of the stem - these will be the stamens.
- Twist the ends inside the purple piece, which is 4 cm wide, using a pencil.
- Step back from the base of the stamens and glue the petals.
- Take a 6cm wide purple blank and wrap it around the bud as shown in the photo.
- Twist the ends of the petals and straighten the middle.
- Cut out 6 sepals from green paper, then glue them on.
- Cut 6 long leaves of different sizes from light green paper and glue them to the stem.
The corrugated paper aster is ready! You will find even more flowers HERE.
I recommend watching this video!
Note! Crafts made from corrugated cardboard
For the little ones
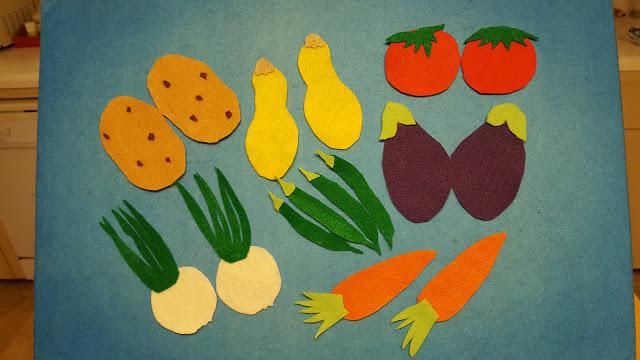
You can start making your first applications from about 2 years old, you just have to choose the easiest and simplest options. As a rule, appliques of vegetables and fruits in a preparatory group or nursery are done in the form of a single work, rather than a composition.
This way it is easier for children to glue them and also to remember them. To make it as easy as possible for your child, you can use already prepared templates of fruits and vegetables for appliqué.
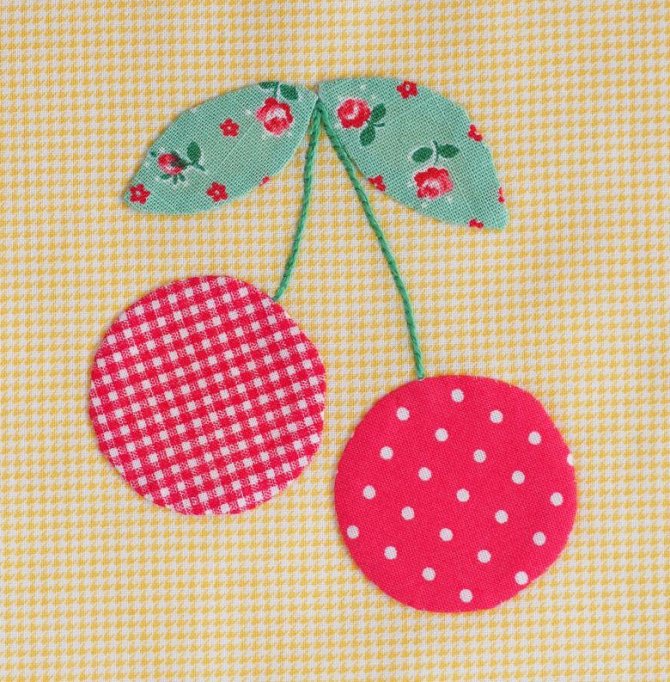
Cherry
Cherry is an excellent applique option for the youngest children on this topic. To make it you will need:
- white sheet of cardboard;
- pencil;
- scissors;
- glue;
- colored markers;
- red colored paper.
Work plan:
- Draw 2 small circles on colored paper and cut them out.
- Glue the circles onto the cardboard so that they are on the same level and not far from each other.
- Using a brown felt-tip pen, draw 2 stripes, connecting the circles to create a design in the form of a pair of cherries.
- Draw a leaf with a green felt-tip pen.
A pineapple
Almost every child likes this exotic fruit, and of course it makes them want to portray it. For a more beautiful and interesting look, you can make it voluminous from simple colored paper. All you need for this craft:
- yellow, green paper;
- sheet of cardboard;
- glue;
- scissors;
- pencil.
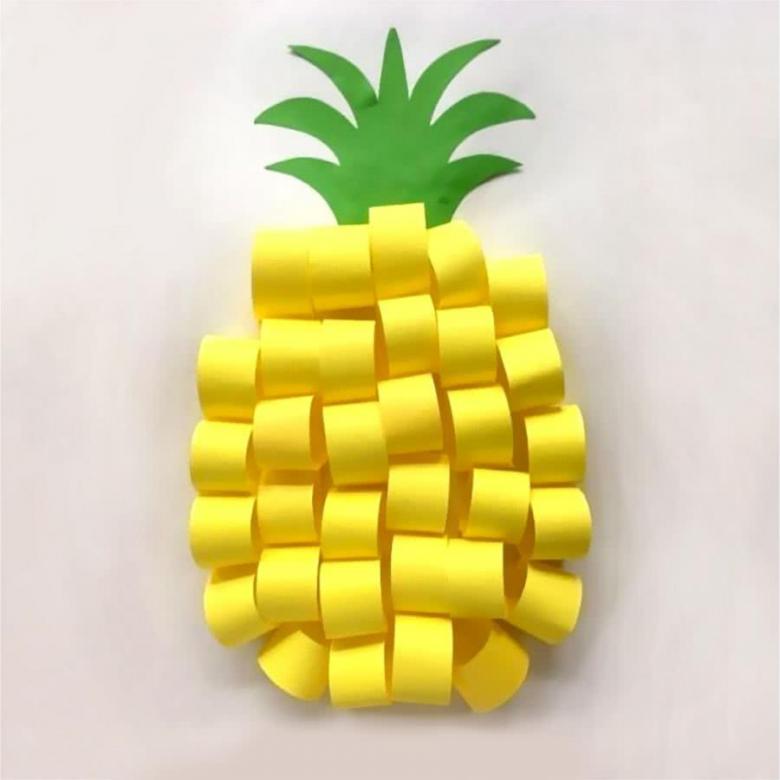
Step-by-step work plan:
- Draw a pineapple on a piece of cardboard.
- Cut the yellow paper into strips, approximately 5 cm long and 1.5-2 cm wide.
- Take one strip and fasten its ends to make a ring, glue the ends together.
- Press down a small part of the ring a little and glue it to the upper contour of the pineapple.
- Glue another ring next to it and fill the entire top row.
- Take a ring of paper and also glue it, but just below the top row of the pineapple, while the glued part should be under the free edge of the upper rings.
- Follow the previous step until the entire pineapple is filled.
- Cut out small long leaves from green paper and glue them to the top of the pineapple.
DIY autumn crafts for the garden and school
Autumn crafts
- These are works made most often from natural materials. Acorns and chestnuts, cones and nuts, seeds and berries, and even colorful leaves - all these are universal craft materials that autumn is so generous with. The section presents master classes and photographs from exhibitions from kindergartens and schools. If you were asked to make a craft with your child in kindergarten on the themes: “Gifts of Autumn”, “Pantry of Autumn”, “What Autumn Brought to Us”, “Golden Autumn”, etc. — be sure to look at the materials from this section.
The change of seasons brings variety to our lives and serves as a source of creative inspiration. Autumn is a special time. The energy accumulated over the summer is looking for a positive outlet, and nature pleases with an abundance of bright colors. Clear days alternate with monotonous rains, and cheerful walks with quiet homework. This is the best time to make crafts from natural materials with your children.
Autumn inspires
Contained in sections:
Includes sections:
- Leaves. Crafts and applications from leaves 834
- Autumn bouquet. Fine art, compositions, drawing 455
- Autumn wreath 55
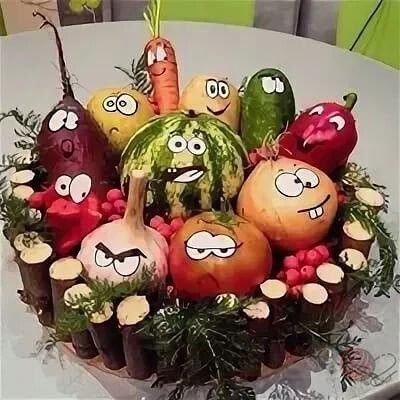
- Crafts from vegetables and fruits 418
- Rowan. Fine art, crafts, rowan drawings 410
Master class: application “Autumn Forest” for children of middle preschool age I bring to your attention a simple application for children of middle preschool age on the theme “ Autumn ”: 1) For work you will need: colored paper of red, orange, yellow, brown and blue , scissors, glue, black felt-tip pen. 2) On yellow and red paper.
Collective work with children of the middle group “Autumn has come to us” Topic: “ AUTUMN ” Materials: whatman paper, colored pencils, wax crayons, leaves, clover flowers, berries, maple and birch seeds, PVA glue, glue brush, oilcloth, rags for hands Goal: To develop the ability to arrange leaves of different colors and sizes on the background, to move them in search.
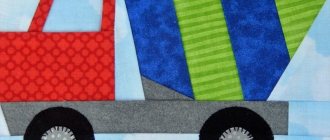
Vegetable applications for kindergarten
The applique involves cutting out and gluing vegetable shapes from paper onto a base. Carrying out activities with children can be done in different ways:
- simple sticking of shapes
- gluing the figure to the middle of the part
- production of volumetric applique
- using different techniques.
Application "Vegetables" for kids
Before starting classes, interest your child in work in a playful way. You can use poems, riddles, songs, fairy tales. The child should be interested, then he will be happy with the result.

Sharp objects should not be used with small children, so scissors will not be useful for them. When creating an applique, you can use two technologies for making crafts:
- use ready-made templates that parents or teachers cut out for children themselves
- Use the technique of tearing paper or crumpled paper to create a three-dimensional craft.
The main thing when creating crafts with young children is to teach them how to correctly place objects on a sheet, to introduce the children to the colors and shapes of vegetables.
The guys should know that vegetables grow on the ground. Tell them about their color and size: round red tomato, oval green cucumber, yellow round onion, orange triangular carrot, etc.
Tomatoes and cucumbers grow in the garden bed, onions, beets, carrots grow in the middle of the bed, potatoes in the ground. At the end of the lesson, be sure to praise the guys for their work.
You can make a stand of crafts for children in the younger group so that children and parents can see their creativity.
Application “Vegetables in a jar” for the middle group
For children of the fourth year of life, scissors are introduced to work. Before starting, it is imperative to have a conversation on safety precautions when working with sharp objects. Show children how to hold scissors correctly and how to use them.
The outcome of correct, safe and accurate work depends on this. This exercise will help you avoid injuries. Organize a comfortable workplace for them: cover the table with oilcloth, remove unnecessary items from the table, prepare a sufficient amount of paper.
It will be interesting to make the “Vegetables in a Jar” applique with children. For this you can use various materials:
- jar or any other transparent container,
- a can shape cut out of cardboard.
As you work, you need to decide what you want to do with your child. Children at home often see canned vegetables: tomatoes, cucumbers, peppers, carrots, cabbage, etc. They master the shape of an object, color and size.
To make their work easier, children are given preparations of future vegetables in the form of a square, rectangle, or triangle. You can make a voluminous application of vegetables. So, for example, on a cut out orange triangle - the base of a carrot - stick orange strips, crumpled by hand and slightly smoothed.
Stripes will give the voluminous vegetable appliqué an interesting look. The top of the work is decorated with a fringe of green paper. To do this, cut out a trapezoid from paper and make cuts from top to bottom, slightly short of cutting the part to the end. It turns out carrot tops.
By combining both parts of the carrot, a voluminous vegetable applique is obtained. Add a tomato to the composition, attaching a green sprig to the red circle; cucumber, drawing thorns on it.
Cabbage can be made by gluing several green circles at the bottom edge onto the stalk base and drawing veins on the leaves with a pencil. Other vegetables for work can be prepared using similar methods.
To complete the work, children place their applications in a glass jar or glue them onto a cardboard imitation jar. You can make a craft “Vegetables in a pan”, while complicating the task for children. For example, advise making and placing vegetables in a pan for borscht, vinaigrette or salad.
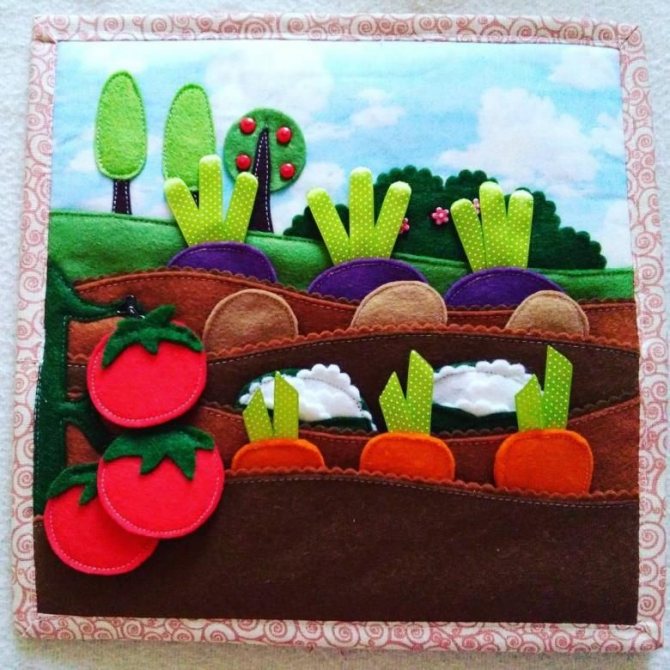
This task will contribute to the all-round development of the baby. With children in the middle group, you can make a vegetable bed by placing the vegetables correctly. This can be either individual or group lessons for children.
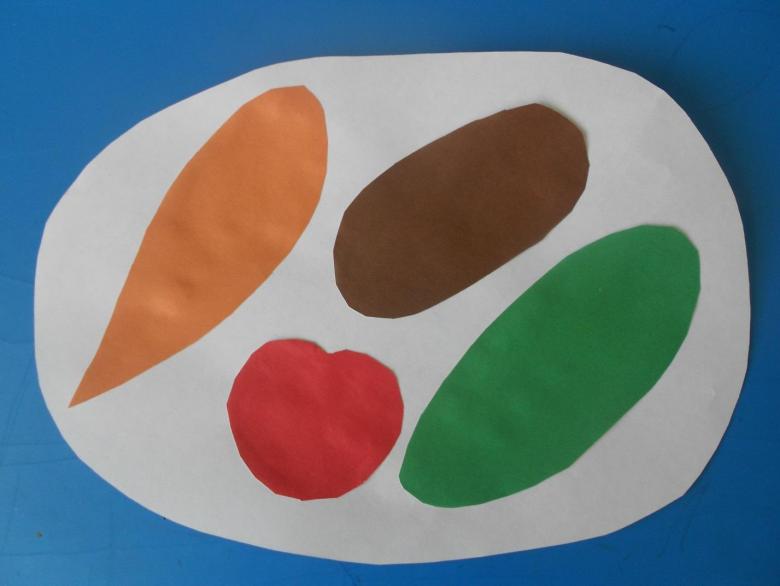
Application “Vegetables” in the senior group
By cutting out vegetable blanks for their crafts in the older group, the child masters the technology of cutting out paper folded in half. Objects cut out in this way turn out to be symmetrical and neat in appliqué.
For work in the older group, you can use mosaic or cutting techniques for working with paper. The child draws with a pencil the vegetable he wants to make and pastes squares of torn colored paper onto his drawing. You can cut out pieces for a mosaic.
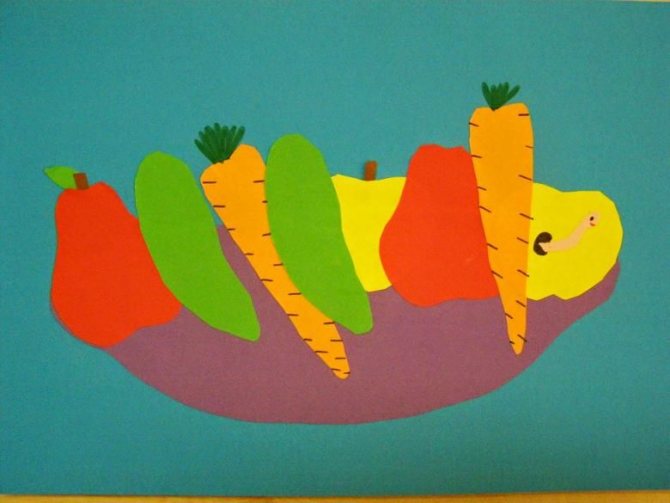
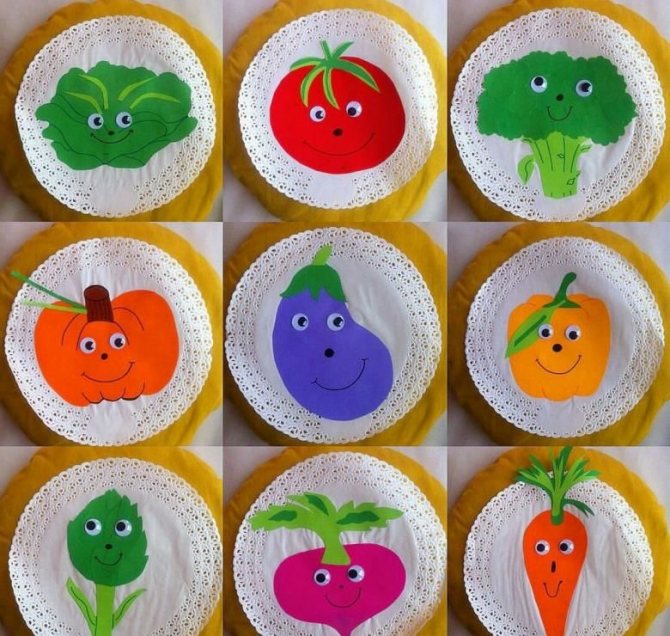
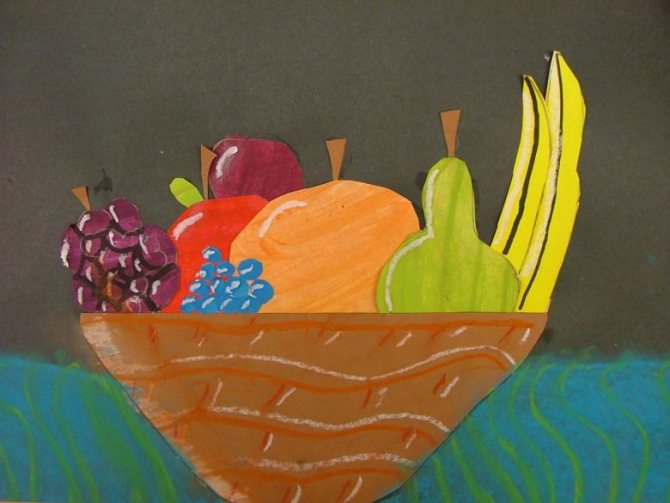
Such work will be more accurate. An interesting and original craft will inspire children to make further applications. You can make a large collective applique “Vegetables on a plate”. Each group member makes his own vegetable, and together the children form a plate of vegetables.
For a plate, take a round or oblong template. You can also place voluminous appliqués of vegetables on it by cutting out three parts of the object for this purpose. All parts must be glued together to form a triangular shape. Then the vegetables are placed on a plate.
You can place crafts in a basket, because the child can see how vegetables and fruits are stored. The box can be made from strips of paper or cardboard of the appropriate color.
Crafts on the theme of autumn with your own hands: 70 photos
Golden autumn has arrived, which means it's time for long evenings at home due to bad weather. We invite you not to waste time, but to get creative. DIY crafts on the theme of autumn will be useful for both mothers of children in kindergartens and schoolchildren, and complex compositions will perfectly decorate the house and make it cozier and warmer. Such crafts can reduce autumn depression, because any kind of creativity calms the nervous system.
- Autumn craft ideas for kindergarten
- Crafts on the theme of autumn for school
- Photos of crafts on the theme of autumn for the home
Autumn craft ideas for kindergarten
Let's start with the simplest compositions. It is difficult for kids to make intricate crafts, so appliques made from dry leaves, chestnuts and acorns would be excellent options. Such applications will delight the little ones.
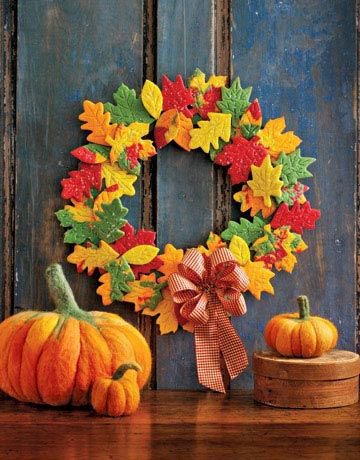
A wreath made of leaves is also a fairly simple children’s garden craft, but no less beautiful for that.
Such a wreath will be an excellent craft if you do not have time to stock up on natural materials. Just cut out the leaves from colored paper; it will be especially chic if you decorate the leaves with paints or gouache.
Very simple crafts for kids - trees with colorful foliage. There are so many options for making them!
All children love hedgehogs and many people associate this animal with autumn. Cute and prickly hedgehogs with an apple or mushroom on their back will delight children. They are made simply: as a rule, the body is made of plasticine, and needles - seeds (or other natural materials) are pressed into it.
Note! Crafts from corrugated paper: DIY flowers step by step
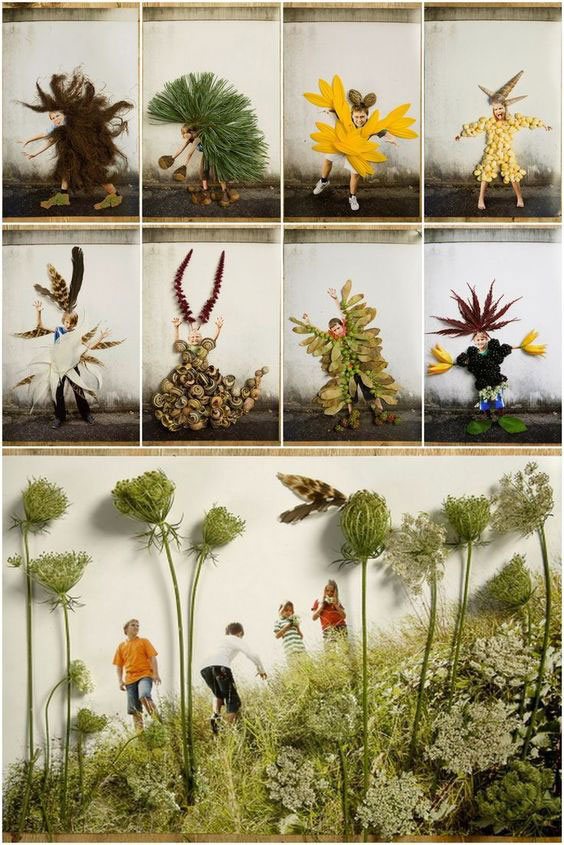
Children in the older group of kindergarten are no longer so interested in making simple compositions, so we found several more complex options, but making them will not be difficult. For example, a doll with a dress from dry leaves is not difficult to make. You need to take the top half of the doll and place it in the neck of half a plastic bottle. Due to the shape of the bottle, different styles of dresses will be obtained. The leaves are glued in layers and moment crystal glue is used. Of course, girls will like this craft more than boys.
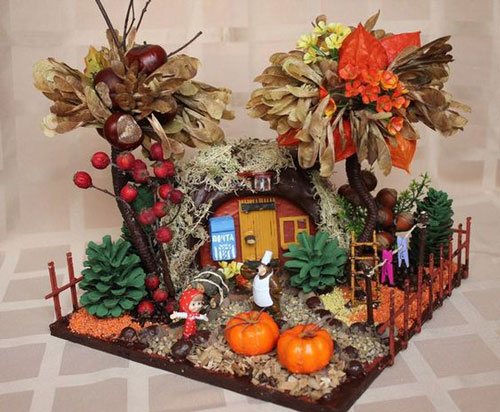
The following crafts are universal, both boys and girls will be delighted with them. Of course, these are already beloved houses made from natural materials. In such a house you can settle fairy fairies or animals, or you can leave them on their own.
Applications fruits and vegetables
Applications in the form of fruits and vegetables are quite popular; they are created by both younger and older children. Using them you can glue real compositions, and from different materials.
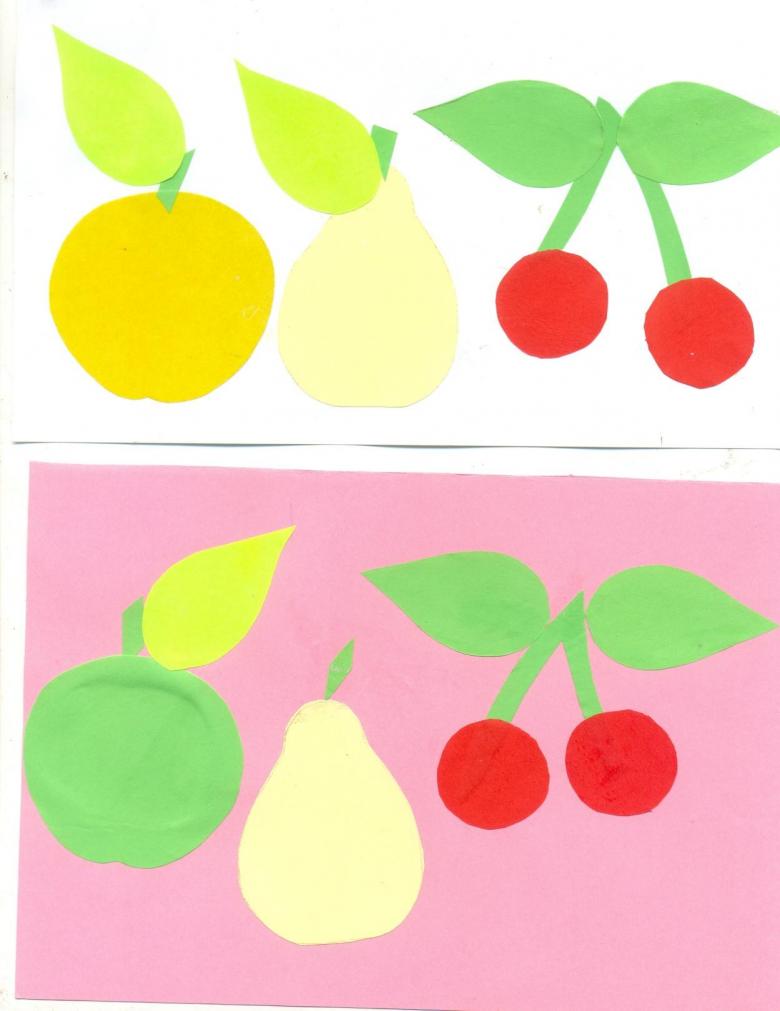
The depiction of fruits and vegetables using the appliqué technique facilitates their quick learning and memorization, which is very important for a small child.
Materials for their manufacture
To make applications depicting fruits and berries, you can use not only the usual material - colored paper, but also others:
- corrugated paper;
- felt;
- some types of fabrics;
- dried tree leaves and berries;
- seeds;
- cereals and pasta;
- beads;
- eggshells;
- threads
An application on this topic with several types of materials turns out to be quite interesting and original.
Technicians
As a rule, fruits and vegetables are depicted in the form of standard applications, but they also look very interesting in 3D volume. If desired, you can make the applique using the origami technique or by twisting narrow strips of paper.
They also often do work using the mosaic technique, that is, they tear paper or break eggshells into small pieces, and then fill them with the required image.
Crafts on the theme of autumn for school
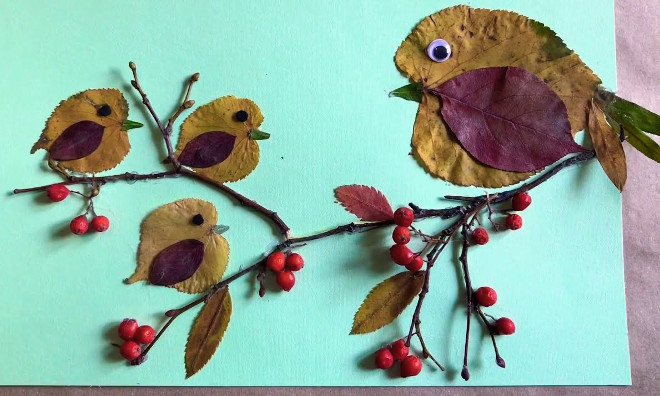
Crafts on the theme of autumn for school are in many ways similar to those made in kindergarten. The difference lies largely in whether the child makes them himself or with the help of his parents. Simple crafts are suitable for DIY. The eyes will come to the rescue - they will make any craft more lively and expressive.
With due diligence, these mushrooms are also not difficult for a child to make on their own.
It’s more difficult to do these options yourself, in many ways you will need the help of parents, but joint creativity brings us together.
Such crafts are suitable for competitions and require imagination from the performer. How do you like these ideas?
Photos of crafts on the theme of autumn for the home
It is not at all necessary to make crafts just because they were assigned in kindergarten and school. Many of them can be made simply to decorate your home. These completely unconventional ideas will amaze you with their beauty and give you unique pleasure and lift your autumn mood.
Dry leaf applications don't have to be simple. Sometimes they become real paintings - masterpieces. Here are just a few ideas.
Wreaths have already become a traditional home decoration, and in the autumn they can also be a small work of art.
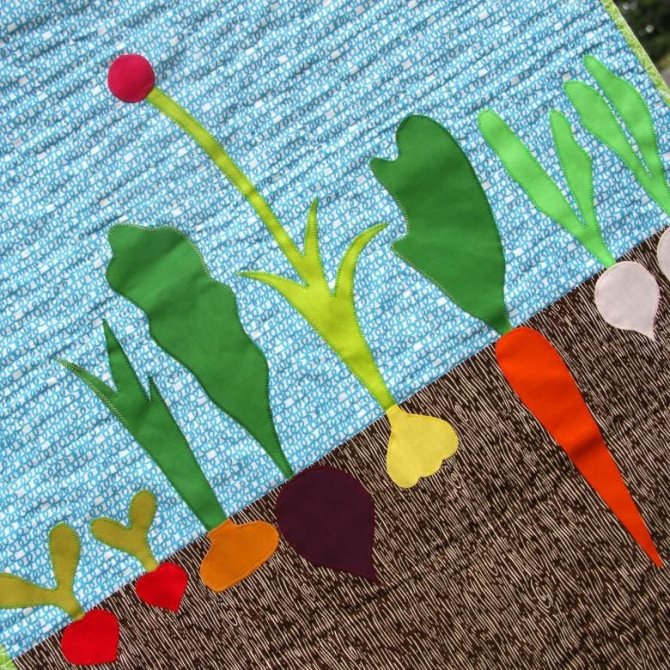
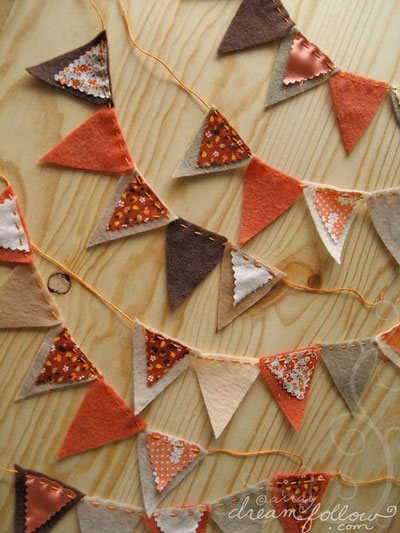
For those who like to sew or knit, the ideas might be something like this.
If you don’t want to do anything complicated, but need to create an atmosphere, garlands of leaves or fabric of appropriate colors are suitable.
This pumpkin craft is not at all difficult to make - you will need glue and a flexible pipe for extraction. Bend the pipe to create a pumpkin shape and then spray paint it. Add a stalk - a wine cork or a suitable twig, and decorate the craft with leaves.
This miniature will delight the eye for many years. Of course, it is not so easy to make, but the result is amazing.
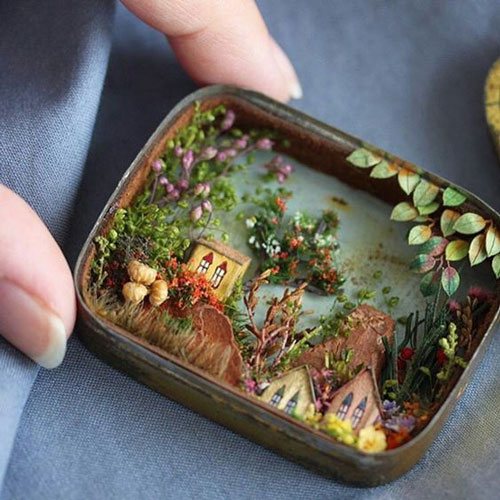
This kind of fun pampering with photographs will make long autumn evenings truly creative.
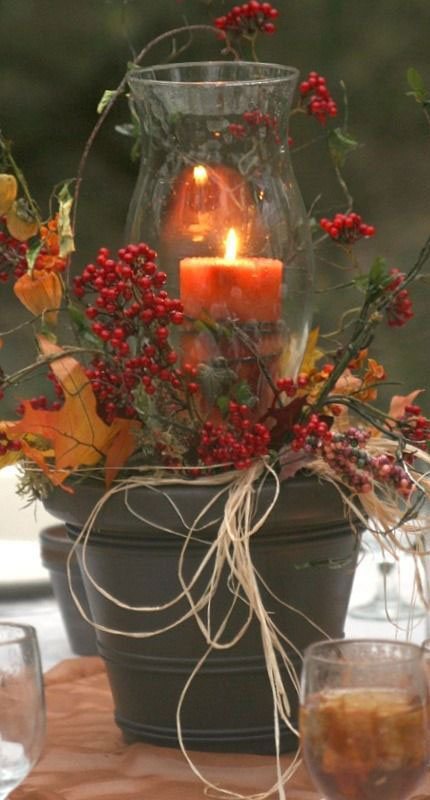
Candles will bring comfort on cold evenings:
A few more craft ideas for adults and children
Which crafts did you like the most?
My name is Nadezhda, I am a mother of many children. I love children and am actively involved in their development. At one time, I was looking for a site where all the information on children’s development, ideas for crafts, and poems for memorization would be collected. And also the inspiration that all mothers need, because being a mother is not always easy. Now I know such a site - I created it myself))) “Mom can do anything!” This is not just a website, this is my motto in life.
In 3-4 grade
Simply gluing pieces of paper onto paper will no longer captivate ten-year-old children. The tasks need to be more challenging and creative.
The most popular options:
- modular appliques - complex silhouettes from parts;
- mosaic of geometric shapes;
- ornamental panels with a selection of colors;
- 3D applique craft made from leaves folded into a cone.
Combined techniques can be proposed in one work. Joint creativity will also arouse interest - a proposal to implement one idea together or three. This activity will also teach children to negotiate and work in a team. Gluing corners for a voluminous appliqué will promote perseverance and develop fine motor skills.
Dress for a doll
Children can make a dress for a girl even in kindergarten, so in elementary school the task needs to be complicated. It is necessary to convince children in advance that the dress must have an original cut, details, and accessories. Children can already come up with and depict the silhouette of the Queen of Autumn on their own.
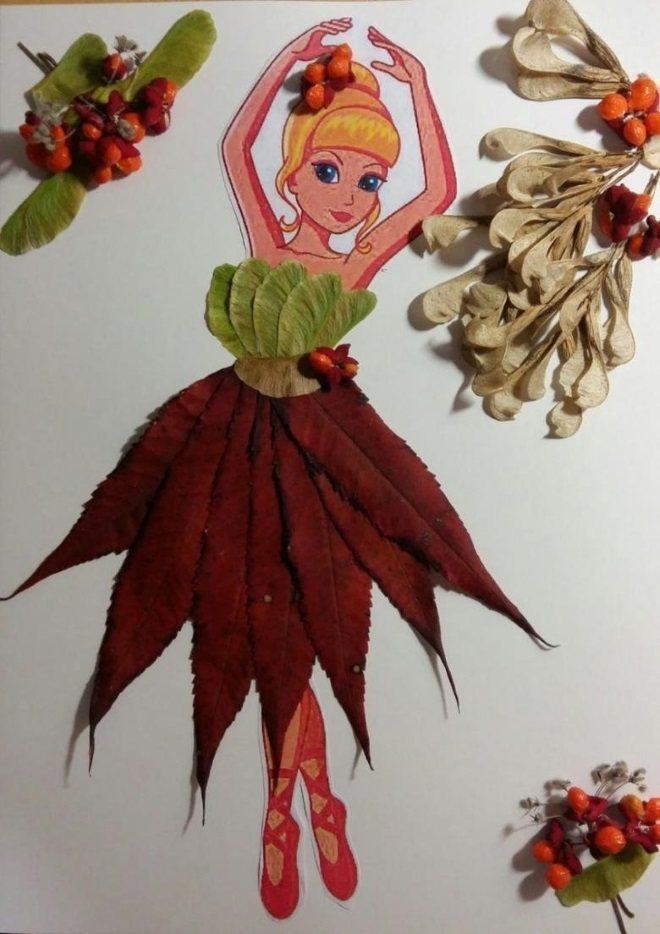
Another complication of the topic is three-dimensional work. Old Barbie will probably be found in any family with girls.
Procedure for working on a three-dimensional model:
- Sketch, selection of material.
- Making a base from fabric or paper napkin.
- Gluing the leaves to the base.
Accessories can be chosen from natural or doll-like ones. For a formal outfit, sparkles, beads, and beads are useful. In addition to the dress, you can come up with a spectacular umbrella, fan, and hat. The doll itself will not suffer from such work.
Beauty Autumn
Children in grades 2-3 can also draw a face on their own. It is proposed to use the leaves to create a hairstyle and accessories. Despite its apparent simplicity, the work requires a creative approach, selection of colors and shapes. It is worth discussing in advance how students see this person - a fairy fairy in a light dress, a girl wrapped in a collar, or a queen in a ball gown.
Other photo ideas
The teacher planning the lesson needs to take into account that the leaves brought by the children may be of the same type - collected in the yard next to the school. To have a larger assortment of shades, you will have to take care of unusual colors and textures personally, starting the collection in the summer. To prevent crafts made from natural materials from losing their shape, finished works can be sprayed with hairspray.
DIY autumn crafts
Crafts on the theme Autumn
Autumn crafts with children
Crafts made from natural materials
Autumn crafts from natural materials for schoolchildren. Master classes with photos
Autumn gives us many beautiful ideas for creativity. What beautiful autumn leaves are in the fall, you can look at them endlessly. Nature has spread a beautiful golden autumn carpet of leaves in front of us.
In autumn, you can collect not only leaves, but also acorns, cones, chestnuts, acorns and other natural materials for children's creativity.
DIY autumn flowers made from threads
Work from waste material “Autumn stars”
The work is intended for children 6-7 years old.
Can be used as a group decoration or as a gift
Goal: to promote the development of creative imagination.
Objectives: develop coordination of movements, fine motor skills of fingers, cultivate a caring attitude towards nature.
Master Class. Panel “Wonder of Autumn”
For work you will need: cardboard, fabric, scissors, pencil, Moment-Crystal glue, tree leaves, wood shavings, pencil shavings, a cutout of a woman's face from a magazine, braid.
Draw a contour figure of a girl on thin cardboard and cut it out, cut out the base for the panel from box cardboard of the desired size.
From an opaque plain fabric, cut out the background for the panel, 1.5 cm. larger than the panel size.
DIY autumn crafts at school
Master class: “Leaf fall”.
Application: Work for exhibition, interior decoration.
Dear friends, in childhood we all launched paper airplanes, made wallets, boats and steamboats out of paper, made caps and hats from newspapers. And only many years later they learned that paper folding is called a beautiful word - origami.
And I offer you a master class of work made using the modular origami technique - “Falling Leaves”.
Material: For work you will need colored paper in “autumn” shades, a ruler, a simple pencil, glue (glue stick), gouache, and a brush.
Modular origami is a style of origami in which a whole figure (work) is assembled from separate parts - modules. There are many varieties of origami modules, both flat and three-dimensional.
Master Class. Composition “Autumn Sun” (natural material).
The master class is designed for students in grades 2-3.
This craft can be used for an exhibition at the Autumn Ball holiday.
Step-by-step manufacturing process
Prepare dried flowers or dried flowers (small leaves are fine).
Materials we will need: scissors, yarn, Titan glue, any lid from large paint cans (I used a lid from Façade Paint).
DIY crafts made from natural materials.
Master class “Butterfly made from natural material”
The master class is designed for school-age children, teachers, and parents.
Purpose: Decoration in a corner of nature, interior decoration, gift.
Goal: To develop fantasy, creativity, imagination.
— Introduce a new way of using natural materials;
— Develop fine motor skills, attention, intellectual and creative activity;
— Foster a sense of love for nature.
Corn leaf doll. Master class with step-by-step photos
Crafts from talasha. DIY doll
Master Class. Corn leaf doll
This master class will be useful for additional education teachers, technology and primary school teachers, and passionate and creative parents. The doll can be made together with children over 8 years old.
The product can be used to decorate the interior or as a souvenir
Application on the theme “Applique of autumn leaves”
Master Class. Application of autumn leaves “Fairy”.
Autumn was blooming at the edges of the colors,
I quietly ran a brush across the foliage.
The hazel tree turned yellow and the maples glowed,
The aspen trees are purple, only the oak is green.
Autumn paper crafts in the preparatory group of kindergarten
Master class “Autumn trees”
Making autumn trees in different ways.
Technique: Paper plastic.
The master class is designed for preschool children aged 6-7 years.
Purpose of the master class: interior design of kindergarten groups for the autumn holiday.
Goal: development of artistic and creative abilities of children.
Crafts for the autumn school exhibition
Purpose: the master class is designed for craftswomen who have experience in threading and weaving beadwork and are passionate about this technique, since the work requires a lot of patience and some theoretical knowledge and practical skills in this field of art.
Note! Crafts on the theme of autumn for kindergarten
“The sky was already breathing in autumn...”
Crafts made from natural materials for primary schoolchildren
Master class: Volumetric applique made from natural material using paper mosaic “Vase with flowers”.
The master class is designed for students of primary school age.
Goal: to create conditions for unleashing the creative potential of children through artistic creativity.
— deepen students’ knowledge and skills about paper mosaic, volumetric applique and techniques for using natural material in work;
DIY rose bouquet from maple leaves
Roses from maple leaves. Master Class
Autumn bouquet “Roses for you” Master class
Master class: DIY autumn crafts from natural materials.
Bouquet! It can be so different: candy, floral, fruity. And this bouquet is special, deciduous. It is beautiful and unusual, made of crimson autumn leaves.
Such an autumn bouquet can be a pleasant gift for your loved ones, a decorative decoration for a table and not only for autumn, show your imagination and it will delight you all year round.
Application on the theme “Autumn”. Master Class
DIY Autumn tree applique
The master class is designed for children of middle and senior preschool age, teachers and parents.
Purpose: interior decoration.
To work you will need:
DIY autumn crafts for elementary school
Application made from natural material “Trees in autumn”
Materials needed: glue, scissors, colored or white cardboard, dry leaves, a small tree branch, paints
Roses from maple leaves. Master Class
DIY crafts made from natural materials
Goal: learn to create flowers from different materials: colored napkins, maple leaves, threads and wooden sticks; work carefully.
Materials: tree leaves, threads, colored napkins, scissors, wooden sticks, tape, stapler.
Summary of a lesson on appliqué in the senior group “Autumn Flowers”
Tasks:
Educational:
— Introduce children to the method of symmetrical cutting from paper folded several times (taking into account the characteristics of the inflorescences);
— Teach how to compose a composition on the plane of a sheet (a sign of beauty can be found in the combination of a dark background and a light bouquet and a light background and a dark bouquet);
— Activate the dictionary;
- To form a generalized idea of autumn flowers - asters, dahlias, calendulas, chrysanthemums.
Educational:
— Develop a sense of color, a sense of composition;
— Develop attention, memory, logical thinking, imagination of children;
— Develop interest in completing tasks and creative activity.
Educational:
— Cultivate accuracy in working with scissors and paper;
— To cultivate a caring and aesthetic attitude towards nature, a sensitive attitude to the beauty of autumn flowers.
Methods and techniques: verbal, practical.
Materials and equipment: Reproductions from paintings by famous artists, postcards with images of autumn bouquets, bouquets of fresh flowers, background paper - dark, light, square paper blanks for flowers (also light and dark), scissors, glue, napkins.
Preliminary work: Examining autumn flowers in flower beds; search for contrasting combinations (plants, objects) in the surrounding world; reading fiction about flowers; viewing reproductions, pictures, postcards depicting still lifes with flowers.
Progress:
1. - The Sorceress Autumn gave us many gifts - these are mushrooms, fruits, vegetables, and berries; she decorated the trees with rich clothes and grew beautiful flowers.
— What autumn flowers do you know?
— Look at the bouquets in vases. What does an aster flower look like? Dahlia? Please note that these flowers have many petals and are lush.
- And if we place all the light asters and calendulas on the table against the background of a light wall, and dark dahlias, gladioli, chrysanthemums against the background of a dark curtain, what will happen? (not bright, the background blends in with the colors)
- Let's swap our bouquets - what happened? Why?
- Now we will also try to create our own unique bouquets, we will be magicians, magicians. Let's make light flowers on a dark background, and dark ones on a light background.
Phys. just a minute
2. There are materials for work on the table; children independently select the ones they need.
— To get a beautiful aster or chrysanthemum, you need to fold the leaf diagonally in half 3 times, holding it by the blind corner of the fold, make several cuts on the open side, cutting out the pointed petals of the flower, and unfold it. (Show.)
— For dahlia and calendula petals, you need to follow the same steps, only cut out the rounded petals. (show)
— In order for the flower to be lush, several cut blanks are needed. The tips of the petals can be bent using a pencil or scissors. Next, cut out the stems and leaves.
- After finishing working with scissors, we try to create a composition on the background sheet - make the bouquets the way you like.
- Apply glue only to the middle of the workpiece, assemble it - you get three-dimensional flower heads. (Show.)
Children's work. Individual assistance.
3. Lay out the work on the table.
— Dear wizards, do you think we succeeded in turning paper into luxurious autumn flowers?
— Did you get the right combination of background and bouquet?
— Which bouquets do you like best? Why?
- Let's collect all the compositions and arrange an exhibition for parents, so that they can also admire your magical bouquets of autumn flowers.
Idea 1. Autumn topiary
Topiary is a decorative tree that can be used to decorate a dining table, mantel, or front door area. To make it, you can use natural or artificial materials, for example: leaves, berries on twigs, acorns, cones, chestnuts, flowers, dried citrus slices, as well as felt, sisal, linen and whatever your imagination tells you. In the next slider you can see several examples of such autumn crafts.
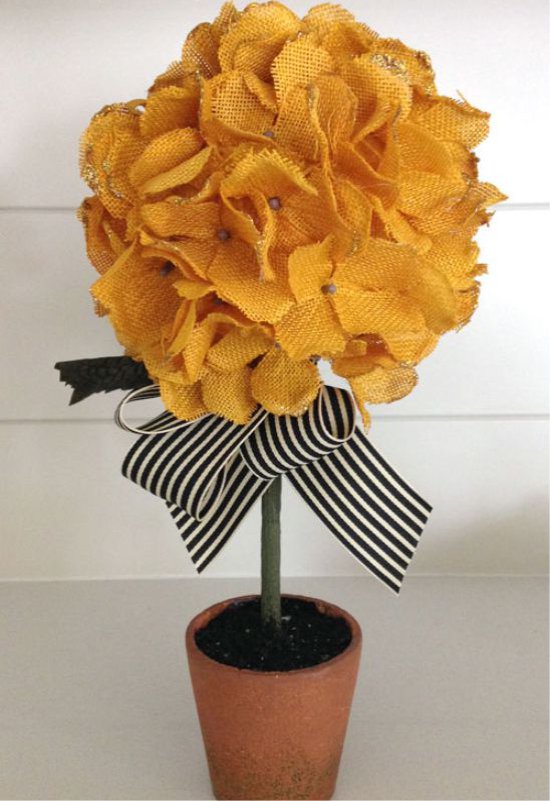
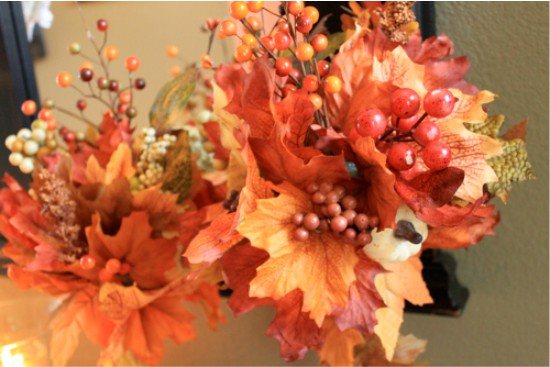
Next, we present to you a simple master class on making an autumn decorative tree from artificial leaves and berries.
- Clay pot;
- Wooden stick or branch;
- Two polystyrene or floral foam balls;
- Materials for decorating the crown;
- Dry moss (you can replace it with sisal);
- Glue gun and several glue sticks;
- Scissors;
- Side cutters or pruning shears;
- Acrylic paints for painting the trunk, ball and pot (optional).
Step 1. Cut a hole in the base ball with a sharp tool for the barrel, about a third of its diameter deep. Place a drop of hot glue into the hole and insert the barrel into it.
Step 2: Insert the second ball into the pot. If the ball does not sit tightly enough in the pot, place newspaper around it. Cut a hole in the ball for the trunk, 2-3 cm deep. Insert the trunk with the crown into the hole and adjust its length. Next, drop glue into the hole of the ball, place the barrel in it and begin to fill the hole with glue, placing small pieces of paper around the barrel. This is necessary so that the hot glue does not deepen the hole too much.
Step 3: Paint the pot the color you want if you don't like the original look. In this project, the pot was painted with spray paint in a dark bronze shade from Rustoleum (sold in construction stores, for example, in Leroy Merlin).
Remember that the design of the pot should be simple and unpretentious so as not to distract attention from the crown. If necessary, paint the barrel and/or balls at this stage. It is advisable to paint the balls so that the gaps between the decorative details are invisible.
Step 4. While the paint on our blank is drying, sort the decorative parts by type and size. If you use artificial leaves, flowers and berries with a wire base, then when cutting them, leave “stems” about 2 cm long. This is necessary in order not only to glue the parts, but also to stick them into the ball - then they will hold more securely . If the “stems” do not have wire, then it is better to cut the parts “at the root”.
Step 5. Now it's time for the fun part - creating the crown. First, evenly distribute and glue the largest parts onto the ball, then the middle ones. Finally, fill in the gaps with small embellishments.
- Step 6. Well, that's all, all that remains is to decorate the ball in the pot with dry moss or sisal, after treating it with glue.