Children's creativity not only contributes to the development of artistic taste and fine motor skills, but also broadens the child's horizons. Creating landscapes using the appliqué technique will help kids learn the concepts of perspective and horizon. The theme of the autumn forest will help kids learn the signs of this time of year.
Tell your children about autumn and let them make crafts according to their taste, without being limited by rules. Even if the first works do not really meet the requirements, they are still beautiful, because the child filled them with his imagination and sincere love for this world.
Application “Autumn tree” made of colored paper
To work, prepare a set of colored paper and decorative cardboard, office glue, a ruler, scissors, and a simple pencil for marking. Do the job like this:
- Take brown paper. Draw the outline of a tree trunk. Or you can draw a trunk on a white landscape paper using paint or pencils in different shades of brown to create a beautiful woody texture.
- Cut out the resulting trunk. Its approximate height should be 18-20 cm, considering that the background will be in landscape format.
- To make leaves, cut out squares with a side of 3 cm; they should be of different autumn colors: red, red, burgundy, yellow, green. Also cut out the grass-covered ground from green paper into a long, narrow rectangle.
- Fold the grass like an accordion along the short side. Turn multi-colored squares into “accordions” too, but fold them from one corner to the opposite.
- Fold the folded squares in half and glue them in the middle to make cute ribbed leaves.
- Use a light blue cardboard sheet as a background. Glue a tree trunk on it.
- Glue the grass parallel to the bottom edge of the background, stretch the accordion so that it takes up the entire distance between the right and left edges of the cardboard.
- Glue leaves on the branches. The distribution of colors should be arbitrary so that the crown looks variegated. You can glue several leaves to the grass, as if they had fallen.
- Cut out clouds from white or pale blue paper and glue them above the tree.
Golden autumn - 25 creative crafts for children aged 2-6 years
Home › 1-3 › Development › Golden autumn: 25 creative crafts for children from 2 to 6 years old
Autumn is the golden time for cozy home gatherings with cocoa and pie, and of course educational crafts! It’s easy to create with your child in the fall, because this time is so colorful, and you can bring a lot of natural materials from the street, which will become the basis for creativity!
Source: children_doma
But even if you don’t have a herbarium yet, you can always draw, glue from paper and implement other creative ideas from our list!
50 Best Educational Games and Crafts for Family Fall Evenings
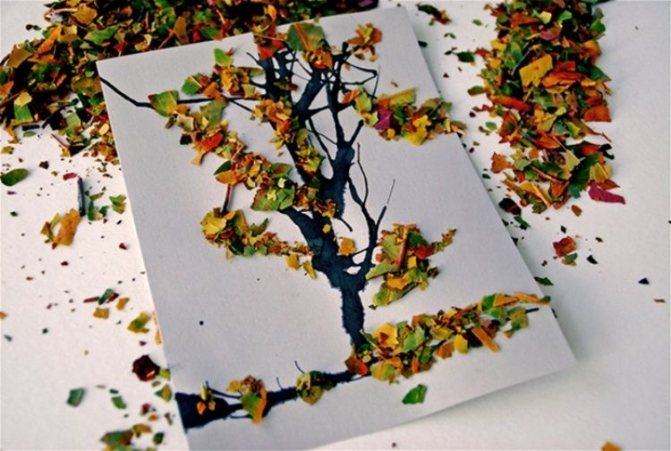
To draw such a voluminous outline of the leaves, you need to mix PVA glue and black paint. Then let the little one trace the outline of the herbarium! Ready! Let the drawing dry, and then paint with colored watercolors!
Autumn tree for the little ones
For this craft you will need:
- colored paper
- cardboard
- double sided tape
- scissors
If your baby is still very small, make the paper blanks yourself and let him glue the leaves. Older children can be asked to cut out paper and work with PVA glue.
Watch the entire application process in the master class:
Publication from ????WHAT TO DO WITH A CHILD????? (@deti_mogut) Sep 18, 2017 at 8:01 PDT
Craft “Winter Compote”
Apples cut into 2 parts can serve as very beautiful stamps for autumn crafts.
For this craft you will need:
- kraft paper
- thick white paper
- rope
- gouache
This craft will suit even the little ones! Mom just needs to make a jar template and show the child how to dip the apple halves in paint.
Source: Source:
Stamping with egg trays
This craft is done in the same way as the previous one, but to get the result we will make stamps using egg trays. If you have this material at home, don't throw it away!
You can also stamp on wood using:
- real leaves
- fingerprints
- halved potatoes
- kitchen brush
- bunch of cotton swabs
- foam sponge
- bubble wrap
- disposable fork
- lego cubes
- crumpled paper
- old toothbrush
- pine cones and other natural materials.
Posted by @kopilka_mam Oct 8, 2022 at 10:30 PDT
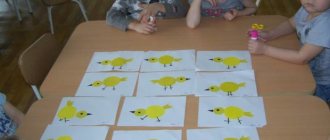
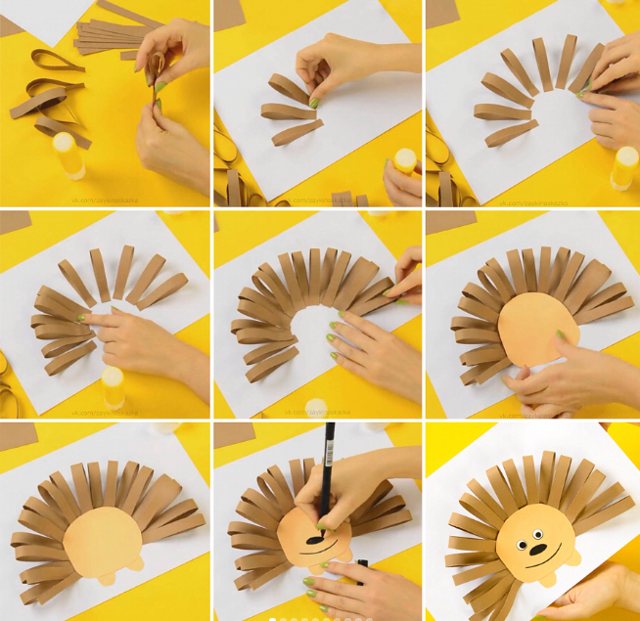
Application "Hedgehog"
For the application you will need:
- colored paper
- scissors
- PVA glue
- felt-tip pens
Source: children_doma
Painting with wax and watercolor
Invite your child to draw autumn leaves on a white sheet of thick paper using a piece of candle or white wax crayon. Then apply water to the piece using a brush and add color with watercolors!
The outline of the leaves will not be painted over with watercolor, so you can drip paint on it and go beyond the boundaries!
Watch the whole drawing process in the master class:
Publication from ????WHAT TO DO WITH A CHILD????? (@deti_mogut) Sep 20, 2017 at 8:00 PDT
Application “Echinacea flowers”
For this craft you will need:
- plasticine
- dry needles or “spouts” of maple
- felt-tip pens
This craft can be done even with a baby! And if a child likes to sculpt from plasticine, then he will definitely like this kind of creativity.
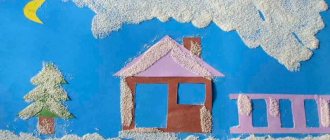
Application “Autumn Forest”
For this craft you will need:
- thick white paper
- paints
- scissors
- sheet of cardboard
- colored paper
- glue
- spray bottles or toothbrush
You can apply splashes on paper using a toothbrush if you don’t have spray bottles at home. The applique is perfect as a craft for kindergarten!
Watch the entire application process in the master class:
Publication from ????WHAT TO DO WITH A CHILD????? (@deti_mogut) Sep 28, 2017 at 8:01 am PDT
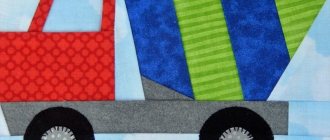
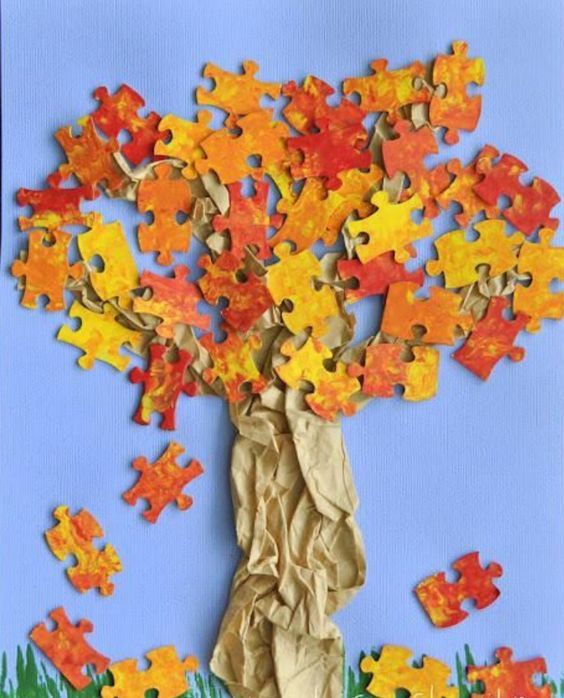
Autumn applique made from cut paper
You will need:
- colored paper
- paints
- scissors
- glue stick
This applique can be made even with a 2-year-old child, since there are no limits to creativity and imagination! The child can choose how to glue the paper blank and how to place it on the paper.
Watch the entire application process in the master class:
Publication from CHILDREN AND MOTHER: GROWING UP WITH FUN (@deti_doma) Oct 7, 2017 at 9:38 PDT
Autumn application from crushed leaves
For this craft you will need:
- dry autumn leaves
- paints
- paper
- PVA glue
Watch the entire application process in the master class:
Publication from ????WHAT TO DO WITH A CHILD????? (@deti_mogut) Sep 27, 2017 at 8:01 PDT
Autumn painting with masking tape for kids
The simplest, but at the same time original craft for the little ones! Give your child a sponge and a few “autumn” gouache colors and let him stamp on a sheet of paper covered with masking tape.
When the drawing dries, carefully remove the tape and draw bark and branches on the “trees”.
How to implement the idea, look at this short master class:
Publication from ????WHAT TO DO WITH A CHILD????? (@deti_mogut) Sep 22, 2017 at 8:01 PDT
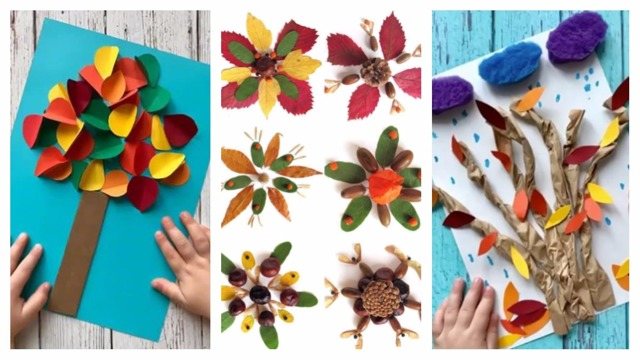
"Autumn Kaleidoscope"
You can create many, many wonderful patterns from bright autumn leaves. Like in a kaleidoscope, you change a little and a new flower appears, even more beautiful than the previous one! For such floral patterns, use dry autumn leaves, seeds, tree fruits and berries.
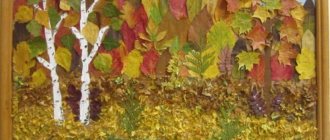
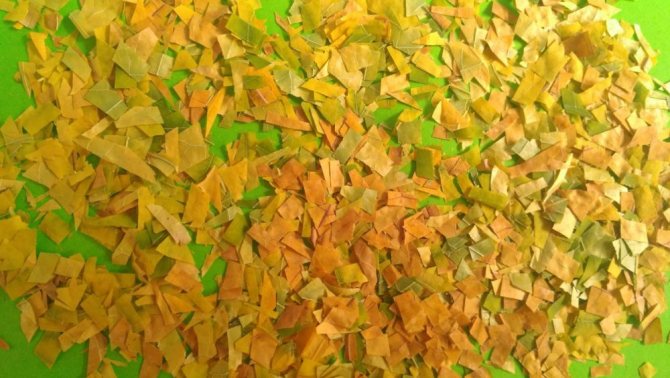
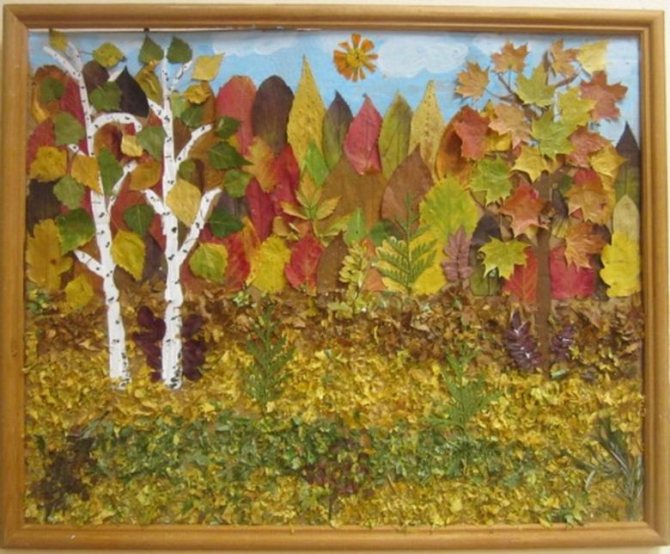
Autumn tree made of leaves
For this lesson you will need leaves collected in the fall and dried; they must be neat, without holes or signs of rotting. You also need decorative cardboard for the background and office glue.
Instructions for creating an application:
- Cut the leaves into thin strips and triangles.
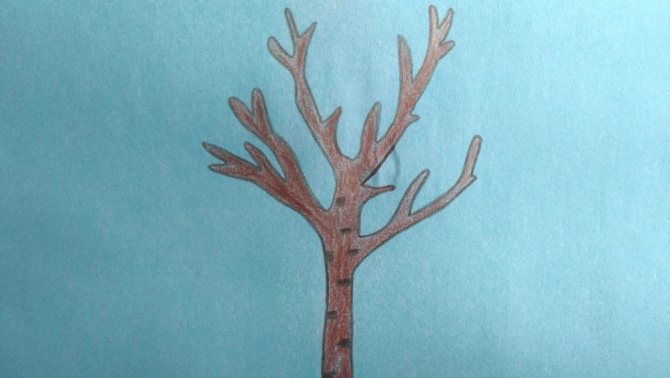
- Draw a tree trunk on a background cardboard sheet.
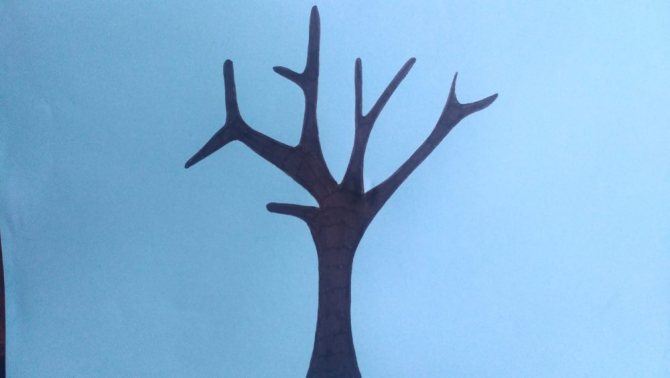
- Carefully coat the branches of the tree shown with glue.

- Immediately, before the glue dries, sprinkle the chopped leaves on it.
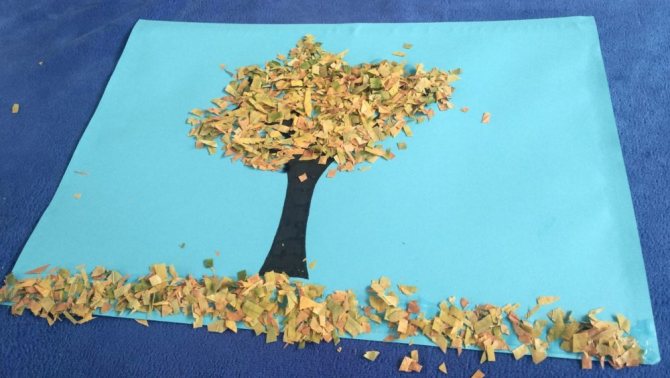
- Leave the application to dry.
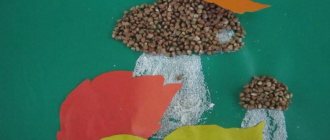
Autumn tree in the younger group
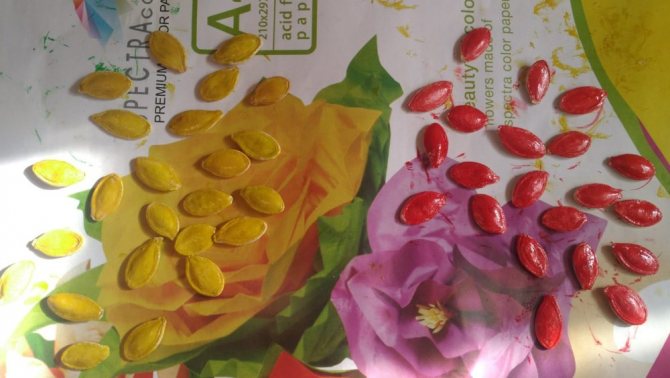
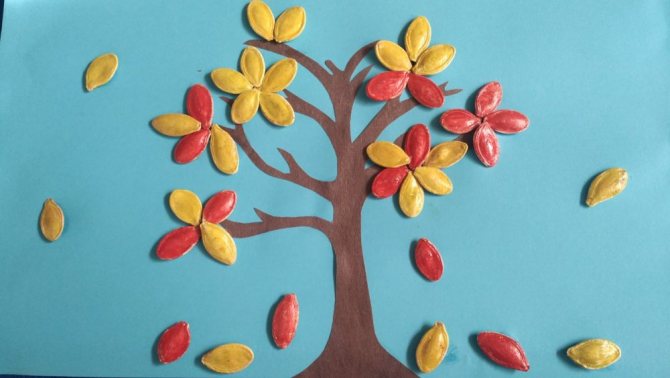
For the activity, prepare a cardboard background sheet, strong glue, clean pumpkin seeds, a tree trunk template, and gouache paints.
Do the job like this:
- Place the seeds on oilcloth or newspapers, paint them with gouache in autumn colors: red, burgundy, red, yellow.
- On a sky-colored background cardboard, draw a tree trunk according to the template.

- Carefully glue the dried seeds to the branches.
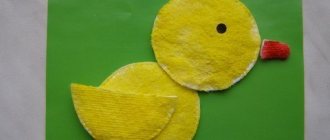
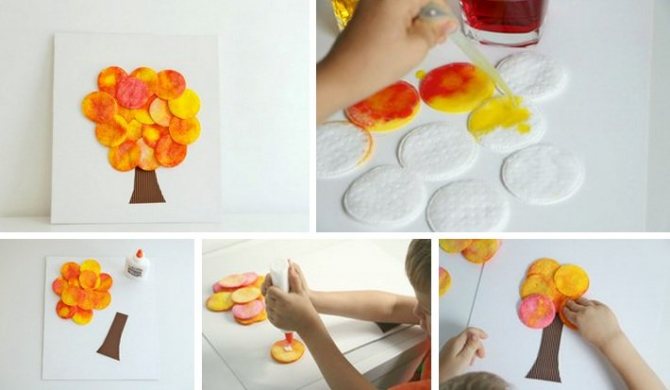
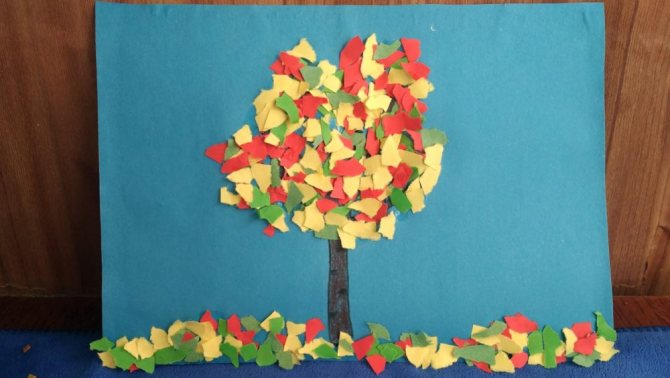
DIY “Autumn Tree” craft
The activity is suitable for younger preschoolers. The purpose of creating an autumn applique is to teach children 3-4 years old the skill of working with available materials, developing imagination and fine motor skills. For the lesson, take gouache in 3 autumn colors: red, yellow, orange. It is not advisable to use watercolor paint, otherwise the application will turn out faded. You also need cotton pads, 12-15 pieces.
Making the craft is as easy as shelling pears:
- Lay out the discs on oilcloth.
- Dilute gouache paint with water in 3 separate containers.
- Use a brush to pick up the diluted paint and drip it onto the discs. You can drip a certain color onto each disc, or you can mix colors to create beautiful stains.
- On the background sheet, draw a tree trunk with brown gouache.
- When the discs are dry, glue them onto the top of the trunk so that they partially overlap each other. Leave the craft to dry.
Materials and tools
Before work begins, you should prepare tools and materials:
- Thick cardboard.
- Multi-colored paper.
- Scissors with rounded ends.
- PVA glue or stationery pencil.
- Wallpaper.
- Cotton wool.
- Felt pen.
- Cotton pads.
- Watercolor paints.
Application “Autumn tree” in the middle group
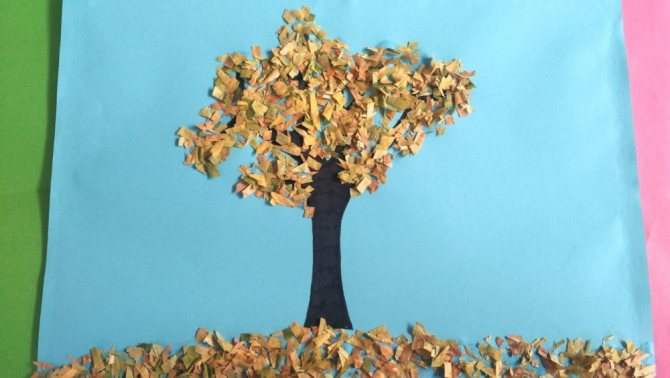
The applique is made using an interesting technique, when the elements of the composition are made from paper scraps. For work, prepare a set of colored paper, pencil glue, colored pencils, and a tree template.
To make an application:
- On the background sheet, color the tree according to the template using colored pencils in different shades of brown.
- Take colored paper in red, yellow, and light green colors. Tear it into small pieces of arbitrary shape.

- Glue paper pieces in random order onto the tree branches to form a crown, and onto the bottom of the background to create the ground covered with fallen leaves.
MAKE THE WORLD BRIGHTER| MAKE THE WORLD BRIGHTER
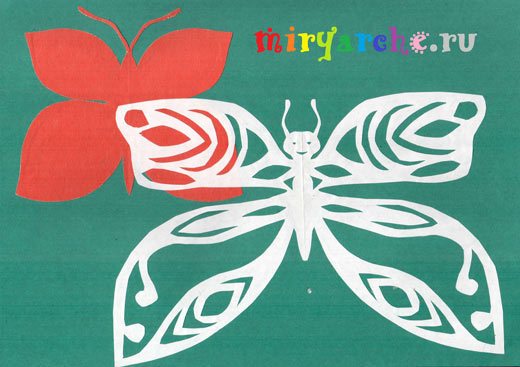
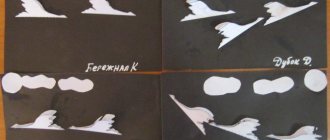
Paper is one of the most accessible materials; I really like working with it. What can't you make from paper?! It is used in various techniques: applique, paper-plastic, silhouette and symmetrical cutting, protruding, quilling, origami and others. Today we will focus on symmetrical paper cutting .
Silhouette and symmetrical cutting, like many other paper crafts, originated in China. There was a tradition there of decorating houses with carved silhouettes on New Year's Eve.
Chinese women tried to decorate the windows of their houses with beautiful paper cut-outs of the Year of the Snake pattern.
This tradition is now relevant in Russia too, with more and more families now decorating their windows with intricate cutouts.
Recently I talked about vytynanka, the art of paper cutting. Silhouette cutting has something in common with vytynanka, both are cut out of paper. Silhouette cutting differs in that the image is cut out by the continuous movement of scissors along the mentally created silhouette of the object.
Symmetrical cutting means that one part of the depicted object is symmetrical to the other, an imaginary plane divides the object in half, into two identical mirror halves (a leaf of a tree, the tree itself, a tulip or cornflower flower, a vase, a glass, a person, etc.).
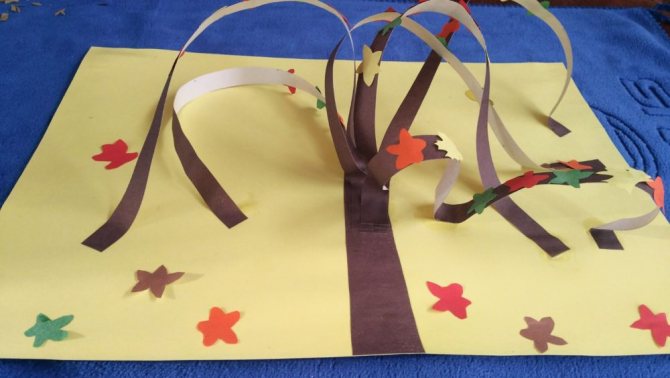
Application “Autumn Tree” in the senior group
To make a three-dimensional applique, take a set of colored paper, white or blue background cardboard, PVA glue, scissors, and a cut out template of a small maple leaf. The optimal template length is 3 cm.
To make an autumn applique:
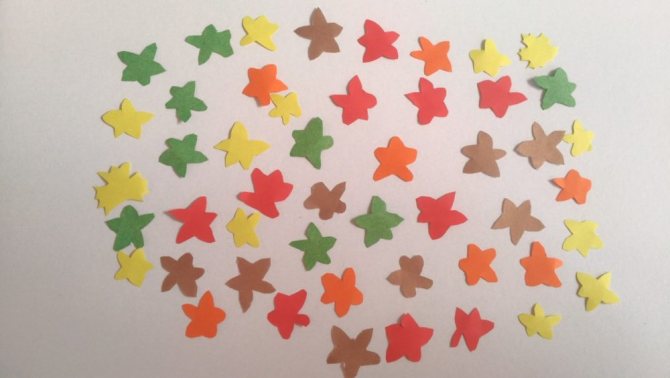
- Cut out maple leaves according to the template: 10-12 pieces each in red, yellow, burgundy, light green, orange.
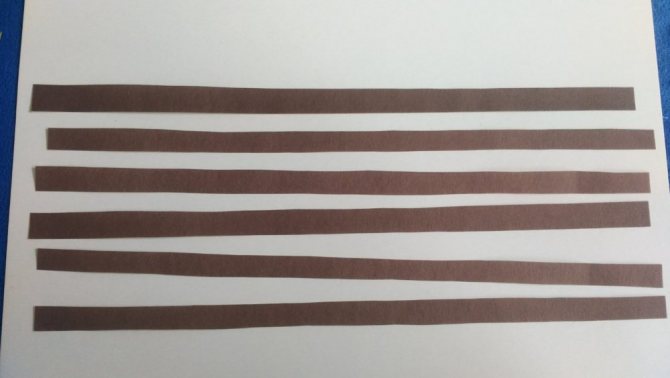
- From brown paper, cut out 6-8 strips 28-30 cm long and 1 cm wide.
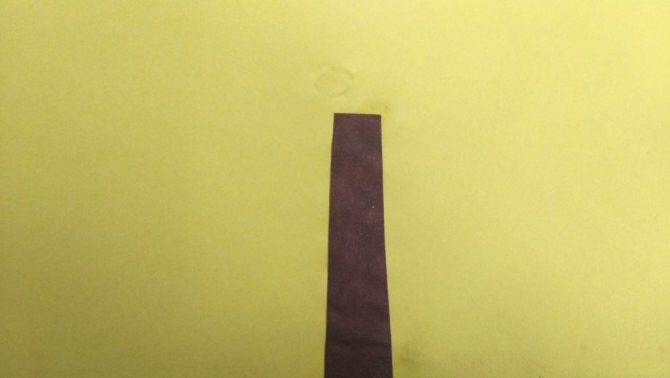
- Having outlined with a pencil, cut out the tree trunk, only its lower part, without branches. It should be about 10 cm in height.

- Glue the trunk to the background cardboard sheet.
- Glue the strips to the top of the trunk, but not completely, but only one of their edges.
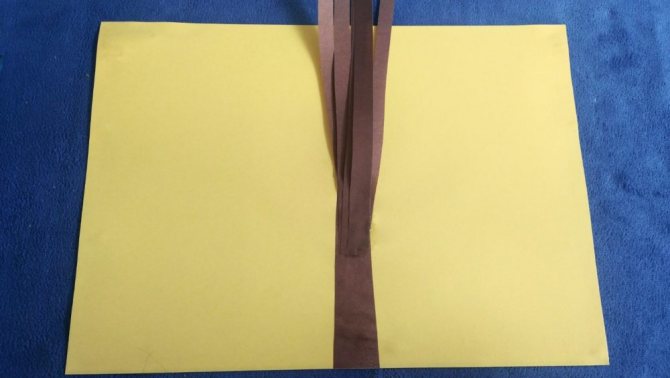
- Twist the strips into a spiral. Then glue their second free edge onto the background. You will get “curly” tree branches.
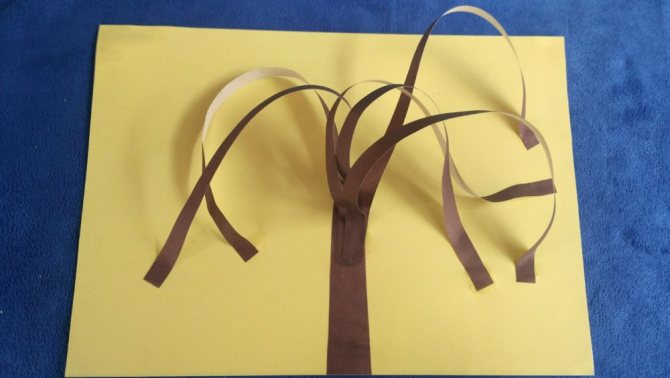
- Glue maple leaves on the branches in random order. Leave the application to dry.
Where to start?
So, no matter what group you teach, you should first introduce children to the varieties of trees and shrubs.
After all, only some of them will be able to tell you more than 2 types of trees, not to mention bushes. How can you do something you don't know? Therefore, the teacher’s task is not only to tell, but also to show what a particular tree looks like. You may have teaching materials on this topic, either hand-drawn or printed from the Internet. But I recommend that you buy demo images of trees and shrubs that you can use later in other activities. They cost pennies, and you'll love the thick cardstock and large cards.
The thematic dictionary with pictures “Flowers, Trees” will also be useful in classes where it is necessary to learn about all the diversity of the plant world and depict it in the form of an application or drawing. These two manuals will provide invaluable assistance to the teacher both in the initial stages of preparation for creative work, and in the case of in-depth study of the subject.
And, of course, you need templates to work. For the little ones, you will need to cut them out yourself, leaving only small elements for cutting - you need to teach them to use scissors from an early age. Students will only have to glue the necessary elements. Older children will benefit from “patterns” to surround them on colored paper and then cut them out themselves.
Application “Autumn Tree” in the preparatory group
Completing this application is simple, but painstaking and will require perseverance and patience from the preschooler. The lesson develops imagination, introduces the possibilities of using scrap materials, and teaches how to sew buttons to fabric.
To make an applique, collect unnecessary buttons of different sizes, but be sure to be flat and painted in autumn colors: yellow, beige, ocher, red, red, brown, burgundy. Also for the background you need a piece of canvas, preferably a light shade.
Instructions for creating crafts:
- Cut out a tree from thick dark brown colored paper.
- Paste it onto the background. You can also draw the trunk and branches directly on the fabric with a brown felt-tip pen, but if you don’t have artistic skills, it’s better to do it using a template.
- Sew the buttons with matching threads to the top of the trunk, forming a lush crown.
The finished application turns out to be extremely beautiful and interesting, worthy of hanging on the wall in a prominent place in a frame.