Craft material
A lot of experience has been accumulated in such games. If you look at the photos of traffic crafts, you can see that making them is not difficult.
Permitted street crossing locations
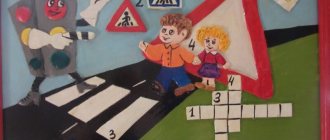
If a child knows the rules for crossing streets, the risk of an accident involving him will be significantly reduced. To master these rules, crafts that include markings, traffic lights, and road signs are of great importance.
Note!
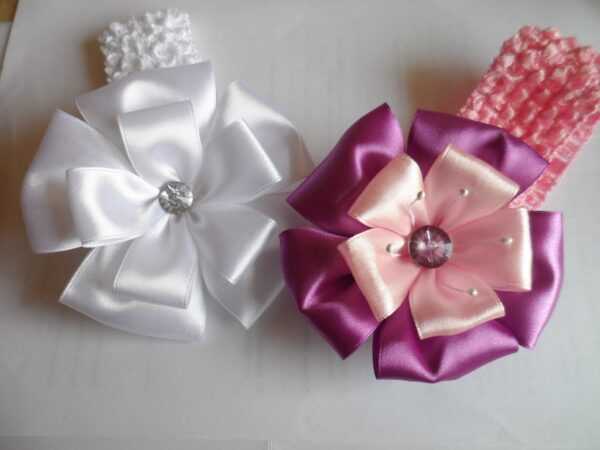
DIY satin ribbon bows - step-by-step instructions for creating unusual bows + detailed diagrams with photos- Do-it-yourself furniture restoration: step-by-step master classes on restoration at home (120 photo ideas)
- Do-it-yourself rack: step-by-step instructions with photos and descriptions on how to make an unusual rack
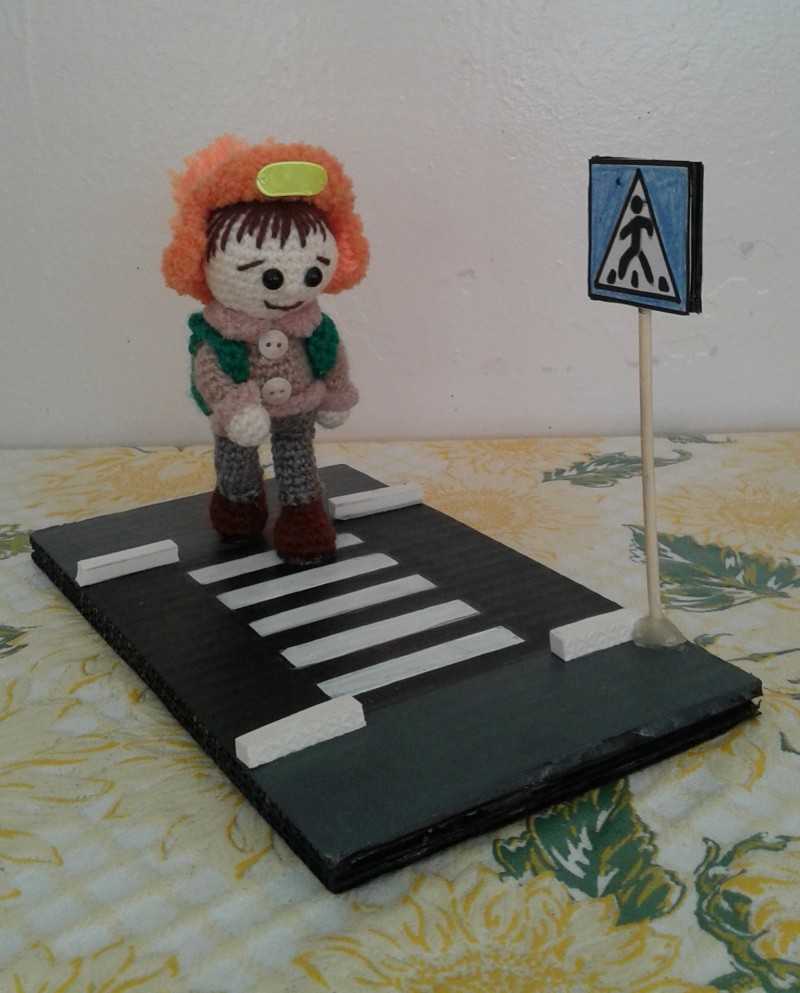
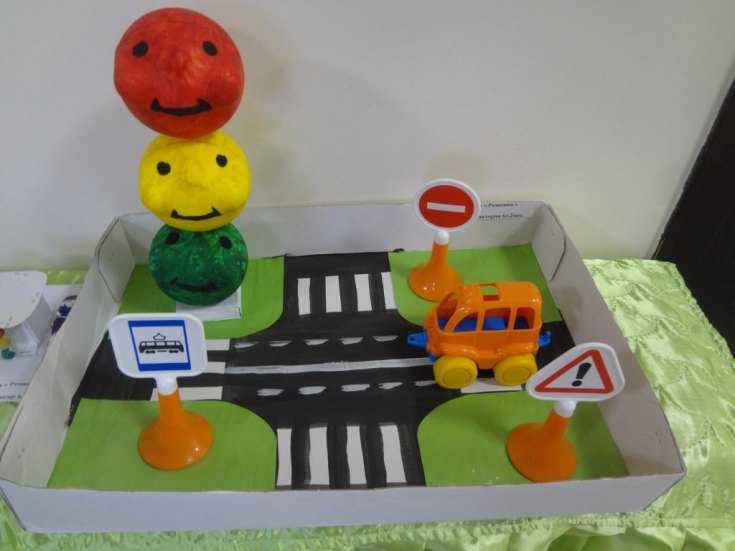
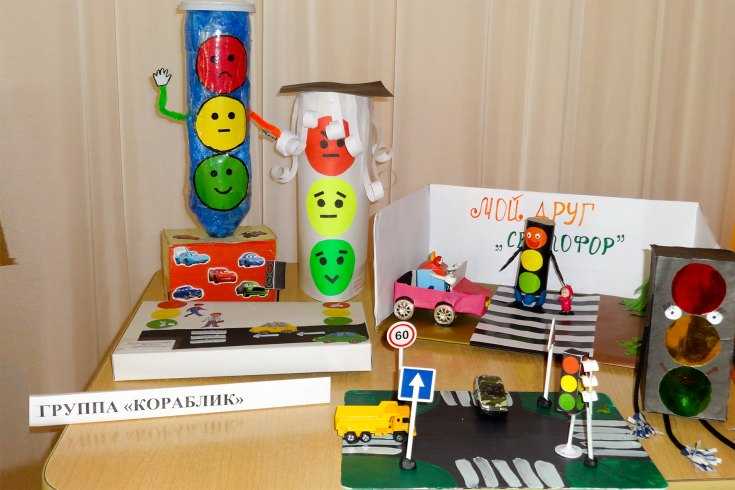
In preschool institutions, schools, and suburban areas, you can build crafts that help you learn the rules for crossing the roadway.
The asphalt path is painted with white stripes representing a crossing sign (“zebra”). Stylized traffic lights are installed at the beginning and end of the crossing.
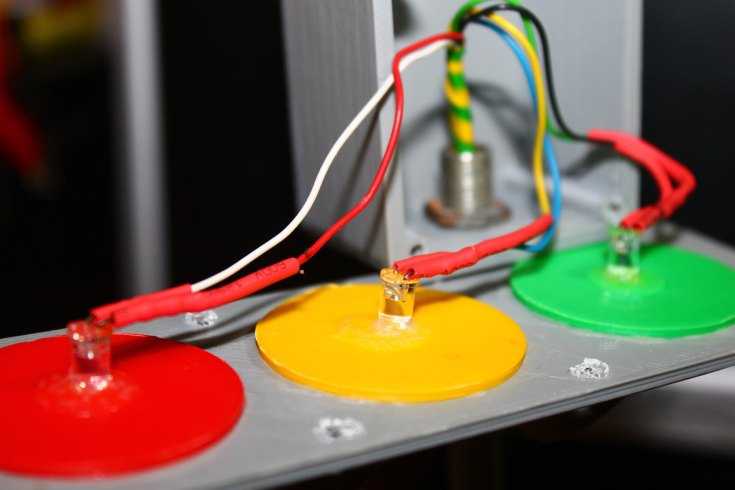
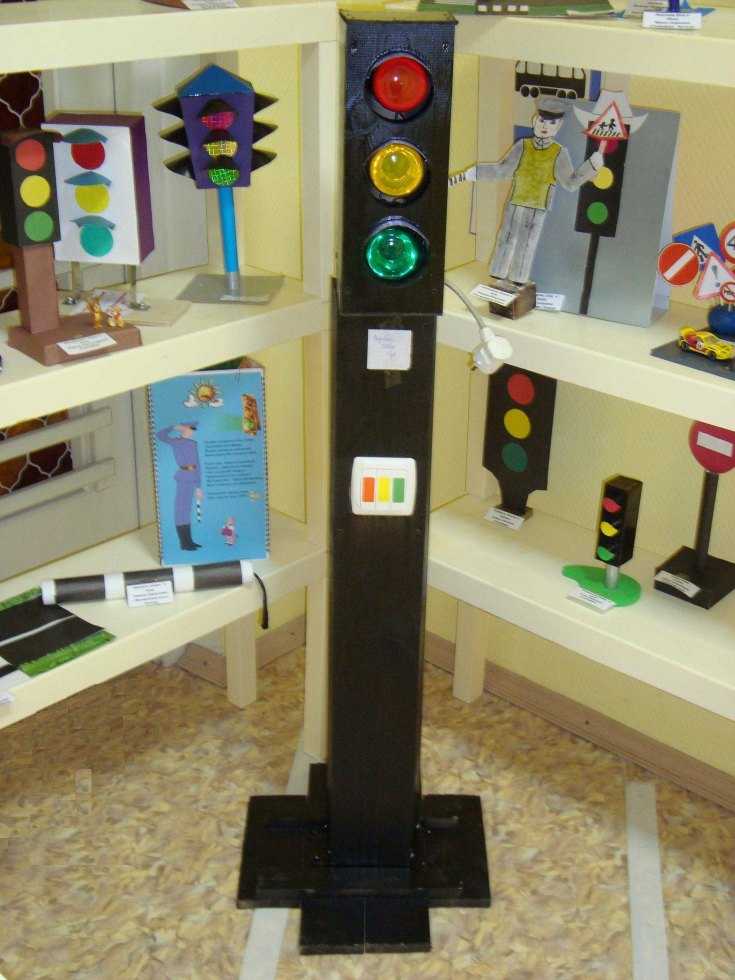
To make them, two (pedestrian) or three (car traffic lights) holes are cut out in dark-colored plastic bottles into which LEDs are placed. They are powered by a battery and are turned on with a special button.
The holes are covered with transparent colored material of the desired color. The buttons for turning on prohibiting or allowing signals are controlled by the child. A traffic light can be either stationary or portable.
Where to start
It is important to create a scenario that involves you in the creative process, and then working together will become useful and educational. Gradually, the child will remember the norms and realize that:
- At the “Pedestrian crossing” arrow, you must not let your guard down;
- First you need to make sure that all transport has stopped;
- when walking, look to the left, and when you reach the middle, look to the right;
- It is forbidden to play near the road, even if it is in the yard.
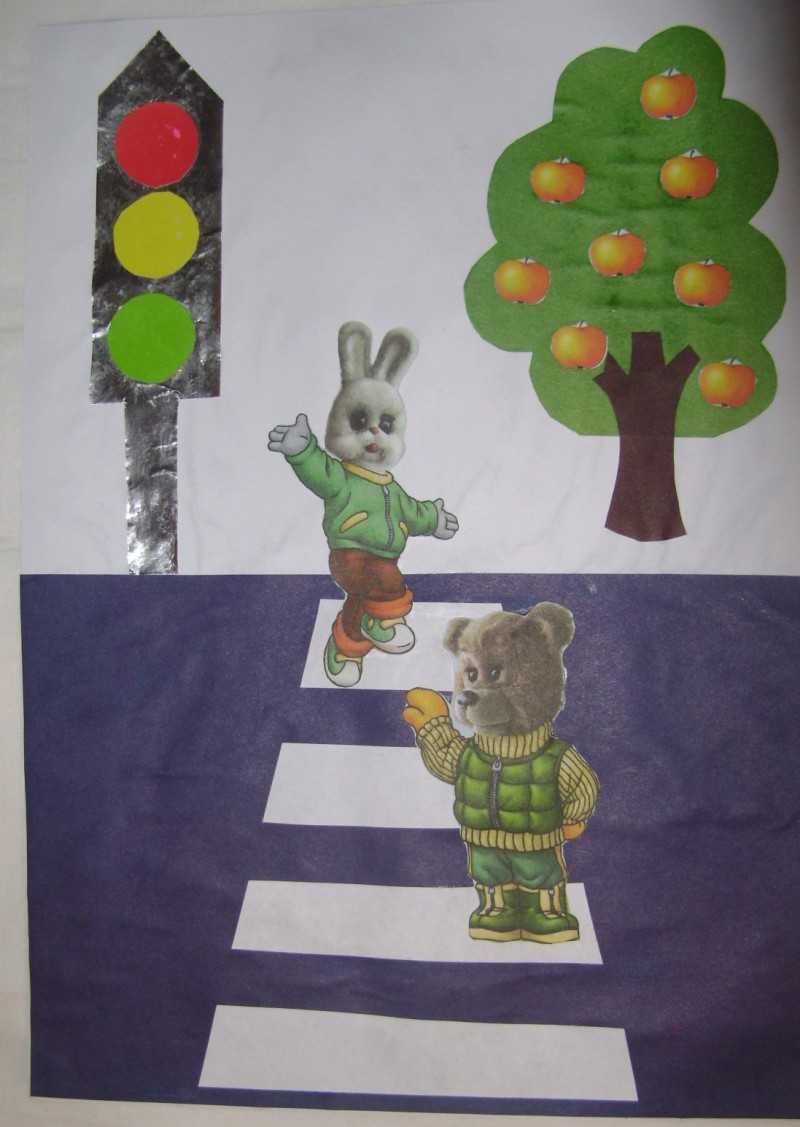
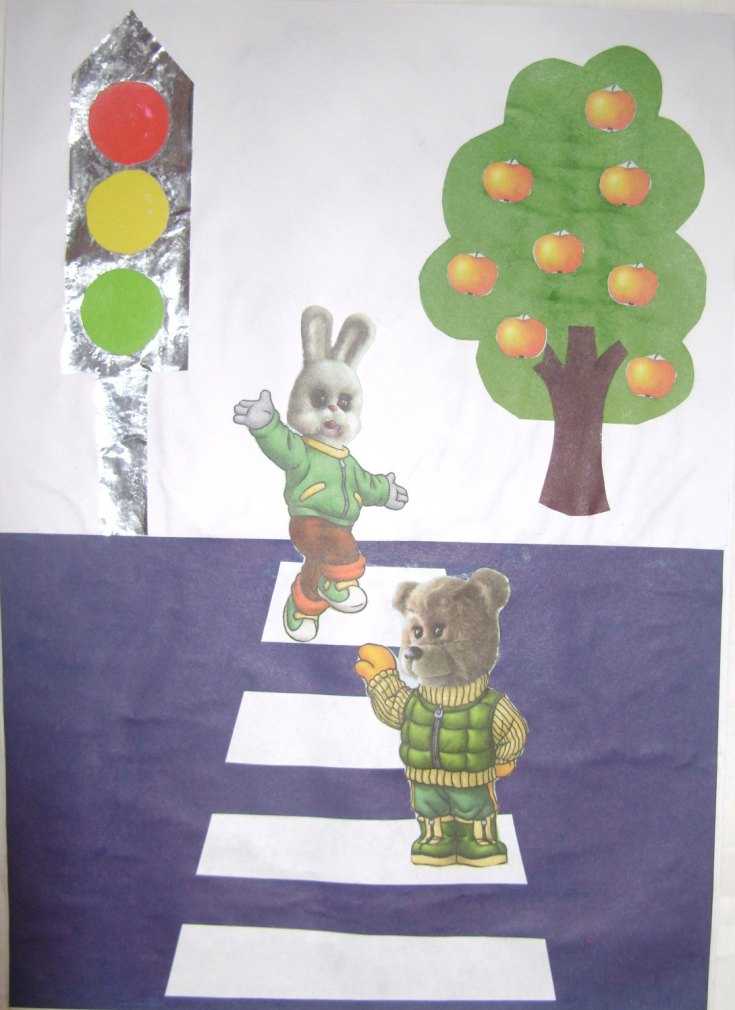
Application
A children's craft in the shape of a "Pedestrian Crossing" sign will help your child learn the rules of the road, including learning how to cross the street correctly.
The geometric figure required for the road sign (in this case, a rectangle) is cut out of cardboard of the desired color. Then the strips and the human figure are glued on.
The “Pedestrian traffic is prohibited” sign is made from a round blank, which is glued to the base, and then the figure of a pedestrian is fixed in its center with glue.
Note!
DIY feeder - step-by-step instructions for creating a feeder + detailed diagrams with photo reviews- Do-it-yourself rugs - TOP 120 simple patterns with master classes on how to make them yourself + photo reviews of finished rugs
- Do-it-yourself dolls: a master class on making a beautiful doll. Simple instructions with photo examples of ready-made options
To better assimilate the Rules of the Road, the child must get carried away with working on the craft, and then bring it to school and show it to classmates.

At what age to start
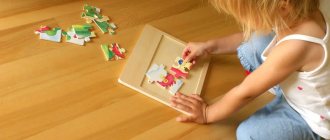
Even a small child can make DIY traffic crafts from paper or cardboard. This process not only develops hand motor skills and spatial imagination, but also brings new information.
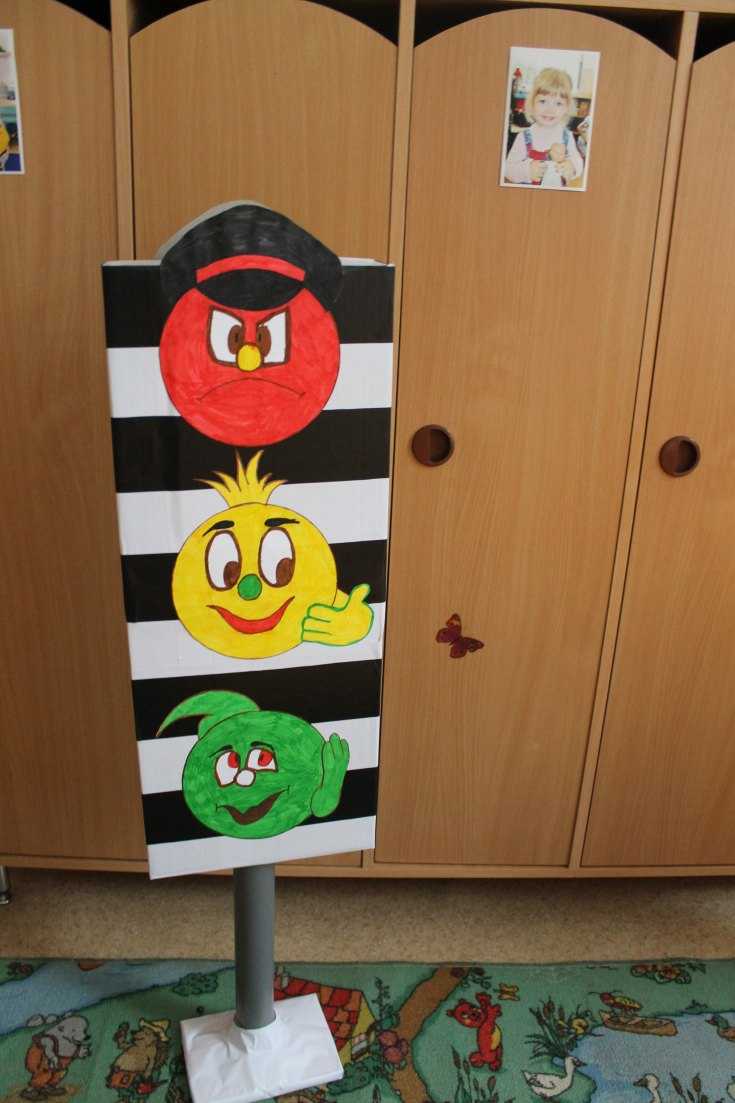
For example, by drawing or gluing together a traffic light, a child will remember the colors of the lanterns, and with the help of an adult’s explanations, he will learn that red signals danger and one must stand, yellow means readiness, and one can go only when the light turns green.
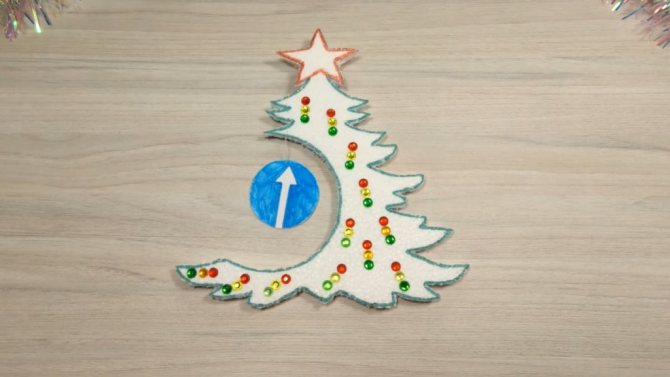
Idea No. 4. Traffic rules - Christmas tree
Let your child feel like a designer. In the process of creating this toy, children can be tasked with coming up with ways to decorate the Christmas tree and draw/color road signs.
We will need:
- thin sheet of foam;
- scissors;
- threads;
- Christmas tree template (you can draw it yourself or cut it out ready-made);
- paper;
- stationery knife;
- round lid;
- pen (gel pen is best);
- some decorations.
We transfer the tree to the foam. To do this, trace the template with a gel pen.
We attach the lid and mark the cutout on the tree.
Cut out with a stationery knife.
This creates a “window” for the future road sign.
Next, we create the design of the Christmas tree to your liking. For example, like this:
We cut out identical circles from paper and color them in the form of road signs. You can choose the simplest and most important ones so that the child can draw them himself.
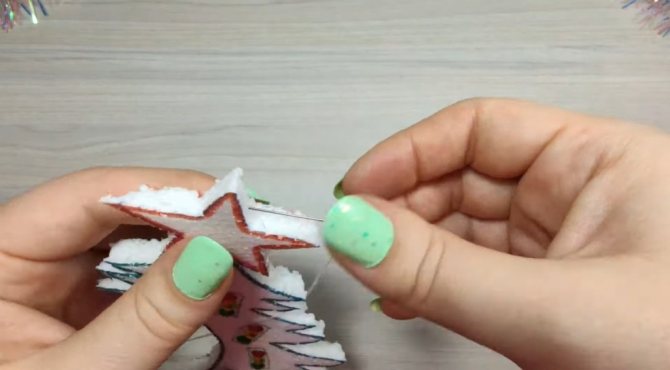
We glue them together to make a double-sided sign, and thread a thread into it using a needle.
Using the same thread we hang the circle in the cut out window.
Add more shine to the Christmas tree.
All that remains is to sew a loop for hanging on a branch.
It turns out to be a “movable” toy.
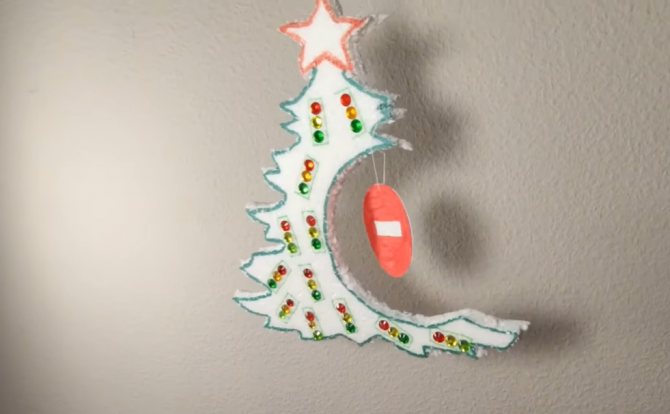
The main feature is the play of details. A craft made of light foam plastic will be set in motion even by a light air flow, turning first one side or the other and flickering with its rhinestones. At the same time, the sign will rotate.
Using the same principle, you can make a tabletop Christmas tree. The craft does not require special skills, effort or materials.
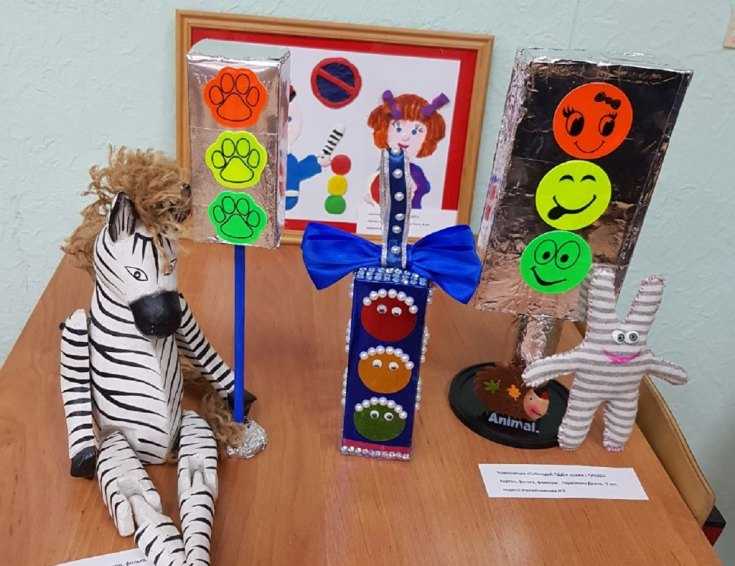
How to make a traffic light
There are many options for manufacturing. It can be made in the form of a paper or plasticine applique on a landscape sheet or on a tube from a toilet paper roll, or on a box, for example, from a juice box.
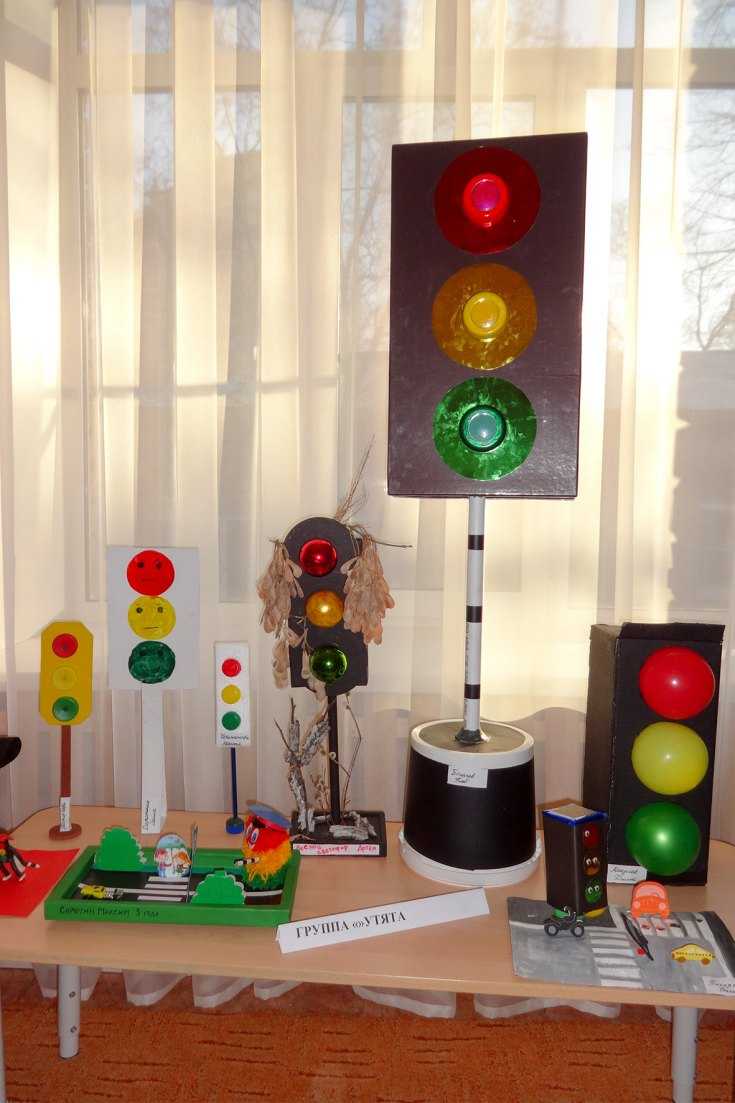
Any available or junk means will do. A little imagination is enough to arouse the interest of a child. And then the vital rules will be remembered quickly.
Simple ways to make a traffic light
In older preschool age, you can safely make crafts using electrical parts. A very original option is a traffic light made from plastic bottles. 2-liter dark bottles will do. Three windows are cut into them with scissors or a cutter. Each of them contains light bulbs connected by batteries and equipped with power buttons.
To install a traffic light near an intersection, mount it on a portable PVC pipe. Cover the windows with colored glass or film. Bring the control device into operation by pressing the desired button.
How to make a road with a barrier
To do this, you will need to cut a strip of black paper of the required width and glue it onto a piece of cardboard with PVA glue. Cut out barriers from the boxes, wrap them in white paper and paint them with red stripes.
We recommend reading:
- Craft bullfinch: detailed description of how to make a bird with your own hands (115 photos)
- Crafts from vegetables: 100 photos of the best crafts for children and a review of recipes for adults
- Craft ship: 120 photos, templates, drawings and step-by-step instructions on how to make a boat
Attach to the sides. Make markings depending on the type of traffic: single-lane or two-lane. Draw and display signs. Toy cars will complement the picture.
Interest turns into knowledge
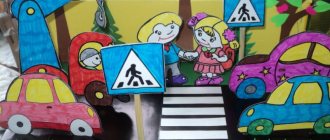
Crafts for little ones are easy to make. They are made in the form of a three-dimensional object or a flat figure.
Drawing road crossing strips together with children and placing special signs on “paper streets” will help to convey to children the law about moving across roads in strictly designated areas.
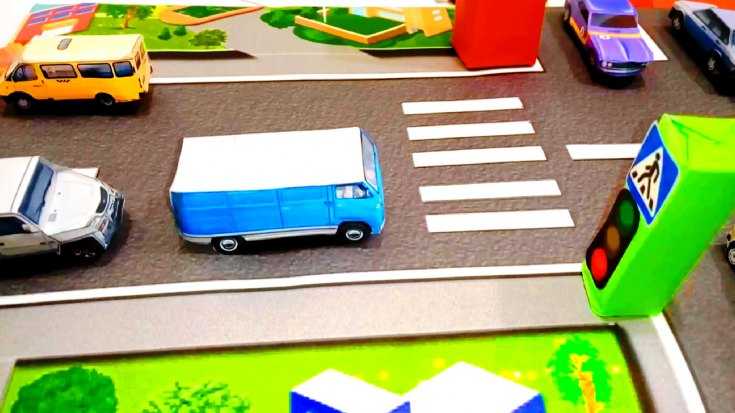
When drawing sidewalks, you should explain that they are for people only, and that you should walk on them keeping to the right. During the game, learning occurs naturally and naturally.
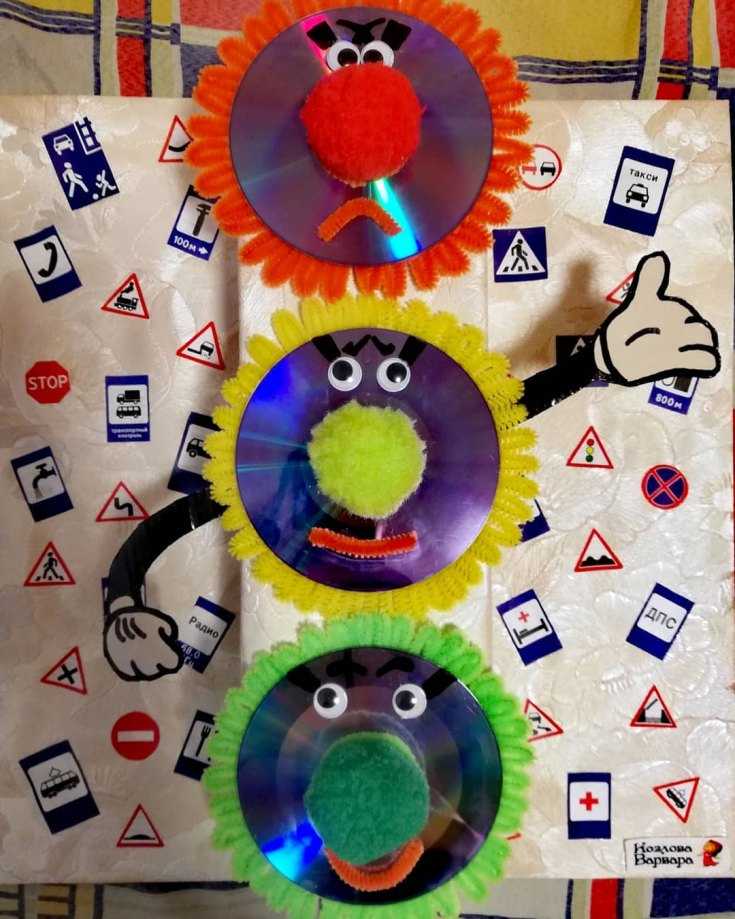
Idea No. 5. CD ball
For those who are not looking for easy ways, but want to be proud of the result. You will have to work hard, but the craft can be safely submitted to a competition at school.
So, you need to prepare:
- compact discs (CD or DVD) - 12 pieces;
- drill/screwdriver;
- wire with wire cutters;
- glue gun;
- images of road signs (draw them or cut them out - it’s up to you);
- pattern in the form of a pentagon with equal sides. According to our calculations, the side length should be 6.5 cm.
First, cut out the pattern from plain paper. This is where a 75 degree protractor comes in handy. We drill 5 holes in the disk at equal distances.
We do the same with the rest. We take 6 disks and lay out a flower from them.
We attach 5 in a circle to the middle disk with wire. The result should be a hemisphere.
We do the same with the remaining 6 disks. We connect the two parts into one ball.
Glue circles with images of road signs in the center of each disk. We hide the seams and wire under the tinsel.
The toy is ready!
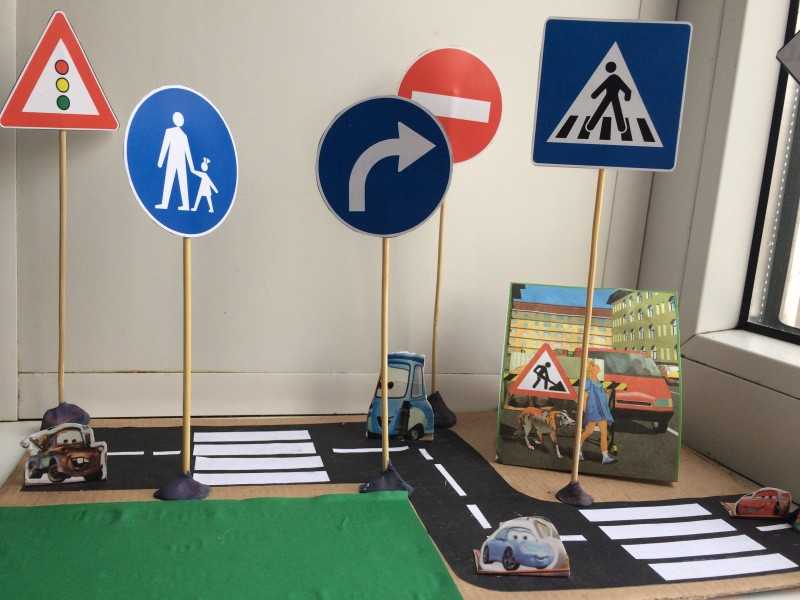
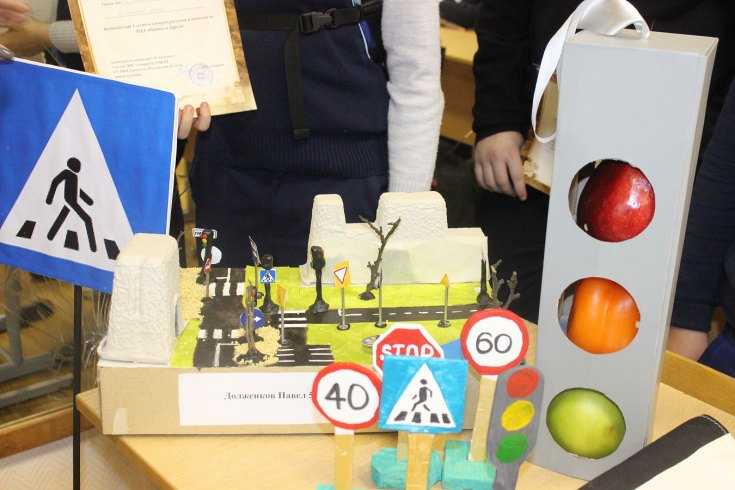
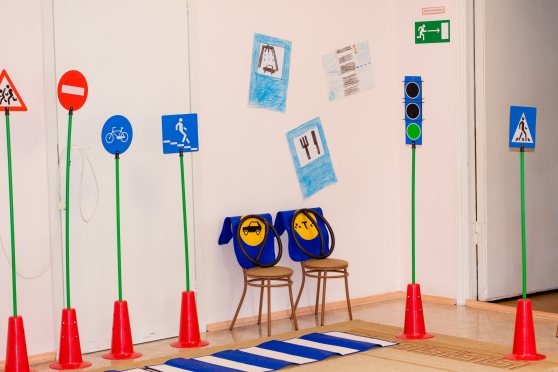
Road signs
For older children, road safety crafts are used to introduce road symbols. They are easy to prepare. After drawing on paper, cut out, glue on cardboard and make a base for them from tubes and circles.
We recommend reading:
- Crafts weapons - step-by-step instructions for making dummies of weapons with your own hands (105 photos + video)

Crafts of the symbol of 2022: New Year's crafts and tips for choosing a holiday theme (90 photos)
- Crafts: the second life of things: ideas for creating beautiful crafts from old things (95 photos)
Such material will help classify signs. The first ones carry information, the second ones make warnings, and the third ones issue a ban.
Layout for introducing children to traffic rules in the middle group
Svetlana Agafonova
Layout for introducing children to traffic rules in the middle group
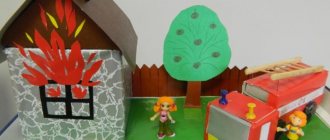
I present to your attention a model for introducing middle school children to the rules of the road. As always, there are a lot of layouts Next week we will have a themed week on traffic rules. In our group we have games based on traffic rules , but there is no layout . The idea came to make a model to familiarize children with traffic rules .
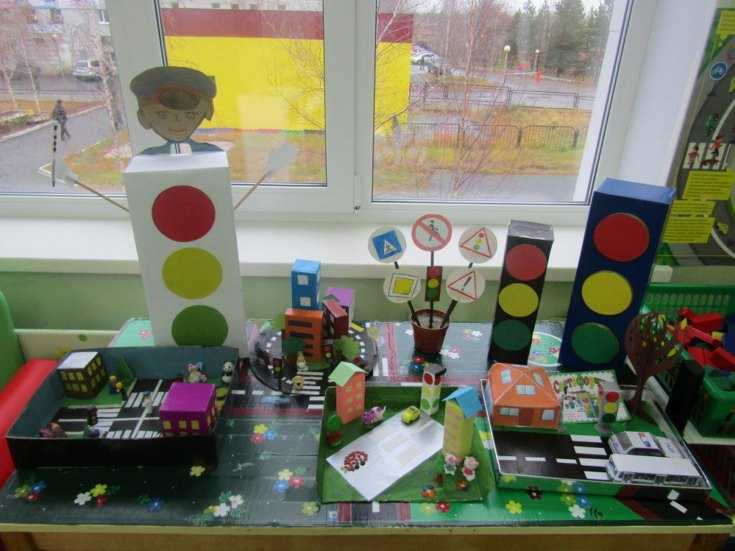
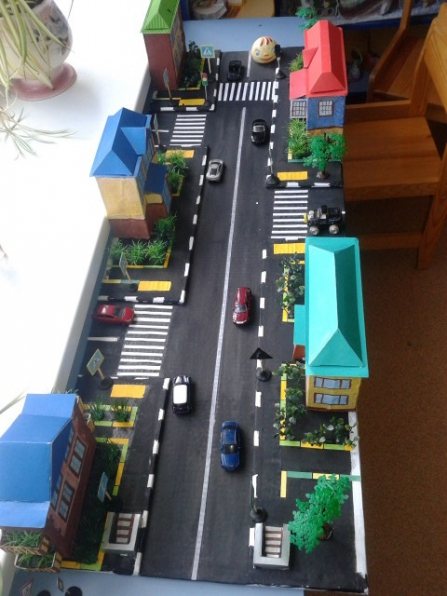
I used cardboard measuring 135x45 cm as a basis.
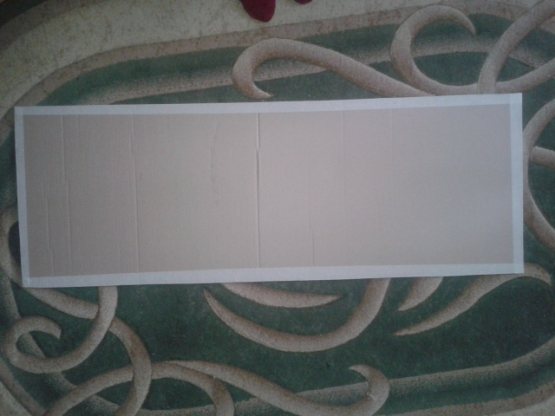
I marked the road on cardboard and painted it with black gouache. After the gouache has dried, you can varnish it so that children do not get dirty later when playing with the model . To make a border you will need to glue a second layer of cardboard from pieces, as in the photo. Cover the edges of the cardboard with paper.
I painted the borders alternating white and black. I decorated the borders near the house in yellow and green. I planted shrubs along the border near the house (I used artificial grass)
and trees will be planted later.
Now all that remains is to mark the road. The dividing solid stripe, zebra, is made of white adhesive tape. The yellow rectangles (approaches)
at the zebra are designed for people with disabilities
(blind)
. On the right, at the end of the road, I made an underground passage.
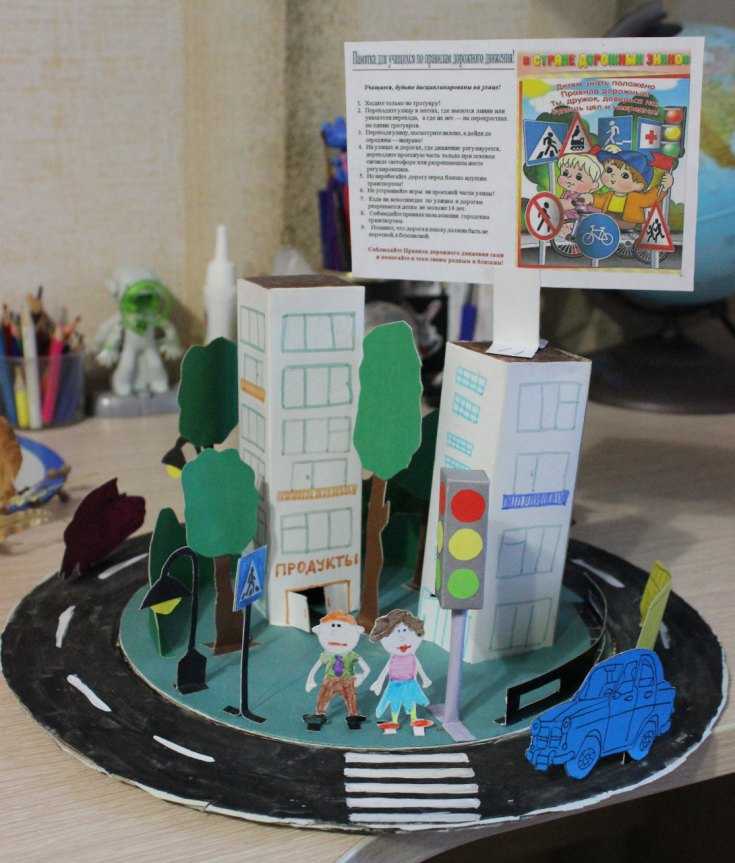
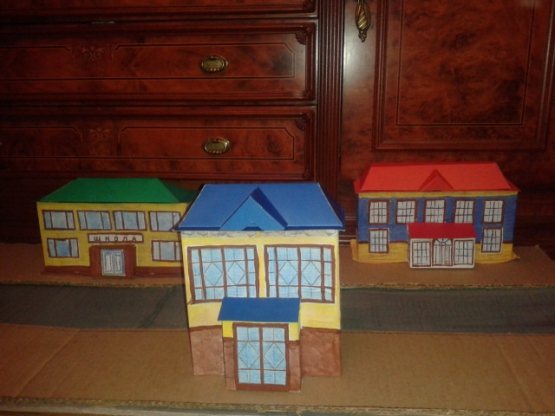
Well, now you need to do it at home. Houses are made from boxes of different sizes.
In order to give the boxes the appearance of a residential building, we find on the Internet and print out windows of whatever shape and size you want, doors, house cladding (stone, brick, etc.)
You can also find something for the roof. We glue the boxes.
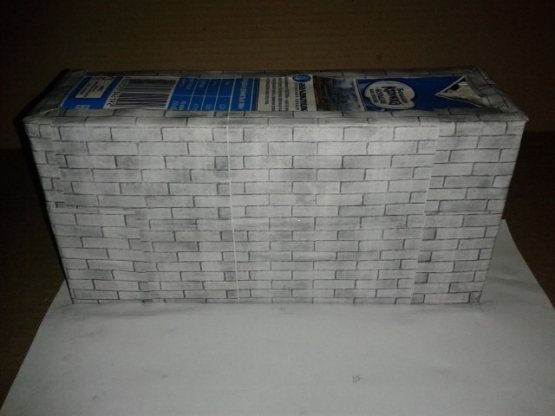
We paint houses and make a roof out of cardboard. We make different roof shapes. You can also select roofing materials on the Internet.
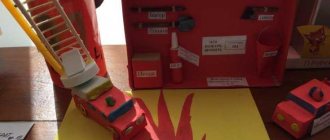
The houses are ready, the road is ready, road signs need to be made. I printed out the signs on the Internet and glued them onto colored cardboard. Then I glued the signs onto toothpicks (legs)
.The base was made from plasticine.
Almost everything is ready, all that remains is to put everything in its place.
Well, everything is arranged!
The layout is ready to familiarize children with traffic rules.
We have a middle group , so we will talk with the children about the traffic light, its purpose, the pedestrian crossing, the underground passage, the sidewalk, and we will get acquainted with traffic signs. We'll ask riddles, watch Aunt Owl's traffic lessons, and play with the model .
traffic rules in your group, Of course, you will spend time making a model , but you will see how children will be drawn to this model , they will play, and while playing, they will remember the traffic rules.
I wish you success!
Behavior in transport
It is important to teach how to behave correctly in and out of transport. The behavior model is formed during the game with a layout made up of streets, cars, buses, and stops. The little people are molded from plasticine or salt dough.

The child will get a fun idea of how to get on and off the bus correctly, so that in practice the information will be consolidated and gradually become a habit.
Crafts for kindergarten
Original crafts for kindergarten, made by children together with their parents and brought from home, form collections of visual aids. When making them, it is useful to build models of safe routes from home to kindergarten and back, as well as group walks on excursions.
You can come up with various stories with cartoon characters. The main thing is to try to ensure that the child understands what non-compliance with the canons can lead to and how to avoid dangerous situations.
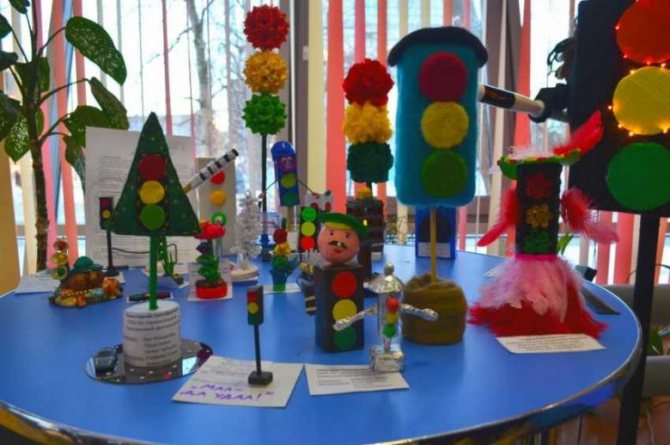
Activities in the garden
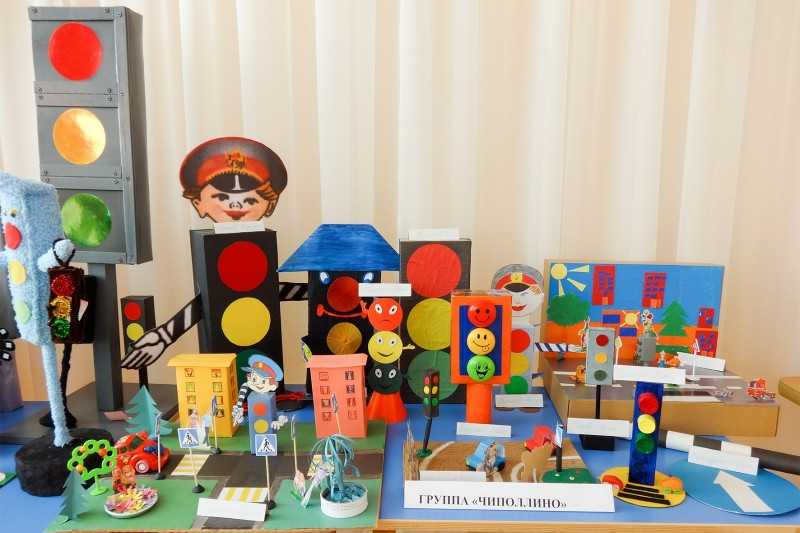
The result of joint creations of children and teachers in a group are collective compositions.
At the same time, different techniques and techniques are combined, original stories are invented. Thematic corners are designed to consolidate knowledge. Children not only learn traffic rules and remember road signs. They become familiar with new terms: inspector, intersection, roadway.
Schoolchildren's crafts
Crafts for school are done by older children. Both simple materials are used in various combinations, as well as more complex ones, such as wood. And here you can’t do without the help of adults.
The products have a voluminous appearance. Techniques such as collage, modeling, and design are used. The design of an object plot in the yard is a space for the implementation of new ideas and a source of joy for everyone taking part in its creation.
Stands
In addition, information about the rules and the work of the traffic police can be placed in a wall newspaper or on a poster. Invented poems and colorful pictures will clearly tell you about traffic rules.
In children's institutions, the range of methods used should have a wide range of forms that develop independence, organization, and self-discipline. The goal of which is to prevent trouble.
Wall newspaper
A wonderful craft for visual propaganda – a wall newspaper for school. It should be completely dedicated to traffic rules. Photo 6 shows an example of a poster. It colorfully displays road signs and the most common situations on the road. To do this, a bright name is made on a sheet of Whatman paper, colorful comics and outlines of road signs are placed. It is important that the drawings consist of cheerful characters that can attract children's attention.
Crafts on the theme “Traffic Rules” perform an important task in ensuring the safety of children. When making them, the child receives maximum information about a specific episode. Ready-made crafts should become an element of a game that will allow you to learn the basic rules of behavior on the road. When creating them, not only kindergarten teachers and teachers, but also parents should take an active part.
Photos of traffic crafts
0