Pencil drawing master class
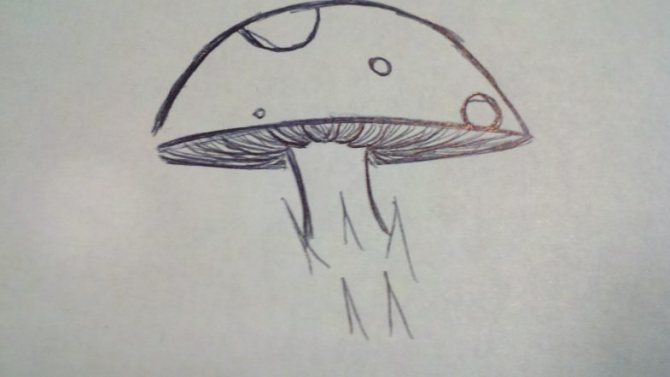
Regardless of the chosen type, the diagram of how to draw a mushroom with a pencil requires the following steps:
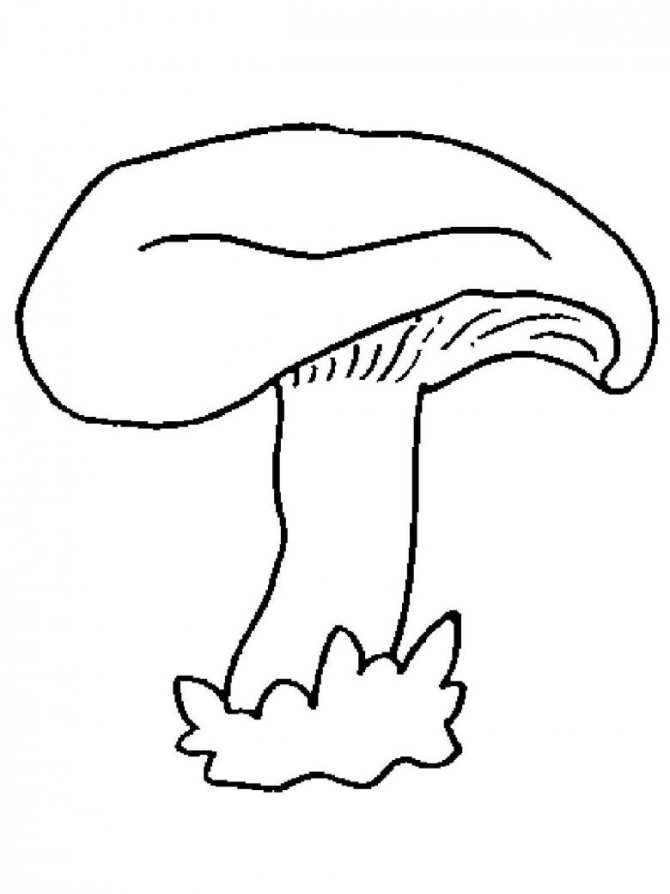
- Creating outlines. This is an oval cap with a stem attached to the bottom.
- Contour detailing.
- Erase auxiliary lines.
The completion is painting. To do this, you can use colored pencils, felt-tip pens or paints.
Preparation
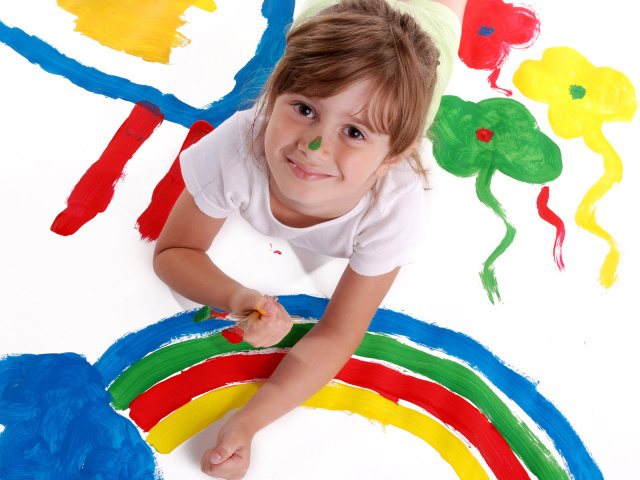
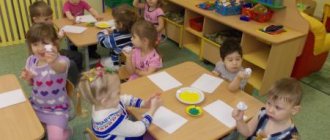
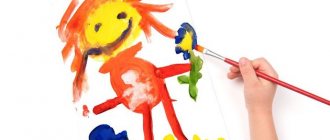
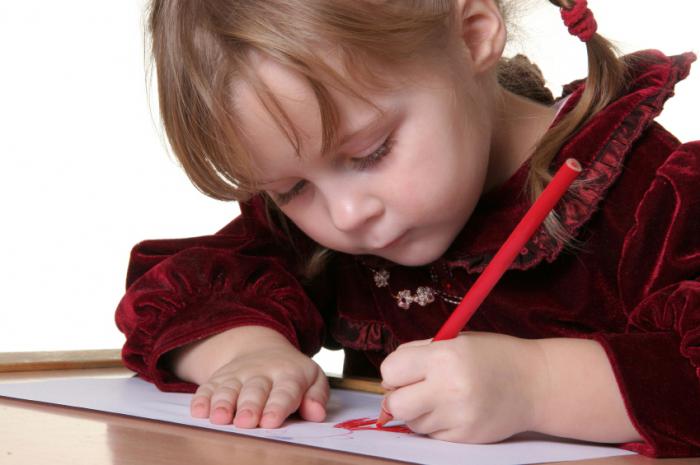
Drawing classes allow the child to develop comprehensively
The result of achieving the goals and objectives depends on how thoroughly the teacher prepares for the lesson - this is no secret. And taking into account all the subtleties of the preparatory process plays an important role in this process.
Materials
In the preparatory group, children are already familiar with the main types of drawing materials. That is, they can use
- pencils;
- gouache;
- watercolor;
- wax crayons;
- markers.
This is interesting. Many methodologists categorically deny the possibility of using felt-tip pens in drawing classes in kindergarten, since children cannot use them to convey shades and elementary shadows in an image.
The basis
The A4 format is most convenient for children to use.
As a basis for drawing you can use:
- paper of different thicknesses (colored or printer paper);
- cardboard (thick and thin).
The only condition is that the drawing format should not be larger than A4 if we are talking about individual work. For group assignments, you can use sheets of A3 and even A1 format.
This is interesting. Images on whatman paper are allowed if the teacher takes an active part in creating the overall composition of the work.
Techniques and techniques in the preparatory group
As a task for sketching, children can not complete the entire composition, but only its element
It is assumed that in the preparatory group children already know a number of non-traditional drawing techniques (for example, blotography, when an outline is applied to random spots of paint, or palm painting, when various images are created based on the outline of the palms). However, classical techniques still remain a priority. Among them
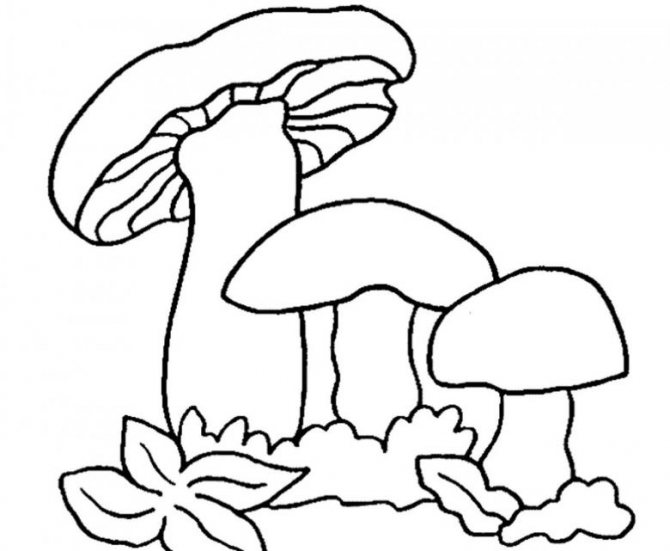
- coloring picture templates;
- completing the composition on a ready-made background (for example, a forest background is complemented by a drawing of a hedgehog, squirrel, mushrooms, berries, etc.);
- sketching (this technique is actively mastered in the senior group and practiced in the preparatory group);
- tracing and coloring stencils (in the group the figures depicted are becoming more complex, animals appear with traced contours of fur, small objects in the composition, etc.);
- drawing from life (natural materials are used as nature - branches, stumps, acorns, chestnuts, etc.).
To depict mushrooms and berries, it will be important to use additional drawing, sketching and drawing from life.
Drawing techniques are determined by the fact that children already have clear ideas about the point-boundaries of the image, determined by the idea of the drawing. Available for children 6–7 years old
- any form of painting (small, large details, as well as elementary shadows);
- drawing thin and wide lines in any direction;
- vertical position of the brush when drawing thin lines and inclined position of the brush for wide lines (when using paints);
- dipping, when a brush dipped in paint is applied to the paper with all its bristles to make a print;
- mixing a watercolor palette to obtain different shades;
- techniques for painting in different positions of the pencil in relation to the sheet.
In a lesson on mushrooms and berries, you can combine all these techniques, depending on what materials will be used.
Photo gallery of drawings made using non-traditional techniques
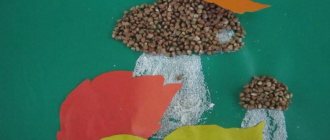
Using semolina painted in different colors using watercolor or gouache allows you to quickly fill the image with color
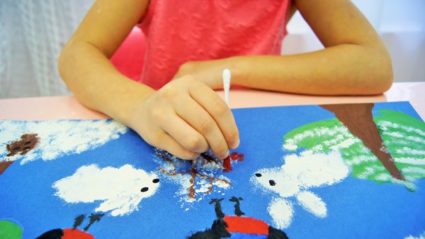
Drawing with cotton swabs is a type of blotography where an object takes its shape from a spot of paint.
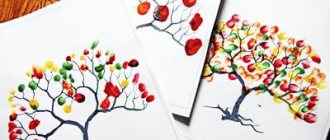
To create this drawing, the technique of fingerprinting paint was used.
How to personalize work?
The implementation of an individual approach is one of the main goals of the educational process in kindergarten. This is easier to do in drawing classes than in others, since the final product is a priori unique. And yet, the teacher can already achieve the goal at the stage of setting the task. To do this, an adult can give the following drawing options:
- present the composition at different times of the day (day, night, morning) or different times of the year, which implies the use of different colors;
- depict a picture from life in different approximations (for example, from close range if the baby has vision problems);
- add one element to a given composition at your discretion and prove the validity of this detail.
This is interesting. To individualize the drawing, you can invite children to add elements of other types of visual activities, for example, appliqué made from natural materials, fabric, or three-dimensional plasticine parts.
Composition options
Drawing, as already mentioned, can be done individually and collectively. In the latter case, it is better if these are elements (for example, pine, squirrel, mushrooms, etc.) made on separate sheets and then placed against a general background . Alternatively, children can color individual blocks of the overall composition. As for the thematic variety of using images of mushrooms and berries as a task, this is traditionally an “autumn-winter” thematic block, when kids study natural phenomena, the life of animals associated with the changes of the seasons. You can suggest the following ideas for wording the topic:
- “Supplies for a hedgehog”;
- "Rowan Branch";
- "Mushroom Glade";
- "Amanita";
- “Bullfinches on a rowan branch”;
- “Who hid there under the tree?”;
- “Gifts for a squirrel”, etc.
How to draw a fox?
Chanterelles are different in appearance from most other mushrooms. It may be yellow or orange. They have an irregular shape: the edges are wavy, curved towards the bottom. The cap is almost completely fused with the stem. Such mushrooms grow in almost every forest. More often found near oak, birch or pine. Having learned a few distinctive features, you can begin to depict it on paper in stages.
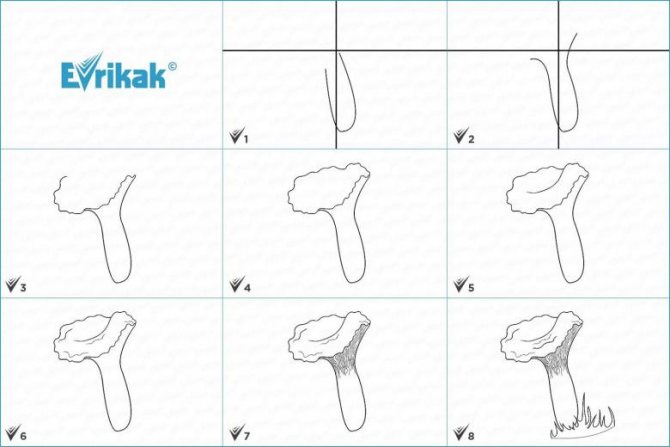
- We make the outline of the mushroom. To make it beautiful, you need to draw two auxiliary lines: one horizontal, the second vertical, slightly tilted to the side.
- We add two slashes to the vertical line. This will be the base of the leg. Now we draw two lines up, gradually expanding them. The result is a shape similar to a cup.
- To give the top its own shape, draw an elongated and uneven oval. It should protrude slightly to the sides.
- We remove all auxiliary lines. Under the cap we draw, a little with a slight slope, a lot of vertical stripes. Draw the grass using sharp triangles.
- All that remains is to color everything. We outline the outline in brown, lightly shading the mushroom itself. Make the sides more saturated. Add orange to the top of the leg. The grass is green. This is how easy it is to draw a fox with a pencil, following a step-by-step plan.
Stages of working on a drawing
"Basket with mushrooms for a hedgehog"
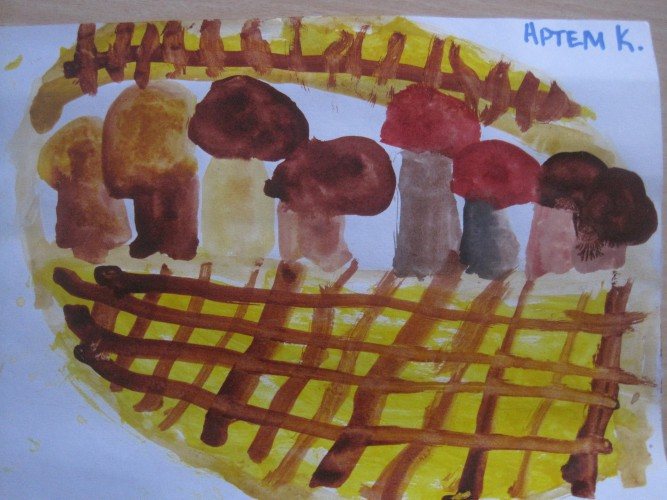
This drawing can be done using the sketching technique
To complete this drawing, you can use both watercolor and gouache. First, children make a pencil sketch of mushrooms, and then complete the drawing (without a pencil outline) of the basket.
Instructions:
- “We draw with a pencil the ovals of the caps and legs of the mushrooms.”
- “We paint them in yellow-beige-brown colors.”
- “We use beige paint to make an oval into which we write mushrooms.”
- “We finish drawing the basket, color it yellow.”
- “We let the background dry for 1-2 minutes and apply a pattern of cells with brown paint.”
- “We also use brown to imitate weaving on the handle of the basket.”
This is interesting. If there is no beige paint in the palette, then you can make it by mixing white with yellow, adding a little brown.
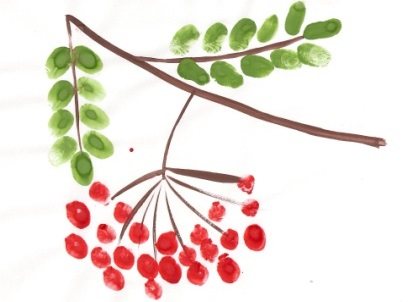
"Bunch of Rowan"
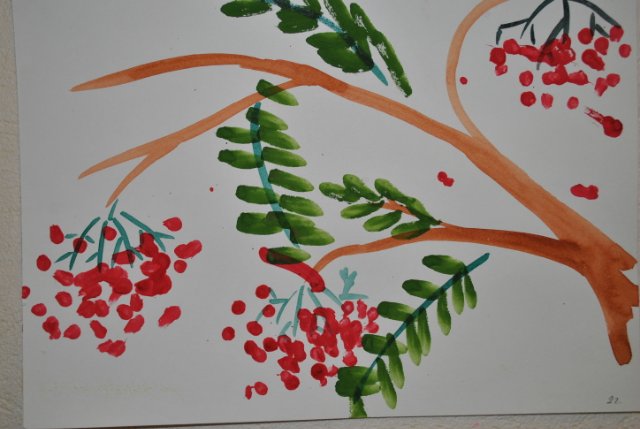
The size of the image of rowan berries trains the baby's eye and sense of proportion
To complete this drawing, the dabbing technique is recommended, but a pencil outline is not required at all.
Instructions:
- “Dip the brush into brown paint and paint a twig.”
- “We apply thin short strokes like branches with green color.”
- “We draw berries on each branch, making dots with orange or red paint.”
- “Dip the brush into the green paint again and paint the branches for the leaves, making them thin but long.”
- “Now we apply the leaves by applying the bristles of the brush in one direction to the long green branches.”
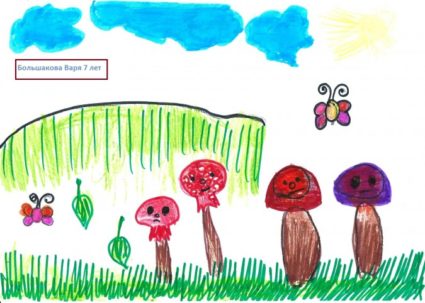
"Amanita"
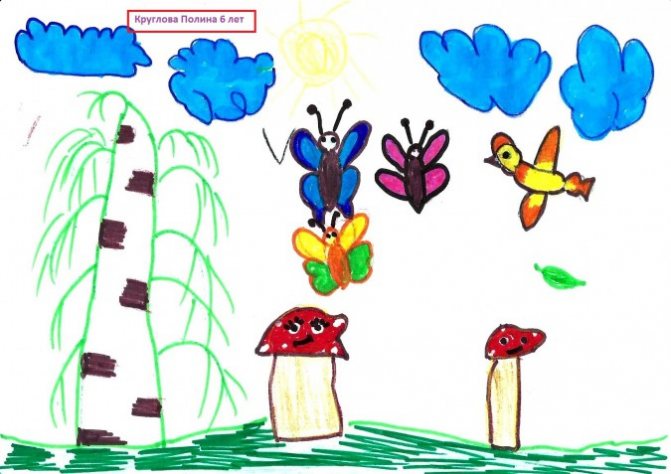
Drawings with felt-tip pens are usually practiced in classes devoted to creating an illustration for a fairy tale heard or a cartoon seen.
This drawing can be an illustration for a poem or fairy tale you have listened to, and since it is done with felt-tip pens, it takes a little less time to create. That is why such pictures can be supplemented with accompanying elements (in this case, butterflies, clouds, etc.).
Instructions:
- “We start by drawing the contours of the tree.”
- “We show the branches and draw marks on the birch trunk.”
- “Drawing the caps and legs of fly agaric mushrooms.”
- “We color them, not forgetting to leave white spots.” You can use not only felt-tip pens for coloring, but also pencils.
- “We draw butterflies. We draw an oval outline for the body, add wings in the form of the number 3, add a circle-head, and don’t forget about the antennae.”
- "Coloring butterflies."
- “We close the wavy lines into a shape similar to a circle - these are clouds.”
- “Coloring the clouds, finishing the sun.”
Photo gallery of finished works
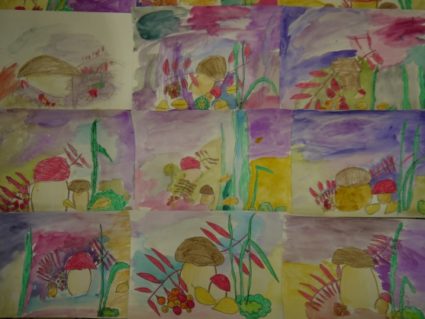
The theme of mushrooms and berries allows you to practice still life painting skills
kids love to personify their illustrations with fairy tale characters. By depicting mushrooms, children learn to reproduce different shapes
Video: How to draw a bunch of rowan, educational video for children
Video: Learning to draw mushrooms of different shapes
Drawings of mushrooms and berries in the preparatory group can be either an illustration of the studied material related to the theme of autumn, preparations for animals, or gifts of the forest, or a way to practice artistic techniques using paints and pencils. In addition, these drawings allow you to practice the skill of creating images without a pencil outline, which, in turn, teaches children not only to maintain proportions and work without rough lines, but also trains their eye, and also develops a sense of color.
Honey mushroom family
Small mushrooms with round caps are always arranged in groups. They grow on green meadows and stumps. Every mushroom picker loves these fragrant babies. When starting to depict these beauties, it is better to look at them in person. After all, it is so unusual for them to gather in friendly companies. But, if this is not possible, you can look at the photo and make our step-by-step lesson.

- Let's draw a cylinder - this is the future stump. We mark the location of the mushrooms with thin lines. Two will be at the bottom left, and a group of five will be at the top right on the edge of the stump.
- We thicken the legs. We draw semi-oval caps.
- Now we color the work with colored felt-tip pens. The mushrooms themselves will be light brown. Don't forget to show the skirt under the hat and on the leg. The stump is dark brown in color. The top of the cut is yellow.
- We add a little yellow to the mushroom itself, showing the transition from dark to light areas. We darken the bottom of the stem of each honey mushroom.
- Draw the roots of the stump and the grass.
You can make a drawing unique by adding just a little bit of your vision. Even following our general step-by-step master classes, each person’s paintings will be different. And that's great. After all, every video world is different.
What can be used as a motivating start to a lesson?
In order for preschoolers to better understand the signs and properties of the depicted objects, the teacher constantly works to help children understand the world around them. Without this, no drawing activity is possible. So, before inviting the children to draw mushrooms, the teacher conducts a lesson on this topic, where he talks in detail about what kind of living objects these are. Be sure to show pictures depicting all kinds of mushrooms, the teacher explains the difference between edible and poisonous ones. It is also good to touch on the topic of behavior in the forest.
As a motivating start to the lesson
It is possible to offer a fairy tale about mushrooms, of which there are a great variety. For example, it is worth recalling the work of Russian folklore “The War of Mushrooms and Berries”, adapted by V. Dahl, or the famous fairy tale by V. Suteev “Under the Mushroom”. The children's task will be to draw their favorite episode from a fairy tale. By the way, this fairy tale can be played out in an interesting way: toy characters came to visit the children and asked them to help them hide from the rain - to draw a big mushroom where they could all take shelter.
In addition, we can recommend other, lesser-known literary works: E. Shim “The Brave Honey Mushroom”, N. Pavlova “Two Tales of Mushrooms”, A. Lopatina “Acquaintance with Mushrooms”, N. Sladkov “Amanita” and “Round Dance of Mushrooms” ", V. Zotov "Autumn Honey fungus". These literary fairy tales and stories touch on various issues, such as how the names of mushrooms came about, whether it is possible to grow mushrooms in the garden, and how beneficial mushrooms can turn into harmful ones. Many of these aspects can be played out in class and an interesting motivation can be created based on them. For example, tell that mushrooms grew near the road and became harmful (because they absorbed harmful exhaust gases), and the children’s task is to draw new, useful, environmentally friendly mushrooms that grow in the forest.
To develop speech and broaden the horizons of children, it is good to introduce them to signs and proverbs about mushrooms. For example, according to the superstition “Where there is a red fly agaric, there is a white mushroom sitting nearby”, you can create an entire composition (as an option “Where one butterfly was born, others fled side by side”).
White King
Let's start with the simplest and most popular option. You can draw with your child. To do this, you should prepare: simple and multi-colored pencils, plastic.
- We draw the contours of the mushroom. We make the head semicircular, and add an elongated oval at the bottom. This is a leg.
- Next we draw the same one, only smaller in size. We are engaged in drawing contours and details. At the bottom of the cap we draw an arc separating its top. The line indicates the location of the beginning of the leg.
- Make the contours of the small mushroom clearer. We remove all auxiliary dashes. For a beautiful look, add grass. It may slightly overlap the main part.
- Now you can start coloring. The tops will be brown. Show a little light highlight. We make the base gray and the grass green. Paint the bottom of the cap with pale yellow paint. The drawing is ready.