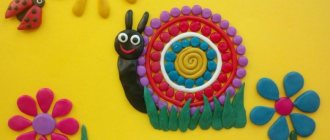
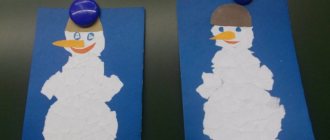
Application with plasticine
Children at two years old do not yet know how to hold scissors and brushes in their hands. But their children's hands easily roll plasticine balls. Exciting activities to make colorful fruits bring joy to the process.
After all, beautiful stucco pictures are created right before your eyes. Such crafts last a long time, so they are suitable for decorating play corners.
Stores sell applique kits at prices starting from 58 rubles. The set for the little ones includes four pictures with fruits, multi-colored plasticine, and stacks.
As a backup option, you can use: thick cardboard, disposable plastic plates, yogurt or sour cream lids. Using a felt-tip pen, draw the outlines of fruits familiar to children. The following actions accompany the display:
- Small pieces are plucked from plasticine.
- Roll balls and stick them to the base.
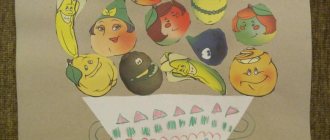
In older preschool age, coloring books are often used for creativity. Silhouettes are cut out from the book and glued onto cardboard. Then they roll the balls and stick them to the outline pictures. Children are also taught to use several colors of plasticine in one craft.
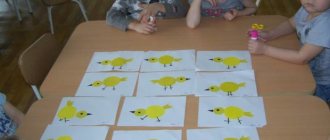
Circle applique
The first paper products that even three-year-old children can make are fruit appliques from multi-colored circles. Riddles, songs, counting rhymes, sayings and proverbs on the topic will help to interest the kids.

Creative activity will not be boring if you make a note that reflects what goals you need to achieve:
- Talk about the benefits of the fruit.
- Learn how to glue round shapes using glue.
- Fix shapes and colors.
- Instill neatness.
Preschoolers do not yet master concepts and think only in visible, concrete images. Therefore, for practicing applique, visual material is prepared: apples of three colors of different sizes on a plate. Adults also cut out blanks from paper:
- A white circle with a radius of 20 cm is for the base.
- Yellow, red and green circles are for fruits.

With children, they look at each apple on the plate, analyze the sizes and differences. They offer to capture them by accurately laying out colored circles on the base.

Then they begin the practical part: they are introduced to the simple technique of paper appliqué. They show how to smear parts and press them onto paper using a napkin.
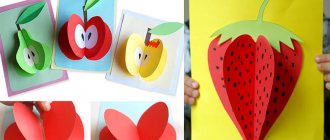
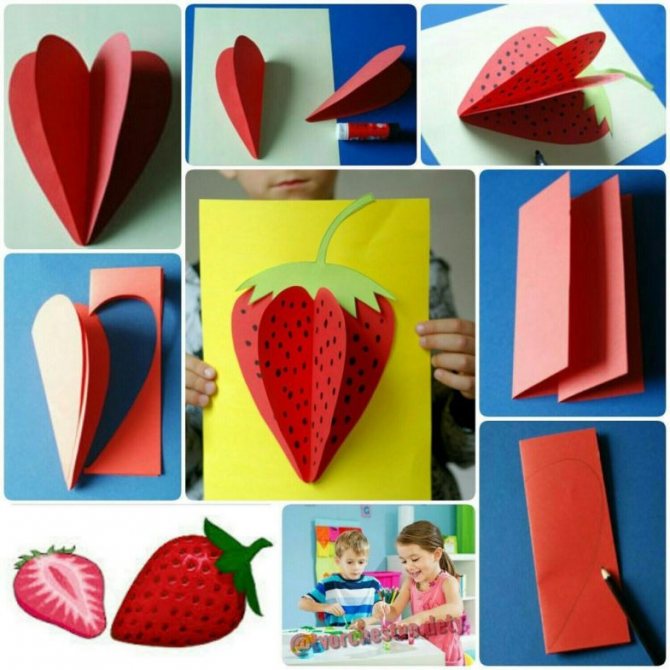
Strawberry
The technique for creating this sweet berry is similar to the previous ones. The following materials will be required:
- A sheet of cardboard for the base;
- Glue;
- Scissors;
- Black felt-tip pen;
- Red paper.
Operating instructions:
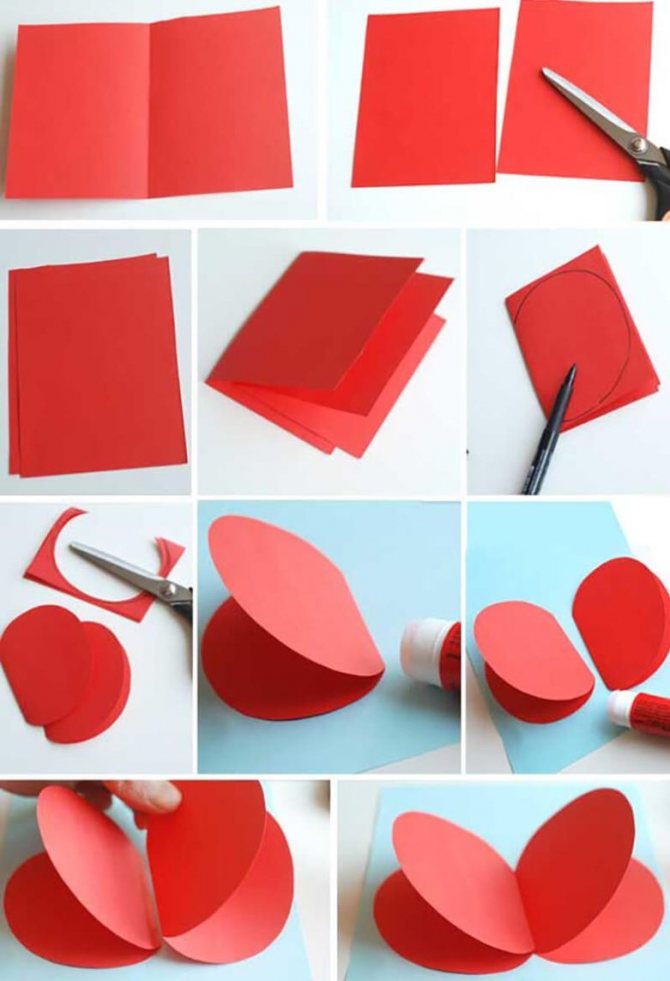
- You need to cut out two identical parts from red paper. You can take an elongated heart as a basis;
- Each part needs to be folded and one of the halves glued to a sheet of cardboard;
- It should turn out that the berry consists of 4 lobes;
- Now you need to cut out a leaf with a stem for the berry from green cardboard and stick it on the top;
- All that remains is to draw the seeds with a dark marker on the pulp of the berry. The craft is finished.
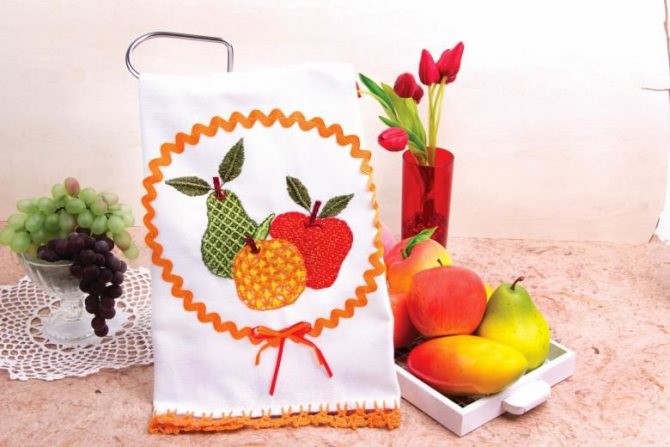
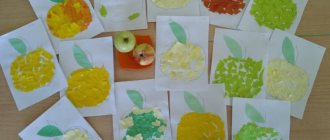
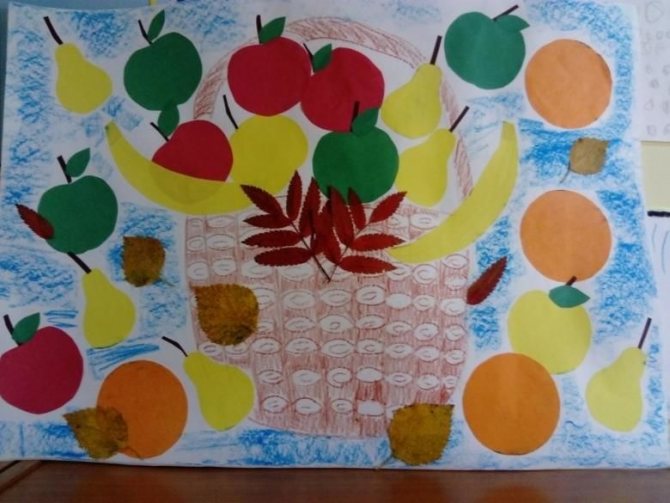
Broken applique
At 4 years old, a child is introduced to mosaic techniques and taught how to create pictures from pieces of torn paper. Autumn themes that are understandable at this age: vegetables and fruits. Children are given templates of an apple, pear, plum, and orange. Then they are shown the procedure for making the craft:
- Contours are drawn on a landscape sheet.
- Tear the paper into small pieces.
- Spread glue on the leaves and stick pieces of green paper on them.
- Color the tails of the fruits with a brown or black pencil.
- Apply glue to the apple. Glue pieces of red paper first along the contour, and then fill the entire middle with them.
- Step 5 is repeated with pear, plum and orange.
The work is decorated with a colored border. Cut out 4 strips 1 cm wide and glue along the edges.
A pineapple
A craft in the form of a pineapple can be created using the same principle as a grape branch.
- You can slightly change the appearance of the craft by cutting out the base from cardboard in the shape of a fruit, and not just gluing rings onto the sheet.
- In this case, a yellow oval is cut out of thick paper, and many strips are cut out of ordinary colored double-sided paper and rings are also glued together from them.
- You need to fill all the free space on the form.
- Then a green tail is glued on top, like a real fruit.
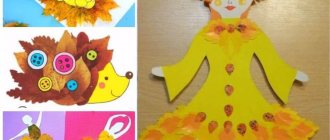
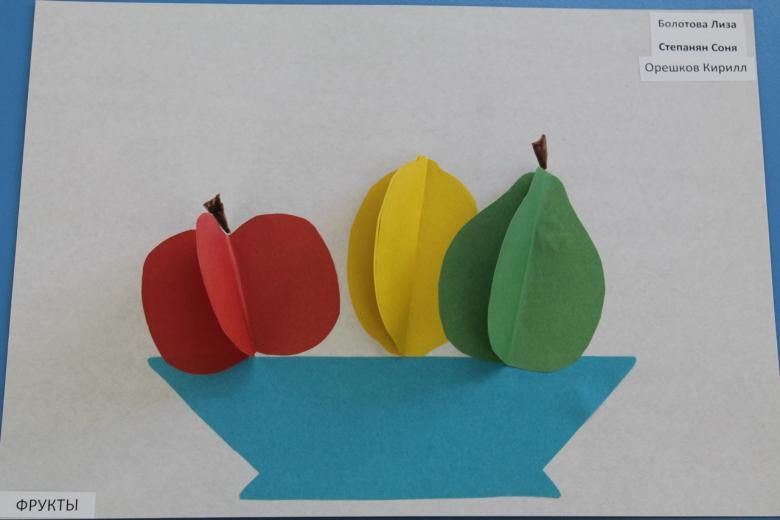
Volume applique
Preschoolers are taught about the technique of volumetric appliqué at an older age. With the help of adults, they learn skills that will be useful to them in labor lessons at school.
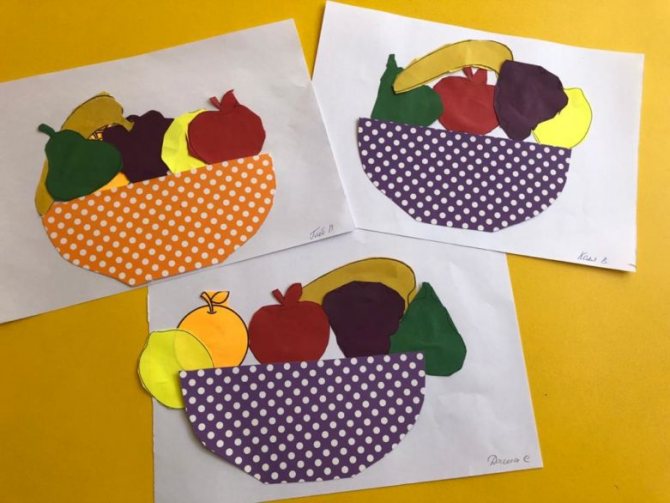
In junior grades, children are asked to perform the composition “Fruits on a Plate.” For crafts, stock up on cardboard, a set of multi-colored paper, templates, hard glue, pencil, scissors, and felt-tip pens. The application is performed in the following sequence:
- Two squares of different colors are cut out of cardboard, one for the background, with a side of 20 cm, the other for the frame.
- A yellow sheet of paper is folded in half twice. A pear template is applied to the workpiece and the outline is drawn with a pencil. Cut along the line and get 4 parts.
- Step 2 is repeated using your own color of paper for plum, apple, kiwi and orange.
- Fold all the parts of the fruit in half, ironing the fold lines.
- Apply glue to the first part of the pear. Two halves of the second and third parts are glued to it, aligning the fold lines in the center. Spread the last part and glue it to the glue-free halves.
- Step 5 is repeated with the apple, plum, kiwi and orange parts.
- A plate is cut out of paper according to a template.
- Glue it on cardboard, and on it - voluminous fruit.
- Draw branches with a brown felt-tip pen and decorate them with leaves.
- The work is placed in a frame: the applique is glued onto colored cardboard.
The plate is decorated with an ornament, pattern or flowers from circles prepared using a hole punch.
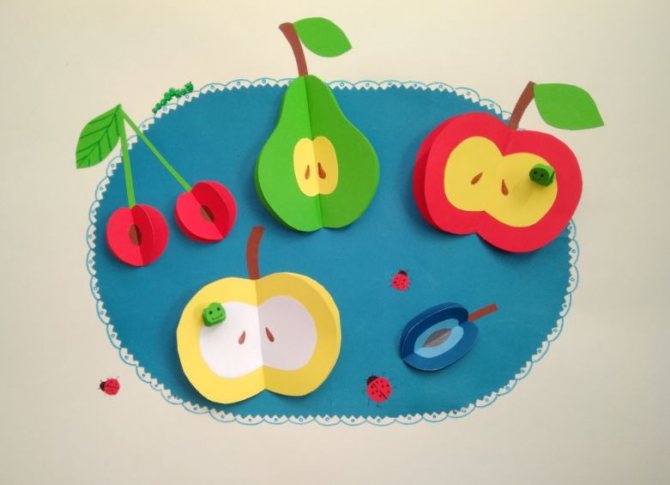
fruit plate
Step-by-step instructions on how to make an applique of fruits will become a reliable guide in the work for parents who have not sat down to create for a long time.
Moreover, such a craft will not take much time and is quite simple, so you can do it even with small children.

So, for a fruit plate you will need:
- Colored paper in the shades that match the fruits that will be on the plate;
- Cardboard base or disposable plate;
- Glue;
- Scissors.
Operating instructions:
- Fruits are cut out from a cardboard base according to a template. The easiest to make are pear, plum, apple and bunch of grapes;
- For each fruit you need to cut out 4 identical parts;
- Each piece is folded in half, it turns out that each fruit consists of 4 parts;
- The parts need to be glued together so that each other half of the part remains free;
- You get four voluminous fruits that need to be placed on a plate, secured with glue;
- This is not included in the master class for beginners, but you can additionally cut out leaves for the fruit from green cardboard and also glue them onto the plate.
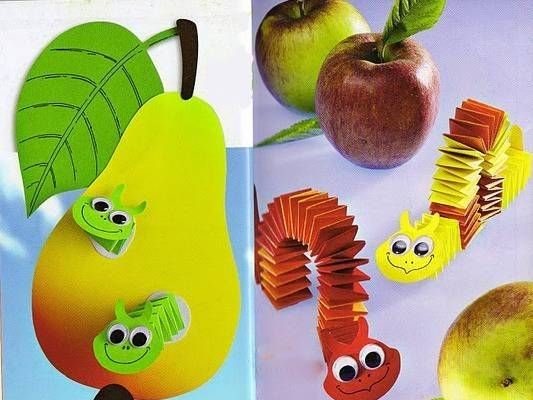
Fruits made from colored accordion paper
Applique fruits in a vase or vegetables on a plate as a kitchen decoration is one of those interesting ideas that delight children. Making such crafts from colored accordion paper is a useful form of creativity for developing fine motor skills.

Preschoolers of the preparatory group aged 6–7 years will cope with the task. Materials and tools that will be useful for creativity: double-sided colored paper, cardboard, a simple pencil, felt-tip pens, scissors, hard glue, a compass and a ruler.
How to make apples
To make 1 fruit, cut two strips 5 cm wide and 21 cm long. 2 accordions are folded from green, yellow or red blanks according to the instructions:
- On the narrow side, make a fold forward, 5–7 mm wide.
- Use your finger or pencil to smooth the fold line.
- The workpiece is turned over and a fold of the same dimensions is made again.
- Steps 1 and 2 are repeated with each strip until accordions are formed. Then they are glued together, spreading the narrow edges. The result is a tube 5 cm high.

Now the tube is placed vertically on the table and pressed with your palm on top. At the same time, hold the craft with the other hand, otherwise you won’t get a flat, round shape. A cardboard circle of the same color, but 1–1.5 cm smaller in size, is glued onto it.

The top is decorated with an even smaller piece, similar in shape to the slice of an apple, cut out from light yellow or beige paper. Seeds are drawn on it with a felt-tip pen. The applique is completed by gluing a green leaf.
How to make pineapples
All fruits follow the same pattern:
- Accordions are made from two strips of colored paper.
- Spread the narrow edges and glue them together.
- Press the tube with your palm.
- A smaller circle is glued to a flat round base.
- The applique is complemented with details characteristic of the fruit.
For example, for a pineapple, a green Christmas tree with a long top is cut out of cardboard. The yellow circle is glued to the accordion from the front side, and the Christmas tree turned upside down is glued to the back side.
Complete the applique by drawing intersecting lines on the yellow round center.
How to make other fruits
The technique of folding paper accordions allows you to make all sorts of round-shaped fruits or berries. For example, a lemon applique consists of three parts:
- The accordion is the basis.
- The white circle is the middle.
- Yellow drops are slices.
For the cherry, a red circle and a branch with leaves are cut out, and the watermelon is decorated with a red center, gluing it to a green accordion.

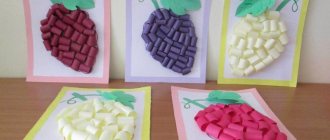
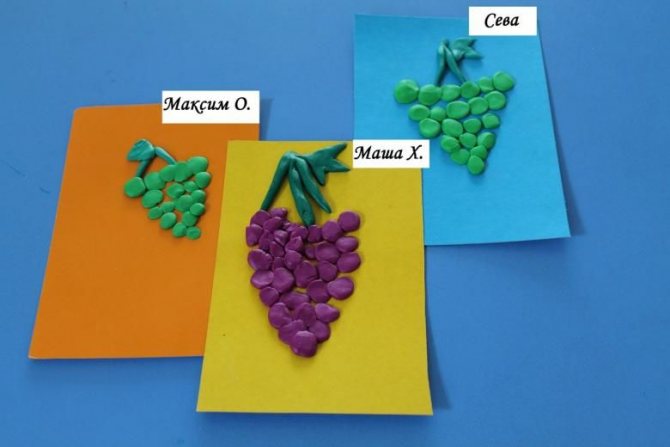
grape branch
Creating such a craft will be interesting for a child, because each berry on a bunch of grapes needs to be cut out and glued separately.
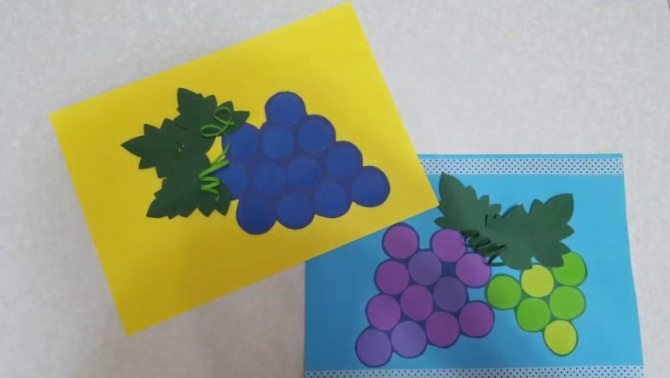
This is a rather painstaking process, but the result will be a beautiful three-dimensional craft.
The following materials will be required:
- Green double-sided colored paper;
- White sheet of cardboard;
- Paints with a brush or colored pencils.

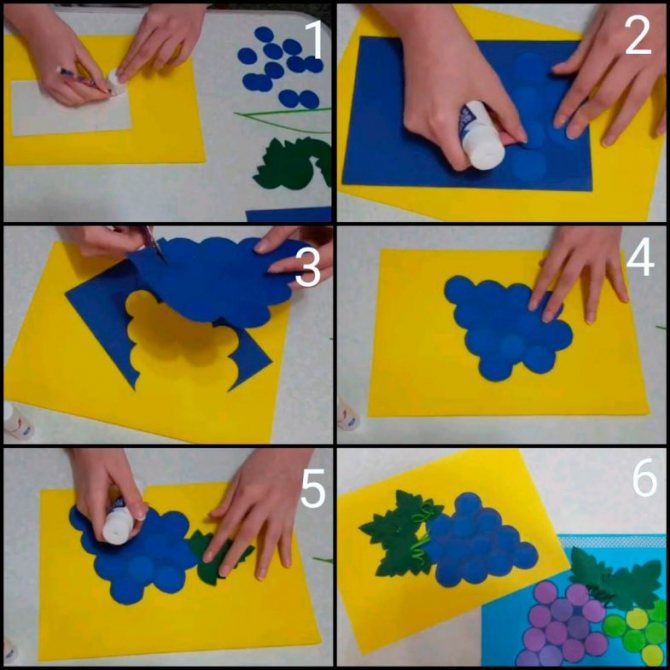
Operating instructions:
- You need to cut out many small strips from green paper;
- Each needs to be rolled into a ring and the end glued;
- Draw a grapevine on a sheet of paper and add leaves;
- Now all that remains is to “collect” the bunch of grapes by gluing paper rings. You need to start at the top, gradually narrowing the bunch, like a real fruit.
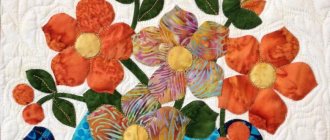
Fruits in quilling style
Twisting narrow strips into spirals is a labor-intensive process, but understandable to older preschoolers. Fruit slices are made using the quilling technique.
Materials that will be useful for creativity: colored paper, disposable cardboard plate, glue. Tools: pencil, ruler, scissors, toothpick.
How to make kiwi slices
For 1 slice, cut 8 green strips 0.5 cm wide and 30 cm long:
- Alternately twist onto a toothpick with a spiral.
- They are formed into drops by squeezing one part of each shape with your fingers.
The center of the kiwi is made from a white strip of the same width and length. A tight roll is made from it, loosened slightly, and then flattened with the palm of your hand.
Last step: 4 brown strips are glued together with one long strip. A ring is made from it, which is glued to the base. Inside, fix a white center in the center, and green drops around them, placing them in a circle.

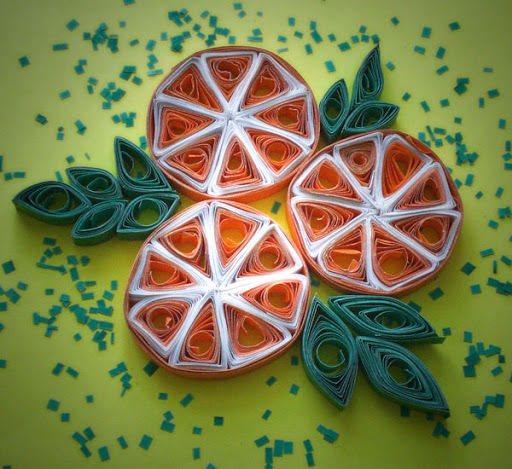
How to make orange slices
Cut strips of white, yellow and orange paper:
- Combine the yellow and white stripes into one.
- Screw onto a toothpick, starting from the yellow end.
- Form a triangle - squeeze the spiral in three places with your fingers.
- Glue the blanks together to form an orange slice.
Three orange stripes are combined into one strip and pasted around the triangular blanks.
Looking through photos of children's crafts, you might think that stunning still lifes are created by young talents.
Paper fruits made using different techniques are simply impressive in appearance.
I want to decorate the walls of my apartment with appliqués and decorate the New Year tree. And also give as a gift to relatives and friends from the whole family.